The popularity of such work is due to its speed and low cost. Having skills in this area, you can install such a ceiling without involving a construction crew, which will significantly save your budget.
This article will tell you how to calculate the necessary materials and carry out the installation of an attic floor from A to Z.
What does such an attic mean?
There are 2 main types of attic and interfloor floors: wooden and reinforced concrete. Wooden consists entirely of timber or logs, boards and other lumber, fastened with steel corners and brackets. Concrete consists of slabs, reinforced screed and other iron and stone elements.
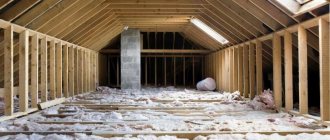
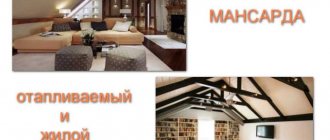
Attic floors can be cold or warm. The difference lies in the method of insulation itself. If a living space or attic is planned in the attic, then it must be completely insulated. To do this, insulating material is laid on the floor, walls, rafter system, and slopes. That is, the attic turns into a full-fledged room.
A cold attic does not need full insulation . It is used as a technical room and warehouse. It is enough to insulate the ceiling itself from the cold so that cold air from the roof does not reach the lower, residential floor. This is the difference between cold insulation and warm insulation.
Reference . The difference in temperature between the cold attic and the lower living rooms should not exceed 3-4 degrees.
Where is it acceptable to use?
If we talk about wood as a material for the construction of floors, then it is appropriate if the size of the house allows it.
The span, that is, the length of the beam in a suspended form (not supported by a support) should not exceed 4.5 m .
If the span is longer, then the house plan must have a load-bearing wall inside, that is, an interior floor that will support the beams. Otherwise, you need to lay steel beams that will not bend even with a larger span.
However, there is a nuance here. The metal structure combined with reinforced concrete has enormous weight, which puts pressure on the foundation. Therefore, you have to choose between the foundation and the attic floor. Private developers in most cases prefer wooden structures due to their low weight and ease of installation .
If we talk about insulation, then, as already mentioned, a cold attic can become a full-fledged room only in the summer. In winter, without insulation of the slopes there will be no more than 10-15 degrees.
Functional purpose of floors
The design of the attic floor depends on the parameters of the structure and the purposes for which it is planned to use the under-roof space. The attic functions as a kind of air gap that separates the cold roof from the heated floors.
The floor in the attic performs a number of tasks:
- carrier _ The floor, located between the upper residential floor and the attic space, is assigned a load-bearing function, so it is made reliable and durable, since people will move on it, they plan to place equipment on it and arrange storage areas;
- insulating _ In a cold attic, the temperature differs little from that outside the house. In this case, the floors in the attic have a thermal insulating function, thereby preventing the air from cooling on the residential floors. To retain heat, the attic floor needs to be insulated. It is advisable to entrust such work to professionals.
What does it consist of?
At the heart of any interfloor ceiling, be it a basement or an attic, are large-caliber beams, on which a so-called pie of flooring, insulation and external finishing is placed. The difference between the structure of the attic and the basement is only in the cross-section of the beams . The attic requires stronger beams, especially if we are talking about a warm room where furniture will stand and people will walk around.
For cold floors, the standard is timber or other versions of beams with a section of 100x150. It is impractical and unsafe to use a smaller thickness. For a stronger floor, you can use 100x200 beams. They are heavier, but you will need less of them, since the step can be increased from the standard 60 cm to 1.5 m.
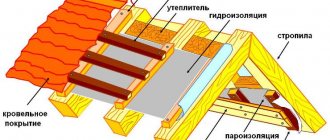
Next, a vapor barrier is laid on the side of the lower room, filling it with a rough ceiling, for example from OSB boards. On the attic side, insulation and waterproofing are laid and a rough attic floor is created .
In another option, you can use metal beams, for example, I-beams. They are more durable, but when used, the thermal conductivity of the entire cake suffers. Metal has high thermal conductivity, which increases the cost of insulation.
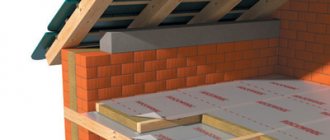
Another option for attic flooring is concrete slabs, which are laid ready-made on the load-bearing walls of the house. The advantage of a reinforced concrete floor is its high strength and the absence of the need to install a vapor barrier. The downside is that it is cold and heavy, as well as expensive and labor-intensive from an installation point of view.
Basic parameters of timber for beams
The parameters of the beams directly depend on the geometric dimensions of the rooms on the lower and upper floors and their intended purpose. Calculation of parameters is an important stage in creating an interfloor ceiling; the reliability and durability of the entire structure largely depends on it.
Shape and section
Rectangular timber seems to be the optimal material for the manufacture of beams. Mounted on the edge, it has a sufficient margin of safety and high reliability. Sometimes round timber or lumber of specific profiles, for example, I-section, are used as load-bearing structures.
The exact parameters of the beam directly depend on the expected load, span length and distance between adjacent beams. By the way, it is not at all necessary to calculate all the parameters yourself; you can use ready-made tables and diagrams.
Length calculation
Calculating the length of the beam is simple - it is the width of the span plus tolerances for embedding in the grooves. Regardless of the cross-section, it is not recommended to make spans wider than 6 m; this will inevitably cause sagging, which can result in an accident. If it is necessary to make a larger wooden floor, you can get out of the situation by installing supports and supports in the form of columns from the same timber.
Quantity of material
To make it easier to calculate the amount of material, it would be useful to sketch out a diagram of the future overlap. It should be taken into account that the distance from the outer beams to the wall will be approximately 50 mm, and the rest will be evenly laid between them at the same interval (0.5–1.0 m).
Requirements
The main requirements for planning an attic floor concern its height, ventilation, thermal insulation and sound insulation.
The standard height of a non-residential attic is 2 m, a residential one - from 2.5 m. Despite the requirements for the heat resistance of the attic, it must maintain minimal natural ventilation. This is achieved by creating ventilation grilles in the gable or by using windows in the attic.
Paradoxically, icicles and freezing in the attic occur precisely because of the lack of ventilation. The moisture accumulated due to air flows from the room has no outlet and begins to freeze. In addition, ventilation in the attic prevents large amounts of snow and precipitation from accumulating on the roof.
Ventilation must also be present between the insulation on the ceiling itself. The insulation itself is insulated on both sides with hydro- and vapor barriers, but there should still be a small gap between them, at least 1 cm, so that there is air circulation and the heat-insulating material does not rot (if it is mineral wool), and the beams themselves are not in constant moisture from condensation.
The thermal insulation layer must be laid in such a way that there are no air corridors between the attic floor and the room. Floors must be insulated as much as possible.
Air will still penetrate the wood fibers, but to a lesser extent. To do this, a layer of membrane vapor barrier is laid under the insulation , which is capable of absorbing moisture, but not transferring it to the insulating material.
And the last factor, sound insulation, is extremely important in houses with wooden floors. Wood itself is a noise-transmitting material, since it contains microcavities. And any creaking or noise from the attic will be heard throughout the house. A layer of mineral wool of at least 150 mm copes well with this task.
Features of flooring in the attic
The process of arranging the attic floor has some features:
- Despite the fact that the attic floor does not come into contact with the cold external environment, it needs high-quality heat and sound insulation.
- The material for floor insulation should be light in weight so as not to burden the structure.
- The attic comes in different configurations, allowing you to open up new opportunities for realizing design ideas. Practice shows that making a room from an attic is cheaper than building a full second floor, despite the cost of insulating the room.
- Thanks to the variety of shapes and configurations of the structure, attics give an original look to the house.
- A high-quality floor depends on the quality of the materials for its manufacture and the technology of its construction process.
- When arranging the floor of log houses, the size of the relay and rafter beams must be the same and form a strong frame for attaching the mauerlat to it.
House with a residential attic
Pie composition
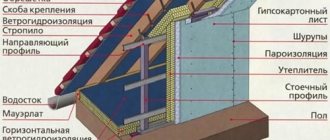
If we consider the wooden attic floor from the bottom up, that is, from the side of the lower room, then the pie will look like this :
Ceiling finishing in the form of plasterboard or suspended ceiling.- A rough ceiling, possibly made of OSB boards or boards, to which the finished ceiling is attached. Insulation is placed on top of it.
- A layer of vapor barrier stapled to the floor beams.
- Floor beams laid on load-bearing walls.
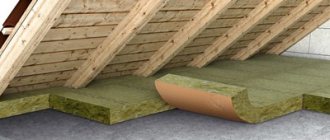
- The insulation layer between them is slightly smaller in height than the beams themselves. A gap of 1 cm is needed for ventilation between the insulation and waterproofing.
- A layer of waterproofing nailed to the floor beams.
- Subfloor, plank flooring.
- Finish floor if necessary, but not required.
For reinforced concrete floors there is no need to install a vapor barrier; it is enough to ensure high-quality ventilation of the entire attic.
Methods for creating attic ventilation
First of all, air flow is ensured, usually in the eaves of the roof. To ventilate your attic yourself, in most cases, you use perforated soffits. They are installed in the lower part of the roof eaves, and the perforation allows air flow to penetrate unhindered, but delays the possible entry of various insects.
Soffits combine proper decorativeness and functionality, making them the most popular solution for air flow into the attic space.
Attic ventilation in a private house also requires air outflow. For this there are the following elements
:
- ventilated ridge;
- inertia turbines;
- electric fans;
- roof aerators.
The roof along the entire perimeter must have a ventilation gap of at least 40-50 mm. This distance is often ensured by the width of the sheathing slats, which allows air to circulate freely under the roof. This method, for example, is suitable for roofs made of metal tiles, corrugated sheets or ondulin. The shape of these roofing materials allows air to easily pass underneath and provide ventilation.
The area of ventilation ducts should be 0.2% of the total area of the ventilated room.
When using soft roofing materials, the counter-lattice is made not continuous, but with breaks
.
This allows the air to bypass the most problematic and difficult areas of the roof pie
.
In the most problematic areas of the roof, for example, at the valley or hip, it is necessary to make point ventilation, which is provided by aerators or turbines.
Calculation of the number of elements and their sizes
The calculation of floor beams, their cross-section and the step between them must be known in order for the attic floor to be as stable as possible for the loads placed on it. To do this, the developer must understand for what purpose the attic will be used. The classification is as follows :
- unused premises;
- storage space;
- living space.
There are standards for each listed type. So, the initial value is the weight of the ceiling itself, which consists of wood and light insulation; it is equal to 50 kgf/m² (kilogram-force per meter²).
For non-residential premises on which there will be no furniture, unnecessary things, etc., the specific gravity, according to the SNiP table, is 100 kgf/m².- The room where equipment, old furniture, boxes, boxes and the weight of the person himself are stored has a mass of 200 kgf/m².
- A living space equipped as an attic floor, with insulation, furniture and constant human visits, has a weight of 300 kgf/m².
Thus, we add the weight of the living space to the initial value of 50 kgf/m² and, checking the SNiP table, which takes into account the dimensions and pitch of the beams for each weight, we calculate the required lumber.
conclusions
Let’s not forget this “law from a school textbook” - warm air rises, and cool air goes down. If the warm one is always wasted on top, then you will always feel from below that it is being “dragged from above”.
If the attic for you is just a place for playing hide and seek, then the work insists only on the struggle for warmth, without making it beautiful, which is done very quickly. If you have a desire to make a decent attic out of an attic, then you won’t be able to do without facing operations after insulation.
Often this design, even without the final coating, is actually enough. And then, it might make sense to think about the design of a water heating system, but this is in “special cases”
A warm attic is a condition without which there is no comfort in the house. There are a lot of tasks performed when insulating an attic. And therefore, you need to collect all the material that is easily accessible to you on this topic in order to have a complete picture. A nice touch will be the additional video in this note, which summarizes all acceptable situations.
Materials and tools
The table shows the materials and tools for each stage of work.
| Lumber | Fastenings | Insulation | Tools | Chemistry |
|
|
|
|
|
Vapor barrier
The process of breathing, cooking and heating water creates a large amount of steam in the house. Steam always tends to move from a zone of high pressure to a zone of lower pressure. When moisture in a gaseous state collides with an impenetrable barrier (glass, metal), it condenses on it in the form of water droplets.
Most building materials have non-zero vapor permeability, so they allow steam to pass inside them, and condensation occurs in the dew point area.
The dew point is the temperature at which a gas turns into a liquid state.
The vapor barrier membrane acts as a protective barrier that prevents steam from entering the inside of the roofing pie.
Some vapor barrier materials have different surface properties. For such membranes, the orientation of the sides must be observed; usually the inner and outer ones have corresponding designations.
Installation technology
The entire turnkey floor installation process can be divided into 4 stages:
- installation of beams;
- ceiling installation;
- floor insulation;
- installation of attic floor.
Before starting work, materials are prepared, the wood is treated with antiseptics and fire retardants and allowed to dry for 24 hours. The ends of the beams that will be hidden in the wall are insulated with roofing felt or polyethylene so that they do not come into direct contact with the wall. In this case, the ends are left bare. A hole in the wall is made 15-20 cm deep. The beam is attached to the wall with anchors.
Reference . Before bricking the end of the beam into the wall, it is cut at an angle of 60° and retreated at a distance of 3 cm from the bottom of the cavity in the wall. This must be done in order to ventilate the tree itself.
Next, install the ceiling in the room using small-section slats (counter-lattice) , 20x90 mm is enough, not forgetting the hole for entering the attic. Between the slats and beams, a vapor barrier is nailed into the room with holes. Insulation is not laid on the side of the room, but the finished ceiling is immediately installed.
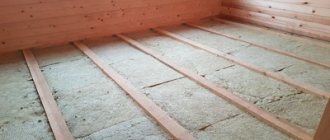
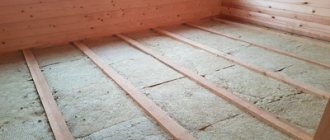
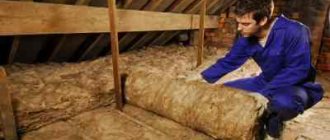
Logs are either mounted on the beams or spacers are installed, creating square cells for the insulation. In height and pitch they are equivalent to the beams themselves. The cells are filled with insulation; the following are especially popular:
- basalt wool;
- ecowool;
- polyurethane foam;
- expanded clay granules.
Waterproofing is laid on top of the insulation, also known as windproofing . Nail it with a stapler to the beams and joists (spacers). At the last stage, a subfloor is installed and a finishing floor made of tongue and groove boards is installed on it.
Sometimes floor beams are installed on a mauerlat, which, in turn, is fixed to load-bearing walls. This option is considered if the beams go outside.
I-beams of metal are laid on load-bearing walls during the process of laying brick or aerated concrete . Wooden beams are then inserted into their grooves, thus combining two materials.
The method of covering over wooden beams is less expensive in terms of finances. It does not require the use of special equipment as is the case with the installation of tile floors or special equipment that is used to deliver concrete in the process of creating a reinforced screed.
Features for concrete slabs
For comparison, briefly about tiled floors. The building is initially prepared for these floors, that is, a reinforced, monolithic foundation is poured. A mandatory requirement for the preparation of walls is the creation of an armored belt . It is created either between the last two layers of cinder block (or other material) or at the peak of a load-bearing wall.
For durable materials, either a layer of reinforcement is laid between the last two blocks, or a reinforced mesh is stretched. For porous and hollow materials, a reinforced belt is created according to the principle of a strip foundation, pouring cement into the formwork in which the reinforcing bars intersect.
Floor slabs are placed on load-bearing walls at 50% of the wall width. That is, if the wall thickness is 40 cm, the slab should cover 20 cm. The elements are laid using special equipment.
The construction team is just guiding the lowering slab . Next, the plates are connected to each other crosswise or linearly through eyelets. The gaps between the plates are sealed with polyurethane foam, and the ceiling is insulated with mineral wool.
Lighting
In order for natural light to freely enter the rooms under the roof, translucent structures are needed. In this case, the only correct solution would be to install skylights. An important point in the process of preparing to install a window into the roof slopes is the manufacture of a strong wooden frame on the inside, which will help hold the window frames and prevent possible deformation. The frame is installed between the rafter legs, so the width is ordered taking into account this distance and the thickness of the beams. Windows can be installed on gables or directly in the roof of the house. What are the advantages of roof windows?
- Saving on energy costs. Such windows allow you to increase the transmission of natural light by 40%.
- Exquisite design. Windows help create a unique atmosphere in the room under the roof; they organically complement the design, creating spaciousness in the room.
- Functionality. Manufacturers offer various configurations and functional loads of windows for attic spaces.
Dormer windows are an excellent source of daylight
As for wiring into the attic to create high-quality artificial lighting, there are several proven methods:
- laying wires over the walls, hiding them in special plastic boxes;
- arrangement of hidden electrical wiring by laying the wires under the inner lining.
The first method is the simplest; you can do it quickly and easily with your own hands. The second method is more technically complex, since the fire safety standards and requirements for a private home must be taken into account. Hidden electrical wiring is installed during the installation of the frame, wall and ceiling cladding.
When the electrical wiring is installed in the attic, all sockets and switches are placed in their places, you can begin the most exciting stage - interior planning. Flights of imagination are welcome here! You can choose classic style solutions, cozy Country or gentle Provence. For young people you can create an urban room under a roof in the Loft style, and for children - a fabulous dream island.
The easiest way to highlight the beauty of your attic interior is through thoughtful lighting.
Transforming a dusty and dark attic into a cozy and spacious room under the roof itself is a labor-intensive process and requires financial costs. Knowing the secrets and tricks, following the rules and advice of experts, you can quickly transform an uninhabited cold attic under the roof into additional living space.
Transforming an Abandoned Attic
Errors and difficulties in the process
The main share of errors occurs in the choice of lumber itself. It is necessary to take into account not only its cross-section, but also its quality. It is advisable to use coniferous wood that is free from blue stains and fungus. In addition, the moisture content of the wood matters. If the lumber for the beams is not dry enough, as a result the cross-section of the beams will differ by 1-2 cm. It is important that this difference is from the side of the attic, and not from the side of the room, otherwise the ceiling will be crooked.
Sometimes when buying timber for beams, you come across units that are a fraction of a percent bent into an arc . You shouldn't discard them right away. If the percentage of curvature is acceptable according to SNiP calculations, then the beam can be installed with the hump up. During operation, it will level out under the weight of materials pressing on the beams.
If double boards are used as beams, then a corridor for air flow is formed between them, which is not removed using thermal insulation. In this case, it is better to use an additional layer of mineral wool, which will lie perpendicular to the first layer.
Briefly about the main thing
Thermal insulation of the attic, like any other construction work, requires calling specialists. If you want to save money and have the necessary skills to work with tools, then you can try to do it yourself.
When choosing how to insulate an attic, you first need to decide on the material. At this stage, it is important to consider the further use of the premises, as well as correctly calculate your budget.
There are many thermal insulation materials. The cheapest of them are sawdust and reeds. Expanded clay, penoizol and mineral wool are a little more expensive. They have better quality properties.
Thermal insulation is carried out in three stages - insulation of the ceiling, then the roof and gables. In the process of insulating the attic yourself, it is important to follow the instructions presented above with all the recommendations. The result of the next one depends on the quality of one stage.
Average cost of work in the Russian Federation
The cost of installing an attic floor is calculated per 1 m². The price depends on the included work. As a rule, complex installation consists of :
- installation of wooden beams;
- insulation and hydro-, vapor barriers;
- installation of subfloor and ceiling.
Sometimes the job involves sealing seams, sometimes not. The price may vary depending on the thickness of the insulation. For cold regions, more of it is needed, so workers install it in 2 layers, hence the cost of work increases.
On average, installation of floors in Moscow and the region costs 500-850 rubles . In St. Petersburg, maintenance crews perform complex installations for 400-800 rubles. excluding materials.
Acceptable mistakes
Pay great attention to the completeness and order of all work performed. Violating these two rules is a very common mistake.
Among other acceptable mistakes we note:
- Violation of ventilation. Carefully ensure that the gap between the external waterproofing and the roof tiles is at least 4 cm.
- The moisture protection film is attached specifically to the insulation. But you need a gap of 2 cm or more. Only in this option will the condensation be ventilated and not go into the insulation material.
The insulation guidelines certainly include weighted ventilation, a plan for which should be made at very early construction stages
Rafter system
The rafter system forms the frame of the pitched roof; it consists of rafter legs, tie rods (crossbars) and vertical posts. The rafters can rest on a wall, a reinforcing belt or on a mauerlat.
Mauerlat is a beam that runs along the perimeter of the “box” of the house. This element of the pitched roof is attached to the wall with studs. The Mauerlat is needed to evenly distribute the thrust loads from the rafter legs.
The thickness and width of the insulation depends on the parameters of the rafter legs. The material must completely occupy the space between the wooden elements.
Warm or cold?
A “warm” attic requires more serious investments; errors during construction are critical, as they threaten damage to the insulation. The advantage of the attic is the expansion of living space through the use of upper rooms.
A “cold” attic is more unpretentious; less money will be spent on insulation and vapor barrier. Also, do not forget that a residential attic will require the installation of lighting and windows for an influx of natural light.
You can read more about materials for pitched roofing here.
How to decorate a space
The attic may contain:
- bedroom;
- living room;
- children's;
- dining room;
- gym;
- billiard room;
- study;
- wardrobe;
- workshop.
Children's room in the attic
Children's room in the attic
You can even set up a children's room for sleeping and playing in the attic. Natural, safe, environmentally friendly materials are best suited for this purpose. The interior of the attic can be decorated in either bright colors or light pastel colors. Furniture must be safe, without sharp corners and securely fastened. This could be a small sofa and a table for games and activities. And an indispensable attribute of the nursery are, of course, toys. The flooring can be a rug or carpet.
Bedroom arrangement
Bedroom in the attic
Due to its location, the attic has a particularly cozy atmosphere. Therefore, it is convenient to equip a bedroom for adults, teenagers or a guest room. To design a bedroom that is comfortable for sleep and relaxation, you will need to arrange sleeping areas, as well as areas for storing bedding and linen.
From furniture you can use the necessary minimum - a bed, a mirror, soft poufs. Lighting plays an important role in the bedroom interior. Soft diffusion of light can be achieved using wall sconces or a floor lamp.
Office option
Office arrangement
