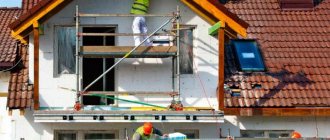
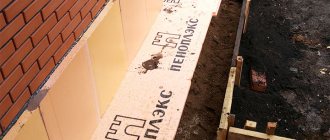
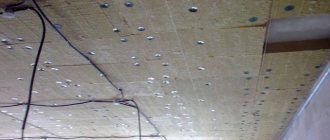
But for each specific type of ceiling there is its own insulation technology, as well as a suitable material. What is suitable for a reinforced concrete floor will not be suitable for a wooden one.
Installation methods and selection of suitable thermal insulation material are discussed further in the article.
Is it necessary to insulate?
After installing a wooden floor, in fact, the house simply acquires an additional floor, which does not protect the upper and lower rooms from cold or sound vibrations. If the building is not of a residential type, for example, it is a barn or a garage, then you can lay a layer of insulation at your discretion; it will not hurt, but there will be no special need for it either.
But if we are talking about a residential building, then thermal insulation of a wooden floor is extremely important . Firstly, it is necessary to maintain heat in the room, and secondly, for reasons of sound insulation.
There is no need to insulate the floor between two residential floors, since the temperature in them will be the same. Except in cases where each floor has its own heat source (fireplace, stove, radiators). It will be enough to insulate the walls and floor between the basement or basement. But even here, sound insulation is still necessary.
It is especially important to insulate the attic and basement floors; if this is not done, it will be impossible to maintain heat in the house. Even completely laid boards (subfloor) will not prevent the leakage of precious warm air, especially in winter.
And if soundproofing is not carried out, the creaking of floorboards and clatter from the top floor or attic will resonate throughout the house. Sound insulation and insulation of wooden floors is done using heat-insulating materials.
Work on insulation of interfloor ceilings in a wooden house
Preparatory
Before starting work, it is necessary to carefully inspect the structure to detect mold, mildew, and signs of damage by the bark beetle.
If the inspection results reveal defects, it is necessary to treat the affected areas with special substances. Then you can begin installation of floor insulation material. If necessary, strengthen the beams.
Waterproofing
For these works, a superdiffusion membrane is used, since a waterproofing film is not suitable. The membrane reliably protects the ceilings from water ingress, but allows steam to pass through.
The membrane covers the entire structure that needs protection. The beams are wrapped with film for waterproofing. Each free edge is left uncovered to allow the beams to dry naturally.
Laying material for thermal insulation
Foam plastic or penoplex, for example, is attached using liquid nails and hardware specially designed for this purpose.
The mineral wool is secured with wire. special hardware or liquid nails. You can use wire to secure the cotton wool.
Any heat-insulating material can be attached to wooden floors using nails or self-tapping screws, which greatly simplifies installation work.
Where to buy insulation for your home? We have selected the best online stores with low prices for you.
- Thermal insulation in the Petrovich store - Go to the online store >>
- Thermal insulation materials in Leroy Merlin - Go to https://leroymerlin.ru/catalogue/teploizolyaciya/ >>
- Thermal insulation in OBI - Go to the store at https://www.obi.ru/stroitelnye-materialy/teploizolyaciya/ >>
- Thermal and sound insulating materials in Maxidom>> Go to the catalog https://www.maxidom.ru/catalog/teplozvukoizoljacionnye-materialy/ >>
Go to the insulation catalogue>>
Features of thermal insulation
Interfloor wooden floors do not differ from each other in construction technology. But in terms of insulation, they differ somewhat from each other. Thermal insulation of residential and non-residential premises requires a special approach.
Attic
The attic itself comes in two types:
Cold .
This is a non-residential premises that is either completely empty or designated as a warehouse for equipment, old things, etc. In the first case, maximum requirements are set for the ceiling, the insulation layer is thicker, and vapor and waterproofing are required.That is, there should not be the slightest chance for a cold corridor to arise. The ceiling is insulated to the maximum, since the temperature in a cold attic in winter rarely exceeds 8 degrees.
- Warm .
This is a full-fledged room, an attic where people live, an office or a recreation room. If there is an attic, the requirements for floor insulation are the same as for a conventional interfloor. You can lay a small layer of sound insulation. Since there will be no strong temperature changes, the likelihood of condensation accumulation is also low, so a vapor barrier will not be required if the room is well ventilated. On the attic floor, walls and vaults are mainly insulated.
Basement and basement
The basement differs from the basement only in the level of ceiling above ground level. But even this is enough to make a difference between insulation methods. The basement is underground, the wind does not get into it, so the temperature there never drops below zero. However, laying vapor and waterproofing is necessary, because the moisture coming from the ground is enormous.
The basement floor is raised slightly above the ground, which means that cold can penetrate through small cracks between the brick, stone or wooden walls. The temperature there will be like in the attic, so it is necessary to insulate the basement floor more carefully, using high-quality, thick insulation.
Between floors
If the entire building has interfloor ceilings of the same type, wooden, and all rooms, upper and lower, are heated equally, then there is no need for a thick layer of insulation .
In this case, it is laid only as sound insulation. If the room is dry and warm, then there is no point in paying much attention to hydro- and vapor barriers. It is laid only to protect the insulation itself from rotting and moisture accumulation.
If there is high humidity in the room, for example, there is a bathroom on the lower floor and a bedroom on the upper floor, then high-quality waterproofing is needed. Firstly, there will be strong temperature changes in the bathroom, and secondly, moisture and hot air will rush upward, the insulation will accumulate moisture, the wooden beams will rot and everything that comes from it.
Formation of floor covering
So, we have sorted out the questions of what is the best way to insulate the floor in a wooden house yourself, and what are the best ways to do this. It remains to give a little information on how to form the floor covering.
If the floor structure is a concrete screed, then covering it will require materials and technologies used for finishing concrete floors. Moreover, the floor itself is already insulated, so no additional measures are required.
What can you offer? Here are a few traditional options: linoleum, laminate with underlay, plank flooring with joists underneath, ceramic tiles, stone, etc.
Building a floor using floor beams is a little more complicated. If a plank floor is assembled, then it is carried out without additional operations and nested, that is, using standard technology. In order to lay laminate or linoleum over the beams, additional investments will be required in the form of plywood sheets or OSB boards. They are the ones that are first laid along the beams, leveled in one plane, and then the floor finishing can be mounted on them. In this case, the substrate layer must be treated with protective compounds, often drying oil.
Boardwalk under a wooden house
Before making an insulated floor in a wooden house, you need to think carefully about what technology and thermal insulation material is best to use. But keep in mind that you should not save on thermal insulation measures. The initial investment will pay off quickly by reducing energy consumption for heating a wooden house.
How can you isolate?
To insulate floors, materials are selected that are most suitable for a particular climate and the structure of the floors.
When purchasing thermal insulation material, you should make the following requirements for it :
- lowest thermal conductivity;
- environmental friendliness (no toxic substances released);
- fire resistance;
- thickness appropriate to the climate;
- resistance to moisture accumulation;
- sufficient strength, resistance to shrinkage;
- ease of installation.
Insulation materials can also be divided according to their release form. There are both fairly dense options that you can walk on, as well as loose ones, such as sawdust or foam. The entire process of installing thermal insulation, including the structure of the ceiling itself (the pitch between the beams and the presence of sheathing), depends on the form of release.
The thickness of the insulation is of great importance; it is calculated using a certain formula:
q=R*k
Where:
- q – required material thickness;
- R – thermal resistance;
- k is the thermal conductivity of the insulation.
Table 1 shows the thermal resistance for each region:
Table 2 shows the thermal conductivity for each material:
For example , to calculate the required thickness of mineral wool for a wooden floor in Voronezh, you need 3.8*0.035=0.133. 13 cm is the required insulation thickness. But since the cotton wool will shrink over time, this figure can be rounded to 15-17 cm.
Minvata
For interfloor wooden floors, mineral wool and its varieties are most often chosen. This choice is due to the ease of installation, sufficient thickness, as well as excellent resistance to fire and smoldering. Basalt wool begins to melt only at a temperature of +600 degrees.
This is the highest figure among all known insulation materials. But it has a significant disadvantage - it easily accumulates moisture, as a result of which it becomes moldy. It is for this that the highest quality waterproofing is needed.
Polystyrene
There are 2 options for polystyrene:
- extruded;
- non-extruded.
They differ only in the degree of density. Non-extruded polystyrene is ordinary foam plastic, it is quite brittle and flammable material. Extruded polystyrene foam (EPS) is more durable and monolithic.
In terms of thermal conductivity and other indicators, they are almost the same. This insulation does not require water insulation; insects and bacteria are not interested in it.
Polyurethane foam
This type of insulation is considered the highest quality.
It has the required thermal conductivity, does not absorb moisture at all, does not shrink or decompose. Apply to any surface using a special sprayer .
As it dries, it swells, creating the desired thickness. It can be sprayed both on the floor and on the ceiling, insulating the ceiling on either side. During installation, polyurethane foam gets into all the cracks without creating gaps.
The only negative is that insulation services are quite expensive, so they are not yet so popular.
Wood sawdust
If there are no other options, you can insulate the ceiling with sawdust and shavings. The process is not simple, but it is cheap. To mix the composition, take cement, lime and water, mix and lay out a layer in the cells between the beams .
The insulation is heavy due to cement, and flammable due to sawdust. Therefore, the chips must also be treated with fire retardants. There are many disadvantages - mice love it, mold, it burns, it is afraid of moisture. One of the advantages is that it is cheap, you can buy a machine of sawdust for 3-5 thousand rubles and use it to insulate all floors from the basement to the attic.
Expanded clay
Expanded clay is produced in granules, similar in diameter to sand, crushed stone or gravel. These names are used for classification. For wooden flooring, coarse expanded clay is used. It is laid on a vapor barrier because it is able to absorb moisture because, in fact, it is fractional clay.
In terms of thermal conductivity, it is inferior to all of the listed insulation materials, and it is also quite heavy, because the insulation layer for it to work requires a large one, about 20 cm or more. It is quite popular on the market due to its low cost.
Scheme of insulated layers of the pie
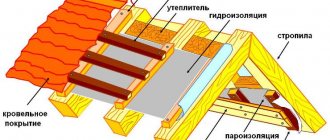
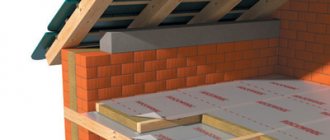
In general, regardless of the thickness of the insulation and its origin, the thermal insulation pie looks standard with minor nuances. Most insulation materials one way or another require additional hydro- and vapor barrier.
Therefore, the layout of the layers looks like this:
- A vapor barrier is nailed to the wooden beams.
- Logs are nailed across the beams (but not always) to provide cells for future insulation.
- Mats, slabs or bulk insulation are placed on top. The foam material requires a continuous sheathing to prevent it from penetrating through cracks into the ceiling of the lower floor.
- A layer of waterproofing is laid on beams or joists that slightly rise above the insulation, which at the same time serves as a wind barrier.
- A subfloor is placed on top. This can be plywood, OSB boards or regular board sheathing.
- The final stage is laying the finished floor, cladding.
On the reverse side of the floor, that is, to the ceiling of the lower floor, sheets of plywood or boards are also nailed to the wooden beams as the bottom sheathing. If the lower floor is residential, it is also finished with various decorative materials; if not, a rough ceiling is left, for example, in the basement.
Which floors require insulation?
The following structures need protection:
- cold basement floor pie;
- attic floor;
- interfloor slab design.
In the case of an interfloor option, the material is used as sound insulation. In this case, you need to provide a layer 3-5 cm thick.
Insulating the floor of the first floor in a wooden house allows you to provide comfortable living conditions. Most heat loss occurs through the ceiling of the upper floor, so it is necessary that the insulation is selected and installed correctly.
Tools and consumables for work
The required materials can be divided into 3 categories:
- hand tool;
- fasteners;
- main material for insulation;
- chemistry.
Hand tools include everything that is useful to a craftsman during fastening, adjusting material, and making holes in wood:
- hammer;
- stapler;
- chisel;
- screwdriver;
- drill;
- hacksaw (chainsaw);
- roulette;
- stationery knife.
Fastening materials include:
- Staples;
- metal corners;
- self-tapping screws;
- nails.
Material for insulation and insulation:
- slabs or mats (foam, shavings, etc.) for insulation;
- polyurethane foam;
- rolls of membrane vapor barrier;
- rolls of waterproofing.
Chemistry is needed for processing wooden materials:
- antiseptics;
- flame retardants.
You will also need boards for sheathing and to simply move along the floor until the subfloor is laid, as well as facing material at your discretion.
Installation
Insulation of the interfloor ceiling can be done both from the ceiling and from the floor. It’s just from the floor side, it’s easier when the plane is horizontal. But in the case of polyurethane foam, the insulation can also be applied to vertical surfaces, to the ceiling. It fits perfectly to the plane, no matter what position it is in.
But for solid materials (mineral wool, polystyrene foam) the work progress is as follows :
Sheets of plywood (OSB) are nailed to the wooden beams treated with antiseptic on the side of the ceiling (lower floor) or sheathed with boards.- A vapor barrier film is nailed to the formed cells from the floor (upper floor) side with a stapler, the rough side to the plywood, the smooth side to the insulation.
The film is nailed with an overlap of about 15 cm and secured together with special self-adhesive tape.It must completely follow the bends of the beams, that is, it must be nailed not in tension, but to each of the 4 corners of the beam itself and the cells between the beams. If the humidity of the lower floor is high, a vapor barrier is nailed under the beams, that is, from the ceiling side.
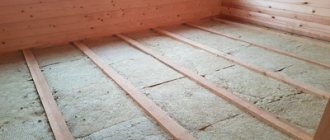
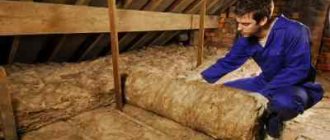
- Insulation (mineral wool, sawdust, expanded clay) is placed on top of the vapor barrier membrane closely between the joists, leaving no gaps. If the width of the insulation is not enough to cover the entire distance between the joists, it is cut and compacted tightly.
- If the insulation is laid in 2 layers, then the thickness of the bottom layer should correspond to the height of the beams. The second layer of insulation is placed on top randomly to cover the gaps of the bottom layer.
- If a second layer of insulation is not provided, then a layer of waterproofing is laid on the thermal insulation, also not in a stretched form, but slightly loosened, so that it seems to be real. If there is 1-2 cm between the insulation and the waterproofing along the height of the beams, this is normal. Sometimes craftsmen deliberately leave space for additional ventilation. For a cold attic, waterproofing over insulation is not necessary.
- Slats or beams with a small cross-section are nailed to wooden beams parallel to each beam.
- The subfloor (plywood, sheathing, OSB boards) is nailed to the slats.
- A finished floor made of linoleum, tongue and groove boards or any other beautiful material is placed on the subfloor.
This type of insulation is suitable for interfloor ceilings, basement (from the living room side) and attic. If a cold attic is being insulated, and there is no plan to create a living room in it, then a finished floor is not needed. The same applies to the basement; there is no need to install a finished ceiling in the basement.
For insulation based on foam materials and polystyrene, vapor and waterproofing is not needed. These materials have water-repellent properties and do not accumulate condensation.
General principles
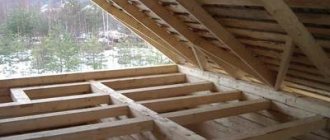
Beams, or logs, are laid parallel to each other between two walls on a layer of concrete screed or on a base slab.
Previously, logs were only made of wood, but now variety is introduced by metal and polymer materials, which more successfully resist the deformations and squeaks that arise over time when the finished floor is laid on top of the boards. The role of beams can be played by thick boards laid on edge, but more often it is an ordinary beam, fixed level in a single plane of the floor. The space between the joists is filled with insulating materials. Sometimes there is a layer of insulation underneath it. It serves as an additional barrier against high humidity.
Bugs and difficulties
The most common problems are:
- Sometimes manufacturers indicate the working side on vapor barrier rolls, sometimes not. How to determine which side to lay the vapor barrier on? On one side, it absorbs moisture, that is, it has small holes; if you run your hand over it, you can feel the roughness. It is this side that is absorbent; it must be laid “facing” the lower room. If the film is double-sided, then it should be laid as the roll unfolds.
- You only need to attach vapor barriers to each other, as well as to the walls, using special tape designed specifically for vapor barriers. No stapler or regular tape will provide the necessary sealing. If the sealing is not done well, condensation will begin to accumulate between the beams, which will cause them to rot, mold and complete destruction of the beams and the insulation itself.
- The width of the thermal insulation must clearly coincide with the pitch of the beams. You cannot place rolls or slabs of mineral wool with a gap or leave the remaining part in a raised state.
- The thickness of the insulation must correspond to the climatic conditions for a particular region. If the layer is smaller, freezing in a cold attic is possible on the outside of the insulation, especially mineral wool. All the frost in the form of water will penetrate into the cotton wool and go further to the ceiling of the lower floor.
- Rotting of insulation and wooden beams occurs mainly due to poor ventilation of the room. Therefore, the attic and basement must have a ventilation system connected to the street.
- Mineral wool tends to shrink over time. If 15 cm thick insulation is planned for the attic or basement, then it is better to lay 20 cm at once. In a year or two it will shrink to the required size. Manufacturers offer the highest quality material in the form of slabs; mats are softer and retain heat less well.
- The hydrobarrier cannot be replaced with ordinary polyethylene, as many private developers do. The waterproofing roll is designed in such a way that it can allow air to pass through, but cannot allow moisture to pass through. If you use ordinary film, there will not be proper ventilation between it and the insulation, moisture will begin to accumulate and the thermal insulation, along with the beams, will begin to rot.
- If yellow, damp spots begin to form on the ceiling, but the attic is dry and the roof is not leaking, then most likely moisture has accumulated in the insulation layer.
- Between the floors where the wiring is planned to be laid, it is better to wrap it separately in polyurethane foam so that it does not come into direct contact with the insulation and wooden elements. You should not rely on fire retardants and fire resistance of cotton wool.
Main workflow steps
The instructions for carrying out the work will be divided into several stages so that you can understand all the features as best as possible. And we will start by laying out the main supporting elements.
Fastening beams
Work in wooden buildings can be carried out in several ways; consider the sequence of required operations:
- First of all, you should prepare the products - clean them of dirt and bark residues, if any, and also coat them with a special fire-retardant composition. This will protect the wood from fire and damage from woodworms and will significantly extend the life of the structure.
It is most convenient to carry out the treatment before attaching the elements; if you have a sprayer, the work can be done with your own hands very quickly
- Next, all the necessary measurements are taken; if cutting of beams is required, then it is better to double-check all the dimensions, since cutting off the excess will simply ruin the product, the price of which is quite high. Cutting is easiest done with a chainsaw or other special woodworking device.
Fastening is carried out in three main ways:
- The first is cutting out recesses to fit the ends of the beams and securing each element in special recesses. This option has been very widely used for several centuries. It is important to cut the material carefully so that the laying level of all elements is the same, the joints are sealed and thermally insulated using tow, this helps protect all cutouts from the penetration of cold air.
Laying in recesses is convenient because each element is located in its place, which is prepared in advance
- The second solution is laying on the ends of the walls, with each of them fixed in a stationary position using staples or special screws. This option is applicable if cutting the recesses would be too time-consuming and complex, and the configuration of the building allows the beams to be laid with sufficient overlap on the walls so that they rest securely and provide high load-bearing capacity.
- The newest option - the use of special supports for timber - is used if it is necessary to make a partition anywhere on the wall surface without cutting out recesses or where the beams extend into the walls only a few centimeters. The work is simple: the fastening element is fixed to the base, after which the element is inserted into it and fixed using self-tapping screws.
The supports are highly durable and provide the necessary load-bearing capacity
Ring fastening, waterproofing and insulation
After the beams are installed, you can begin covering the structure with rough flooring, the work is carried out in different ways, we will consider the simplest and most cost-effective option:
- The underside is filled with rough flooring, which is most often made from inexpensive unedged boards of the same thickness. The optimal solution is a 20-25 mm pine board. Its cost is low, and for this type of work it is ideally suited.
Important! Be sure to remove the bark from the ends if there is any, as it may contain pest larvae, which can greatly harm your home in the future. Also, do not forget about treating all elements with a fire-retardant composition.
- The boards can be laid on a cranial block specially fixed at the lower level of the beams (50x50 mm in size) or screwed directly to the beams. We strongly recommend using self-tapping screws for these purposes; they are much more reliable than nails and will hold all the elements much better.
This is what the construction of the second floor floor in a wooden house using a cranial block looks like
- Next, the surface must be waterproofed, and if previously various options were used for this - from clay-based putty to roofing felt, then in our time special materials have appeared that release moisture from the wood, but prevent its penetration from the outside. These are so-called membranes, and we recommend using them.
Special membrane materials are an excellent solution for floors
- Now let's look at how to insulate the floor of the second floor of a wooden house. Previously, different options were used - from sawdust and slag to expanded clay and various mixtures. With the advent of mineral wool, all work has been simplified - this type of material is characterized by high performance properties and excellent heat retention. In addition, mineral wool is an excellent sound insulator.
Insulating the floor of the second floor in a wooden house using mineral wool is a quick and simple process; it is important to lay the material as tightly as possible
- From the outside, the surface is covered with another layer of waterproofing material, at which point this stage of work can be considered complete.
Floor construction
The floor of the second floor on wooden beams can be laid in two main ways:
- Directly along the surface of the structure, this option is applicable if the thickness of the insulation inside the structure is less than the height of the beams and there is a small cavity below for ventilation. If the mineral wool is located flush with the top edge of the beams, then it is better to use the second option.
- Logs are laid on the beams, which makes it possible to create a so-called “floating floor”, since it is not rigidly connected to the walls and can move slightly due to temperature changes. This option allows you to improve sound insulation in a wooden house.
The work also varies depending on the material used:
- If you decide to make a wooden floor, then purchase a special board 32 mm thick or more with a special tongue-and-groove fastening system. The work is simple: the board is secured with screws or nails through the recess, i.e. groove, then the next element is inserted so that the connection is tight; if necessary, you can tap the end with a mallet. This results in a smooth surface without nail heads or screws.
- If you decide to lay laminate, parquet or other covering, the easiest way to cover the surface is with sheet materials: plywood or oriented strand board. The second option has high moisture resistance, so it is used more often. The work is simple: the sheets are combined so that the connections go along the beams and are screwed with self-tapping screws.
Price for materials and services
The cost of insulating any type of floor depends on the selected material and square meters of the structure. Sometimes the work includes laying vapor and waterproofing, sometimes not. This service is considered separately. The work also sometimes includes cleaning the ceiling from old insulation.
Thus, insulation of 1 m2 of flooring costs :
laying mineral wool with vapor barrier – 70-180 rubles;- laying polystyrene foam – 70-150 rubles;
- insulation with expanded clay granules - from 150 rubles;
- application of polyurethane foam - from 850 rubles;
- cleaning floors from old insulation – 400 rubles;
- laying vapor barrier/waterproofing – 100 rubles.
Cost of materials:
- basalt wool slabs – 800-900 rubles. (depending on thickness);
- polystyrene foam 1 m2 - 300-350 rubles;
- sawdust machine - 3500-5500 rubles;
- cube of expanded clay fractions - 1800 rubles;
- cube of foam glass from 10,000 rubles;
- vapor barriers – 700-4000 rubles/roll;
- self-adhesive tape – 50-150 rubles/linear meter;
- waterproofing – 700-2000 rubles/roll.
