The roof is built in order to protect the house from precipitation, but it will not be able to perform this function if the smallest cracks and gaps between the roofing material and the adjacent elements are not eliminated. The outlet of the chimney pipe needs more careful sealing. Since the size of the hole in the slope is 2-5 centimeters larger than the diameter of the smoke exhaust channel, a gap is formed between them, through which water penetrates into the rafter frame. To prevent leaks, bitumen mastic, cement mortar and sealants are used, however, the effectiveness of these materials decreases over time. To solve the issue of insulating the joint between the pipe and the roof once and for all, experienced roofers advise installing Master Flash elastic penetration.
Device
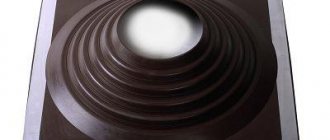
The Master Flash penetration is a stepped pyramid on a rectangular base made of silicone or rubber. Each of the steps has a corresponding diameter, so it is used for waterproofing pipes of any diameter. The Master Flash penetration is put on through the head, moved to the base of the chimney outlet to the roof and secured to the surface of the slope using self-tapping screws. Manufacturers offer models made from two different materials:
- Made of rubber. Master Flash is made from ethylene-propylene rubber, which belongs to the class of synthetic elastomers, has high elasticity, flexibility, and a high degree of moisture protection. They are used for chimneys in which the gas temperature is not higher than 100-120 degrees, since this material melts and burns. EDPM rubber has a porous structure and has low resistance to chemical compounds that contain fat and mineral oils.
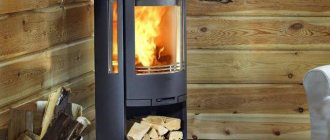
- Made from silicone. Master Flash made of silicone is used for chimney pipes whose operating temperature exceeds 120-130 degrees. They tolerate heating well up to 220-240 degrees. Therefore, they are used to isolate the smoke exhaust duct of devices operating on solid fuel. Silicone products do not tolerate direct sunlight well, so they last less. This type of passage isolation device is non-flammable.
Master Flash compactor device
Important! Manufacturers produce straight Master Flash penetrations, which are used for installation on flat roofs, and angular penetrations (30 and 45 degrees), intended for pitched roofs. When choosing a model for installation with your own hands, be guided by the slope of the slopes; if only straight lines are available, take a larger penetration.
What is a flash master
The problem of leaks can be radically solved with the help of a special elastic penetration - flash master. This device looks like a round or square base, in the center of which there is a set of rings installed one after another, in such a sequence that each subsequent one is smaller in diameter than the previous one, so that together they form a cone.
The material for the base can be either silicone or special rubber. The advantage of the first is the ability to withstand elevated temperatures, up to 350 degrees, while rubber melts already at 180.
But silicone is destroyed and deformed under the influence of ordinary ultraviolet rays from the sun.
Therefore, it is protected from direct exposure to the sun by covering it with another material.
The design of the flash master also includes aluminum elements, which impart rigidity to its base and evenly distribute the load on the system.
Such a flash system must have the following set of characteristics:
- Easy installation, allowing you to install such a structure yourself without inviting a specialist.
- Acceptable price.
- Durable and able to withstand both very low and very high temperatures. It also produces flexible materials that are resistant to corrosion and other impacts. Silicone models can work in conditions of 300 degree heat.
- Tightness ensured by the tight coverage of the pipe by the upper ring of the cone.
- The flexibility of the design allows it to be mounted on any roofing materials, including tiles, metal tiles, corrugated sheets, slate and on any roof structures - straight or sharply pitched.
All flash seals are divided into two types:
- Straight, which is a cone with rings placed relative to the base at an angle of 90 degrees and intended for installation on surfaces parallel to the ground.
- Angular, used to seal roofs with slopes, using a cone made of rings protruding at an angle of 30 or 45 degrees.
The flash master is designed to be installed on the roofing, so that its rings tightly compress the pipe section, so that the opening between the roof and the pipe is hermetically sealed from precipitation.
This design can be installed both during the installation of pipes and after their installation, for which some products even have special cuts.
Equipment
Using the Master Flash penetration is the simplest way to insulate the joint between the chimney and the roof. Its installation takes no more than 30 minutes, and it lasts at least 15 years. To do the installation yourself, you will need:
- Master Flash penetration of the appropriate size made of silicone or rubber. Choose a model based on the diameter of the chimney pipe and the temperature of the gases inside it. Pay attention to the base of the product: products with a metal-reinforced flange last longer, however, it provides a poor fit to textured roofing materials.
Corner penetration
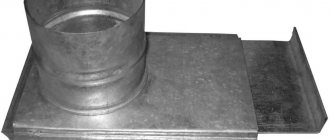
Direct penetration - Plate. This term refers to a galvanized steel product that is placed over the penetration to protect from sunlight. Outwardly, it resembles a plate without a bottom; ready-made models are sold in hardware stores, but making such a device with your own hands from sheet steel is also quite simple.
Drawing of a decorative plate for decorating a passageway - Fasteners, sealant and screwdriver. If you do the installation yourself, you will need self-tapping screws with a press cap, a heat-resistant silicone-based sealant and a screwdriver.
Note! At each penetration stage, the corresponding pipe diameter is indicated. To prepare the Master Flash for installation with your own hands, you need to accurately determine the size of the chimney and cut the device according to the mark with ordinary scissors. Experienced roofers say that the hole in the flexible penetration should be 20% smaller than the pipe.
Installation
The elasticity of the flash master allows you to install the passage unit without any problems. All you need to do is select an element of the required diameter, cut a hole in the center, the size of which is 20% smaller than the diameter of the seal, and install it by pulling the seal onto the chimney to the base of the pipe.
The installation instructions included with the seal inform you that after carrying out the above steps, the base of the flash master should be secured to the roofing using sealant and, in addition, secured with self-tapping screws.
The standard instructions can serve as an algorithm of actions, but some details should be clarified. This will save you from mistakes and rework.
Depending on the type of roof: pitched or flat, you will need to purchase the appropriate type of sealant. In addition, you should take into account what material the roofing is made of and whether there are transverse joints.
When installing, be sure to take the following recommendations into account:
- In order to make it easier to thread the seal, it is recommended to open the surface of the pipe and the ring of the product with a slip agent.
- If the hole for pulling the flash master is cut incorrectly, do not rush to get rid of the element.
- For sealing, use only waterproof sealant.
- Do not overdo it with screws. Over time, the sealant will gradually lose its properties, and as a result, the waterproofing will not be as powerful. Due to the large number of holes, water will leak under the roof.
- When installing the ridge on a ridge, its upper half should be moved under the ridge flashing.
- If the pitched covering is characterized by a non-uniform shape with overlaps, then the upper part of the flash master should be moved under the adjacent part of the roofing material. This action will allow for free flow of sediment, regardless of the quality of the sealing work performed. This connection is characterized by a longer service life.
Tools required for work:
- self-tapping screws;
- screwdriver;
- scissors;
- hammer;
- pliers;
Materials for installing the element:
- the seal itself with a steel lining;
- clamp;
- sealant;
- means for ensuring the sliding of the seal along the pipe;
- building level;
Installation work for wiring the flash master is extremely simple to perform:
- First, you should choose a seal ring whose diameter is approximately 20% smaller than the size of the pipe; this nuance will ensure reliable contact of the elements. The unnecessary remaining part must be trimmed.
- Work on installing a master flush on an object is carried out extremely tightly, so it is recommended to treat the chimney pipe with a product that will ensure free sliding when the seal is threaded through it.
- The effect of maximum penetration of the seal to the roofing is achieved by crimping the flange. Joints should be sealed when using special compounds. After this, the plate is fastened at the base of the master flush to the surface, using self-tapping screws. Recommended installation pitch is 35 mm.
Advantages
Elastic products for sealing the passage of pipes through the roof have earned the trust of craftsmen and have become more popular than traditional methods of sealing gaps. Master Flash is optimal for DIY installation due to the following qualities:
- Tightness. It reliably protects the gap between the pipe and roofing materials from moisture penetration, preventing the possibility of leaks.
- Elasticity. Due to their flexibility, rubber penetrations tightly cover the pipe and fit tightly even to profiled roofing materials. These devices are suitable for roofs of any shape and slope.
- Versatility. It is suitable for roofs covered with corrugated sheets, metal tiles, roofing felt, slate and bitumen shingles.
- Easy to install. Do-it-yourself installation can be done in 10-15 minutes alone; even an inexperienced craftsman can do this work.
- Durability. Due to their resistance to temperature changes, chemical influences, and moisture, rubber penetrations have a long service life and do not require frequent replacement.
- Strength. Products made from high-quality rubber have a durable structure that is resistant to mechanical damage.
- High temperature resistance. The maximum permissible temperature at which silicone can be used to insulate a chimney meta-inlet is 220-240 degrees. This heat resistance allows Master Flash to be used for heating devices using any type of fuel.
Important! In some cases, the elasticity of Master Flush is the main advantage over other types of insulation. Only rubber and silicone penetrations have the ability to compensate for changes in the dimensions of the roofing material under the influence of thermal expansion.
Tips for choosing a product
How to choose the right roof sealant? To do this, we recommend following simple recommendations:
- You can choose flexible types of seals, the base of which is made in the form of a circle or square, for roofs with an acute angle of inclination. Most often it reaches up to 50 degrees. As for the roofing material, the entire roof must be made of bitumen shingles, special steel or profiled metal. Silicone is used for installation;
- It is recommended to use a seal with a flange for roofing structures whose angle exceeds 60 degrees;
- For flat roofs with a slope angle above 65 degrees, it is recommended to select seals whose soft part will have an increased area;
- For flat roofs, cuffs without a flange are suitable. They will be fixed perpendicular to the roof. Bitumen mastic or liquid silicone glue will allow you to create a seal;
For a roof made of tiles or slate, types of seals that are equipped with a metal base with a large area are suitable.
Terms of Use
Elastic rubber penetration Master Flash is the best option for waterproofing the gap where the chimney passes through the roof. However, it is not suitable for all cases. Professional roofers and manufacturers recommend using this device for DIY installation on the following types of smoke exhaust ducts:
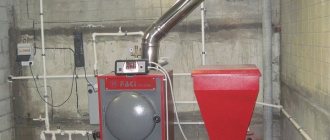
- Sandwich chimneys. Between the two galvanized steel contours of these pipes there is a thermal insulating layer of basalt fiber. The insulation retains heat in the inner pipe, so the outer surface of the chimney remains cool. Rubber models are used to waterproof sandwich pipes.
- Stainless steel chimneys. Stainless steel chimneys that remove combustion products from solid fuel stoves are heated to high temperatures. Therefore, heat-resistant silicone penetrations are used to seal the target between the roof and the pipe. The use of conventional rubber models is possible if the chimney is connected to a condensing-type gas boiler.
Note! If you want to insulate the outlet of a bare pipe with Master Flash, you can use a special sleeve. A section of 50-100 cm is cut out of a pipe whose diameter is larger than that of the chimney. The section of the chimney passing through the roof is tightly wrapped with fireproof material, and then the sleeve is put on and secured with a steel clamp.
Types of roofs and their area of application
There are the following types of roofs:
- ridge;
- single-slope design;
- decyl;
- decylless;
- universal.
Let's look at some of them in more detail.
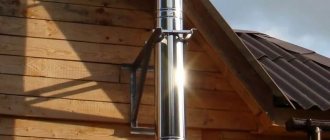
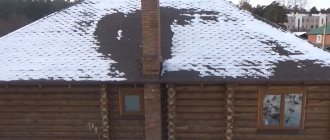
Skate. It is used during installation work and installations with access to the outside through the roof through the ridge. This insulation option allows installation above the roof with an overhang of only 500-600 mm
It is important that the rules of wind support are not violated.
There's no point in talking about installation. The photograph clearly shows the working parts. It is better to watch the video material presented by specialists on our website about installation possibilities.
Watch the video
Watch the video
Installation
Each passage of Master Flash is supplied with detailed instructions to facilitate DIY installation. Since the work is performed at height, you should follow safety precautions, use a safety rope and a helmet. Installation is performed as follows:
Instructions for installing the seal
- If a protective cap is placed on the pipe, it is removed. The top of the penetration is cut with a knife to the required diameter.
- Pull the device onto the pipe through the head. If the penetration is too slow, the pipe is treated with a soap solution, which makes the task easier.
- A heat-resistant silicone-based sealant is applied to the base of the penetration in an even, thick layer and pressed against the surface of the roofing material.
- Additionally, secure the base using self-tapping screws with a press cap. Do not overdo it with the number of screws, because when the sealant is washed off, water will begin to flow into the holes.
- If the installation takes place on a roof made of bitumen shingles, the upper part of the base is tucked under the covering elements.
- A decorative plate in the color of the roof is installed on the penetration.
Important! If, while cutting the penetration, you made a mistake and made a hole of a larger diameter or damaged the device, you can try to secure it to the pipes using sealant and a steel clamp.
Assembly
The Flash Wizard is installed as follows.
First, cut off the upper part so that the diameter of the resulting part is approximately one fifth less than the chimney pipe. This will ensure a tight fit. The resulting structure is placed on the pipe with the base down and moved along the pipe until it fits against the roof. When installing master flush on corrugated sheets and metal tiles, it is better to use a rubber penetration.
The next step will be to secure the resulting structure with sealant. At the very end, you should screw it to the roof using self-tapping screws.
Master flush, or kryza, perfectly performs the function of protecting the attic from precipitation
There are several tricks when installing master flash.
To make it easier to thread the pipes through the roof, cover them with soapy water.
This will make pulling easier. If you were unable to immediately successfully cut a hole in the master flash, you can try to use it, sealing it tightly with a clamp. When buying a sealant for master flush, make sure that it is resistant to moisture. There should not be too many self-tapping screws, since in any case the sealant will someday begin to let moisture through, and then it will seep through the holes. Try not to screw self-tapping screws into recesses in the roofing material, as this is where precipitation flows. When installing the master flush on a chimney ridge, place its top under the flashing.
There are some features that you need to know before installing master flush on metal tiles. And other roofing materials that are installed with one sheet overlapping another. When performing installation in this case, you need to bring the upper part of the canopy under the nearest adjacent sheet. By performing this maneuver, you will achieve free flow of liquid regardless of the tightness of the penetration connection. This way you can increase the service life of the connection.
If you use a chimney without insulation, as well as boilers running on solid fuel, temperatures can reach 600 º, which can lead to failure of the roof. How to install the master in this case? You need to select a pipe whose size exceeds the diameter of the chimney by about 10-12 cm. Its length should be up to 50 cm, or you can use regular galvanized metal. In the place where the chimney passes through the roof, it must be covered with basalt, and a selected sleeve must be placed on top. The master flash is installed, the dimensions correspond to the sleeve used. The open section of the insulation at the top is covered with a hopper, which is made of galvanized steel. You can attach it using a clamp.
The canopy with fastener is installed according to the following scheme. The top of the cone is also cut to a size 20% smaller than that of the pipe. Then the clasp is removed from the lock. The cuff is wrapped around the pipe, its sides are connected. Then the fastener returns to its place, the teeth tighten. The sealant is then applied to the appropriate area of the roof. Then the fastener and all places that need to be insulated are treated with it.
Having completed the installation, install the plate, thus giving the structure a finished look.
Thus, installing a master flush with your own hands is completely easy to do even for a novice, inexperienced builder. After all, all the tools needed for it can be easily found in many construction stores or even made with your own hands. This will not require special time or material costs from the master. At the same time, the installation of such a device will reliably protect the roof from precipitation, which otherwise could lead to unpleasant consequences.
approximate price
Flash specialist cost
depends on what materials it is made of. If the base is silicone, then these types of materials are much more expensive than those based on rubber.
Prices for silicone wings range from 1,500 rubles to 3,500 rubles per piece. The cost depends on the diameter and the size of the material.
Prices for roofs made of rubber material range from approximately 255 rubles to 600 rubles per month.
That's all! As you can see, specialist flash is considered a cheap material. It is important to remember that if everything is done according to the rules, the gap will be closed hermetically, which will subsequently prevent water from getting under the roof.
Also, when working at height, you should always remember safety rules.
Installation nuances
To install the penetration, you will need the following equipment:
- Hardware with a press head;
- Pliers;
- Drill-driver;
- Sharp knife;
- Carpenter's hammer;
- Flash master device;
- Steel clamp;
- Silicone glue;
- Lubricant for parts;
- Level.
Installation of the Master Flash penetration includes the following steps:
- Before starting installation, you should check that the hole in the Flush Master seal for the chimney is 20% smaller than the pipe diameter. To adjust the product to the required size, you can independently trim the edge of the penetration hole by 20%;
- Next, the Master flush is put on the pipe. To make it easier to put on the device, you can use a lubricant without petrochemical impurities;
- Now the sealant is pressed down and fits tightly under the roofing profile. Any blunt object can be used for adjustment;
- Next, a special sealing agent is introduced into the gap between the roof and the lower area of the seal;
- The resulting structure is attached with self-tapping screws to the roofing deck. The fastening pitch should be 0.15 cm for optimal sealing.
For those cases when it is impossible to put the penetration on top or it is necessary to repair the chimney insulation, Master Flash systems with a lock on the cuff are produced.
To install it correctly, installation is performed in this way:
- The top of the cone is cut off with special scissors;
- Next, the metal toothed fastener is removed and the pipe is wrapped around the penetration;
- The lock is fastened and its teeth are pressed with pliers;
- A layer of sealant is poured into the joints and onto the fastener;
- The remaining glue is distributed over problem areas of the structure to seal them.
A seal with clamping clips is used for flat or sloping roofs.
Its installation is carried out as follows:
- The upper area of the rubber cuff is cut to fit the size of the chimney;
- The penetration is wrapped around the pipe;
- Next, the clamping clips are installed using pliers;
- Using a marker, outline the contours of the penetration;
- Raise the base and treat the roofing deck with sealant;
- Apply the seal to the surface and attach its base with self-tapping screws.
Additional recommendations from roofers for installing Master-Flash:
- When adjusting the penetration to the required diameter, it is necessary to first remove the protective element from the pipe;
- If the penetration hole was cut too much or damaged during cutting, it can be fixed with sealant or a clamp;
- When installing, it is recommended to put the penetration through the pipe head;
- Silicone sealant can serve as a sealing agent for treating the joint areas of the structure and coating. It is applied in a dense layer to the joints between the seal and the roof;
- Self-tapping screws for sealing the system are inserted into the press head;
- When installing penetrations on a bitumen roof, the base of the seal is tucked under the roofing elements;
- An architectural plate is placed on the sealing product to match the color of the roof surface;
- With a non-uniform pitched flooring, the upper part of the penetration is moved under the roofing material. This ensures uniform drainage of water from the roof surface.
Installation errors:
- During installation, it is prohibited to join chimney elements at the intersection of floor beams and roof;
- The penetration should only be put on the pipe itself, but not on the chimney opening;
- The layer of silicone sealant must be at least 10 mm;
- The chimney in the roof opening must be fixed with steel clamps to seal it from moisture.
Facing with wild stone
This material gives the house an aristocratic appearance and allows its owner to distinguish his home from the gray and monotonous mass of other buildings
When using facing stone, pay special attention to caulking all seams, especially for interior finishing. But, wild stone is often used as a means of cladding on the outside, giving its natural and presentable appearance. In addition, the wear resistance threshold of such elements is also surprising.
In addition, the wear resistance threshold of such elements is also surprising.
Stone-lined chimney on the second floor.
Marble plaster
This is a crumb where particles of small pebbles are mixed into a solution. Cladding, therefore, is only permissible inside buildings, since the crumb does not like exposure to cold temperatures. It goes well with fireplaces and traditional stoves, especially if the kitchen area is additionally finished with such chips, not to mention brick chimneys.
Venetian plaster
On sale it is a white powder, which must be dissolved in water when applied. If desired, you can add different colors, resulting in a rich selection of shades. Keep in mind that decorative cladding must be carried out on a pre-prepared base - plaster. After application (use a spatula), it is recommended to dry with a hairdryer.
Necessary materials
Before installing the master flush on the roof, check its contents. You will need:
— Master flush for a pipe of the appropriate diameter. When choosing, also focus on the temperature of the exhaust gases, since the choice of material from which the roof is made depends on it.
Advice! When choosing a penetration, keep in mind that a flash master with a reinforced base has a longer service life, but provides insufficient adhesion when installed on metal tiles, corrugated sheets or other embossed roofing materials.
— A plate used to protect the wing from sunlight. It can be purchased at building materials stores or made with your own hands. It looks like an ordinary plate without a bottom.
— Screwdriver, self-tapping screws, metal scissors and heat-resistant silicone sealant