It is not at all difficult to insulate a floor with expanded clay even if you have no experience; the main thing is to carefully study the technology. Thermal insulation of the floor using expanded clay not only allows you to reliably protect your home from the cold, but also significantly saves on materials. This insulation is one of the most affordable and easy to use, and if installed correctly, it is also very durable.
Floor insulation with expanded clay
Properties and advantages of the material
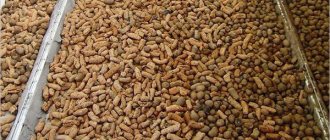
Expanded clay contains exclusively natural components that are not capable of causing harm to health. Its basis is clay, which undergoes thorough cleaning and drying. Upon completion, the crushed mass is placed in a special oven. In it, under the influence of high temperatures, a porous structure is formed.
In addition, expanded clay has a significant number of other positive qualities, some of which should be noted:
- The material is frost-resistant, thanks to which it tolerates freezing cycles well.
- Non-flammability. Insulate is one of the non-combustible materials, which, if necessary, are also used to provide fire protection.
- It is not a place for insects and rodents to form and live, making it ideal for use in private homes.
- Expanded clay provides increased sound insulation.
- It has negligible thermal conductivity.
- Long period of operation. The laid material can easily last for the entire life of the building.
- Insulate easily tolerates the effects of various chemicals.
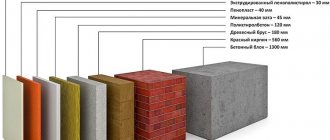
- High level of thermal insulation. A layer of expanded clay 10 cm thick is not inferior in its characteristics to a wood coating, which is three times thicker.
- Availability. Due to its relatively low cost (about $2.5 per 20 kg bag), many people can afford it.
- Ease. Due to its low weight, even when pouring a large layer of insulation, there is no need to construct special frames and other structures.
Expanded clay is also quite simple to lay and, due to its flowability, it is easy to fill all hard-to-reach areas with it, and when using it, it is not necessary to have special skills, since most of the work carried out with it occurs without significant difficulties, even for novice craftsmen.
We insulate the ceiling in the bathhouse
To insulate the ceiling in a bathhouse, you will need a layer of 20 cm, the procedure is carried out from the attic side. The sequence of work looks like this:
- A vapor barrier membrane is laid with a 15 cm overlap. If you take foil, the reflective surface is directed indoors .
- The joints are taped with metallized tape.
- Provide vapor barrier to the chimney and rafters above the backfill level. It is necessary to fix the result with tape or a construction stapler.
- Using a ten-centimeter layer of softened clay, the thermal insulation properties of the insulation are increased; The clay must be compacted very carefully.
- Expanded clay insulation should simply be poured and leveled over the surface;
- Cement-sand screed is poured on top.
- If the attic will be actively used, lay a floorboard on top across the beams.
Which expanded clay should be preferred for floor insulation?
The material is used not only as a heat insulator, but also for leveling surfaces; for example, it can be used to create a warm and even floor screed in an apartment.
Based on the size of the fraction, it is divided into 3 varieties:
- Sand. The finest expanded clay, which is used to create a thin screed. Its fraction reaches up to 10 mm.
- Gravel. It is used when constructing expanded clay concrete screeds over 5 cm thick, as well as when insulating floors during backfilling. Its fraction varies from 10 to 20 mm.
- Crushed stone. The most popular and used option for insulating wood floors. Ideal for filling the empty space between the floor covering and the foundation. Its fraction reaches 40 mm.
The type of material is selected depending on the needs. If necessary, you can combine several of them.
How does insulation work and why is it needed?
Air is the most effective thermal insulation material. It can only compete with inert gases, which practically do not react with the environment. Such gases are used, for example, when filling the chambers of double-glazed windows, but in basic building structures it is impossible to ensure complete tightness.
All thermal insulation materials have a porous structure. It is in the pores that air is retained and prevents heat loss. The lower the density of the material, the better it will perform its function. The insulation can be used in rolls, slabs, sprayed or bulk. Bulk is one of the most budget-friendly and easiest to install with your own hands, but it also has the lowest heat-protective characteristics.
Main heat losses at home. Through the floor - 10-15%.
It is necessary to insulate floors above the basement, on the ground or in the ceiling of a cold attic for the following reasons:
- ensuring comfortable living in the house;
- reduction in heating costs;
- protection of structures from condensation, which leads to the formation of fungus and mold;
- increased sound insulation.
If insulation is not done, serious problems will arise during the operation of the house.
Expanded clay insulation methods
During these works, one of three options for laying thermal insulation material is used - dry, wet and combined. To decide which method to give preference to, you need to familiarize yourself with each of them in more detail.
Dry insulation method
In this case, expanded clay is used to fill the free space between the joists or beams, on top of which a rough floor covering made of wood floorboards, chipboard or plywood is laid. To ensure the protection of the base from the negative effects of dampness under the insulation, it is imperative to lay waterproofing material. To increase the density of the thermal insulation layer, it is advisable to purchase expanded clay of various fractions and mix it before filling. This method of insulation does not take much time and does not require significant effort.
Wet styling
When carrying out insulation using this method, it is necessary to mix expanded clay with liquid concrete mortar, which then needs to be used to fill the free space between the beacons. It is most convenient to use it when the floor has significant differences in height and requires a leveling screed of enormous thickness. The low weight of expanded clay in this case significantly reduces the load on the base. In addition, the screed hardens an order of magnitude faster and noticeably fewer cracks form on it. Before giving preference to the wet method, it is necessary to take into account that the thermal conductivity of expanded clay increases significantly, which is why its performance becomes an order of magnitude lower than with the dry method of insulation.
Combined method
When choosing this method, it is necessary to pour insulation between the beacons, level it, and then pour liquid cement mortar on top of it. After the mixture has hardened, you need to make an ordinary screed. A cement-based solution allows you to strengthen the expanded clay layer and prevent its deformation when pouring the screed. If during operation the floor covering will be subject to significant loads, then it is additionally necessary to lay a reinforcing mesh.
More about expanded clay
The word "expanded clay" has Greek roots and is translated as "burnt clay." This material is extremely light, has a cellular porous structure, and its granules are round in shape. During the firing process, low-melting clays, to which peat, sawdust and diesel fuel have been added, swell. Expanded clay is often used in construction as a filler in concrete in cases where it needs to be made lighter.
The thermal insulation properties of expanded clay are affected by:
- granule size;
- granule strength;
- density of the material.
Based on bulk density (or volumetric weight), there are 10 grades of expanded clay (from 250 to 800). The brand number hides the bulk weight of the material, expressed in kilograms per cubic meter. For example, a cubic meter of expanded clay grade 250 weighs exactly that much in kilograms.
The greater the porosity of the material, the lower its density and the higher its thermal insulation properties, which is very important when choosing which expanded clay is best for floor insulation.
Different bulk densities are obtained with different methods and modes of processing the feedstock. Bulk density is determined by filling special measuring vessels. Typically, the largest fraction has the lowest volumetric weight.
Wood floor insulation
Next, we will consider in more detail the process of insulating a wooden floor on a concrete base, which must be carried out in the following sequence:
- Removing floor coverings. The floorboards must be removed and taken out of the room, and then a thorough inspection must be performed and the joists checked using a building level. If the wood elements are in excellent shape, without sagging or other defects, then they can be left in their original place. For minor damage, only the required joists should be replaced. If they are too old, poorly secured, or have begun to rot, then each of them must be removed down to the concrete base.
- Surface preparation. The first step is to clear the floor of debris, repair minor cracks, and also inspect the corners. Deep damage identified in these places must be covered with mortar or filled with foam, which should also be used to treat the joints around the perimeter of the walls and the base of the floor covering. Next, the surface needs to be filled with a layer of sand and compacted completely. If coating waterproofing is used, then there is no need to use sand.
- Waterproofing. At this stage, it is necessary to spread polyethylene or a special membrane on the floor so that the edges of the material extend beyond the perimeter walls by 8-10 cm. In this case, the logs are also under the film. If a single piece is not enough, then strips of it should be laid overlapping and the joints should be secured with construction tape. On beams, the waterproofing must be secured using a stapler, distributing polyethylene in the recesses between the joists. When using a waterproofing mastic compound, you need to open the dust-free concrete base using a roller or paint brush, grasping the wall surfaces to a height of 15-20 cm. In this situation, the installation of the logs must be done above the protective coating. As a mixture, you can use mastics based on bitumen or cement-polymer, liquid rubber, as well as bitumen-polymer compositions. The mixture must be applied in 2-3 layers, each of which is fully absorbed in approximately 3 hours. At the end of the stage along the length of all walls at the height of the rough floor covering, it is necessary to fix the damper tape, which will prevent deformation and the appearance of cracks on the screed during temperature changes.
- Installation of slats. If the joists are completely deformed, they will need to be replaced. To do this, you need to take strong slats or beams of wood, cut them to the required sizes in accordance with the length of the floor, open them with an antiseptic and wait until it is completely absorbed. The height of the wooden frame for the flooring must reach at least 10 cm. The last logs must be placed and installed at a distance of 2-3 cm from the walls. Between the others, you need to maintain a distance of 50-100 cm. Optimally 0.5-0.6 m. Each log must be placed using a building level and parallel to the others, so that none of them is above or below the horizontal plane. The beams must be fixed to the base of the floor with screws using metal corner plates. One side of them is adjacent to the wood, and the other to the floor covering on which the logs are laid. The last fasteners should be fastened 2-3 cm from the edges of the slats, and all the rest should be kept at a distance of about 50 cm.
Note! In addition, dowels, anchors and other similar products can be used as fasteners, which, when installed correctly, provide no less reliable fixation of the joists than metal corners.
- Falling in expanded clay. Initially, you need to mix the expanded clay of the small and large fractions with each other, and then fill all the free space in the gap between the joists or guide rails. In the corners, the insulating material must be carefully straightened by hand to eliminate the presence of voids. Upon completion of filling the entire space, you should carefully compact the expanded clay layer, trying to avoid damage to the granules. It is also necessary to lay waterproofing on top of the material, to fix which you need to use a stapler.
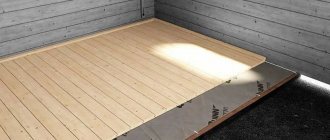
- Laying flooring. On the logs protruding from the expanded clay, it is necessary to stuff a rough floor covering made of plywood, chipboard or wooden floorboards, after which you can begin laying the finishing floor.
Finally, the film protruding along the length of the room should be trimmed with a knife, and the joints should be hidden using a plinth.
Floor screed with expanded clay: secrets of creating a warm and durable base in detail, with photos
Among the disadvantages, it should be noted the poor moisture resistance when using the dry screed method, so in some cases it is better not to use expanded clay. The material will not be damaged directly, but moisture will linger under the concrete. This will subsequently lead to increased humidity in the room. This factor is favorable for the development of fungi and mold. The disadvantages of the material also include the fact that for insulation you will need to make a thick screed. A layer less than 10 cm will be ineffective.
Expanded clay is a very light material and therefore does not weigh down the screed and does not place additional load on the foundation
Expanded clay concrete screed outperforms other fillers in many ways. In addition to the maximum level of heat and noise insulation, it has good breathability and is durable. The material is suitable for any floor covering. The maximum effect from all of the listed positive qualities can be achieved only if all the requirements of the expanded clay laying technology are met.
Various materials are used to insulate floors, walls and ceilings of buildings. In addition to expanded clay, the most popular materials also include polystyrene foam, polystyrene foam and mineral wool. They are characterized by such qualities as lightness, high thermal insulation and low price. However, due to their versatility, expanded clay or mineral wool are most often used. Floor insulation with these materials is most effective.
Expanded clay, as an environmentally friendly material, does not pose a threat to health and lasts for several decades. It is inexpensive, multifunctional and resistant to fire, moisture and rodents. However, its use requires a number of preparatory works, so it is not suitable for creating “warm floors”.
Expanded clay has high thermal insulation properties and is cheaper than other materials
Insulating walls with expanded clay outside the house is a rather labor-intensive and inconvenient process. This is where expanded clay is inferior to mineral wool, which is suitable for insulating facades, roofs and pipes in hard-to-reach places. It is easy to cut out the required shape using a knife.
It is impossible to say unequivocally which material is better, much less make a categorical choice in favor of one of them. The choice of insulation should be based on the specific construction conditions and material capabilities. Most often, experienced builders combine mineral wool with expanded clay, which has a positive effect on the cost of work and increases the degree of thermal insulation. Both insulation materials are distinguished by their simple installation process and low cost, giving excellent results.
Insulating walls with expanded clay gives excellent results for the entire life of the building
For expanded clay screeds, various types of fractions are used. The modern construction market offers materials with different levels of density. The weight of a cube of expanded clay ranges from 260 to 600 kg/m³. The specific gravity of expanded clay is the weight of a cube of material. It depends on the grain size: the larger the grain, the lower the specific gravity. It is the mass of 1 m³ of expanded clay and its density that underlie the classification of the material given below:
The table will help to clearly demonstrate the specific and volumetric gravity of expanded clay, depending on the type and fraction:
| View | Fraction, mm | Specific gravity (g/cm³) | Expanded clay weight per 1 m3, (kg) |
| expanded clay sand | 0-5 | 0,5-0,6 | 500-600 |
| expanded clay gravel | 5-10 | 0,4-0,45 | 400-450 |
| expanded clay gravel | 10-20 | 0,3-0,4 | 300-400 |
| expanded clay crushed stone | 20-40 | 0,2-0,35 | 200-350 |
In accordance with the table, the approximate weight of 1 m3 of expanded clay with a fraction of 10-20 is 350-400 kg.
The specific gravity also depends on the brand of density. According to existing GOST, the higher the density of expanded clay, the greater the weight of the material.
It is impossible to accurately determine the specific gravity of expanded clay, but the average value is quite easy to establish. The average value is 400 kg/m³ (0.4 g/cm³). Moreover, each faction has its own specific indicator. For example, expanded clay 10-20 in bags weighs approximately 16.8 kg.
It should be noted that loose clay granules are widely used not only in construction, but also in public utilities and agriculture. Therefore, the price range for this material is quite wide and ranges from 1000 to 2000 rubles per cubic meter.
Expanded clay granules have a porous structure, so they are good for use for dry screed
Expanded clay producers also dictate the pricing policy on the market. When setting prices, they are guided by the following criteria:
Enterprises selling expanded clay also take other factors into account when setting prices. For example, packaging, size of granules and their porosity. The first criterion includes a list of additional costs for purchasing additional equipment and hiring workers to dispense, weigh and package the material.
The size and porosity of the material determine such qualities of expanded clay as thermal insulation, strength, and moisture absorption. All these criteria respectively influence the formation of prices. For example, the size of the granules determines the price in inverse proportion: the finer the grain, the higher the cost. The price of small expanded clay in bags is much higher, since the material itself is much heavier compared to the weight of large fractions of expanded clay of the same volume.
Expanded clay is produced in fractions of different sizes, suitable for any type of work
Sales agents on the construction market offer the purchase of expanded clay wholesale and retail, packaged or in bulk. Buying material by weight or per cubic meter is much more profitable, since when packaging, labor costs and the cost of packaging influence the formation of the price. If the question is about purchasing expanded clay for floor insulation, and not for backfilling an area as a decorative element in landscape design, then it is enough to purchase just a couple of cubes of material.
Packaged expanded clay is of higher quality, as it undergoes special cleaning. In addition, the packaging is more convenient to transport and protects the material from moisture, maintaining its quality characteristics.
When buying expanded clay, you should take into account another important factor - seasonality. Usually, after the end of the construction season, the price of the material drops by about a quarter. Thus, granular building materials can be purchased much cheaper in winter.
If it is important to purchase high-quality, clean, hard and certified material, you should give preference to expanded clay in packaging. Since it has been certified, it will be free of impurities, debris and foreign matter. The strength of the granules can be checked by simple compression, and porosity is determined by breaking the grains.
If you need to purchase purified, high-quality material, you should give preference to expanded clay in bags
Floor screed carried out using the dry method is more advantageous compared to other technologies. First of all, the cost savings lies in the absence of the need to involve professionals, because most dry screeds can be made with your own hands.
When it comes to expanded clay, the overall cost is also affected by the method of its use. For dry screed, material of different fractions is taken - and its price can be low. While the pouring method requires fine-grained expanded clay, which costs an order of magnitude more.
Fine-fraction expanded clay is best suited for self-leveling screed
The best price for products can be found from the direct manufacturers of the material. Intermediaries, as a rule, set a markup of 15 to 30%, which includes the costs of delivery and storage. Therefore, to purchase large volumes, it is better to spend time on the road and bring expanded clay from the manufacturing plant yourself.
If we are talking about small quantities of goods, then it is better to refuse pickup and buy the material in specialized stores with delivery. The seller guarantees timely transportation, safety and quality of products. In any case, to avoid unnecessary costs, you should correctly calculate the required amount of material.
When choosing which fraction of expanded clay is needed for floor screed, they are guided by the room in which the material is planned to be used. The choice also depends on the technology used to backfill. According to the traditional method, which involves subsequent pouring of concrete, the size of the material does not matter much. Any type will do, including fine-grained expanded clay.
For a better quality screed, use expanded clay of different fractions, since this gives the required backfill density
At the same time, the opinion regarding the choice of a 0.5 mm fraction with a minimum weight for the base of expanded clay is erroneous. After all, such a filler has a higher density, so it fills the space better, thereby making the screed layer heavier.
Experienced builders recommend using expanded clay for screeding different fractions - from 5 mm to 20 mm in appropriate proportions. The recommendation is based on the fact that when laying a layer of expanded clay, grains of different sizes fit well together. This feature has a positive effect on the further use of the floor, which will not shrink or deform.
Expanded clay is a very ergonomic and economical material. Its use reduces financial costs, minimizes loads on concrete floors and increases the level of thermal conductivity. In order for the result to be as effective as possible, it is necessary to accurately calculate the required amount of expanded clay for the job.
To obtain a high-quality screed, it is necessary to comply with the proportions and installation technology
Builders use traditional methods when calculating how much expanded clay is needed for floor screed. If the layer thickness is 1 cm, then 0.01 m³ of material will be needed per 1 m². The weight of a cube of expanded clay is generally not taken into account, since the density of expanded clay calculated in kg/m3 varies for different types of material. Therefore, for convenience, sales are carried out in liters, based on calculations: for 1 m² of screed 1 cm thick you will need 10 liters.
To accurately calculate the consumption of expanded clay, you should measure the thickness of the insulating layer. In dwellings located on the lower floors or above unheated rooms, the thickness of the screed made of this material should be at least 10 cm. In order to maximize thermal insulation in residential premises, expanded clay is laid in a layer averaging 4 cm.
Based on the calculations given above, we come to the conclusion that to install a screed in a standard apartment you will need at least 0.04 m³ (or 40 liters per m²) of material. As a result of multiplying this indicator by the size of the room area, you get the total volume of expanded clay required for the screed.
The required amount of material must be calculated before starting construction work.
For example, you should calculate how much expanded clay is needed to insulate a floor with a layer thickness of 4 cm in a room of 15 m². The calculation will look like this:
15 m² * 0.04 m³ = 0.6 m³ (in cubic meters) or 15 m² * 40 l = 600 l (in liters).
The equivalent is 16 bags of 50 liters each. That is, one bag of expanded clay is consumed per 1 m² of screed. You can calculate exactly how much expanded clay you need for floor insulation using a special online calculator.
This material has been used as a reliable insulation material for quite some time. The heat-insulating effect of expanded clay granules is ensured by their porous structure.
Expanded clay ceiling insulation scheme
Expanded clay grains are similar in structure to expanded polystyrene. But there is also a significant difference: expanded polystyrene is made from polymers and is used mainly for wall decoration. Expanded clay is a natural material, the raw material for which is organic clay.
Due to the high degree of thermal insulation, the use of expanded clay for insulating floors, walls, ceilings and load-bearing structures is very effective. The material is often used for attic insulation due to its increased fire resistance (compared to expanded polystyrene). This advantage of the material allows its use in fire-hazardous objects: in a bathhouse, on the roof and on wooden floors.
However, using expanded clay on a horizontal base is more convenient than on flat or vertical surfaces, since it is a bulk material. To level and insulate the floor with expanded clay under the screed, it is enough to simply pour and level the material, but insulating the walls and ceiling will require more time and effort.
Scheme of floor screed with expanded clay and waterproofing in layers
Expanded clay is usually used to insulate the floors, ceilings and walls of wooden houses. Its use in brick and concrete buildings is very advisable. The most commonly used technology is to insulate the floor of a frame house with expanded clay. This is due to the fact that it is one of the most affordable, convenient and effective materials on the construction market.
Insulating the walls of a frame house with expanded clay is a labor-intensive and rather problematic process, so the use of this material for this task is less advisable. Although, due to its thermal insulation characteristics, expanded clay will well protect any wall - both brick and block. But the main condition for use is a three-layer structure, which will ensure the possibility of filling material between the rows.
In aerated concrete blocks, the distance from the inner to the front layer must be at least 10 cm. The material is filled in as the masonry is built. It is carefully compacted and filled with cement laitance. The consumption per 1 m3 of expanded clay binder M 300 will be 260-300 kg. It should be noted that in this case you will need about three times more water than cement.
Expanded clay for insulation is poured between the logs, after which all other work is carried out
Provided that the thickness of the side surfaces of the sandwich panels is correctly selected, it is possible to additionally insulate even frame walls with expanded clay, since during compaction the load on them increases significantly. To insulate the walls of a wooden house, it is necessary to prepare a thermal insulation layer of at least 20 cm. For this purpose, special canopies will have to be built for backfill.
Special expanded clay blocks used for the construction of walls have the necessary thermal insulation qualities. These are hollow structures containing expanded clay, sand and cement. Such buildings are warm in winter and cool in summer. This material is characterized by low strength, so it is suitable for the construction of one-story buildings and partitions between rooms.
Expanded clay blocks are a universal material that is used for the construction of insulated houses
Slotted blocks have good plasticity, which allows you to create different shapes. They are laid empty-sided down on a sand-cement mortar to save heat. Structural and thermal insulation blocks are a hollow material used for thermal insulation during the construction of walls. Depending on the size of expanded clay blocks, they are divided into wall, partition and facing.
Due to poor insulation, about 15% of the heat escapes through the ceiling, so during construction you need to take this factor into account and take care of insulating the ceiling or floor in the attic. For this purpose, mineral wool and polystyrene foam are often used, but expanded clay is deservedly considered the most popular material.
Insulation work begins with laying layers of vapor and waterproofing. A layer of vapor barrier film is attached to the finished ceiling. To do this, you can use self-adhesive roofing felt and foil, but if you don’t have enough money, a simple plastic film will do just fine. The technology is simple: a roll of the selected material is rolled out on the floor, marked and cut. The strips should be approximately 10 cm wider than the distance between the beams.
To ensure reliable thermal insulation, a layer of 10 cm is enough
If the ceiling area is large, it is advisable to lay the sheets with an overlap of 8-10 cm. The seams are taped with special tape or construction tape. When insulating the ceiling in a bathhouse with expanded clay, a vapor barrier should be provided for the beams and chimney pipe. The canvases are fixed above the expanded clay layer with masking tape or a construction stapler.
It is recommended to lay crushed clay over the waterproofing layer. Now you can begin laying the main insulation - material in a layer of 10 to 16 cm.
To insulate a roof with expanded clay, it is better to use a combined method, that is, take large and small granules. This will increase the density of the coating, and the level of subsidence of the granules will decrease, which will facilitate uniform filling of the material over the entire surface that needs to be insulated.
Expanded clay is most often used to insulate floors in different rooms. If you strictly follow the technology of using the material, you can achieve a positive effect even in a house with a very cold floor. It should also be noted that the floor bears the heaviest load, so a lot depends on what layer of expanded clay is needed to insulate the floor.
Dry backfilling of the floor with expanded clay is widely used for laying any type of flooring
Correct calculation of the insulation thickness will help avoid subsequent subsidence and surface deformation. It is also important to consider what expanded clay to use for floor screed. The most effective is the use of granules of different fractions. Then smaller grains will fall into the space formed by large grains, uniformly filling the entire surface.
Expanded clay screed plays a very important role. There are several technologies for its application. The screed provides fixation of the material and serves as the top waterproofing layer. Usually a two-level method of applying the solution is used. First, a layer of material is poured in order to fill empty spaces and displace air. Expanded clay under the screed is reliably protected from moisture and physical stress. The final screed is done to completely level the floor, which will be an ideal base for installing any type of floor covering.
Despite the fact that insulation with expanded clay (no matter the floor or ceiling of a house) is several times simpler than using the same polystyrene foam or mineral wool, the technology has a number of features. It is important to follow them, otherwise the insulation layer may become saturated with moisture.
For high-quality insulation with expanded clay, it is necessary to follow the backfill technology
There are many technologies for insulating wooden houses using this material. We have already figured out how to insulate the ceiling and walls, but the most common use of expanded clay is to insulate floors in a private home. There are many technologies and methods. This includes simple backfilling, pouring an expanded clay layer, and covering the material with a concrete screed.
In any case, first prepare the surface. To do this, dismantle the old coating, clean the surface of dirt, debris and dust. Next, they begin the process itself. The most popular method of insulating a wooden floor with expanded clay is to backfill it directly onto the ground, between the laid joists. Most often, this technology is used in the construction of country houses, but it is also acceptable in the arrangement of residential cottages.
The sequence of such work includes several stages:
Expanded clay is excellent for insulating wooden houses
This is the easiest way to insulate the floor in a wooden house from below with expanded clay. This method is also used to insulate the ceiling from the attic side.
Often in multi-storey buildings, the initial design assumes the presence of an open balcony or loggia, but most owners insulate the structure themselves by installing reliable heat-insulating double-glazed windows. Then the question arises about the need to insulate the floor in this room. There are a number of methods, in particular using expanded clay screed.
Considering how much expanded clay weighs, it is suitable as an insulating material for floors on balconies and loggias. The process itself is quite simple. First, a cement-sand mortar is mixed, then the entire surface of the concrete base is covered with an even layer of expanded clay 3-5 cm thick. After this, beacons are installed and, guided by them, the expanded clay layer is filled with concrete mortar.
Before insulating a balcony with expanded clay, it is necessary to carry out waterproofing
It is important that the cement mixture is thick to prevent light clay granules from floating, thereby compromising the thermal insulation effect. In addition, such a screed will be quite problematic to level.
It is important to take into account the fact that a conventional balcony slab is installed with a slight slope towards the outside. This is done so that rain and melt water flows freely from the balcony. Therefore, before insulating the floor with expanded clay, you need to take care of leveling the surface. The easiest way is with a concrete screed.
Quite often, expanded clay is used as a reliable material for thermal insulation of bathhouse floors. The required layer thickness is calculated taking into account the expected loads. Here they use technology using beacon filling. The simple method of falling asleep in logs is not suitable, since there is an increased level of humidity in the bathhouse.
To waterproof the insulating layer, you can use polyethylene film
When insulating the floor in a bathhouse, a number of features should be taken into account:
Floor insulation using expanded clay in buildings on stilts significantly extends the service life of the room and makes the bathhouse warm, reliable and comfortable. The main condition is compliance with all technological requirements during repairs. We will describe each type of screed with expanded clay in more detail below.
The use of expanded clay significantly extends the service life of the screed
The versatility of the material allows it to be used in different ways. The main criteria for choosing installation technology are the type of room and the relevant circumstances. At the moment, there are three main installations of expanded clay screed:
Expanded clay concrete mixture is widely used for various construction works.
Regardless of the type of screed application technology chosen, the base should be prepared in advance. This is a separate stage that requires special attention.
The list of necessary tools depends on the choice of type of screed. It should be noted that in any case you will need:
Necessary list of tools required for floor screed
A sufficient amount of water should also be provided, especially for the implementation of bulk and typesetting technology. You may need self-tapping screws for setting the beacons and, accordingly, a screwdriver or screwdriver. Ordinary mastic is suitable for smoothing seams. We should not forget about the presence of a construction tape for calculating the material and marking the beacons.
This kind of construction work is quite labor-intensive and dirty. Therefore, you should take care of appropriate clothing, footwear and personal protective equipment in advance.
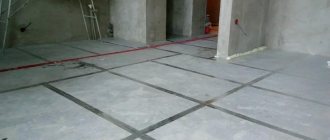
When starting work on floor insulation with expanded clay, you should calculate not only the mass of the required material, but also the expected load on the screed. To do this, calculate the height of the expanded clay layer and the thickness of the cement-sand floor screed. For example, to effectively insulate the floor on the first floor, the layer thickness must be at least 10 cm.
Scheme of floor screed with expanded clay on the ground
To prepare the solution, it is better to take a ready-made sand concrete mixture, where the proportions are clearly calculated. It contains plasticizers that prevent the screed from spreading and make the solution more plastic. The amount of material for sand-concrete screed is calculated using the formula:
AhBxS/D=K
Where:
For example, the estimated area is 20 m², for screed you need 2 kg of ready-made mortar per 1 m². The thickness of the tie is 10 cm, and the weight of one bag is 25 kg.
As a result, we get the following material calculation: 20 × 2 × 100/25 = 80 bags of dry mixture. Accordingly, with a smaller layer of concrete and in a small room, significantly less material will be required.
Scheme of dry floor screed using beacons under gypsum fiber boards
Before starting work, reinforcement or masonry mesh is laid on the floor. Next, beacons are installed at a distance of one and a half meters, fixing them in level with alabaster. You can make smaller indents, but this will cause difficulties when working with the rule. The floor is marked using a level. It is better to take water or laser. First, marks are made at the required height along the perimeter of the room, and then the required distance is measured from them.
The base for the screed should first be prepared by leveling the surface, and then waterproofed. An ordinary polyethylene film is suitable for this. It is placed with an overlap of at least 10 cm if laid in strips. The allowances on the walls should be slightly higher than the height of the screed. It is necessary to take into account such points as the thickness of the film, and the overlap of the strips should reach 50 cm.
Waterproofing can be achieved using hydrosol or bitumen-polymer liquid mastic. The material is applied with a brush to the floor and the lower part of the wall just above the border of the screed. The surface is covered with mastic twice at three-hour intervals.
As part of the preparatory work, it may be necessary to install fittings. Its installation is simplified by multi-layer filling. Installation is carried out before applying the leveling layer.
Filling the floor with expanded clay along the beacons will guarantee a flat surface
Next, beacons are installed along the filling levels. They are made from any available material, for example, from straight profiles for drywall. The installation of beacons is carried out on the base in a solution. The fastest and most effective solution is gypsum. The rule is also easy to make yourself from a piece of board.
An edge damper tape is fixed along the perimeter of the walls, which compensates for temperature fluctuations. It is better to take a product with a self-adhesive side. A simple tape can be attached in any other way. Reliable fixation is not needed - the tape will only be needed during pouring.
To prepare the solution, take expanded clay of the appropriate fraction. For this purpose, the following proportions are used:
Before preparing the solution, expanded clay is soaked in water. Dry and poorly soaked granules may simply float to the surface of the mixture. Next, fill and level the solution along the beacons.
Scheme for pouring a surface using expanded clay concrete
If the floor with expanded clay is poured in multiple layers, then in order to obtain a uniform screed, the leveling layer must be poured immediately after the first layer. Thus, the process of laying an expanded clay concrete screed is identical to the process of laying a conventional screed. The differences lie only in the preparation of the mixture.
The thickness of the screed itself is of great importance. If it exceeds 6 cm, then it is poured in two layers. Moreover, the first of them is about 4 cm, the second is thinner. It is applied to the required floor level. The finishing layer solution itself is thicker; it is poured in small batches. If you plan to insulate with expanded clay under a ceramic tile floor, then this method is the most acceptable.
Laying a screed on an uneven base in a section
Dry screed technology is relatively simple, and therefore it is very popular. Its essence lies in the fact that expanded clay is poured onto a plastic film, the surface is leveled, and boards or gypsum fiber sheets are laid on top. However, the procedure itself includes a lot of nuances. To do everything correctly, you must follow the instructions and carry out the work in stages. The screeding process includes the following steps:
For laying GVL slabs, a ready-made expanded clay mixture is used.
The dry method of applying expanded clay screed has its advantages compared to other methods, in particular:
The value of such a screed lies in the fact that it puts virtually no pressure on the floor slabs, since the expanded clay is not weighted with concrete mortar.
Scheme for marking the level of dry floor screed with expanded clay
As with any other type of screed, for the dry method it is better to take expanded clay of different fractions in different proportions. The main disadvantage of a dry screed is that only electric or film heated floors can be installed on it. It is impossible to install a water heating system under such a screed.
You should not trust the screed to inexperienced craftsmen, because the slightest violation of technology can lead to irreversible consequences. At best, the floor will simply make sounds when walking, at worst, it will lead to subsidence and deformation of the coating. Unscrupulous workers resort to a number of tricks, for example, they use crushed expanded clay, and instead of gypsum fiber sheets they use other slabs that are unsuitable for such work.
Also, owners should be wary if there is a noticeable gap between the sheets and the wall or if the folds at the point of contact are not cut. The sheets are connected and fixed using polyurethane foam, and not using glue.
Packaged expanded clay is much higher in quality sold in bulk
There are also cases when unprofessional use of even very high-quality materials leads to rapid deformation of the floor, and it sag under the weight of people. Such actions by amateurs discredit the dry screed method itself, making the semi-dry method or pouring the leaders. In fact, a successful result depends on the right approach to business and experience in this field of construction.
The backfill or stacking method is a middle option between dry technology and pouring expanded clay concrete. Based on the intended purpose, different fractions of the material and their combinations are used. To achieve the maximum thermal insulation effect, the expanded clay layer must be at least 10 cm, the granule fraction must be 20 mm. To prepare the filling, use finer-grained material with a fraction of 5-10 mm.
The stacking technology is not suitable for rooms where water ingress is possible. Therefore, it is imperative to carry out moisture-proofing measures on the first and basement floors.
The stacking method of floor screed with expanded clay is best used in rooms where high humidity is not expected
The technology itself consists of filling expanded clay under a floor screed and includes the following steps:
Expanded clay of any fraction is suitable for dry backfilling of the floor, the main thing is that the granules are of the correct shape
This “average” technology between the dry and wet methods of laying expanded clay makes it universal in use both as an independent screed and as part of “pies” of several layers.
Recently, a new type of dry backfill “Compevit” has become especially popular. This material is used during the installation of dry screed using the Knauf method. Initially, the material was developed as floor insulation, but its further use showed that it is excellent for leveling surfaces.
The “Compevit” mixture is very small grains of expanded clay (up to 5 mm), which are easily distributed on any surface. The main requirements for such granules: they must be finely crushed and round. If they do not meet these requirements, then they should not be used. Otherwise, after laying the base with GVL slabs, the expanded clay chips will shrink, and the floor covering itself will be deformed. The oval and asymmetrical shape of the granules also negatively affects the degree of shrinkage of the material.
Compoevit backfill can be used to create warm floors
The Knauf method using Compavit has a number of advantages, namely:
The main advantage of such a floor is its ability to withstand high loads without deformation - up to 900 kg per 1 m². Thus, an affordable price combined with high quality and ease of installation will ensure a long service life of the floor.
The scope of use of expanded clay is quite wide. But the main direction is its use as insulation. At the same time, most of the positive consumer reviews concern precisely such an area of application as floor screed. While people encounter certain difficulties when insulating ceilings and walls, they practically never arise when pouring floors.
Expanded clay is widely used for insulation and construction work of all types
A special place is given to filling attic spaces with this method, as well as the floor between joists during the construction of private houses and country houses. In addition, they point out such a positive quality of the material as its low cost. In practice, floor insulation with expanded clay is 4 times cheaper than using other materials, and the result will be no worse.
Expanded clay receives negative reviews mainly due to the fact that a large amount of material is required to carry out the work. To achieve the maximum insulation effect, you need to use a fairly thick expanded clay layer, which occupies a significant part of the space.
Experts advise using the material in accordance with technology in private homes, utility rooms and garages. Expanded clay is not suitable for high-rise buildings due to its heavy weight. The exception is the first and basement floors.
Before screeding with expanded clay, it is necessary to prepare the room
Experts and experienced craftsmen recommend using a number of tricks:
Scheme of combined floor insulation using expanded clay
If you follow all the rules and technologies, it is quite possible to make a floor screed with expanded clay with your own hands. Video materials, of which there are many on the Internet, will help facilitate the process. As a result, you can not think about repairing the floors of your home for a long time, while ensuring maximum heat and sound insulation. In addition, you can easily eliminate all floor unevenness using expanded clay. The photos clearly demonstrate both the installation process and the positive result obtained.
Insulation under a concrete base
When insulating the floor under the screed, preparatory work for the base is carried out in the usual way. First of all, it is necessary to remove the old floor covering, seal the cracks and clean the surface from dust. After this, the base needs to be opened with liquid mastic or covered with film.
The joints along the length of the floor must be hidden, which is why polyethylene must be placed on the walls. The last thing you need to do is fix the damper tape at a height above the screed being poured. After completing the above steps, you can begin insulation, performing work in the following sequence:
- Installation of beacons. They must be made of metal. It is best when the beacons are T-shaped and made of aluminum. Initially, before installing them, you need to mix a small portion of cement or gypsum mortar. After this, having taken the first beacon, it is necessary to lay it on the mixture under the wall opposite the doorway, without fail checking the placement of the slats using a building level. If necessary, it is necessary to press it into the solution or lift it out of it. The height of the beacons should not be higher than 0.1 m and the distance between them should be maintained in the range from 50 to 100 cm.
- Falling in expanded clay. You need to fill the free space between the installed beacons with material of different fractions and level it over the surface using a piece of plywood or using a rule. Then you should carefully tamp the expanded clay, avoiding damage to the granules.
- Reinforcement. It is necessary to lay a metal mesh with large cells on the backfilled insulation material, which should not have dents, protruding sharp edges or other defects, while leaving 4-5 cm indentations along the entire length of the walls in the room.
- Pouring the screed. When implementing it, you need to use sifted sand and cement in a ratio of 3:1, thoroughly mixing them with water until a homogeneous thick mass is obtained. After this, the prepared solution should be poured onto the floor between the guides placed on it gradually in portions.
To level the screed, you need to use an oblong rule, with the help of which you need to draw along the beacons, due to which excess mixture will be removed from the surface. Then you should wait a while for the concrete to fully harden.
After completing all the above steps, you can begin laying the flooring.
Semi-dry method: expanded clay cushion followed by screeding with mortar
Filling with expanded clay begins from the far corner of the room, gradually moving towards the exit. The layer is compacted so that a distance of 2.5 cm remains to the top of the guides - the thickness of the cement-sand screed. Dry filling of the floor with expanded clay requires high-quality compaction so that the cement screed does not deform in the future due to shrinkage of the granules. To make it easier to apply the top leveling layer of cement screed, you can put a mesh on the pad so that the granules do not move when leveling the mortar.
You can use cement laitance to better secure the expanded clay cushion: the cement is diluted to a liquid consistency and the compacted expanded clay is poured on. After drying, apply a cement-sand screed. The solution is leveled using a rule, moving it along the beacons.
After the surface has hardened, the beacons are pulled out, and the resulting voids are sealed with mortar.
It is important that drying and evaporation of moisture occurs gradually. If it dries suddenly, the floor surface may crack. To prevent this from happening, cover the screed with film or periodically spray it with water. For finishing with a decorative coating, the screed is ready in 3 - 4 weeks.
Expanded clay concrete screed
If the rough foundation has significant defects or the floor level needs to be raised very high, then you should resort to its construction. First of all, you need to clear the surface and remove dust from it, seal the joints and cracks with foam, and also lay the waterproofing material. Then you can begin to carry out the main work on the production of expanded clay concrete screed, carrying out a number of actions in the following sequence:
- The first step is to install beacons made of metal slats on the floor surface, for fixing which you need to use a cement-based solution.
- Next you need to mix. The portion should consist of 1 part cement, 2 sifted sand, 1 water, and also, depending on the level of future loads on the floor, from 3 to 5 parts expanded clay.
- Next, the solution should be used to fill the free space between the beacons, not reaching the upper border by 2-3 cm.
- Then you need to compact and level the surface. Floating granules should be immersed in the solution.
- When the screed has set slightly, you need to start preparing an ordinary concrete mixture without additives, after which you need to cover the surface with it on top of the previously applied one, leveling it according to the beacons using the rule.
Note! Complete hardening occurs within 3 weeks, but it is better to wait until a month has passed. During the first days, the poured screed must be moistened with water from time to time to avoid the formation of cracks.
The base made in this way has sufficiently high strength, is warm and has a significant service life.
Preparatory work
Before you begin leveling with expanded clay, the base must be prepared.
The procedure remains the same regardless of which leveling method is selected: dry or wet:
- Cleaning the base from construction debris, dust, and fragments of loose old flooring.
- Wires running along the base are additionally protected by wrapping them in polyethylene and gluing them with tape.
- Cracks are sealed with mortar.
- Waterproofing is carried out according to the technology specified by the manufacturer: roll materials are overlapped, the mixtures are prepared according to the recipes indicated on the packaging. A prerequisite is that the waterproofing material must extend onto the wall with a margin.
- Apply damper tape around the entire perimeter of the junction of the walls and the floor.
After preparation, the most crucial moment comes - the installation of beacons, without which it is impossible to achieve a flat floor plane.
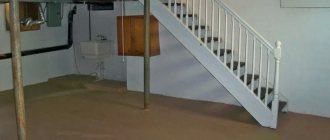
Insulation on the ground
For floors on the ground, it is undesirable to scatter insulation due to shrinkage of the thermal insulation. The first step is to make a base of concrete or wood on which expanded clay will be poured. An exception is the technology of insulating the foundation of a building, when a trench is created around it and filled with a solution of this material.
Floor insulation over the ground can also be carried out directly in the pack. In this case, it is enough to lay the material in a fraction of 10-20 mm, which is in packages on a layer of compacted sand. For 1 sq. m of surface that can be leveled and compacted in advance requires laying 3 bags, which must be filled so much that the layer thickness reaches 15-20 cm.
After placing in the packages, cuts or holes should be made so that no air remains inside them, and the granules themselves do not spill out. The free space between the bags must be filled with loose material of a similar or finer fraction. In the same way, work must be continued until the space is completely filled.
Note! This technology is most suitable for ground floors in non-residential structures, for example, in summer kitchens, garages and other similar types of buildings.
Insulation of the attic floor
Insulation of the ceiling with expanded clay and the attic is carried out according to the following instructions:
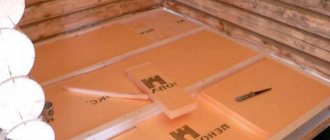
- Place a vapor barrier material on the ceiling, it is secured with a construction stapler, it is important not to forget about the overlap of 10-15 cm. If you want to seal the joints between the layers well, you can additionally glue them with soft double-sided tape.
- Pour a layer of expanded clay for insulation between the beams of the attic with a layer of at least 15 cm, the thickness depends on the specific climate zone and the design features of the house. Then you can lay sheets of foam plastic or penoplex between the partitions, in which case the thermal insulation will be at the highest level.
- Next, start laying the waterproofing, it can also be easily penetrated with a stapler, the distance between the staples is at least 10-15 cm.
- Then the crossbars are prepared on the inside of the roof sheathing. Gradually going up, fill in the expanded clay. The work is not difficult in general, but it requires your attention and a lot of time.
Attention! Do not forget that expanded clay is very dusty, so be sure to wear a respirator and safety glasses.
Insulating the floor with expanded clay in an apartment
In most multi-storey buildings, concrete floors and floors in apartments are the coldest place, as warm air rises upward. When the premises are on the ground floor with a basement underneath, the flooring also always remains cool.
For proper insulation using expanded clay, work must be done in the following sequence:
- Remove floor covering (linoleum, laminate).
- Remove the old screed. To make it easier to eliminate, it is better to use a hammer drill with a special attachment installed.
- Then you need to clean the surface from debris and dust.
- Following this, it is necessary to seal the existing cracks and other defects with a cement-based solution.
- Next, due to the porosity of expanded clay, it is imperative to organize a waterproofing layer that will prevent the insulation from absorbing moisture. As a material, you can use a special mastic, which is applied using a roller or paint brush. It is best to open the surface with it in 3-4 approaches, each time waiting for it to dry completely.
- At the next stage, you need to set the beacons to 10-12 cm, using self-tapping screws to fix them.
- The first layer of insulation must be filled dry. Next, you need to prepare the solution by mixing concrete with expanded clay of 5-10 fractions in a ratio of 1:5 and fill the free space with it to a height of 8 cm.
Note! The first layer should have a thickness below the installed beacons.
- Afterwards, you need to mix an ordinary concrete mixture, which should be filled to a height of no more than 2 cm. To tighten the solution, you need to use the rule. The period of complete hardening occurs within 3-4 weeks. During drying, you must avoid exposing the screed to sunlight and drying out the concrete mixture.
- After the specified curing period, the floor covering must be laid.
Having learned how to insulate a floor with expanded clay, you will be able to perform the described methods properly and quite simply with your own hands even without experience in carrying out such work, following exactly the specified sequence of actions for each method and the given recommendations in practice.
Video:
Features of laying expanded clay
Leveling expanded clay using a level
When carrying out measures for thermal protection of the floor with your own hands, it is necessary to take into account the characteristics of the material used. When insulating a floor with expanded clay, you need to know:
- To obtain a flat surface, beacons are used. The smaller the installation step of the beacons, the greater the chances of perfectly laying expanded clay with your own hands.
- When laying along joists, all wooden elements must be treated with antiseptic compounds.
- The minimum layer of material is 10 cm.
- It is best to install wooden flooring when using expanded clay.
- Operation of the floor is possible 7 days after completion of construction or repair work.
Technology for laying screed on expanded clay:
Do-it-yourself insulation using expanded clay allows you to carry out work at minimal cost without compromising quality.
We insulate the walls of the bathhouse with expanded clay
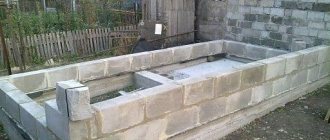
As a wall insulation, loose expanded clay is used only for thermal insulation of brick structures . Insulation work is quite labor-intensive, the load on the foundation increases, and the technology for constructing walls has its own characteristics. It is necessary to provide for all aspects in advance even before the construction of the bathhouse begins. The first outer wall is constructed using brickwork, half a brick thick.
At a distance of 35 cm, a second similar wall is laid inside the room. Then, every 10 cm, jumpers are arranged and expanded clay insulation is poured from 20 to 40 cm in height. Insulating walls with expanded clay requires careful compaction of the material and periodic addition of a cement mixture to hold the fractions together . The described process is repeated until the very top of the structure. Particular attention should be paid to waterproofing and vapor barrier of walls .
If we summarize the information collected in the article, then expanded clay is excellent in its functions, and in combination with a low price, it is simply irreplaceable for certain types of work. This material is ideal for ecological housing construction. It prevents moisture from evaporating, so it has found recognition in the construction of steam rooms. Take advantage of the recommendations and appreciate how easy and pleasant it is to work with this insulation for floors, walls and ceilings.
Advantages and disadvantages of expanded clay
Let's analyze the pros and cons of expanded clay insulation. The advantages of this insulation include:
- safety from an environmental point of view;
- financial inclusion;
- excellent sound insulation qualities;
- long service life;
- resistance to frost and temperature changes;
- a light weight;
- strength;
- fire resistance;
- good thermal insulation properties.
The disadvantages are considered to be high hygroscopicity and the need to use a fairly large volume of material for high-quality insulation.