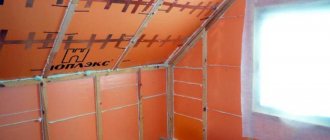
Fifty percent of the heat from a heated room exits through the attic, so it necessarily requires thermal insulation. We will figure out how to insulate an attic in a private house with your own hands: what is the best material to choose, what stages the entire insulation process consists of, what actions need to be performed on each of them and what to pay attention to.
To properly insulate an attic, you need to know the specifics of the work. Source stroika-i-remont.ru
Why is ceiling vapor barrier necessary?
Rockwool ceiling vapor barrier is an excellent way to protect and extend the life of a wooden floor, which:
- significantly extends its service life, eliminating rotting from the inside and deformation of building materials;
- increases the percentage of heat retained by the ceiling in the room;
- makes the attic an inaccessible place for mold and mildew to form.
In addition, it is worth paying attention to the absolute absence of the need for further additional maintenance of vapor barrier materials, given their composition and the design of the entire floor. Therefore, by installing a vapor barrier on the steam room ceiling during the initial construction or during repairs, you don’t have to worry about possible problems in the future
Vapor barrier for attic pie
- Attic floor (ladders) - necessary for maintenance, repair of the roof and attic space. In order to get to the attic, provide an attic ladder with an insulated hatch (Thermo). To exit from the attic to the roof, we recommend installing blind or glazed exit hatches (Velux, Vilpe, etc.) on the roof.
- Para- or super-diffusion moisture-proof membrane - for effective removal of steam from insulation.
- Insulation - mineral wool slabs. Recommended thickness for the Moscow and Leningrad region is 300mm. 200 mm are laid in the space between the beams, the remaining 100 mm are laid perpendicular to the laid layers - counter-insulation. For comparison, building codes in Finland determine the thickness of insulation from 400 to 500 mm. It is recommended to delay the installation of insulation as much as possible - no earlier than 6 months after the completion of the construction of the house frame. Because For the construction of floors, timber with natural moisture is mainly used. The timber must dry thoroughly, otherwise there is a high probability of wood being damaged by fungi and mold, which entails additional costs for dismantling/installation work and treating the wood with bleaches and antiseptics.
- Counter grille and ventilated gap. For effective ventilation and removal of steam from the surface of the moisture-proof membrane.
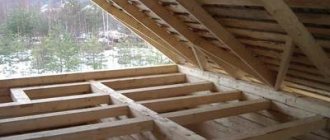
- Floor beams. As a rule, in private housing construction a 50x200mm board or 100x200mm natural moisture timber is used.
- Lathing is the basis for laying insulation. It is recommended to use a 100x20 (25) mm board as lathing and lay it in increments of 70-80 mm. The resulting cracks will form an additional air thermal layer under the insulation. That. The insulation slabs (mats) will not lie on a vapor barrier film, but on a rigid base, already under which there will be a vapor barrier. This solution eliminates the possibility of accidental damage to the vapor barrier or its pushing through when laying insulation, during maintenance and repair work of the roof and attic. In this case, you can begin interior decoration of the premises, and postpone the installation of insulation as much as possible (see above).
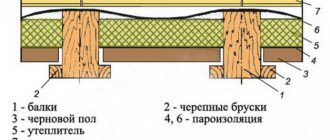
- Vapor barrier of the attic floor on wooden beams
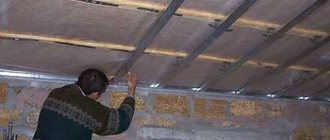
- is attached using a construction stapler from below to the rough ceiling (lathing), which allows you to cut off vapors from the entire floor structure. It is necessary to overlap the vapor barrier rolls by at least 15-20 cm and carefully glue them with aluminum adhesive tape. It is necessary to form overlaps on the walls of 15-20 cm and carefully glue them (place them under plaster and other wall finishing). Carefully seal the places where chimneys, ventilation pipes and other utilities pass through the attic floor using special hoses. The best material for vapor barrier is high-density polyethylene film of 200 g/m² and above. - We close the attic - the finished ceiling is attached to the vapor barrier
. The finished ceiling (OSB, gypsum board, etc.) is installed along the sheathing and guides. For the best fire protection, it is recommended to “sew up” the ceiling with 2 layers of plasterboard sheets.
The process of insulation with mineral wool
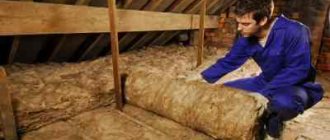
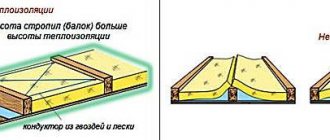
We attach a vapor barrier layer to the beams (staples for a 14-16 mm stapler). Mats are laid in the gaps of the flooring, which are nailed with slats with a cross-section of 20x50 mm. Next, the plank deck is installed and the ceiling is arranged.
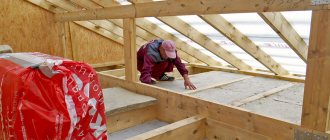
Insulation with mineral wool: be sure to use protective equipment
To insulate pipes, use penofol , this is an insulating multilayer material with a thin layer of foil applied to polyethylene foam. When a pipe passes through a load-bearing wall, the use of a thermal insulation sleeve is necessary. In cases where the ventilation pipe goes through the room, thermal insulation is laid where freezing is felt, and installation is carried out here first. And then they proceed to the entire main part. The denser and thicker the wool, the higher its thermal insulation.
In cases where the ventilation pipe goes through the room, thermal insulation is laid where freezing is felt, and installation is carried out here first.
Advantages of a cold attic
The advantages of choosing a cold attic are that:
- Waterproofing is much more reliable. The fact is that when creating a warm attic structure, the integrity of the rolled waterproofing is in any case interrupted by superstructures, which significantly reduces its reliability. In the design of a cold attic, add-ons should be done to a minimum.
- Maintenance becomes as simple as possible. An attic is an attic and often something needs to be corrected or replaced, which is as easy as shelling pears with this design. There is a lot of space, repairing a cold attic is convenient and practical.
- The heat-transfer surface area is minimal. With this design, there is only minimal heat loss from those rooms that are located directly under the attic.
- Possibility of operation. As mentioned above, such an attic can be easily adapted both for storage and for other needs of the owners. Depending on the method of entry into the attic, whether it is a ceiling hatch from the living room, or a door from the street, even feed supplies can be stored in it, if we are talking about a rural house.
What to insulate?
In order to achieve the expected effect and not spend extra money and time, it is worth deciding at the initial stage what exactly requires insulation.
Communications
For a cold attic, the possibility of condensation occurring when heat enters the cold space of the attic is always relevant. This situation arises when there are various communications on it. This could be ventilation pipes or a heating system. When warm air comes into contact with the cold surface of uninsulated pipes, condensation occurs on the outer and inner surfaces, which over time leads to their deterioration.
Insulation is carried out using soft, hard insulation or applied by spraying. The pipes are wrapped with soft materials and covered with waterproofing. Thermal insulation boxes are made from solid materials. Spraying creates hard protective films. The most convenient option for this purpose is a split shell made from different types of insulation. All that remains is to select such a shell according to the required diameter, put it on the ventilation pipes and fasten it with tape. They produce very durable shell panels with all the advantages for Teplofom+ pipes of different diameters. They can be used for ventilation ducts due to the rigidity of the structure.
Interfloor ceilings
The ceiling between the living space and the attic is insulated only for a cold attic. In case of warm weather this is not necessary. After insulating the roof, the air in the room will be relatively warm and heat loss will be small.
What kind of film to put under the insulation in the attic All about insulation and energy efficiency
When ensuring insulation of a private house and insulation of the roof along the rafters, one must not forget that special attention should be paid to such a place as the attic. Development of attic floor insulation with mineral wool
Development of attic floor insulation with mineral wool
Warm air tends to rise to the top, and therefore, in a temporarily unheated room, heat can escape through the cold attic space. Therefore, the issue of insulating the attic must be resolved without delay.
1 Why do you need attic floor insulation?
Insulating a cold attic floor with stone or mineral wool is generally necessary in lightly used rooms that are properly equipped with special roof ventilation.
The attic, or rather its ceilings, serves as a kind of boundary between heat and cold. In such places, the attic floors are exposed to intense moisture due to the formation of condensation.
However, you can properly insulate the floors in the attic of a house with mineral wool with your own hands. The very process of insulating the floor in the attic with mineral wool is the creation of a durable thermal insulation coating, which will have a low degree of thermal conductivity.
The technology itself for insulating mineral wool floors in the attic, as well as Energoflex thermal insulation for pipes, implies strict adherence to its stages and requirements.
The technology itself is quite simple and understandable. Good attic floor insulation using mineral wool helps close unwanted gaps.
To do this, the insulation must be laid tightly. In most cases, mineral wool is used to insulate the attic of a house.
The presented insulation is the most suitable for this type of work; it can also be used to insulate the floor surface in the living areas of the house.
Schematic insulation of the attic floor with mineral wool
By organizing good insulation with mineral wool, the most optimal temperature will be maintained in residential premises.
If the procedure is performed incorrectly, moisture rising from the floor of the house will lead to the formation of condensation.
It will accumulate on the ceiling and then seep through the ceilings. The resulting temperature difference in those areas where the attic floors adjoin the walls of the house initiates the formation of mold and microscopic fungi, which can be causative agents of allergic diseases.
1.1 Requirements for attic insulation
The process of insulating the attic floor and insulating the roof of a house with your own hands, or rather the level of its quality, has a direct impact not only on the size of heat loss, but also on the service life of the entire truss structure and roof covering.
The fact is that water vapor located inside the heated room diffuses to the attic of the house. In order for the insulation used to provide a high degree of calculated efficiency of the thermal insulation layer, it must always be dry.
Based on this, the insulation must be protected from excessive humidification by vapors of rising heated air using a special vapor-proof material.
Preparation for insulation work
And yet, how to insulate a cold attic? However, before starting the main work, it is important to carry out preparatory activities. Check the floor joints. There should be no cracks or gaps; if such a problem is discovered, then simply use tow and lime mortar. Treat the frame with fire retardant and antiseptic compounds. If you did not have ventilation ducts, then it is better to make them. When planning roll insulation, install the floor slabs, securing them with dowels or concrete screws. Clean the ceilings and attic space, remove all things. Prepare for use or purchase tools:
- several hammers (differing in weight),
- plane,
- set of chisels,
- saw (preferably transverse and longitudinal),
- roulette,
- building level,
- screwdriver with replaceable attachments,
- drill.
Insulation with mineral wool
Steam and thermal insulation of a cold attic
For a roof with a cold attic, it is most important to minimize heat loss through the attic floor. Vapor barrier is mandatory for both wooden and reinforced concrete floors
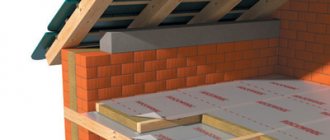
It is laid on the ceiling itself and protects the insulation from vapors that can condense in the heat insulator after passing through the ceiling of the living room. Slab and bulk materials can be used as insulation. The ceiling pie consists of a vapor barrier, floor beams and insulation.
The following types of heat insulators are often used in ceiling coverings:
:
- expanded polystyrene and foam boards;
- mineral wool slabs or mats;
- expanded clay granules;
- fuel or granulated slag;
- sawdust with lime or clay;
- pumice.
The thickness of the required insulation layer is selected depending on the estimated winter temperature using the table below.
Winter temperatures are calculated according to SNiP 2.01.01-82 (building climatology and geophysics) or selected by regions of the Russian Federation from the corresponding climate maps.
The insulation is laid between the joists or ceiling beams, and a boardwalk is made on top for the attic passages. Joists are usually 50 mm thick, and decking boards are 25-35 mm thick.
Attic waterproofing device
Waterproofing roofs with a cold attic, according to many experts, is a controversial issue. Some say that waterproofing must be present under the roofing material, while others categorically recommend that it be abandoned. Here, a lot depends on the type of roofing material and the angle of inclination of the roof slopes.
Metal roofs are most susceptible to corrosion, which occurs due to possible small leaks or condensation
Therefore, we once again draw your attention to the fact that ventilation plays one of the main roles in the fight against condensation.
For flat metal roofs, experts recommend installing superdiffusion membranes. It will prevent moisture from entering the outside of the roof when snow or rain blows in. No matter how well the roof is laid, there is always the possibility of minimal leaks. That is why, by paying a little extra, you will receive additional protection from moisture getting on the insulation in the ceiling of a cold attic.
If, for example, slate is used as a roofing material, then waterproofing can be abandoned. There is also corrugated sheeting with an anti-condensation coating on the market, which can hold up to 1 liter of water per 1 m2. For our part, we recommend always using waterproofing membranes, because this is the cheapest and easiest additional way to protect your roof from possible leaks
.
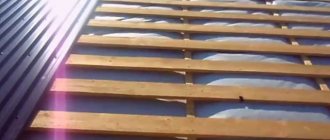
When installing waterproofing membranes, a counter-lattice is used. It serves as a fixing strip and, due to its height, provides the necessary clearance for ventilation of the under-roof space. The installation of lathing in a cold attic is no different from insulated roofs. The dimensions of the sheathing and its pitch determine the type of roofing being installed.
Cold attic temperature
To prevent ice and icicles from forming on the roof, it is necessary to maintain the correct temperature and humidity conditions in the attic. If the thickness of the thermal insulation material is insufficient, significant heat losses occur through the ceiling. Warm air, heating the roof covering, causes snow to melt and ice dams to form. By choosing the right insulation layer, this can be avoided.
The effectiveness of a heat insulator can be assessed by measuring the temperature of the top layer of insulation. The electronic thermometer is immersed in insulation by 10-20 mm. The temperature readings taken should correspond to the values in the table below.
As you can see, the design of a cold attic pie is not particularly complex in design. The main task is to ensure the necessary intensity of ventilation and the thickness of the thermal insulation layer in the ceiling.
We will install copper roofing quickly and efficiently
Peculiarities
Most of the warm air masses escape through the roof. Therefore, when building a house with an uninsulated attic, you need to carefully approach the topic of insulating the attic floor with wooden beams. After all, it creates a certain barrier between warm rooms and a cold attic.
Let's consider the special criteria for attic insulation that affect the maintenance of temperature in the house:
- Purpose of the room.
The attic is a kind of buffer between the environment and the living rooms. Its task is to regulate the temperature difference between the external environment and the house. - Temperature regime.
In any season and on any day, the temperature of the air masses in the attic will always be higher than outside the window. This is why the attic is very cold in winter, and unbearably hot and stuffy in summer. - Heat loss in winter.
The more a substance heats up, the less dense it becomes. This is a physical phenomenon. This is why in residential premises with a heating system, warm air from household appliances is concentrated in the ceiling area. That is, if you do not insulate the ceiling, then in winter all the warm air will warm the attic.
- Excessive heat in summer.
In summer, the reverse process can be observed. The roof, heated by the rays of the sun, will warm up the attic air, which, in turn, will penetrate into the room through the attic floors. - Reverse circulation of air masses.
In contact with the ceiling without thermal insulation, warm air becomes cold, more dense and, as a result, sinks to the floor. This is reflected in the living space in the form of circulating drafts that cause harm to human health.
- The appearance of excess moisture.
When it comes into contact with an uninsulated attic, hot, humid air turns into condensation. The overall level of humidity in the house increases, which leads to mold growth in the corners. - Saving
. The heat lost through the roof without insulation is about 30%. This means that with proper insulation of the attic floor, you can save 30% of the fuel used. Using air conditioning in the summer will also cost less.
The entry of warm air masses into a technical attic (non-residential) leads to negative consequences:
- Due to the mixing of warm and cold masses, condensation may appear in the attic. Water falling on the surface can lead to rotting of wood on load-bearing beams.
- If the attic is warm, the snow collected on the roof will begin to melt. The water dripping at the same time will begin to turn into icicles. Ice forms on the drainage system.
Vapor barrier membranes
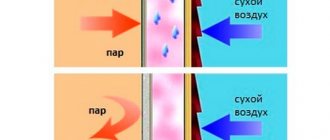
Diffuse (breathable) membranes are classified as the most effective and expensive vapor barriers. This group of products contains both single-sided and double-sided materials
The former allow steam to pass through only in one direction, so during installation it is extremely important not to confuse which side to lay the fabric towards the insulation and which to the load-bearing surface. Double-sided ones work in both directions, so there are no problems with them
Vapor barrier membranes can be single-layer or multi-layer. The first ones have an affordable price. Multilayer ones have the function of accumulating moisture inside the canvas and gradually releasing it.
A special group of products in this category are “smart” membranes. They are able not only to absorb vapors, but also to regulate the level of humidity of surrounding materials, while simultaneously acting as a water barrier. These membranes are the best choice. But their cost is beyond the means of most private home owners.
Vapor barrier membranes "TechnoNIKOL"
The undoubted leader in this category of materials is TechnoNikol membranes. For vapor barrier of wooden ceilings, the “Optima” brand is recommended for use. This hydrophobic polypropylene membrane consists of three layers:
- upper and lower polypropylene;
- medium – high-tech functional vapor-permeable film.
- weight 80 g/m2;
- thickness 0.3 mm;
- vapor permeability 5 g/m2x24 hours.
The TechnoNIKOL Optima membrane is produced in rolls. The width of the canvas (roll height) is 1.5 m. The length is 50 m. This material is optimal for vapor barrier of any type of ceiling, intended for installation indoors and on external surfaces of buildings.
Superdiffuse reinforced membrane
Diffusion membrane films "TechnoNikol"
Rules for installing a vapor barrier for a wooden ceiling
Step 1. The membrane is laid directly on the insulation so that the smooth side is directed inside the room.
Step 2. It is possible to lay the strips in different directions: parallel or perpendicular to each other.
Step 3. During installation, an overlap of at least 10 cm must be observed.
Step 4. To attach the membrane to a wooden floor without insulation, use galvanized screws with wide heads or staples with an anti-corrosion coating.
Step 5. The joints of the canvases are sealed using self-adhesive mounting tape.
Use foil tape, width 50 mm, length 30 lm.
Step 6. When laying on a floor with insulation, it is necessary to bring the edges of the panels onto the wall by 15-20 cm and secure them with suitable materials (slats or metal profiles).
Step 7. Mounting tape is glued along the perimeter of the vapor barrier layer.
Step 8. Between the membrane and the material with which the wooden floor will be lined, leave a ventilation gap 3-4 cm wide.
Step 9. Particular attention is required to the places where the vapor barrier comes into contact with the structural elements of the floor and the building: beams, chimneys, ventilation ducts.
Ceiling vapor barrier in wooden floors
During installation of the vapor barrier, it is necessary to ensure that the film is laid evenly, without folds or sagging. A guideline for correct installation can be a colored stripe, which is the center line along the entire length of the canvas.
Video - Ceiling vapor barrier
An equally good choice are multilayer vapor barrier membranes of other brands: Dorken Delta REFLEX/REFLEX PLUS and Dorken Delta LUXX. The first is a four-layer material, is particularly durable and can provide 100% waterproofing of a wooden floor. The second has limited vapor permeability, ensuring gradual and uniform removal of moisture from the living space.
Floor design
Construction and floor of the second floor in a wooden house
Before proceeding to a detailed description of creating the correct “pie” for the first floor, it is worth noting the constituent elements and technical rules.
- Priming. The ceiling of the first floor separates the room from the underground space, the surface of which is soil. The soil becomes a source of moisture entering wood structures, which can negatively affect their technical properties. Therefore, this surface must be waterproofed. There is no need to waterproof the second floor.
- Ventilation must be provided in the underground space so that moisture penetrating from the ground is evaporated and does not enter the floor ceiling.
- Brick pillars on which wooden floor beams lie.
- Wooden beams. The beams serve as a supporting element for the floor joists. Depending on the step at which the beams are laid, the choice of the thickness of the boards for the supports depends. The structure should easily tolerate possible loads without deforming the floor.
- Logs are transverse boards lying on the end sides. They serve as the basis for laying the finished floor in the form of floor boards or using plywood or other tile backing.
- Insulation material is filled between the bars. In this case, it is necessary to take into account that there is a gap between the insulation and the finished floor for ventilation.
- Vapor barrier and waterproofing, allowing you to protect the insulating material from moisture entering it.
- Finish floor with or without sheet and tile backing. When using boards, they are laid on bars, and finishing coatings such as laminate, parquet, tiles are placed on a leveling layer of tile material.
When using an insulated coating, it is necessary to take care of damping gaps for ventilation under the floor.
Application of Teplofom panels
The design of a heat-insulating cake, which includes an insulating layer, protecting it from external influences and a solid base, has become an example for the creation of heat-insulating panels with a layered structure. Teplofom panels are developed according to this principle and combine most of the advantages of previous materials, while being thin and light in weight. Extruded polystyrene foam, which has very low thermal conductivity, is used as an insulating layer in the panels. The panels are reinforced with reinforcing fiberglass mesh, and their coating is made of a smooth layer of polymer cement, creating a surface for finishing. In addition to the already mentioned advantages, such panels can please you with durability, ease of installation, complete immunity to moisture (there is no need for waterproofing or vapor barrier), and resistance to temperature changes (operating range from -50 to 75°C). They are easy to work with even for non-specialists, which allows you to save money by doing everything yourself.
Choice of insulation
The methods of insulating the ceiling of the upper floor of the ceiling along beams in a private house are very diverse. When doing the work yourself, the insulation is placed between the joists and provides reliable thermal insulation and noise protection. There are many options for insulating a structure, the most common of which are:
- insulation with mineral wool;
- laying expanded polystyrene (foam plastic or penoplex) on wooden beams;
- filling with expanded clay;
- insulation with sawdust;
- filling the ceiling space with foam.
Each of these options has its own characteristics and advantages.
Mineral wool insulation
The material is available in two versions: plates and rolls. Insulating the attic floor with mineral wool has the following advantages:
Styrofoam
Foam plastic has become one of the most common materials for thermal insulation. It has earned its place in the top three thanks to its very attractive price. Using this insulation in an individual home provides the following advantages:
- high degree of protection;
- resistance to rotting and mold and mildew;
- low degree of water absorption;
- ease of installation and no need for complex tools and protective equipment;
- the light weight of the material prevents excessive load on the structure and allows for insulation from below.
Extruded polystyrene foam
More often this material is called a shorter word - penoplex.
Being the closest relative of foam plastic, penoplex is devoid of most of its disadvantages. In the process of improving performance characteristics, the cost has increased. The material is produced fireproof, it has sufficient strength for use as a base for flooring and is light in weight for use in ceiling construction. Do-it-yourself installation is quite simple. This issue is discussed in detail in the article. The text discusses options for using both penoplex and polystyrene foam for different types of floor construction.
For people who decide to build their own wooden house, the naturalness of the materials is usually important. Here penoplex, like foam plastic, loses to other types of insulation due to its artificial origin.
Expanded clay or sawdust
If you decide to use completely natural materials in your home, these two types of insulation will become indispensable helpers. They do not have high heat-protective characteristics, like previous types, but provide reliable protection from the cold with a sufficient layer thickness. Sawdust can be obtained almost free of charge; expanded clay is also an inexpensive material.
Insulation of the attic floor can be carried out by non-professionals and does not require special skills. The application is limited by the physical characteristics of these materials: they cannot be used for thermal protection from below.
Heat protection foam
Polyurethane foam insulation is a fairly new material in construction. When constructing a building yourself, this method can provide high speed work and reliable protection from the cold. You can read about insulating a building, including attic floors, with foam in the article.
This provides a large selection of materials for insulation and significant savings on construction.
A large percentage of heat losses occur precisely through the ceiling of the upper floor, which is why it is so important to choose the right insulation and follow the installation technology. Are you insulating your house for winter and don’t know how to insulate the attic floor using wooden load-bearing beams? Having gained experience in this matter, I will accurately convey the technical aspects of thermal insulation, and also describe step by step the procedure for carrying out the work
Are you insulating your house for winter and don’t know how to insulate the attic floor using wooden load-bearing beams? Having gained experience in this matter, I will accurately convey the technical aspects of thermal insulation, and also describe step by step the procedure for carrying out the work.
Common mistakes
What is important to consider when developing and implementing an attic insulation project and what mistakes to try not to make:
- First of all, determine what the purpose and use of the attic will be. This will allow you to decide what and how to insulate.
- Be sure to do the preparatory work. Carry out a full inspection of the premises, elimination of existing structural defects, treatment of all wooden elements to protect them from mold.
- Do not take risks when increasing the load on the floor. If you plan to use bulk materials, make sure that it can withstand this load.
- Carry out insulation strictly in accordance with technology. This is especially true for vapor and waterproofing, so as not to create conditions for structural destruction and the formation of harmful mold.
