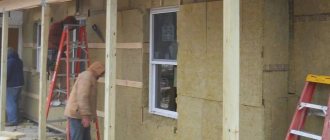
Today there is no need to convince anyone that your home needs to be thoroughly insulated.
But the question is: where exactly should the insulation be placed - outside or inside?
People who are poorly versed in construction issues may well decide on the second option, considering it more convenient for a number of reasons. Is it possible to insulate a house from the inside, and what thermal insulator is best suited for this?
Dew point offset
The main reason why you should abandon internal insulation of a house is a shift in the dew point.
Without going into physical terms, this point means a place where the temperature reaches values at which the relative humidity becomes 100%. As a result, condensation begins to form in this place. In the case of internal insulation, the place where condensation forms is in the insulation, which can accumulate a huge amount of water during the cold period. This will continue until the weather warms up, when the water in the insulation begins to melt. After this, the water will enter the room, increasing the humidity in it, and also leaving characteristic marks on the walls and ceiling. However, the problems will not end there, since prolonged high humidity will lead to the formation of mold, premature destruction of the finish and damage to the furniture.
In the opposite situation, when the insulation is installed on the outside of the house, the dew point is outside the load-bearing walls. Therefore, when thawing, moisture will evaporate into the environment rather than enter the room.
What happens if the walls are insulated from the inside?
- The wall will gradually collapse from condensation.
- Due to the fact that the insulation will not transmit the heat of the house to the walls, moisture will begin to accumulate in them. Such walls do not dry out for a long time and are not able to provide the necessary comfort in the house.
- As a result of moisture accumulation, mold will begin to multiply.
- It will be worst in winter. Steam, which is usually a lot in the house due to cooking and even washing the floors, will not be able to pass beyond the insulation: it will be prevented by a cold wall with capillaries filled with water. Condensation will fall directly into the insulation, and wet insulation will cease to perform its functions. It will be a waste of money.
Reducing the size of premises
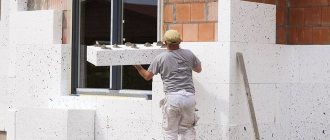
Another reason why you should abandon the internal insulation of your home is to reduce the size of the premises. It may seem that this is an insignificant factor, since the thickness of the thermal insulation material is only a few centimeters.
However, in practice, the difference is quite noticeable, especially if we are talking about a small house or a building with a large number of small rooms.
Calculate the thickness of the insulation
So, we found out whether it is possible to insulate walls from the inside and how to do it correctly. Then we chose the material that suits us best. An important matter remains - calculating the required thickness of the heat insulator.
First, we measure the wall thickness D, and determine R - the actual heat transfer resistance. We use the formula:
R=D/L
L is the thermal conductivity coefficient of the material. For example, let's take a brick wall 50 centimeters thick. We get the following:
R=0.5/0.47=1.06 square meters-degree Celsius per watt.
In Moscow and the Moscow region, the standard value of this indicator is 3.15 or more. We calculate the difference to be 2.09 square meters-degrees Celsius per watt. This difference must be compensated by insulating the walls.
To determine the thickness of the insulation, you need the inverse formula:
D=L∗R
For expanded polystyrene, for example (L = 0.042), the following value comes out:
D=0.042∗2.09=0.087 meters, otherwise, 8.7 centimeters. It is better to take a margin of 10 centimeters, then the dew point will definitely be inside the heat insulator.
Increased fire hazard
Another reason not to install thermal insulation materials on the inside of walls is the increased fire hazard. And in this case we are talking not so much about the likelihood of a fire, but about the possible consequences.
The fact is that many insulation materials are made from synthetic materials, the combustion of which is accompanied by the release of large amounts of hazardous substances into the air. If the insulation is located on the outside, then the bulk of the smoke escapes into the environment. However, with internal insulation, combustion products will end up in the room and pose a serious threat to residents.
Contact with hazardous materials
Without going far from the topic of materials from which insulation is made, I would like to add that they, as a rule, are harmful even without a fire. Even in the absence of fire, harmful substances from insulation can end up in the indoor air. Of course, their number is significantly less compared to the amount of harmful substances formed during a fire.
However, it is worth understanding that in this case we are talking about long-term contact, which can last for decades, and an accumulated negative effect.
Loss of the ability to hide an external defect
Another reason to give preference to external insulation is the ability to hide external defects. Often, during the construction of walls, slight unevenness is allowed. I can't say that this is normal, but there is no denying that it is a common occurrence.
In this case, the insulation can become a leveling layer that will correct minor flaws and make it possible to apply the finishing touch to a flat surface.
In the end, I would like to tell you where the practice of internal insulation came from. The fact is that insulation is used not only in private house construction, but also in renovations in apartment buildings. However, in the latter case, external insulation is impossible. In this case, despite all the shortcomings, installing thermal insulation indoors is the only option and is justified. However, this practice should be taken as a last resort and should not be used when building a private house.
Details
Which thermal insulation method and material to choose
If it is impossible to insulate a wooden house from the inside, then additional thermal insulation from the side of the premises can be done using 2 methods at once:
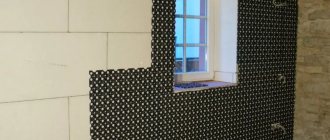
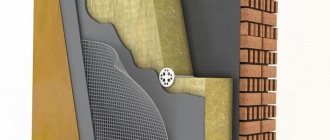
- As on the facade, sometimes it is possible to use the method of bonded thermal insulation, when dense seals are glued to the base, drilled into the wall part using disc dowels, and then a mesh for reinforcement is smeared on the surface and everything is covered with a final decorative and protective layer on top (this must necessarily be a layer that is vapor-proof - tiles, polymer plaster, etc.).
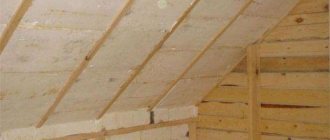
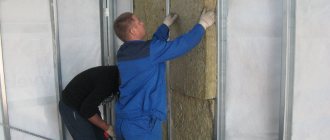
- A wall-type frame is assembled near the structure for the fence, and the insulation is placed in the cavities of the false wall made.
By the way, the second option is much more popular, because despite the greater thickness of the insulation cake, you will get a wall that is more resistant to mechanical damage, and you will be able to do all the finishing touches, including painting with interior paint and varnish or wallpapering. When using insulation in a wall frame, it is not necessary to abut the point with the highest density of materials for thermal insulation, but it still must be slabs. You can only work with materials that were designed for use in a vertical form without loading them. It turns out that rolled mineral wool models should be immediately excluded.
Fiberglass material and basalt wool are convenient due to their elasticity and resilience. They can be easily adjusted to fit, they stay in place perfectly when fixed between the posts by surprise. But also wall insulation inside is associated with moistening of the mass due to condensation, and then fibrous cotton materials will not be an ideal option. They have the ability to absorb water, which is why they become thermally conductive after getting wet. Against this background, EPS and polystyrene foam will be more preferable. A layer of thermal insulation on the side of the room will be exactly the place where the usual disadvantage of polystyrene plates will turn out to be a plus for a person. EPPS is completely out of competition.
- Extruded polystyrene foam has virtually zero water absorption due to the closed pore structure.
- Moreover, EPS is a vapor-proof material and will not allow moisture to pass through where there is a dew point.
- Also, slabs of extruded polystyrene foam with a thickness of more than 3 cm can usually be purchased with a stepped edge design, which will help seal the seams in thermal insulation as best as possible.
- Extruded polystyrene foam will show some of the best figures in terms of thermal conductivity coefficient among other types of insulation materials.
There is another option that also deserves attention - sprayed types of thermal insulation. Polyurethane foams applied under pressure will create a layer of insulation without seams, and they also perfectly fill uneven areas, tightly bond to the base and adjacent types of structures, and seal joints. If the spray-type insulation is not damaged in the future, then the pores will remain closed, and it will not allow water vapor to pass through, and will not saturate it with moisture.
Procedure for insulating walls inside
Let's look at the algorithm step by step.
Preparing the base
Why can’t you insulate the walls from inside the house with penoplex? If you do everything correctly, there will be no problems. The load-bearing wall should be cleaned before starting work, and then all possible cracks and through holes should be sealed. When insulating from the side of the room, it is recommended to treat the base with antifungal compounds. For a wooden house, a composition such as Nortex-Lux is perfect. There is an antiseptic product with a similar name, which is intended for treating stone and concrete walls of other types.
Hanging walls
Before installing the frame, you should determine the possible irregularities on the load-bearing wall. Inside rooms, this can be done by applying a long rule with a length of 2.5 to 3 meters, where a bubble type level is integrated. If the walls are very long, then differences can be easily found by pulling the control cord. It should be stretched along the base being examined near the floor, ceiling and diagonally. When identifying localized areas that bulge, it is important to take the frame indentation specifically from them. in certain cases, if the flaw in the base is small, it will be more convenient to knock it down than to go very far into the room with a false wall.
Installation of brackets
When insulating part of the room, the frame is assembled from “ceiling” galvanized profiles. In a house made of wood, these are dry edged boards, the cross-section of which is 5*5 cm, which is thoroughly antiseptic. It is always important to use perforated direct hang brackets. To install brackets on wall surfaces, you first need to choose their location. Due to the fact that the profiles will be spaced at a distance of 0.4 or 0.6 meters (this is a multiple of the width of the plasterboard slabs), it is at this interval that the rows of fasteners will be placed along the axes. In each vertical row, the distance between the U-shaped brackets should be from 0.6 to 0.75 meters. Fixing direct suspension on the walls is done using quick-installation dowels, the size of which will be 0.6 * 4 cm for concrete, or 0.6 * 6 or 0.6 * 0.8 cm for bricks. They are attached to the wall made of wood with self-tapping stainless screws with a flat and large head of 4.5 cm. All brackets will have 2 hardware, and they must also pass through the eyelets on the sides.
Please note that it is recommended to install direct suspension on the walls through a thermal insulation gasket, and then it will be possible to interrupt the heat transfer through the metal, and then minimize cold bridges.
Fastening plasterboard sheets
It would be possible to use materials like blockhouse, imitation timber or lining here. But in order to create a seal, slab materials are ideal. When insulating the walls of a house/apartment inside, drywall should be purchased with a thickness of 1.25 cm, moisture-resistant. We are talking about green slabs marked GKLV. The slab frame is installed according to all system rules for drywall. fixation occurs with self-tapping screws with a length of 2.5 cm for metal, with the usual spacing between the screws and the traditional indentation from the slab edge. There are no special requirements for puttying and finishing, and only the usual general construction requirements must be observed. But if variations in choice are available, it is better to give preference to materials with vapor permeability with ideal moisture resistance.
