There are all sorts of bathhouses in the Russian expanse: log, which are often compared to buildings made of timber, frame, cinder block, foam concrete... Among them there are also those built of brick. But, To be honest, brick is far from the best material for bathhouse construction. However, the circumstances are different: some choose it of their own free will, putting solidity, reliability and fire resistance at the forefront, others already have a brick extension in their yard, but don’t have a bathhouse yet, so they find a use for what they have.
One way or another, such baths exist, which means you need to know how to achieve maximum comfort from them .
Is it necessary to insulate?
If with other materials it is appropriate to argue about whether insulation is necessary or not in their case, then there is no reason to doubt : insulation of a brick bathhouse is mandatory. Brick has high thermal conductivity, so without insulation it will take a very long time to heat a bathhouse, but, on the contrary, it will cool down very quickly.
Just imagine how much time and firewood it takes to heat walls that have frozen at sub-zero temperatures. By the way, insulation is always compared to a brick wall, saying that where meters of masonry are needed, you can get by with a few centimeters of insulation.
However, the next question requires more detailed consideration.
Strip foundation
- The first step is to free the foundation from soil along its entire perimeter;
- Next, you need to dig a trench, the depth of which should be greater than the freezing level of the soil, and the width should be about 50 cm;
- Sand is poured into the bottom of the trench in a layer of 20-25 cm. Coarse sand is a more suitable option for this purpose;
- We use bitumen mastic as waterproofing and coat the foundation with it in 2-3 layers;
- After the waterproofing layer has dried, you can begin installing the insulation. Its thickness depends directly on the climate of the region in which the bathhouse is built. The seams must be treated with polyurethane foam;
- It is worth considering that heat loss is highest in the corners, so the insulation layer here should also be larger;
- If you chose polystyrene foam as insulation, then you can simply fill it with sand on the sides and compact it thoroughly. If you provide thermal insulation using polystyrene foam or mineral wool, then they need additional protection. To do this, you can use ordinary brick, which needs to be laid along the entire base;
- A blind area is made from the base, which can be decorated.
Insulation of a brick bath: inside or outside?
In the event that you have to choose between which side it would be better to sheathe the bathhouse with insulation, it is worth looking at what will happen in both cases.
It is clear that when sheathing the outside, the entire brick of the building ends up inside a warm “fur coat,” which means that it will have to be warmed again, because in a room that is heated only from time to time, the temperature of the walls drops even with insulation. And again, the lion's share of the heat will go to waste , as if you had not insulated your bathhouse at all.
If you carry out insulation from the inside (including with your own hands), then all the heat will go to heating the air in the room, which, in fact, is what we need .
BUT! If it is possible to sheathe the bathhouse on both sides, then there are no obstacles to this, but this will be a matter of the owner’s taste, because good installation of internal insulation can single-handedly solve all problems.
Now that we understand the mechanism of how insulation works and have decided on the choice of side, it’s worth talking about how brick differs from other materials.
Design Issues
The key element of the steam room is the heater (firebox). When building a steam room, it is recommended to take into account the dimensions of the stove, as well as the number of visitors to visit the steam room at the same time.
What should a steam room in a bathhouse be like, designed for a specific number of visitors? So that vacationers do not experience discomfort and at the same time there is no unused space in the room, which should be heated more, the steam room must have certain dimensions.
Room dimensions
The optimal dimensions of the steam room are determined by generally accepted standards and are 2x2.5 meters with a ceiling height of up to 2.25 cm. It is generally accepted that a steam room of this size is designed for a company of 3-4 people.
Also, when designing a steam room, you should pay attention to the following issues:
- The need to install windows;
- Installation procedure for entrance doors;
- Arrangement of a ventilation system;
- Number and location of benches.
Windows and doors
The standard project does not provide for windows, but if desired, they can be installed. In the steam room, it is recommended to install square blind windows, the size of which does not exceed 50x50 cm. The best option is to install a modern double-glazed window, which provides better heat and sound insulation of the room.
To reduce heat losses when constantly visiting the steam room, when installing a small door leaf, it is recommended to provide a high entrance threshold (up to 30 cm) and a low crossbar on top.
The door to the steam room should be simple and easy to use, open/close well, and have no locks or locks. The best material for making door leaves is wood or glass.
Exhaust ventilation
To reduce high humidity, as well as prevent the development of fungus and mold, the steam room in the bathhouse must have a reliable exhaust ventilation system. Ventilation is installed during the construction phase of the bathhouse.
The ventilation system is provided for the timely removal of excess moisture and the supply of clean air from outside. Experts recommend installing a modern supply and exhaust ventilation system with built-in air ducts.
In this case, the supply channel should be located near the firebox in the lower part of the room. The hood is installed on the opposite wall at the top, almost under the ceiling. The diameter of the exhaust duct should be twice the diameter of the supply duct. Air flow is regulated by built-in valves.
To develop a project for a future bathhouse, you can contact an architectural bureau or private designers.
A ready-made steam room with your own hands and step-by-step instructions for its construction are aimed at novice craftsmen.
Insulation of brick bath walls: features
If we compare brick with other materials from which walls are built, for example, wood, frame or foam concrete, then the main difference will be that these walls are colder than others. In fact, brick can be considered an artificial stone, and this speaks of both advantages and disadvantages:
- strength;
- heavy weight (full-bodied);
- low moisture permeability (for a burned person);
- increased thermal conductivity;
- frost resistance;
- low shrinkage;
- fire resistance.
Wood shrinks much more and is flammable. But you can do without additional insulation of wooden walls.
Foam concrete is cheaper than brick, but it must be protected from moisture. But the presence of numerous air bubbles in it, which has low thermal conductivity, makes this material warmer, which means it requires less time to heat the room and retains heat longer. In low-rise construction, foam concrete has more advantages than disadvantages.
Frame buildings are much less durable than brick ones, but they need insulation no less than the latter.
The creation of bricks with internal voids has reduced the thermal conductivity of the material, but their use is limited to the thermal insulation layer, and the base of the load-bearing walls remains solid brick. But even laying in several rows will not solve all the problems with bath insulation, so it is more profitable to insulate a brick bath by covering the walls of the building with insulation .
LOGICPIR Bath from TECHNONICOL: product characteristics
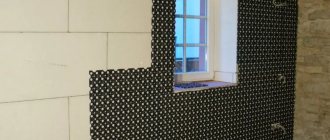
LOGICPIR Bathhouse from TECHNONICOL is an insulation material made from rigid polyisocyanurate foam with a closed cell structure. The top and bottom are covered with aluminum foil, which provides it with increased sound and heat insulating properties. The insulation is produced in Russia.
Main characteristics in the table.
Thanks to the special shape of the edge, LOGICPIR Bath slabs from TECHNONICOL fit tightly together, which minimizes the likelihood of gaps. For greater sealing, it is recommended to glue them along the seams with metallized tape.
Foil-coated PIR boards have high insulating properties, so they can be installed in both dry and wet areas. LOGICPIR Bath from TECHNONICOL is a material that is designed for installation in a steam room, dressing room and other rooms of bath complexes.
The material is durable. Its service life is more than 50 years. During this time, it does not lose its properties and does not require replacement or additional processing by any means.
A person with minimal knowledge in the field of construction can cope with the installation of LOGICPIR Bathhouse from TECHNONICOL. But before starting work, you need to study the technology, prepare tools and materials.
Insulation of a brick bath: methods
Today, owners of a brick bathhouse can choose between several methods of internal wall insulation with final finishing either with tiles or lining. Let's start with the method where plaster is used:
- The first layer on top of the brick wall is to waterproof it, for example, using bitumen mastic. For this purpose, talc, asbestos and lime are added to the mastic. The resulting mass is applied directly to the walls.
- Then the surface is plastered, and expanded clay and finely chopped slag are mixed into the plaster solution.
- A lathing is placed on the layer of plaster, between the bars of which fiberglass is laid - a non-flammable heat insulator, similar to asbestos, but environmentally friendly.
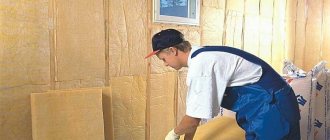
- A layer of insulation is placed on the fiberglass - for example, basalt or kaolin wool.
- Then everything is covered with a vapor barrier, for example, foil or foil fabric.
- All that remains is the finishing layer - the same lining, for example. It is mounted on a sheathing with a ventilation gap.
Tile option:
- waterproofing;
- sheathing;
- insulation between the sheathing posts;
- vapor barrier;
- reinforcing mesh;
- plaster;
- tile.
Method without plaster:
- The first layer on top of the inner surface of the wall is waterproofing - either film or the one described above.
- The sheathing is made of timber with a section of 5x5. The step between the beams is equal to the width of the seal minus 1 cm, so that it lies tightly in the spacer.
- Fiberglass is attached to the sheathing without tension.
- Insulation, for example, basalt wool (not containing phenolic impregnation) is laid in the remaining spaces between the posts in two layers, shifted by half the width in the second layer, so that cold bridges do not appear. The total insulation layer is 10 cm.
- A reflective vapor barrier is placed on top of the insulation, for example, simple foil for the steam room and Penofol for other rooms. The vapor barrier is overlapped and sealed with aluminum tape.
- If the finishing is done with clapboard, then there must be a ventilation gap between the foil and it. To do this, a sheathing is made of bars of the required cross-section, on top of which the lining is attached.
The essence of internal insulation is shown using the example of a foam block wall; the principles are the same.
IMPORTANT! Metal fasteners will last longer if you use galvanized nails, screws, etc.
Another way is to build an additional wall from timber:
- The first layer on top of the brick is sheathing.
- Waterproofing is attached on top of it.
- A wall is erected from 10x10 cm timber, self-tapping screws are used for fastening.
- The sheathing is again placed on top of the timber.
- It is covered with fiberglass fabric with a slight sagging.
- Insulation is placed in the gaps.
- It is covered with a vapor barrier, for example, foil.
- A ventilation gap is made using a sheathing onto which the lining is nailed.
Useful video
Here is a new material that sounds tempting, but has not yet been tested by many years of use. There is some risk.
Steam room: step-by-step instructions
In order for bath procedures to be of high quality, it is important to make the steam room correctly. The instructions presented below will help you understand all the nuances and decorate the room as conveniently and functionally as possible.
Step 1: Making a plan
Any construction work always starts with a plan. It is not necessary to create a complex project using special professional programs; you can at least make a drawing.
First you need to decide where the stove for the bath will be located, since each stove has its own requirements for the size of the room, ventilation, etc.
It is also necessary to decide on the size of the steam room. They depend on the total area of the room and how many people will be steaming in it at the same time. The steam room should be such that everyone feels comfortable in it, but it is important that it be compact, otherwise warming up the steam room will take longer.
The standard height of the bathhouse is 2.2 m. If you make the ceiling lower, the bathhouse will be uncomfortable, and it will also be difficult to massage with a broom. There is also no need to make ceilings that are too high, since in this case the steam will go up and there will be no therapeutic effect from it.
You should decide in advance whether there will be windows in the steam room or not. If there are, then you need to make them small (about 50x50 cm).
At the design stage, it is necessary to carefully consider the ventilation of the bathhouse. Improper ventilation can lead to heat loss and even harm human health.
Step 2. Insulating the steam room
Insulation is an important step; if done correctly, the steam room will cool down more slowly, bathing procedures will become more enjoyable, and fuel consumption will decrease.
Insulation is done in the following order: ceiling, walls and floor. Mineral wool is usually used for thermal insulation; to protect it from moisture, you need to additionally cover the material with aluminum foil.
Step 3. Finishing the steam room
If you look at a photo of finishing a steam room in a bathhouse with your own hands, you will notice that almost all steam rooms look the same: mostly lining is used for their finishing. This material has many advantages, including ease of installation, long service life, moisture resistance, etc. The lining can be made from different types of trees: aspen, alder, larch, ash, linden.
When choosing, you should focus on your financial capabilities, the quality of the wood and personal preferences.
If lining made exclusively from deciduous trees is suitable for the floor and shelves, then coniferous trees can also be used for the walls. The advantage of the latter is that when heated, they release resins that fill the room with a pleasant pine aroma. Hardwood lining has a higher level of vapor barrier.
The floor in the bathhouse can be wooden, concrete or clay. It is permissible to use natural stone or porcelain tiles as flooring. If you go with tiles, it is better to cover it with wood flooring, as there is a risk of slipping on the tiles.
By the way, it is recommended to raise the floor of the steam room 15-20 cm above the floor level of other rooms, in this case you can avoid the appearance of drafts in the room.
Step 4. Installing furniture and arranging the steam room
A steam room is a room with a special temperature regime and high humidity, so it requires special design. The lighting in the steam room should be soft and diffused. The ideal option is lamps with matte shades. They must be reinforced and made of heat and moisture resistant material.
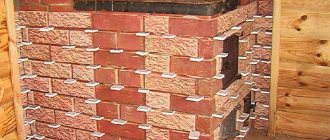
Any steam room must have a stove and shelves. The stove in the bathhouse can be made of iron or brick. A brick stove for a bathhouse is fireproof and has an attractive appearance. Its disadvantage is its massiveness, so a brick bathhouse is usually installed in spacious bathhouses. Those who have a small bathhouse prefer metal stoves, which you can make with your own hands or purchase ready-made ones.
If we compare stoves by fuel type, they come in wood, gas and electric. The most common option is a wood-fired sauna. It is the fire and the sound of burning wood that help create the right atmosphere. Gas and electric ovens are more modern options that require a gas pipe or electricity, respectively.
Deciduous trees (aspen, linden, abash) are suitable for making shelves for a bathhouse. It is unacceptable to use coniferous species, because the resin released when they are heated can burn the skin.
Shelves can be installed in one row or several. Multi-tiered shelves are more spacious; they give everyone the opportunity to choose the temperature regime that suits them (as you know, the closer to the ceiling, the higher the temperature). The standard height of each tier is 35 cm. In very small baths you can make folding shelves for the bath.
If it is permissible and even recommended to decorate other rooms with various interior items, then this is not necessary in the steam room. Only the essentials should be here.
But if you still want to further decorate the room, then make elegant hangers for brooms and towels, install unusual handles on the doors, and select original lamps.
Below are photos of do-it-yourself steam rooms:
Step 5: Door Installation
The final stage in the design of the steam room is the installation of the door. It should fit tightly so that heat does not escape outside. For a bathhouse, the best options are doors made of solid wood or tempered glass.
Now you know how to make a steam room in a bathhouse. There is nothing complicated about decorating a steam room. There is no need to complicate the interior of this room and load it with additional little things. A simple steam room will be as convenient to use as possible, which means that bath procedures will bring only joy and pleasure.
Choice of insulation
Let's tell you a little about the most common insulation materials in relation to our case:
| mineral wool | a good material for external insulation, but should not be used inside, because when heated it releases harmful organic substances. |
| basalt wool | in a bathhouse for internal insulation you should only use it, because it does not have phenolic impregnation. |
| cotton wool rockwool | Among the products of this company there is stone wool, which is specially designed for baths and saunas; its use is safe. |
| ecowool | excellent insulation for a bath - does not support combustion, low thermal conductivity, environmentally friendly. It is placed dry on horizontal surfaces and wet on vertical surfaces. |
| Styrofoam | It is flammable and can release harmful volatile substances when heated; it is better not to use it in a steam room . |
| expanded polystyrene | It should be used as one of the layers of floor and ceiling insulation. |
| foam glass | a material that borrows the best features from mineral wool and polystyrene foam. Does not require a vapor barrier, lightweight, porous, does not emit anything, fireproof. |
| foil and foil materials | There is a reason to use these materials in a brick bath, but ultimately everything is decided by the tastes of the owner. With foil and its derivatives, the temperature becomes higher and the steam becomes harsher. |
Additional requirements
Lathing. A profile frame is the most durable option for a brick or stone bath. The most commonly used profile is a ceiling type CD; the ceiling perimeter is edged with a UD type guide profile; direct hangers are attached in increments of 0.6-0.8 meters; steps between profiles are made 1-2 centimeters less than the width of the insulating material slabs.
As for wooden baths: insulating the steam room of a log bath allows you to save a little. Since the cost per linear meter of timber is an order of magnitude lower than that of profiles; at the same time, the durability of such insulation remains at the same level and is limited solely by the durability of the materials of the walls themselves.
Foil waterproofing of the bath. To achieve this task, you need not only water- and vapor-proof, but also heat-resistant material. The good news is that the modern market is replete with such materials and deciding how to insulate the walls of a bathhouse will not be difficult: an example of such a material is foil-type foamed propylene Penotherm NPP LF, designed for temperature loads of up to 150 degrees Celsius. This material is not only an excellent protection for walls and ceilings from dampness. It is also an excellent reflector of so-called radiant heat and, being a foam material, further reduces heat loss. As the manufacturers assure, Penotherm 3 millimeters thick is quite capable of providing thermal insulation at the same level as timber 150 millimeters thick.
Clean finish. Any thermal insulation for saunas and baths should always be hidden with a layer of finishing material. Today, the role of such material is traditionally played by wooden lining made of aspen or linden.
These types of wood, even in very, very hot rooms, do not burn. They are also resistant to rotting and practically not subject to corrosion, which makes it possible to use such lining in bathhouses and even sheathe steam rooms with it.
Insulation of a steam room in a brick bath
The main difference between the steam room and all other rooms in the bathhouse is that it is here that the temperature reaches its maximum.
In this regard, great restrictions are imposed on materials that, when heated, begin to deform or release substances harmful to humans. For example, if you decide to use mineral wool as insulation, then you need to look for basalt, because phenolic impregnations . You should not use flammable materials, reducing the risk of fire.
The second specific property of the steam room is high air humidity due to steam. Therefore, the insulation layer must be covered with a layer of vapor barrier and complete sealing must be achieved using tape. It is also necessary to leave a ventilation gap between the vapor barrier and the finish.
In addition, it is in the steam room that the task is to quickly heat up and maintain the set temperature for a long time. Increasing the thickness of the insulation and using foil as a vapor barrier can help with this . Both of these transform the steam room into a real “thermos”, that is, the heat does not find a way out and remains in the steam room. But the downside is the severity of a person’s stay in such a steam room, which can be leveled out by proper ventilation. However, the insulation of a steam room in a brick bath depends on the personal preferences of the owner.
Advice from the experts
There are no high temperatures in a brick washing bath, but the materials are affected by moisture. Therefore, the walls can be finished with tiles. The surface is first leveled with plaster. The layer is applied with a thickness of 15 mm. Once the ceramics have been laid, the solution is removed with a rag if it gets on the surface of the cladding.
The foundation, floor, walls, windows - all these are parts of a single whole - the baths. Therefore, for its finishing it is better to use materials that combine with each other. For cladding walls, for example, you can use clinker tiles for interior work, and for arranging the foundation, clinker for difficult operating conditions.
Floor insulation
The solidity of the brick bathhouse suggests that the owner does not intend to limit himself to warm days to take a steam bath in it. And this means that of all types of floors at his disposal only:
- concrete;
- dry wooden;
- pouring onto a concrete screed.
They all need insulation, just a little differently.
A dry wooden floor consists of a rough and a finished floor, between which there is a gap equal to the height of the floor beam. This space is filled with insulation. Foamed polystyrene foam will be the best - it is not afraid of moisture. Mineral wool and expanded clay require a water barrier before laying the finished floor. It is also possible to insulate with ecowool and Aisinin foam. As an option, you can also fill the space under the subfloor with expanded clay, but for this you need to waterproof the soil in advance.
A concrete floor on the ground or a concrete screed under a pouring floor is insulated in the same way:
- Half a meter of soil is removed.
- The future water drainage is laid - a pit/ladder and pipes to the outside.
- 15 cm of gravel is poured and compacted.
- Then 35 cm of sand and compacted.
- This “pillow” is hermetically sealed with roofing felt.
- A layer of insulation is laid: mineral wool, expanded clay, slag, felt with tar.
- It can be closed with a water barrier if the insulation gets wet.
- Reinforcing mesh is laid.
- A concrete screed is poured with the required slope towards the drain.
Find out more : How to insulate the floor in a bathhouse? It depends on what kind of floors: on screw piles or poured, with a layer of insulation, dry or poured
Disc dowels: long lasting strength
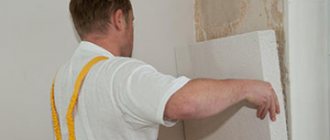
The use of disc-shaped dowels is justified in the case of a large insulation area or uneven façade surfaces. For fastening to dowels you need: a hammer drill (impact drill), a drill of the appropriate diameter and length, and a hammer. Holes are drilled with a recess of 50-60 mm into the base. The holes are filled with polyurethane foam. Then the dowel is driven in with a hammer so that the dowel fungi do not protrude above the surface of the slab. It is best to use dowels in combination with metal screws to increase the reliability of the connection. Installing 5 dowels per slab is sufficient. Adjacent sheets are fastened with one dowel. It must be installed in the seam between the slabs.
Ceiling insulation
Warm air and steam always collect near the ceiling.
Therefore, the owner of a bathhouse should definitely think about insulating it so that the heat is not wasted. This applies to any type of ceiling - hemmed, floor or panel, regardless of what is on top: a cold attic or a warm attic.
The following requirements apply to the ceiling insulation used:
- incombustible;
- moisture resistant;
- does not emit harmful substances when heated;
- with low thermal conductivity.
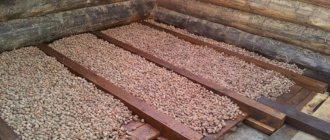
Expanded clay is good in this regard - it is poured onto a waterproofed rough ceiling between the floor beams on the attic side. And then they are again isolated from moisture. Instead of expanded clay, you can add a layer of ecowool.
also a good idea to use basalt wool without phenolic impregnation . But it easily absorbs water, so it needs high-quality insulation from water and steam. The wool can be laid either on top of the flooring boards or hemmed underneath.
Polystyrene foam would be good for the ceiling, but it is flammable and, if manufactured poorly, releases harmful substances when heated.
When insulating the ceiling, clay or mixtures with clay are often used; find out if it is suitable here.
We recommend that you familiarize yourself with the materials from the sections Insulating the ceiling of a bathhouse and Insulating the roof.
IMPORTANT! Above the steam room, the ceiling needs a double layer of vapor barrier.
***
A brick bathhouse can become very comfortable, but it will require a large investment of labor and money from the owner. Therefore, it is worth going to build such a bathhouse only if it seems completely acceptable.
Frame (beacons)
Proper manufacturing of the frame is the most difficult stage of insulation. A high-quality and durable frame provides a smooth front surface made of lining.
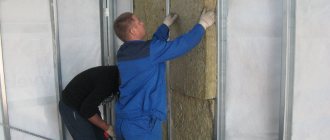
Insulation of a brick bathhouse inside is carried out by filling the cells of a wooden or metal frame.
Other options do not apply.
The wooden frame is assembled from bars, the metal frame is assembled from a specialized galvanized profile.
A wooden frame is simple and cheap, but its strength is less than that of a metal one.
For a heavy block house, a wooden frame made of bars may not be enough. Then the cross-section of the elements must be increased or a structure combined with metal must be used.
A powerful wooden frame is only possible with a large gap for placing insulation. The choice of this gap must correspond to the thickness of the insulating board. Typical options provide a layer of 20 – 90 mm.
The quality of insulation directly depends on the thickness of the slabs. The choice of how to insulate a brick bathhouse from the inside is based on typical data for your climatic region. Recommended projects can be used. Types of connections in a wooden frame:
- Tenon and groove;
- With metal corners;
- Butt joint on nails and dowels.
The most durable and practical connection is on metal corners. Instead of nails, it is convenient to use self-tapping screws, which are purchased with metal corners.
Each T-shaped connection requires two angles and about 10 screws.
Vertical posts (beacons) and horizontal bulkheads are made from bars of the same cross-section.
The most advantageous aspect ratio is 7:5.
Such timber is produced in large quantities and can be purchased at any lumber store.
