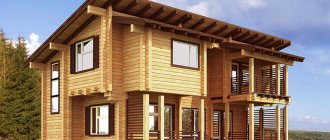
The thermal insulation characteristics of timber with a cross section of 150x150 are not sufficient to ensure comfortable living in a house during the cold winter period. In this regard, the owners of such a building inevitably ask the question: how and with what to insulate the house? According to the rules of heating engineering, external insulation is much more effective than internal insulation. Therefore, first of all, you need to worry about choosing the optimal thermal insulation material for specific conditions, suitable for use outside the house, and find out all the nuances of installation.
Insulation of a house made of timber from the outside
When there is a need to insulate a house made of timber
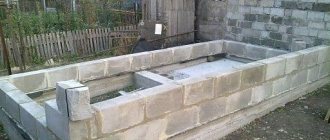
SNiP defines the minimum thickness of timber for the construction of a house where people will live permanently - 200 mm. If we are talking about a summer house that is used only during warm periods, this figure is reduced to 150 mm. To adapt such a structure to retain heat in winter, you will have to deal with external insulation.
However, this does not mean that a house built from 200 mm timber will be reliably protected from the cold. Due to errors in connecting the beams, gaps may remain through which heat will leave the room. Insufficiently dried profiled timber is susceptible to deformation, which will also lead to the formation of cracks.
The need for additional thermal insulation of timber houses arises when:
- the façade needs updating and additional protection using PVC panels or similar facing material;
- it is necessary to reduce heating costs;
- Cracks formed in the timber lead to heat loss.
What to plant in January 2022 for seedlings
bell pepper
Mid-ripening and late-ripening varieties of bell pepper have a growing season of 110-140 days. To grow such varieties, seedlings begin to be sown from mid-January to mid-February.
Pepper requires special conditions regarding heat. Bell pepper is a heat-loving plant that needs 25C, no less. It is necessary to keep the daylight hours to about 12 hours.
Bell pepper seeds for seedlings are first planted in a small container. Plant two seeds at once, in case one does not sprout. If both have sprouted, then one must be removed. When 4 leaves appear, the sprout should be transplanted into a larger container.
Tomatoes
In January, it is important to plant early-ripening and late-ripening tomato varieties. It should be taken into account that tomatoes are transplanted into open ground or a greenhouse no later than 60 days after the sprouts appear, otherwise the seedlings will become overgrown. Therefore, tomatoes are sown as seedlings at the end of January and February.
Like peppers, the seeds are planted in a small glass or other container, 2-3 seeds each. In the end, only one is left. Tomatoes require about 12 hours of daylight. When 4 leaves appear, the tomatoes are transplanted into a large container. After 60 days, transplant into open ground or a greenhouse.
Eggplant
Eggplants are late-ripening, heat-loving and light-loving plants. In fact, eggplants cannot grow under natural conditions in the middle and northern zone. A person helps this cultivated plant to ripen with the help of early seedlings.
The format for sowing eggplants is not much different from previous types of cultivated plants. It is recommended to first plant 2 seeds in a small container, maintain a temperature of 25 degrees and 12 hours of daylight. When 2-4 leaves appear, transplant into a large container.
Celery
The growing season of celery is quite long - 160-200 days. Naturally, it can only be grown in the southern regions in the usual way. For seedling soil, use a mixture of sand and earth. The seedlings are transplanted into a large container 30 days after the sprouts appear.
General recommendations for insulating a timber house
On wooden buildings, thermal insulation materials are placed outside. This protects the beams from rotting and does not reduce the internal area of the premises.
There are other reasons why it is more correct to insulate a house made of timber from the outside:
- external thermal insulation is more effective than internal insulation in terms of reducing heat loss and saving on heating of the building;
- after insulation, a house made of timber will become less susceptible to high humidity and low air temperatures;
- The process of installing thermal insulation can be combined with updating the exterior using siding, which will make the building not only warm, but also more attractive in appearance.
To properly insulate a house made of timber, you should pay attention to the following points:
- competent choice of thermal insulation, calculation of the optimal thickness and required quantity;
- careful adherence to technology when installing insulation;
- mandatory vapor and waterproofing;
- pre-treatment of wood with agents that protect against fire, mold, fungal and insect damage.
There are several requirements for the thermal insulation material with which it is planned to insulate a house made of timber:
- high quality;
- long service life;
- ease of installation;
- environmental cleanliness;
- harmlessness;
- inability to maintain combustion.
It is not difficult to properly insulate a house made of timber; it is enough to pay attention to the key points and avoid mistakes that can result in a waste of money and effort:
- The use of damp thermal insulation material will lead to rotting and subsequent destruction of the wood. When purchasing, you must make sure that the insulation was stored in a dry place and provide suitable conditions for its maintenance before starting work.
- There is no point in starting to install thermal insulation until natural shrinkage of the house has occurred. On average, this process lasts one and a half years. Violation of this rule will lead to deformation of PVC panels.
- Before attaching the insulation to the walls, they are treated with agents to prevent combustion and the appearance of microorganisms - fire retardants and antiseptics. Cracks in the beams must be repaired using putty.
Work progress
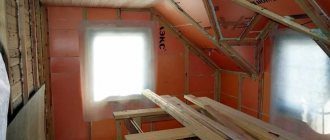
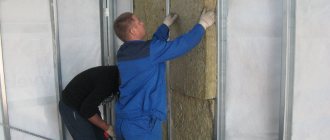
To ensure complete thermal insulation, one caulk is not enough. It is necessary to insulate the walls of the entire structure. The modern market offers a wide selection of various thermal insulation materials, the most affordable of which are mineral and stone wools; it is quite possible to install them yourself.
Lathing
To attach soft or lightweight hard insulation with your own hands, you must first equip the frame. To do this, a vertical or horizontal sheathing is placed on the wall surface, in which the guides are placed at a distance of 40 - 50 cm.
Depending on the thickness of the insulation layer, the geometry of the bar or board for the frame ribs is also selected. So, to lay a layer of 50 mm, it is best to make a frame that protrudes from the wall by 70 mm, which ensures the formation of a ventilation gap.
First, the corner elements of the sheathing are created. A 50x50 mm timber strip is attached to the rib at an angle of 90°. Such elements are placed in all corners of the room and, after checking the location according to the level, they are attached to the walls. The remaining space is marked for the selected number of sheathing ribs. It is advisable to treat all frame elements with antiseptics to prevent rotting.
Moisture protection
Before installation, the entire frame is covered with waterproofing film, which is attached with the smooth side to the wall. The film is laid horizontally and the seams between the cuts are insulated with special adhesive tape.
Then insulation is placed in the frame and a vapor barrier is applied on top of it to protect against internal moisture. Before installing any type of waterproofing, you must carefully study the instructions, since an error in the location can lead to the insulation getting wet and losing its properties.
The gap left will facilitate natural ventilation and evaporation of condensate. Next, the entire frame is covered with any finishing material.
Laying insulation
After creating the frame, the heat-insulating material is cut into strips or sections 2–3 cm wide greater than the distance between the guides and placed between the frame elements. Sometimes additional fastening of the insulation with special polymer anchors is used. This technique ensures a tight fit of the material to the frame and reduces its subsidence.
How to properly prepare a timber house for insulation
The preparatory stage includes the solution of several important issues on which the result of work on thermal insulation of a house made of timber depends:
- what kind of pre-treatment the walls require;
- what material to choose;
- how to lay it correctly.
Preparing the walls of a house for insulation involves carefully inspecting them to exclude signs of rotting or damage to the wood by insects. If infection with a fungus or bugs is suspected, or simply for prevention, treatment is carried out with appropriate compounds. Elements of door and window openings are checked for strength and strengthened if necessary.
Recommended reading:
- Types of foundations for a private house
- Construction technology of a half-timbered house
- Service life of a wooden house
Next, you need to decide whether to caulk the walls. As a rule, this is done if there are deep cracks. To improve the thermal insulation of a home, they are traditionally sealed with fibrous materials. This work cannot be called difficult, but it requires thoroughness and knowledge of some techniques that speed up the process.
They caulk the walls, that is, they eliminate the gaps between logs or beams, various fibers of plant origin:
- oakum;
- jute;
- flax wool.
For proper caulking of wooden walls, there are special tools - spatulas with a wooden or metal working edge, which must be smooth, without burrs, so that when pulled out of the crack, fibers do not cling to it. Craftsmen also use a mallet, which hits the handle of the spatula to push the insulation into the depths of the crack.
There are two ways to caulk walls:
- laying stretched insulation;
- laying insulation into the set.
The first option is suitable for narrow gaps, and the second is used if the crevices are long and deep. Extended caulking involves distributing fibrous material along the cracks in an even layer while simultaneously pushing it with a spatula into the gap. A good result is obtained as a result of careful, leisurely work, striving for maximum compaction of the tow. Repeat the treatment of each crack until it is completely filled.
When caulking a set, the tow is rolled into lumps the size of the crevice, then with a spatula and mallet they are driven into the hole that needs to be sealed. In any case, work begins from below, gradually moving higher along the wall.
Preparatory stage
You need to start by assessing the condition of the walls and the quality of the previously completed work on insulating the log house. It is necessary to carefully examine all the joints, corners and joints of the beams, and evaluate the compaction of the entire surface of the log house walls. If any defects are detected (for example, thinning of the caulk layer), they must be eliminated in advance.
Caulking walls
Any timber structure is distinguished by a large number of seams. After the building shrinks and the moisture content of the wood equalizes, voids may form in the grooves and seams, which reduce the ability of the entire structure to retain heat. That is why caulking is so important, allowing you to completely isolate the inter-crown joints.
Carrying out such work requires compliance with several rules:
the caulking must be carried out from below and processed one crown from all sides at the same time, otherwise the building may warp; It is important to choose the right tool, because the chisel should not damage the wood; Taking into account the formation of a narrow groove between the timber, it must be processed “stretched”.
This type of caulking is carried out by stretching fibers of tow, moss, jute or their analogues along the seam. Part of the material is left out and after processing the groove, it is rolled into a roller and pushed in, completely covering the space between the rims.
Material for external insulation of a house made of timber 150x150
When choosing lumber for building walls, preference is often given to timber with a cross-section of 150x150, but without additional thermal insulation such a structure can only be used as a summer house. If you plan to live in the building all year round, you will have to think about how to properly insulate the house.
Today, for effective thermal insulation of wooden buildings, a lot of options are offered, suitable for different regions. Specific climatic conditions require solutions that are optimal in terms of key characteristics:
- coefficient of thermal conductivity;
- compressive strength indicator;
- frost resistance;
- service life guaranteed by the manufacturer.
The following materials can be used to properly insulate a timber house from the outside:
- all types of so-called wool - mineral, stone, basalt, glass wool;
- sheet foam;
- foamed polyethylene;
- extruded polystyrene foam;
- windproof boards Izoplat;
- sprayed polyurethane foam.
Mineral wool and its analogues
The excellent thermal insulation characteristics of mineral wool have long been known, but its inherent hygroscopicity forces developers to incur additional costs for proper vapor and waterproofing of the foundation and walls. If this is not done, the insulation will become saturated with moisture and, as a result, perform worse as thermal protection for a house made of timber.
When choosing mineral wool and similar fibrous materials for thermal insulation, pay attention to:
- air humidity level in the region;
- method of cladding external walls.
The use of this type of insulation involves the installation of ventilated facades, and this is not the cheapest cladding option. In addition, it will be necessary to protect the mineral wool from moisture, which is quite difficult to do in regions with constantly high air humidity.
Styrofoam
Many people do not even consider the use of insulation such as polystyrene foam due to the widespread myth about its harm to humans. This is an absolute fallacy, the groundlessness of which has long been confirmed by the results of authoritative examinations, including the sanitary-epidemiological conclusion 63.01.06.224.P.001216.04.03 dated April 7, 2003, Conclusion 01-188 dated April 25, 2000 of the Research Institute of Hygiene and Children's Health and adolescents of the Russian Academy of Medical Sciences, Conclusion No. 03/PM8 of the Moscow Research Institute of Hygiene named after. F.F. Erisman. Polystyrene foam is recognized as completely safe for health, even when used indoors.
The most important criterion for choosing the right polystyrene foam is its density. The higher this indicator, the more heat is retained. At the same time, many focus on the number in the brand designation, considering it to be the density value. This is not entirely true. For example, C-25 foam has a density from 15.1 to 25 kg/m3. The table will help you figure out which brand of insulation to choose.
| Foam brand | Density (kg/m3) | Compressive strength at 10% linear deformation | Thermal conductivity (W/mK) |
| PSB-S-15 | up to 15 | 0.05 MPa | no more than 0.042 |
| PSB-S-25 | 15.1-25 kg/m3 | 0.1 MPa | no more than 0.039 |
| PSB-S-35 | up to 25.1-35 kg/m3 | 0.16 MPa | no more than 0.037 |
You can insulate a house made of timber from the outside using polystyrene foam of any brand. When choosing between thickness options offered by manufacturers (5 or 10 cm), it is better to give preference to PSB-S-35 with a thickness of 5 cm. Compared to PSB-S-25 with a thickness of 10 cm, the effect will be much better at the same financial costs.
Extruded polystyrene foam (EPS)
The composition of EPPS is almost identical to polystyrene foam, but surpasses it in its characteristics. It has lower water absorption, is stronger in bending and conducts heat worse. This difference is explained by a fundamentally different production method.
Answering the question of how to properly insulate a house made of timber, many professionals agree that XPS is ideal for this. The only thing that can stop developers is its higher cost compared to other types of thermal insulation materials.
To fix EPS to the walls, you can use glue, but not everyone can use it. So, for styrene derivatives they are completely unsuitable:
- petroleum toluene;
- ethyl acetate;
- compositions based on acetone and any solvents;
- water-soluble glue.
Preference would be correct to give to one of the following compositions:
- BITUMAST;
- adhesive foam "TechnoNIKOL";
- ALLFIX facade adhesive;
- Ceresit CT 85;
- “Insta-Stick universal-145345”;
- polyurethane adhesive Illbruck PU 010.
Foamed polyethylene
When working on thermal insulation of houses made of timber, this material is in great demand due to its unique characteristics:
- light weight;
- low thermal conductivity coefficient;
- elasticity;
- low cost.
Foamed polyethylene is presented on the market in two types - LDPE (high pressure) and HDPE (low pressure). It also differs in the method of applying foil - on one or both sides.
The greatest demand is:
- “Thermopol” (available in the form of mats 1.5–4 cm thick);
- "Vilatherm" - thermal insulation harness;
- "Penofol" with one-sided and double-sided foil.
The popularity of foamed polyethylene among developers is explained by the opportunity to save on steam and waterproofing of walls. This material does not absorb moisture at all, so there is simply no need for additional protection from it.
Spray polyurethane foam
Polyurethane foam sprayed onto walls using special equipment has many advantages over other types of thermal insulation materials:
- minimum thermal conductivity: 0.023–0.03 W/m*K;
- environmental cleanliness;
- no need to do steam and waterproofing;
- simplicity and reliability of attachment to the wall;
- The application method eliminates the possibility of cold bridges appearing.
The combination of these advantages ensures the undoubted leadership of sprayed polyurethane foam among other materials for external insulation. It has one drawback - quite high cost. You won’t be able to do it on your own; such work can only be done correctly by a specially trained person using special equipment.
Windproof boards Isoplat based on wood fiber
European production standards guarantee the absolute naturalness of this material. In its production, coniferous tree fiber is used without resins, glue and other binders of synthetic origin. At the same time, a 12 mm board provides the same thermal protection as 44 mm solid wood.
Other advantages of Izoplat windproof boards:
- Tightness. The slabs are elastic, which ensures a tight fit to the walls made of timber, without compromising the integrity of the windproof layer.
- Thermal insulation. Shrinkage of such material is eliminated throughout its long service life. The thermal conductivity coefficient is extremely low - λ10 ≤ 0.045 W/mK.
- Vapor permeability. Water vapor passes freely through Isoplat, the likelihood of mold and mildew forming on the walls of the house is zero.
- Resistance to atmospheric moisture. The paraffin with which the slabs are impregnated reliably protects them from the negative effects of rain and snow.
- Soundproofing. The lowest indicator, typical for the thinnest slabs, is 23 dB.
- Simple and quick installation. Its small size (2700x1200x12 mm) and weight (9 kg) allow Izoplat to be installed on timber walls without much difficulty.
- Service life guaranteed by the manufacturer is 50 years. In fact, it can exceed 70 years.
- 100% natural and environmentally friendly.
Video description
In this video we will take a closer look at insulating a house with polystyrene foam. How safe is polystyrene foam?
Extruded polystyrene foam
It has a special porous structure, tolerates low temperatures well and is unsuitable for microorganisms. The material is durable, easy to install (slabs), and does not absorb water. Disadvantages: Highly flammable and releases harmful toxins.
Polystyrene foam and polystyrene foam are similar in appearance Source lineyka.net
Methods for installing insulation on a timber house
The use of thermal protective materials makes it possible to make a wooden structure suitable for living at any time of the year. Correctly insulating a house made of timber from the outside means fixing them on the external walls, ensuring their reliable fixation and protection from external atmospheric and mechanical influences.
There are several ways to install insulation:
- Hinged ventilated facade
The main purpose of this method is to give the facade an aesthetic appearance, but since the process involves laying a layer of mineral wool, it can be considered one of the options for beautifully and correctly insulating a house.
The advantages of using ventilated facades are undeniable:
- Dew point shifts outward.
- Possibility to choose the appropriate color from a large assortment.
- Easy to install.
- High-quality heat and sound insulation.
- Long service life (up to 50 years).
- Laying insulation under siding
This method of insulating a house is very similar to the previous one: fibrous materials are covered with decorative panels.
When installing siding, you must follow certain rules:
- When choosing sheet material (foam plastic or extruded polystyrene foam) as insulation, the slats are attached with a distance between them equal to the width of the mat.
- For mineral wool, the distance is reduced by 10–15 mm so that it stays tightly, space-straight, in the cells.
- Polyurethane foam is used to process the joints of polymer boards.
- The mineral wool layer must be covered with a diffuse membrane, which acts as a waterproofing agent. If foam or glass wool is used, there is no need for it, since these materials are not hygroscopic.
Turnkey service cost
Prices are formed from several parts. Why is a calculation made? An accurate calculation can be made after all measurements:
- location of the house;
- insulation size;
- type of design.
Approximately for 1 m2 of facade insulation you need to pay from 2000 rubles.
Table of average cost of insulation.
| Name of material | Price in rubles per 1 m2 |
| Expanded polystyrene | 920,00 |
| Mineral wool | 1 189,66 |
How to properly insulate a timber house using a ventilated facade
The façade system, under which an air gap is formed, is ideally suited for wooden buildings. Thanks to the free functioning of air flows, the walls are protected from the negative effects of moisture, and heat loss is minimized.
The ventilated facade consists of several successive layers:
- wall;
- lathing (frame);
- thermal protective material;
- vapor barrier membrane;
- clearance for air circulation;
- facing material.
This procedure is followed when using any type of insulation. An important point that should not be overlooked is the presence of a gap between the cladding and the heat-insulating material of at least 1 cm.
Window and door openings, ceilings and attics must be checked for leaks, waterproofing must be laid on the floor, then insulation and a vapor barrier on top of it.
- Beginning of work
- Laying
- Ventilation layer and finishing
- Attic, doors and windows
First of all, timber walls are treated with fire retardants and antiseptics. Then, using polyurethane foam or fibrous sealants (tow, jute, linen), the cracks are sealed.
The next stage is the creation of a supporting structure for the insulation, namely the installation of vertical slats. The distance between them is made 10-15 mm less than the width of the heat-insulating material. This will allow each sheet of thermal protection to stay securely in its cell.
Correctly lay the sealant, moving from bottom to top. To fix the slabs, anchor fasteners are used; there should be no distance between the joints.
Next comes the installation of the second row of the frame - horizontal slats. Mineral wool is laid between them, and the joints between the slabs of the first layer should be covered with it. Anchors are also used for additional fastening, but the insulation is already held quite securely between the bars due to its elastic structure.
The thermal protection plates are covered with a diffusion membrane on top. It allows air and steam to pass through it from the inside and at the same time does not allow external moisture to enter the structure, preventing the insulation from getting wet and protecting the wood.
If the region has consistently high air humidity, it is correct to use a vapor barrier layer in addition to the above. The special film is attached directly to the wall beam, before the first insulation.
When creating a frame on which fragments of exterior finishing will be attached, it is necessary to provide for a gap between the thermal protective material and the cladding. This will allow moisture to evaporate freely without settling as condensation on the heat insulator.
Facade finishing parts - metal or polymer panels, lining - are attached to the mounted frame. A block house is popular among developers - an imitation of rounded logs made of wood or plastic. The main task is to eliminate heat loss, not only through the walls, but also through the roof, foundation, floor, doors and windows.
The attic of a timber house is insulated using the following technology:
- the false ceiling is covered with a layer of vapor barrier;
- the next stage is laying and fixing thermal protection - polystyrene foam or mineral wool;
- A waterproofing layer is laid on top of the insulation and a sheathing of boards is installed.
Double-glazed windows made of metal-plastic or wood, as well as double doors with a mandatory entrance vestibule, will help to minimize heat loss. As a rule, wooden frames are chosen if the exterior decoration is planned with a block house or clapboard. White plastic windows are more suitable for buildings covered with siding.
Tools and materials for thermal insulation of buildings
Having decided on the choice of thermal insulation material, you need to prepare the necessary tools for the work:
- gloves, glasses;
- scaffolding;
- construction knife, hacksaw;
- wide tape;
- screws, dowels, screwdriver;
- tape measure, building level, plumb line;
- construction stapler;
- buckets, spatulas and brushes;
- polyurethane foam;
- fiberglass mesh;
- glue;
- facing material;
- sprayer for antiseptic treatment;
- hydro-vapor barrier membrane.
The set of tools may vary depending on the type of insulation chosen and the method of its installation.
How to properly insulate a timber house from the inside
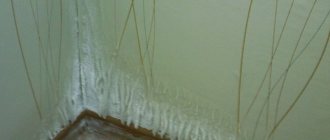
Experienced builders agree that it is correct to insulate a house made of timber not from the inside, but from the outside. The fact is that when the thermal insulation layer is placed on the side of the interior, the dew point shifts deeper into the beam. Ideally, this conditional plane should be in the outer layer of thermal protection, otherwise the wood gets wet, which leads to its rapid destruction and shortening the life of the house.
If there is no other option but to insulate the house from timber inside, you should pay special attention to the fire safety of the heat insulator. Preference is given to mineral wool or fiberglass. The sequence of actions is as follows:
- First of all, the places where the beams adjoin each other are inspected. Any cracks found must be caulked with tow or jute.
- The next step is to fix the vapor barrier film with a construction stapler.
- Then a frame is constructed from wooden blocks, in the cells of which insulation is placed. Thermal protection plates hold well due to their springy structure, but are additionally secured using “fungi”.
- The final stage is installation of the facing layer. The best option for finishing a house made of timber is considered to be a wooden block house or lining, but plasterboard, OSB boards and plywood sheets are quite acceptable.
All of the above work does not require special training; minimal skills in working with simple tools are sufficient. Any novice craftsman can properly insulate a house made of timber.
Heat loss through the floor also needs to be minimized, so laying thermal insulation materials here is also indispensable.
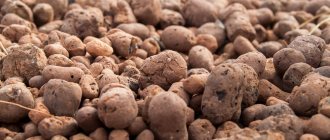
As thermal protection, you can use any of the options: mineral wool, expanded polystyrene, penoplex. If there is a need to save money, expanded clay or sawdust are suitable.
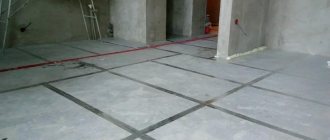
If the floor boards have already been laid, they are dismantled, then a gravel bed is poured and leveled. Next, the subfloor is poured. After some time, when the concrete has set, waterproofing work is carried out. The next layer will be insulation, which is covered with floor boards.
It will not be possible to properly insulate a house made of timber if you ignore the ceiling. Warm air tends to rise, and if it does not encounter obstacles on its way in the form of special protection, it will be difficult to maintain a comfortable temperature in the room. The same polystyrene foam, mineral wool, penoplex, and polyethylene foam are used as insulation.
Of course, the most difficult thing to work with is bulk materials - expanded clay and sawdust. But it should be taken into account that these are the most affordable and most environmentally friendly thermal insulators.
In addition to the shift in dew point, internal insulation has another serious disadvantage: by placing a multi-layer “pie” in the premises of the house, developers significantly reduce their area. In addition, you will have to pay special attention to ventilation, since if there is insufficient air circulation, the wood is at risk of rotting. Based on this, it is considered more correct to insulate the house from the outside of timber.
Video description
What happens to the wall if the insulation is not properly insulated from the inside - in the video:
Insulation of walls from the outside: advantages and disadvantages of the method
Most often they resort to it, keeping in mind the obvious advantages compared to internal insulation:
- The usable area of the internal space is preserved;
- External work does not change the family's daily routine.
- The facade of the house is reliably protected from sudden temperature changes, which extends the life of the building.
- The correct selection of materials does not disturb the microclimate of the rooms (the house “breathes”).
- You can decorate the facade to your liking or improve the appearance if the wood has darkened over time.
- If the technology is followed, the wood will be additionally protected from damage.
- Ease of monitoring the work of the construction team.
The main disadvantage of external insulation is the need to carry it out in good weather; in cold and damp weather there is no point in doing this.
See also: Catalog of companies that specialize in insulating country houses.