What is a roofing “pie” and how to “cook” it? Do you need a “warm” attic (attic) in a private house? The main similarity between a confection and a roof is the presence of layers. In this article we will look at why these layers are needed and what role they play in the roof.
The issue of the roofing “pie” is more relevant for houses with a heated attic or attic. This does not mean that a “cold” attic does not have a layer structure. But the roof in an unheated room has a simpler structure. Let's compare the structures of the “cold” and “warm” pie.
Installation stages
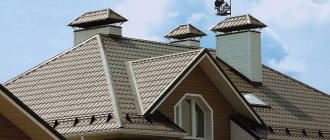
Let's figure out how to properly install metal tiles so that they last a long time. When laying the membrane to protect against moisture, it should be taken into account that it should remain with a slight sag, about 20 mm. In this way, it will be possible to ensure the drainage of condensed moisture, thereby protecting the rafter system and other roofing elements from rotting. To allow water to evaporate in a timely manner without stagnating and thereby creating an unfavorable environment, care should be taken to include in the design a ventilation gap, which is placed between the moisture-repellent film and the roof ridge.
This technology for installing metal tiles implies that the clearance will allow air flows to easily circulate in the space under the roof, removing all condensation. The laid membrane must be free of ruptures and other damage. To secure it, it is best to use a construction stapler. The layers of the membrane are laid with a slight overlap, and its edges are sealed with tape.
The design of the roof with a cold attic is such that it can be used in regions with any climatic conditions. Quite a lot of people believe that this type of roofing is not applicable to northern regions, although in fact this is not the case. Often, cold attic spaces are most often installed in such regions. The attic itself is insulated, and the cold roof does not in any way affect the internal microclimate of the upper floors. You don’t even have to use the attic, because laying a layer of insulation between the top floor and the under-roof space eliminates all the nuances that affect heat loss.
When installing a cold roof made of metal tiles, it is necessary to take care of the thermal insulation of ventilation openings, chimneys and exits to the attic. In this case, you will not have to worry about the accumulation of condensation, icing, heat loss, or the flow of rain and melt water.
Expanded clay, vermiculite, perlite
These bulk insulation materials are made from mineral raw materials - clay, shale, volcanic rocks. High-temperature swelling results in the formation of porous granules with low thermal conductivity.
Mineral materials do not burn, tolerate waterlogging well, and shrink little. But there is a significant drawback - it is quite heavy in comparison with fibrous or polymer heat insulators.
A higher load may not be critical for load-bearing structures if they are calculated with a margin. But bringing, pouring out and leveling several dozen cubes of expanded clay in the attic is not such an easy task. For comparison, the weight of 1 cubic meter of mineral wool weighs 50 kg, foam plastic - 35 kg, and expanded clay of fractions 5-40 mm - 300-400 kg. In terms of an attic area of 100 sq.m and a layer height of 25 cm, the result is 7.5-10 tons.
The second drawback is that a fairly thick layer is required. Its thickness should be determined by calculation. On average, it is 25-30 cm. In the southern regions, it is allowed to reduce the thickness of the insulation to 15-20 cm. In the northern regions, it should be increased to 35 and even 40 cm.
Bulk materials must be protected from moisture from steam. To do this, a vapor barrier made of dense film is spread on the base under the insulation layer. There is no need to cover the top with anything; moisture evaporation should occur naturally.
Installation of vapor barrier for ceiling in wooden floors
Ceiling vapor barrier device
The ceiling is attached to the lathing, the thickness of the slats is usually 2-3 cm. This is followed by a layer of vapor barrier and insulation. So the thickness of the thermal insulation is slightly less than the height of the floor beam, this allows you to create an air gap for ventilation.
The rubber-cork backing on the floor beams performs the shock-absorbing and waterproofing function of a wooden ceiling. To avoid the negative effects of moisture, the ceiling must have double protection: waterproofing on top and vapor barrier on the bottom.
Preparation
It all starts with preparation for the installation of a vapor barrier. To do this, carry out the following steps:
- Clean the surface from dust and debris.
- Cover the cracks with special compounds.
- Prime and dry the ceiling.
Stages of installing insulating material using the example of vapor barrier films
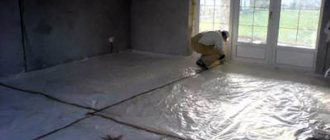
Mount the pre-cut film to length on the inside/outside of the ceiling in a wooden ceiling with overlapping strips of 10-15 cm and fasten with a construction stapler. The film is mounted with its clean side facing the insulation, and with the logo facing out. To obtain strong and reliable connections at the joints, use a special waterproof mounting tape (for example, Ondutis ML), and the places that are adjacent to the passage elements and surfaces are additionally insulated with tape (for example, Ondutis BL)
It is very important that the insulating material covers the ceiling completely (in a continuous layer) and without gaps. The vapor barrier should lie freely, without tension. Professionals recommend that the material sag a little
This ensures a safety margin and the vapor barrier will not break during sudden temperature changes. wooden blocks are fixed on top of the installed film for installation of interior decoration.
Calculation of the number of elements and their sizes
The calculation of floor beams, their cross-section and the step between them must be known in order for the attic floor to be as stable as possible for the loads placed on it. To do this, the developer must understand for what purpose the attic will be used. The classification is as follows :
- unused premises;
- storage space;
- living space.
There are standards for each listed type. So, the initial value is the weight of the ceiling itself, which consists of wood and light insulation; it is equal to 50 kgf/m² (kilogram-force per meter²).
For non-residential premises on which there will be no furniture, unnecessary things, etc., the specific gravity, according to the SNiP table, is 100 kgf/m².- The room where equipment, old furniture, boxes, boxes and the weight of the person himself are stored has a mass of 200 kgf/m².
- A living space equipped as an attic floor, with insulation, furniture and constant human visits, has a weight of 300 kgf/m².
Thus, we add the weight of the living space to the initial value of 50 kgf/m² and, checking the SNiP table, which takes into account the dimensions and pitch of the beams for each weight, we calculate the required lumber.
RECOMMENDATIONS FOR ELIMINATING CONDENSATION CONDITIONS IN A COLD ATTIC
1. It is necessary to ensure constant air exchange (inflow of external air and exhaust of internal air) throughout the entire volume of the cold attic in order to lower the relative humidity of the air and remove (dry out) the condensate formed. (see example below in Fig. Diagram of a cold attic)
2. It is necessary to replace the smooth impermeable waterproofing under-roof film with a special anti-condensation membrane. The essence of the work of anti-condensation membranes is their ability to neutralize the formation of large drops of condensation on their inner surface (due to fluffiness), and also to allow moisture to pass out and not into the room. Attic condensation does not drip or flow from such a film, because its excess is filtered outside the film or dried inside the attic. And condensate from the surface of the roofing material (roofing condensate), dripping onto the outer surface of the membrane, flows down it without penetrating inside (see Fig. Node A).
Cold attic design diagram
Cold attic roof eaves design. Node A
Compliance with the recommendations in accordance with paragraphs 1 and 2 ensures the absence of condensation on the internal surfaces of the roof structure and high performance properties of the attic insulation.
The main reasons for the appearance and methods of eliminating condensation on the roof are also described in detail in a special article.
This article was written based on the results of the work of an expert from the AkaDOMiya portal on a specific country house located in a holiday village in the Moscow region, 50 km from the Moscow Ring Road along the Novo-Rizhskoye Highway.
AkaDOMia experts will always come to your aid in matters of construction, repair and arrangement of a country house: “Call an expert builder to your home”
| rating: 2
The roof and attic are designed to protect from wind, cold and dampness. Sometimes they themselves become a source of inconvenience: not only do they not interfere with the penetration of moisture, but they are also abundantly saturated with it. Without solving this problem, it is difficult to count on comfort in the house and its durability.
Is it possible to use roofing felt?
Sometimes roofing felt and its analogues are used as waterproofing for pitched roofs. But these materials are intended for waterproofing flat roofs over a continuous floor.
The technological map of the TechnoNikol company for the installation of bitumen roll materials indicates that the roofing material is attached to the base using mastics or by fusing.
Mechanical fasteners at large roof slope angles are used as additional “point” fixation to prevent bitumen waterproofing from slipping in hot weather. And this limits the scope of use of roofing felt on pitched roofs.
On those roofs where the slope angles are large and the technology for laying the roof is continuous, lathing is not needed, it is not economically profitable to install it, even though roofing felt is cheaper than waterproofing films. But only mechanical fastening along a row sheathing does not provide sufficient reliability of fixation due to the low tensile strength of roofing material.
Average cost of work in the Russian Federation
The cost of installing an attic floor is calculated per 1 m². The price depends on the included work. As a rule, complex installation consists of :
- installation of wooden beams;
- insulation and hydro-, vapor barriers;
- installation of subfloor and ceiling.
Sometimes the job involves sealing seams, sometimes not. The price may vary depending on the thickness of the insulation. For cold regions, more of it is needed, so workers install it in 2 layers, hence the cost of work increases.
On average, installation of floors in Moscow and the region costs 500-850 rubles . In St. Petersburg, maintenance crews perform complex installations for 400-800 rubles. excluding materials.
Do-it-yourself attic insulation
Creating a warm attic is definitely not a DIY job. This is because there is work to be done on the roof itself, and damage to it can have dire consequences on the stability of your entire home.
However, it is possible. If you are planning to do any work in your attic, there are a few safety issues to consider before you begin.
- If you are working in an attic without a floor, crawl/tip boards must be installed to ensure safe movement. They can be temporarily fixed in place to eliminate the risk of creating traps or movement.
- Make sure your attic is well ventilated and free of condensation.
- Make sure the attic is well lit so you can see exactly what you are doing. Ideally, try using several LED lights in different locations - LEDs don't get hot and produce a powerful, bright white light.
- Wear a protective face mask to prevent inhaling dust particles.
- Crawling on your knees for any length of time can be quite debilitating, so you may also benefit from using knee pads.
- Finally, if your home was built before 2000, there may be asbestos-containing materials in your attic. If you suspect there is, read the next section very carefully.
Dangers of asbestos
Asbestos fibers
As mentioned above, it is possible that there are asbestos-containing materials in your attic. Asbestos has been used for thousands of years due to its fantastic properties (durable, fire-resistant, acid-resistant, alkali-resistant, heat-resistant and non-conductive).
Its harmful qualities were discovered only relatively recently. Exposure can lead to a serious long-term lung disease called asbestosis or mesothelioma, which is a type of cancer that develops in the lining that lines the body's organs.
So how do I know if I have asbestos in my attic? If your house was built before 2000, then the likelihood of it being in the attic is high. After this date, it began to be used much less frequently.
You won't know you have asbestos in your attic (or anywhere else in your home) until a professional comes and checks. Asbestos fibers are invisible to the naked eye and have no taste or odor, so it is difficult to tell for sure just by looking at part of the house. For this reason, asbestos is known as the "hidden killer."
Fire safety
The danger of a fire in the attic cannot be underestimated; it can lead to tragic consequences. Therefore, it is worth considering fire safety recommendations:
- Even at the stage of building a house, it is necessary to provide measures to protect all structural elements from fire. This is especially important for houses using wood. Currently, there are many types of protective impregnation for wooden parts. Its use makes wood a less flammable material and reduces the risk of fire.
- When insulating an attic, the choice of materials should be made taking into account their resistance to fire and the absence of toxic emissions during combustion.
- If there is electrical wiring in the attic, it should only be carried out by specialists.
When should you use ceiling waterproofing?
The material is designed to protect structures from moisture. High-quality waterproofing of the ceiling against leaks from above is required in private buildings, where it has not yet come to repairing the roof, and in multi-storey residential buildings in the kitchen and bathrooms. Installation of waterproofing is required not only in residential premises with high levels of humidity, but also in open spaces (loggias, balconies), in rooms with no or variable heating - attics, basements. The materials protect decor and furniture, minimize the risks of the formation of fungus, moss, mold, and failure of electrical wiring due to short circuits.
Types of waterproofing for ceilings and scope
In multi-storey buildings, it is easiest to waterproof the ceiling from the inside of the premises. A variety of materials are used in composition, type and type of application.
Let's consider the properties and types of waterproofing products:
- Adhesive based materials. These can be polymer products: polyethylene, vinyl plastic and non-polymer products - fiberglass, roofing felt, roofing felt. The use of materials is limited by the complexity of installation and the use of a burner. It is most convenient to install insulation on balconies and loggias.
- Penetrating ceiling waterproofing. It is considered one of the most convenient options for multi-storey buildings due to the long service life of the protective layer. The mixture is applied to a damp surface; during the wet process, the active components are converted into insoluble crystals, forming high-quality protection for the ceiling against leaks. Application is indicated on concrete surfaces, the composition fills all cracks, microscopic cracks and increases the strength of structures by 15-20%. The mixture is also considered safe for health and does not limit air exchange processes in the premises.
- Coating materials. There are bitumen-polymer, cement-polymer, bitumen-rubber. Low cost, lightness and ease of application are advantages. The insulation is laid out layer by layer, in 1-2 layers, then be sure to plaster the coating.
- Plastering. Special compositions for waterproofing include additives and polymers that give the mixture water resistance. After hardening, a smooth surface is obtained that prevents the penetration of moisture. Plasters are suitable for processing concrete and brick structures. It should be applied to a previously leveled and dried base.
- Powder formulations. They are a mixture of resin, cement, and plasticizers. The powder is diluted with water and applied to a dried base. Waterproofing is rarely used, as it quickly deteriorates due to mechanical stress. The group includes paints and varnishes, gels, bitumen and rubber emulsions, as well as compositions based on latex and other waterproof elements. Pros: economical consumption, affordability. Cons: short service life. Can be used on any surface, including wood.
The last option is water repellents. A new universal type material suitable for any type of base. Application technologies differ: by painting or in the form of a plaster layer. The result is a water-resistant elastic coating that protects the ceilings from moisture. Advantages: ease of use, versatility.
Choice of insulation
The methods of insulating the ceiling of the upper floor of the ceiling along beams in a private house are very diverse. When doing the work yourself, the insulation is placed between the joists and provides reliable thermal insulation and noise protection. There are many options for insulating a structure, the most common of which are:
- insulation with mineral wool;
- laying expanded polystyrene (foam plastic or penoplex) on wooden beams;
- filling with expanded clay;
- insulation with sawdust;
- filling the ceiling space with foam.
Each of these options has its own characteristics and advantages.
Mineral wool insulation
The material is available in two versions: plates and rolls. Insulating the attic floor with mineral wool has the following advantages:
Styrofoam
Foam plastic has become one of the most common materials for thermal insulation. It has earned its place in the top three thanks to its very attractive price. Using this insulation in an individual home provides the following advantages:
- high degree of protection;
- resistance to rotting and mold and mildew;
- low degree of water absorption;
- ease of installation and no need for complex tools and protective equipment;
- the light weight of the material prevents excessive load on the structure and allows for insulation from below.
Extruded polystyrene foam
More often this material is called a shorter word - penoplex.
Being the closest relative of foam plastic, penoplex is devoid of most of its disadvantages. In the process of improving performance characteristics, the cost has increased. The material is produced fireproof, it has sufficient strength for use as a base for flooring and is light in weight for use in ceiling construction. Do-it-yourself installation is quite simple. This issue is discussed in detail in the article. The text discusses options for using both penoplex and polystyrene foam for different types of floor construction.
For people who decide to build their own wooden house, the naturalness of the materials is usually important. Here penoplex, like foam plastic, loses to other types of insulation due to its artificial origin.
Expanded clay or sawdust
If you decide to use completely natural materials in your home, these two types of insulation will become indispensable helpers. They do not have high heat-protective characteristics, like previous types, but provide reliable protection from the cold with a sufficient layer thickness. Sawdust can be obtained almost free of charge; expanded clay is also an inexpensive material.
Insulation of the attic floor can be carried out by non-professionals and does not require special skills. The application is limited by the physical characteristics of these materials: they cannot be used for thermal protection from below.
Heat protection foam
Polyurethane foam insulation is a fairly new material in construction. When constructing a building yourself, this method can provide high speed work and reliable protection from the cold. You can read about insulating a building, including attic floors, with foam in the article.
This provides a large selection of materials for insulation and significant savings on construction.
A large percentage of heat losses occur precisely through the ceiling of the upper floor, which is why it is so important to choose the right insulation and follow the installation technology. Are you insulating your house for winter and don’t know how to insulate the attic floor using wooden load-bearing beams? Having gained experience in this matter, I will accurately convey the technical aspects of thermal insulation, and also describe step by step the procedure for carrying out the work
Are you insulating your house for winter and don’t know how to insulate the attic floor using wooden load-bearing beams? Having gained experience in this matter, I will accurately convey the technical aspects of thermal insulation, and also describe step by step the procedure for carrying out the work.
Roofing system diagram
The reliability and durability of the roof directly depends on how well the “roofing pie” is designed and made. Each structural element in it performs its own functions, and together they provide tightness, the necessary rigidity, strength, and a sufficient level of heat and sound insulation.
Figure 6. Correct metal roofing scheme
The roof structure made of metal tiles includes the following structural elements:
- The rafter system is the main roof structure that absorbs loads and transfers them to the lower load-bearing elements of the building.
- Vapor barrier is a special membrane that acts as protection against the penetration of moisture-saturated steam from warm rooms to the insulation and elements of the rafter system. It is attached from the inside of the roof to the rafters with a stapler, ensuring that the individual sheets overlap by at least 100 mm. The joints are taped with special double-sided tape.
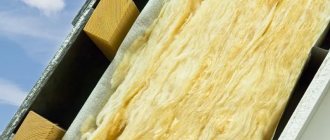
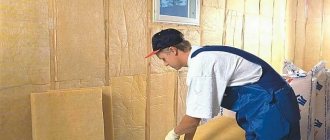
- Thermal insulation is a layer of insulation (usually mineral wool is used) that ensures optimal temperature conditions in a heated attic. Fits between rafter legs.
- Vetrohydroprotection is a specialized membrane to protect the under-roof space from moisture penetration and blowing out of insulation. It is attached on top of the thermal insulation to the rafters on the outside of the roof.
- Lining - serves as a finishing or rough finishing of the attic floor and a supporting surface for laying thermal insulation material.
- Counter grille - needed to provide the ventilation gap necessary for air circulation in the under-roof space. It is constructed from bars with a cross-section of 50x50 mm, which are attached directly on top of the rafter legs in the same direction.
- Lathing is the basis for fastening metal tiles. It consists of boards located perpendicular to the counter-lattice bars.
Experts recommend constructing the lathing after selecting and purchasing metal tile sheets, since the main geometric parameters (working width, wave length and height) may vary slightly depending on the model, manufacturer, etc.
Figure 7. Standard metal tiles - drawing with main dimensions
Application of extruded polystyrene foam
Polystyrene foam (expanded polystyrene) is a loose material, so it is used when it is necessary to insulate a floor made of joists and beams. For thermal insulation of slabs, extruded polystyrene foam is used, which is denser than conventional foam.
Before laying it, the surface of the base is leveled. On the warm side of the floor, vapor barrier is not needed, since concrete slabs have virtually no vapor permeability. A vapor barrier film is laid out on the prepared base. Then slabs of extruded insulation are laid out in a checkerboard pattern. Polyurethane foam is blown into the joints.
Review of the main vapor barrier manufacturers
There are several popular vapor barrier manufacturers on the market:
- surpasses all other companies in quality (according to the Test Purchase program).
- does not lag behind the leader either in quality or in the use of the latest technological developments. This is a domestic company that produces a very high quality product.
- The product is good for both industrial and residential construction, but is not suitable for creating temporary roofing.
Not included in the top three:
- Polish - the company's products are distinguished by the fact that they can withstand very low temperatures.
- "Ondutis" - low prices, excellent connecting tapes, rolled materials.
- Tyvek products provide ideal wind protection.
- German DELTA - steam and wind protection.
Causes
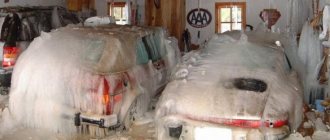
The physical essence of the phenomenon is quite simple: condensation appears whenever cold and heated air meet each other. Only by reliably separating them and not allowing them to enter into “close contacts of the wet kind” can ideal dryness be achieved. Experienced builders know how to achieve this, so you shouldn’t skimp on their services.
The technical reasons why dew forms in the attic are as follows:
- low quality roof insulation;
- weakness of thermal protection;
- lack of ventilation under the roof itself;
- errors when laying protection against steam or water;
- poor installation of windows, slopes and roof doors.
What they have in common is that all of these are the consequences of technological errors, defects or improper savings on materials. Attempts to save money in this way are a serious mistake, since eliminating condensation that appears is much more difficult than avoiding its occurrence. A cheap film seems to perform the task of waterproofing, but a surface impenetrable to steam will prevent condensation from evaporating. It can only fill in the insulation or seep onto the surface of the finishing material.
Cause of condensation in the attic
Regardless of whether your attic is cold or warm, condensation will form for one of the following reasons:
- the thermal insulation of the roof was performed poorly or it is simply weak;
- during installation, the builders completely ignored the so-called ventilation under the roof;
- mistakes were made during vapor barrier or waterproofing;
- the slopes and roof windows were installed unprofessionally.
In other words, condensation was the result of technological violations during operation. Also, many are trying to save on materials. This is a serious mistake, since correcting it will cost you much more than the initial expenses on craftsmen and good materials. For example, a very ordinary layer of impermeable film was placed under the roof for waterproofing. On its smooth surface, ideal conditions will be created for the formation of condensation in a cold attic, since it simply will have nowhere to go except to drip onto the insulation layer or the eaves.
This is interesting: Do-it-yourself production of heat blocks
Mistakes when installing roof windows
When constructing an attic, you need to install attic windows correctly - with high-quality insulation of their frame around the perimeter to the entire thickness of the roof’s thermal insulation layer and maintaining its tight connection with the vapor and waterproofing layers of the roofing “pie”. Mistakes are often made when creating internal window slopes. According to the requirement of GOST 30734–2000 “Wooden attic window blocks. Technical conditions", the lower slope should be perpendicular to the floor plane, and the upper slope should be parallel to it. In addition, a heating system radiator must be installed under the window (even if there are heated floors). This allows for convection of warm air along the window opening to prevent freezing of the window and the formation of condensation on it. Meanwhile, in many attics there is either no radiator under the window, or, if there is one, the upper and lower slopes are located perpendicular to the roof slope, which results in the appearance of a cold zone in the window area, and within one or two years after installation it begins to “leak”.
Methods
Insulation of the attic floor in the bathhouse must be done in any case. It is this element that is the last line that traps heat inside and prevents the penetration of cold air. There are three methods of thermal insulation - hemming, flooring, panel.
Grazing
A simple method that is suitable for inexperienced builders. To complete it you need a small amount of building materials. Floor ceilings cannot be installed in rooms whose width exceeds 2.5 meters. The flooring should rest only on load-bearing walls, and not partitions.
Laying features:
- The maximum distance between load-bearing walls is 2.5 meters.
- The minimum thickness of the boards is 50 mm. They must be of high quality, free from cracks, knots, and rot.
- Before nailing the boards, they need to be sanded and coated with an antiseptic.
Flooring assembly process:
- Attach the prepared boards to the wall beams.
- Lay a vapor barrier film and attach it with a stapler.
- Lay mineral wool in rolls or slabs.
You can make homemade insulation - sew flat bags from waterproof fabric, fill them with padding polyester, foam rubber, red moss or dry pine needles. When installing a floor ceiling, the attic cannot be used as a room.
Hemmed
Build process:
- Cut the lumber to the required size, correct any unevenness, and coat it with a protective antiseptic.
- Since stove equipment that runs on solid fuel is often installed in bathhouses, it is necessary to consider the location of the chimney. Install a special sleeve in the selected location. You can make it yourself from metal sheets or buy a finished product at a hardware store.
- Secure the vapor barrier film over the ceiling beams. Fix the individual sheets overlapping each other, with an overlap of 10 cm. It is recommended to seal the seams with metal tape.
- Hem the ceiling with pre-treated boards.
- Secure the foil insulation, which is nailed down with slats.
- On top of the vapor barrier film, which runs along the ceiling beams, make a wooden frame from 50x50 mm bars.
- Insert mineral wool slabs into the sections.
- Install a vapor barrier membrane. Cover it with slats to create a ventilated gap.
You can fix the lining on top of the slats.
Panel
Build process:
Panel thermal insulation involves the assembly of a massive panel. Its base is two beams measuring 50x100 mm. Place the bars on the floor in front of you, leaving a distance of 50 cm between them. Align the edges in one straight line. Prepare the boards, cut them 60 cm long. One edge should protrude 50 cm
It is important to choose boards of the same thickness (25–30 mm). Make a shield. Attach a vapor barrier film to the inside of the structure. Place mineral wool on top of the film, tightly to each other.
Several such panels need to be prepared to insulate the entire ceiling. The finished structures are laid out on top of the last crown. The modules are connected by jumpers. They are attached to the crown with self-tapping screws.
On top of the finished flooring, it is necessary to lay another layer of vapor barrier and fill the slats to create a ventilation gap.
Materials and tools
The table shows the materials and tools for each stage of work.
| Lumber | Fastenings | Insulation | Tools | Chemistry |
|
|
|
|
|
Summary
The design of a cold roof is similar for all types of finishing coating, only the types of lathing differ:
- For metal tiles - horizontal sheathing with a pitch equal to the pitch of the wave;
- For corrugated sheeting - horizontal lathing with a pitch depending on the type of sheet and the slope of the roof;
- For soft roofing - continuous flooring.
It is important to choose the right waterproofing - a vapor-permeable membrane. If a decision is made to install a roof without a moisture-proof layer, it is necessary to take a particularly responsible approach to the choice of the finishing coating and its installation.
The ventilation gap will ensure the safety of wood components from rotting and create natural steam removal, which will significantly extend the life of the roof.
Characteristics
The main characteristics of the panels as a thermal insulation material exceed those of the most popular insulation materials. If we compare the thermal conductivity, then for Teplofom it is in the range of 0.028-0.032 W/(m*°C). For comparison, this figure is: for foam plastic 0.033; glass wool - 0.04; mineral wool - 0.05 W/(m*°C). From which it follows that insulation with such panels will allow you to retain better heat in winter and coolness in summer.
An important characteristic for thermal insulation material in the attic is water absorption. It shows the ability of a material to absorb moisture and is measured as the percentage of water absorbed over a certain period of time when the sample is completely immersed. The indicator for Teplofom is 0.1%, which is significantly less than foam plastic (1.5-3.5%) and incomparably less than glass wool and mineral wool (up to 70%).
The following modifications of panels are suitable for insulating the attic:
- Teplofom+ can be used for indoor and outdoor spaces and does not require waterproofing or additional ventilation. The panel size is 250x50cm, thickness from 10 to 100mm, this makes it possible to select the necessary parameters for any use case;
- Teplofom+ SP - use a tongue-and-groove connection. This allows you to speed up installation work and create durable, securely bonded coatings with minimal effort.
- Teplofom+PL - a coating of moisture-resistant plywood on both sides allows the use of such panels to create an already insulated base for the roof and floors. This results in a surface completely ready for finishing with linoleum, parquet, laminate, etc.
How to remove?
Not all builders perform their tasks efficiently, and home craftsmen often make mistakes
In addition, the finishing “pie” can deteriorate over time: it is damaged by careless repairs and improper use. Finally, a house with condensation in the attic may be inherited from the previous owners, and this problem must be solved
First of all, if condensation collects in the attic, you need to carefully study the air movement. Normally, it should be continuous and cover the entire volume of the room.
The attic should be inspected by a professional with a thermal imager; his consultation will allow him to detect any deviations from the norm. When the picture is clear, you need to check the roof formation diagram. Most likely you will need:
- change the location of the attic window;
- strengthen the insulation layer;
- make additional ventilation openings.
If you know that the attic space is getting wet due to the use of low-quality materials, you will have to change the problematic structure. The best replacement would be a membrane layer that will not allow condensation to form: water calmly comes out, but does not penetrate inside, and the lint-covered layer prevents drops from forming on the surface. It happens that even after replacing the waterproofing, the attic in a private house sweats. Then there is nothing left but to adjust the sheathing and vapor barrier layer. After all, they can also interfere with the normal movement of air masses and provoke the accumulation of dampness.
When the perforated soffits on the eaves are properly prepared, when the insulating layer is laid on the rafters themselves and under the metal tile sheathing, then the insulation will not become damp. There is a popular myth that venting causes heat loss in the attic during the winter months. In reality, the situation is different: the cause of excessive cooling is associated with poor thermal insulation.
When it is done poorly, the dew point ends up inside the roofing “pie” or on its surface. Therefore, moisture is deposited continuously, and the ceilings begin to rot.
Ventilation of the attic space is also necessary during the cold months, since otherwise icicles will appear inside, then fungi and mold will form. It is necessary to make holes of a certain size for air passage. Excessively small openings have almost zero efficiency. According to experts, for 500 sq. m of total area, you need to create 1 m2 of holes for ventilation. This proportion simultaneously allows:
- guarantee fresh air;
- get rid of condensed moisture;
- prevent hypothermia in a cold attic or attic.
The fight against dampness under an unheated wooden roof has its own characteristics. It is unacceptable to cover the rafters, as well as the sheathing. If they are sutured, it is necessary to provide gaps to support air circulation. Under sheets of slate or ondulin, laid without vapor barrier and wind barrier, there is no need to carry out additional ventilation work: air flow moves freely through the roof waves.
Placing ventilation passages inside the gables will help increase the ventilation efficiency of gable roofs. When using stone fronts or the impossibility of refusing to fit materials tightly, it is necessary to prepare holes in the walls (minimum 0.2% of the total floor area).
Elimination of dampness is possible with the help of more economical materials, that is, using a standard grille: one copy of it is turned with the holes downwards, the other requires periodic adjustment. A mosquito net becomes a reliable barrier against the penetration of various harmful insects.
It is also possible to avoid the appearance of wet areas under a hip roof, but a different technological method is used for this. The inlet for fresh air is located at the bottom of the hem, and it should exit near the ridge. Overhangs lined with wood are formed from loosely placed timber, which separates the gaps by fractions of a centimeter. Plastic linings are equipped with holes for air access.
The holes in the roof ridge should be brought as close together as possible. Often, continuous soffits are installed under the eaves, which are equipped with a thin mesh screen. The cells of such networks must be plastic or aluminum, otherwise there is a high risk of corrosion. It is advisable to equip the spaces between the rafters with vents, and the openings are arranged so that there is no air pollution and its movement is not complicated.
Roof slopes
Roof slopes need to be insulated only if the attic space is planned to be made residential. This is a rather problematic solution - organizing an attic requires excellent knowledge of building physics and intense attention to each layer of the roof structure.
The air in a living room is saturated with moisture vapor that rises. If moisture penetrates into the thickness of the insulation - almost any! – its thermal insulation properties will deteriorate, so there must be a high-quality vapor barrier in the path of warm air. It is necessary to ensure that the joints of its panels and the junctions with the walls are carefully taped with special tapes. The other side of the coin is that absolute vapor tightness leads to disruption of the comfortable microclimate, so in attics it is preferable to use more expensive and modern diffusion membranes. Or often (and in fact, almost constantly!) ventilate the room. Another point that is extremely important when organizing an attic is the presence of a ventilation gap that helps remove moisture from the insulation if it does get there.
If the attic was initially included in the project, then in the vast majority of cases the roof insulation is carried out from the outside, before the installation of the finishing coating. There is a vulnerable point in this technology - when the insulation layer is laid, but not yet covered with roofing material, sudden rains are very dangerous. If the owner wants to avoid this risk, then it is advisable to lay thermal insulation material from the inside. This solution has a lot of advantages - in particular, it will be possible to do insulation after the end of the main construction season, in bad weather.
Insulation of the roof outside the house
To insulate the attic from the inside, it is necessary to place strips between the rafters that will hold slabs or rolls of insulation. The step between them should be 40-50 cm. The thermal insulation material is carefully placed in the resulting “pockets”, the sheathing slats are nailed, which will finally fix the insulation, the vapor barrier layer is installed and its joints are carefully glued.
Insulating the attic from the inside
In addition to slab and roll insulation, you can use various sprayed materials. They are also effective, however, their application requires expensive professional equipment and appropriate skills. We examined insulation for pitched roofs in more detail in this article.
