In heat and mass transfer, air condensation is one of the fundamentals of the theory. Considering humidity is important in many areas of construction and design.
Before calculating the dew point when insulating walls, you need to figure out what this indicator is and what initial data is needed to find it.
To keep your house dry and warm, you need to correctly calculate the dew point when insulating the walls.
Areas of application
There are many areas that take this temperature into account. One of the areas is aviation. During aircraft operation, condensation may form on some of its parts and freeze. This leads to freezing of the engine, metal structures of the flying vehicle and its breakdown.
In forestry, fire conservationists use dew point to calculate fire hazard class.
Experts calculate the likelihood of forest fires and develop protective measures.
Most often, determining the point is necessary in construction and agriculture.
Video: Dew point - insulating the house wisely
Construction
In construction, this value is determined when insulating the facades of buildings and private buildings. If you do not take into account the indicator or calculate it incorrectly, due to settling moisture, the wall finishing material will deteriorate or pathogenic flora and mold will appear.
Agriculture
In agriculture, experts determine the likelihood of damage to crops due to weather conditions, knowing the point and atmospheric humidity.
When cultivating new plants, breeders try to create varieties that condense moisture on the vegetative parts. Such plantings can exist with little precipitation.
Finally, recommendations for those who build with aerated concrete:
- The most economical, fastest to produce and most comfortable construction for external walls is made of aerated concrete blocks of density D400 (D400). In our region, such blocks are produced only under the Twinblock brand; - If you are building a house for permanent residence, - Twinblock D400 with a thickness of 400 mm is suitable for you; - If you are building a house for seasonal residence, - Twinblock D400 with a thickness of 300 mm is optimal for you;
- Aerated concrete blocks cannot be laid on regular cement mortar. Only use special glue - mineral or polyurethane. The thickness of the seams is no more than 3 mm;
- Carefully control the quality of filling of seams (especially vertical ones) to prevent “waste”;
- Do not use metal products that “pierce” a significant part of the wall thickness. For example, metal dowel-nails for attaching insulation;
- Do not use polystyrene foam (PSB) or extruded polystyrene foam (EPS) as insulation for external walls. For external walls made of aerated concrete of density D400 of sufficient thickness, insulation is not required at all;
- Use adhesives, plaster mixtures and paints with a high vapor transmission value for exterior wall finishing;
If you follow these recommendations, you can not fear the negative consequences associated with the “Dew Point”. Its appearance is a natural physical process. The main thing is to take this factor into account when choosing a wall design and follow the technology during construction!
Comfortable values for a person
For most people, conditions with a point value in the range of +10…+15℃ are optimal. If the indicator increases, then the person feels discomfort. When the point value is less than +10℃, the environment becomes dry, and from +15℃ humidity begins to be felt. If the indicator is above +20℃, it becomes stuffy. People with heart and respiratory problems are more susceptible to environmental parameters than others.
The dew point temperature determines the comfort level of living in the house
Articles on the topic
Brick sides - what they are called, characteristics, instructions, advice from masons
Beating plaster from brick surfaces using machines and manually, instructions, advice from masons
Switching from brick to sandwich - installation, pros and cons, instructions, advice from masons
How to renovate an old brick house - methods, preparation, instructions, advice from masons
Cladding the base with bricks - materials, work, instructions, advice from masons
How to install a door in a brick house - options, installation, instructions, advice from masons
Brick pediment - advantages, disadvantages, masonry, instructions, advice from masons
How to rebuild a brick house - options, techniques, instructions, advice from masons
Reviews ()
How to calculate the dew point when insulating walls
Only a specialist can make an accurate calculation. But when choosing insulation yourself, you can find out the approximate point values in several ways.
Formula for calculating dew point temperature
The calculation using the formula is considered quite accurate, but gives a deviation of 0.5℃.
Formula for calculation: Tp=(b*f(T,Rh))/(af(T,Rh)) , where:
- f(T,Rh)=(a*T)/(b+T)+ln(Rh/100);
- a = 17.27 and b = 237.7 are constants;
- T —air temperature;
- Rh —relative humidity.
Using an online calculator
Not every person is able to calculate the value using the formula. For such cases, we came up with an online calculation calculator. All you need to do is enter the temperature and relative humidity. The result will appear on the monitor.
Application of devices
To calculate the value, you first need to determine the parameters by which the calculation will be carried out. This is done using meteorological instruments. To avoid using a separate thermometer and hygrometer (a device for measuring humidity), a thermohygrometer was invented. It simultaneously measures the necessary parameters and displays the values on the screen.
Using a thermohygrometer you can calculate the dew point temperature
In addition, there is a device that itself is capable of calculating the point. The tool is brought to the desired surface, records the values and stores them in memory. The results can be transferred to other media for later use.
Using table data
Using the table, you can quickly determine the point, knowing the necessary parameters. The value you are looking for is at the intersection of the column and row of the two indicators. However, the tabular data provides only approximate results.
Water vapor in the wall - where does it come from?
In order to understand what consequences will result from the absence of a ventilated gap in walls made of two or more layers of different materials, and whether gaps in walls are always necessary, it is necessary to recall the physical processes occurring in the outer wall in the event of a temperature difference between its inner and external surfaces.
As you know, the air always contains water vapor.
The partial pressure of vapor depends on the air temperature. As temperature increases, the partial pressure of water vapor increases.
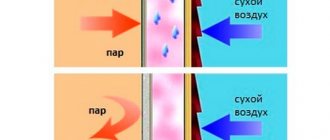
During the cold season, the partial vapor pressure indoors is significantly higher than outside. Under the influence of pressure differences, water vapor tends to enter an area of lower pressure from inside the house, i.e.
on the side of the material layer with a lower temperature - on the outer surface of the wall. It is also known that when air is cooled, the water vapor contained in it reaches extreme saturation, after which it condenses into dew.
Dew point
- this is the temperature to which the air must cool so that the vapor it contains reaches a state of saturation and begins to condense into dew.
The diagram below, Fig. 1, shows the maximum possible content of water vapor in the air depending on temperature.
| Fig.1. Dew point temperature chart. The maximum possible vapor content in the air depending on temperature. |
The ratio of the mass fraction of water vapor in the air to the maximum possible fraction at a given temperature is called relative humidity,
measured as a percentage.
For example, if the air temperature is 20 ° C and the humidity is 50%, this means that the air contains 50% of the maximum amount of water that can be there.
As is known, building materials have different abilities to transmit water vapor contained in the air, under the influence of the difference in their partial pressures. This property of materials is called vapor permeation resistance,
measured in
m2*hour*Pa/mg
.
Briefly summarizing the above, in winter, air masses, which include water vapor, will pass through the vapor-permeable structure of the external wall from the inside to the outside.
The temperature of the air mass will decrease as it approaches the outer surface of the wall.
Dew point determination table
According to the table, at a humidity of 60% and a temperature of +20℃, the value is +12℃.
| Relative humidity, % | Thermometer temperature, ℃ | ||||||||||
| 0 | 2,5 | 5 | 7,5 | 10 | 12,5 | 15 | 17,5 | 20 | 22,5 | 25 | |
| 20 | −20 | −18 | −16 | −14 | −12 | −9,8 | −7,7 | −5,6 | −3,6 | −1,5 | −0,5 |
| 25 | −18 | −15 | −13 | −11 | −9,1 | −6,9 | −4,8 | −2,7 | −0,6 | 1,5 | 3,6 |
| 30 | −15 | −13 | −11 | −8,9 | −6,7 | −4,5 | −2,4 | −0,2 | 1,9 | 4,1 | 6,2 |
| 35 | −14 | −11 | −9,1 | −6,9 | −4,7 | −2,5 | −0,3 | 1,9 | 4,1 | 6,3 | 8,5 |
| 40 | −12 | −9,7 | −7,4 | −5,2 | −2,9 | −0,7 | 1,5 | 3,8 | 6,0 | 8,2 | 10,5 |
| 45 | −10 | −8,2 | −5,9 | −3,6 | −1,3 | 0,9 | 3,2 | 5,5 | 7,7 | 10,0 | 12,3 |
| 50 | −9,1 | −6,8 | −4,5 | −2,2 | 0,1 | 2,4 | 4,7 | 7,0 | 9,3 | 11,6 | 13,9 |
| 55 | −7,8 | −5,6 | −3,3 | −0,9 | 1,4 | 3,7 | 6,1 | 8,4 | 10,7 | 13,0 | 15,3 |
| 60 | −6,8 | −4,4 | −2,1 | 0,3 | 2,6 | 5,0 | 7,3 | 9,7 | 12,0 | 14,4 | 16,7 |
Calculation using the formula with the same initial data:
Tr=(237.7*((17.27*20)/(237.7+20))+ln(60/100))/((17.27-((17.27*20)/(237 ,7+20))+ln(60/100))=12℃
The result shows that the tabular data and the mathematical calculation coincide.
Determination methods
The dew point is calculated at the design stage. Designers use a special formula, but it is quite complex and requires special knowledge and information on the climate of the region, as well as survey information.
An easier method of calculation can be performed using this option, namely, to determine the dew point, we recommend using specially created tables, where you will need to know only two parameters: relative air humidity and its temperature.
So, with an average climatic air humidity in the region of 70% and at a temperature of +20, the desired parameter will be 15.4 degrees, i.e. it is at this temperature that the steam contained in the air will begin to turn into condensate.
Determination of dew point position
Before determining the position of a point in the wall, several indicators are recognized:
- ambient and indoor temperature;
- humidity outside and inside the building;
- wall thickness.
Video: Thermal engineering calculation. Dew point
In uninsulated walls
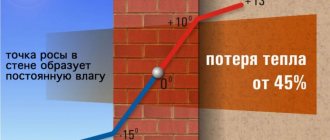
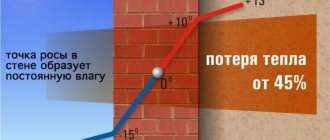
Uninsulated walls lose a lot of heat, the point is located directly in it. The material becomes damp and becomes moldy. Due to temperature changes outside and inside, the wall is subject to destruction.
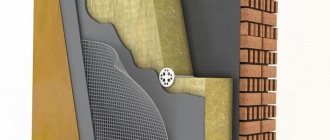
In externally insulated walls
In this case, the point is insulated, and the wall is protected from weather conditions. The ceiling is always dry, and the heat in the room is retained.
In internally insulated walls
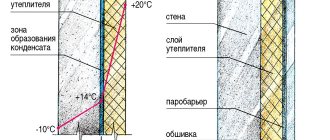
The wall outside begins to freeze and collapse. Condensation accumulates between the outside and the insulation because the point is in the middle of the layers. This leads to the proliferation of pathogenic flora.
How to avoid moisture in mineral wool insulation?
So, the dew point itself is not dangerous. Problems arise when it appears in the wall, where moisture accumulates in winter. Therefore, it is necessary to make a calculation in advance of the moisture accumulation of a multilayer enclosing structure during the heating season, using, for example, one of the online calculators. As a rule, moisture accumulation is within acceptable limits, provided that there are no obstacles in the insulated wall for steam to escape to the street.
A few tips on how to prevent fiber insulation from getting wet. They largely coincide with the recommendations for the construction of non-insulated aerated concrete walls:
- It is impossible to install finishing materials with low vapor permeability close to such insulation, for example, decorative concrete stones, clinker tiles, facing ceramic bricks, etc. They “lock” moisture in the wall. Use façade systems with a ventilation gap.
- In structures with a ventilation gap, cover the insulation only with vapor-permeable windproof membranes (in no case with ordinary films, they have low vapor permeability).
- Use only those systems of “wet” type plaster facades that are recommended for aerated concrete (that is, they have high vapor permeability of all layers). In particular, the facade cannot be finished with high-density cement plasters (more than 1600 kg/m3).
- Install thermal insulation and finishing after excess initial moisture has left the aerated concrete wall.
Thermal insulation material
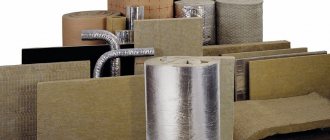
To protect buildings from heat loss, high humidity and point shifts, it is insulated with thermal insulation materials. In winter, insulation helps reduce heating costs, and in summer it keeps the room cool. Each product has its own areas of application and properties. Eco-friendly and easy-to-install materials are used in construction. The required type of insulation is selected for certain conditions.
With proper insulation from the outside, the dew point will be located inside the insulation
According to their form, materials are divided into:
- roll;
- leafy;
- bulk;
- single.
By structure:
- fiber;
- cells;
- grainy.
Raw materials can be organic, inorganic and mixed.
Main characteristics of insulating materials:
- thermal conductivity;
- moisture absorption;
- porosity;
- humidity;
- density;
- vapor permeability;
- specific heat;
- strength, etc.
Penoplex
Penoplex is also called expanded polystyrene. Unlike foam polystyrene, the material has a higher density and is less subject to mechanical damage. It almost does not conduct steam due to its low vapor permeability coefficient. However, it belongs to group IV of flammability (it ignites quickly).
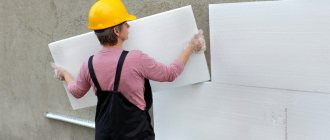
Penoplex is recommended for external wall insulation
Penoplex of the “comfort” category is produced for insulating walls, terraces, loggias, and balconies. Its thermal conductivity coefficient is 9 times less than that of mineral wool. The material requires little time to heat the room after cooling due to its low heat capacity. The operating temperature range is -70…+70℃. Penoplex of this type does not have the best sound insulation, has the lowest density and lower tensile strength compared to other materials.
Penoplex for walls is suitable only if an effective ventilation system is installed in the room to maintain comfortable humidity.
A 2 cm wide layer of polystyrene foam retains heat almost as well as 40 cm of mineral wool or 37 cm of brickwork.
Styrofoam
Polystyrene foam is a material characterized by lightness and buoyancy. It is resistant to fire, but when exposed to fire it begins to melt. The material is easy to process and is not subject to infection by fungi and mold.
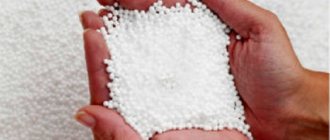
Polystyrene foam is obtained from foamed polymer raw materials: polystyrene, polyethylene, polyvinyl chloride or polyurethane. It consists of small identical balls that are fastened together. High-density rigid foam is used for insulation. The panels are easy to connect using rubber or epoxy adhesive.
The temperature range is not important for polystyrene foam, but the material is subject to mechanical damage.
Slabs 5 and 10 cm thick are used as thermal insulation. But, despite the structure, the material is sound-permeable.
Polystyrene foam is one of the most common materials for home insulation.
Mineral wool
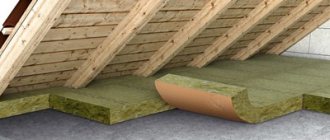
Thermal insulation material consists of compressed fibers. Glass, basalt and slag are used as raw materials. The starting material is melted and spun into fibers. Their length is 2-60 mm. The air pores of the mats fill approximately 95% of the total volume. The product is easy to produce and has a low cost.
Mineral wool has many qualities suitable for home insulation.
Due to its porosity, cotton wool allows air and steam to pass through, maintaining air exchange. At the same time, it does not burn and is resistant to moisture, has good sound insulation. But the material has 2 drawbacks:
- contains phenol;
- Flying pieces of cotton wool, falling on human skin, cause itching.
Toilet finishing options: finishing with tiles, wallpaper, panels, photos
The decoration of the toilet should not only be beautiful, but also practical. It is advisable to choose decorative coatings that do not absorb odors and are easy to clean. The most popular are wall panels, tiles and, oddly enough, wallpaper.
Plastic panels are an economical and convenient way to decorate a toilet with your own hands. The cost of one square meter does not exceed $7, and the richness of the color palette is also pleasing. The consumer today is free to choose between classic plain panels, bright samples with abstract patterns and designs, as well as sheets that imitate one or another texture (marble, wood, malachite, etc.). The length of one PVC sheet is 2.5-3 meters, this is enough to cover the entire length of the wall.
Finishing the toilet with plastic panels is possible not only on the walls, but also on the ceiling. True, unlike PVC wall sheets, the width of which is usually 30 cm, for finishing the ceiling it is better to use plastic about 20 cm wide. In this case, the decorative coating will look more harmonious and neat.
Ceramic tiles are a classic of the genre. Materials of different sizes are suitable for tiling a toilet. As a rule, rectangular elements measuring 20x30 cm are laid on the walls. In order to visually expand the interior space of the restroom, it is recommended to choose tiles coated with a glossy glaze.
The tiles on the floor also feel good. However, in this case, tiling the toilet is best done using a material with a matte surface. The rough coating will protect you from falls and injuries.
Wallpaper for the toilet is a rare but possible finishing option
When choosing wallpaper, pay attention to its properties. It is desirable that the canvas be moisture resistant and have an oilcloth surface. Vinyl wallpaper is also suitable
The latest fashion hit is the so-called liquid wallpaper in the toilet, photos of which can be viewed in our gallery
Vinyl wallpaper is also suitable. The latest fashion hit is the so-called liquid wallpaper in the toilet, photos of which can be viewed in our gallery.
Possible consequences
Improper installation of thermal insulation can lead to unpleasant consequences. The material is applied only to the facade, since additional insulation from the inside is considered impractical for the following reasons:
- Living space is decreasing.
- The wall freezes because the heat from the room does not reach the ceiling. As a result, condensation penetrates inside the thermal insulation. The wall is wet and subject to corrosion.
Poor installation results in wall destruction. If the surface under the insulation is uneven and old, it will have to be reapplied, after making repairs. If the insulation on the outside is not additionally covered, then in one season it will become wet, become unusable and begin to move away from the walls. The thermal layer must be protected from the external environment.
Video: Removing the dew point from the wall
What happens if you choose the wrong point?
The air leaving a heated room in winter will become supercooled and form condensation on all surfaces with a lower temperature. This is why the walls will be wet all the time, resulting in the appearance of harmful microorganisms and mold. And this, therefore, can cause asthma.
And the building itself will not last long - its destruction will significantly accelerate. Buildings with fungus and mold cannot last long. In this regard, the dew point should be correctly determined at the design stage. You must choose:
- material for construction;
- thermal insulation material;
- type of heating and ventilation systems;
- insulation technology.
Results
You can calculate the dew point on your own, the main thing is that the climatic conditions of the area are taken into account. If you are not confident in yourself, contact a specialized company - for a fee they will take measurements for you!
Experts' opinion
Experts believe that the best thermal insulation option is mineral wool. If installed correctly, the material will not cause harm and will last a long time. The main thing is to avoid high humidity. To do this, the cotton wool is additionally covered with a film that limits the access of moisture.
Another option is to install breathable materials on both sides of the insulation that will release liquid to the outside. It is recommended to lay polystyrene foam or expanded polystyrene in combination with materials that do not allow water vapor to pass through and prevent moisture condensation.
A short excursion into the physics of the phenomenon
The dew point is the temperature of the air at which excess moisture contained in it falls out in the form of condensation. Why is there too much of it? The fact is that warm air holds a large amount of water vapor, cold air holds much less. It is this temperature difference that forms condensation . An example of the phenomenon are drops of water on cold water pipes or windows, or fog.
What else you need to know about dew point:
- The higher the humidity, the closer it is to the air temperature, and vice versa.
- Its value cannot be higher than the air temperature.
- Condensation always appears on cold surfaces . This is explained by the fact that the warm air next to them cools and its humidity decreases.
The unit of measurement for the condensation point is degrees Celsius.
Determining the location of condensation
In order to perform the calculation you need to know:
- thermal resistance coefficients of the wall and insulation, λ1 and λ2, W/(m•K);
- wall and insulation thickness, h1 and h2, m;
- air temperature inside the house, t1, °C;
- air humidity, %;
- dew point, °C;
- temperature outside the building, t2, °C.
Before proceeding with the calculation, we assume that the temperature change across the thickness of all layers will be linear. It is necessary to find the temperature at the point of contact between the wall and the insulation. After this, you will need to construct a graph showing the change in temperature along the thickness of the wall. The constructed graph will help you find the desired point.
To do this, you need to find the ratio of the thermal resistance of the wall and the insulation. Using a special formula, it will be possible to find the temperature at the layer boundary. Knowing the temperature on one and the other side of the layer, it will not be difficult to construct a linear graph. It will be possible to track the temperature change throughout the entire thickness of the wall in order to understand exactly where condensation will form.
In which frame houses does condensation most often occur?
The problem of condensation most often occurs in frame houses for permanent residence, equipped with a heating system. It is heating that brings warm air into contact with cold air. Therefore, at the design stage, it is necessary to take into account heating, the future temperature during the heating period and take into account the dew point.
Houses that were planned for seasonal living most often do not suffer from this problem: they have a minimal difference in external and internal temperatures. That is why in countries with warm climates there is no need for heating and, accordingly, problems with condensation. But if the house is not a country house or seasonal, it is necessary to take into account the dew point during installation. In Moscow, the Moscow region and most of Russia, it is impossible to do without heating in winter, and the heating season can last almost six months or more.
