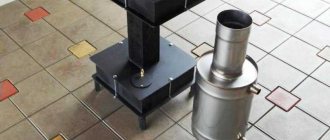
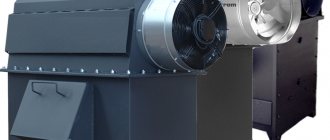
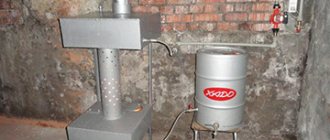
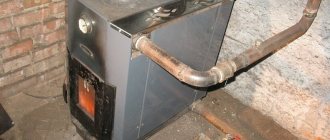
Furnace in production: options for making the device yourself
With the approach of cold weather, many craftsmen are coming up with various designs for heating the room and heating water. First of all, the question is about the type of fuel. In search of the most rational and cheapest option, many choose to work off, the average consumption of which is about 2 liters per hour. A waste oil furnace has a number of advantages. Knowing all the intricacies of its manufacture, you can create a budget-friendly and efficient source of heat in the house. Garage stove: photo examples, varieties, how to make it yourself (read more) Creating a homemade stove for mining is not a labor-intensive process.
Materials
To assemble a drip furnace with your own hands, you need to prepare:
- used 50-liter gas cylinder with a whole body;
- a two-meter metal pipe with a diameter of 100 millimeters with a wall thickness of at least 3.5 millimeters;
- for the heat exchanger and other small parts - the remains of an equal-flange metal corner with a thickness of 40–50 millimeters;
- a sheet of 4 mm steel or its trim of the required size;
- cast iron brake disc from a car, can be used;
- a regular-sized freon bottle with a needle valve;
- half-meter half-inch metal pipe;
- a hose of the required size, which is suitable for attaching to a ½-inch pipe and clamps;
- half-inch ball valve;
- door hinges and fire door latch.
In addition, pipes of a certain cross-section and a duct fan are needed to assemble an air heat exchanger. You can use a corrugated pipe or components for the chimney. To ensure a high-quality result, you should use drawings of a stove from a gas cylinder during testing.
Advantages and disadvantages of a waste oil stove
A factory or homemade waste oil furnace is characterized by a number of advantages:
- ensuring fast and efficient heating of enclosed spaces in the form of greenhouses, domestic buildings, warehouses and technical rooms;
- independence of the device from electricity and gas;
When ensuring normal operation, the stove does not create a lot of soot and burning.
- unique design features of the device that allow you to carry out the cooking process;
- ease of operation;
- no open flame;
- reliability of the structure, which is made of metal products connected by welding;
- when ensuring normal operation, the stove does not create a lot of soot and burning;
- due to its light weight and dimensions, the device can be transported;
- the stove can be made from scrap metal;
- during operation of the device, combustion of oil and its vapor is ensured;
- The stove can be combined with a water heating system by installing a tank on top.
A closed type furnace is not without its drawbacks, among which are the following:
- the possibility of clogging the supply tube with waste oil;
- the need to install a chimney with a length of at least 4 m;
- presence of hot open surfaces;
The exhaust furnace provides fast and efficient heating of various types of enclosed spaces.
- weekly cleaning of the chimney and oil container from accumulated waste;
- high probability of contamination of clothing and premises during contact with fuel;
- the container with fuel should be located in a warm room;
- unpleasant smell of used oil;
- the flame in the apparatus can be extinguished only after the fuel has completely burned out;
- if used incorrectly, the fire hazard increases;
- characteristic humming noise during operation of the furnace;
- The fuel ignites only when it is heated to its flash point.
Note! Before pouring oil into the system, it should be filtered.
Installation and first ignition of the device
If possible, the chimney should be positioned strictly vertically, and its length should be 4 meters or more. The exhaust gas exhaust pipe must be insulated. Otherwise, condensation will form. It is desirable that the stove has a collapsible design, especially for the chimney. This will make it much easier to clean the unit when it becomes clogged with soot.
Both mineral oil and its synthetic analogue can be used as the main energy resource. Do not fill fuel more than half the tank capacity. After pouring the waste, you need to leave the lower chamber damper open for a while - this will allow the fuel to be fully enriched with oxygen.
For ignition, use special fireplace matches or a wooden splinter, which is lowered into a container with fuel through a special hole. After the oil flares up, the hole in the homemade furnace during mining is half blocked. This is necessary to regulate the oxygen supply, which ensures uniform combustion of gases in the furnace of the unit.
Operating principle of a waste oil furnace
The prototype for oil furnaces operating on waste oil is kerogas, which was previously used in villages and dachas. It used kerosene as fuel, the vapors of which were burned in a separate chamber. To save on fuel, a waste oil burning option was developed. It can be purchased for free or at a reasonable cost at any service station.
Components of a waste oil stove.
Creating a homemade stove during mining is not a difficult process. The main task is to properly organize the system for a productive oil combustion process. To ensure complete combustion of vapors, heavy components must first be split into light ones, which is carried out as a result of pyrolysis. The oil must be properly heated for efficient evaporation.
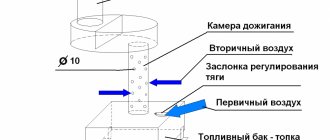
The operating principle of an oil furnace during mining is as follows. First of all, the mining is ignited in the lower chamber of the apparatus. The combustion intensity is regulated using a throttle valve in the device body, through which air enters the chamber. Oil vapor mixed with oxygen rises upward through a vertical pipe. The pipe is connected to the upper tank, which is the afterburner chamber.
The mixture is mixed under the influence of the Coriolis force (force of inertia). The intensity of the process is achieved by choosing the correct diameter and length of the combustion chamber. To ensure complete combustion, air must flow through the damper in sufficient quantity. To do this, it is additionally sucked through holes made in a vertical perforated pipe connecting the tanks.
The combustion intensity is regulated using a throttle valve in the device body.
The gas flow is directed to the final combustion chamber, in which the upper part is expanded. During its manufacture, a horizontal separation is made between the chimney inlet and the combustion chamber outlet, which is necessary to ensure a temperature jump between the nitrogen oxide and oxygen afterburning zones. At temperatures below 600 °C, nitrogen oxides are more active than oxygen. As they decompose, they oxidize fuel particles. With increasing temperature, oxygen acts as the main oxidizing agent. Harmful substances are released into the atmosphere through the chimney.
Note! To ensure efficient oil combustion in the upper tank, the temperature must be low.
Cleanable
It is definitely worth remembering that the chamber where the oil is burned must be made so that it can be disassembled during operation; this is the only way to make cleaning easier. The chimney does not need horizontal sections, since they can impair draft; in addition, there should be a minimum number of inclined sections. It is preferable to make the pipe vertical.
Waste oil furnace: types of designs
There are several types of oil furnaces that operate on waste oil. The classic model is the pyrolysis apparatus. It is made from ready-made containers in the form of barrels, pipes, cylinders or from alloy sheets. Oil is poured into the lower vessel, which splits when there is insufficient air. In the upper tank, intensive combustion of its vapor occurs, due to which a lot of heat is released.
Temperature regulation is carried out by air supply. Such a furnace requires constant cleaning of the chambers from accumulated fractions. It does not have mechanical temperature control.
Oil is poured into the lower vessel of the stove, which breaks down when there is insufficient air.
At the oil recovery stove, a guaranteed air supply to the second chamber is realized with the help of a fan. The combustion process is more efficient, so warm air evenly enters the room.
The operating principle of a stove with a drip supply of fuel is similar to the operating mechanism of diesel engines. It is economical. However, the independent process of manufacturing the device is very labor-intensive, so it is better to purchase a factory device of this type. In addition, it should be taken into account that homemade drip stoves are picky about the quality of the oil, which must be preheated before feeding into the stove.
The most efficient model is a supercharged waste oil furnace. It, in comparison with a potbelly stove, has a higher cost. Additional heat comes from blowing fans. Supercharging can be done using a car cooler motor, and the heater is blown by a 220 V home propeller.
Standard layout of a waste oil furnace.
Improvement options
The model presented above is a basic base, onto which additional elements can be attached at the request of the master. For example:
- To increase the efficiency of the stove, a heat exchanger can be built in its upper part. Passing through the labyrinths, hot air heats it, and therefore the air in the room. Then, to the method of heating with infrared radiation, air is also added.
- Sometimes a reflector is made consisting of two pipes. One of them forces cold air in; hot air will come out of the other. This option is good because the heat from this pipe can be transferred to the next room.
- You can “dress” the stove in a brick coat. When warming up, the brickwork retains heat for some time.
- You can also build a permanent water tank in the upper part and use the stove as a boiler.
- A metal tube and any container (even a plastic bottle) is suitable for making automatic oil supply, based on the principle of communicating vessels.
How to paint the stove? To make paint, you need to mix liquid glass (500 g), aluminum powder (200 g) and chalk (20 g). Mix everything. Ready!
Requirements for installation and operation of an oil furnace
It is required that the stove be located in an empty room, near which there should be no flammable surfaces. Particular attention is paid to self-made devices. They should not be placed on a shelf or other support that could catch fire.
A homemade furnace for mining should be located on a flat base, which can be concrete or brick. It is necessary that the distance between the apparatus and the wall be at least 1 m. To create good draft, the chimney must have a length of more than 4 m. Insulation should be provided on its external side to prevent the formation of acid condensation.
The used oil should not contain any solvent or other flammable element, so such components should be kept away from the furnace. It is also unacceptable for moisture to get into the container with oil. This will cause a fire in the oven. In the event of an emergency, a fire extinguisher should be used to extinguish the fire.
Note! In the room where the stove is located, there must be a good system of natural supply and exhaust ventilation.
The operating principle of a stove with a drip supply of fuel is similar to the operating mechanism of diesel engines.
Before starting work, oil is poured into a container in an amount equal to half the volume of the tank, which will provide the necessary space for the formation of vapor. For the vapors to become enriched with oxygen, you need to wait some time. Then the fuel is ignited using long matches. As soon as the process of ignition of vapors begins, the damper is closed halfway.
To increase the performance of the mini-furnace during mining, you can install a sealed tank with liquid above its upper chamber. To supply and drain water, fittings are attached to it, which are located at different levels. Another option for increasing productivity is the necessary air convection, which is carried out using a fan located near the upper chamber. By taking warm air from the stove, it helps to cool it, which has a positive effect on the life of the device.
Increasing the number of pipe bends
Increasing the bends of the potbelly stove chimney
The tank at the outlet of washing machines will retain a certain amount of heat, but it will not be able to retain all the heat. A large amount of heat will continue to escape into the chimney.
Therefore, one of the improvements that provides additional heat retention is to increase the length of the outlet pipe. A long pipe running through the room, but with good exhaust, ensures the transfer of heat from its surface, which was previously lost.
Materials and tools
- several elbows that can be easily placed in the room after the potbelly stove,
- brackets for fastening pipe elbows,
- welding machine and metal processing tools.
Instructions
First you need to mark the location of the pipe. It can pass with a large number of bends and zigzags, thereby ensuring maximum heat retention, without forgetting about the loss of exhaust draft. After marking the pipe laying location, it is necessary to install pipe mounting brackets
Particular attention should be paid to the joints of pipe elbows and corners. Brackets must be made of heat-resistant materials. Lay the pipes to ensure a tight, hermetically sealed connection, and, if necessary, modify the elbows to ensure the pipe is laid along the marked route. Firmly secure the elbows in the brackets, check the working draft (burn newspaper in front of the pipe), check the tightness of the connections, connect the inlet elbow to the stove.
DIY options for increasing the efficiency of a mini-oven
Waste oil furnaces are often used to heat a garage or small workshop. It is not recommended to use such a device in a building where people are constantly present. This is due to the fact that the stove absorbs oxygen, which has a negative effect on the human respiratory organs. If the device is intended to heat a living space, it should be located in a separate room.
It is not recommended to use such a stove in a room where people are constantly present.
To improve the efficiency of the device, additional devices can be used. A waste oil furnace with a water circuit is organized by tying the coil body or installing a water jacket on the chimney. In the first case, the coil is made of copper pipe. It is built into the heating system of the house.
The water jacket is made of sheet metal in the form of a container, which is located in the upper part of the housing. It circulates a liquid coolant. For the stove to operate efficiently, the tank must contain up to 30 liters of water. Such a device will allow you to heat a large area.
An exhaust furnace with a water circuit must be equipped with an expansion tank with an emergency drain, necessary in case of boiling of the liquid. It is not recommended to install a membrane container here.
Another option for increasing the efficient operation of the furnace is to use an air heat exchanger, which is represented by a fan. No design changes are made to the device, and the heating of the room is improved. The fan is located near the upper chamber. When it cools, the heated air spreads across the area of the room. You can also pass air through a box located on top of the stove, or through a pipe that is installed in the afterburner chamber.
An exhaust furnace with a water circuit must be equipped with an expansion tank with an emergency drain.
Heat exchanger assembly
I made the stove to heat the garage. I don’t have hot water heaters in my garage, so I decided it would be better to have it immediately heated and circulate the air. If you have water batteries, then you can abandon the air heat exchanger and simply run 4-5 water coils through the upper chamber, connecting them in parallel. In this case, the design must be supplemented with a circulation pump and fan. Such equipment will allow you to heat the entire house with a stove; you just need to allocate a room for installing the stove.
Heat exchanger assembly
Let's go back to my heat exchanger. I installed it between the smoke exhaust pipe and the stove burner - this is where the heat is greatest. I welded an iron plate to the heat exchanger. Thanks to it, the flame will be held better. It will also help distribute the fire inside the stove body.
An air swirler was installed inside the heat exchanger. There are no engineering delights in such a swirler, but it copes with its task one hundred percent. When operating at maximum power, the metal of the case heats up to a scarlet color, and the heated outgoing air even penetrates the glove. You can see the swirler itself in the photo.
I'm making a swirler I'm making a swirler I'm making a swirler I'm making a swirler
Next, I took a duct fan and placed it on one side of the heat exchanger. By the way, you can connect a thermal relay to the fan for automation. This will allow you to set the temperature yourself and save resources. For example, I decided to use a thermal relay from Autonics - I just had it lying around idle. But you can also take some budget model, for example, Vemer KLIMA. I tried it too, it works great.
I supercharged it and this is what happens
Heat is concentrated in the firebox compartment.
Popular options for pre-fabricated furnaces, their characteristics
The Teplamos NT-612 stove is often chosen as a device used for heating a garage. The power of such a drip fanless heater can vary between 5-15 kW. Fuel consumption is 0.5-1.5 l/hour.
This furnace for use in a garage is a closed type device. It is equipped with a chimney, an air supply pipe and a built-in tank designed for 8 liters of fuel. Fuel combustion occurs in the inner chamber. The operation of the device begins with electrical heating of the plasma bowl. When the required temperature is reached, fuel is supplied and air is forced into the combustion chamber. The average cost of the device is 30 thousand rubles.
Note! For normal operation of the stove, it must be preheated with a small amount of diesel fuel, which is poured into a special bowl.
Another popular model is the Zhar-25 (MS-25) stove. This device can operate not only on waste oil, but also on diesel fuel. The device operates from the electrical network, which powers the internal fan. The thermal power of the furnace varies from 25 to 50 kW. It is designed to heat a room up to 500 square meters. m. Maximum fuel consumption is 4.5 l/hour. The device has large dimensions. Its weight reaches 130 kg. This stove needs to be equipped with a good chimney. You can buy it for 45 thousand rubles.
The exhaust furnace is equipped with a chimney, an air supply pipe and a built-in tank.
List of popular stove models
Great demand for installations operating with waste creates supply on the market. The Belamos company, manufactured in Germany and Russia, can boast of good quality products. You can also highlight the following options for efficient heating:
Don't miss: How to properly heat a coal stove in a house - basic rules and features of the firebox
Emelya - exhaust heater with a power consumption of 40 W, capable of heating up to 200 sq.m.;
Heat pump NT 612 – positioned as a garage unit and suitable for small spaces;
Heat 25 – suitable for air heating with hot steam;
Master wa 33 – used for heating industrial premises;
Polarus - units from Polarus have a power adjustment function from 20 to 60 kW;
Euronord at 306 – drip design with a radial-type blower;
Typhoon is a heating device for garages, car services and workshops, thermal power ranges from 4 kW to 15 kW;
Herringbone - suitable for heating small rooms;
Thermobile at 306 – manufactured from Russia, technical or diesel fuel is used for operation;
Kronburg d15 is a convenient device at an affordable price that uses machine oil;
Multeat plus - products manufactured from Novosibirsk, are distinguished by smokeless combustion of the fuel mixture.
Some Belamos models are suitable for use in a bath; they do not emit black smoke if you follow all the rules of use. Stav products from Russia performed well. Many users learn about the features of using devices from the Thermoportal forum: stoves from various manufacturers are carefully discussed by their owners, highlighting the pros and cons.
Buleryan can be distinguished separately - the device operates in a combination of firewood and oil. To remake the model, you can arrange a door at the front of the installation to add a liquid component, and also make a reservoir. The Zhuchka stove is excellent for heating a car service center, as it is small in size and has low fuel consumption.
Ready-made installations or models made by yourself are beneficial to use: they save money, have low resource consumption and are affordable. Making the unit yourself is not difficult, and this model will last a long time.
Do-it-yourself stove made of sheet metal and pipes
Depending on the type of device, the structure can be created from pipes of different diameters or from iron sheets. To work you will need the following tools:
- grinder with cutting and grinding wheel;
- sheet metal and pipes;
- welding machine and electrodes;
- metal corners;
- metal paint that can withstand high temperatures.
Before making a furnace for testing, a detailed drawing of the apparatus is made. You can create it yourself or use ready-made options that are easy to find on websites on the Internet.
The first step is to make the lower part of the chamber connecting to the fuel tank. It looks like a rounded or straight tank with a lid where two pipes are located. The first is used to supply oil, and the second is used to strengthen the pipe that goes into the middle part of the device. Elements for the tank are cut out with a grinder and connected according to the drawing.
Depending on the type of device, the structure can be created from pipes of different diameters or from iron sheets.
The bottom and metal corners are welded to the walls of the tank, which act as the legs of the structure. To create a lid, a sheet of metal is taken and holes are made in it. The first, with a diameter of 100 mm, is located in the center; the second, 60 mm in size, is located closer to the edge. The lid should be removable, which will make cleaning the stove easier.
A pipe about 37 cm long and 100 mm in diameter is used to supply oxygen. It has holes along the entire length of the element necessary for the supply of oxygen. The pipe is welded perpendicular to the cover at the bottom of the apparatus. An air damper is fixed on it, which will be secured with a rivet or bolts. The hole under the damper should be 6 cm in size. It is intended for supplying oil and igniting fuel.
The design of the upper tank is carried out by analogy with the design of the lower tank according to the drawing of a furnace using waste oil with your own hands. The walls of the product must have a thickness of at least 350 mm. A bottom with a diameter of 10 cm is cut out of the bottom of the tank, which should be placed closer to the edge. A small piece of pipe with a diameter of 11 cm is welded to the bottom of the hole. This is necessary to connect the element to the gas combustion tank.
Before making a furnace for testing, a detailed drawing of the apparatus is made.
Since the top cover of the supercharged exhaust furnace is exposed to high temperatures, a metal sheet with a thickness of at least 6 mm should be used for its manufacture. There is an opening in the lid for the chimney pipe, which should coincide with the opening at the bottom of the container. Between these elements, a partition made of dense metal sheet is mounted, located near the smoke hole. A pipe is attached to the top of the lid, connecting to the chimney part. The self-production process can be seen in detail in the video of the furnace being tested.
Note! To give the structure rigidity and stability, a metal spacer in the form of a piece of pipe with a diameter of 200-300 mm is welded between the chambers.
How to build a stove from a pipe?
Do-it-yourself sauna stove from a pipe
One of the common homemade options is a bath stove made from a pipe. Let's consider how such construction is carried out.
Pipe is an excellent “semi-finished product” for constructing a furnace
Metal stoves can be made from a sheet of steel or, for example, from an old barrel. But if there is a piece of pipe of suitable diameter on the farm, then it is worth using this “blank”.
A homemade stove for a bathhouse made from a pipe can be made with a vertical or horizontal direction of a piece of rolled pipe. By using prefabricated stove pipes, the amount of welding work required when making sheet metal stoves is reduced.
Only high-quality pipes without signs of corrosion are suitable for the manufacture of furnaces.
If the pipe has been lying outside for a long time, it should be inspected first and reinforced in problem areas by welding patches.
Preparing parts
To make a good stove from a pipe, you will need a piece of rolled pipe with a diameter of 50 cm and a length of 1.5 meters. The thickness of the pipe walls must be at least 10 mm.
The workpiece should be cut into two parts, measuring 0.6 and 0.9 meters, respectively. A longer piece is needed to build a firebox and heater, and the remaining piece will be used to make a tank.
Making a furnace
An example of using a pipe stove in a bathhouse
- First of all, you should take care of the blower. A hole 5 cm high and 20 cm wide is cut at the bottom of a long section of pipe. A thick round steel plate is welded above the hole.
- Next, a niche for the firebox is formed and a door is made for it. The door is hung on hinges or hooks.
- A piece of pipe is welded above the firebox, which will be used as a heater. The height of the segment is 30-35 cm.
To fill the heater, you should use rounded cobblestones; in extreme cases, you can pour electrical insulators made of ceramics.
A steel coupling is installed in the upper part of the future furnace, which will be required to fix the water heating boiler.
Making a water heating tank
Assortment of pipe bath stoves
When building a sauna stove with your own hands, a water heating tank is also formed from a pipe.
- For its manufacture, a piece of pipe 0.6 m high is used.
- A steel circle – the bottom – is welded to the end part of the pipe section.
Advice! The thickness of the metal for making the bottom of the water tank is at least 8 mm
A hole is cut in the bottom of the tank to accommodate the chimney. It should be moved towards the rear wall of the tank. The chimney is fixed to the bottom of the tank by welding
It is important that the seam is of high quality to prevent water leaks into the firebox. The upper part of the tank is closed with a metal lid with holes made for the passage of the chimney and for filling with water. The chimney is welded tightly to the lid, and a neck with a lid is installed in the hole for filling water.
Step-by-step instructions for making a waste oil stove with your own hands from a cylinder
The device can be made from old items using the presented drawings of a waste oil furnace. For this process you will need a gas cylinder with a capacity of 50 liters. You should also prepare:
- pipe with a diameter of 80-100 mm and a length of 4 m;
- steel corner for making a stand and internal elements of the heat exchanger;
- sheet steel for making the bottom of the upper chamber and the plug;
For the manufacturing process of a waste oil furnace, you will need a gas cylinder with a capacity of 50 liters.
- brake disk;
- fuel supply hose;
- clamps;
- half-inch valve;
- loops;
- half-inch oil supply pipe.
An empty gas cylinder is used to make the body. You need to unscrew the valve on it, after which you should leave it outside overnight to ventilate the remaining gas. A hole is drilled in the bottom of the product. To prevent the formation of a spark, the drill must be moistened with oil. Through the hole, the cylinder is filled with water, which is then drained, washing away the remaining gas.
Two openings are cut in the cylinder. The top one will be used for the combustion chamber, where the heat exchanger will be installed. The lower one acts as a burner with a tray. The upper part of the chamber is specially made large. If necessary, it can be filled with other fuel options in the form of firewood or pressed briquettes.
A stove made from a gas cylinder will be more economical and efficient than one made from other materials.
Next, the bottom for the upper compartment of the device is made from sheet metal 4 mm thick. A burner is made from a piece of pipe 200 mm long, as shown in the drawing of a waste oil stove. There are many holes made around the circumference of the product, which are necessary for air to enter the fuel. Next, sand the inside of the burner. This will eliminate the possibility of soot accumulating on the ends and uneven surfaces.
Burner for testing: varieties, device, how to make it yourself (read more)
The furnace burner is exhausted from a gas cylinder and welded to the bottom of the upper chamber. If there are no mining reserves, wood can be laid on the formed shelf.
Bottom of the firebox chamber and burner
I cut out the bottom from steel. I decided to make the burner 20 cm long - that would be enough.
This will be the burner
I made many holes around the circumference so that air could easily get to the fuel. Once all the holes were done, I sanded down the inside of the burner. You should definitely do this too, because... soot will begin to actively accumulate on the protrusions and other defects.
First, I welded the burner into the bottom of the upper chamber, and then installed them in their proper place. You can safely lay wood on such a stove shelf. Relevant for cases when it is not possible to replenish mining reserves.
First I welded the burner into the bottom of the upper chamber
Making a tray for working off and installing a chimney for an oil stove with your own hands
According to the drawing of the stove, a cast iron automobile brake disc, which has good heat-resistant characteristics, is used to make a waste oil pan. A steel circle is welded in its lower part, which forms the bottom. At the top there is a lid through which air enters the oven.
A cast iron automobile brake disc is used to make the pan.
On a note! It is better to make the opening wide. This will provide sufficient air draft so that the oil will flow into the pan.
The next stage in the manufacture of a stove using waste oil from a gas cylinder is to make a coupling from a 10 cm long pipe that connects the burner and the pan. Thanks to this element, servicing the stove will be much easier. You can remove the tray and clean the bottom of the burner. To ensure the supply of oil, a metal tube is inserted into the hole in the housing and secured by welding. An emergency valve is installed on the pipe.
The chimney structure is made of a pipe with a diameter of 100 mm. One end of it is welded to the hole in the central upper part of the body, and the other is brought out to the street.
On a note! The chimney pipe through the wall must pass through a special fireproof glass.
By watching the video “Furnace using a gas cylinder”, you can familiarize yourself with the sequence of actions in the manufacture of the device.
Manufacturing a horizontal heater
If you lay a standard propane cylinder horizontally and install a door at the end, you will get a fairly spacious firebox that can accommodate meter-long logs. For better heat transfer and afterburning of the resulting pyrolysis gases, you need to make a secondary chamber with partitions, as shown in the drawing.
The afterburning of combustible gases in this potbelly stove is combined with the extraction of heat from combustion products that flow around hemispherical partitions (cut out from the cylinder body). Well, an indispensable attribute of intense heat exchange - external ribs made of steel strips - are required. Practice shows that such a stove heats a garage of up to 50 m² in medium combustion mode, as described in the next video:
The heating unit is simple to manufacture: doors are installed in the front part, and a hole is cut in the back part, into which a secondary chamber from a pipe or a second cylinder is welded. In order not to take away the useful volume of the firebox, the ash pan is made hinged. If necessary, a hob is installed on top of the horizontal part.
How to make a pyrolysis type stove
A potbelly stove during mining consists of three main elements:
- oil containers with lid and valve;
- closed combustion chamber;
- afterburning chambers.
The stove must have a chimney, the length of which is at least 4 m. The oil container, according to the do-it-yourself potbelly stove drawing, is made from a piece of pipe with a diameter of 345 mm and a length of 100 mm. A sheet metal cover is welded to its lower part. The removable top cover is made of a pipe with a diameter of 352 mm, to which sides with a height of 600 mm must be attached by welding. The lid has a central hole of 100 mm in size, intended for the combustion chamber, as well as a side hole (60 mm in diameter) for air injection, which is closed by a rotating lid.
Note! By adjusting the clearance of the blower, you select the combustion intensity of the stove, which affects the air temperature in the room.
According to the drawing of the stove during testing, a pipe with a diameter of 352 mm and a height of 100 mm is used to make the afterburner. Holes measuring 100 mm are made in its lower and upper parts. The first is for the combustion chamber pipe, and the second is for the chimney. Closer to the chimney opening, it is necessary to weld a partition 70 mm high and 330 mm wide.
Diagram of a pyrolysis-type furnace.
Using a drill, holes are made in the combustion chamber pipe along its entire height, leaving the lower zone 20 mm high and the upper zone (50 mm) unused. After completing all welding work, the tightness and reliability of the seams should be checked. Next, a furnace test is organized. The waste is poured into the oil container. Kerosene is added on top. Careful ignition is carried out with the ash pan open, with the help of which, after heating the oven, the heat intensity is adjusted.
Note! Testing the furnace during testing should be carried out outdoors, which will avoid a fire indoors or other accident.
To heat a garage, small workshop or living space, you can use a waste stove, which has a number of advantages. The device can be purchased ready-made or made independently using drawings from the Internet. Before making a stove, you should study the sequence of actions in order to subsequently obtain a practical and effective device.
Stages of making a homemade potbelly stove
The construction of this heating equipment consists of several stages. You need to think about its size and determine what it will be made of. Next, a drawing of a potbelly stove for the garage is drawn up. It indicates not only the parameters of the entire structure, but also the amount of material used for its construction.
It’s quite easy to make a “potbelly stove” for the garage with your own hands. Drawings of this equipment are drawn up independently. You can also seek the help of specialists.
Then the structure is welded and refined.
Combined potbelly stove
If you slightly modify the design of a classic potbelly stove, you can make a universal stove that will work not only on waste fuel, but also by igniting solid materials.
To do this, you need to make several additional elements. When igniting wood, the pipe must be sealed, so four plates must be made of steel that can close the pipe from air penetration. To do this, you should make several fastenings for bolts on the pipe so that additional elements can be easily screwed on.
A grate or steel grate is placed on the base of the lower tank. It is necessary to design an additional container that will be placed in the lower tank. It is necessary to ensure that the container can be easily installed through the removable top of the stove. It will serve as a reservoir for used oil.
The more removable elements there are in a potbelly stove, the easier it is to clean the stove after using used oil. You should also handle the stove with care. To ensure that the oil burns evenly, without bubbling or hissing, several important points must be taken into account. The tank must be filled no more than two-thirds with spent fuel. It is best to use machine oil and let it sit. Oil that was drained from a car several hours ago will not burn well.
Work on preparing the cylinder
Even after prolonged ventilation, condensation remains in the gas cylinder. To remove it, you need to remove the valve and gearbox and leave it in fresh air for several days.
Then a hole is drilled in the bottom of the cylinder. To prevent sparking, the drill is moistened with oil. Since it is not easy to make a hole in thick metal, it is better to start the work with a small diameter drill, and then it can be increased to 10–16 millimeters.
Next, the balloon is filled with water and drained after 24 hours. Since condensate has an unpleasant, pungent odor, it should be carefully poured away from your home. The procedure is repeated if necessary.
Starting the furnace
It has already been said implicitly that you need to start the drip furnace slowly and smoothly. Usually, for this they use a torch made from a knitting needle with a piece of foam rubber or a rag: let some drops in and place the torch. When it gets wet, they wait until a puddle drips into the bowl, light a torch, and pour oil into it.
There is a much more convenient and safer way to start a drip stove: a wad of toilet paper soaked in the same oil. They put it in a bowl, set it on fire and slowly regulate the drips, no longer worrying about kindling. Toilet paper is almost pure cellulose; it burns without leaving a residue. Tourists have been warming themselves in tents this way for a long time: the roll is inserted into a wood chip stove, poured with half a glass of alcohol (which also burns without a trace), or the whole thing, darling, and set on fire from above. A lot of heat is generated, and an insignificant amount of fluffy ash can simply be blown out. In the oven it will fly out into the chimney.
How to use a homemade unit correctly?
The unit described above should not be placed near mixtures or objects that can easily ignite, or in a draft. It is also important that the stove chimney is completely sealed, and there is at least 50 centimeters of free space around in each direction. It is imperative to ensure that no water gets into the fuel used, otherwise it will splash out of the holes in the pipe.
The “working” will heat up very quickly. Fill the container to two-thirds of the height, then, adding 25 grams of gasoline or solvent, ignite the resulting mixture through the fuel filling hole. For ignition, it is preferable to use a burning wick screwed to a piece of wire.
Note! Check regularly how the unit works. Use the plate to adjust the burning intensity. Never leave a working oven unattended!
Schemes of drip furnaces
Quite a lot of varieties of industrial devices for drip combustion of liquid fuel are known, and new patents appear regularly. But a home handyman and/or a car owner in an unheated garage shouldn’t rummage through them right away: it’s complicated, energy-dependent, and expensive.
A drip furnace, available for hobbyist construction, can be built using one of the following. circuits (see figure):
- With a wick burner (the evaporator is filled with porous filler);
- With a “wet” bowl;
- With a flame (flame) evaporator bowl and bottom fuel supply;
- The same, with top fuel supply.
Schemes of the design of drip furnaces for mining
With wick
Any potbelly stove can be adapted for a drip stove with a wick burner, because It is not the falling drops of fuel themselves that evaporate, but its reserve in the hot porous filler. To start, a little fuel is poured into the evaporator, set on fire, and when the filler warms up (as can be seen from the boiling away of the remaining kindling and the appearance of a clean flame instead of a smoking one), drops are released. The power of drip furnaces with a wick evaporator does not exceed 6-8 kW, otherwise too frequent drops cool the filler and the furnace has to be started again. If the stove is left unattended, the excess drip will cause the evaporator to overflow and fuel will leak out; possibly burning. This is a serious disadvantage of drip wick evaporator ovens. Another is that they do not have the property of self-regulation; drops for testing from different batches must be set manually each time.
Filler
The efficiency of a drip-wick stove is largely determined, firstly, by the burner filler. The ideal option is fragments of animal bones; they retain all the dirt from the fuel. Thanks to a homemade stove with a bone-filled burner, an absolutely incredible story became possible.
During Robert Scott's famous Antarctic expedition, its northern party found itself cut off from its base on the eve of the Antarctic winter. Its participants were running out of food, matches, and fuel. There was no warm clothing or salt. People dug a cave in the snow and built a grease stove from a large tin can, but it worked poorly - it barely heated and consumed a lot of seal oil (blub). Then one of them, a simple sailor whose name deserves mention - Harry Dickason - came up with the idea of filling the evaporator with seal bones. The northern party in full force (6 people) survived the winter, and in the spring, on foot, pulling a sleigh, having covered almost 600 km, they returned to the base, where they were all considered long dead. One of the participants in the northern party, Raymond Priestly, wrote a book about this “Antarctic Odyssey” (Raymond Priestly, “Antarctical Adventures.” Keep in mind that you will suddenly find yourself in an extreme situation.
The filler made from fireclay brick crumbs has similar properties. Not fireclay mortar, but finely crushed brick. With it, the drip-wick furnace develops its maximum 8 kW, because The heat capacity of fireclay is high. Broken red working brick, moderately annealed brick, is somewhat worse, because less porous, and burnt iron ore bricks and clinker are not suitable. But any filler of an evaporative wick burner is quickly poisoned by dirt from the fuel, and it must be changed regularly.
Frame
The configuration of the body of a drip-wick stove does not greatly affect its efficiency: such a stove made from a potbelly stove will be very voracious. The ideal option here is an industrial gas cylinder, for example, oxygen; under a high, strongly convex arch, fuel vapors successfully burn out before exiting into the chimney. A drip stove made from an industrial gas cylinder is well suited for a garage due to its compactness. The outlet to the chimney (diameter 100 mm; height from 4 m) is made at a level of approx. 2/3 of the height of the cylinder. Leave 120-150 mm under the burner. At a level of 60-80 mm below its bottom, 12-16 holes with a diameter of 10 mm are drilled in a circle in the cylinder for air access, this is instead of a blower (the fire door must close tightly). A threaded hole is made in the bottom of the cylinder for a plug to drain condensate.
Note: the bowl and fuel supply system are the same as those of other drip stoves, see below.
With a wet bowl
For a wet bowl drip furnace to operate successfully, a pool of oil must be burning in its evaporator. In essence, it turns out to be a small stove with a gravity burner, fed drop by drop, releasing vapor into a large afterburner. However, its efficiency is worse, because part of the secondary air (entrained by the flame in the bowl) slips into the chimney, carrying oil vapor with it. Whether the chimney is on top or on the side does not matter in this case. In addition, primary air flows around the evaporator bowl, cooling it.
The advantage of this furnace is some ability for self-regulation. If the flame in the bowl gets too hot, it will also reduce the flow of secondary air into the afterburner. Since quiet burning of oil in a bowl requires little air, the flow of primary oil will decrease and the flame will subside. But the limits of self-regulation are small, and when switching to testing from another batch, the dropper (see below) needs to be reconfigured.
Homemade drip stove with forced circulation air heating circuit
Another advantage of this furnace is the ability to integrate a horizontal air heat exchanger into it. The stove, pressurized by the air heating circuit from a low-power fan, turns into a heater (see figure on the right). Unfortunately, a vertical non-volatile heat exchanger with natural circulation cannot be installed: it will disrupt the afterburning process, and the furnace will soon become overgrown with carbon deposits (coked).
And finally, the optimal size and shape for an 8-10 kW oven of this type is a 50 liter household gas cylinder. Due to these advantages, drip furnaces with a “wet” bowl have recently become popular due to their simplicity of design.
Note: the low maximum power of furnaces with wick and wet bowl is also explained by the fact that the oil in them can evaporate in the supply tube, the end of which is located close to the flame. The vapors will evaporate into the afterburner and burn, there will be nothing left to heat the bowl, and the stove will go out.
With a flaming bowl
The most economical and safest type is a drip-type furnace with a flame bowl. The features of its structure and operation are as follows:
- Air is supplied from above through air duct B, which passes vertically through combustion chamber K.
- Secondary air (although physically in this case it is primary) is immediately taken away by fuel vapor for afterburning.
- Primary air (physically secondary) enters directly into the fuel flame in the evaporator, bypassing the bowl.
- Fuel vapor enters the combustion chamber through the annular gaps in the diaphragm D.
- It is possible to supply fuel from above through a supply tube located coaxially in the air duct, which eliminates premature evaporation of the fuel.
Thanks to these features, drip furnaces are, firstly, self-regulating: the evaporator got too hot - more vapor was spent on afterburning - less air got into the bowl - the furnace returned to mode. Secondly, it is less sensitive to the properties of the fuel: if you get oil that is more fluid, the drops start to drop more often and the evaporator flares up - see above. The oil was watered - the oil vapors, being heavier, pushed the water vapors to the periphery - the water vapors went into the peripheral gap and into the chimney, without disturbing the combustion process. We filled the tank with diesel instead of oil - the fuel vapor went to afterburning through both gaps - the combustion chamber consumed more secondary air - the flame in the evaporator died down - the stove returned to mode. And thirdly, a furnace with a flame bowl and top fuel supply is capable of developing the maximum power for this class of devices, up to 15-16 kW, thanks to air cooling of the fuel supply line.
Fuel from below
A drip furnace with a flame bowl and bottom fuel supply is structurally simpler and, unlike furnaces with wick and wet bowls, is capable of developing power up to 10-12 kW due to wider self-regulation limits. An evaporation bowl can also serve simply under a stove if it is installed on a fireproof floor or on legs; in both cases, on a gasket made of asbestos or basalt cardboard with a thickness of 20 mm or more.
An assembly drawing of a drip furnace with a flame bowl and bottom fuel supply, dimensions and details for it are given in Fig. Material: pipes of different diameters. The bowl is under the stove. The peculiarity of this design is that it is not critical to the overall dimensions. When the height of the perforated part of the air duct increases from 350 to 500 mm, the furnace power increases from 6 to 9 kW. Further increasing the height of the furnace body increases its efficiency without increasing power. The oil tank is also made from a 90 mm pipe. The fuel from it is supplied to the dropper through the side pipe, and the bottom one is designed to drain the accumulated sludge.
Drawings of a drip furnace for testing with a flame bowl and bottom fuel supply
Fuel from above
The top supply of fuel to a drip furnace with a flame bowl allows it to realize the maximum possible power and efficiency. The reason is that the self-regulation range of this design, which is the largest for drip furnaces, makes it possible to organize a proportional supply of secondary air: holes in the air duct are drilled in horizontal rows, and their number in a row and, possibly, diameter are reduced in height. To ensure high efficiency of the furnace at the lowest stroke, the lower row of holes is sometimes replaced by vertical slots. In this way, an air flow into the combustion chamber is organized, exactly equal to the need for it from burning fuel vapors at different operating modes of the furnace.
Drawings of a drip furnace in production, in which the above principles are implemented, are shown in Fig. This is the same stove, just depicted differently. Excluding the chimney and the bottom of the bowl: the option on the right is designed for 40-60 W fan pressure. The efficiency of this furnace will be only 3-4% less than that of a Babington burner if it (the furnace) is equipped with an air jacket with natural circulation, thus turning it into a heater furnace. The air in the jacket, when heated, will not diverge to the sides, but will create thermal insulation, improving the conditions for burning fuel vapors. The thickness of the air layer in the jacket is 100-120 mm.
Drawings of a drip furnace with increased power and increased efficiency
From cylinders
A 50 liter household gas cylinder is also quite suitable for the body of a drip furnace for mining with a flame bowl. Moreover, its large relative width and convex arch make it possible in some cases to abandon the diaphragm, which requires extra metal, work and complicates the maintenance of the furnace. True, it will not be possible to accelerate a drip furnace from a cylinder to more than 11-12 kW, but since any furnaces in production are suitable for heating only non-residential premises, this is not so significant.
Drawings of a drip furnace from a cylinder with a flame bowl and top fuel supply for air heating are given on the left in Fig. below. Please note: the holes in the duct are narrow; There are only 3 rows of them, located far apart in height. In a wide cylinder, burning gases rise more slowly than in a pipe and therefore mix with air better, but not yet well enough. Strong streams of air shoot out from the holes in the air duct, further mixing the gases. In the bottom row, the holes are frequent, streams of air from them form something like a virtual diaphragm, which works in the same way as the steel one in pipe furnaces.
Drawings of drip furnaces for exhaust from a household gas cylinder
On the right in Fig. – drawing of a drip furnace with a water jacket from a household gas cylinder in production. Water greatly cools the combustion chamber, preventing fuel vapors from burning out properly. Therefore, here all the secondary air “splashes out” all at once into the zone of greatest concentration, at the same time forming a virtual diaphragm stretched in height from many wider and weaker streams of air. Actually, the result is no longer a virtual diaphragm, but a virtual piston of variable diameter. This is worth a slight decrease in the efficiency of the furnace compared to the previous one, but attaching a water jacket to a drip furnace without reducing its efficiency to an outrageously low level is actually a very difficult matter.
Drip boiler
On the trail. rice. Given as an example are drawings of a drip water heating boiler from the same cylinder during testing, suitable for CO with forced circulation of the coolant (in the previous case it can only be natural thermosyphon). As you can see, the whole range of measures has been applied to increase the efficiency of the drip furnace, plus thermal insulation of the bowl and jacket with basalt wool. The insulation, in turn, must be carefully isolated from fuel vapors, otherwise the boiler will quickly fail. The sources of waste are unstable, the design of the boiler is complex, and therefore this sample has not received any widespread use.
Drawings of a drip water heating boiler for testing
