On trading floors, the firewood splitter is presented in classic and modified form in various variations. Let's get acquainted with the main types of manual and automatic wood splitters and the principles of their operation. Let's look at how to make a device with your own hands. After reading the article, it will be clearer what to ask consultants about so that splitting logs is a pleasure and without much labor.
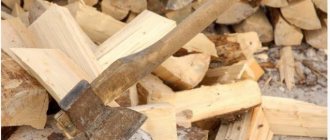
Traditional splitting ax Source pechiexpert.ru
Classic wood splitter and its varieties
A traditional hand tool consists of three elements: a handle, a wedge-shaped head without sharpening, and a wedge that holds the working part on the handle. Externally, the cleaver is similar to a sledgehammer and an ax. The first one got a massive butt, the second one got a narrowed part of the working nozzle.
The weight of the product is chosen according to strength and purpose. For an average person you can limit yourself to 2.5 kg, for a tall person - on average 4-5 kg. A lightweight wood splitter is more difficult to split large workpieces.
The principle of operation is a single blow to the workpiece. In this case, during the swing, a force is applied, which should be sufficient to split the log. That is, it is not rupture, but delamination of wood fibers that occurs. The effectiveness of the work depends on the characteristics of the head and the length of the handle.
Varieties of hand axes Source amur-bereg.ru
The following is a list of varieties of traditional hand cleavers with a brief description of the working part:
- Big
Made of a massive nozzle and a long handle. Weight is often 5 kg.
- Mini cleaver
Consists of a compact head and a short stalk (up to 60 cm). Weighs at least 1.5 kg. Serves as an alternative to a branch ax.
- Iron
“Soviet classic” with a square butt.
- Sledgehammer
Heavy tool for working with large diameter workpieces. Using the back of the head, it is convenient to drive wedges into the wood.
- Wedge-shaped
Externally, the nozzle is similar to a wedge due to the elongated piercing part.
- Eared
The nozzle is shaped like an axe. Only the blade is not sharpened, and there are built-up “ears” on the sides (cheeks). They act as an expander of the crack formed after being struck by a cleaver.
Long-eared cleaver Source 36volt.ru
The Chinese wood splitter deserves special mention. It is characterized by a wedge-shaped head, only longer and narrower. The disadvantage of such a cleaver is that the working element of the hand tool that is almost completely inserted gets stuck in the wood.
Work technology
To split firewood using a manual cleaver, you will need a large block of wood with an even cut. Egor is installed in a vertical position on a solid base. The process will be more efficient with dry or frozen workpieces. This can be explained by the low probability of the working edge getting stuck in the body of the log.
For a beginner, it will be easier to start working from the edges of a block or along existing cracks. If there are knots, then you need to hit along or between them. For owners of an old cleaver, it is recommended to keep it in water for 24 hours. The wooden ax will swell and securely fix the piercing head. That is, the risk of it flying off during a swing will be reduced to a minimum.
Criterias of choice
The cleaver cannot be considered a universal tool. Therefore, there are no general recommendations for a group of products. The basic questions are:
- shape ;
- length ;
- weight of the working part.
A splitting ax with a two-component handle Source handtool.kz
Below is a brief description of the three elements on which the productivity of splitting wood depends:
- Blade
The edge is straight (for large workpieces) or rounded (for coniferous and humid forests). Wedge-shaped is relevant for damp wood. According to users, the eared one is inferior to its analogue because it often gets stuck in logs, but this does not apply to dry forest. Rough sharpening of the blade at an angle of 45 degrees is acceptable.
- Head
Stamped from medium carbon steel and weighs from 2.5 kg. used for splitting large logs. Cast from hardened steel in a smaller size. Its functions are closer to an axe. The popular method for determining the good quality of a metal is to click it with your finger. If the sound is dull, then such a product should be left in the store.
- Lever
The handle is made from classic solid oak, birch, maple, elm or ash. It is characterized by the ability to dampen vibrations. Minus - when cracks appear, it becomes unusable. Composite fiberglass has higher strength. Often encased in a rubber shell for ease of use. Such a cutting weighs less than a natural one, which is important for shifting the center of gravity towards the massive head.
Cast mini-cleaver Source fishki.net
See also: Catalog of companies that specialize in the construction of small architectural forms - including outbuildings with firewood sheds
These moments are decisive for the kinetics of the impact. The main thing that must be done before paying is to check the product for defects. These are any damage or cracks, head play. Some manufacturers carefully include a case with your purchase for safe storage of the instrument.
Characteristics of product parameters
The tool is selected depending on the required parameters. These include:
- Weight . On the one hand, the heavier the cleaver, the faster the log will split. However, with prolonged work, fatigue sets in faster. Therefore, the mass is selected in accordance with the physical capabilities of the person. The weight range of the cleaver is in the range of 2−5 kg.
- Blade shape . The standard option is wedge-shaped. It is used most often. But there is also an eared species. They can only chop dry logs. It can get stuck in wood with a high degree of moisture.
- . Handle material The main material is wood, which has the ability to absorb vibrations from impact. However, the wood splits during the process. The material used as a replacement for wood is fiberglass. It is much lighter, and in terms of strength characteristics it is close to metal.
- Handle length . Depending on it, the impact force increases.
Upgraded devices
When it is necessary to split a large volume of logs, it is easier to complete the task using mechanical devices or automated analogues. The woodcutter did not stand aside. There are several designs that allow you to quickly chop firewood at any time of the year.
Mechanical
This group of cleavers has a simple design with minor functional additions. Three subspecies can be distinguished here. The first is a cylinder without walls, with a piercing element located in the center. Plus it is safe, but low efficiency is noted.
Manual cone splitter (“carrot”) Source zaggo.ru
Less effort is required to work with a spring mechanical cleaver. Here the metal spiral is fixed to the frame due to a stationary crossbar. The piercing element is fixed on a long lever. The structure can be welded or assembled using bearings and bolts. The minimum height of the device is close to 0.8 m. Wheels with stops for mobility can be screwed to the support sole.
Homemade spring wood splitter Source insales.ru
At home, a vertical inertial structure is often made. Here the components are a support base, two pipes and a splitting ax. The height of the device is only 1 m. The principle of operation is to raise the piercing part and lower it with slight acceleration. The splitting of the workpiece occurs due to the gravity of the working attachment.
Inertial device for splitting firewood Source pinimg.com
Ready-made and homemade wood splitters can also be of the lever type or with a foot drive. They are notable for the fact that the load on a person’s back is minimal during operation. The devices are also safe to use and easy to use.
Lever manual wood splitter Source mmm.dk
Working with a handheld device
First, the largest deck is selected on which the log is placed. It is advisable to chop lumps with a low degree of humidity. Dry logs weigh less. Each block falls into 2-8 parts. If the log is large, small parts break off from it on the sides, and then it is split in half.
Before starting work, the wood should be dried. If the weather is frosty, it is better to let the tree freeze so that the looseness and softness disappear from it. If there is a crack in the log, you should try to hit it with the tip. You can put a cleaver on it and hit it with a sledgehammer from above. If the metal is stuck in the wood, you should strike it hard with the butt of the cleaver on the block, first turning it over in the air.
How to choose a cleaver
A cleaver is not a universal tool.
For this reason, there is simply no general advice on choosing the best model.
It is necessary to build on the shape of the blade, the length of the handle and the weight of the head.
The kinetics of the impact directly depends on them.
However, before you buy a specific cleaver you like, which in theory will perform the task, you need to check it for mechanical damage and absence of cracks.
The ax handle should sit tightly in the head; any play is unacceptable.
The handle should be comfortable and long enough, well polished.
Some models come with a case that will ensure safe storage and transportation of the tool.
It must cover the blade and sit securely.
Manufacturing Instructions
And when you finally decide, a new question will arise: how to make a hand cleaver? It's not particularly difficult to make. Make the handle bent and the cross-section ovoid. Harvesting wood for the handle should begin in the fall, so that it dries out over the winter and does not crack.
In the meantime, it’s drying, it’s time to create a template from cardboard. Draw a large handle shape and then transfer it to the workpiece - this will make the ax handle more accurate. Hew a piece of wood parallel to the grain, and the place inserted into the eye should be wider than the middle. Trace the drawing, leaving gaps.
Insert the upper part into the eyelet, remove unnecessary parts. Before cutting out the handle, make longitudinal cuts not reaching 5 mm from the handle. Make transitions and corners using a rasp. Bring the finished workpiece to a smooth state.
Now you need a splitting part for the axe. It is impossible to make it, so when purchasing, look for the GOST marking, a cone-shaped hole for the ax handle and a perfect blade without flaws. And you can start assembling. Cut the upper part of the ax lengthwise and crosswise.
Next you will need five cut out pieces of wood. Wrap the top of the handle with gauze soaked in resin to make it easier to fit into the hole in the blade and use a hammer to drive it in. Hammer the cut five pieces into the cutouts made at the top. When the product dries a little, cut out the interfering parts and remove the gauze.
And the final touch is a properly sharpened blade. After all the work, you should have a neat hatchet, ready for work. In the photo, a homemade cleaver will look just like a purchased one.
Do-it-yourself ax sharpening
Overheating of the metal leads to a decrease in hardness exactly where it is most needed, near the cutting edge, therefore, when sharpening an ax on an electric sharpener, you need to be extremely careful.
When starting to sharpen an ax, you should not rush, you should not take on this work tired or in an irritated state. To succeed, you need to focus on the sensations of your fingers holding the tool you are sharpening. Next to the sharpener there must be water in a sufficiently wide vessel to cool the blade. It is necessary to minimize grinding wheel runout. Dressing of the wheel is carried out with special cutters, but in the absence of a cutter, the runout can be eliminated using a piece of another abrasive wheel, preferably one that is harder and coarser-grained. At the same time as eliminating runout, dressing the wheel refreshes its working surface: old, dull abrasive grains are chipped away, and new grains with sharp edges come into play, which remove chips better and heat the metal less.
Rice.
When sharpening, the ax is held so that the ax handle is located at approximately 45° to the plane of rotation of the circle (Fig. 2), with the blade facing the rotation. One hand holds and guides the head, and the other supports the axe. Pressing the chamfer of the blade against the rotating circle, move the ax with a smooth movement so as to grind off a strip of metal on the chamfer from one edge to the other of the blade. First, they grind the metal on the back of the chamfer, and then, having adjusted to the sharpener, they gradually approach the front edge.
After each pass, the blade is cooled in water. The drying of a wet blade opposite the zone of its contact with the sharpening wheel indicates the rate of heating of the blade during the sharpening process. This signal is used to regulate the force of pressing the blade against the circle and the speed of its movement across the circle.
Sharpening is carried out alternately on one and the other side of the blade, achieving a symmetrical descent of the chamfers. At the very edge of the blade, the conditions for heat removal from the contact zone with the wheel are the worst, and there it is most difficult to avoid metal burns, therefore, when processing the front part of the chamfer, it is necessary to reduce the pressure of the blade on the wheel, and the blade must move across the wheel without delay. The work on the sharpener ends when a burr forms on the entire edge.
Rice. 3
Sharpening is continued by hand on a wide wet block until the mark left by the grinding wheel is ground off on the entire surface of the chamfer. You need to be careful not to fill up the chamfers after switching to the block. In a cross-section of the blade, the chamfers should appear as straight lines. All other forms of sharpening: oval and “razor” (Fig. 3) - in practice they do not provide any advantages, but only mislead regarding the true sharpening angle at the top of the cutting edge.
When sharpening a new axe, the width of chamfer A should be approximately twice the thickness of blade “B” at the base of the chamfer (picture above). In this case, the angle B at the apex will be approximately 28°. In the future, this angle can be adjusted based on the results of operation: if the cutting edge becomes wrinkled or crumbles, in both cases, angle B needs to be increased, and if it holds an edge well enough, you can try to reduce the angle.
They finish sharpening the ax by straightening the chamfers with a whetstone moistened with water. When straightening, the ax is held in the left hand with the blade facing away from you, and the whetstone in the right. Lightly pressing the whetstone against the chamfer, move it in a circular motion. Editing ends when the burr formed during the previous stages of sharpening spontaneously falls off.
Thanks to Yuri Kasyanov for the review. The original is here.
Review of the Finnish knife and ax sharpener - Fiskars xsharp.
The Finnish company has a great product that will provide quality care for your ax and knife.
How to properly store a cleaver
Storing a cleaver is no different from storing an ordinary axe.
Branded models are paired with plastic or leather cases, which allows you not only to store, but also to safely transport the instrument in a car or even public transport.
The metal part is coated with lubricant to prevent rust formation.
A tool with a large head can be safely coated with a thin layer of automotive oil.
For branded expensive models, a special lubricant for the ax is sold.
Tools with a wooden ax should not be stored in direct sunlight.
It is also not recommended to work in temperatures below -20.
It is best to store axes in rooms with average humidity.
How to sharpen a cleaver correctly
The question of sharpening the blade of a cleaver ax remains open today.
Is it worth sharpening it at all?
The thickness of the blade, as a rule, does not exceed 5 mm over the entire surface, and experts advise using a floating sharpening (sharpness increases towards the center of the tool blade).
This will allow you to cope with wood of various species.
The sharpening angle also matters.
For most cleavers, the wedge is sharpened at an angle of 40 - 60 degrees.
At the same time, an angle that is too sharp is not suitable for working with soft and wet material.
The tool will get stuck in the fibers.
An obtuse angle is not suitable for frozen and dry logs, as the tool will simply bounce off.
The blade is sharpened with an electric sharpener at low speed.
Periodically, you need to moisten the wedge of the tool with water, which will prevent it from overheating during friction.
Kinds
Modern technologies and materials make it possible to improve the traditional cleaver design. Nowadays, different types of cleavers have appeared, among which are the following:
- with an offset center;
- manual cone;
- rack and spacer;
- heavy forged;
- with electric or gasoline engine (automatic).
Modern developments are working well for the Finnish company Vipukirves, which offers a wide variety of models that have a “floating” center of gravity.
Let's look at several types of cleavers that are especially popular.
Screw splitter
It has become widespread among farmers; making such a tool yourself is not very difficult. To make a screw cleaver with an electric drive, you will need:
- an engine with a power of at least 1.8 kW;
- roller with mounted bearing;
- pulley;
- threaded cone;
- metal sheet 5 mm thick;
- corners "4";
- pipes 40 mm;
- bearing.
If you set the engine to 450 rpm, then there will be no need to mount a pulley, then the cone can simply be attached to the shaft. The optimal choice is therefore a speed of 400 per minute. The cone can be ordered from a turner or turned out yourself according to a pre-drawn drawing. The material from which the cleaver is made is steel with a high carbon content. The thread should be in increments of 7 mm, and the turns can reach 2 millimeters. The pulleys are machined from ordinary steel. The size of the groove is determined by the parameters of the pulley.
To assemble a cleaver that works on the screw principle, you must first make a base, place a plate under the tabletop on which the engine will be supported, and on it, in turn, the shaft. You can also attach the cone and pulley, and then install and tension the belt. After this, you can move on to tests.
Hydraulic wood splitter
Has good power and performance. The stationary tool is massive, works using a cylinder in which the operating pressure is provided by a pump
It is placed on the same shaft with an electric motor; it is also important to take into account that the unit can be placed even at the other end of the room (not necessarily on the frame). The connection can be made using special hoses
After the drawings have been selected and the necessary components have been purchased, you should think about how to make the shape of the cleaver. Welding from metal is the simplest solution. The sizes can be any. Here the power of the cylinder is of decisive importance. It should be enough to split massive wooden ingots that are fairly saturated with moisture. This material has the highest viscosity coefficient and is especially difficult to work with.
Cleaver in the form of a cross
The mold is mounted on the frame so that the transverse axis coincides with the shaft, which is attached to the hydraulic cylinder, connecting to the pump using hoses.
Tips for better wood splitting
Like any business, the process of splitting logs can be improved. Here are some tips to help you do this:
A stump in a car tire does not fly apart in different directions.
- Try to dry the wood before chopping. If it's winter and the firewood is damp, let it freeze. The main thing is that the firewood is not soft and loose.
- To ensure that a minimum of soot is formed when wood burns, before starting, figure out how long it should be. This is done on the basis that the length of the log should be approximately ¾ of the length of the firebox.
- If there is a crack on the block, position it as conveniently as possible and try to hit it. If you managed to get into the crack, but for some reason the block did not split, do not be nervous. Take a sledgehammer and hit the butt of the cleaver with it. If you don’t have a sledgehammer at hand, take a cleaver with a block stuck on it, swing it and hit the block stump with the whole structure. After such a convincing step, the block should split.
- The situation is the same with knots - hit between them or along one of them. The same inconvenient situation as with a crack can occur here. The solution to the problem is the same.
- Do not try to split a very large log into two halves: there is a high probability that the cleaver will get stuck. Try to chop off small pieces along the edges of the log, and then chop the rest into two parts.
So, in order for the process of chopping wood to be successful, you need to choose the right ax: comfortable, with a handle made of elastic types of wood and an acceptable head weight. In addition, the success of the undertaking also depends on the correct execution of this matter and a responsible approach to it. And, of course, we should never forget about safety. Gloves on your hands and safety glasses will help with this. [ads-pc-2][ads-mob-2]
Exotic
Recently, lever axes with a shifted center of gravity have appeared on the market and are gaining popularity. The Finnish company LEVERAXE is considered the flagship. The manufacturer promises that with one movement the cleaver splits the block of wood and, turning, disconnects the broken part.
Before going to the store, check out the market assortment and user reviews about a specific model. Assess the frequency and intensity of tool use. Consider whether you need a designer device. Considering all of the above, you can choose an inexpensive functional model that will not let you down when working with any material.