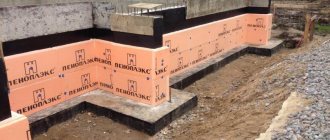
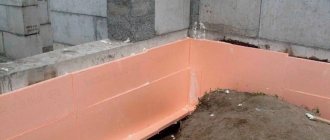
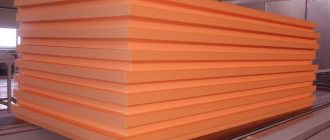
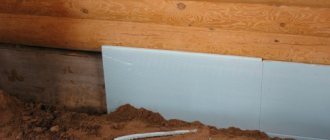
Until recently, heat loss through the foundation was not taken into account; it was simply compensated by increasing the heating intensity. However, the constant rise in energy prices forced a change in the approach to the problem of insulation. Nowadays, among thermal insulation methods, the first place in terms of quality and reliability is occupied by insulating the foundations of houses from the outside with penoplex foam.
Vertical insulation: technology
This method is advisable to use not only at the stage of foundation construction, but also on already constructed structures.
In the second case, you will have to dig out the foundation to the depth at which it lies. The following actions are performed:
- The foundation is pre-cleaned of soil and other contaminants. If the surface is uneven, it must be leveled. For this, a cement solution is used. It is forbidden to use mastic made with the addition of a solvent, otherwise Penoplex may interact with it and collapse.
- Then you need to dilute the glue intended for polystyrene foam. It is mixed and left to swell. Next, you need to mark the lower boundary of the slab arrangement on the foundation. It is worth noting that they can be placed below the base level, this will not cause harm.
- When the glue is ready, it is applied to Penoplex in dots. If the surface is perfectly flat, it can be applied in an even layer. The slab is then pressed and leveled if necessary. A mounting groove is used to attach the next plate. If it is necessary to place several layers, a checkerboard pattern is used. It should be ensured that the subsequent seam overlaps the previous one. Thanks to this, better thermal insulation can be achieved. As for fixing the next layer, the technology is similar, the same glue is used.
The underground part of the base does not require additional fastening, since the insulation slab is completely pressed by the soil. When arranging slabs in the basement part, it is necessary to use dowels-nails. Thanks to the wide cap, they hold the material tightly and do not rise above the surface. Before hammering in the dowel-nail, a hole is drilled in the polystyrene foam. It is through, extending into the concrete by approximately 4 cm. In the case of decorative finishing, plaster or special tile adhesive is applied to the insulation, with mesh reinforcement provided.
Thermal insulation of soil with Penoplex
Thermal insulation of soil is a construction technique that can significantly reduce the estimated depth of the foundation, and hence the costs of its construction. Soil insulation is carried out using an insulated blind area.
Thermal insulation of soil with penoplex
- After vertical external thermal insulation of the foundation, backfill with sand and gravel is carried out to a level 10-15 cm below ground level. Stepping back 1 meter from the walls, formwork is made from boards. The height of the formwork is 20-30 cm.
- The bottom of the blind area is additionally compacted and leveled. Penoplex slabs are laid around the perimeter of the foundation.
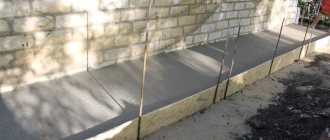
- A polyethylene film is placed on Penoplex with a slight overlap on the base, after which concrete is poured into the formwork. Level the concrete so that there is a slight slope towards the outside. Subsequently, after the concrete has hardened, the formwork is removed, and the blind area is finished with paving slabs or decorative stone.
Comprehensive insulation of the foundation and soil with Penoplex allows not only to prevent freezing of the foundation, but also eliminates temperature changes on the outside and inside of the foundation, and, as a result, the formation of condensation. The humidity in the basement and basement is reduced, which improves the microclimate and increases the service life of the entire house.
Material:
- penoplex plates. To insulate the foundation, a thickness of 300 mm is sufficient;
- glue for penoplex (adhesive mixture or glue-foam in a can). Using foam will save money and time, even though foam adhesive is more expensive in absolute terms. But it has much less consumption. The adhesive mixture will be needed in any case; it needs to be used to cover the mesh;
- mounting foam for sealing seams between sheets. In principle, penoplex panels are distinguished by a tongue-and-groove system, so installation is carried out without through joints. But, in those places where the sheets have to be adjusted to size, seams appear. To eliminate the possibility of cold bridges, the seams must be sealed;
- deep penetration primer or bitumen mastic;
- metal or polymer reinforcing mesh;
- corner with mesh for lining the corners of the building. This material is used only if the base will also be covered.
Tool:
- construction knife for cutting penoplex insulation and mesh;
- mixer and container for preparing the adhesive mixture;
- spatula for applying the mixture;
- level;
- brush for applying a waterproofing layer;
- perforator or drill.
We invite you to familiarize yourself with: Distance between screw piles for a frame house: pitch and dimensions
To carry out the work you will need the following tools: tape measure, construction knife, hammer drill, concrete drill 200 mm long (according to the diameter of the dowel), mixer for mixing glue, wide brush, shovels, tamper.
You can calculate the number of slabs knowing the area of the insulated foundation and the area of the slab. The area of the foundation is calculated by multiplying the perimeter by the height of the foundation, and the area of the slab is 0.72 m2.
It is ideal to deal with insulation during the construction stage. But this can be done in a house that has already been built and it doesn’t matter how long the building costs.
To insulate the foundation from the outside, it is necessary to dig it around the perimeter to the depth of soil freezing. This is a different indicator for each region, but usually it fluctuates in the range of 0.6 - 1.2 m, unless we are talking about the permafrost zone.
The width of the trench should allow work to be carried out on fastening slabs and applying waterproofing without being particularly crowded.
The exposed walls must be cleared of any remaining soil and roots. If the foundation wall is uneven, it is necessary to level it with cement mortar. After the leveling layer has dried, you can begin insulation.
The thickness of the foundation walls in private housing construction is usually 0.4 or less than 0.6 m. To insulate such walls, 10 cm thick penoplex is used.
Before installing penoplex slabs, a layer of waterproofing must be applied to the walls. This work is carried out using a wide brush and bitumen mastic. To make the work easier, you can use a ready-made bitumen primer that has the consistency of slightly thickened paint.
The primer has high adhesion to concrete surfaces and adheres well to the wall. The drying time for the primer is one day. The next day you can begin attaching the insulation.
Penoplex boards are attached to the wall using cement adhesives for fastening polystyrene foam. You need to dilute the glue according to the instructions on the package and let it sit for a while.
The slabs can be glued in both vertical and horizontal orientation. It all depends on the depth of the foundation. At a depth of 1.0 m, you can dig below the laying level in order to attach the insulation vertically without cutting off the remainder. If the depth is no more than 90 cm, then you can turn the slab in a horizontal plane, and cut the slab installed in the second row in half along the long side.
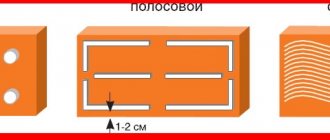
The adhesive must be applied pointwise to the slabs. A continuous layer of glue can be applied if the foundation wall is perfectly flat. After applying the glue, the insulation is pressed against the wall and left for a short time. The next slab is combined with the groove of the previous one and thus moved along the perimeter of the house. Fastening the slabs begins from the bottom. The groove in the slab gives a tight fit to each other and eliminates the appearance of gaps, cracks and cold bridges.
Then, additional fixation is performed using dowel nails. This is especially important when the insulation of the foundation is combined with the formation of the base of the house and part of the insulation extends above ground level. On each slab it is necessary to install five dowels in an “envelope” pattern - one in the center and two in the corners.
Having finished fixing the slabs with dowels, some of the slabs that extend above ground level and form the base are plastered over a plaster mesh.
When starting this stage of work, you need to determine the thickness of the material in accordance with the climatic conditions of the region, and clearly calculate how much of it will be needed. Let's look at each feature in more detail.
When arranging the foundation of a private house, it is recommended to take Penoplex 45 or Foundation. The size of the slab is 60*120 cm. The average weight of one element is from 2 to 2.5 kg. The thickness varies - from 2 to 10 cm.
When building in regions where winter temperatures reach –30 C, it is better to use slabs 10 cm thick.
Calculation of parameters
R = h1/λ1 h2/λ2
- R – regional resistance to heat transfer;
- h1 – foundation thickness indicator;
- h2 – slab thickness;
- λ1 – thermal conductivity coefficient of the material from which the base of the building is constructed;
- λ2 – thermal conductivity coefficient of penoplex.
Insulation of the house
Additional insulation elements
When planning thermal insulation of the underground part of the building using polystyrene foam, it is also worth thinking about how to insulate the basement of the house from the outside. Of course, it is possible to arrange a “wet facade” or “ventilated facade” system using mineral wool or other insulating materials. But it is more logical to continue work using penoplex.
They can - and they should! – insulate the blind area near the house, garden paths, porch and entrance areas. Thanks to this, the thermal radiation of the house into the space will be noticeably reduced, thereby reducing the cost of heating and air conditioning of the building.
Nuances that should be taken into account when insulating the base
If the foundation of the house is deepened, then before carrying out insulation work it is necessary to dig a trench along the entire base, with a depth to its base and a width of half a meter to one and a half meters.
Upon completion of the work, the trench is buried with the same soil or it will be replaced with expanded clay and sand, which improve thermal insulation.
and at a depth of about 30 cm from the top of the trench, a ten-meter layer of sand is poured and compacted tightly. After this, roofing material is laid, the width of which is slightly greater than the width of the dug trench, and its joints are coated with bitumen.
When the bitumen has hardened, penoplex is glued to the bottom of the trench on top of the roofing felt with acrylic glue, its joints are coated with polyurethane foam or the same glue. After the glue has dried, you should make a concrete screed with a slope away from the base, which will allow excess moisture to be drained away from the house.
The final finishing of the base can be done from clinker tiles, stone or using other materials. Insulating the foundation base helps reduce heat loss by more than 20%. Carrying out the work also protects the base from mechanical damage, protects against the formation of cracks and mold, and the development of fungus.
If external thermal insulation is not done, the service life of the foundation is significantly reduced due to the fact that it is exposed to harmful factors - frost, moisture. You can carry out external insulation of the foundation plinth with your own hands; for this you should purchase materials and carefully study the technology for carrying out the work.
For a master class on insulating the foundation base from the outside, watch the video step by step:
Insulation of the basement from the outside
1. Applying plaster composition over a metal mesh
- building wall
- Basement ceiling
- Cutting from mineral wool slabs
- Cement-sand plaster on metal mesh
- Basement wall
- Blind area
- Insulation PENOPLEX FOUNDATION
- Waterproofing
- Foundation
2. Cladding with clinker tiles
- building wall
- Basement ceiling
- Cutting from mineral wool slabs
- Clinker tiles
- Basement wall
- Blind area
- Insulation PENOPLEX FOUNDATION
- Waterproofing
- Foundation
3. “Heavy” cladding (natural/artificial stone)
- building wall
- Basement ceiling
- Cutting from mineral wool slabs
- A natural stone
- Basement wall
- Blind area
- Insulation PENOPLEX FOUNDATION
- Waterproofing
- Foundation
4. Facing with facade panels (basement siding, block house)
- building wall
- Basement ceiling
- Cutting from mineral wool slabs
- Plinth panel
- Basement wall
- Blind area
- PENOPLEX FOUNDATION
- Waterproofing
- Foundation
Insulation of the basement floor from the inside
- building wall
- Plaster on metal mesh
- Basement ceiling
- Cutting from mineral wool slabs
- Facing tiles
- Blind area
- PENOPLEX COMFORT
- Basement wall
- Waterproofing
Table No. 2 “Required thickness of PENOPLEX for insulation of basement floors, including those located below ground level”
Cities Thickness "PENOPLEX" mm
| Anadyr | 100 |
| Arkhangelsk | 70 |
| Astrakhan | 40 |
| Barnaul | 70 |
| Belgorod | 50 |
| Birobidzhan | 80 |
| Blagoveshchensk | 80 |
| Velikiy Novgorod | 60 |
| Vladivostok | 50 |
| Vladikavkaz | 50 |
| Vladimir | 60 |
| Volgograd | 50 |
| Vologda | 70 |
| Voronezh | 60 |
| Grozny | 40 |
| Ekaterinburg | 70 |
| Izhevsk | 60 |
| Yoshkar-Ola | 60 |
| Irkutsk | 80 |
| Kazan | 60 |
| Kaliningrad | 50 |
| Kaluga | 60 |
| Kemerovo | 70 |
| Kirov | 60 |
| Kostroma | 60 |
| Krasnodar | 40 |
| Krasnoyarsk | 70 |
| Mound | 70 |
| Kursk | 50 |
| Kyzyl | 90 |
| Lipetsk | 60 |
| Magadan | 90 |
| Maykop | 40 |
| Makhachkala | 40 |
| Moscow | 60 |
| Murmansk | 70 |
| Nalchik | 50 |
| Nizhny Novgorod | 60 |
| Novosibirsk | 70 |
| Omsk | 70 |
| Eagle | 50 |
| Orenburg | 60 |
| Penza | 60 |
| Permian | 70 |
| Petrozavodsk | 60 |
| Petropavlovsk - Kamchatsky | 50 |
| Pskov | 50 |
| Rostov-on-Don | 50 |
| Ryazan | 60 |
| Salekhard | 100 |
| Samara | 60 |
| Saint Petersburg | 50 |
| Saransk | 60 |
| Saratov | 50 |
| Smolensk | 60 |
| Stavropol | 50 |
| Syktyvkar | 70 |
| Tambov | 60 |
| Tver | 60 |
| Tomsk | 80 |
| Tula | 60 |
| Tyumen | 70 |
| Ulan-Ude | 80 |
| Ulyanovsk | 60 |
| Ufa | 60 |
| Khabarovsk | 70 |
| Cheboksary | 60 |
| Chelyabinsk | 70 |
| Cherkessk | 40 |
| Chita | 90 |
| Elista | 50 |
| Yuzhno-Sakhalinsk | 80 |
| Yakutsk | 110 |
| Yaroslavl | 60 |
Insulation characteristics
Expanded polystyrene sheets
Expanded polystyrene sheets have a large number of positive properties:
- it is light;
- moisture resistant;
- environmentally friendly;
- insects do not grow in it;
- does not mold or rot;
- has high compressive strength;
- absorbs sounds;
- does not allow heat to pass through. Expanded polystyrene sheets
In addition, this material is easy to install and lasts about 40 years if the thermal insulation is carried out according to all the rules. Expanded polystyrene also has disadvantages:
- the material is fire hazardous;
- subject to mechanical damage;
- destroyed by exposure to UV. Expanded polystyrene sheets
To attach polystyrene foam sheets, do not use organic solvent glue or hot mastic. To protect the insulation from damage, it must be transported and unloaded carefully, not thrown from a height, and after installation it must be covered with external finishing - tiles, siding, plaster or at least cement mortar.
| Technical characteristics of polystyrene sheets | Index |
| Temperature range of operation of sheets not subject to mechanical loads (C°) | from -18 to 60 |
| Density (kg/m3) | 1040 – 1060 |
| Hardness (MPa) | 120 – 150 |
| Softening temperature (Vic) in air (C°) | 85 |
| Softening temperature (Vic) in a liquid medium (C°) | 70 |
| Tensile strength, MPa (kgf/cm2), not less for sheets with a nominal thickness up to 3.75 mm inclusive | 17,7 (180) |
| Tensile strength, MPa (kgf/cm2), not less for sheets with a nominal thickness of over 3.75 mm | 16,7 (170) |
Insulation
Physical and mechanical properties are presented in the table.
Penoplex - technical characteristics (table 1) Penoplex insulation - technical characteristics (table 2)
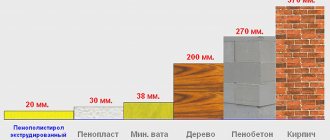
The competitiveness of penoplex in comparison with analogues (brick, concrete, wood, mineral wool, polystyrene) is clearly demonstrated by the figure.
Comparison of Penoplex with other insulation materials in terms of thermal conductivity (thickness at the same heat transfer resistance)
It becomes obvious why foundation insulation with penoplex is the most popular among other thermal insulation materials. Add here another argument such as the availability of material and ease of installation, and it will immediately become clear that if you rank insulation materials, then penoplex should be put in first place. It can be used for external and internal insulation, and no special tools are required for installation.
Technology
How to insulate the foundation itself with Penoplex? You need to start with the situation in which the installation is being carried out:
- If you are just building a house, most likely its foundation is free of soil and you don’t need to do anything beforehand;
- If we are talking about an already constructed foundation, you must first clear it of soil. Clean the surface and only then carry out insulation.
Also, it is worth noting that when insulating the foundation of a house, three components are insulated from the outside:
- Blind area;
- Horizontal insulation on the cushion of the future foundation (carried out only during construction);
- Vertical installation of slabs on a plinth.
We talked separately about how to make an insulated blind area, so here we will describe in more detail only the last of these three points.
Preparing the workplace
If you need to insulate the foundation outside of an already built house, you will have to dig it out. To do this using:
- Your own shovel
- Special equipment,
A trench is being dug around the entire perimeter of the building. The depth of the trench should be equal to the depth of the foundation. The width should be such that you can work safely. Please note that when you attach the penoplex to the foundation, the width of the trench will narrow, in our example by as much as 120 mm.
After this, you need to let the foundation dry, then the insulation will be effective. A minimum of 2 weeks is allotted for this. By the way, this nuance imposes some restrictions on the time of year in which work can be carried out. In the fall, the dug trench may fill with sedimentary water. Inspect the foundation and assess its condition. Plaster large uneven areas, if any.
Waterproofing
We talked about this important step for the foundation separately, but here it is only worth repeating that waterproofing is mandatory for the foundation of a house with a basement. If there is no basement, perhaps Penoplex itself can handle it, because it repels moisture
If you use waterproofing, choose a composition that does not contain alcohol so that it does not corrode the insulation.
Installation of slabs
Although you can find examples of penoplex being attached to dowels, this approach is considered unacceptable. Nails damage the waterproofing layer and the insulation itself, which, unlike a “wet” façade, will not be particularly protected. The material must be secured with foam adhesive or other adhesive for fastening.
Fastening the slabs begins from the bottom row. Using a level, you need to mark a strip of the upper edge of the slab. The lower part of the slabs is trimmed so that the upper edge is always level.
If, as in our example, installation on the outside with penoplex takes place in 2 layers, the second layer needs to be attached only after the first has been completely fixed (hardened), usually no less than 2 hours later. That is, first the entire foundation strip is covered with the first layer, then with the second. The sheets are laid in a checkerboard pattern, without joining the seams.
Afterwards, the insulation is covered with a membrane for additional protection from moisture and mechanical damage.
By the way, external insulation is considered the most effective.
Finally, video: how to insulate the foundation of a house with Penoplex.
Houses are different, and they need to be insulated in different ways.
There is no universal means for insulation.
Methods of fastening insulation materials also directly depend on the room itself: on the surface of the walls, operating conditions. It is best to consult with specialists before starting work.
Wood and stone materials are the most common materials used in the construction of houses.
Particular attention should be paid to surface preparation. If the walls are made of brick or concrete, you will need:
- get rid of all efflorescence on the brickwork;
- clean the walls from traces of paint, dirt stains, all kinds of deposits and fuels and lubricants;
- remove dust from the surface of the walls;
- if fungus is detected, the surface must be treated with an antiseptic;
- repair chips and cracks in the surface;
- treat the surface with a primer, then smooth out any unevenness with putty;
- reapply primer for the walls.
The tree is prepared much faster and easier. You will need to apply a specialized impregnation to the wooden surface to protect it from rot and insects. After this, install the timber base, also treated with impregnation. This nuance will allow for additional ventilation of the facades of a residential building.
General installation rules
To obtain a high-quality layer of thermal insulation, you must follow the rules for attaching penoplex. First of all, you need to fix the starting bar. This can be either a wooden beam or a metal part with perforation
The second one can be bought at any hardware store, but please note that the strip must be commensurate with the width of the insulation
The bar is set after small calculations. Initially, you will need to carve out a horizontal line along the entire perimeter of a private house. It is better to secure the “starter” using dowels. This feature will at least protect against the penoplex sliding down. Before installing penoplex, the wall is processed and cleaned.
The inner side of the insulation must be rolled with a needle roller. This guarantees a rough surface, which means better adhesion to the walls.
The slabs are installed from bottom to top, and each horizontal row will need to be offset by half a slab. This type of fastening of classic penoplex to the wall ensures maximum heat retention.
Press the plates against each other as tightly as possible. To make the insulation connection as strong as possible, the second row can be attached directly to the grooves of the first. To save adhesive composition, after installation you can seal the joints with installation foam. So, how to glue penoplex to a wooden or brick wall?
How to insulate the foundation of a wooden house
Many owners of wooden houses believe that to ensure favorable living conditions it is enough to insulate the walls and floors. However, this is not true, because serious heat loss can occur through a wooden floor - up to 20%. Therefore, thermal insulation of the foundation is mandatory, especially if the house is located in an area with harsh weather conditions.
Insulating the foundation of a wooden house from the outside will not only create favorable conditions indoors, but also prevent adverse effects on it. For this purpose, polystyrene foam and its varieties, as well as expanded clay, are usually used.
Stone finishing
Insulation of the foundation of PPS or EPS
Expanded polystyrene has excellent consumer properties, such as low thermal conductivity and moisture absorption, resistance to negative weather conditions, affordable cost, ease of installation, etc.
These and other characteristics have made this material one of the most relevant and in high demand among many consumers.
To insulate only the above-ground part of the foundation or plinth, a fairly simple installation is required. PPS sheets are simply attached to the surface using glue or special fasteners.
After this, cladding or plastering is performed. However, you should know that installing insulation does not mean complete waterproofing, so it should be carried out separately to avoid groundwater from penetrating under the floor.
At the summer cottage
In this case, it is necessary to completely waterproof the walls. For this purpose, a trench is dug around the wooden house, then the foundation is cleared of soil and debris. Next, EPS panels are attached to the surface, after which the whole thing is backfilled and compacted.
The insulated base can additionally be finished with brick or other types of cladding that can withstand adverse weather conditions.
Foundation insulation with expanded clay
Often a wooden house is insulated from the outside with expanded clay. However, it has increased moisture absorption.
To avoid the negative effects of this phenomenon, a trench is dug around the house and formwork with waterproofing is installed, after which the expanded clay itself is filled.
Blind area
This method is no less effective, but requires special attention and the need to adhere to all installation rules.
About preparing walls for fixing penoplex
On the one hand, penoplex will not be a finishing coating for the walls, so it is not so important whether it will be evenly attached to the walls. However, it is much easier to plaster smooth walls made of polystyrene foam than curved ones.
Moreover, if there are large cavities under the penoplex, this can further lead to the destruction of the material, because the penoplex is a rather fragile (but not the same as foam) cladding material and when pressure is applied to it, it can break in front of the cavity. Moreover, excess moisture may appear in such cavities, which will lead to the development of mold and mildew and subsequently to the destruction of your walls.
Before fastening the penoplex, you need to work with the walls.
- First of all, all dirt and waste materials, in the form of falling off plaster, etc., are removed from the walls.
- Walls that have oily stains must be degreased.
- It is advisable to cover the walls with a primer liquid to collect all debris and dust.
- The walls also need to be coated with an antifungal solution to prevent mold and mildew from forming on them.
Having finished preparing the surface, we proceed to choosing a method for attaching penoplex.
We insulate the foundation ourselves
The high cost of the required materials and the simplicity of the process make it possible to insulate the foundation yourself, minimizing the total cost of this type of work. We will dwell on the features of each option for installing a penoplex foundation in more detail, which will allow us to avoid inevitable mistakes in the future.
We insulate the slab foundation
The technology for insulating the foundation with penoplex with your own hands is not complicated and is similar to working with the simplest version of a children's construction set. The slabs are laid on a pre-prepared base, tightly joining them to each other. As a rule, no additional fastening is required for this. A prerequisite is the laying of a polyethylene sheet to prevent the concrete mixture from leaking into the seams.
Penoplex for slab foundation
Calculating the required quantity will also not be difficult for any home craftsman who has not yet forgotten the elementary school mathematics course. The area of a standard Penoplex foundation slab with dimensions of 1200x600 mm is 0.72 m2. Therefore, to determine the required amount of material, it is enough to divide the total area of the future slab by 0.72, rounding to the nearest integer. When making calculations, do not forget to determine the amount of Penoplex insulation for the side walls of the slab base of the house.
Often, to determine transportation costs, it is necessary to calculate the number of packages of material. To do this, in addition to the total number of slabs, you also need to know their required thickness. This is due to the different configurations of penoplex packs, which have a standard thickness of 400 mm. Thus, the package will contain 8 pieces of slabs with a thickness of 50 mm, and 20 pieces of slabs with a thickness of 20 mm.
We insulate the strip foundation
Since the strip type of base is the most common, the technology of its insulation should be discussed in more detail. Penoplex slabs allow you to finish the walls of the foundation of a new house or one that has stood for several decades. The sequence of work will look like this:
Penoplex for insulating strip foundations
- It is necessary to completely remove the soil from the strip base at a distance convenient for two people to move. Typically, this value is 1 meter.
- The surface of the belt is thoroughly cleaned of various debris and lagging parts of the concrete mixture. This is especially true for foundations with a long service life. Plastic brushes, mounted in a drill chuck or on a grinder, are recommended as tools.
- If deep depressions form on the surface of the foundation walls, they must be filled with fresh cement mortar and plastered.
- Before attaching foam boards to the foundation, it must be insulated from moisture. To do this, the dried walls of the tape are covered with coating mastic, onto which roofing material is glued. Waterproofing the foundation with penoplex, even taking into account its low moisture permeability, is not recommended.
- Having decided on the basis of preliminary calculations which penoplex for the foundation is suitable in your conditions, we install it. In the lower, underground part, a special adhesive for slabs is used, sold in the form of a dry mixture and prepared directly at the construction site. For the above-ground part, builders recommend using dowels and nails.
- The outer surface of the insulation must be coated with one or another composition. Before closing the penoplex on the foundation, wait until the adhesive has completely cured. The best option is plastering using plastic reinforcing mesh.
The described technology has wide application, and, for example, correctly insulating the foundation of a bathhouse with penoplex, as well as the outer surface of a country pool, will now not pose any problems for you. By maintaining consistency and striving for high quality work, it is not difficult to get the result you are going for.
This may be useful:
- Construction technology for a rubble concrete foundationInstallation of a foundation for a fireplace - types, technology, featuresInsulation for the foundationDrilling wells for piles: equipment and technology
Additionally, we recommend reading:
How to calculate the need for insulation
Example of basement insulation
Before deciding how to insulate the foundation with penoplex, you should determine what thickness of sheets is needed.
The packaging materials of the sheets contain recommendations for the use of insulation in various climatic zones.
If you wish, you can independently make the necessary calculations of the need for insulation under the foundation of a house with penoplex foam, using the following formula for resistance and thermal conductivity:
R is an indicator of resistance and thermal conductivity. For example, in relation to Moscow it is 3.2;
H1 – width of the constructed foundation;
λ1 – coefficient indicating the thermal conductivity of the material of which the foundation is composed;
H2 – penoplex thickness;
λ2 is a coefficient indicating the thermal conductivity of penoplex.
For example, you need to do the work of insulating the foundation with penoplex yourself. Moreover, its thermal conductivity coefficient is 1.69, and its thickness is 0.40 cm, then by substituting the necessary values into the formula, we get:
3.2=0.4/1.69+H2/0.032;
3.2=0.24+ H2/0.032;
2.96= H2/0.032;
H2=0.0947 m.
10 cm penoplex is perfect for insulating the foundation
Thus, to carry out work on insulating the foundation with penoplex with your own hands, you need sheets with a thickness of 95 mm. Since the industry produces 8 and 10 cm, you need to choose a thickness of 10 cm.
Now we calculate the required number of slabs, provided that the insulation height is 1 m, the entire length along the perimeter is 100 m. It is necessary to insulate (1 m x 100 m =) 100 sq.m. the outer part of the house foundation with penoplex.
The area of each penoplex slab is 0.72 sq.m. As a result, we get the result that we need (100 sq.m. / 0.72 sq.m. =) 139 10 cm slabs and the question of how to insulate the foundation of a house has been resolved.
According to the technology of insulating the foundation of a house with penoplex, it is recommended to purchase 278 5 cm slabs in order to install the insulation in two layers, shifting them relative to each other. This way, all the cracks and previous joints will be closed.
Ventilation in the waiting room
Ventilation in the lobby is similar to ventilation in any other room and is designed to provide fresh, oxygen-rich air and remove stale air.
In this case, the circulation of air flows must be designed in such a way that not only the room, but also decorative and furniture elements are well ventilated and dry.
The most important “disease” of the front bench is condensation that forms on the walls and ceiling of the room. This leads to terrible consequences, namely the formation of various fungi and molds, which lead to premature decay of the wood.
Sometimes an oven is installed in the antechamber, and then the issue of air exchange disappears on its own when air flows in and out through it.
After bathing, the front room is usually ventilated and all windows and doors are opened. Despite these measures, experts still recommend installing at least a basic ventilation system on the front bench.
What is better for gluing foam?
To obtain a high-quality result when gluing foam plastic to walls, it is recommended to use the following materials:
- compositions based on dry mixtures;
- PVA construction adhesive;
- "liquid nails";
- polyurethane foam;
- polyurethane foam.
Interesting materials:
Why can't you pour cold water on the stones in the bathhouse? Why can't you pump water out of the basement? Why can't you put water into the cooling system? Why is there no hot water pressure in the tap? Why is there no water pressure in the tap? Why is there no water in the toilet tank? Why doesn't my new dishwasher fill with water? Why doesn't the new boiler heat the water? Why is water purified? Why does water remain in the washing machine tray?
Technology of vertical foundation insulation with Penoplex
This method can be used both on a foundation under construction and for already constructed buildings. In the case of insulating the foundation of an existing building, it is necessary to first excavate it to its depth.
The process of vertical insulation of the foundation with penoplex
- The foundation is cleaned of soil residues, dust and other contaminants. If the surface is uneven, level it using cement mortar. Coating waterproofing of the foundation is carried out using water-based polymer or bitumen mastic. You cannot use solvent-based mastic - Penoplex is destroyed by contact with it.
- Dilute polystyrene foam glue according to the instructions on the package. Mix it thoroughly and leave to mature. On the foundation, mark the bottom line of laying the slabs according to the level. If the base of the foundation is uneven, the insulation can be buried below the level of the sole, this will not harm.
- Apply glue to the Penoplex slab in several places. The glue can be completely leveled only for an absolutely flat plane to be insulated. Press the Penoplex slab against the foundation for a few seconds, then level it if necessary. The next plate is fastened by aligning the mounting groove. If it is necessary to secure several layers of Penoplex, they are placed in a checkerboard pattern so that the second layer overlaps the seam of the first. This contributes to better thermal insulation. The second layer is attached with the same glue, the technology is also no different.
- In the underground part of the foundation, additional fastening of Penoplex to the foundation is not required - when backfilling it will be tightly pressed with soil. In the basement part, Penoplex must be secured with special dowel nails after the glue has dried. The dowels for fastening the insulation have a wide plastic perforated cap, which allows you to tightly hold the insulation on the wall without rising above its surface. Holes are drilled through the slabs, going 3-4 cm into the concrete, after which dowel-nails are driven in. The length of the drill must be selected depending on the thickness of the insulation board.
- If necessary, for decorative finishing of the base, plaster or tile adhesive can be applied directly to the insulation boards, reinforcing them with mesh.
What to glue
How to glue penoplex to a concrete wall? In this case, it is better to choose cement-based or mineral adhesive solutions. With their help, you can achieve the maximum effect of bonding two surfaces. Such compositions have an affordable price and high adhesion rates when using penoplex for outdoor use. The composition is excellent for installing slabs to concrete, aerated concrete and sandstone. Such compositions are sold in the form of bulk mixtures and packaged in paper packaging. Before use, the mixture is mixed with water; instructions are on the package.
Mineral and cement adhesives are sold in the form of a dry mixture, which is diluted with water in accordance with the manufacturer's instructions. Source blog-potolok.ru
If you are choosing how to glue penoplex to a brick, then you need to look towards polyurethane glue. This is an ideal option for attaching penoplex to wood and brick. Such a solution can be used to insulate concrete surfaces, but in this case the cost of the result increases significantly. Polyurethane compositions are sold ready-to-use, they are sticky, and are sold in 750 ml aerosol cans.
It is very important to remember that this type of glue has one characteristic feature - it dries very quickly. Therefore, immediately after applying the adhesive, the slab must be immediately attached to the surface.
Polymer adhesives are universal and can be used on different surfaces. Provides quick fixation. Can be used to attach slabs to the ceiling. Bituminous waterproofing compounds are designed specifically for rooms with high and constant humidity.
Polymer compounds are a universal type of glue; they can be used for different surfaces and quickly glue slabs to different surfacesSource ad-cd.net
All types of adhesive compositions have their own characteristics, pros and cons. When removing glue, it is necessary to take into account working conditions, external or internal work, room humidity, and so on.
How to attach to concrete
What should I use to glue penoplex to concrete? There are several ways to attach slabs to concrete surfaces - using special adhesives, foam and liquid nails. It is necessary to select a suitable material taking into account the characteristics of the work. Experts prefer dry mineral and cement mortars developed specifically for these purposes. They have high adhesion and give a high result of bonding two surfaces. Liquid nails can only be used if penoplex will be installed on the floor. Foam is best used only to fill joints.
Special dry adhesive mixtures are designed for installing foam boards to concrete surfacesSource www.cemtorg.com
How to attach to metal
How to glue penoplex to metal? When working with metal surfaces, you can use regular polyurethane foam. The composition is applied to the sheet at five points and then pressed tightly against the metal. Many experts use PVA glue. This is a cost-effective option, but you will need to purchase additional burlap.
The gluing process occurs in two stages. First, glue is applied to the burlap and it is glued to the metal. At the second stage, a foam board is glued to the burlap, but only after the previous layer on the metal has dried well. Cladding is allowed only after the glue has completely dried. For cladding, any materials that are light in weight can be used.
To glue penoplex to metal, you can use mounting foams or PVA glue. Source imhodom.ru
Gluing the boards together
Sometimes the question arises: how to glue penoplex together? In this case, it is strictly forbidden to use any solutions that contain kerosene, alcohol or acetone. This is due to the fact that organic solvents can completely destroy the structure of the insulation. To fasten foam boards together, it is allowed to use only adhesive compositions designed for working with polymer materials.
Any dry mortars based on cement are used in this case. The best option is polymer adhesives. After application, it forms a homogeneous mass that reliably holds the sheets together. Polyurethane compounds that provide quick bonding also give quite good results.
Plates can only be glued together to increase thermal insulation properties and noise protection using polymer adhesives; it is strictly forbidden to use compositions with organic solvents Source i1.photo.2gis.com
Materials for insulating blind areas and foundations
The purpose of the blind area is to prevent rain, snow and condensation (dew, fog) from penetrating the walls of a private house. In addition to this function, the blind area is often built for:
- Protecting the foundation of the house from atmospheric water and moisture;
- Maintain cleanliness around the base;
- Creation of a pedestrian zone in the form of a sidewalk path;
- Protecting the soil from freezing.
Slope of the blind area
Work on the construction of a blind area requires compliance with certain rules, requirements and parameters:
- The material of the blind area must be waterproof and wear-resistant, so most often they choose paving slabs of any configuration, asphalting or concreting the surface;
- The width of the blind area is not an arbitrary parameter. The tape should be 15-20 cm wider than the width of the eaves overhang on dense soil, and 100 cm wider on shrinkage soil;
- A brick or gravel (crushed stone) blind area is made with a slope from the wall of ≥ 5, the concrete strip must have a slope of ≥ 3;
The blind area need not be made for buildings on a columnar foundation, but in this case there must be a system of drains that drain water from the walls more than 1.5 meters, and a waterproof coating must be laid in places where water is collected from the roof.
The foundation is also insulated from the outside in order to protect it from exposure to low temperatures, which turn water into ice, which destroys the building material of the blind area. In the spring, thawed ice can contribute to deformation and displacement of the soil.
Scheme of insulated blind area
Penoplex takes a leading place among insulation materials in home construction due to its high heat saving efficiency and environmental friendliness. According to the principle of implementation, insulation of the foundation and blind area with penoplex is a simple laying of insulation sheets in one or several layers, depending on the requirements and design of the structure. Standard sheets have a thickness of 100 mm.
Advantages of the material:
- Low moisture absorption;
- High thermal insulation properties;
- Strength and durability due to the high density of the material;
- Temperature stability over a wide range;
- Passivity to chemicals and fungal infections;
- Simplicity of installation and ease of machining.
Disadvantages of penoplex:
- Fire hazard;
- Fragility;
- High price;
- Additional waterproofing.
Protective covering
Scheme for attaching penoplex to a brick or concrete wall
In order for the surface of the insulation to look beautiful and be durable, it must be protected. The simplest and cheapest way to protect insulation is plastering, which is carried out in stages.
- Selection of plaster mortar.
- Selection of reinforcing mesh for plaster mortar.
- Fastening the reinforcing mesh using a certain technology.
- Laying the mortar, leveling the surface, grouting with a plastic float.
- Primer the surface for the finishing coat.
- Finish plaster. After drying, painting is done or a transparent protective layer is applied.
Video instruction:
In general, attaching penoplex to concrete and brick walls, as well as insulating the foundation of a building, is not difficult. It is enough to follow the installation technology and carry out the work carefully to ensure that the insulation is attractive and durable.
Subscribe
Features of installing insulation on the foundation
As a rule, the foundation needs insulation in the same way as the walls. Various methods of insulating the base of a building with penoplex are used.
- Vertical method.
Along the entire foundation there is a lower level for laying insulation.
The slab is covered with adhesive and pressed in the right place.
The entire foundation is covered with insulation using the same method. An exception may be places that are in the ground. The slabs in this place are pressed tightly against the foundation with soil.
- Horizontal method.
In this way, the foundation from below is protected from freezing. The work is carried out at the initial stage of construction, when the foundation is just being laid.
The slabs are tightly placed on the concrete base of the formwork.
Waterproofing is laid on the insulation, and then the foundation is poured and reinforced.
After removing the formwork, the sides of the foundation are insulated.
- Thermal protection around the house.
In this case, the foundation and the surrounding area are simultaneously insulated.
First of all, the foundation is insulated vertically.
Then formwork is made around the foundations with an indentation of 100 mm, and the blind area is prepared.
Insulation is laid in a dense layer on the compacted surface between the foundation and the formwork.
A waterproofing film is installed on top of the insulation, overlapping the foundation, after which the formwork is filled with concrete.
Features of the work
After installing penoplex slabs along the entire perimeter of the building, the issue of drainage system should be resolved so that the water that will drain from the roof of the building does not seep to the very bottom of the foundation. To learn how to properly drain drainage, watch this video:
Reinforcing mesh will protect the insulation from damage
After all the foam boards have been installed, the foundation should be covered with a thin reinforcing polymer or metal mesh with a fine pattern, onto which a thin layer of adhesive or plaster should be applied. This will protect the surface of the penoplex from mechanical damage when backfilling with soil.
If it was decided to thermally insulate the surface from the inside with penoplex, then the list and sequence of work performed remains the same. Simply, after all the work has been completed, the surface of the insulation is puttied for painting or wallpapering.
Carrying out foundation insulation work with your own hands is not particularly difficult and can even be carried out by the developer himself.
Tape-type structure insulation technology
How is the foundation insulated with polystyrene foam? Preparing the load-bearing foundation of a house, as mentioned above, is the most labor-intensive and physically difficult process. First you need to dig out the foundation with your own hands.
To do this, a trench is dug outside, along the perimeter of the construction site. Its width must be at least one meter.
The depth will depend on the place to which the soil freezes when the temperature drops. Usually, it is with this calculation in mind that the strip foundation is initially laid.
Despite the fact that the technology of insulation with extruded polystyrene foam from the outside becomes a barrier to moisture, in case of heavy floods it is recommended to install drainage.
Having retreated about 60 cm from the strip foundation of the house, they dig another shallow trench for laying drainage pipes.
Having properly equipped the drainage system, they begin to prepare the excavated base for insulation with their own hands.
The walls are cleaned of adhered pieces of soil and broken parts of concrete. Then, using a cement-sand mortar in a ratio of 1:4, the strip foundation slabs are plastered.
Having thus leveled the surface, you don’t have to worry that the slabs will damage the waterproofing material, and this problem will subsequently affect the life of the house.
At the next stage, the leveled slabs are thermally insulated. Do-it-yourself application of several layers of waterproofing onto completely dry plaster.
As the first layer, bitumen mastic is used, and as the second layer, sheets of TechnoNIKOL are used.
Next comes the insulation of the foundation with penoplex, which is fixed on the walls in a vertical position, from bottom to top.
Penoplex is attached using any glue made on the basis of inorganic components.
The space at the joints and seams is sealed with polyurethane foam. If the thickness of the insulation seems insufficient, then a second layer is placed on top of the first layer of polystyrene foam boards in the same way so that the thickness increases slightly.
This layer is attached with an offset, which will further insulate the joints.
At the final stage, insulating the foundation with penoplex requires plastering the surface. To do this, reinforcing material is overlapped over the insulating layer.
Then a plaster cement-sand mortar is applied. After the plaster layer has completely dried, the trench is buried, but not completely, since it will still be necessary to leave room for a warm blind area.
Additionally, we suggest watching video material on this topic (including about the installation of a blind area).
Video:
Preparing the surface for installation
Penoplex panels are attached only to treated and smooth surfaces.
The preparatory stage includes the following operations:
- The surface is carefully inspected, after which all dirt, remnants of the old destroyed coating, and peelings that will not withstand the load of the insulation are removed. Cleaning the walls with a wire brush
- Particular attention is paid to surface damage by mold and mildew. The damaged area is cleaned with a stiff brush and then treated with a special composition, which is made at home using copper sulfate or purchased in a retail chain.
Ready-made compositions against fungus and mold
- To eliminate irregularities, a map of problem areas is drawn up. After this, alignment is performed using any of the following methods:
- plastering is a simple and reliable method. The solution is selected individually for the surface material. The insulation can be attached when the plaster has dried;
- Laying slabs of different thicknesses is a labor-intensive method that requires precise identification of irregularities. The brand of penoplex depends on its thickness. When purchasing, slabs of different thicknesses, but of the same brand, are selected;
- using shims is a method used only by experienced installers. Pieces of penoplex or plastic are used as linings.
- Metal parts that are planned to be covered with slabs are treated with anti-corrosion compounds.
Anti-corrosion composition WEICON Zinc Spray
- Brackets are mounted for equipment that will be hung in the future, for example, an air conditioner.
Cost of insulation
How much will it cost to insulate walls using this material?
To do this, you need to calculate the geometric plane that needs to be insulated.
If a house has a perimeter of 42 meters and a foundation depth of 1 meter, then 42 square meters need to be insulated.
There are no sheets 120 mm thick. But, there is Penoplex Foundation 100 mm and 20. You will have to insulate it in 2 layers. A sheet 100 mm thick costs approximately 375 rubles and has an area of 0.72 m3. A sheet 20 mm thick costs about 70 rubles. In total, we need 59 sheets of each type. One hundred square meters will cost us 22,000 rubles and the second layer 4,200, totaling 26,000 rubles for the insulation.
If you add several cylinders of adhesive foam, then you can definitely meet the 30,000 mark.
Advantages and features of penoplex
Penoplex is a Russian product. It is actively used by builders and residents of the private sector who decided to do the insulation of the old foundation themselves. It is polystyrene foam, which during manufacturing was extruded (foamed under the influence of high temperatures), thereby improving its technical characteristics:
- moisture resistance – 0.5% of the total volume of the material;
- operating temperature range from –500 to 750 C;
- compressive strength – 27 t/m2;
- service life – 50 years and above.
And this is not all the advantages of penoplex. You will find more information about the composition and properties of the material here: “Foundation insulation”.
