Every owner of a private home faces roof insulation work. Those who are doing this work for the first time will face a long process of becoming familiar with different technologies and studying the properties of modern materials. The task of roof insulation is to create a cake from insulation and waterproofing films. Regardless of the type of roof structure, the durability and efficiency of insulation is determined by the correct choice of materials and compliance with the sequence of laying each layer of the roofing cake.
Roof insulation with mineral wool
Varieties of mineral wool and options for installing the material on various types of roofing, pros and cons of coatings based on fiber products, rules for selecting components, installation technology.
- Features of work
- Advantages and disadvantages
- Insulation technology
- Selection of mineral wool
- Sloping roof
- Flat roof
Insulating a roof with mineral wool is the creation of a shell for comprehensive protection of the house from cold, overheating, and precipitation. The composition of the thermal insulation coating includes, in addition to the main element, vapor and waterproofing materials, and a screed for protection against mechanical stress. You can learn about the rules for forming an insulating “pie” from this article.
Pros and cons of the material
Table with the characteristics of mineral wool
Roof insulation with mineral wool has the following positive properties:
- high heat-protective characteristics;
- strength and durability;
- resistance to biological influences (mold, fungus, rodents);
- resistance to fire and high temperatures, which is especially important when ensuring the fire safety of a wooden house;
- when insulated from the inside, the slabs hold quite well without additional fastening (during operation, the bottom sheathing becomes an additional holding element);
- Do-it-yourself thermal protection with mineral wool ensures free movement of air through the material, this has a beneficial effect on the microclimate of the premises of the house.
It must be remembered that protecting the pitched roof of a house with mineral wool has its own characteristics and disadvantages:
- DIY installation requires special clothing, gloves and a mask, since fiber particles getting on the skin and lungs cause itching and irritation;
- a sufficiently high degree of water absorption of mineral wool requires the mandatory presence of vapor barrier and waterproofing;
- When insulating a house with mineral wool, it is important to remember that it weighs more than, for example, polystyrene foam or penoplex.
Insulating the attic floor
Of course, the easiest way will be to install thermal insulation during the construction of the building - this will simplify the design and some of the nuances of the work. In most cases, it will not be possible to follow this advice - lack of finances or time may well interfere, so the ceiling remains without insulation. As a rule, this state of affairs persists until the first frost, and the owners have to quickly lay thermal insulation.
Before insulating the attic floor, you need to carry out a number of preparatory work, which is especially important when using bulk thermal insulation materials. There are two insulation technologies - traditional and modern.
The traditional method of floor insulation is implemented as follows:
- The first step is to treat the boards attached to the ceiling with clay or lime mortar - such treatment will ensure the structure is airtight while maintaining normal ventilation;
- When the mixture hardens, you can proceed directly to insulation work - pouring bulk materials into the space between the floor beams onto pre-treated boards.
Today, a more modern method of floor insulation is used much more often:
- First of all, a vapor barrier membrane is laid on the floor and beams with a 20-cm overlap, which will not only protect the insulating material, but will also complement its thermal insulation properties, reducing the amount of heat escaping from the building through the ceiling;
- To ensure a tight seal, the membrane in the overlap areas must be sealed using construction tape;
- The next step is laying the selected insulation (mineral wool, ecowool, expanded clay or one of the bulk materials) using the appropriate technology;
- To ensure that the floor beams do not have cold bridges, it is necessary to ensure that the insulation passes over them;
- Above the insulation, in compliance with the already known rules, another layer of vapor barrier film is laid, which is attached to the beams with counter-battens;
- All that remains is to lay a covering of boards or fairly strong plywood over the finished thermal insulation structure.
Sometimes, instead of insulating the floor from the attic side, thermal insulation is installed inside the building itself. This design is also quite effective in insulation, but requires additional finishing.
Two options for ceiling insulation
The ceiling is insulated if there is a non-residential attic above it, which is not equipped with thermal insulation.
It is not used as a living space in winter, therefore, there is no need to lay a layer of insulation on the slopes. Often this is just a warehouse for equipment or a room for drying mushrooms/berries.
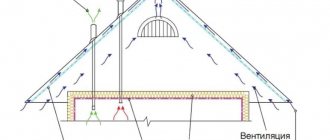
The non-residential attic itself plays the role of an air chamber, preventing the movement of heat waves both inside and outside the building. However, to dry the wooden elements of the frame structure, roofing, and metal fastening parts, a cold attic is usually equipped with effective ventilation.
Ventilate it naturally, i.e. regular ventilation without the use of any mechanisms. The system operates without coercion. Air moves due to the temperature difference with pressure outside and inside the attic.
The air flow enters the attic space through the dormer windows in the summer and the gaps framing them in the winter, when a rarefaction of air is formed inside. It is removed spontaneously, replaced by a new portion coming from the street.
For building structures, constant air circulation is really necessary. But along with continuously moving air masses, heat is blown out of the attic. As a result, instead of saving it to save energy resources, additional costs are incurred.
How to deal with them? Be sure to insulate! Insulation is carried out in two standard ways:
- Installation of thermal insulation along the ceiling from above. Those. From the attic side, slabs of foamed polymers, mineral wool are placed on the reinforced concrete floor or between wooden joists, expanded clay or folk remedies (sawdust, dry leaves, etc.) are poured in.
- Installation of slab insulation from inside the premises. Simply put, fastening insulating boards from the premises to the lower plane of the ceiling.
In both cases, the insulation layer increases around the perimeter, i.e. along the line of connection between the ceiling and the adjacent wall. Reinforcement is required here due to increased heat loss. A vapor barrier membrane is placed between the wall, ceiling and insulating layer.
Why is it not waterproofing that is used in the formation of a heat-insulating pie over the ceiling? Yes, because it is necessary to protect it, first of all, from steam penetrating from living quarters, and not from atmospheric water flowing from above.
It is the fumes emitted during breathing by us, our pets and house plants, as well as those formed during the cooking process, during hygiene procedures that can harm the thermal insulation system. But the roof above must protect it from water.
By the way, when laying all types of insulation from the side of a cold attic, they are not covered with either vapor or waterproofing on top. This allows the materials to dry out spontaneously when the attic space is ventilated.
Under no circumstances should insulation materials get wet or wet under a practically sealed insulating film. Together with moisture, they lose their insulating properties. Wet thermal insulation preserves almost nothing, but it can rot, and mold will spread to wooden elements.
The vapor barrier under the insulation, laid from the attic side, is arranged in the form of a trough: with the edges of the panel extending onto the walls. So it will prevent the insulation from getting wet not only from steam moving upward from the side of the premises, but also from the walls that absorb atmospheric moisture.
It is permissible not to use a vapor barrier layer only when extruded polystyrene boards are used as thermal insulation. They have virtually no pores capable of absorbing and retaining moisture.
Moreover, this is allowed only above rooms with stable “dry” operating conditions. Above bathrooms, showers, and swimming pools, a vapor barrier layer is installed in combination with extruded polystyrene as usual. Since there is a possibility of moisture penetration between the joints of the slabs.
Vapor barrier materials
The most popular vapor barrier material is a special film that protects wood and insulation from the effects of steam, which turns into condensation as a result of temperature changes. The negative impact of moisture on the elements of the roofing structure need not be mentioned once again - suffice it to say that it significantly reduces the service life of the roof and the effectiveness of the thermal insulation material.
The vapor barrier membrane is attached to the roof or ceiling before thermal insulation materials are laid. In rooms where heating is installed, a vapor barrier should be installed only under the finishing layer. To protect structures that are constantly exposed to temperature contrast, a vapor barrier layer must be placed on both sides. The exception is concrete floors, which do not require such protection.
To create a vapor barrier layer, a film with different characteristics can be used. The simplest option is a film made of non-woven material, but a much more effective option is a foil membrane. The latter option, as its name implies, has a thin layer of foil on one side, which prevents heat from escaping beyond the structure. The roof vapor barrier installed from the inside of the house is connected with special tape, ensuring a tight connection.
Selection of material for insulation
Today, the choice of thermal insulation materials is so large, and their characteristics are so different, that making the right choice for a particular case can be very difficult.
Most often, developers prefer the following materials as insulation:
- glass wool;
- mineral wool;
- basalt (stone) slabs (there are ready-made sandwich panels with basalt insulation);
- foam plastic (expanded polystyrene);
- polyurethane foam (liquid sprayed insulation).
Recently, Izover, a fiberglass material characterized by a high level of heat and sound insulation, has become especially popular when insulating pitched roofs. Due to the content of air in the structure of this material, its low thermal conductivity is ensured, not exceeding 0.044 W/mK. In addition, this material has incredible durability (at least fifty years), excellent vapor permeability and high fire resistance (flammability class - G1).
When considering other types of roof insulation, you should pay attention to expanded clay. It is also characterized by excellent heat and sound insulation, environmental friendliness and fire safety
Since clay is used for its manufacture, it does not lose its properties under the influence of temperature, does not deform and does not emit any substances harmful to humans, which is possible when using synthetic heat-insulating materials.
Why do you need to insulate your roof?
A third of a home's heat loss occurs through the roof. Therefore, high-quality roof insulation primarily saves money on heating the house.
The infrared photo clearly shows that there is no heat loss through the insulated roof
Insufficient waterproofing and insulation of the under-roof space leads to the formation of dampness. It penetrates the load-bearing elements of the roof frame, as a result of which their service life is reduced.
Insulating a pitched roof allows you to turn the attic into a full-fledged living space.
Instructions for insulating a pitched roof
Laying mineral wool
The entire installation process can be divided into several stages of work:
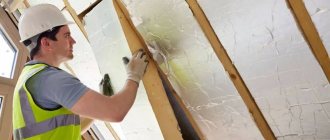
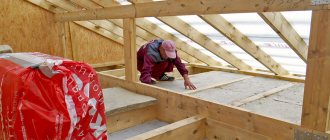
Padding on the rafter legs on the inside of the sheathing boards in increments of 20 to 30 cm - they are needed for attaching the insulation. Mineral wool is laid on the outside of the rafter legs. If insulation is installed for cold regions, it is better to increase the number of layers to two or three. The main working condition is to tightly press the joints of the slabs to the rafters
It is important to ensure that there are no through holes in the mineral wool layer. If after installation you still notice holes, they need to be eliminated using polyurethane foam. When the installation of mineral wool is completed, it is necessary to install a waterproofing membrane
To do this, they simply nail it onto the rafter legs, leaving a slight sag. Installation "in tension" is not advisable. The waterproofing membrane must be positioned correctly. The fact is that such material has a front and a back side. The first is designed to prevent the passage of moisture, but the lower one, on the contrary, allows moisture and vapor to pass upward. The waterproofing material is laid in strips, leaving a slight overlap. It is also necessary to create a gap of 5 cm between the membrane and the mineral wool.
When the waterproofing material is attached in place, we move on to the additional ventilation device. To do this, blocks of wood with a cross-section of 25x50 or 50x50 cm are stuffed onto the rafter legs. They can be used as trimmings of beams. The length can vary from one to two meters. When the bars are in place, it is necessary to fill the sheathing, placing the boards across the rafters. This will create a gap that will facilitate the evaporation of condensation and moisture that will collect on the waterproofing membrane. The roofing material is laid on the sheathing. Do not forget about treating wood with antiseptic solutions. This will help increase the service life of the roofing pie structure. Creating a vapor barrier is an important step in roof insulation. It will prevent water vapor from entering the mineral wool. The vapor barrier film is stretched over the inside of the rafter system. To be able to finish the room, it is necessary to lay sheathing boards on top of the vapor barrier material. For this, slats are used, onto which the internal lining in the form of lining, plasterboard, plywood, etc. will later be attached.
Calculation of insulation thickness and rafter height
The thickness of the insulation layer is directly related to the climatic factors of the region. For the areas of Moscow and the Moscow region, basalt insulation with a low density of 25 kg/cubic meter is best suited. The use of other insulation over time leads to its subsidence.
The greater the height of the rafters, the thicker the insulation should be. When selecting the optimal height of boards for making rafter legs, they rely on calculations of the thickness and strength of the insulation. In residential buildings located in central Russia, the thickness of the mineral wool layer is within 15 cm; for the northern regions the thickness is increased.
You can calculate the approximate consumption of insulation and its thickness using our calculator: Calculator for calculating the thickness of insulation for walls or balcony ceilings
Features of roof insulation from the inside with mineral wool, and the cost of work
Mineral wool is the collective name for three types of insulation that have one common property – a fibrous structure.
Basalt or stone wool is made from rock. It lasts for a very long time, so it is used for capital construction. The most expensive type of mineral wool.
Glass wool made from the same components as regular glass. Cheaper than basalt, but its service life is much shorter. It is used in places where it can be quickly and cheaply replaced.
Slag wool, for the production of which waste from blast furnaces is used. The price and properties are similar to glass wool.
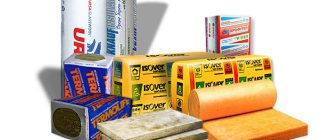
These materials are available in a variety of forms. These can be slabs, rolls, mats, and cylinders.
Insulating a roof with glass wool from the inside is the most effective and affordable way to retain heat in the attic.
In order to insulate the roof from the inside, especially when it comes to a structure made of wooden structures, materials that meet serious requirements should be used. They should be:
- Non-flammable (fire safety class G3 and higher).
- Durable.
- Eco-friendly.
- Rot resistant.
- Possessing not only insulation, but also soundproofing properties.
- Not affected by temperature changes.
- Resistant to damage from insects and rodents.
Mineral wool meets these requirements best of all. To insulate the roof from the inside, mineral wool is used in the form of a roll or mattress. The last option is the most convenient to install.
Prices for mineral wool allow almost every owner of a cottage, bathhouse or garden house to use it for roof insulation.
The only disadvantage of this material is its ability to absorb water, losing up to 40% of its thermal insulation properties. However, insulating the roof from the inside with mineral wool, carried out in strict accordance with technology, helps prevent liquid from entering the insulation.
Well, the quality of roof insulation can be seen using a thermal imager, which can instantly show the places through which heat loss occurs.
What set of tools and consumables will be needed to insulate the roof from the inside?
When carrying out roof insulation yourself, you should prepare everything necessary for the work:
- Minvatu.
- Wooden blocks with a cross section of 40 mm.
- Vapor barrier (for example, any waterproofing film).
- Drill.
- Glue.
- Antiseptic solution for wood.
- Nails or screws.
- Hammer.
- Mineral wool dust respirator.
Installation errors
Before laying mineral wool slabs, you will need to perform a number of actions:
- Checking the truss structure. If rotten fragments are found, they are replaced.
- Antiseptic treatment of the entire rafter part. It is advisable to use combined compounds (bio- and fire protection).
- If the roof is pitched, thermal insulation is performed with basalt tile material.
There should be a ventilation space between the roofing material and the mineral wool layer. When thermally insulating a pitched roof in private houses, not only high-quality insulation is achieved, but also good noise absorption.
The following mistakes are typical for specialists who lack experience:
- The use of insulation whose width is 3 cm greater or less than the distance between the rafter legs. Poorly laid wool will cause heat leakage.
- Thermal insulation of the roof with material with high humidity levels - wet cotton wool, for example. This will cause rotting of the wooden elements of the rafter base. The insulation will begin to freeze, as it is not able to “work.”
- Neglecting to install vapor and waterproofing.
The insulation system will not function properly and its service life will be shortened.
Features of mineral wool
Mineral wool
is very popular as insulation. This material is easy to work with and has a number of advantages, including:
- low thermal conductivity;
- combustion resistance;
- environmental friendliness;
- resistance to aggressive environments;
- high level of heat saving;
- good noise absorption;
- hydrophobicity. This property manifests itself as resistance to wetting; You cannot rely only on the hydrophobic qualities of mineral wool. It is imperative to take measures to protect the under-roof space from moisture. When wet, any insulation will reduce its effectiveness by a couple of times.
- high resistance to deformation;
- ease of installation;
- length of service life.
Unlike foam plastic, careless transportation of the material will not lead to damage. And thanks to the softness of mineral wool, it is easy to install.
Despite similar insulation procedures, mineral wool differs from ecowool, which appeared on the construction market not so long ago, which is an insulator characterized by friability and light weight. Ecowool contains cellulose, antiseptics and boric acid.
Safety precautions
Mineral wool, especially glass wool, becomes a source of harmful dust during installation. If inhaled or enters the gastrointestinal tract, it can cause serious diseases of the respiratory system and other body systems. If such dust gets on the skin or mucous membranes, irritation occurs and severe allergic reactions are possible. Therefore, when working with mineral wool, you should follow the safety requirements:
- use personal protective equipment: gloves, goggles, respirator;
- work clothes, shoes and hats must be made of thick fabric, have tightly fastened cuffs and do not leave exposed skin;
- When cutting mineral wool, you should use freshly sharpened, sharp knives or scissors;
- Ventilation of the attic should be organized to prevent the accumulation of hazardous dust in the air;
- At the end of the shift, you should take off your work clothes, thoroughly wash your hands and face with cold water and take a shower.
In addition to the danger from harmful dust, we should not forget about the general safety rules:
- work only with working tools;
- do not work from random supports, use inventory scaffolds and stepladders;
- before starting work, check power tools and extension cords for mechanical damage and integrity of insulation;
- When working at height, use a safety belt secured to a reliable support.
Timely and high-quality insulation of a pitched roof will help create comfortable conditions in the house and save significant amounts on heating. Mineral wool has established itself as one of the most popular materials for roof insulation. The technology does not require special skills, high qualifications or the use of expensive equipment. You can insulate the roof with your own hands.
Insulation of a flat roof
Quite often, flat roofs of houses are used to equip terraces, winter gardens, sports or children's playgrounds. Therefore, such a design must be as reliable as possible and capable of withstanding significant loads, and the thickness of the roof insulation must also be quite significant (also read: “House roof diagram - features”).
Insulation of such a roof is carried out as follows:
- First, a cement screed is installed on the reinforced concrete floor slab, forming a slope. Then a layer of waterproofing is laid;
- after this, a layer of extruded polystyrene foam with a density of at least 35 kg per square meter is laid;
- then, to create filtration, everything is covered with fiberglass, covered with a layer of gravel or pebbles, and finally paving slabs or paving stones are laid.
Foam can also be used to insulate the roof or foam concrete applied to the vapor barrier layer and covered with a foam fiber concrete screed. After this, a welded or membrane coating made of polyvinyl chloride is installed.
In cases where flat roofs are used as an attic, and a soft roof with insulation is planned, a vapor barrier layer and insulation are laid in the attic, and a waterproofing layer is laid under the roofing material. It is also possible to insulate the attic floor with expanded clay. If the use of a flat roof is not expected, then it can be insulated both from the outside and from the inside (for more details: “Insulation of a flat roof and its features”).
Advantages of mineral wool
The main advantage of this material is its special fibrous structure, due to which the material has excellent thermal insulation characteristics.
The material lends itself perfectly to cutting - for this you can use the most ordinary knife with a long thin blade.
Note!
Mineral wool is usually used in cases where repair costs are limited and you want to get insulation with decent performance characteristics at a low price.
As you can see, roof insulation with mineral wool slabs is not only practical , but also profitable.
The advantages of the material can be listed as follows:
- low thermal conductivity;
- fire resistance
- high noise absorption ;
- resistance to deformation ;
- environmental friendliness;
- possibility of long-term operation.
Abroad, roof insulation with ecowool is very common, which is highly environmentally friendly and safe. In our country, glass wool is also used, which is almost a complete analogue of mineral wool.
Instructions for insulating a flat roof
All flat roofs are divided into ventilated and non-ventilated. Let's consider both types.
Ventilated flat roof
The structure of a ventilated flat roof
The process of insulating it is similar to the scheme for working with a non-residential attic space. This roof design ensures a minimum distance between the slope and the ceiling, which makes it difficult to move in the under-roof space and reduces the functions of the room to technical ones only.
Mineral wool slabs 20 cm thick are suitable for work. The material is laid on the floor of the attic. Dowels are used as fastening elements. In addition to the mechanical installation method, it is possible to use glue or hot mastic, but the latter method has not gained much popularity. For proper operation of the insulation, it is necessary to place the construction film under it in one layer.
Stages of work
- First, the condition of the entire roofing pie is checked. Damaged elements must be replaced.
- To further insulate the attic, it is possible to lay a layer of mineral wool on top of the existing one.
- Before installing mineral wool slabs, you should clean the surface of the floor that will be insulated. When using reinforced concrete floor slabs, a vapor barrier is not necessary, because concrete does not allow moisture to pass through.
- The beams must also be insulated or covered with insulating materials, or mats must be laid (rolled insulation can be used) between the beams. But before this, it is necessary to install a vapor barrier layer.
- When using foil material, installation is carried out by placing the slabs with the foil down.
- A ventilation gap must be left near the cornice.
Unventilated flat roof
Structure of a non-ventilated flat roof
Concrete slabs or wood are used as the base, depending on the material from which the house is built. The peculiarity of this type of roof is the absence of any gap between the roof and the ceiling. Therefore, it is necessary to install mineral wool directly on the base.
Stages of work
- The vapor barrier film is laid on the base of the roof.
- After this, you can begin laying mineral wool slabs. It is recommended to do this with a checkerboard arrangement of the material so that the joints are not located along the same line. The slabs must be fitted tightly together. The most suitable thickness of the thermal insulation layer is 25 cm.
- Next, roofing felt is laid on top of the mineral wool slabs.
An unventilated flat roof can have various types of thermal insulation:
- Single layer. For this purpose, hard mineral wool slabs are used, which have increased strength. But their thermal insulation qualities are not great.
- Two layer system. For this purpose, elastic plates are suitable for forming the first row, and harder ones are used for the second. In this way, a structure is obtained in which the bottom layer exhibits excellent thermal insulation qualities, and the top layer helps to compensate for the sensitivity of the first row to various mechanical damage. The material used is basalt mineral wool.
- Mixed two-layer system. This option is similar in design to the previous one, but differs in the use of two types of mineral wool slabs. Glass wool is used for the bottom layer, and basalt wool is used for the top layer.
Drawing conclusions
As you can see, the process of insulating the roof of a building with mineral wool is not a very difficult task. First you need to decide what material will be used for insulation. If the price issue is serious, then you can use glass wool, but experts recommend using basalt wool, because it is easier to work with and has better characteristics. Then, not forgetting about waterproofing and vapor barrier, the system should be installed.
By correctly carrying out all the thermal insulation work, you can ensure a long service life of the materials and maximum efficiency of such insulation.
More
Thermal insulation methods
Depending on which structural element of the building is insulated, two methods can be distinguished.
Thermal insulation of the floor
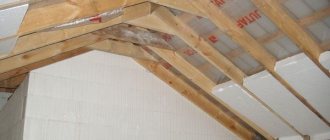
The first option is to insulate the floor. The method is inexpensive and very easy to implement. It consists of laying wool on concrete base slabs or, in the case of a wooden floor, between structural elements. Any type of mineral wool will do, even soft and granular. Installation is simple, there is no need to go around the rafters, as when insulating roof slopes, you can easily fill all the gaps and cracks.
Thermal protection of stingrays
The second option is to insulate the roof slopes. If the room in the attic is not used, then this option is not economically viable. The consumption of materials increases significantly; more time is required due to bypassing the rafters and additional fastening of mineral wool.
Insulation of slopes can be done in two ways: on top of open rafters or between them. With the first option, wooden beams remain visible indoors and have an additional decorative function.
Technology for self-installation of mineral wool
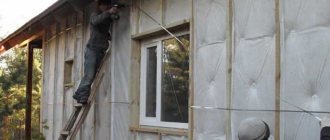
First, you need to make sure that the outer elements of the roofing pie (or at least the waterproofing layer) have already been installed. This is necessary to protect the mineral wool from atmospheric moisture before installing the outer membrane.
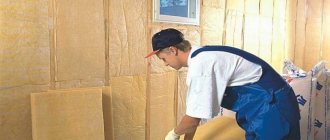
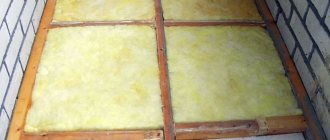
Place mineral wool tightly between floor beams or posts
Next, the width of the openings between the rafter beams is checked. If the size ranges between 550 mm and 600 mm, then you will not have to cut the insulation (you can use the factory width of the slabs 600 - 610 mm). If the distance between the rafters is more than 600 mm, it will be necessary to cut fragments of the required width from mineral wool slabs based on the installation compression of 20 - 30 mm. For example, if the rafter niche has a width of 720 mm, then sections of 700x600 mm are cut out of 1200x600 mm slabs. Residues 500×600 are accumulated for use in insulating various contours (for attic walls, around window openings, for laying crossbars on top, etc.)
The second method involves cutting rectangular slabs diagonally and relative displacement of the halves along this diagonal. When shifted, the overall width increases, ensuring that the ends of the wool rest against the vertical edges of the rafters. However, in this case, for a tight connection, the following slabs will have to be cut curvilinearly from the outside.
Installation of mineral wool and further operations are carried out alone using the following techniques:
Fastening mineral wool with nylon thread
- If there are no significant differences in width in the openings between the rafters, you can install mineral wool slabs without preparatory work. Pressing the material by 20 - 30 mm allows you to lay out all the insulation elements from the inside of the room into the roof slope. Otherwise, to support the wool, a temporary (removable) sheathing of planks, boards, or nylon thread (non-removable) is used, stretched along the lower edges of the rafters in a zigzag using a stapler. Layers of mineral wool are laid out in a checkerboard pattern to cover the joints.
- A vapor barrier film is stapled from below to the ends of the rafters. It must be joined with an overlap, gluing the joints with special tape.
- The lathing is installed to install the final ceiling cladding.
Step-by-step photo instructions for installing thermal insulation
Insulation of a pitched roof
The technology for insulating a pitched roof depends on its structural features, as well as on the purpose of the attic. So, if the attic is non-residential, then the insulation is laid on the ceiling (attic floor), and not between the rafters. If mineral wool is used, then the following roof insulation scheme is recommended, photos of which can be seen on the pages of many specialized publications or websites: walkways are made along the attic joists, and a special membrane is laid on the layer of wool, ensuring steam removal and fiber filtration. After this, the floor is covered with OSB boards, and any floor covering is laid on top of them (useful article: “Types of roofing on pitched roofs”).
How to properly insulate a pitched roof, watch the video:
https://youtube.com/watch?v=C4QOujBaYVQ
If you plan to install a residential attic, then resort to a different insulation technology:
Roof insulation - which is better?
To choose the best insulation for a roof, you need to compare different types of insulation at least according to such parameters as price, thermal conductivity (efficiency), manufacturability (ease of installation/application), durability, and environmental friendliness. This is not easy to do, and such a comparison in any case will be in some sense subjective, and not objective, since there are a huge number of factors on which each of these parameters will depend. To make it clearer, let’s explain possible contradictions with examples:
How to insulate a roof with mineral wool from the inside
Roof slopes can be equipped using different technologies, but their design always includes a heat-, hydro- and vapor barrier layer, as well as a counter-lattice that creates a ventilation gap and is used for additional fastening of materials.
The roof installation technology involves the following steps:
- Waterproofing is laid on the assembled and installed rafter system. Most often, high-density polyethylene is used as a waterproofing material, which can protect the roof from both moisture and gusty winds. The roof waterproofing is laid from the inside of the house with an overlap of about 20 cm and attached to the rafters with a construction stapler.
- A counter rail is installed above the film along each rafter. This element forms a small gap between the film and the roofing, due to which the structure is constantly ventilated.
- To lay a soft roof, sheets of moisture-resistant plywood are attached above the counter-lattice. Before insulating a metal roof, or a roof made of other solid roofing materials, you will need to create a regular sheathing with a well-calculated distance between its elements.
- After the sheathing is assembled, you can begin installing the roofing.
Algorithm for carrying out installation work
In order to insulate the roof from the inside with your own hands as efficiently , you need to carefully prepare - study topical articles and forums, watch training videos, consult with professionals. The work procedure itself can be divided into four stages:
- Arrangement of waterproofing. This step is usually done when covering the roof with roofing material. The waterproofing film is mounted to the rafters with slight sagging. When laying a hydrobarrier, it is important to lay it with the smooth side facing up, then seal the joints with tape. After the film covering is laid, it is fixed with counter-battens, to which the sheathing is nailed.
- Installation of thermal insulation. At this stage, insulation of optimal thickness is selected, cut to the required size and placed between the rafter beams. To keep the insulation in place, it is secured using small slats, rope or fishing line stretched between the rafters. To avoid the appearance of cold bridges, heat-insulating mats are placed with each row offset to the side.
- Installation of vapor barrier. This film material is placed with the smooth side towards the insulation, and the rough side towards the room. It is important to do everything clearly and not confuse the bottom with the top. Laying a vapor barrier is an important step when arranging the “pie”. Its installation is carried out using thin counter-battens or a construction stapler.
- Installation of bars and guide profiles. This stage is necessary for installing facing materials and creating a ventilation gap.
You can do the work yourself
