Set of socks, Omsa socks
349 ₽ More details
Set of socks, Omsa socks
349 ₽ More details
City Wallpaper
A summer kitchen in a country house or in a private house is an ideal place for preparing food in the warm season. For this building to be fully functional, a stove for the summer kitchen is a must. In this article we will tell you how to build such a stove yourself with minimal construction skills.
Material selection
At the very beginning of construction, it is necessary to decide which material is best to choose for the future structure.
There are two options here - aerated concrete blocks or refractory bricks. They do not burn out, can withstand exposure to high temperatures for a long time, and retain heat.
Aerated concrete for a summer stove will cost less. However, outwardly it looks worse and after construction the stove necessarily requires cladding (plaster, tiles, etc.). This is necessary not just for an aesthetic appearance, but also to minimize heat loss and protect the concrete from moisture.
First you need to choose the material
At the same time, brick will be the more preferable material, despite its high cost. It is moisture resistant, does not require additional cladding, and has a longer service life.
In order to accurately determine the future scope of work and correctly calculate the amount of materials required, it is necessary to develop a construction project.
Stove in a summer cottage - purchase or DIY
The market for summer cottage accessories and services for equipping summer cottages today allows us to satisfy the most demanding requests. The only question is how reasonable it is to order from professionals what you can do yourself. In order to build a stove for a summer kitchen, it is not necessary to have an engineering education. Yes, and a project with an orderly plan for laying bricks can be found on the Internet or developed independently, picking up a ruler and pencil.
In ready-made summer kitchen projects, a lot of attention is paid to the external arrangement. Here we offer both open options with one or two blank walls, as well as options with closed stationary or mobile walls of the room. When ordering a ready-made project, usually the foundation, walls and roof make up the lion's share of the price, while the fireplace itself with a chimney and additional work surfaces will cost a third of the cost of the entire complex.
How to make a calculation
Before starting construction, you need to decide on the location of the furnace.
If the site already has an open or partially open kitchen, then it is most rational to build the oven as a functional extension of the building. It’s best to be close to where you’re cooking. It can also be erected remotely from the kitchen, as a separate device on the site. Then you need to set up a place nearby where you can conveniently process food before sending it to the oven. For example, it would be suitable to install a gazebo with a table or stretch an awning.
See also: types and installation of a gazebo.
When choosing a place for the stove, you must also take into account the distance from the water source and cesspool, safe proximity to the eating and rest area, etc. This way you will make the building as convenient and safe as possible.
Today, summer stove designs are presented in a wide variety. You just need to choose the option that suits you best. However, creating a design and drawing of a furnace yourself will be difficult and time-consuming, especially if you do not have the necessary experience. If you have never done anything like this before, then it is best to follow ready-made “recipes” for construction.
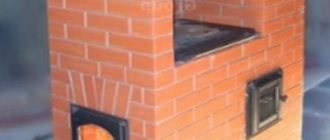
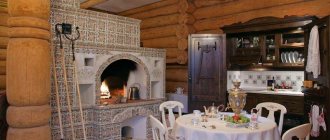
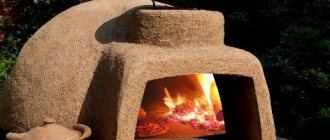
Our article will show the step-by-step construction of one of the simplest building options, which does not require special skills. This will be a stove with a barbecue and a removable cauldron (installed on the hob), stylized as a classic Russian one.
For such a construction you will need:
- 750 pcs. fire-resistant brick;
- 650 kg of special masonry mixture;
- 600 kg of broken brick or crushed stone;
- 300 kg of cement;
- 900 kg of sand;
- 1 roll of roofing material;
- 2 pcs. grate;
- 2 pcs. furnace doors;
- 2 pcs. closing iron doors;
- 1 furnace valve;
- 3 pcs. blower dampers;
- 1 hob;
- 1 barbecue grill.
This is a list of the main required materials. If you want to add something else to the design or plan to expand it, then you will need to draw up your own drawing.
Don't forget about the relevant material
Functions of a summer kitchen
Unlike a stationary stove in the house, a stove for a summer kitchen has several additional functions.
But, be that as it may, cooking remains the main function of this structure. The only difference from a stove in the house is that you can use the stove normally only during the warm season. In addition, if you choose the right project and build the stove as a multifunctional structure, then it can be used as a barbecue, as a barbecue, and even as a smokehouse. In this case, the time frame for using the building is not limited only to the summer period. However, if you install a panoramic door made of heat-resistant glass in the stove, it can also be used as a garden fireplace. And if the size of the firebox allows, then it can also be used as a place for burning garden waste - leaves and small branches.
Pouring the foundation
The stove requires a solid foundation, since the total weight of the structure will be large - more than 750 kg. Before starting to lay the foundation, it is necessary to calculate that the dimensions of the foundation will be 100–150 mm larger than the dimensions of the building itself.
The foundation itself is poured like this:
- At the site of the future foundation, we dig a pit 40–50 cm deep.
- A sand substrate 10–20 cm thick is placed in the resulting recess. The substrate is well compacted until a dense structure is formed.
- We lay crushed stone on top of the sand base. The thickness of the crushed stone cushion should be at least 3 cm. But you can save on crushed stone if you first lay 2 cm of broken brick on the sand, and add crushed stone on top of the remaining 1 cm.
- After laying the crushed stone cushion, you can proceed to pouring the foundation. To do this, mix the cement mortar and pour it into the pit. The surface of the poured solution should completely cover the pit and extend to the floor level.
Now you need to let the base dry and harden.
The main stages of manufacturing a stove for a gazebo
Before building a stove complex for a gazebo, projects of which are widely presented on the Internet, it is recommended to choose experienced specialists. In addition, to create a furnace you will need refractory bricks, a foundation, metal structures for the chimney, firebox and finishing of the adjacent surface. The elements are connected with heat-resistant glue, the outer surface is finished with varnish.
Most modern stoves are not lined, allowing owners to enjoy the natural beauty of brick Source materialexpert.ru
Construction of the furnace
The first stage is preparing the foundation on the selected site. The more massive and functional the future installation, the more reliable this design should be. Builders dig a pit up to half a meter deep, in which a reinforced concrete foundation is installed. The entire structure is located 1 cm below the floor level of the gazebo and 5 cm larger than the dimensions of the stove base in all dimensions.
The waterproofing material is laid directly on the foundation, and sheets of roofing felt - a dense material for finishing the roof - are often used.
Refractory bricks (a similar type is called “fireclay brick”) are laid on the foundation, fastening the elements with a mortar of clay, sand and cement.
2 grates are placed between the walls: the lower one will be used for coals, and the upper one will be used for arranging products. A coal tray made of sheet metal is mounted just below the grate level, the optimal height of which is 15 cm.
Creating brickwork for a fireplace in a gazebo - a job for an experienced craftsman Source bg.aviarydecor.com
Installation of the stove at the same time as the gazebo itself involves the construction of a hood and chimney before installing the roof of the building. Otherwise, builders will have to “cut through” the roof, which will take time and cost owners extra money. Some designs, for example, barbecues for a gazebo with a chimney, can be purchased ready-made or constructed from sheet metal.
Decoration of the cutting table
Most modern gazebo stoves are equipped with a cutting table that is designed directly to the right of the firebox. When designing a full-fledged culinary complex, the rule of the “working triangle” is used, which facilitates the path of the owners from the place of storing raw food to serving the finished dish for guests. In general, the cutting table has no different characteristics from the kitchen work surface. For the countertops, coverings made of wood, metal, artificial stone and chipboard are used. The best option is tiles or porcelain stoneware, which are resistant to temperature changes and very easy to clean.
The right section of the culinary complex is equipped to integrate a sink Source msk-kamin.ru
Projects for the construction of certain types of stoves are widely presented in architectural bureaus, and are also available from professional stove makers. It must be emphasized that the construction of a culinary complex in a gazebo is a labor-intensive process that requires the well-coordinated work of several professionals, high-quality materials and regular maintenance. Therefore, it makes sense to build such a spectacular and expensive structure for constant intensive use. Owners of a “weekend cottage” will save effort and money if they opt for a more affordable modification, for example, a barbecue oven.
Finishing work
The finished installation can be covered with a layer of decorative plaster, as well as tiled with tiles, decorative bricks or tiles.
The area in front of the firebox is finished with metal, porcelain stoneware or other material that is resistant to the effects of hot coals and ash falling from the stove.
Stone cladding is a universal finish for the stove and its surroundings Source pinterest.com
Metal chimneys are coated with heat-resistant paints of various colors.
Construction of the foundation
Before laying bricks, the foundation surface must be additionally waterproofed. To do this, cover the base with a roll of roofing material, and cover it with plastic film on top.
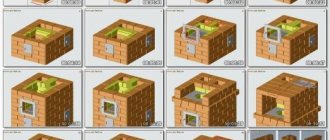
Now that the foundation is protected from moisture, you can proceed to the construction of the brick base:
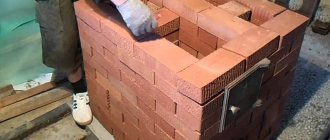
- Sprinkle the film with a small layer of sand and place the first row of masonry on it. It is laid dry, without mortar. Only the joints of the masonry need to be treated with the bonding mixture.
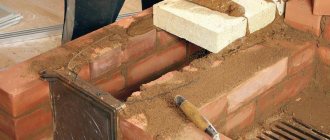
- Now you need to determine the location of the future blower. We select the location that suits you on the first row and mark it with a door. To do this, we wrap the door around with a mounting cord and install it on a brick coated with mortar in the place where the future vent will be. During construction, the door is additionally secured with wire.
- We lay out the next three rows on the mortar so that the bricks and mortar fit tightly to the frame of the blower damper. In this case, you need to carefully monitor the evenness of the corner of the building. Be sure to use a level.
- When the masonry overlaps and goes above the blower, we form special protrusions in the base of the mortar and install grate bars. It cannot be completely built into the walls. The grate is made of cast iron, and it tends to expand when heated. Because of this, there is a risk that the wall will begin to collapse over time.
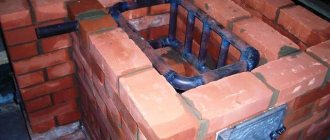
- The fifth, sixth and seventh row of bricks are laid out alternately - on edge, flat, on edge.
- In the seventh row we select a place to install the furnace door. We attach it in the same way as the blower damper.
- We prepare three quarters of brick and begin laying the eighth row with them, which is laid out flat.
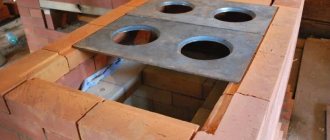
- The ninth row is laid out edgewise and a hob can be installed on it. You can install only after the row is completely dry.
- The tenth row is intended for laying out the base of the firebox pipe.
- A valve is installed in the eleventh row. It is fixed in the same way as the blower and the combustion door. The only difference is that it needs to be well coated with clay before installation.
- Next, recesses are created directly in the pipe for a removable grill or barbecue grate.
- All subsequent rows of masonry gradually narrow to form a full-fledged chimney. When laying out the pipe, be especially careful that the center of gravity of the furnace does not deviate from the specified direction. Check the level regularly to avoid mistakes.
At this point we can assume that the summer stove is ready.
Improved heater options
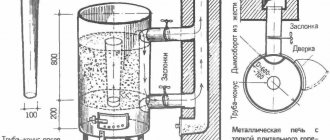
Many Russian masters were involved in the modernization of the classic stove - I. Kuznetsov, I. Podgorodnikov, A Emshanov, A. Batsulin. The essence of the changes is as follows: the details of the old design were taken as a basis - the vaulted furnace, the bend and the high above the mouth. New functional elements were added to them:
- Instead of a hearth, a hob is placed, and a small flood is arranged below. A parallel summer passage shaft is laid out, connected at the top with the main smoke collector.
- Hot gases from the additional firebox are directed through smoke circulations made in the lower part - the stove. Then the combustion products are discharged into a common pipe.
- At the end or on the sides of the furnace, vertical channels are installed, again leading to the lower zone under the firebox, then into the chimney.
- The channels from the firebox go into the attached heating panel and out through a combined pipe.
- The firebox is made from the bottom of the furnace and communicates with it through a grate installed in the hearth (bottom) of the main firebox. Gas ducts from the furnace penetrate the furnace and converge into a vertical shaft leading into the chimney.
Another example - vertical passages are arranged in the side wall, forming a heating shield
We tried to clearly describe common concepts; there are many more existing options. The purpose of the changes is to improve heat transfer and functionality of the basic design. If desired, a water circuit register or an oven is mounted inside the flues (the cabinet is placed next to the firebox).
Now we will analyze the updated options in detail using specific examples - with drawings and procedures.
General Tips
Construction of a furnace is a labor-intensive process with many nuances. Here are the main ones:
- if the foundation is poured in excessively hot weather, then it must be moistened from time to time so that the screed does not crack;
- the first row is laid out dry, so it needs to be formed from even bricks that can be tightly fitted to one another;
- to achieve the desired plane surface of the brick, it can be trimmed with a grinder;
- hewn or chipped bricks cannot be placed with the damaged surface inside the furnace, since on this side the material is less refractory;
- Any cast iron elements cannot be installed flush with the masonry, so that it does not collapse; make a layer of mortar or clay.
If you follow these rules, they will help you create a durable structure that will last for many years.
Baking in a summer kitchen is not only convenient, but also delicious. With a barbecue you can easily cook meat over coals, and a cauldron will help you prepare wonderful soups or porridges over a live fire. And it always adds piquancy to any dish.
Riddles about delicious things-2
Text:
I was green and small, Then I became scarlet. In the sun I turned black, And now I am ripe.
Answer: Cherry
* * *
The green house is a bit cramped: narrow, long, smooth. Round kids are sitting side by side in the house. In the fall, trouble came - the smooth house cracked, the round kids galloped in all directions.
Answer: Peas
* * *
In the hot sun the dried out leaves burst from the pods...
Answer: Peas
* * *
The cramped house split into two halves, and beads and pellets fell into the palms.
Answer: Peas
* * *
In the green tent, the Koloboks sleep sweetly. There are a lot of round crumbs! What is this?
Answer: Peas
* * *
Small stove with red coals.
Answer: Garnet
* * *
The berry tastes good, But go ahead and pick it: The bush with thorns is like a hedgehog, That’s what it’s called...
Answer: Blackberry
* * *
It shakes on the table, And it’s called….
Answer: Jelly
* * *
There are a lot of thin stems in the sun on the stumps. Each thin stem holds a scarlet light. Unbend the stems - Collect the lights.
Answer: Strawberry
* * *
In a forest clearing Tatyanka is showing off - Scarlet sundress, White specks.
Answer: Strawberry
* * *
I am a drop of summer on a thin leg, They weave boxes and baskets for me.
Answer: strawberries
* * *
Red, juicy, fragrant, Grows low, close to the ground.
Answer: strawberries
* * *
Egorka stands in a red skullcap, and whoever passes by will bend down.
Answer: Strawberry
* * *
I am a drop of summer on a thin leg. They weave boxes and baskets for me. Whoever loves me is happy to bow. And my native land gave me a name.
Answer: Strawberry
* * *
In haymaking it is bitter, And in frost it is sweet, What kind of berry?
Answer: Kalina
* * *
What kind of trotter is this? Fell on its side? Well-fed, lettuce-like. That's right, kids...
Answer: Zucchini
* * *
The green fat woman put on a lot of skirts. She stands like a ballerina, a cape made of leaves.
Answer: Cabbage
* * *
The lady is scattered in the garden, dressed in noisy silks. We are preparing tubs for her and half a bag of coarse salt.
Answer: Cabbage
* * *
What's that squeak? What kind of crunch is this? What kind of bush is this? How can I be without a crunch, If I...
Answer: Cabbage
* * *
Not sewn, not cut, But all in scars. Seventy clothes, And all without fasteners.
Answer: Cabbage
* * *
2
Rating:
Interesting
| Eighth month The child distinguishes between light and dark. He responds better to low sounds—to daddy's voice. The ability to focus your gaze appears. The skin is almost completely formed, and the layer of subcutaneous fat is becoming thicker. The amount of cheese-like lubricant is reduced. Vellus hair (lanugo) on the body disappears. Sun… |
Riddles for children
- Riddles about nature
- Riddles about animals
- Riddles about plants
- Riddles about time/seasons
- Riddles about school
- Riddles about the house
- Riddles about work/hobbies
- Riddles about man
- Riddles about delicious things
- Riddles about the road
- Riddles about toys
- Riddles about fairy tales
- Riddles about technology
- Riddles about transport
- Riddles about color
- Other riddles
Poems for children
- Poems about kindergarten
- Poems about school
- Educational poems
- Instructive poems.
- Poems about family
- Poems about animals
- Poems about friendship
- Poems about nature.
- Riddles in verse
- Poems for the holidays
- Happy Birthday Poems
- funny poems
- Agniya Barto. Children's poems.
- Korney Chukovsky. Children's poems
- K. Avdeenko. Children's poems
Review of more complex stoves with oven and stove
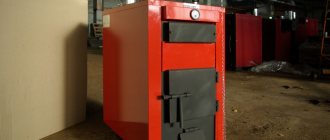
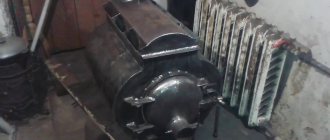
The oven described above is mainly suitable for cooking. The functionality of a small barbecue stove, which is usually installed outdoors, has approximately the same functionality. But there are also more complex designs that successfully perform not only “culinary” but also heating functions. For example, it could be...
- Oven with water box. Its heat output is about 600 kcal/h when heated twice a day.
- Swedish oven. The main advantages of this option are compactness combined with high efficiency.
- Double-bell oven. Effectively heats a room up to 45 sq. m., but at the same time is very compact. The dimensions of the base are 5x4 bricks or 5x3.5 bricks.
Repairing stoves with an oven and stove has its own specifics, like any other stove design for a bathhouse or home. However, this topic deserves separate and detailed consideration.
We recommend that you watch the video to better understand and master the principles of laying a stove.
Temporary barbecue of their bricks
You can make a temporary barbecue oven out of brick - without using mortar. For these purposes, you can use ordinary brick - an open hearth (without a chimney) and small gaps in the masonry will ensure a thermal regime acceptable for ceramics.
A step-by-step algorithm for constructing a temporary barbecue looks like this:
- Prepare a flat and firm area on the ground. You don’t even have to remove the humus layer - just cut off the vegetation, level and compact the surface.
- Cover with a couple of layers of roofing material.
- Lay out the first tier of bricks with small gaps between the prongs and tongues of adjacent elements.
- The second tier is placed in a dressing with the first, maintaining approximately the same size gaps.
- The next rows are laid out in the same way. The masonry is laid to a height convenient for using a barbecue. You need 10-11 such rows. At this height, a steel sheet is placed on the bricks, which will serve as a tray for coals.
- Lay it dry on the sides and back of the wall, two bricks high. Lay and secure the grate.
- The walls are increased in height by another two or three bricks.
Such a stove can be laid out in a couple of hours. And take it apart in the same amount of time. A good option for a summer house or a small local area.
