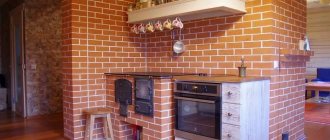
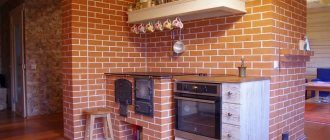
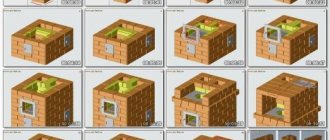
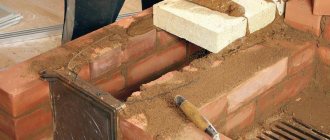
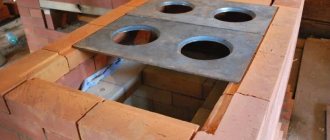
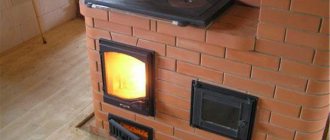
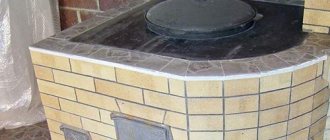
To heat a large house consisting of several rooms, you should choose the most economical option, for example, a stove with a boiler. A modern brick stove with a water circuit makes it possible to heat all rooms from one point. The coolant in it is able to distribute heat evenly and maintain the desired temperature over the entire area. Before purchasing such a unit, it is necessary to study in detail the principle of its operation, all the pros and cons, as well as the connection method and type of system.
Method of operation and design
A stove with a water circuit built in at the masonry stage.
A brick stove with a water circuit for heating a house works according to the standard principle. To install it, it is necessary to create a water heating system, through which heat is supplied from the stove walls and heating radiators connected to the main circuit. The loop pipes are connected to the boiler or register built into the furnace. The coolant is heated by passing through a hot register, then it passes to pipes and radiators.
Having passed through the circuit, the temperature of the coolant decreases and it again enters the heat exchanger, where it warms up again. For ideal fuel circulation, a special pump is built into the circuit. An important element of the system is the expansion tank. If we are talking about a closed system with a sealed circuit, such an element can be placed anywhere. As part of an open system, the tank is placed at the highest contour point, this can be an attic or other room.
The expansion tank is a container for excess heated coolant. It has a varied design, size and volume; it must be selected taking into account the type of heating system and the amount of coolant.
Preparation of mortar for cladding
Experts advise using fine mountain sand to make a high-quality mixture, as it is highly durable and heat-resistant. First, the sand must be passed through a sieve with cells measuring 1.5 millimeters; the finer it is, the thinner and neater the seams between adjacent bricks will be. The fact is that thin seams help the masonry retain heat longer.
It is impossible to name the exact proportions of sand and clay in the solution, since each time the clay will have a different fat content.
To determine the desired ratio of components, proceed as follows:
- Measure out 5 liter jars of clay, previously sifted through a sieve.
- Nothing is added to the first jar, 1/10 of the sand is poured into the second, a quarter of a liter container of sand is poured into the third, 3/4 is added to the fourth, and a whole liter is poured into the fifth.
- Add water to each mixture until a solution is obtained that has a plasticine-like consistency and does not stick to your hands.
- Then they make 5 balls with a diameter of 5 to 7 centimeters and 5 small 3-mm pancakes.
- Clay crafts are left to dry in the shade for about two weeks.
- Then the balls and pancakes, so as not to be confused, are numbered and thrown to the ground from a height of 100 centimeters. An unbroken option is suitable for masonry.
After the proportion of the components is determined, they begin to prepare the masonry mixture. First, clay is poured into a large container, filled with water and left to sour for 3 days, during which time it should become elastic.
Then add the required volume of water and mix the mass until smooth so that there are no lumps in it. The mixture should come off the trowel easily. Next, a little mortar is applied to the brick and applied to the masonry. If after 5 minutes it cannot be torn off, then this solution can be used.
There is another way to check that the mixture is prepared correctly - you should lower a wooden stick into it. A good solution will cover it with a thin layer, the dry one will be barely noticeable, and after the greasy composition, a shiny film will remain.
The main element of the furnace unit has a complex structure. It can be installed both in the chimney and in the combustion chamber.
Down the chimney
With this method of installing the heat exchanger, the firebox will heat up evenly and to the maximum level. The heating intensity is adjusted by the length of the coil.
Due to the lack of direct contact with fire, the element retains its performance properties longer. In this case, installing a heat exchanger in the chimney leads to an increase in the dimensions of the candle.
The register can be integrated into an already finished structure only after dismantling the chimney. To avoid mistakes, you need to design the masonry order in advance.
Into the furnace
This option increases the efficiency of the furnace system, since under the influence of flue gases the pipe will heat up to the maximum. External and internal coils slightly cool the external surfaces and maintain the optimal degree of heating.
The heat exchanger has 2 pipes. The top one is combined with the pipe and storage tank, and the bottom one is combined with the heating circuit.
Pros and cons of heating with a water circuit
In winter, the stove must be heated continuously, adding firewood manually.
Brick stoves with a water circuit, used for heating a private house, have their advantages and disadvantages. They need to be taken into account when choosing a similar device for a bathhouse or living space. You need to choose a suitable model taking into account the specific parameters of the house. The best option would be a long-burning stove, capable of operating for 12-14 hours after one load of fuel.
The list of advantages of a furnace with a water circuit includes:
- economical fuel consumption compared to systems operating on other energy sources;
- the ability to install the stove in conjunction with other heating systems;
- the ability of the stove to successfully fit into any interior design project.
One of the disadvantages of such units is the need to heat the stove in winter in continuous firing mode. Otherwise, the rooms will not warm up to the optimal temperature.
A furnace with a water circuit is not an automated system, so heating fuel in some models of units must be loaded manually.
Homemade water boiler made from cast iron radiators
A boiler that is excellent in quality and efficiency can be obtained from ordinary cast iron heating radiators. You can use the M-140 radiator as a basis. It is easy to find, because large quantities of them are taken out for scrap during the dismantling and demolition of most old five-story buildings. The capacity of each section of such radiators is 1.5 liters of water, while the surface area reaches 0.254 square meters. When assembled, when 12 such sections are combined, the resulting volume of liquid is 18 liters and the total surface area is 3 square meters. m. Not every ready-made boiler assembled from sheet metal can boast of such parameters with similar dimensions. The performance of such a boiler from a radiator may be quite enough to heat a room of up to 100 square meters. m. So it will be suitable for an ordinary bath, and the supply will be quite large.
Before using the radiator, some modification is required. First you need to get rid of the cardboard spacers between the sections. It is best to replace them with asbestos cord impregnated with natural drying oil with an admixture of graphite. This way you can protect the gaskets from burning out at high temperatures.
While the sections are disassembled, they should be washed from the inside with a 6% concentration of hydrochloric acid solution, and then with a large amount of water. This way they can be cleaned of a large layer of rust and dirt accumulated over many years of use.
The procedure for assembling the radiator repeats the disassembly process, only in the opposite direction. To connect the sections, nipples are used, equipped with right and left threads on each side. Thus, sections both from below and from above are simultaneously attracted by turning the nipple. As soon as there is a gap of 2 cm between the sections, an impregnated asbestos cord is wound and the nipples are finally tightened.
Types of systems
A stove with forced circulation warms up the room more efficiently and quickly.
A brick stove with a water heating boiler, made with your own hands or purchased, can operate on a system with forced or natural circulation. Each of the two types has its own characteristics and differences that need to be taken into account.
Forced circulation
A system of this type is complemented by a circulation pump, which is responsible for moving the coolant through the chimneys. By connecting the system to electricity, the pressure level in the radiator can be controlled using valves. This also makes it possible to reduce the amount of fuel for heating the coolant. Forced circulation is quite economical, but its main disadvantage is its dependence on power supply. If there is a power outage, it will not work.
Natural circulation
With natural circulation, it is impossible to regulate the temperature, in addition, the system is difficult to install.
A system with natural circulation works based on the application of the laws of physics. During operation, the coolant moves through the pipes due to differences in the density of cold and hot water. The main advantage of the system is energy independence, which is why it is often created in homes where power outages occur. Among its disadvantages, they note the need to use heavy metal pipes, for example, cast iron, which are difficult to install. Also, the system does not have the ability to regulate the heating level of each room.
A stove or fireplace with a water circuit can be made of cast iron, steel or brickwork. The owner of the house chooses the appropriate option. When choosing, take into account the total area of the premises that need to be heated, the power of the device, the amount of space allocated for the stove, the location of each element of the circuit, the functions of the unit and its design. In addition to these parameters, you need to remember the need to install a special foundation under the stove.
How to cover a wood-burning stove with brickwork
Here you will learn:
- Features of potbelly stoves
- Is it possible to line a potbelly stove with bricks?
- How to properly line a stove with bricks
A potbelly stove is one of the simplest stoves. By burning solid fuel in its interior, it provides heat to residential and non-residential premises. These ovens are divided into factory-made and home-made. Thanks to their simple design, they are easy to assemble with your own hands. In the future, it is recommended to cover the potbelly stove with bricks. This step will increase its effectiveness and protect users from burns. Get information about the lining in our review.
Features of potbelly stoves
The design of the potbelly stove is extremely simple. It is a rectangular or cylindrical combustion chamber to which the chimney is connected. At the bottom there is an ash pan with a grate. There are two doors in the front part - firewood is loaded through one, ash is unloaded through the second. The second door also serves as a blower. Sometimes, instead of two doors, only one is installed - if the combustion chamber is small.
To increase the efficiency of the potbelly stove, partitions are attached inside. They prevent combustion products from directly escaping into the chimney. First they will have to go through a curved channel formed by two sheets of iron. Here they will give up the accumulated heat to the maximum, after which they will leave the confines of the stove. Brick lining gives equally good results, increasing efficiency and retaining heat.
Connecting the stove to a water heating system
The water circuit is lined with fireclay bricks so that it does not burn out ahead of time.
To fully connect the device to the general system, you will need to purchase a coil for the stove for water heating. It is installed inside the firebox. When choosing it, take into account the thickness of the walls of the stove; if we are talking about a device that runs on wood, the walls may be thinner.
Units fired with coal briquettes may have denser walls. This condition cannot be ignored, otherwise the boilers will quickly burn out and will have to be replaced before the end of their intended service life.
Some useful tips
When installing a steam heating system, you should remember that all its elements must withstand high temperatures, more than 100 degrees. For example, a conventional membrane expander will not work as a reserve tank in case of an increase in coolant volume, because its maximum is 85 degrees.
The chimney of a stove with a built-in heat exchanger will become dirty faster than that of a conventional stove. Therefore, chimney cleaning needs to be planned and performed more often.
If desired, an oven with a heat exchanger can also be used for cooking, but this is not very convenient. In summer, when heating is not needed, this stove cannot be lit. We'll have to look for an alternative. It’s easier if there is a separate, convenient stove for the kitchen in the house.
Calculation of power and size of heat exchangers
The power of a heat exchanger depends on the materials from which it is made. If the part is cast iron, the best choice would be models of the MS-110-300 and MS-90-300 series. Due to their small size, they easily fit into the firebox; their heating area for each fin will be 0.14-0.16 m2. If you take these numbers into account, you can calculate how many sections are needed to heat each circuit. For every 10 square meters of room you will need 1 kW, equal to approximately 0.1 m2 of area from the total heating of the heat exchanger.
Final cleaning of the furnace casing masonry
It will take approximately 1-3 days for the solution to completely set and dry. And only after this the masonry can be cleaned of the mortar.
It is recommended to carry out the main work of cleaning the masonry surface using a drill with a brush attachment, which leaves dark spots on the brick. They can be removed manually with a stiff brush previously soaked in soapy water. For these purposes, it is recommended to use laundry soap.
This finishing treatment ensures an even surface color and, therefore, an attractive appearance.
Advice! The first kindling must be carried out very carefully, avoiding overheating of the metal casing of the stove. Uniform heating will ensure the final alignment of the color of the masonry.
How to make a stove with your own hands
Diagram of components of a brick stove with a welded water circuit
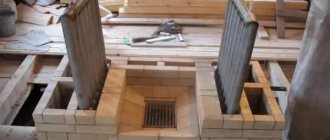
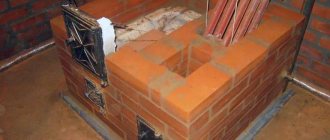
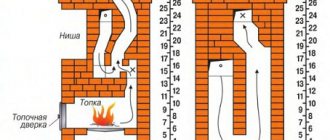
Sometimes it becomes necessary to equip a brick stove with your own hands and build it into a niche or install it on a square or rectangular foundation. First of all, markings are made for the stove and the foundation is poured. After it dries, two rows of brickwork are laid out according to the ordering scheme in order to level the uneven foundation and make a base for the unit. Next, you will need to lay out the rows on the clay mortar and finish the laying, taking into account the thickness of the seams between the rows in the process.
When the body is ready, all that remains is to install the doors, firebox, hob, heat exchanger and other parts. After completing the work, the stove must be heated completely and its performance checked.
You can develop drawings for the stove yourself or seek help from professionals. If you lack experience, it is better to entrust this work to specialists who will prepare a detailed diagram taking into account the requirements for the heating system and a specific room. In this case, the finished unit will fully comply with the safety requirements and criteria for the heating system.
Why should you line a steam room oven with bricks?
Brick will protect walls and shelves from fire
Despite the fact that modern products look beautiful and representative, in the interior of a steam room against the background of natural wood they will look inorganic. And this is not the only reason to cover the stove in the bathhouse with bricks.
The following factors speak in favor of the event:
- The outer surface of the metal becomes very hot. This leads to overheating of the room and creating an uncomfortable environment in it.
- Fire hazard. If you overdo it with fuel, the heat from the boiler becomes so strong that it can first smolder and then burn the finish of the steam room.
- Possibility of getting burned by accidental touch. In the case of brick, such a risk is eliminated, since this material absorbs heat, distributing it evenly throughout the entire volume.
- Iron heats up quickly and cools down just as quickly. This makes it difficult to control the temperature in the room.
- Corrosion protection. Sooner or later, the protective coating comes off from the iron and the boiler begins to become covered with rust. This is not aesthetically pleasing and is fraught with thinning of the walls of the furnace body in the future.
- Organic interior. Brick against wood looks much better than metal.
Steel chimney
Steel chimney: collapsible design
You have the choice of a chimney made of regular or stainless steel. As you understand, the latter is becoming increasingly popular, since the service life of a conventional steel chimney is no more than 3-5 years.
high heat resistance - they can withstand temperatures from 500ºС to 700ºС.
resistance to condensation formation - and this, in turn, ensures the reliability and durability of the system itself
316, 316L, 321 - grades of stainless steel, which are suitable as a material for the chimney of a solid fuel boiler.
affordable price is another important plus that attracts attention.
the ability to adjust the design of the chimney - unlike glass or brick, you can easily add the necessary details to the device, for example, a damper, if you forgot about it in the original version.. Read more about the construction of a steel chimney in our article
Read more about the construction of a steel chimney in our article.
