Do-it-yourself insulation of walls with polystyrene foam is a very, very relevant topic. The material is cheap, light in weight and easy to use, and allows you to quickly achieve a very noticeable effect. A reduction in the cost of energy resources and heat supply tariffs is not expected in the foreseeable future.
The construction industry is inherently not very dynamic: after all, the main thing in a “machine for living” (Le Corbusier) is its inhabitant, a person, and his body does not fundamentally change. Therefore, one cannot expect the rapid development of inexpensive and effective technologies for constructing energy-saving houses: modern examples of energy-independent houses with a living area of about 50 square meters. m, per two living rooms, cost about $1,000,000.
The technology of insulating walls with foam plastic is a completely acceptable option for several decades, allowing not only individual homeowners to significantly reduce their costs, but also improve the environmental situation in general. But, as elsewhere in general, the desired result can be obtained only by taking on the work with a full understanding of the essence of the matter. So let's start with the basic concepts.
Temperature thresholds
It is not for nothing that +18 degrees Celsius is taken as the lower limit of the comfort threshold: the psychophysiological perception of temperature and humidity at this point changes dramatically. Below, your fingers get cold and you get chills. I want to sleep with my head huddled under the blanket, and in the morning I want to get out of bed slowly in parts, shivering, shuddering and hissing something to myself through my teeth. At a relative humidity of 75%, beyond the threshold of imperceptible comfort, clothing that has not gained any weight seems damp; the walls are slimy. Underwear quickly becomes saturated with sweat and acquires an unpleasant odor.
It has exceeded +18 - it’s a completely different matter: you walk around the apartment in sweatpants and a T-shirt, you think about washing in the shower without an internal shudder, you sleep peacefully with your hands on top of the blanket, and in the morning you get up cheerfully.
+22 is already a medical and sanitary threshold - the temperature in medical institutions should not be kept lower: treatment, even not for colds, goes according to plan, and the likelihood of complications decreases sharply.
+25 is the threshold of the physiological optimum: warm, good, you can sleep naked, but if you go outside in the cold, the likelihood of catching a cold increases sharply. You can’t soak in the bath for a long time; it gets stuffy.
And, finally, +28 is the upper threshold of comfort and at the same time medical-sanitary: it’s already a little hot at home, and if you jump out into the street in winter, you can catch pneumonia.
Dew point
The dew point, as is known, is the temperature at which absolute humidity, in grams of water vapor per cubic meter of air, becomes 100% in relative terms and condensation occurs or fog forms. However, only a few sources indicate that not only temperature is important, but also the ratio of condensation/evaporation of moisture. For example, measuring air humidity with an evaporative hygrometer based on the dew point should be carried out in a room or shelter without the slightest draft, otherwise the readings will be greatly distorted. With relative humidity values typical for residential premises, the dew point temperature lies within +(10-15) degrees.
Important for later: by removing moisture vapor from the area with the dew point temperature, condensation can be avoided at the same total humidity in the room.
In building structures, the dew point corresponds to a certain imaginary surface that generally follows the contour of the building. As long as it is in the thickness of the wall or insulation, everything is in order: there is nothing there to fall out into condensation. If the dew point goes outside, it’s also okay - the back-up of heat from the rooms will not allow condensation into the thickness of the wall, and it will either flow down it or evaporate.
But if the dew point is inside, even in the insulation, but on a load-bearing wall, this is already bad: the same thermal pressure will drive condensation into the wall, even a concrete one. And there, the moisture will cause the reinforcement to rust; periodic freezing/thawing over the seasons will quickly ruin the wall material.
The dew point inside is even more harmful to the health of the inhabitants: in such a home the risk of development is greatly increased and the course of existing pulmonary diseases is complicated. And finally, wet walls and damp laundry are also unacceptable. Both in terms of health and in terms of costs for the inevitable quick repairs.
Important No. 2: when developing an insulation system, it is necessary to completely eliminate the possibility of condensation in the room, even if the dew point penetrates inside.
Inside or outside?
In apartment buildings, it seems tempting to insulate the walls from the inside with foam plastic: you don’t need to formalize anything anywhere, you don’t need to pay for the work of a team of industrial climbers. But this is only an appearance - capital, up to the calculated value of heat loss (see below), insulation from the inside does not allow to avoid condensation in the room: the dew point, walking in the wall from season to season, will inevitably fall into the gap between the supporting structure and the insulation. But the pockets there are dull, there is nowhere for condensation to evaporate, and all the physical chemistry of water (very complex) will be harmful.
Recommendations like: “What the hell, put in vapor barrier, and everything is covered in chocolate!” come from “experts” whose hands are used only to a computer mouse and a cup of coffee. In reality, not a single conscientious craftsman will undertake to put a vapor barrier on the outside wall , with a heating radiator, windows, balcony opening, curtain rods, etc., achieving complete tightness . One small, unnoticeable hole - and the effect of an open bottle began to work, the wall, for the time being unnoticed, sucks and sucks moisture.
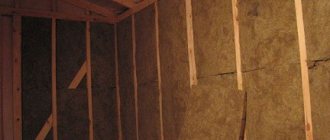
So, is it absolutely impossible to insulate the inside of an apartment? It is possible and necessary, but additionally during finishing or cosmetic repairs. It is quite possible and necessary to place slabs of the lightest and cheapest (and warmest) foam plastic of grade 20 or lower in the cells of a wooden sheathing under sheathing made of plywood, wood, laminate, MDF or plasterboard. And the obligatory conditions: on the wall, the lathing should not lie on a bare structure, but on plaster, even if it’s homemade rough - once. Heating radiators must be of a modern type, with profiled channels - two. And three, it is very desirable that the window frames have adjustable ventilation slots.
How does this insulation work? Firstly, the infrared radiation of the battery will warm up the casing, and the convection of air under it will spread the heating upward. Secondly, the flow of warm air from the radiator nozzles, directed obliquely upward, directly near the wall will create a vacuum. Tiny, but sufficient for water vapor from under the casing to be drawn out without having time to condense.
A window that ventilates the room without cooling enhances the effect: by adjusting the slot with the radiator for comfort in the middle of the room, we get a dry ball of air near the wall, pushing the dew point even deeper into the wall. And the effect is further enhanced by not simple plaster, but warm plaster. Expanded clay is sufficient, which is only slightly more expensive than usual.
There is also a positive side effect, even two. Firstly, the most loose and cheap foam plastic, which is not suitable for external cladding, can be placed in the sheathing, which will reduce the overall costs of subsequent external insulation. Secondly, if this is done, then in a layer cake made of concrete or brick between foam plastic on both sides, the freedom to move the dew point will be sharply limited.
However, the front decorative finishing of walls with polystyrene foam, in addition to being weak and short-lived, will have the opposite effect: its high thermal resistance (see below), on the contrary, will attract the dew point. An accurate calculation requires solving differential equations, but the final conclusion is simple: from the inside, the thermal resistance of the insulation should not increase abruptly; the sheathing just smoothes it out.
Conclusion from the section: it is impossible to achieve full thermal insulation with internal insulation, but it is quite possible to strengthen the external one, reduce heating costs by 5-7% or raise the temperature in the apartment to the threshold of comfort. Insulating interior walls also makes sense. Firstly, as soundproofing. Secondly, reducing internal heat transfer will make it easier and more accurate to adjust ventilated radiators.
PPS or EPPS?
PPS - polystyrene foam familiar to most
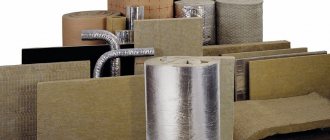
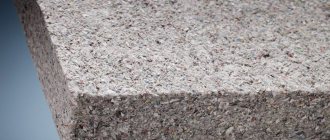
Of the many heat-insulating materials, expanded polystyrene (EPS), also known as foamed polystyrene, is the most suitable for independent work. This material is produced either in the form of slabs pressed from granules, which are colloquially called polystyrene foam, or in the form of slabs of extruded polystyrene foam (EPS). The latter is 3-4 times more expensive ($12-16 per cubic meter versus about $4), but has lower thermal conductivity and is several times more durable. Due to their relatively high strength, EPS boards are produced with a quarter, which is very important: with or without gluing the joints, the formation of cold bridges at the joints between the boards is eliminated.
Which material to choose? In a private house, it is better to insulate the walls outside for the sake of economy using PPS : by forming a closed box, the insulation as a whole will gain sufficient strength. If you plan to apply decorative plaster on top of the basic exterior plaster, and you have money for repairs, then for the sake of higher strength it is better to take EPS.
EPPS
In a city apartment, the choice depends primarily on the climatic conditions of the area: in regions with strong winds and precipitation, you need to work harder and order EPS . It adheres more firmly to both glue and fungi, and its moisture absorption is 0.1-0.4% by weight versus 1.5-3.5% for PPS. But in areas with an even climate, simple PPS is not prohibited - the likelihood of damage to the coating at height is extremely low, and relief plaster is not done on the outside of the floors; it is still not visible from below.
Types of dowels for fastening insulation
The retail distribution network offers the following types of dowels for thermal insulation:
- completely plastic fastening - the head-rod and expansion nail are made of nylon, polypropylene or low-density polyethylene;
- the fastening consists of a plastic head-rod part and a zinc-coated steel expansion nail;
- the fastening is similar to the previous one, the expansion nail is equipped with a plastic thermal head;
- the fastening contains a plastic head-rod and a fiberglass expansion nail;
- a dismountable dowel consisting of separate parts: plastic - a cap, an expansion head, a rod, a spacer sleeve, and a steel - expansion nail with a thermal head.
All-plastic products are in greatest demand. Their main advantage is their low price. Among the others are a long service life, inertness to high humidity, low thermal conductivity, which does not provoke the appearance of cold bridges. Such dowels are not susceptible to corrosion and heat loss is minimized. The disadvantage is the insufficient rigidity of the expansion nail, which, when driven into a rod (wall made of dense material), can bend and collapse.
The expansion force of a plastic nail is significantly less than that of a steel nail, so completely plastic dowels can only be used with lightweight polystyrene foam insulation. When using them for fastening basalt slabs, the risk of tearing under extreme loads increases sharply.
What to glue with?
The next question that needs to be resolved before the calculation is how to glue the slabs to the wall; the technology itself will be described below.
Foam plastic is glued to walls with special mixtures, two-component - adhesive and leveling - or one universal one. It seems easier to work with a universal mixture, but it only seems so: a universal mixture is much more expensive, and it costs 20-25% more to cover the same area. Considering that several tens or hundreds of squares will have to be sheathed, the amount is quite significant.
In terms of strength, durability and durability, both separate and universal mixtures are equivalent.
What to fasten with?
Umbrellas (fungi) for attaching foam plastic
Also, looking ahead a little, we’ll tell you how to fasten the glued slabs. For strength, they are attached to the wall with special fastenings - umbrellas or mushrooms, see fig. It is better not to take metal fungi: they rust, and the foam tending to swell from heating in the heat is cut on them. The method of saving fungi described below is not applicable to metal fungi.
Plastic mushrooms need to be taken either complete (these are more expensive), or, cheaper - individually weighed. But in the latter case, the clips need to be PVC, and the nails for them should be propylene. The nails will have to be driven in, and if the plastic is from the same strength group, there will be a lot of waste. It’s better not to take the cheapest polyethylene ones at all - they bend and tear like hell.
Operating principle
Despite the fact that technical progress is advancing by leaps and bounds, and building materials are constantly being improved, the dowel described here (or a fungus for attaching insulation) is attached in the same way as before - it holds due to the fact that the holding force of friction acts on it. It is worth noting that this force is so significant that it is not for nothing that this fastening method is called disposable: if you remove the umbrella from the hole, it will simply collapse.
Of course, there is another way to hopelessly damage an element - you just need to tear it out along with the insulating material. To avoid all this, it is imperative to ensure that the seating area is arranged correctly. It is important that the hole for the umbrella fully corresponds to the required depth and diameter. Chips and cracks in the holes are unacceptable, as is the presence of installation dust in them.
Insulation with foil
Previously, we talked about the advantages of insulating material with foil, its technical characteristics and cost, in addition to this article we advise you to read this information, read about it here
Thermal calculation
How thick should foam plastic be for wall insulation? Simply sticking it thicker means not only wasting money, but also reducing the strength of the coating.
The initial value is the permissible value of specific heat loss in a given climatic zone, or the thermal resistance of a building R. For walls in the European part of the Russian Federation, the recommended values are:
- South (Krasnodar – Astrakhan – Rostov-on-Don) – 2.8 kW/sq.m.
- Black earth strip (Voronezh – Lipetsk – Volgograd) – 3.5 kW/sq.m.
- Middle band - 4.2 kW/sq.m.
- Boreal zone (Karelia – Arkhangelsk – Naryan-Mar) – 5 kW/sq.m.
Note: beyond the Urals, the northern border of the boreal strip generally follows the southern border of permafrost. The middle strip accordingly narrows and is pushed to the south. For example, Vladivostok lies at the same latitude as Sochi, but you need to insulate there, like in Moscow.
In a specific locality and in regions with difficult weather conditions, R can be found from the appendices to SNiP, from the local department of architecture or the Municipal Internal Affairs Committee. For floor R is taken with a coefficient of 1.3; for the ceiling - 1.7. That is, in Moscow, the floor R should be at least 5.5 kW/sq.m, and the ceiling – from 7 kW/sq.m.
The indicated R values are obtained from typical values of the temperature gradient Γ from inside to outside. For example, in the Moscow region it is considered equal to 40 degrees: +20 inside and –20 outside. If Г changes by no more than 1.7 times, the dependence of R on it can be considered linear and taken with the appropriate correction. For example, you want to have +25 at home in Barvikha with -40 outside. G = 25 – (-40) = 65. 65/40 = 1.625. We multiply by it the recommended 4.2 kW/sq.m for the Moscow region, we get 6.8 kW/sq.m. This is the R value that insulation should be calculated at.
Next, you need to know the values of k for various building and finishing materials. What is this k? This is their specific thermal resistance, R of a square of material in a layer 1 m thick, i.e. Through a meter-thick square, at standard G, exactly that much heat will escape. Some meanings are:
- Reinforced concrete grade 400 – 2.00 kW/m.
- Cement-sand mortar grade 200 – 1.16 kW/m.
- Silicate brick – 0.7 kW/m.
- Fired ceramic brick – 0.56 kW/m.
- The same, hollow – 0.35-0.41 kW/m.
- Gypsum plaster – 0.43-0.47 kW/m.
- Warm plaster (HS) on foam plastic or expanded vermiculite – 0.057 kW/m.
- HS on perlite sand – 0.063 kW/m.
- HS on expanded clay – 0.22-0.25 kW/m.
- Expanded clay granules 20 mm – 0.16 kW/m.
- Oak, laminate – 0.20 kW/m.
- Pine, MDF, construction plywood – 0.16 kW/m.
- Fiberboard, OSB, plasterboard – 0.15 kW/m.
- Polystyrene foam PSB-20 – 0.033-0.035 kW/m.
- The same, PSB-25 - 0.035-0.037 kW/m.
- EPPS – 0.028-0.032 kW/m.
Notes:
- For porous materials, k values are indicated in an air-dry state; for wood - at 12% humidity.
- The numbers in the foam brand indicate its density in kg/cub.m. In general, it varies within the range of 11-35 kg/cub.m (for XPS - 30-45 kg/cub.m); accordingly, k PSS changes from 0.031 to 0.041 kW/m.
Next, we determine R of the available construct. Let's say this is a wall, counting from the inside out, of the following design:
- Laminate 0.012 m (12 mm);
- PSB-20 0.030 mm;
- TS on expanded clay 0.020 mm;
- A wall made of two clay bricks with a layer of 1 cm mortar - 0.50 m of brick and 0.010 m of mortar;
- External cement plaster 0.030 m.
Rn of each layer is calculated using the formula:
Rn = pn/kn, where p – layer thickness in meters; n – serial number of the layer.
We have:
- R1 = 0.012/0.20 = 0.06 kW/sq.m;
- R2 = 0.030/0.035 = 0.85 kW/sq.m;
- R3 = 0.020/0.25 = 0.08 kW/sq.m;
- R4 = 0.50/0.56 = 0.89 kW/sq.m;
- R5 = 0.010/1.16 = 0.008 kW/sq.m;
- R6 = 0.030/1.16 = 0.026 kW/sq.m.
Total R = R1+R2+R3+R4+R5+R6 = 0.06+0.85+0.08+0.89+0.026+0.008 = 1.914 kW/sq.m. This is not enough even for Krasnodar, and already in the middle zone without insulation you will have to freeze, or pay an additional 4.2 - 1.914 = 2.286 kW (approx. 2.3) for heating for each square of the external wall area.
Now let’s calculate the thickness of the external insulation required to bring R to the standard of 4.2 kW/sq.m. We have already found out that we need to retain Rwarm = 2.3 kW/sq.m in the room additionally. We will insulate with EPPS, for which K=0.032 kW/; We take the upper value based on moisture absorption. The thickness P of the insulation is determined by the inverse formula:
P = K*Rwarm
We have: P = 0.032x2.3 = 0.0736 m. Sheathing made of 80 mm EPS or even PSB-25 will allow you to insulate properly, because there will also be plaster on the outside.
A task for those interested: Remove R2 from the list (foam plastic in the sheathing under the cladding), recalculate, and determine how much expensive EXTERNAL insulation is saved due to only 3 cm of cheap (can be waste, from waste) internal insulation. And transfer it to money, at prices in your region.
Notes:
- Insulation of floors and ceilings in private houses is calculated similarly. R for different types of roofs can be found in SNiP or other construction reference books, or consider slate as cement, tiles as brick, and for a metal roof consider R = 0.
- When calculating insulation on the top floor of a high-rise building, the floor is not considered, because there is an apartment downstairs in which they heat. On the ground floor, on the contrary, only the floor is insulated.
Options
There is no GOST article regulating plastic dowels for insulation. However, the requirements for polyamide material for construction dowels apply, and GOST specifies exactly what brand of plastic can be used and for what climatic zones.
The remaining sizes vary very little:
- the size of the cap ranges from 45 to 90 mm in diameter;
- on plastic there are only 2 rod diameters - 8 and 10 mm;
- The length of the product ranges from 40 to 400 mm.
The load-bearing capacity depends on the strength of the fasteners and the wall material. The load ranges from 0.3 kN to 23 kN.
| Dimensions of plastic fasteners, mm | Weight 1000 pcs, kg | Dimensions of fasteners with metal screws, mm | Weight 1000 pcs, kg |
| 10*80 | 2 | 10*90 | 15 |
| 10*90 | 2,5 | 10*120 | 16,75 |
| 10*100 | 6 | 10*140 | 20 |
| 10*120 | 8 | 10*160 | 32,2 |
| 10*140 | 9,8 | 10*180 | 44,5 |
| 10*160 | 11, 25 | 10*200 | 57,5 |
| 10*180 | 13,8 | 10*220 | 62 |
| 10*200 | 14,5 | 10*260 | 81,3 |
| 10*300 | 105,5 |
Read below about fastening insulation boards with disc dowels.
Let's warm ourselves up
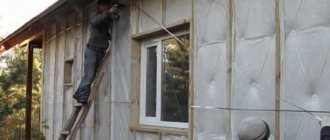
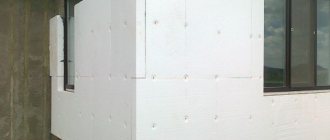
Correctly performed external wall insulation is a “puff”, shown in the figure. Its assembly includes the following steps:
- Inspection and preparation of walls;
- Covering the cornice with foam;
- The same - slopes;
- The same for walls;
- Fastening foam plastic to the walls;
- Pasting the cornice, slopes, walls with reinforcing fiberglass mesh for plaster;
- Primer for plaster;
- Plastering walls.
Scheme of external wall insulation.
No special tools are required; you can get by with ordinary household and repair tools. But it is imperative to prepare scaffolding or trestles of such a height that the cornice is at face level, otherwise it is difficult to obtain high-quality insulation. And just as obligatory is a roof rack, from which the face will be somewhere at the height of the top of the window.
Let's estimate: even if the ceilings in a house are of a standard apartment height - 2.7 m - then, taking into account the protrusion of the foundation, the thickness of the floor and its screed, from the ground to the cornice it will be more than 3.5 m. This means that in the middle of the wall the height will be an area in which it is inconvenient to work both from scaffolding and from the ground. You can, of course, rent dismountable scaffolding, but this will not be cheap: you will need them for a long time. And carrying them back and forth is inconvenient.
Physical and financial features
Insulation should be started in the spring, 3-4 days after the heating is turned off. Or in the fall, the same amount after the average daily outside temperature drops below +18, i.e. shortly before turning on the heating. But then you need to have time to sheathe the walls before they flood.
The physics here is for the house to come into thermodynamic equilibrium. If you stick polystyrene foam onto a wall that has not yet hardened in thickness, it will wrinkle as the glue dries, imperceptibly to the eye, but enough so that the adhesive joint turns out to be fragile. In the summer heat, the wall swells too much and shrinks during the day; In general, in the summer it is better to take a break from insulation work by tightening the already covered film with tape.
In terms of finances, it’s also better to start in the spring: the economy is always in a recession at this time, savings over the winter have been consumed, and there is little money. Starting with the slopes and cornice, which is optimal from the point of view of organizing the work, you can initially get by with minimal costs and acquire skills with which the walls will then go faster and easier. At the end of spring - beginning of summer, it will be possible to take on the walls, and you can still work depending on the weather, and the seasonal decline will just begin in the prices of insulation materials, and it will be possible to purchase cheaper ones.
In general, we start in the spring, and in the fall - that’s if we missed it and realized it.
Installation of polystyrene foam should begin from the north side. The glue will set well in the shade and the north sheathing will provide support to complete a strong box. But if you start from the south, then on the contrary, the southern casing, playing from uneven heating, will drag everything else with it.
About time pressure
There are two operations in the work, normalized by time; each – for 3-4 days:
- Gluing the mesh after strengthening the slabs.
- Grouting primer and plaster.
In the first case, the photosensitivity of the foam plays a role: it cannot be stored in direct sunlight, even in packs (by the way, is there a shed for materials?) And at the same time, the glue needs a day to harden. In the second case, the dried primer will not hold the plaster properly.
That is, do not expect to make the entire box or large wall at once; you will have to work in sections. In the first case, we glue so many slabs that tomorrow or the day after tomorrow we have time to fix, apply and glue the mesh. In the second, we prime the piece, rub it down tomorrow, and plaster it the day after tomorrow. A day or two in reserve - in case of rain. And for the same case - 2-3 beams for the roof, and a large piece of film for the curtain.
About the preparation of EPPS
EPS is a fairly dense material with a smooth surface. In order for it to stick to the glue properly, it needs to be rolled with a needle roller for drywall before gluing. Roll - on both sides, because the mesh will be glued to the outside.
About the glue
The adhesive mixture (when purchasing, make sure that the package says: “For polystyrene foam”) must be diluted in two consistencies: creamy for slabs and jelly-like for walls; The jelly should flutter on a horizontal spatula without dripping off it.
“Sour cream” for the first layer of polystyrene foam will need about 1/8 of the jelly; specifically - look at work. For the second one, the cornice and slopes, there is no need for jelly at all, everything is glued with sour cream. With this organization, the glue consumption for a beginner is close to the minimum - 4 kg/sq.m. And if we dilute according to the instructions, then we are unlikely to meet the maximum of 6 kg/sq.m. Well, the difference is immediately visible – one and a half times.
Walls
It is not necessary for the walls to be primed only by “vagrant” hack-slashers. Prime with a deep penetration primer on stone or concrete, depending on the wall material. But before priming, it is necessary to remove a smear from the wall (literally, but not with a swab or medical spatula, but with the palm of your hand with slight pressure) and, depending on the result, prepare the wall:
- If any brown or dark street dust remains, wash it with water using a window mop, and prime it the next day.
- A whitish coating of mineral salts and products of the initial weathering of the surface layer remains - go over it with a round metal cord brush in a drill or grinder, remove dust with dry duster or a soft cord brush, and prime.
- A gray (concrete, sand-lime brick), red or brown (clay brick) coating remained - the erosion of the surface went deeper. You need to properly work with a cord brush until it is solid, or even knock down the husks with a hammer drill and a chisel, then treat it with concrete contact and rub it smooth with cement putty on concrete.
Cornice
We cover the cornice with strips of sheets of minimum thickness (30 mm) on one “sour cream” - where else can we drive the dowels if only half a brick is sticking out of the wall. A thin sheet of EPS can be easily cut with a mounting knife, but for EPS you will have to use a jigsaw with a foam file or a hacksaw for metal with a blade-string.
We glue it starting from the wall, so that we can then support it with wall slabs. We glue the horizontal elements with an extension on which the vertical ones will lie. There should be no hanging ends.
Slopes
Installing a new window sill
On slopes, external window sills will have to be replaced so that the final offset is 40-60 mm. For example, if the insulation thickness is 80 mm, the new window sill should be 150-170 mm wider than the old one; 20-30 mm will be for mesh and plaster. A window sill that is too wide is not needed; it will be loud when it rains.
Before installing the window sill, fill the cavity under it with fragments of foam plastic, foam it, put the window sill on and press it down with bricks or other available weights. There should be no void under the window sill, see figure; Moisture will inevitably penetrate into it, and the wall will become damp without any dew point. The foam hardens for a day, after which you can glue the foam.
We take the material for gluing the slope from the standard range of thicknesses: 30, 40, 50 mm, such that it does not interfere with the opening of the doors. It is necessary to glue with a offset, taking into account the height of the corner of the foam strip: after the glue hardens, the insulation of the slope is cut flush with the wall, or a 5-7 mm extension is left so that the wall slabs press it and hold the entire slope.
Pasting walls
The walls are covered in rows from top to bottom ; If you glue from the bottom up, then under the pressure of the overlying slabs the entire coating will creep. The slabs are arranged horizontally (in width, not height). Vertical joints should be placed alternately, in a checkerboard pattern, for which the corner slabs will have to be cut in half along their length.
Adhesive jelly is applied to the wall with a notched trowel at least 400 mm (or better - 800-1000 mm); Apply it with a medium (60-100 mm) even spatula onto a wide spatula. If a deep pothole is found, over which the spatula slips, lubricate with medium. Next, a sour cream sausage is applied to the end of the slab with a narrow (10-20 mm) angled spatula, or from a tube with a pistol, the slab is put in place and, shaking, leveled and adjusted to the previous one.
Most often, a 50 mm layer of insulation is not enough, so you have to glue it in two layers. The top layer is glued with a horizontal shift of half a slab, i.e. above the half corner slabs of the lower layer there will be solid upper ones, and vice versa. The top layer is glued entirely on sour cream.
According to thermal engineering, the layers must be of the same thickness. If, say, the total thickness is 80 mm, as discussed earlier, then you need to take 40+40 mm, and not 50+30.
Fastening
Manufacturers recommend attaching foam to the wall with fungi using an envelope, which is generally correct. But for some reason the company’s instructions recommend installing corner mushrooms indented from the edge of the slab. The only more or less reasonable explanation for such instructions from highly intelligent experts is the desire to sell the complete idiots more fasteners, and in a year, when the insulation repairs are required due to the raised corners of the slabs, sell them more.
Location of fungi for attaching foam
The craftsmen immediately, to put it mildly, ignored, silently and verbally, such control centers, and the corner fungi were taken to the corners of the slab, as shown in the figure. So one corner fungus holds not one slab, but three, and in general the fastening is more reliable. Do you have any doubts? Let us remember the strength of strength: the strength of a prefabricated assembly is determined by the strength of its weakest part. Which in this case is polystyrene foam. Even if you cover the entire slab with fungi, it won’t be any stronger.
The only condition is that the mushrooms must be plastic. Metal ones are not matched with foam plastic according to TKR (temperature coefficient of expansion), and foam plastic is cut on them. In addition, metal fungi corrode.
The fungus should sit in the wall at least 60-80 mm. That is, if the insulation is 80 mm, fungi need 150-160 mm. Then you need to take a 200 mm drill for them - with a margin to fit into the cartridge and for a dust pocket in the blind hole.
More precisely, you need to take TWO drills at once. You will have to drill a lot, the drill, which is still quite good at gnawing the wall, may wear out in size, and the Fungus will not fit into the hole. While the second one wears out, you can buy the next one without fuss.
The fungi are inserted into the holes by hand and beaten until they come into contact with the foam with a rubber hammer. They also hammer propylene nails into them until the head of the fungus is buried in the foam. The holes with fungal heads are sealed with a leveling solution, see below.
The corners and perimeters of the slopes are decorated with fungi in increments of 150-300 mm, with a distance from the corner of 200-220 mm, counting ON THE WALL. That is, if the insulation is, again, 80 mm, you need to retreat by 300 mm. There should be fungus at the corners of the slopes; Based on this, the step of their placement is chosen.
Gluing with mesh
Gluing the mesh onto the polystyrene foam
After a day, the surface of the foam plastic is leveled with a grater and an abrasive mesh. There is no need to throw away the worn-out mesh: it is good for leveling the ground under plaster, and the new mesh goes over the ground tightly and tears it. Then a LEVELING mixture is prepared, and a mesh is glued onto it.
First glue the corners, gradually unwinding the roll of mesh from top to bottom. They prop it up by placing it on a pair of nails stuck obliquely into the foam. The mixture, again, is applied to the foam with a wide notched trowel, a mesh is applied, stretched and pressed, punched with a slightly damp end brush, or rolled until the mesh lies on the foam. Applying a mesh and then applying the mixture onto it is a widespread but hacky method.
Notes:
- In places with a harsh climate, special perforated corners are first glued to the corners using sour cream. Preference should be given to plastic ones.
- a more expensive option, but less troublesome - the mesh is glued with sour cream, and a day later it is filled with a leveling mixture, and another day later it is rubbed down.
The edges of the mesh are initially left free (see figure), otherwise the joint will end up sticking out. The overlap of the mesh strips is approximately 2/3 of the reserve, i.e. 5 cm with a margin of 7 cm and 7 cm with a margin of 10 cm. After the mixture has set (about 2-4 hours; just enough to cover a medium-sized wall with some skill), the edges of the mesh are folded back, the mixture is applied, the edges are applied again apply and punch through to foam.
Let's sum it up
Now you know how to attach foam to the wall. Usually, fixation methods are combined: first, the foam is placed on glue, after which the fastening is reinforced with dowels. In any case, with this knowledge, even a beginner can cope with this task. You just need to choose the type of dowel, its length and fastening pattern. And then, according to the instructions, it is easy to mount.
Recommended Posts
Japanese houses made of polystyrene foam
Cement mortar for bricklaying
Gypsum stone for interior decoration + photo
Polymer concrete: composition, characteristics
What kind of mortar are fireclay bricks placed on?
Polyurethane adhesive for foam plastic
Primer and plaster
A day later, a trowel with a used abrasive mesh is passed over the leveler (see above). Now, within 3 days, the surface needs to be primed with a primer for plaster and plastered, but this is already plastering work. There is only one thing (see above about time pressures) - the soil under the plaster must be leveled with the same used abrasive a day after application, but always within 3-4 days. Plastering can be done later, once the soil relief has been formed.
Note: if plastering will be done later, the soil in front of it must be treated with a liquid primer that penetrates deep into the stone.
Conclusion
So, we looked at the features of choosing thermal insulation materials and found out what the instructions are for installing them on wooden walls. Provided that installation work is carried out correctly, external insulation is guaranteed to last for 10 years or more. As a result, the house will be warm in winter and cool in summer.
But you need to understand that the optimal result is guaranteed not by separately performed insulation, but by complex insulation, during which the walls, ceilings and subfloors are treated.
Do you still have questions that require comprehensive answers? The necessary information can be obtained by watching the video in this article.
We insulate the floor
If the lower surface of the floor is accessible, say, a basement under the entire house, we insulate it from below, calculating the thickness of the foam using the wall method, but using R for the floor. In this case, the work can be completed by attaching the foam with fungi.
If floor insulation with foam plastic has to be done from the inside, then three methods are effective, the first is without replacing the screed:
- We lay 30-40 mm EPPS on the screed.
- Using EPPS, we make lathing on intersecting mortise wooden logs with a cell of 300-400 mm from 40-60 mm beams.
- We put PPS-15 or PPS-20 into the cells of the sheathing.
- Along the sheathing we make a rough flooring from 16-20 mm plywood, and on it - a decorative one from laminate, marmoleum or cork.
Second, if the screed is less than 150 mm:
- We make a vapor barrier on the base floor as usual.
- Instead of expanded clay, we lay 30-40 mm EPPS.
- Next - reinforcing mesh and concrete screed, as usual.
- Flooring - on wooden lathing with EPS in cells, as described.
If there is more than 150 mm in height under the screed, then we make a vapor barrier using a dry screed from aerated concrete (not foam concrete!) blocks or foam concrete with a thickness according to thermal design. Then - reinforcing mesh, screed along the beacons, sheathing with insulation, flooring, see again above. This method is good because in a dry screed you can arrange channels for hidden communications.
Benefits of fungal fixatives
Fungal fasteners
When installing thermal insulation, special fasteners with wide caps are used. Because of this, they are called fungi or umbrellas. They hold fragile materials well, such as polystyrene foam, polystyrene foam, mineral wool, etc. With their help, you can attach the entire thermal insulation structure to concrete, brick, cinder block and other materials.
The dowel itself is made of low-density polyethylene, and the wedge can be made of polyamide or metal. Fungal fasteners have a number of advantages:
- The wide cap securely fixes any insulation. It is rough on the inside, which creates additional fixation. If necessary, you can use an expansion washer, which increases the pressing diameter from 60 to 100 mm.
- The long leg allows you to withstand heavy loads. The fastening is reinforced by a spacer zone, which consists of three sections.
- Plastic dowels are a replacement for outdated wooden plugs. The former do not rot and mold, plastics do not deform under the influence of temperatures, artificial material is cheaper than wood.
- Reliable fastening is ensured by a wedge that expands the anchor simultaneously in all directions. This provides greater grip on the working surface.
We insulate the ceiling
Insulating the ceiling with polystyrene foam is difficult because you can’t hang a lot of material from it. But it’s simplified by the fact that the air there is warm and circulates well (except in the corners). Therefore, we will give advice: since you cannot do without a false ceiling when insulating the ceiling, smooth out the corners when installing it. This will significantly reduce the likelihood of condensation in the inter-ceiling space by increasing overall air circulation.
There is an attic - it’s very good, you can accurately calculate the heat and insulate it with foam plastic on top. You just need to remember to lay a vapor barrier under the foam and over it as carefully as possible: the appearance of a dew point in the attic cannot be avoided. If you walk freely in the attic, without scaffolding, you need to insulate it with EPS, and form a moisture-proof screed over it, with a water-polymer emulsion added to the solution.
It is possible to insulate the ceiling in an apartment well if the false ceiling sheathing is made from 40x100 mm boards placed on edge. They are attached to the base ceiling with corners on both sides in increments of 100-120 mm. The cells are filled with PPS-15 or 20, and a plasterboard ceiling is made. The corners are smoothed (see above), and their cavities are filled with foam.
Installation
Using a dowel to attach insulation occurs in 3 stages:
- A hole is drilled corresponding to the diameter of the rod and exceeding its length by 10 mm;
- The dowel is inserted manually (its head should be flush with the insulation);
- The fixing anchor is inserted and hammered.
If you are using an extension cuff, it must be put on before inserting the fungus!
If available, cover the cap with a lid.
Installation can be considered complete.
