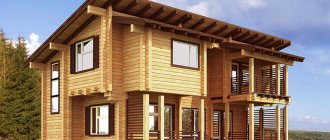
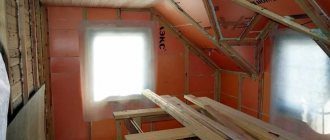
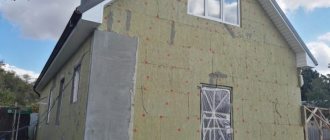
Metal roofing is a modern and popular solution, easy to install and affordable. The material has good performance characteristics and can be used on roofs of various configurations. Compliance with installation technology allows you to create a durable roof that provides a high level of protection of the under-roof space and premises from wind, cold and precipitation. The installation of metal tiles should be carried out by qualified specialists to ensure the best results. The process of laying this material has some distinctive features. When arranging such a roof, you need to decide in advance on the type of material and insulation.
Metal tiles are most often used for roofing Source orgtorg.org
What to do with a complex roof shape
Let's tell you frankly: metal tiles are far from the best roofing material for a roof with a complex shape.
Therefore, since there is already one and it needs to be insulated, be sure to think about the ventilation of all its parts. Definitely everyone! The fact is that certain areas without ventilation will be warmer; snow will melt on them and flow down to the eaves, where there is ventilation and the roof covering has a lower temperature (especially on the overhang, under which there is no insulation). And with metal tiles for water, it’s not difficult to find an entrance to the under-roof space.
Further, the melted snow will encounter unmelted snow and remain there, eventually turning into ice. And putting it on is not only a danger for people living in the house when they go outside at the wrong time - it is also a constant destruction of the drain.
This is why the ventilation of a complex roof must be 100%, without missing a single section. To do this, install an intermittent counter-lattice, which allows air flows to move not only in one specific direction, but also in different directions, reaching all zones. Also, a couple of additional aerators will not be superfluous.
And after finishing the insulation, also make sure that the air intake hole in the eaves is always open. It cannot be hemmed with a board, but it can be covered with a slightly bent gutter drip.
As a last resort, we advise you to insulate such a roof from the inside using polyurethane foam, which penetrates into all cracks and hard-to-reach places (and a complex roof always has them), and is not afraid of moisture:
How to make waterproofing?
When insulating a roof covered with metal tiles, be sure to install a water barrier. This is a special reinforced, vapor-permeable film that protects the attic space from condensation, dust and accidental rain or snow. Pay special attention to the first problem - it is on metal tiles and corrugated sheets as a metal material that condensation quickly accumulates. After all, metal always heats up quickly and cools down just as quickly, creating a significant temperature difference between the object and the air - ideal conditions for the settling of water vapor in the form of droplets.
When steam condensation reaches a critical point - the dew point - water molecules in the air bind and turn into water. The main conditions for this are high indoor humidity and temperature differences. Plus a poorly designed vapor barrier, of course. And thanks to the micro-perforation of modern water vapor barriers, a small ventilation will be created, which will help such droplets evaporate faster. A good budget option.
Polypropylene films with an anti-condensation layer are also suitable for solving this problem. One side of such barriers is made of non-woven geotextile, and the other is waterproofing. The textile insert of such a film adsorbs moisture and steam and removes them through the ventilation gaps. What’s good is that such a film can be left on the roof without a roofing covering for quite a long time, which is why work at heights goes more smoothly.
And finally, new superdiffuse membranes. Their use allows you to create only one air gap between the film and the roofing - and all the condensation will come out on its own. This provides wind protection, protection of insulation, and effective removal of steam from the entire roofing pie. In addition, the membrane itself can be laid directly on the insulation without any additional sheathing - a valuable saving! See what a modern membrane looks like and how different it is from ordinary polyethylene film, even in appearance:
But purchasing a good roof membrane can be a challenge. Even if you contact an official dealer of a manufacturer with a memorable advertisement, it is not a fact that you will end up with a quality product in your hands. Sometimes unscrupulous sellers offer to look at advertising samples of films that have a noticeable rough structure and a certain color and appearance, but in the end they sell a roll of film with slightly different qualities. At the same time, when buyers try to deal with the “forgery,” they refer to the manufacturer’s legal right to change both the color and texture of the products at their discretion. Those. one thing is advertised, another is sold - not often, but this happens periodically in the construction market.
Therefore, when purchasing a superdiffuse membrane, be sure to check it for the following key characteristics:
- Vapor permeability: 0.02-0.03 m.
- Tensile strength: not less than 140 N/5cm.
- Tear-out strength: not less than 50N/200mm.
- Water resistance: degree W1, and the water column is greater than 2000 mm.
- UV stability: 3 months.
Based on these characteristics, membranes are divided into certain groups. Some can be placed directly on the rafters, others can only be in contact with the insulation. And the tensile and tearing strength is the durability of the film itself.
How to care for your roof
The polymer coating of the metal tile protects it from rust, but is itself exposed to temperatures, ultraviolet radiation and weather disasters.
Regular cleaning consists of the following simple steps:
- Dried leaves and ordinary dirt are removed with a damp brush with hard bristles;
- Snow is cleared using conventional soft snow clearing devices;
- To wash gutters, use a stream of water under pressure, which is directed from the ridge of the roof towards the eaves;
- Heavy dirt can be removed using gentle polymer surface products;
- Aggressive household chemicals should not be used: they can destroy the protective layer of the roof.
Required tools and materials
To make a metal roof for a house, the first thing you need to do is prepare the following tools:
- Roulette;
- Marker;
- Stapler with galvanized staples;
- Hacksaw;
- Metal scissors;
- Drill;
- Screwdriver;
- Wooden slats.
We also recommend preparing power tools, because... metal tiles with a complex profile will be extremely difficult to cut manually.
To cover a roof with metal tiles, you will also need the following materials:
- The metal tile itself;
- Waterproofing (bitumen is not used);
- Thermal insulation, for example mineral wool;
- Beam 2.5 x 5 cm and board 2.5 x 10 cm for constructing the sheathing.
Installing additional items
Installing a valley: constructive tips
It is installed at the junction of the slope to the slope, but always together with the overlays. The lower valley strips are laid on the sheathing so that its lower edges are on top of the eaves strips. Then a sealant must be placed on the lower valley slats - it ensures a tight fit of the sheet to the slats. By the way, the valley is attached at the top of the profile wave in increments of 300 mm.
The joint of roofing sheets looks unaesthetic and therefore requires decorative treatment, which consists of laying a strip of the upper valley
End strip
Here it is necessary to use a “bottom-up” scheme, and the overlap of the planks is at least 10 cm in length. The end strip is attached to self-tapping screws in increments of 40 cm.
Something about the eaves strip: proper water drainage
The eaves strip for metal tiles is a longitudinal structural element, the main function of which is considered to protect the frontal board from harmful wetting and from the penetration of moisture into the internal space. The essence of its fastening lies in the following points: the cornice strip is nailed to the front board in a checkerboard pattern (step 300 mm); First, one plank is nailed, then the other is laid overlapping.
Under-roof waterproofing is laid on the last board of the sheathing and the eaves strip
Horse - say no to leakage
Small gaps must be left at the joints of the ridge. The seal is firmly glued to the upper edges of the sheets, the ridge is fixed with self-tapping screws at the apex points through the wave.
A seal with ventilation holes is placed on the ridge, onto which the ridge strip is subsequently attached.
Snow guards - such components should not be neglected
The planks are attached under the second transverse steps of the profile sheets, and a support strip is attached between them at the top of each wave. In addition, the installation of protective snow retainers can be carried out directly to the sheathing: naturally, then it is advisable to use long roofing screws.
Snow guards are installed in places such as the space above the entrance and windows, as well as at each level of the roof if it consists of several levels
In general, all of the above can be summarized unambiguously: installation of metal tiles is a complex process that requires skills, knowledge, and experience. You can’t master it on your own, so it’s better to immediately turn to professional craftsmen, because then the final result will be excellent and pleasing to the eye!
Features of laying metal tiles on different types of roofs
A hip roof (also called a hip roof) consists of two long and two short slopes.
When laying metal tiles on this type of roof, you should follow the direction from top to bottom. Please note that you will definitely have to cut sheets of roofing material - measure everything in advance and make blanks. A hip roof is a fairly popular option for construction because it is considered more economical and easier to install. But laying metal tiles on a hip roof is a labor-intensive process, so if you lack experience, it is advisable to involve specialists in the work. If you have to install the roofing material in question on the roof of a broken structure, then there are no special features in the process. It is only worth considering one point: it is necessary to reliably hide the joints of waterproofing, thermal insulation and roofing materials to prevent moisture from entering during slanting rain and very heavy precipitation. To do this, it is necessary to equip the joints of the slopes with a continuous sheathing, and lay waterproofing and thermal insulation materials in these places using the overlapping method.
How to insulate a roof, design tips
Metal tiles are used to cover pitched roof structures.
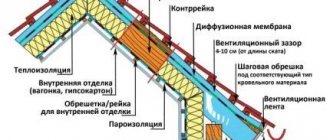
It is laid on the supporting roof frame - the rafter system. It is recommended to insulate a metal tile roof using a roofing pie made between the rafters. This technology is considered the most effective and gives excellent heat saving results. We can say that in the end, the maximum preservation of heat depends on the filling of the pie. Properly selected and installed, it prevents cooling of the living spaces of the attic and attic, prevents the penetration of moisture from the outside and ensures its removal directly from the pie itself.
The main layers of the roofing pie
It is impossible not to note the roofing material itself – metal tiles. The extent to which the roof and the elements of the “filling” of its roofing pie will be protected from the aggressive effects and physical stress of natural phenomena, snow, rain, and wind largely depends on compliance with the technology of its installation. The safety, absence of wetting and effectiveness of the thermal insulation layer are ensured by a waterproofing film, one or two ventilated gaps (depending on the type of waterproofing material) and vapor barrier material.
Waterproofing a metal tile roof is designed to prevent moisture from entering from the outside. Depending on the purpose of the attic space, it can be either vapor-tight or vapor-permeable.
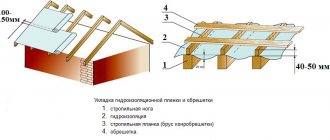
The waterproofing film is attached to the rafters at the top using staples or galvanized nails. In this case, it is necessary to allow a slight sagging of the canvas up to 1 cm in order to protect it during temperature changes. The sheets are laid across the roof slope with an overlap of the top sheet on the bottom sheet by 10 cm. It is desirable that the waterproofing material have high vapor permeability, otherwise it will be necessary to provide another ventilated layer in the roofing pie.
On top of the waterproofing layer, counter-lattice bars are laid along the rafters, and sheathing bars are laid across. The height of the counter-lattice bars is selected based on the length of the roof slope and the size of the required ventilation gap, and the pitch of the lathing in accordance with the horizontal wavelength of the metal tile, since the roofing material will be attached to it.
For a metal roof, it is especially important to have ventilation for the under-roof space. In its absence, condensation, which forms when the internal and external temperatures differ on the inside of the metal tile, can lead to disastrous consequences for the roof structure
For metal roofs, including those made of metal tiles, it is necessary to use special membranes - anti-condensation membranes.
This material is one-sided, and it should be laid with the rough side facing the insulation.
Thermal insulation layer of a metal roof
It is recommended to make it from breathable materials, usually with a fibrous structure. They are based on basalt or fiberglass. These insulation materials have good thermal insulation characteristics and excellent noise reduction. Another advantage is that they are not flammable. The total thickness of the mineral wool layers under the metal tile roof of an energy-efficient house is at least 20 cm. Fiberglass insulation, due to its structure, has many air gaps, which ensures their low thermal conductivity.
In general, the performance characteristics of mineral wool and fiberglass are similar, although the thermal conductivity of fiberglass is lower.
Penoizol is also used as insulation - liquid foam, a new generation of thermal insulation material.
It is necessary that the thermal insulation mats or slabs be semi-rigid. This way they will hold well in vertical and inclined planes.
Their length should be 2–3 cm greater than the distance between the rafters. The number of layers of insulation to be laid is calculated depending on the thermal conductivity coefficient of the material used for insulation.
Vapor barrier layer of a metal roof
protects the insulation from moisture that comes from inside. It is also attached to the rafters, only from below, using galvanized nails or staples. Similar to laying the waterproofing film, an overlap is performed. To ensure tightness, all “dangerous” junction areas, for example, to walls, pipes, windows, are taped with special tape.
The installation of the roof, insulation and other elements is carried out without deflections, gaps and irregularities with a tight fit to each other, with the exception of ventilation ducts.
2019stylekrov.ru
What is the best insulation for metal tiles?
If you are planning an attic floor, what is better to choose? So that you could stay there in winter, and that it would be safe in terms of flammability and health.
To insulate the roof of a house that will be covered with metal tiles, it is best to use “Ursa” insulation. The basis of this mineral insulation is staple fiber. The material is environmentally friendly, non-flammable and lightweight, which is especially important when using it on the roof. Has good thermal conductivity characteristics. Depending on the purpose of the room, different thicknesses of insulation can be used.
You can use any material intended for thermal insulation of residential premises. The thickness of the material is selected according to its thermal insulation properties; this parameter must be present in the attic design. Naturally, the insulating material itself does not heat, so it is necessary to provide heating for the attic.
All these tasks are solved in a working order and do not pose much difficulty. It is much more difficult to perform thermal insulation and waterproofing efficiently, so that condensation does not form, and if it does appear, it is removed without problems. In a residential attic, condensation will certainly form on any non-insulated surface, i.e. the slightest crack in the insulation will allow moisture to enter the metal of the roof and inevitably the appearance of fungus or mold, which is not at all safe for health.
Materials for thermal insulation of pitched roofs
Roof insulation technology involves the use of various materials. The most popular heat insulators include mineral wool and glass wool (in slabs or rolls), slab polymer materials - polyurethane foam, polystyrene foam. The principles of their installation are similar, but it is worth noting that installing slab material is much simpler and more convenient.
As waterproofing, roofing material or a waterproofing membrane is usually used, which is impermeable to water, but capable of removing moisture from the insulation. The vapor barrier layer can be made of
:
- roofing felt;
- polyethylene film;
- glassine;
- foil materials laid with foil towards the attic.
To create a roofing pie with high functional characteristics, it is recommended to use a special vapor barrier membrane to create a vapor barrier: it removes condensation outside from the insulation and does not allow steam and moisture to pass into the roofing pie.
Criteria for choosing insulation for the attic
High-quality insulation makes the attic suitable for year-round use. When choosing a heat insulator, you need to pay attention to the performance characteristics of the materials, including comparing
:
- noise insulation properties;
- ease of installation;
- moisture resistance;
- resistance to biological degradation;
- lifetime;
- efficiency;
- environmental friendliness;
- fire safety.
But the main quality by which insulation material is evaluated is its thermal conductivity coefficient, on which the ability to retain heat in a room depends
.
From the point of view of ease of installation and use of insulation, preference should be given to universal materials. If the same thermal insulator can be used for walls, roof and floor, the insulation of all structures will last the same period.
Sound insulation properties are a particularly important parameter if the roofing is made of metal (seam roofing, metal tiles, corrugated sheets). Gusts of wind, rain and hail make such a roof “sound”, and staying in the attic will cause discomfort.
Slab insulation from a well-known manufacturer
Since the roof frame is usually made of wood, it is advisable to use insulation that is fire resistant and flame retardant. Otherwise, an accidental fire will cause the entire attic and roof to quickly become engulfed in fire.
To ensure that condensation does not form on the wooden structures of the rafter system and gables and that the insulation does not lose its thermal insulation properties due to moisture penetration, it is necessary to insulate the attic space with a vapor- and moisture-proof material, or to use reliable hydro- and vapor barrier. This affects the speed and complexity of installing the insulating layer and influences preferences when choosing a material.
Calculation of the amount of metal tiles
To calculate the required number of sheets of material, you first need to decide on the type of profile and the manufacturer of the metal tile - you will need the exact dimensions of the material itself, and each profile has its own. Then you need to make accurate measurements of the slopes - length, height, if any, you need to measure all the protrusions or other decorative elements that will need to be sheathed with roofing material. If the roof has a complex shape, it is better to draw a plan, put down all the dimensions and then start doing the calculations.
Number of rows
It is best to look for metal tiles not in stores or markets. It is advisable to contact the manufacturer directly. The point is not only the price - it may not differ very much, but the fact that many workshops/factories offer to cut sheets of the required sizes. The minimum sheet height is 0.7 m, the maximum is 8 m. That is, you can order the required number of sheets covering the roof slope from the ridge to the overhang (taking into account the eaves overhang).
This option is good because a metal tile roof will not have horizontal joints, which means there will be less chance of leaks. The second plus is a minimal amount of waste and a smaller amount of material itself (due to the absence of horizontal overlaps, several square meters are saved). Disadvantages: difficulties with delivery, lifting long sheets to the top, inconvenient installation.
Calculation of a rectangular roof slope
When using sheets of standard sizes, the height of the roof slope is divided by the useful length of the sheet. The resulting figure is always rounded up. The useful length is obtained after subtracting the amount of horizontal overlap from the total length - from 100 to 200 mm. The flatter the slope, the greater the overlap of the sheets is necessary so that precipitation cannot get into the under-roof space. On roofs with a slope of up to 12°, one sheet overlaps the other by at least 200 mm; with a slope of 12° to 30°, the overlap is 150-200 mm, more than 30° - 100-150 mm. The specified amount of overlap is subtracted from the total length of the sheet, this will be the “useful length”.
An example of calculating the number of rows of metal tiles on a roof. Let the length of the slope be 4.5 m, the useful length of the sheet is 2.3 m. Divide 4.5 by 2.3, we get 1.95, round to the nearest whole number - we get 2 rows. In this case, only a small part of one sheet will go to waste, but there are times when more than half is cut off. This is very unprofitable, since this piece cannot be used anywhere else.
Number of sheets in a row
Take the length of the slope and divide it by the usable width of the sheet. This parameter is indicated in the technical specifications for metal tiles. Most often it is 110 cm (1.1 m). We round the resulting number up to obtain the number of sheets in the row.
An example of calculating metal tile sheets in a row. Let the length of the overhang be 8 m, the useful width of the sheet 1.1 m. When dividing, we get 7.27 pieces, but round up to a larger integer and we get 8 pieces in one row. Moreover, more than 2/3 of one sheet will go to waste.
Features of hip roofs
Hip roofs have slopes that are triangular or trapezoidal. Here it is necessary to select the length of the sheet in order to minimize the amount of waste.
An example of the layout of metal tile sheets on a hip roof
The height is selected so that no more than half goes to waste. It is quite difficult to do this manually, and there is still a significant error - there will be 20-25% more waste than when calculated using programs. They are usually available from sellers and manufacturers. It is better to provide them with an accurate calculation, and first measure the parameters of the roof at home (or call a measurer), and then try to select the dimensions yourself. Then you can compare the amount of material needed, calculated by you and proposed.
Determining the number of additional elements
A metal tile roof requires a large number of different additional elements (additions), which form the ridge, the edge of the overhang, the sides of the slope, the passage of the pipe, the valley (the junction of two adjacent roof slopes). The more complex the shape of the roof, the greater the amount of additions required. With a simple gable roof, ridge elements and caps, cornice and pediment strips will be needed. That's all.
What types of additional elements are there for metal roofing and why are they needed?
Despite the wide variety of extras, they are all considered the same. Take the length of the surface on which it needs to be mounted and divide by the useful length of the element. It is usually standard and is 1.9 m (total length 2 m). The result obtained is rounded up.
Rafter system, hydro- and thermal insulation, lathing and angle of inclination
Installation of a metal roof begins with the installation of a rafter system.
The process is carried out using the following technology :
- to anchor bolts or studs;
- The rafters are installed on the support beam, fixed with corners, from above they are cut at an angle and connected in pairs by cross members and steel strips.
If the roof is high or has a large area, then a ridge beam is installed, the rafters are attached above it and everything is pulled together with corners.
A high roof requires additional installation of ridge beams Source krsk.au.ru
Almost always, the roof is insulated with special materials, which increases its performance characteristics and functionality. The support for the insulation is the sheathing, and the top is covered with waterproofing. For the lathing, wide boards are used, the distance between the first lower strips is up to 15 cm. Fastening to the rafters using two nails to create the most reliable base for metal tiles.
The roof arrangement scheme is quite complex Source pinterest.com
The installation of metal roofing is carried out with acceptable standards for the angle of inclination. At the same time, the angle of inclination determines other indicators of the roof, such as the type of metal tile, frame design, and the weight of the roofing pie. The greater the slope, the more materials will be required due to the increased area of the slope, while the windage of the structure increases. The optimal angle is 22 degrees, the minimum is 14 degrees; if you make it smaller, then it is impossible to use the attic space and the necessary strength of the entire structure is not ensured.
Design of security elements and their purpose
Ladder
To climb to the roof, you need a stable ladder. It consists of wall and roof ladders with brackets. 4 brackets are required per section; they are placed in the place of the lower wave bend, where the sheathing is solid. Both the brackets and the top of the roof ladder are secured with bolt screws. The wall staircase is installed so that the topmost step is opposite the edge of the cornice. In this case, the wall staircase itself must be aligned with the roof staircase.
Roof fencing
These metal elements are a necessary condition when working on the roof. They are secured using special supports to the continuous sheathing through the lower part of the wave, sealing with a rubber gasket. See photo above.
Transition bridge
Walking bridges are needed for safe walking on the roof from an attic window, hatch or staircase. They are fastened in the same way as fences, only continuous sheathing is not necessary.
Snow guards
Snow guards have a tubular design and are made of metal painted black, brown, red or green. They are installed along the entire perimeter of the roof, above the eaves overhang. In addition, they must be placed above the entrance to the house, attic windows, as well as above each level of a multi-tiered roof.
>Metal Profile roofing system diagram
Below is a diagram of the roofing system of the Metal Profile company. On it, all the nodes discussed above are connected into a whole roof.
Drainage system
Proper installation of a roof under metal tiles is impossible without a reliable drainage system. It consists of several elements.
Gutter
According to the rules, no more than 10 meters of gutter are required for one drainpipe. A V-shaped hole 10 cm wide is cut out on it, into which the outlet funnel will be inserted. It must be secured 15 cm from the edge of the gutter.
Gutter holders
They must be installed before the roof eaves and metal tiles are finally installed. The holders are fixed every 0.4-0.5 m. They need to be marked so that there is a slope of up to 5 mm per meter, after which they are bent with a strip bender. You can also bend the already installed holders by marking them using a stretched cord.
Gutter plugs
They are installed at both ends of the gutter and driven tightly inside using a mallet.
Outlet funnel
The front edge of the outlet funnel is brought under the outer bent edge of the gutter and fixed with a carved flange, which is bent to the rear edge of the gutter.
Connectors
When fastening the gutter or their corners together, it is necessary to make an overlap of 2.5 to 3 cm. For this, connectors are used. They have rubber gaskets and a lock that consists of a tongue at the front and a rear flange. Using such a lock, it is easy to connect the gutters both in a row and at an angle.
Spider
This part is installed in the funnel of the drainpipe. It is designed to keep debris and leaves out. The spider needs to be cleaned at least once a year so that it continues to perform its functions.
Pipe for connection and its elbow
Two transition elbows and a connecting pipe are installed between the funnel and the drainpipe. They are sawed off directly on site, determining the desired size.
Drainpipe and its holders
There are two types of holders. They are universal and suitable for any surfaces and materials. They need to be attached to the wall every meter. Fastenings at pipe joints are also needed. During installation, pieces of pipe of the required length are cut, they are inserted into holders and secured with locks. At the bottom of the drainpipe, 30 cm from the blind area, an elbow is attached to drain the water.
Drain pipe tee
It is necessary if one drain is provided for two funnels. It is crimped at the bottom, and on the side it has a fairly wide socket that allows you to change the entrance angle of the side pipe.
Funnel for collecting water
Seam and other complex types of roofing involve the use of a funnel instead of a gutter. It is inserted into a pipe, which is attached to the eaves with a clamp. It is made from a strip of metal and connected with a self-tapping screw.
Insulation of a flat roof
What should you use?
- Load-bearing base.
- Vapor barrier.
- Roll material (roofing felt).
- Insulation.
The bulk layer on a flat roof consists of a cement-sand mixture and a drainage layer.
The order of layers in the “roofing pie” depends on the type of roof. In the traditional type, the insulation is protected by a waterproofing carpet, and in the inversion type, the opposite is true.
How to insulate a roof
Insulation of flat roofs.
To begin with, the roof should be thoroughly cleaned of excess moisture, foreign objects and dirt. This point should be given special attention; excess moisture will saturate the space in the under-roof layer with moist steam and penetrate into the open pores of the insulation
As a result, this can even lead to swelling of the roof covering and the formation of air pockets, which can significantly affect the insulation. Next, a waterproofing coating should be applied to the insulation; it is important to do this immediately, avoiding any contact of water on a flat surface. To distribute the load evenly, during installation, workers must move strictly along the inventory walkways. It is important to lay the thermal insulation towards yourself, starting from the edge opposite to the roof exit.
These simple rules require very careful study, but your efforts will not be in vain, and in return you will receive high-quality thermal insulation.
Often, when installing roofing materials, big problems arise, and as a result, you have to change the rafter system, which has worn out and completely deteriorated due to insulation that was previously done incorrectly
Therefore, roof insulation must be approached with great care. On the roof of a private wooden house, the rafters may become damaged, the sheathing may become unusable, and all this in literally just 5 years
Therefore, it must be installed correctly and on time, as soon as the team completes the rafter system. and the insulation can be installed after the roof is installed.
Share a useful article:
Calculating the amount of insulation on the roof
To calculate the required amount of material, it is important to remember the rules for its installation. Proper insulation of the roof implies that the insulation is laid between the rafters at random, that is, the width of the material is 1.5-2 cm wider than the pitch of the rafters. It is much easier to decide in advance on the brand of insulation and its dimensions at the time of designing and constructing the trusses. The standard dimensions of the slab are 117*61*10 cm, which is especially convenient with a standard rafter pitch of 60 cm. In this case, there is no need to trim or join the slabs.
To calculate the required number of slabs, it is necessary to determine how many will lie along and across. To do this, it is necessary to take into account the length of the roof slope and the number of spaces between the rafters.
Example
For example, we have a roof with 6 rafter intervals of 60 cm each. That is, one sheet of insulation will lie in each gap. In this case, the length of the slope of a gable symmetrical roof is 5 meters.
Let's calculate how many slabs are needed in one row:
Stages of work on insulating a pitched roof
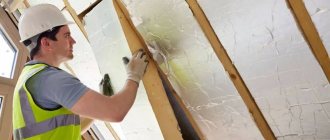
The roof insulation scheme is quite simple. First of all, you need to measure the distance between the rafters. The slabs of cotton wool insulation should be cut according to the results obtained, adding 1 centimeter. This will allow you to fasten the heat insulator between the rafters. This stage of work is greatly simplified if the roofing system is initially designed and installed based on the use of slab insulation boards of a certain width.
If there is no waterproofing between the rafters and the already installed roofing, you should first secure a water barrier. The membrane should envelop the rafters; it is most convenient to fasten it with a construction stapler to the rafters themselves and to the roof sheathing in the openings between them. The waterproofing must be installed under the eaves at the bottom of the roof to ensure moisture drainage. It should be taken into account that with this method of fastening the hydrobarrier, the insulation must be installed without the necessary air gap. For this reason, it is recommended to use a superdiffusion membrane as a waterproofing material.
If there is a waterproofing layer under the roofing, nails are placed on the rafters in increments of about 10 cm. The nails should be located at a distance of 3-5 cm from the waterproofing layer. It is necessary to stretch a polyethylene thread or cord between the nails, tamping them to the end. This will help create an air gap between the hydrobarrier and the insulation. If the heat insulator is planned to be fixed with a cord, and not with lathing for internal cladding, nails must also be driven along the outer edge of the rafters.
If, when deciding how to insulate the roof of a house, you chose cotton slab insulation, then the prepared elements must be slightly compressed and inserted between the rafters
When using stiffer foam boards and similar materials, it is important to accurately size them so that the boards fit snugly into the opening. It is recommended to carry out insulation in two layers
If you have to mount not solid sheets into the opening, but narrower fragments, joining them along the length or width, you need to make sure that the joints of the second layer do not coincide with the joints of the first. The heat insulator should not protrude beyond the plane of the rafter legs. If the rafters are not wide enough to install two layers of insulation, additional timber is nailed to them.
The heat insulator is fixed between the rafters using a stretched cord secured to pre-filled nails. Or, as a fastening, a lathing made of slats is used, intended for mounting the interior lining of the room. The slats are nailed to the rafters in increments of 30-40 cm. In this case, the vapor barrier is stapled to the rafters before installing the sheathing: the thickness of the slats allows you to create the necessary air gap between the vapor barrier and the sheathing.
When installing a vapor barrier, special attention is paid to the tightness of the layer. The panel is laid with an overlap of at least 10 cm, the joints should be taped with adhesive tape in two layers
It is necessary to install the vapor barrier around the chimney and at the junction with the walls as efficiently as possible. At the final stage, the sheathing is installed using wood-based or plasterboard boards.
You can learn more about how to insulate the roof of a house from the video.
Performance characteristics of fiber insulation
Glass wool
.
Her positive qualities include
:
- fire safety (2nd degree of fire resistance);
- environmental safety (does not contain resins);
- unattractive to mice (they do not build nests and passages);
- affordable price.
The main disadvantage is that when working with the material, caustic glass dust is formed; installation of the heat insulator requires care and the use of protective equipment
. In addition, over time, glass wool tends to deform and wrinkle, especially when moisture penetrates.
Mineral wool
. The material contains fibers of various origins (manufacturing materials - clay, stone, quartz sand, glass, etc.). Mineral wool is characterized by a multilayer heterogeneous structure with air lenses. Due to this, the material dampens sound waves well. Choosing mineral wool (primarily Isover, Ursa) is recommended for those who have decided to make metal roofing.
This heat insulator is fire-resistant, does not rot, and is easy to install. But rodents can settle in it, whose nests, passages and waste products reduce the performance properties of the insulation.
Basalt wool
. Consists of fibers obtained by melting rock. Withstands heat up to 1000 degrees, does not spread combustion. You should choose basalt wool carefully, checking quality and safety certificates: some manufacturers, in an effort to reduce the cost of products, use resins that emit toxic substances.
Basalt wool is resistant to fungus, but can be damaged by rodents. This is a good sound insulator and easy to install. But when choosing a material for insulating a rafter system, you should take into account the fairly large weight of stone wool slabs.
If you have to choose a fiber insulator for attic insulation, pay attention to the density of the material. The heat insulator should not lose its shape even after prolonged use. For mineral, basalt wool, the density indicator should be about 40-45 kg/m3.
Laying technology
The laying of metal tiles is carried out after the assembly of the rafter frame and sheathing is completed. To avoid getting the wooden frame elements wet, installation should be carried out in dry weather. For safety reasons, it is prohibited to carry out work at height in windy weather. To lay the metal profile with high quality. There is the following instruction:
- Waterproofing material is laid on top of the rafters, starting from the roof overhang. Laying is done with a slight sag so that the waterproofing does not burst under water pressure. The film is attached to the rafters with a stapler; an overlap between the strips is made of 10-15 cm, gluing it with adhesive tape.
- Counter-lattice slats are installed along the rafters directly on top of the waterproofing, which form a ventilation gap necessary to protect the roofing material from condensation.
- Then, perpendicular to the rafter legs of the frame, the lathing is fixed to the counter-lattice with a step equal to the wavelength of the metal profile.
- Metal tile sheets are cut to fit the dimensions of the slope. If you buy the material directly from the manufacturer, then the cutting is done at the factory, so there will be no horizontal joints between the sheets. You can cut metal profiles outside of production with a circular saw, jigsaw or hacksaw.
- Begin laying from the lower right edge of the slope. If laying is done in one row, then the sheets are attached one after another. If the installation is carried out in 2 rows, then first lay the outermost sheet at the bottom of the slope, then fix the sheet above it, then the 2nd sheet of the first row, and so on.
- The sheet is attached to the sheathing using roofing screws with a rubber press washer, which closes the fastening hole from water penetration. The screws are screwed in strictly at right angles to the surface of the roofing material, leaving a gap of 1-2 mm so as not to deform it. To fix 1 sheet, 10-15 screws are required.
- During installation, metal tiles overlap each other by 1 wave. The place where the sheets overlap is fixed with self-tapping screws through a capillary groove.
Note! When fixing metal tiles, it is important not to twist the self-tapping screw to avoid deformation of the material and chips on the polymer coating. To do this, it is better to use a screwdriver at low speeds.
Material laying technology
Sheet fastening scheme
Location of attachment points
Video description
In the video you can see the rules for installing a roofing pie:
Roof covering
High-quality metal tiles have a thickness of 0.4-0.6 mm and several layers of protection. It is almost impossible to visually check the presence of internal protective layers, so when purchasing roofing material, ask the seller for a certificate. To protect against corrosion, metal tiles are painted on the inside, and on the outside they have a polymer coating, which resists external influences much better than paints and varnishes. The durability and cost of the roof depend on the type of external protective layer. The most common types of polymer coatings are:
- Polyester . The thickness of the protective layer is 25-30 microns. It has an affordable price and relatively high performance characteristics. The warranty period for metal tiles with polyester coating is 8-10 years;
Metal tiles with polyester coating Source satu.kz
- Polyurethane . It is characterized by resistance to mechanical damage, temperature changes and various chemicals. When the sheet is bent, such a coating does not lose its integrity;
- Polyvinyl chloride . Demonstrates high resistance to mechanical, chemical and thermal influences. Has high plasticity. Metal tiles with this coating are recommended for installation on textured surfaces. It is advisable to use in regions with extremely hot climates;
- Plastisol . Consists of polyvinyl chloride with the addition of a plasticizer. It is applied in a layer of up to 200 microns, which allows you to apply a relief pattern to the surface of the metal tile. They have low resistance to high temperatures, which does not allow its use in regions with hot climates.
Metal tiles coated with plastisol - Solano model Source takinado.com.ua
Interior decoration
A ventilation gap is also formed between the vapor barrier membrane and the sheets of plasterboard or OSB. For this, wooden slats with a cross section of 20x30 mm are used, attached to the rafters perpendicularly.
Expanded polystyrene
This material plays a fairly significant role in any construction. Not every insulation has such excellent characteristics and such an affordable price. When carrying out thermal insulation measures with your own hands, you can significantly reduce the monetary costs of operating a building, and selecting high-quality insulation will help save electricity, which is expensive in these days, and roof insulation will help with this. Metal tiles are a material that will be quite profitable in economic terms due to the price-quality ratio.
Errors in installing metal tiles
The most common problems include the following errors.
| Error type | Possible problems | Solution |
| Uneven sheathing and incorrectly chosen pitch. | · Deflection of sheets; · poor joining of material; · The sheets are not secured firmly enough. | Check the installation level, and also do not deviate from the accepted standards for calculating the sheathing pitch. |
| Lack of counter-lattice for metal tiles. | Increased humidity in the under-roof space due to lack of proper ventilation. | Mandatory installation of counter-lattice or installation of forced ventilation. |
| Fixing metal tiles with regular self-tapping screws. | · Rusting of sheets at fastening points; · penetration of moisture under the roof. | Use special roofing screws. |
To summarize, we can say that metal tiles are a universal material that can not only decorate a building, but also protect the house from adverse weather factors. You can install metal tiles in winter and summer, on roofs of any configuration, be it broken, gable, hip, hipped and many other options
However, in each case it is important to strictly follow the manufacturer’s instructions, as well as observe safety precautions and avoid installation errors
An important element of the roof sheathing
To create the sheathing, use bars with a cross-section of 50/50 mm and edged boards measuring 32/100 and 50/100 mm. At the bottom of the roof slope, along the eaves overhang, two 50/100 boards are nailed. Then a counter-lattice made of 50/50 mm bars is placed on top of the waterproofing. The bars are nailed along the rafters, from the ridge to the bottom. On top of this counter-lattice, with a certain step, sheathing boards are attached horizontally. The fastening step of these boards will depend on the type of metal tile profile that is planned to cover the roof.
Ridge sheathing
The uppermost part of the roof requires strengthening. To do this, you need to nail a pair of boards on each side of the ridge strip.
From the end of the roof you need to nail boards larger than the main sheathing to the height of the metal tile profile.
The valley is the internal junction of two roof slopes. Where the valley passes, the sheathing is made continuous.
Roof fencing
It simply must be reliable, so it is made above the overhang of the eaves. As a guide, you can take the height of the load-bearing wall. The sheathing in these places needs continuous sheathing. Therefore, additional boards are added between the ordinary sheathing and a continuous base is made.
Final details of the roofing system
End strips
End strips are installed on the end side of the roof. They are fastened with self-tapping screws every 50-60 cm. It is necessary to make an overlap between adjacent planks of approximately 50 mm.
Ridge strips
Such elements can be flat or rounded. The latter need to be additionally attached to their end caps. It can be simple or conical, it is fastened with screws or rivets. Before installing the strips, you need to put a universal or shaped seal under the ridge. These strips are mounted using ridge screws.
Types of waterproofing substrates
In a high-quality roof, it is necessary to provide for the formation of condensation not only directly under the metal tiles, but also from the insulation side.
To do this, first of all, an anti-condensation layer is applied to the inside of the film and a gap is left for ventilation. The formation of condensation depends on whether the roof is warm or cold. Its intensity and volume are directly related to the temperature above and below the substrate.
There are three types of films in total:
Classic film
It is important to maintain ventilation in two circuits:
- Between roofing material and waterproofing
- Between waterproofing and insulation
Let's sum it up
How high-quality and functional the insulated structure will be will depend entirely on how correctly and conscientiously the thermal insulation work is carried out. Saving on roof insulation is not the most reasonable option. A well-insulated roof will significantly reduce the cost of heating your home. If you choose metal tiles, it is recommended to insulate using fibrous heat insulators (glass and mineral wool). Such materials are distinguished by their reliability, long service life and excellent sound insulation qualities. It is also worth remembering that these materials are not subject to combustion, which is also important in private construction.
Selection of thermal insulation material
To thermally insulate a roof with a cover made of metal tiles, it is better to use thermal insulators with a fibrous structure. The most common of them:
- glass wool;
- mineral wool.
Minvata
Mineral wool and similar materials with a fibrous structure have remarkable thermal insulation properties. They very effectively remove excess moisture from under the roof space into the external environment. A specific membrane fabric film will prevent condensation from remaining inside the building.
When performing roof insulation work on the inside of the attic space, the mineral wool must be cut in advance into fragments having the required dimensions with an allowance of 2 or 3 centimeters. Before installing the insulating material in the gaps between the rafters, it needs to be compressed a little. Upon completion of installation work, the insulation will expand again and completely occupy the space intended for it.
Styrofoam
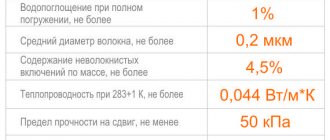
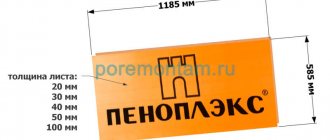
As a material characterized by ease of self-installation and affordable cost, you can use the well-known polystyrene foam. It weighs little, is produced in the form of slabs and does not create additional load on the roof structure.
Polystyrene foam also has its drawbacks:
- low vapor conductivity, which threatens the accumulation of condensate under the roof and dampness in the house;
- the material attracts rodents who like to build their nests in it, which will significantly damage the insulation of the attic..
Polyurethane foam
This material can be applied in foamed form to any surface being processed, regardless of its shape and design complexity. The process takes place using a specific portable installation with a sprayer, from which the substance is supplied under significant pressure. In this way, it is possible to insulate the plane, regardless of its angle of inclination.
In addition, the use of polyurethane foam eliminates the need to lay a vapor barrier layer, which would protect the elements of decorative finishing of the living space from condensation penetration. The cost of such material is less economical than that of other materials used for heat insulation.
Ecowool
This building material is manufactured in a compressed form and will need to be loosened before being used for its intended purpose. Often, in order to return the material to its original shape, make it more voluminous and apply it to the insulated surface, special blowing equipment is used.
The technology for laying polyurethane foam and ecowool is not too complicated; the work can be done without the use of a structure for support. The use of insulation materials in rolls or panels will require more strict adherence to the rules of installation technology.
This is interesting: Types of alarm systems for dachas - we explain in detail
Some advice from professionals
When choosing insulation, you must also purchase ordinary or superdiffusion membranes. They are needed for vapor protection and waterproofing. Such layers must be made on both sides of the heat-insulating material. This will help prevent the appearance of condensation, so the surface of the insulator will not get wet and will not lose its qualities.
When attic rooms are insulated, the heat insulation is laid along the contours of the rooms. The ridge space should be left uninsulated. Vapor insulation is installed under the ceiling.
The waterproofing layer is made both under the roofing sheets and above the insulating material.
To prevent the heat insulator from getting wet, the inner part is covered with a vapor-proof film, and the outer part is covered with a waterproof film. The first counteracts the vapors that accumulate in rooms due to radiators. The second prevents external moisture from penetrating the surface of the insulation. Some vapor barrier manufacturers offer products that are coated with aluminum, and some of the heat is reflected back into the room.
Regardless of the cost of materials, deviations from generally accepted standards during the installation process are unacceptable. According to the layer-by-layer insulation technology, immediately after finishing the interior finishing, a special frame is installed on the roof surface, including wood blocks or a steel profile. The minimum gap between the roof structure and the frame is 1 cm.
The initial layer of the heat-protective “pie” is intended for vapor insulation and is made from ordinary polyvinylchloride film. An insulator is laid between the rafters, as mentioned above. It is covered with a vapor-permeable membrane to neutralize the effects of wind. The air gap is 5 cm. Then it is the turn of the wood sheathing. At the very end, metal tiles are installed.
Thus, the roofing “pie” consists of the following layers: vapor insulation, insulation material, vapor-permeable membrane, wood sheathing, steel tiles.
The order cannot be disrupted. It is only allowed to make changes that have a positive effect on the overall design.
Rules for working with heat insulators
When working with a heat insulator, you must follow a number of rules so that it fulfills its functions and the insulated roof serves you for many years.
Storage and installation
Firstly, moisture should not get on the surface of the materials either during storage or during installation, so the insulation must be stored in a room well protected from moisture.
Preventing the ingress of moisture during installation is carried out by installing a waterproofing layer
It reliably protects the material from getting wet, preventing it from becoming saturated with water - this is a particularly important condition for the normal use of mineral wool.
Instructions
Before you start using, carefully read the instructions for the insulator. Many people believe that all insulation materials of the same type are the same, but this opinion is wrong. Only the goals of such materials are common, but the installation process, storage conditions and other important points are often different.
Handy tools
Never neglect the reliability of the tools at hand. No matter how high-quality the materials for insulating a metal roof are, if you cut them with a dull knife, nothing good will come of it, you will only ruin the insulator.
Safety regulations
Remember about basic safety rules that apply not only to the thermal insulation of roof structures, but also to any other construction activities.
We are talking about wearing safety glasses, durable gloves, a respirator, etc. Even a small metal chip that accidentally gets into the eye can cause serious injury.
We thermally insulate a steel tile roof
Insulating such a roof is a simple construction project that, however, requires compliance with a number of rules:
- installation of heat-insulating materials is carried out between rafters;
- When laying the insulator, it is important to ensure that it is not wrinkled or deformed, since minor damage can lead to heat leakage;
- when cutting material for roof insulation, the width of the tolerances should be 0.7-1 cm, as they will help insert the insulator between the rafters;
- in order not to crush the heat-insulating board, mount the middle of the product in the span between the rafter structures, after which the plate is pressed from the center to the edges;
- if mineral wool is used, then first insulation is installed between the rafters directly under the tiles, and the next layer is mounted on the inside between the counter-battens.
Preparation for installation of metal tiles
How long the roofing material will last depends on the quality of installation and the quality of the metal tile itself. The quality of metal tiles depends on the thickness of the metal sheet (the smaller it is, the greater the risk of corrosion if the upper protective layers are damaged), the number of layers and the quality of the coating.
- Before installing metal tiles, the rafter system must already be installed;
- Next, measurements are taken of the roof slopes. If the diagonals of the slope are not equal, this must be taken into account when laying the sheathing and installation. A difference of up to 10 cm can be easily hidden due to additional roofing elements; small distortions can be corrected at the sheathing stage or with the help of additional parts;
- Lathing is laid on the rafters. Metal tiles do not require continuous sheathing. The minimum cross-section of a beam or board depends on the thickness and weight of the roofing material; the higher these indicators, the stronger the sheathing should be (usually 32x100 mm boards are used), the sheathing pitch should be equal to the transverse profile of the metal tile - 350 or 400 mm. A metal profile can also be used for lathing;
- Next, layers of waterproofing, vapor barrier and insulation are laid, which provide protection for all materials that make up the roof “pie”;
- Ordering sheets of metal tiles;
- Cutting sheets if the roof has broken and non-standard slopes. Not all tools are suitable for cutting metal tiles. You should not use a grinder for cutting; the temperature effect destroys the polymer coating, and this leads to corrosion. It is more correct to use a saw with carbide teeth, manual or electric metal shears, a hacksaw or other tool for cutting polymer-coated metal.
Before cutting, the sheet must be marked; metal tiles can only be cut on a hard surface. After finishing cutting, immediately remove all metal filings - they can damage the polymer coating.
- This publication will tell you what sizes of metal tiles are available and how to correctly calculate the required quantity.
- The technology for installing high-quality sheathing under metal tiles is described here.
- Why you need a backing for metal tiles and what its options are, read this link.
Pros and cons of coverage
The advantages of the material include:
- Light weight.
- High wear resistance.
- Fire resistance.
- Relative ease of installation.
- Good potential for implementing design solutions.
There are also minor disadvantages that can be eliminated with proper planning and execution of work:
- Low sound insulation: during precipitation and strong winds, metal tiles create an increased noise level. The disadvantage is offset by the use of good sound insulation, the function of which is usually performed by a thermal insulation layer.
- Condensation may form in the interior of the roof; to avoid this, care must be taken to provide ventilation and vapor barriers.
The most common mistakes when installing a metal roof
Despite the strength of the roofing material in question, you should not carry out installation work in rough shoes - you can easily damage the top coating of the metal tile sheets.
You should remember the light weight of the material - they are easily blown away/bent by the wind. Moreover, this also applies to those cases when sheets of metal tiles are simply lying on the ground. Therefore, you should not carry out installation work in windy weather.
You cannot step on the crest of a wave, and in general walk on sheets of metal tiles with your full feet - it is better to do this on your toes to avoid breaking the roofing.
The edges of the sheets of the roofing material in question are very sharp - be sure to use gloves when working, because it is very easy to get injured.
Metal tiles are the most popular roofing material - it has high quality characteristics at a relatively low cost. And the installation can be carried out on your own without involving specialists/craftsmen in the work - this will also save money.
What and how to attach it to
The metal tiles are secured with special self-tapping screws and rubber washers. Just like the main material, they are made of galvanized steel, and the top is painted to match its coating. When installing, the self-tapping screw must be screwed in strictly perpendicular to the roof surface; tilting it is not allowed.
How to properly screw self-tapping screws into metal tiles
When fastening metal tiles, you need to monitor how tightly the fasteners adhere to the surface. You cannot tighten it too much, bending the metal, but you also cannot allow a loose fit - the connection will not be airtight.
