More than 60% of Russians use hydraulic heating for their homes. It has a lot of obvious and undeniable advantages, thanks to which such heating of private houses and apartments is in no hurry to lose ground to infrared or other types of heating. The main heating element of hydraulic heating is the battery. Repairers charge a lot of money for installing this element, so installing heating radiators with your own hands is a pressing issue. In this article we will talk about such a solution to the problem.
Radiator
Now let's figure out how to properly install a heating radiator yourself.
Installation nuances
There are two types of bimetallic radiators: partially or completely bimetallic.
In the first case, aluminum is used for the manufacture of vertical collectors, which requires special care during installation. There are the following requirements for how to correctly connect a bimetallic battery:
There are the following requirements for how to properly connect a bimetallic battery:
When connecting fittings and manifolds, be careful not to use excessive force. As a rule, the accompanying documentation contains detailed installation instructions
A torque wrench is very convenient in this regard, allowing you to control the applied force. When using linen winding, it is important not to overdo it with its quantity. Otherwise, some of the effort will go into it, which will ultimately lead to the appearance of microcracks.
After the coolant gets into them, the process of peeling off the paint will begin. As a result, sooner or later a leak will appear. It is best to apply sealant and a little flax. It is better to avoid using paint in systems where antifreeze acts as a coolant. This will lead to rapid corrosion of the seal and the appearance of a leak.
- The battery must be mounted in a strictly horizontal position. An exception is when an air vent is used, when, for greater efficiency in releasing gases, a slight forward angle deviation along the circulation path is allowed. It is prohibited to make a slope in the opposite direction, because this disrupts circulation.
- When hanging the radiator, you must use three brackets: two on top and one on the bottom. The upper elements take on the entire load. Due to the lower fasteners, the desired direction is set.
- To ensure effective air exchange, the following parameters should be adhered to: distance to the floor - from 60 mm, to the window sill - from 100 mm.
In some cases, the manufacturer may recommend other distances, depending on the design features (the differences are usually a few centimeters). However, the gap between the rear surface of the battery and the wall remains unchanged - 30-50 mm.
Tubular steel
Batteries of this type are made in the form of a set of steel pipes with coolant flowing through them. Their industrial production is more expensive than the previously discussed panel samples, so their price is correspondingly higher.
These devices, like all other varieties, have their own inherent disadvantages and advantages. In terms of maximum pressure, they are superior to other steel products, which is their advantage. The disadvantages include the relatively high cost.
Installation
After the preparatory work has been completed, you can begin the direct installation of heating devices that need to be placed on the brackets. If the installation of the brackets is done correctly, the rear wall of the radiator will fit closely to the supports and will be securely fixed to them. When installing the battery itself, you need to take into account that it is necessary to maintain a slight slope, which will be about 3 millimeters per 1 meter of the heating device.
The batteries are installed, pipes and fittings are connected to them, and all this is carefully secured. How well the work is carried out will determine how tight the system will be. Next, you can open the riser and fill it with water. This will allow you to check how tight the connections are.
When installing heating devices with your own hands, you must pay special attention to the installation of shut-off and control elements. The installation of a Mayevsky crane is mandatory, because it is he who will subsequently play the main role when bleeding air at the beginning of the heating season
The element should be located near the highest point.
When working with a one-pipe system, it is necessary to install a bypass, which has a valve, in contrast to a two-pipe system, when the connection occurs only with the discharge, which also has a valve. The bends are attached to the pipes using torque wrenches. Such keys are not included in the kit; when installing a radiator, specialists bring this tool with them. If the work is carried out independently, you will need to buy keys, since the work cannot be completed without them. This element ensures reliable tightening of fasteners.
The fasteners can be twisted or not tightened; a torque wrench eliminates such an error. If the connection is weak during operation, leaks may form, which can lead to serious problems. When the work is completed, the joints should be reliably sealed; for this you can use a special sealant. If the material allows, you can use welding.
Another important step is crimping. To carry it out, special expensive tools are also required, so it would be advisable to call a plumber from the management company for these purposes.
Diagonal connection
By diagonally connecting heating devices, you can obtain the most efficient heat transfer. With lower wiring, the connection process looks quite simple: coolant is supplied to the upper inlet on one side, which comes out on the other side at the bottom.
This design looks more aesthetically pleasing, which cannot be said about a single-pipe system with a vertical riser. However, knowing how to properly install a heating radiator, you can achieve high heating efficiency with this option.
When deciding how to install heating radiators correctly, you should know that when connecting a radiator to a single-pipe system, installing a bypass is required.
Diagram for connecting batteries to the heating system
The installation diagram of the batteries depends entirely on the wiring of the heating system. This can be one- or two-pipe piping and collector-type markings.
Single-pipe
The diagram for connecting batteries to the heating system is: single-pipe, two-pipe and collector.
Single-pipe is the simplest system that a person can do with his own hands. In this case, the coolant is supplied through a pipe to each heating element. They are connected to each other in series, that is, the water arrives to the latter cooled. The coolant returns to the heating device through the same pipe. There is no return here. The advantage is ease of installation. Disadvantages - the temperature of the batteries at the end of the circuit will be the lowest, there is no way to control the temperature regime of each heating element, during repairs the entire riser is turned off from heating.
Two-pipe
Two-pipe - you can also do it yourself, but it is more complicated than the previous option. The coolant flows to each radiator (the heating units here are connected in parallel) through one pipe, and returns cooled to the boiler through another. The advantage is that you can regulate the heating temperature of the batteries using thermostats; repairs are easier, since each device can be disconnected from the system individually; the entire room is heated evenly, regardless of whether the radiator is at the beginning or the end of the chain.
Collector
The battery's performance level is affected by where it is installed.
The collector is the most complex wiring of the heating system and it is not recommended to do it yourself. This scheme provides for the batteries to have an individual pipe that carries warm water and a pipe that returns it back to the boiler. This system is installed in a cottage-type house. It cannot be organized in an apartment.
Advantages - the temperature of the radiators is easily controlled, repairs are simple.
Disadvantages: high pipe consumption; installation of collector cabinets is required.
Building process
Before you expand the heating battery, if it is cast iron, you should remember that this can only be done after the end of the heating season!
After all, in order to add new sections of such batteries, it will be necessary to completely disassemble the batteries. And if this is carried out in winter, then the entire system will need to be shut down. And if you live in an apartment building, it is unlikely that any of your neighbors will agree to spend several hours without heat. Therefore, such a process should be postponed until warmer times. How to build up a heating radiator made of cast iron? Let's look at the process in more detail. We will need the following tools:
- Radiator or adjustable wrenches;
- Nipples are clearly for cast iron radiators (the number depends on the sections);
- Special gaskets to install them between sections.
- Side plugs with gaskets.
So, before you add a cast iron radiator, you will need to remove and disassemble it. Don't forget to turn off the water first!
If the batteries are not new, there may be a build-up of rust and dirt between the sections. To install the gasket and connect the battery sections, such build-up will need to be removed. This is done either with sandpaper or a wire brush.
When you attach the nipple, pay attention to the position of the thread. We begin to twist the nipple on the left, first it is best to attach it approximately 1 turn to the left of the heating radiator. We do the same with the right side.
It is imperative to ensure that the intersection gasket is placed only in the middle of the nipple. The radiator sections must fit snugly against the nipple. Now we insert the radiator wrench into the radiator, and use an adjustable wrench to screw the nipple into the radiator sections.
To make a high-quality expansion of heating radiators, you need to tighten the nipple three to four turns and move to the other side of the sections. We will tighten the sections one by one until they fit one another very tightly.
Now it's time to install special side plugs for cast iron radiators. Do not also forget about gaskets made of a special material - paronite. If there is rust on the surface on which the gasket is supposed to be installed, it must also be cleaned with sandpaper. And only now can you put the plug in. The plugs must be tightened tightly using a pipe wrench.
Features and rules of placement
Any heating equipment is a complex system where each component has its own role
The most important part of the entire system is the heat exchange units, which are the final link in the transfer of heat energy in the house. These include ordinary radiators, convector devices of open or closed type, water floor heating devices, which are profiles of pipes laid on the basis of certain rules
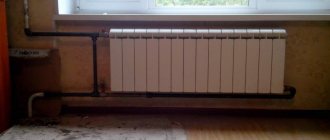
Any type of radiator is installed indoors according to general rules. There is a specific installation procedure that must be followed. The installation procedure will not cause any particular difficulties, but there are many nuances in this matter. So, first of all, they affect the installation site. In most cases, the heating installation is placed in areas of the most significant heat loss, for example, under window openings. Even modern energy-saving double-glazed windows cannot trap warm air in the room. Old wooden frames need not be mentioned.
If there is no radiator structure under the windows, cold air masses descend along the wall and spread across the floor. The situation changes after installing the battery: warm air rising to the ceiling prevents cold air from falling down. Remember that the effectiveness of such protection depends on the size of the heating device: it must be at least 70% of the width of the window. For this reason, small radiators will not provide the appropriate degree of comfort. In the lateral zones there will be areas with a cool air mass descending to the lower level. You will be able to see the “sweating” of glass and walls. The collision points of heated and cold air will become covered with condensation, and dampness will form in the room.
Therefore, do not try to purchase a sample that has the highest heat transfer. They are suitable for areas with harsh climatic conditions. In this case, it would be useful to install a heat curtain at the front door. This is the second problem area in private residential buildings. Residents of the first floors of apartment buildings often encounter it. The principles for placing the heater are simple: installation is carried out close to the entrance. Determine the site based on the layout features and pipe laying capabilities.
The heating installation should be placed exactly in the center of the window. Before installation, find the center and mark it. Then, in both directions, calculate the interval to the fastening points. The gap between the product and the floor should be from 8 to 14 centimeters. If you make it smaller, cleaning under the radiator will be difficult; a larger distance will cause the formation of zones with cool air.
Measure 10-12 centimeters between the window sill and the radiator and begin installation. A closer location will worsen convection and reduce thermal output. The distance between the wall and the back wall of the device is 3-5 centimeters. Thanks to this gap, normal convection and heat distribution will be ensured. A shorter distance will cause dust to settle on the wall.
In addition, batteries can be installed in:
- extended interwindow spaces are a popular alternative option;
- corners and “blind” walls of corner rooms - enhance heating of spaces characterized by increased heat loss due to increased exposure to wind;
- bathrooms, pantries, bathrooms, in which one or two sides are connected by a load-bearing wall;
- unheated entrances, hallways of private houses;
- apartment corridors of the first floors of multi-storey buildings.
Steel panel
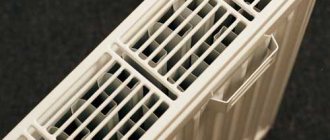
Let's start with panel radiators made of steel. They are called convectors and are characterized by a high rate of thermal output (efficiency - up to 75%.) Inside such structures are built-in heating panels with special ribs that provide the convection effect. Panel radiators are the best solution for country buildings where autonomous heating systems are used.
Their advantages include:
- relatively low inertia, combined with an increased level of thermal output;
- reduced volume of carrier circulating through them;
- low consumption from the heat source and low cost.
They are environmentally friendly (absolutely harmless to humans), which allows them to be installed in school premises, as well as in hospitals and kindergartens.
The disadvantages of this type include increased risks of corrosive destruction due to oxidation of the internal walls and poor resistance to hydraulic shocks. The last drawback is the reason that they are not allowed to be installed in apartments of multi-storey city buildings. The inconveniences of using such systems include heavy dustiness of the insides due to the convection effect.
Tools
For high-quality installation of heating radiators with your own hands, you need to provide yourself with the following tools:
- torque wrenches and gas wrenches;
- gas welding or pipe soldering iron (depending on the type of pipe);
- hammer drill;
- sealing materials to prevent leaks at the junctions of batteries with pipes (fum tape or tow with sealing lubricant).
In addition to heating radiators, you may also need:
- Bypass. Installed in single-pipe heating systems. Externally, it is a pipe designed to connect the incoming (supply) and outgoing (return) sections of the pipeline, and the battery turns out to be looped. This ensures uniform distribution of the coolant and also allows you to repair or replace the radiator without stopping the operation of the entire heating system in your home;
- Accessories. These are angles, tees, a set of plugs and transitions for the radiator itself, couplings and transitions. How much of something there will be depends on the number of radiators and the scheme according to which they are mounted;
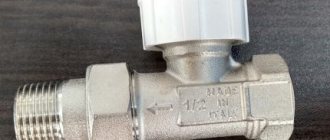
- Taps and the presence of a thermostat (shut-off valves). Since you have decided to do the installation yourself, but do not have sufficient experience in installing heating systems, it is better to purchase standard taps, which are used to connect aluminum radiators to pipes. It is necessary to understand that modern fittings, with automatic and ball valves, are a little more difficult to install; working with them requires certain knowledge and experience will also not be superfluous. The threads on taps, pipes and radiators deserve special attention; they must match;
- Mounting brackets. Here we just need to consider the type and design of the radiator. For cast iron radiators, stronger hooks are selected than for bimetallic and aluminum ones. Since all work on installing the heating system in your apartment will be done with your own hands (without the involvement of specialists) and all responsibility for further operation will fall on your shoulders, it is better to buy high-quality material with a margin of safety. This primarily concerns brackets and anchors, because in addition to the weight of the radiator, they must also withstand the weight of the circulated water;
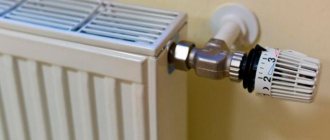
- Mayevsky's tap. It is extremely necessary, since it removes air that can form plugs after the heating system is filled;
- Thermostat. Installing a thermostat on a radiator is carried out in order to be able to regulate the amount of warm water that enters the radiator, this will allow you to control the heating temperature of the radiator. Temperature adjustment can also be done using a conventional half-turn valve installed in front of the radiator. But then, in order to avoid temperature fluctuations, you will have to manually adjust the degree of opening of the tap at least once every 24 hours. Agree, it’s not entirely comfortable.
Air release devices
Air always accumulates in heating radiators, which must be released periodically. Mayevsky taps are installed on aluminum and bimetallic radiators for this purpose. Most often it is located on the free upper manifold. This device is slightly smaller in size than the outlet, so an additional adapter is installed, which comes complete with the tap. When choosing a Mayevsky tap, you should focus on the diameter of the collector.
In addition to this device, automatic air vents are used, which are also suitable for installation on radiators. However, automatic devices are large in size, and their housing can only be brass or nickel-plated. Therefore, such a device does not look very attractive on white enameled radiators. This greatly reduces the demand for automatic air vents.
Aluminum products
This type of battery is made entirely of aluminum. There are two types of products - cast and extrusion type. Both of them, as a rule, are used for autonomous heating, not associated with centralized systems. This is explained by their inability to “hold” high pressure and the possibility of destruction upon contact with low-quality coolant in city highways. Cast radiators are manufactured using injection molding technology and are characterized by significant internal capacity and thick walls. Let us separately consider extrusion-type batteries.
Extrusion radiators
According to the production technology, the vertical posts of these products are extruded from a special aluminum alloy using an extruder, and the collector itself is cast using silumin. A finished radiator cannot be increased or decreased in the number of sections. This is one of the disadvantages of aluminum products.
The advantages of this variety include:
- Lightweight and simple installation, eliminating the need to use “powerful” fasteners (brackets).
- Increased level of heat transfer, not inferior in size to steel ones.
- High rate of heating of rooms and efficiency.
- Possibility of adjusting the operating temperature.
They are well-designed and have a modern and attractive appearance. Despite many undoubted advantages, these products also have significant disadvantages. Among them, the following stand out:
- The service life of aluminum radiators is only 15 years or a little more;
- due to its activity, aluminum is destroyed by corrosion when exposed to a coolant with high acidity;
- The high level of gas formation in radiators of this type forces the installation of special vents in them.
Reduced convection and the possibility of leaks between individual sections also do not add advantages to them. In addition, these products are contraindicated for sudden pressure surges in the system and water hammer.
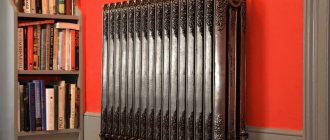
Radiators in retro style
Retro-style cast iron looks elegant and can decorate any living space. However, the cost of such a battery is too high by modern standards. The advantages of these products include long service life combined with resistance to chemically active substances. Let us add that they are capable of retaining the heat stored in the batteries for a long time.
The disadvantages of these products are given below:
- Warming up for too long.
- Significant weight and decent dimensions make it difficult to transport and install these products.
- When installing, they need a “powerful” fastening.
- The capacity of these products is too large.
For their normal functioning, a significant volume of coolant is required.
Since cast iron is a brittle material, water hammer poses a serious threat to it.
Bimetallic radiators
The name of bimetallic products is based on the use of two metal samples in their manufacture: steel and aluminum. The frame itself is made from the first, and the outer shell is made from the second. It is extremely rare, but still there are solid models. Their advantages include the ability to “hold” extreme pressures (up to 100 atmospheres). This can be achieved due to the reinforced steel frame.
The core of bimetallic radiators is installed along the entire length of the product. Thanks to this, they are durable, reliable and are in high demand, despite their high cost. Another type of radiator of this class is known, called pseudo bimetallic. They are characterized by vertical bars reinforced with steel and are therefore cheaper.
The advantages of these products include:
- low inertia with high thermal output;
- the ability to “hold” pressure and resist hydraulic shocks;
- relatively small capacity (internal volume);
- resistance to corrosion.
To this should be added the ease of installation of such radiators, excellent design and attractiveness.
The disadvantages of these products are the relatively high price and low level of thermal output (compared to pure aluminum ones).
Marking the wall for brackets
When installing a heating system with natural circulation in a private house, the pipelines are located at an angle of at least 6° to the direction in which the coolant flows. If this is not done, air bubbles may form and air plugs may appear.
Installation of brackets for a heating battery
We apply markings to the location of the future radiator for installing holders.
Do not forget! The radiator cannot be hung close to the wall. The efficiency of such an installation will be low. There should be a space of 5-10 cm between the surfaces. The battery is mounted from the floor at a distance of 10-12 cm and from the window sill - 8-10 cm.
Markings for the future heating device are made strictly according to the level. Use a pencil to mark the installation locations of the brackets. They are attached in such a way that they are located in the spaces between the radiator sections. And we select the brackets themselves in accordance with the purchased batteries, their weight and dimensions.
Having marked the necessary points, holes of the required diameter are drilled for fastenings. All that remains is to fix the dowels with a hammer and secure the brackets using self-tapping screws. There are special mounts for batteries that are threaded and screwed directly into the dowel.
Mounting for heating battery
How many brackets are needed for a specific battery? A salesperson at a building materials store can help with this issue. Usually, 3 mounts are purchased for a device in six sections: two are installed at the top, one at the bottom.
To reduce heat loss, a layer of foil or thin heat insulator with a foil surface is fixed to the wall. But it is imperative to leave a gap of at least 2-3 cm between it and the radiator. Such a simple design will make heat transfer from the heating device somewhat more efficient.
Calculation of the number of sections
Having chosen a heating radiator, you also need to correctly calculate its parameters. Even the most efficient radiator will not produce warm air if its dimensions cannot heat the room. The basic indicator when calculating the number of sections and battery sizes is the area of the room.
Let's consider a simplified method for calculating the number of radiator sections. According to the standard, to ensure optimal warmth in a room, you need 100 W per 1 m² of area. The formula is simple:
Q=S x 100, here: Q is the required heat transfer from the radiator, S is the area of the room.
The resulting value will tell you what battery power a particular room should have, provided that the radiator is a one-piece, non-demountable structure.
When sections are additionally expanded, the number of sections is calculated using the following formula:
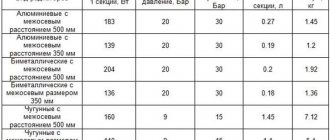
N=Q/Qс, here N is the required number of radiator sections, Qс is the thermal power (specific) of 1 section.
You don't have to be a great mathematician to do the calculations. You will need a tape measure and measuring the area of the room.
Important! Formulas for rooms with a ceiling surface height of up to 2.7 m. If the ceilings are higher than this value, the number of sections must be multiplied by 1.5.
Floor mounted convectors
A completely new approach to heating arrangement is convector-type radiators mounted directly in the floor. They include the following structural units:
- Heat exchange module.
- Protective box
- Plastic decorative grille.
The pipes of these radiators are copper and the fins are aluminum. There are cheaper models with a tubular core made of the same steel (“Breeze” from KZTO, for example).
Particularly attracting the user's attention are floor radiators that complement walls with panoramic glazing. They are installed in rooms with large free spaces (car showrooms, swimming pools, airports and sports facilities).
Advantages of radiators built into the floor:
- Lightweight and durable design that takes up minimal space.
- Protection from corrosive destruction.
- Stealth.
In addition, when using such radiators, it is possible to achieve uniform heating of the room and almost completely eliminate the possibility of glass fogging. Their disadvantages include the inability to use forced ventilation and not very high thermal output.
