Many owners of country plots dream of having their own bathhouse. But putting up a log house is quite expensive. The solution to this issue is to build bathhouse walls from cinder blocks - this is much cheaper and faster in terms of construction time.
In order for such a bathhouse to keep warm for a long time, it must be insulated with modern materials. Moreover, such work must be carried out not only from the outside, but also from the inside. We will focus on insulating a cinder block bathhouse in this article.
What you need to know
You can’t do without additional knowledge: when carrying out work, you should take into account not only structural features, but also the impact of the environment. The insulation of a cinder block bathhouse from the outside is strikingly different from the internal insulation. The preservation of heat also depends on the correct choice of high-quality insulation materials.
The insulation process should begin at the most important stage of construction, which is the thermal insulation of the floor. To do this, it is worth pouring a layer of slag or expanded clay onto the base soil. The height of the poured layer should be twice as thick as the wall.
Scheme of floor insulation in a bathhouse
A reinforced expanded clay concrete screed is laid on the insulating layer, on which ceramic tiles are subsequently laid. In addition to expanded clay and slag, it is possible to use polymer materials as floor insulation, among which glass wool is effective and popular.
Warm floor in the steam room
Work on thermal insulation of the floor begins already in the process of laying the foundation. Initially, it is important to make important engineering decisions that will ensure the drainage of water from the steam room and washing room. To reduce heat transfer through the floor, it is necessary to eliminate the possibility of freezing of the soil under the bathhouse at the very beginning. This problem is solved by using expanded clay concrete screed on the ground. A fairly easy insulation option: it does not require special skills, but that’s not all that needs to be done.
The next step on the path to a warm floor is to warm it up. Naturally, the floor won’t just warm up, but we have a stove and we can use it. To do this, a special insert is made into the combustion chamber of the furnace, with an air supply regulator. This inset is lowered below floor level. In this case, the stove can take cold air from under the floor, and the already heated air will descend in its place. By ensuring such circulation, we will simultaneously get rid of unpleasant odors that may accumulate in the underground.
Internal insulation
The structure of cinder blocks is porous, which allows for excellent heat retention, but the same porous surface absorbs moisture. Therefore, maximum protection of the walls eliminates the accumulation of moisture inside the blocks.
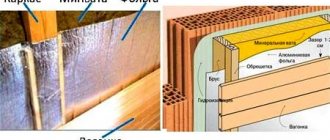
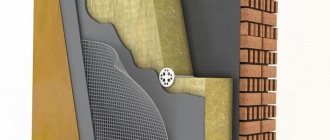
Before insulation, the internal walls of the bathhouse are lathed with wooden slats at least 50 mm thick, on which a layer of mineral wool, basalt insulation, polystyrene foam or any other material is laid. The thermal insulation layer is covered with foil film or aluminum foil, which performs the function of waterproofing. Particular attention should be paid to the tightness of the joints of all layers.
As the most effective way to insulate a bath, experts recommend vapor barrier with polypropylene foam, which is covered with aluminum foil. The ability of this material to withstand heat up to 150°
Aluminum foil is used as a material for insulating seams. If such insulation is insufficient, it is possible to lay one layer of non-combustible mineral wool between the wall and the vapor barrier layer.
Finishing
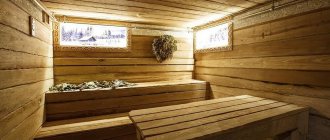
The final finishing can be done with wooden paneling or any other materials, taking into account the wishes and capabilities of the owner. Thin wooden slats are applied to a layer of waterproofing, foil film or aluminum foil, onto which the finishing material is attached. Experts recommend installing wooden lining horizontally in order to be able to replace the lower individual layers - over time, under the influence of moisture, they can become unusable.
External insulation
Cinder blocks with a porous structure quickly lose their properties without proper cladding, so you should not skimp on insulation. For external insulation, lining, siding or block house are often used, which are attached to wooden blocks fixed directly to the walls of the bathhouse.
In any case, special attention should be paid to creating an air gap. In this case, the layer of air between the materials will serve as a heat insulator. Some experts recommend insulating a bathhouse using plaster, but this method is labor-intensive and less effective.
Ventilated facade
The most reliable way to insulate a bathhouse is the ventilated facade method. Before starting work, brackets in the form of corners should be secured to the walls, and the space between the brackets should be narrower than the width of the seal.
Ventilated facade of a bathhouse using aerated concrete as an example. In a cinder block bathhouse, installation is carried out in the same way.
Between the metal corners we reinforce mineral wool mats. We seal the connecting joints with special tape. A waterproofing layer fixed to mineral wool mats will protect the insulation from moisture. After this, you can install additional fasteners for the final cladding of the facade. Glass wool or polystyrene foam can be used as insulation materials for exterior work.
Insulation for block walls
A distinctive feature of the bath is the high temperature level during its use. Therefore, for a steam room, the choice of insulation must be limited. We generally recommend not using the following materials to insulate a bathhouse from the inside:
:
- mineral wool;
- polystyrene foam and polystyrene foam;
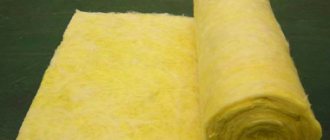
- glass wool
When heated,
mineral wool They are definitely harmful to the human body. The same situation is with the release of harmful substances from polystyrene foam and expanded polystyrene
under the influence of temperature.
Glass wool
you can say a definite “no”. It is dangerous to use: protection of hands, skin, eyes and respiratory tract is required. It is subject to deformation under the influence of high temperature (which is typical for a bath). Over time, it may begin to emit an unpleasant odor.
Nevertheless, these insulation materials are popular due to their availability and low price.
Ecowool can be a good material for insulation
: it is environmentally friendly; when applied using the “wet” method, it fills the entire surface, creeping even into small crevices. But this is also its disadvantage: you cannot do without special skills and equipment to apply it.
Peat blocks and foam glass
have proven themselves to be modern and high-quality materials.
. They are not exposed to moisture, are fireproof, but, alas, quite expensive. At the same time, peat blocks are rare - only a few companies produce them in Russia.
Foil roll insulating materials work well (see link above). They need to be overlapped and glued with aluminum tape.
ADVICE
! Tile insulation can be tied together with diagonally stretched threads (use nylon cord) for additional fixation of the heat-insulating material. The ends of the cord can be secured with a construction stapler to a wooden frame or with special fasteners to a metal profile.
Technology for performing insulation work
For high-quality and reliable thermal insulation, a whole range of insulation measures is required. That is, insulating the walls alone will not bring a tangible result - all surfaces must be sheathed from the inside with heat-insulating material. Let's take a closer look at the entire technology of insulating a bathhouse from the inside.
Floor insulation
The process of floor insulation begins almost immediately after the completion of the construction of walls and installation of the roof. You can save a lot on floor insulation if all the construction waste remaining after masonry is poured into the foundation pit and compacted thoroughly. Here it is important not to overdo it and leave about 50 cm for insulation.
In order to efficiently and reliably insulate the floor, you need to adhere to the following sequence of work:
- It is necessary to level the subfloor a little (with small construction waste, sand or earth) so that the insulation layer is uniform.
- Then expanded clay is poured into the space under the foundation. It is recommended to use it because it has high thermal insulation properties and excellent strength. The minimum layer should be 20–25 cm, more is possible.
- Expanded clay must be compacted thoroughly. You can spill it with water and let it sit for a few days to dry.
- Then a reinforcing mesh is laid on top of the expanded clay.
- The next step is pouring the cement mortar. Its thickness should be at least 10–15 cm.
- In the process of pouring the mortar, you need to follow the technology of a conventional screed: carefully level and smooth the surface, since this will be a subfloor.
After the screed has completely hardened (about 10–14 days), you can begin arranging the finished floor, which can be done in several ways:
- One way is to lay ceramic tiles on a cement screed using an adhesive mixture.
- Another method is to lay wooden joists and lay a plank covering over them. The advantage of this method is the ability to additionally insulate the floor of the bathhouse by laying sheets of polystyrene foam or polyurethane foam between the joists.
Advice! Particular attention should be paid to the space near the foundation. Near it, the thickness of the expanded clay layer can be increased by 10 cm, which will make it possible to more reliably insulate the external walls and prevent freezing of the foundation.
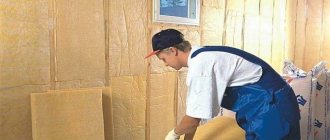
Wall insulation
The next technological point is the insulation of the walls of the bathhouse. The work algorithm is as follows:
- First of all, in order to insulate the walls of the bathhouse from the inside, it is necessary to mount the frame. The sheathing can be made from wooden blocks treated with water-repellent impregnations or from galvanized profiles.
- Next, a layer of waterproofing is attached to the walls; ordinary dense polyethylene will do.
- After this, sheets of insulation, for example, basalt wool, are installed between the frame. The heat insulator can be further strengthened using plastic dowels with large caps.
- The third layer should be a foil material, for example penofol. In this case, the foil should be directed into the bathhouse to reflect heat flows.
- The final stage of insulating the walls of the bathhouse is the installation of the inner lining on the frame. Most often, wooden lining or tongue and groove boards are used for these purposes.
Comparison of buildings made of expanded clay concrete and wood
Many people still believe that the best baths are those built from timber. Wood has long been the most popular material for their construction. But it has disadvantages:
it darkens over time, which deteriorates the appearance of the structure; wood requires regular treatment with antiseptics.
If this is not done, it will begin to deteriorate, mold will form on it, dangerous microorganisms will grow inside the logs; wooden construction requires mandatory shrinkage, which lasts 1 - 3 years. During this time, finishing work cannot be carried out; when constructing a building from logs, serious caulking of the walls is required. This is due to the fact that the logs are in contact with each other over a small area.
A bathhouse made of expanded clay concrete is free from these disadvantages. Therefore, it is a more practical option than wood.
A bathhouse made of blocks is durable, after construction it does not require shrinkage, you can immediately begin finishing it. During operation, the building will not require additional treatment with protective substances. You will only need to monitor the condition of the exterior finishing of the building so that it always looks beautiful and neat.
09/04/2017 Alexey Koshkin
Traditionally, it is believed that a bathhouse should be built from wood - a natural, breathable material that has a beneficial effect on health. However, this is not always possible for one reason or another, and a bathhouse made of expanded clay concrete blocks can be an excellent alternative.
What are the advantages of the material:
Non-toxic.
The manufacturing technology and initial components (clay, cement, sand) are environmentally friendly. Of course, if you purchase the material from a trusted manufacturer. A bathhouse made of expanded clay concrete blocks perfectly resists moisture. The high rate of thermal insulation leads to low consumption of funds for insulating the building. The relative lightness of the blocks does not require the use of special devices and hired labor. You can do everything yourself!
Construction usually begins with the foundation. The light weight of the proposed structure will not require a solid foundation; you can get by with a simplified version. If you plan to do everything yourself, then a strip foundation is suitable, on which a bathhouse made of expanded clay concrete blocks will stand reliably for many years.
Concrete is suitable grade M250. Call us (phone: 8 (846) 30-20-555) in one day we will deliver you concrete of any brand. There are mixers for 7m³ and 9m³.
Additional strength is achieved through reinforcement every two rows. For this, a special reinforcing mesh is used.
Waterproofing material is placed on the finished strip foundation in 2 layers. In this case, ordinary roofing material is perfect. Then a reinforcing mesh is installed on top of it, and then a mortar for construction.
In the future, the construction of a bathhouse from expanded clay concrete blocks is no different in terms of the technological process from the construction of a bathhouse from other materials. You just need to check that the first row is exactly horizontal (an error will lead to cracking of the walls in the future). Then each subsequent row is placed using a bandage.
In a bathhouse made of expanded clay concrete blocks there must be good ventilation. It cannot be completely covered when decoratively treating the surface of the walls. Therefore, tiles must be used on the inside of the washing compartment.
We save heat in the bathhouse. If the bathhouse is supposed to be heated only from time to time in winter, we recommend that it be lined with insulation from the inside.
A bathhouse made of expanded clay concrete blocks is not inferior in quality to a bathhouse made of other materials. At the same time, it is easier to construct and lasts longer than wood.
Is it worth it? Often, such a health corner is built not only together with the main structure, but even before it. Until recently, the issue of choosing building materials for this was decided unequivocally - only wood. It is an ideal material for a bath: it has low thermal conductivity and high heat capacity, is hygroscopic, air-moisture and vapor-permeable. But wood also has a number of disadvantages, which largely manifest themselves in conditions of high temperatures and humidity, characteristic of bathhouses - it is a fire hazard, susceptible to rotting and fungus.
We are building a bathhouse
We proceed directly to arranging a cinder block bathhouse.
There are simple instructions for this:
- Preparing for work. First of all, you need to determine the quality of the soil in the area where the building will be located.
Advice! The most acceptable option for construction is considered to be a rocky-sandy foundation. A foundation built on such soil will not need additional strengthening. If there is peat, fine sand or clay soil on the site, then you will have to additionally strengthen the foundation, since such a foundation can sooner or later cause subsidence of the structure, bringing it to an emergency condition.
- Since the building is relatively light in weight, both strip and column foundations are suitable for it.
- Cinder block bathhouse projects that provide a columnar base use concrete or brick pillars as supports, the dimensions of which are 0.5 by 0.5 meters. They must be installed in every corner, as well as in every node of the future building. The distance between such pillars should not exceed one and a half meters. If it is larger, the design will be unreliable.
Brick columnar foundation.
A grillage is mounted on top of the installed pillars - reinforced concrete crossbars that connect the supports into a single structure, after which the foundation is waterproofed.
Advice! If you use iron piles as supports, it is advisable to treat them with bitumen mastic in order to protect them from corrosion.
- Bathhouse designs made from cinder blocks on a strip foundation are very common. Such a base is a concrete strip laid under the load-bearing elements of the structure. Sometimes brick or stone is also used to construct such foundations, but concrete is more preferable.
- Roof. Here you have two options:
- If you do not plan to use the attic space, the roof must be made pitched.
- If you want to arrange an attic or attic above the living space, make a gable roof.
- Floor . The best option for a bathhouse is concrete floors. To drain water, the base is poured at a slight angle.
- Insulation . Cinder block bathhouse designs involve the use of various thermal insulation materials. Foam glass is an excellent insulation material for floor coverings, since this material is not at all afraid of water.
Advice! In this case, polystyrene foam should not be used as insulation, since this material is flammable and releases harmful substances into the atmosphere when heated.
Setting up a strip base
Marking for strip foundation.
Before building a cinder block bathhouse, it is necessary to lay a reliable foundation for this building.
The work is carried out in several stages:
- Surface marking. Using pegs and fishing line, it is necessary to establish the boundaries of the foundation along which the trenches will be dug.
- Regarding the marking of the trench by the swarm, about 60 cm deep.
- We pour sand into the trench in a layer of 10 cm, which should be compacted well.
- We install the formwork. To do this, we drive pegs around the perimeter of the trench. We lean the formwork boards on them.
- We insert the reinforcement cage into the formwork. It is knitted from reinforcing rods, which are fastened together with wire.
- We fill the formwork with concrete. The solution gains strength within a month. After this time, the formwork can be removed and you can proceed directly to the construction of the walls.
Main stages of construction
1. Laying the foundation. The choice is influenced by the soil of the site. Under normal conditions, it is best to equip it with pillars connected to each other by reinforced concrete beams. On difficult soil (clayey or mixed type), a strip base will look more reliable.
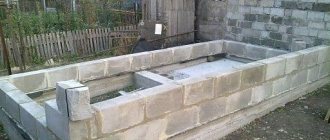
Due to the considerable degree of water absorption of cinder blocks, the height of the base of the bathhouse should be at least half a meter from ground level. After the concrete has completely hardened, they begin laying waterproofing. For this purpose, it is recommended to use molten bitumen and roofing felt.
2. Installation of walls. Before starting masonry work, it is necessary to start laying out the foundation of the heating furnace. The construction of external walls and internal partitions should be carried out in strict accordance with the approved project. Openings for windows and doors are left at the planned points. To further strengthen the bathhouse, reinforcing rods 10-12 mm thick are placed every two to three rows of block masonry.
3. Construction of the roof begins with the preparation of floor beams and installation of rafters. The roofing sheet is laid on the finished structure. After this, they begin to work on the ceiling.
4. Insulation of bathhouse walls made of cinder blocks. First, basalt thermal insulator is attached to the external walls with your own hands, then foil paper. The internal surfaces of the bath are finished with several layers of protective materials. Mineral wool is placed between the beams of the wooden frame. A vapor barrier with foil is secured on top.
5. Exterior finishing. The building is decorated with cheap clapboard, beautiful siding or practical plaster. The most presentable and respectable appearance will be when faced with imitation timber or façade slabs.
6. Interior design. It is better to cement the floor in the bathhouse, and then insulate it and protect it from moisture with a reliable layer of waterproofing. Molten bitumen and roofing felt are suitable for this purpose. Ceramic tiles or wooden floors are used as flooring. The walls are decorated with clapboard or wood.
approximate cost
To calculate the required number of building materials for a box, they rely on the main parameters - the size of the structure and the price of one block. First, the volume of the building as a whole is determined by summing up the length of all walls and multiplying by their height and thickness. The volumes of windows and doors are subtracted from the result obtained. The residual value is divided by the volume of one cinder block. The final number will be the required number of elements. Multiplying it by the cost of bentonite (30-35 rubles), we get the amount of costs for the construction of a bathhouse structure.
The final costs of building a bathhouse consist of a combination of prices for materials, loading and unloading and installation work, and transportation. A standard one-story structure, consisting of three rooms with an open veranda, but without internal insulation, can cost approximately 200-250 thousand rubles.
Reviews of cinder block baths
“We had to build a cinder block bathhouse due to lack of money. At first I thought it was temporary, then I’ll build something more solid. On the advice of experts, I insulated the walls of the house from the outside and inside, lined them with clapboard, and raised the floor higher. The result was such a great bathhouse that now I can’t be happier. And I definitely won’t change it.”
Grigoriev N.N., Ekaterinburg.
“Several years ago we bought a nice country house. A cinder block box from a small bathhouse was found on the property. Since there was little money left after the purchase, they decided to equip it with minimal effort. Instead of wooden blocks, the facade was faced with plaster, under which a layer of foam plastic was laid. And inside they made a frame from the profile into which mineral wool and siding were secured. It turned out to be an excellent economical option for a bathhouse.”
Alexander, Sverdlovsk.
“I always dreamed of having my own bathhouse with a steam room and brooms. When the opportunity arose, I took a swing at the log house. But harsh calculations showed that I couldn’t afford that amount, so I had to save money and replace it with a cinder block. But the inside of the walls was finished with a wooden block. Now there is just a fabulous forest smell in the steam room. My family and all my friends appreciated the beauty.”
Zadorin Nikolay, Kostroma.
“I built a small bathhouse at the dacha with my own hands. I tried to properly insulate the walls, floor, ceiling and protect from moisture. The bathhouse is heated by a conventional wood-burning stove. Literally two hours later, the temperature in the steam room rises to such a temperature that any sauna would envy. The whole family has been using the sauna regularly for three years now. Since then, neither adults nor children have ever had a cold.”
Evgeny Ilchenko, Moscow region.
What is the best way to insulate a cinder block bathhouse?
Very often when building a bathhouse, the question arises: “How to insulate it?” And if with the traditional design of a log house everything is more or less clear - there are no separate measures required, everything is already embedded directly in the structural material - then with the option of cinder block walls you will have to tinker. And here many nuances will emerge that should be taken into account as a matter of urgency. Moreover, it will first be necessary to dissociate and sift out many common, but rather harmful misconceptions. Therefore, you need to understand the principle itself.
The principle of insulation
Very often on the Internet and in some publications in recent years, there are recommendations and advice to insulate a bathhouse from the inside. In all seriousness, recommendations are given for interior upholstery with mineral wool and similar advice from amateurs who carefully transfer other people's nonsense from resource to resource, from book to book. Meanwhile, it is enough to open any construction textbook or any SNiP on insulation to make sure:
INSULATION IS ALWAYS HANGED OUTSIDE THE BUILDING! Insulation must not be carried out from the inside!
The material of the walls does not affect this rule. And the rule for walls made of brick, wood or cinder block will be the same. We always insulate only from the outside!
It's all about the famous (familiar from school, but often quite forgotten) “dew point” - the phenomenon of condensation formation at the temperature boundary.
Material selection
The principle of choosing a “warm material” for bathing activities is simple: highly non-flammable, low hygroscopicity. Therefore, we discard polystyrene foam and similar materials altogether - they are too dangerous in terms of fire. We use basalt and mineral wool with caution - we ensure eternal absence of soaking.
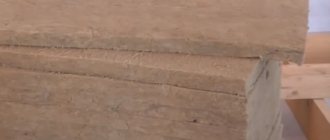
Tow is completely unacceptable - it rots and rots. Blocks of peat and tripoli are not bad. And perhaps the best option is block foam glass. Although foam glass has a significant drawback - its high price.
Important point
Vapor barrier is especially important when constructing a bathhouse ceiling, since issues of vapor permeability in this case are of higher priority than issues of low thermal conductivity - it is important to ensure the steam “layer cake” principle.
Let's try to explain what it is.
The first portion of steam from the heater tends to rise. According to the laws of physics, hot steam rises to the ceiling and stands there - the vapor barrier serves as a barrier to its escape into the attic.
We splash water on the heater. Fresh steam, hotter, displaces the previous batch from under the ceiling, which has had time to cool down a little. And it is located just below the fresh portion of steam.
This process is repeated several times until the steam fills the entire volume of the steam room. It turns out to be a layer-by-layer distribution from the coldest at the bottom to the freshest and hottest at the very top. But the formation of such a “pie” without a normal vapor barrier of the ceiling is impossible - the steam will simply go into the attic. Having soaked the ceiling insulation along the route with moisture. Therefore, vapor barrier of the ceiling is mandatory!
In the old days, this was done using a thick layer of fatty clay covered with a mixture of lean clay with sawdust or straw (or dry earth), but this option is very difficult. Therefore, the method with aluminum foil should be considered optimal here too.
And only after a layer of vapor barrier can you think about how to insulate the ceiling.
And we remind you once again: do not forget about ventilation!
Step-by-step instruction
In order to understand how to insulate a cinder block bathhouse from the inside, you need to carefully read the theoretical materials on this topic and disassemble everything step by step, starting with insulating floors and ending with ceilings.
As mentioned earlier, the process of insulating a block bathhouse made of various materials (cinder block, foam block, aerated concrete, expanded clay concrete) is practically the same.
That is why we will consider in more detail the process of insulating a bathhouse made of blocks using the example of an expanded clay concrete structure.
Floors: how to do it right
Insulation of a bathhouse made of blocks should begin with thermal insulation of the floors.
- First of all, a layer of slag, glass wool or expanded clay is poured onto the soil base. In order to keep the heat in the room much longer, it is necessary to ensure the thickness of this layer is at least 35 cm;
- A reinforced expanded clay concrete screed is mounted on top of the insulating layer;
- After the reinforced screed is ready, ceramic tiles or floorboards are laid on top of it.
To carry out insulation work on concrete floors, you must:
- First of all, waterproofing is installed on the concrete sub-base. To do this, you can use rolled waterproofing or coating;
- Foam plastic, mineral wool or expanded clay are laid on top of the waterproofing. The thickness of the layer must be determined based on the heat-insulating properties of the selected material;
- Plastic supports must be installed on top of the insulation to provide a ventilation gap;
- A reinforced mesh is laid on plastic supports, on top of which a concrete screed is poured;
- Next, you can lay ceramic tiles on top of the concrete screed, or use them as a base for wooden floors.
To install the insulating layer of wooden floors, the following sequence should be followed:
- The first step is to install the subfloor. To do this, cranial bars are packed along the lower edge of the beams;
- Cut cheap boards are placed on top of them;
- Next, the subfloor is covered with a waterproofing layer, which must be vapor-tight. The waterproofing film is laid along the entire perimeter and covers the walls by 15-20 cm. A construction stapler is used for fastening, and the joints are taped with double-sided tape;
- Next, an insulation layer is laid, and a waterproofing film is again laid on top of it. You can also use roofing felt as waterproofing;
- The final stage is laying the finished floor and installing skirting boards.
Due to their porous structure, expanded clay blocks retain heat perfectly, and an additional insulating cake will help avoid the accumulation of moisture in the structure of the bath structure.
You should also remember that the insulation of a cinder block bathhouse from the inside is significantly different from the outside and its significance is more significant.
It is important to take the insulation process as responsibly as possible.
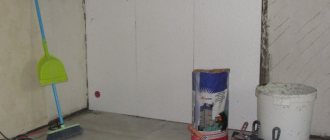
Before you begin insulating a bathhouse made of expanded clay concrete blocks, you should carefully prepare the walls. During the preparation process, they are cleaned of dirt, dust and paint residues, and also plastered to a smooth surface.
After the walls are prepared, you can proceed directly to the insulation process:
- A wooden sheathing is installed using pre-installed waterproofing. Timber is quite suitable for this, since it is easy to install and relatively inexpensive. The thickness of the timber must be at least 50 mm. It is worth noting that the distance between the vertical components of the sheathing should be 3 cm less than the width of the insulation boards, since only under such conditions will the insulation be able to adhere independently to the sheathing;
- Basalt slabs are inserted into the empty cells of the equipped sheathing;
- After the insulation boards are installed in place, a vapor barrier layer is laid on top of them. A foil-coated membrane based on kraft paper is suitable for this. It is necessary to lay a vapor barrier with a reflective layer inside the steam room. The vapor barrier fabric is overlapped by 10-20 cm, and the joints should be carefully taped. The membrane is attached to the sheathing using a construction stapler;
- In order to properly arrange the outer wall cladding, providing a ventilation gap that will allow condensation to be removed from the foil-coated surface of the vapor barrier, it is necessary to install a counter-lattice. It is attached on top of the vapor barrier film in the direction transverse to the beam;
- The final stage is the process of external wall cladding. For the walls of a steam room, it is recommended to use wood of natural origin, which contains an acceptable amount of resins. It is recommended to install wood boards horizontally, as this will simplify the dismantling of the lower layers, which deteriorate when exposed to moisture.
This is explained by the fact that foamed polypropylene can withstand temperatures up to 150 degrees.
The insulation of a bathhouse made of foam blocks and its ceilings is of utmost importance, as is the insulation of the ceilings of an expanded clay concrete bathhouse. This can be explained by the fact that it operates in extreme conditions under the influence of low, on the one hand, and high, on the other, temperatures.
For baths that do not have a floor in the attic, an open insulation method is used.
To do this, a thick layer (at least 25 cm) of loose heat insulation is poured over the ceiling structure, covered with a waterproofing film.
Granulated expanded clay works well.
Waterproofing is installed on top of the insulating layer. To do this, roofing material is laid or plastic film is attached using a construction stapler.
There is an “old-fashioned” technology for insulation using the open method. To do this, instead of a waterproofing film, a mixture of oily clay and sawdust is laid, the layer of which must be at least 4 cm. After the clay dries, dry oak leaves and soil are poured on top of it.
The closed method is most often applicable for bathhouse structures that have a floor in the attic and it is used for various purposes.
The flooring for the floor structure is attached to the joists. Under it, insulating layers are laid sequentially:
- Vapor barrier membrane;
- Insulating basalt wool;
- Waterproofing layer of roofing material.
How to insulate a cinder block bathhouse yourself from the inside?
Many owners of country plots dream of having their own bathhouse. But putting up a log house is quite expensive. The solution to this issue is to build bathhouse walls from cinder blocks - this is much cheaper and faster in terms of construction time.
In order for such a bathhouse to keep warm for a long time, it must be insulated with modern materials. Moreover, such work must be carried out not only from the outside, but also from the inside. We will focus on insulating a cinder block bathhouse in this article.
Recommendations for the technology of lining a bathhouse with clapboard
- The material must be in the required condition. The lining must spend at least a day in climatic conditions comparable to bathhouses. Otherwise, it may dry out to cracks (if it is too wet) or swell (if it is dry), which will greatly deteriorate its appearance and performance properties.
- Nail thin slats onto the finished thermal insulation with a pitch corresponding to the width of the finishing panels. Use stainless nails (bronze, copper). The best way is to assemble the panels into a groove.
- Always mount the lining in the steam room horizontally - this will allow you to easily change the lower beams as they wear out, which will prolong the operation of the sauna for a long time.
- Wood is best suited for flooring. Any synthetic coating is poisonous at bath temperatures and is therefore not suitable. It is not advisable to use oak - it is slippery and therefore dangerous. In addition, it has a low heat capacity. It is possible to install heated floors in the dressing room and rest room.
If you approach the construction and decoration of a bathhouse creatively and wisely, then more than one generation of lovers of paired procedures will delight with its unique design and therapeutic warmth.