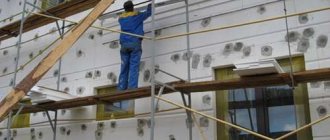
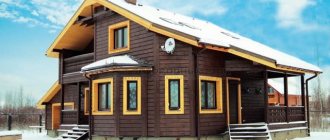
High-quality thermal insulation of a house helps not only to save money, but also to increase comfort in the home. You can insulate walls both outside and inside, especially if funds for repairs are limited. There is an excellent 100% method of insulating walls from the inside with polystyrene foam + video instructions, after studying which it will not be difficult to do all the work yourself.
Method of insulating walls from the inside with foam plastic
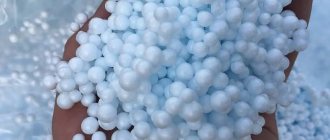
Advantages of polystyrene foam
There are quite a lot of thermal insulation materials, but polystyrene foam has been steadily in demand for more than one year due to its properties:
- does not absorb water;
- not exposed to mold and other microorganisms;
- weighs little;
- easy to cut and install;
- environmentally friendly;
- has low thermal conductivity.
Comparative characteristics and advantages of using polystyrene foam
Polystyrene foam also has its disadvantages: it is damaged by mice, is highly flammable, and emits acrid smoke when burned. To minimize the burnout of the thermal insulation layer in a fire, you should choose insulation with a high content of fire retardants and high density, and use only non-combustible materials as exterior finishing.
Characteristics of foam plastic
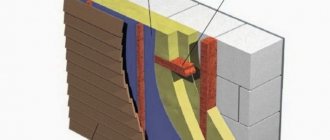
Doweling
After the glue has dried, the insulation boards are additionally secured with dowels, at least 5–6 per standard 600x1200 mm slab.
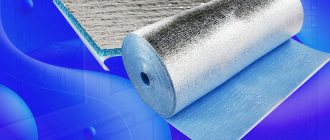
Then a vapor barrier film is laid out over the surface and secured to the frame with a stapler.
IMPORTANT: Polyethylene film has a short service life, about 5 years, and therefore is not suitable for use as a vapor barrier.
Conditions for insulating walls from the inside
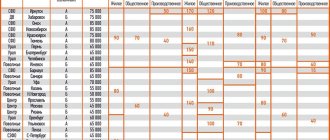
There are certain conditions when it is possible to carry out internal thermal insulation and when it is not. If the insulation is not properly insulated, condensation appears on the walls, fungus develops under the insulation layer, and gradual destruction occurs. The formation of condensation indicates the location of the dew point, and its occurrence depends on the humidity and temperature in the house. The table will help you determine the dew point:
Dew point determination table
In addition, other factors are also important: the presence of a ventilation system, the quality of heating, the mode of operation of the home, the thickness of the load-bearing walls, and the region of residence.
Based on this, internal wall insulation can be performed under the following conditions:
- people live in the house permanently;
- the ventilation system fully meets established standards;
- heating works without failures;
- insulation is planned for all surfaces;
- the walls always remain dry.
In all other cases, only external thermal insulation is allowed.
Prices for thermal insulation materials
Thermal insulation materials
Advantages and disadvantages of expanded polystyrene
The technical characteristics of expanded polystyrene indicate the maximum suitability of the material for internal insulation:
- Light weight. The material is 98% gas.
- Vapor tightness. Polystyrene is an excellent vapor barrier, and extruded polystyrene foam - EPS - almost completely eliminates the penetration of water vapor through its thickness.
- Low thermal conductivity . The presence of air bubbles ensures high heat retention.
- Lack of response to moisture.
- Durable, easy to cut, produced in an easy-to-work form - slabs.
- In terms of fire, the material is neutral ; it burns only in the presence of an initiating flame; it itself cannot be a source of fire.
- Low price (for XPS this point is not entirely correct, but the quality of the material is worth it).
There are also disadvantages:
- With sufficiently high strength, EPS is fragile and breaks or crumbles under deforming loads.
- Does not withstand contact with solvents such as gasoline or acetone.
- When heated above 60 degrees, PPS can release phenols.
- It is afraid of fire, therefore it is not recommended for indoor installation.
Comparison of thermal insulation materials
The last point is quite significant, since the insulation of external walls is carried out around heating radiators, which can significantly heat the insulation areas located in the immediate vicinity. Another disadvantage of PPS is its vapor permeability, but in the case under consideration this is precisely an advantage.
Internal wall insulation technology
Technology of internal wall insulation
The insulation process, although simple, requires careful preparation. First you need to calculate the number of foam sheets, prepare tools and additional materials. Standard sheet sizes:
- width – 1 m and 0.5 m;
- length – 1 and 2 m;
- thickness - 10, 20, 30, 40, 50 and 100 mm.
For internal thermal insulation, foam plastic 1x0.5 m and 1x1 m, 50 mm thick, is best suited. Large sheets will still have to be cut, and transporting them is not very convenient. To calculate the required amount of material, the area of the room must be divided by the area of one slab and added 10%, since when cutting the insulation there will certainly be waste.
Additionally you will need:
- cement mortar;
- glue;
- mushroom dowels;
Fungus dowel - waterproof primer;
- reinforcing mesh;
- plaster composition;
- putty;
- set of spatulas;
- sandpaper;
- drill;
- Master OK;
- level;
- sharp knife.
Step 1: Clean the walls
Cleaning the walls
The polystyrene foam is attached to a clean, dry and level wall, so the old coating is first dismantled. Wallpaper, decorative plaster, panels and other finishing are removed completely, but paint should be removed only if there are peelings or cracks. If the wall is smooth, completely intact, and the paint layer is very durable, you can immediately begin insulation.
Step 2. Alignment
Puttying the walls
After dismantling the coating, the walls are carefully inspected for damage. Cement mortar is used to fill deep grooves and cracks; smaller defects can be smoothed out with putty. Be sure to check the surface with a level to make sure there are no irregularities.
Antifungal primer
After drying, the treated areas are rubbed with sandpaper, and then the entire wall is coated with a primer with antifungal properties. If the wall material is too porous, it is recommended to apply the primer in two layers.
Primer of walls
Prices for different types of primer
Primer
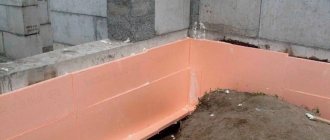
Step 3. Installation of insulation under windows and radiators
The first to insulate problem areas is windows, radiators, door slopes.
Wall insulation
First, they accurately measure the area to be insulated, and then transfer the measurements to the foam plastic. Cut the sheet according to the markings and apply it to the wall. When all the fragments are adjusted, you can begin installation. The glue is diluted with water according to the instructions, stirred well, and allowed to soak. The adhesive composition is applied to the foam plastic according to the following scheme:
Glue application diagram
The glue layer should be uniform and thin. After this, a fragment of insulation is applied to the corresponding section of the wall, leveled and pressed tightly with your hands. Next, the next fragment is attached until the entire area is covered with foam.
Applying glue
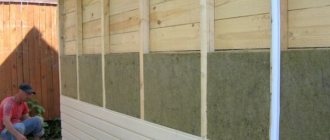
Step 4. Wall insulation
It is much easier to insulate exposed sections of the wall. They start from the bottom: a sheet of foam plastic is covered with glue, placed against the wall and leveled, then pressed tightly over the entire area.
Wall insulation
Adjacent sheets are laid so that there are no gaps at the seams. Vertical joints must be shifted by half the sheet, that is, in a checkerboard pattern. The entire process is constantly monitored by level, otherwise distortions or unevenness in the horizontal plane may form. When the entire area is covered with polystyrene foam, you need to take a break for 2-3 days so that the glue dries completely.
How to attach foam to the wall
Step 5. Sealing seams and fastening with dowels
If, during the process of fastening the sheets, gaps remain at the joints, you will need foam for sealing. You cannot use foam with toluene - it destroys the structure of the insulation. Cracks 4 cm wide or more are first filled with pieces of polystyrene foam, and then blown in with foam.
How to attach foam to the wall
After 3 hours, excess foam from the treated joints is carefully cut off with a sharp knife, and the seams themselves are coated with glue. Next, each sheet is reinforced with mushroom dowels in 4-5 places. This combined fixation of the insulation will ensure maximum fit and reliability during operation.
Fastening the dowel-fungus
Step 6. Reinforcement and plaster
Foam plastic plaster
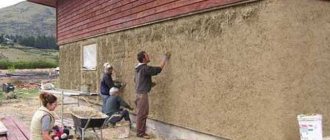
The thermal insulation layer must be protected from external influences. The easiest way is to apply plaster. To do this, first strips are cut from the reinforcing mesh along the height of the wall with a small margin; The first strip is applied to the wall and the plaster solution is applied with a spatula along the upper edge so that it holds the mesh.
Reinforcement and plaster
The plaster layer is made up to 5 mm thick. After this, the solution is applied with a spatula from top to bottom and across the entire width of the strip. On the side where the adjacent strip will be attached, you need to leave a vertical protruding edge of the mesh 2 cm wide.
Foam plaster
An important point: reinforcement is first carried out along the perimeter of door and window openings, behind radiators, at slopes and in corners, and only then on open areas of the wall. The edges of the strips are overlapped by 1 cm; the layer of plaster should be evenly distributed over the walls, completely covering the mesh.
Prices for popular types of plaster
Plaster
Step 7: Finishing
Sanding
The dry surface is treated with a special grater or sandpaper, periodically wetting the walls with water. The wall smoothed in this way is covered with 1-2 layers of finishing putty, then sanded, primed and painted.
Final wall putty
If artistic plaster is used instead of paint, the puttying and sanding process can be skipped. At this point, the insulation of the walls inside the house is considered complete.
Painting walls
Video - 100% method of insulating walls from the inside with polystyrene foam + video instructions
Finishing
After the glue has dried, the wall is primed again, puttyed and painted with acrylic paint or a decorative finish is applied.
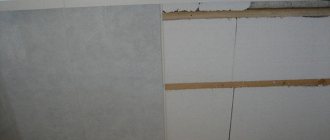
To quickly complete the work, you can use another type of finishing - plasterboard cladding: in this case, reinforcing mesh is not used.
After securing the vapor barrier film with a stapler, beams with a cross section of 25x40 mm are attached to the main frame, and plasterboard is attached to them. The drywall seams are protected with construction mesh, the surface is puttied and finished as desired.
By using plasterboard cladding, you reduce the area of the room, but gain time savings since you do not use a long-drying adhesive.
User reviews
Arsen, 38 years old, Moscow: “I used polystyrene foam to insulate the inside of the balcony and the corner wall of the children’s room. I completed the job in 3 days. The material is easy to attach. The surface was plastered and wallpapered. The heat is retained much better than before.”
Vladimir, 49 years old, Voronezh: “I insulated the wall in the toilet with polystyrene foam. After a few years, black spots began to appear through the wallpaper. I realized that during the repair I did not pay attention to the composition of the soil, which should contain antifungal components.”
Preparatory stage
Before you start insulating walls with foam plastic from the inside, you need to prepare all the materials and tools necessary for this. To do this, it is necessary to measure the total area of insulated surfaces. After completing all the calculations, the resulting figure is divided by the area of one sheet - this will help you find out how many sheets you need. But, as a rule, you need to purchase 10-15% more sheets - this is the so-called loss percentage on complex surfaces.
In addition to foam plastic, you need to prepare:
Calculation of insulation thickness
It is necessary to make correct calculations of the thickness of the material. This will save usable space in the room and provide thermal insulation.
The indicator that determines the measurement is thermal resistance. If there are several layers of insulation, then the indicators for each material are summed up. The thickness of the foam is calculated by multiplying the coefficient of thermal conductivity and thermal resistance. You can use tables indicating the characteristics of thermal insulation materials or a special calculator on the Internet.
Table for calculating the thickness of insulation.