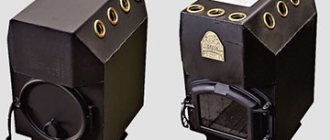
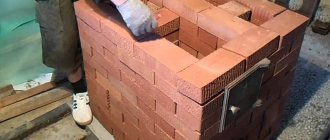
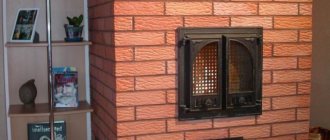
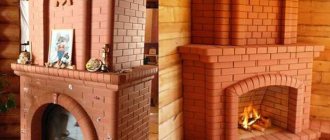
In a private home, a stove is used not only for heating rooms, but also for cooking. The design allows you to live comfortably regardless of the possibility of connecting the building to a centralized gas pipeline. However, the installation of a conventional stove with a hob is carried out by specialists. Despite the complexity of the work, it will be useful for the homeowner to know the selection criteria and popular models of brick heating and cooking structures. Let's also consider the "Swedish" order developed by Ryazankin.
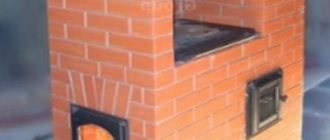
Laying a stove with a metal surface for cooking Source pyromasse.ca
Rules for choosing a cooking stove
Creating a brick oven, additionally equipped with a hob, is a long and labor-intensive process that must be carried out evenly and carefully only by experienced specialists. Only professionals will be able to put together a functional structure. Such a device will effectively heat the premises and provide the opportunity to prepare delicious dishes.
There are different designs of brick stoves for houses with order. The designs differ in size, appearance, and internal structure. They are created small and large, focusing on the area of the house. The provisions of SNiP 41-01-2003 are also taken into account. The rules from it must be followed when selecting a place for furnaces and determining the necessary set of works for additional thermal insulation of the building. Otherwise, problems arise with government agencies that control the fire safety of residential buildings.
Modern stove designs are developed using computer programs Source pro2-bar-s3-cdn-cf5.myportfolio.com
Proven stove designs allow you to create efficient heating and cooking structures from bricks. Moreover, each of them will have its own operational characteristics. Therefore, when making a final decision, be sure to pay attention to a number of important points:
- The size of the stove, in which, regardless of design, the front and rear walls will necessarily give off more heat compared to the side surfaces.
- Features of installing a brick structure. For faster and more efficient heating of a specific room, the side wall of the stove should face towards this room. At the same time, its hob must be located in the kitchen space.
- Heat transfer, which is selected taking into account the area of the heated room. Additionally, the location of the room is also taken into account.
On a note! Lighting and heating a large stove requires a lot of solid fuel and time. Therefore, this design is never chosen for heating a small room.
The dimensions of the stove are always chosen according to the dimensions of the room Source build-experts.ru
The efficiency of any brick heating structure depends on the thermal insulation of the house. If the insulation of the building is done efficiently, then a small stove will be enough to heat it. After all, reliably thermally insulated building structures will retain heat well in the building. At the same time, high-quality insulation is an insurmountable barrier to the cold outside.
Foundation
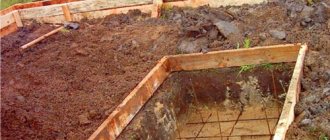
Work on arranging a barbecue area begins with pouring the foundation, regardless of the size of the structure. The service life of the structure largely depends on the quality of the foundation.
For the foundation, it is necessary to dig a pit, the depth of which is 25 cm. The size of the base is measured 50 cm larger than the size of the stove.
a8036fda206dc9ae23b336cf6cd695a2.jpeThe bottom is compacted and covered with crushed stone. Then a small layer of concrete is poured and reinforcement is attached for strength.
Metal rods are driven vertically and laid horizontally, fastening at intersections to provide additional strength.
After this, the pit is completely filled with concrete and kept for 3 days, covered with a metal sheet. Bricks are placed under the edges of the sheet so that the surfaces do not touch.
To protect against moisture, a sheet of roofing material must be laid on the foundation.
Stove models
When existing brick stove designs are considered, attention is paid to the features of each design. After all, you can fold the device with a complex or simpler internal configuration of smoke exhaust channels. The final decision is always made on an individual basis. That is why it is recommended to contact specialists in order to avoid mistakes at the initial stage.
A brick heating and cooking stove can be manufactured in the following options:
- T-shaped and have a massive structure.
This stove is often placed in the middle of a large room. This arrangement allows you to divide the room into separate zones. In addition, a T-shaped stove can be placed between two or even three rooms. This location option will allow you to effectively heat 2 or 3 rooms at once.
T-shaped brick heating stove Source remontnik.ru
On a note! The T-shaped model is an ideal option for a medium-sized private residential building.
- A narrow design in which the hob protrudes from one side.
These types of stoves take up less space in the premises. At the same time, they have a simple design and are installed to heat a maximum of two rooms.
A brick stove in which the hob protrudes from the left side Source iz-kirpicha.su
On a note! Narrow stoves with a protruding part are often heated with dry branches, created in country houses and placed between the kitchen and living room.
- Heated protruding bed, aesthetic appearance and medium size.
Such brick stoves for a home with a hob are smaller than full-fledged Russian heating structures. At the same time, they provide owners with the opportunity to use a large number of functions. Usually in these stoves the hob is located in a built-in chamber. It is convenient to prepare a variety of dishes here.
Some models have an additional built-in camera. It will allow you to bake homemade bread. There are also options with an upper chamber, intended, for example, for heating dishes or drying vegetables.
Stoves with a stove bench and hob are equipped with doors that are entirely made of cast iron or have glass filling. The size of this element can be large, which will allow the structure to be used even as a fireplace. At the same time, any family member will always be able to relax in a warm bed, since the design of such stoves includes a bed, under which there are channels for flue gases.
Brick stove with heated stove bench Source pechiexpert.ru
- Open or closed fireplace fireplace.
This brick heating and cooking stove can be placed in the middle of a residential building. With this arrangement, the fireplace will be located, for example, in the bedroom or living room, and the hob will be in the kitchen. If the stove is placed in the middle of the house, then the entire floor will be filled with heat from the structure. Even the rooms located behind the rear stove wall will be heated.
Modern versions of stoves are most often designs that are simultaneously equipped with a “summer” operation and the ability to work exclusively in warm weather. This device will allow you to save fuel by using only the stove in the summer. At the same time, in warm weather the entire structure will not heat up completely. Therefore, the premises will have a comfortable atmosphere. After all, people in the rooms of the house will not have to endure the heat of the stove in the summer.
Original stove with fireplace insert and hob Source dompech.ru
Russian stove: drawings of brick stoves
Previously, such designs were found in every home, but nowadays they are already a rarity. Despite this, a Russian stove can successfully fit into the interior of the room. Also, Russian brick stoves are not only a heating device - they also have a hob. To lay the stove you will need the following materials:
- solid red brick – 1610 pieces;
- view for a valve measuring 0.3x0.3 meters - 2 pieces;
- dry clay solution in dissolved form;
- samovar 14x14 centimeters - 1 piece;
- flap 43x34 centimeters - 1 piece.
Swedish order
Before you correctly assemble the stove and the brick stove itself, you need to thoroughly understand the order of the entire heating and cooking structure being created. At the same time, the Swedish fireplace stove is popular among homeowners and stove makers in Russia. Its design was developed by A. Ryazankin.
One of the variants of the “Swedish” stove heating design Source 2stiralki.ru
See also: Catalog of companies that specialize in the design and installation of fireplaces and stoves
The Swedish fireplace stove, designed by Ryazankin, has a simple layout. This compact heating and cooking design heats up quickly and features an oven. In addition, the design of the stove allows it to function like a fireplace. This option is great for heating 2 rooms. Although in fact there are a huge number of modifications of the Swedes.
Most professionals are familiar with the Ryazankin stove design. Therefore, they will always help and tell you how to lay a brick stove in a country house step by step for beginners. The order itself looks like this:
- The base of the furnace structure is the first row of bricks made of 34 elements.
It is created on a pre-prepared foundation, which is pre-coated with 2 layers of roofing felt or other similar waterproofing.
For any of the options in the Swedish stove, the 1st row consists of brick blocks tightly laid together Source 1-teplodom.ru
The use of a large amount of brick implies its dense installation. In other words, a specialist creates a kind of slab from it, in which there will be no smoke exhaust holes or any chambers. This so-called stove base will increase the reliability of the entire structure. However, it is laid out exactly along the horizon within the previously designated angles on the waterproofing.
On a note! A specialist first carries out dry, step-by-step laying of a brick stove for a home. Only after this does a professional use a mortar to fix the bricks.
- For the subsequent, second row, use 30.5 bricks.
They are also placed close to each other. In other words, they create a continuous plane. Where the fireplace will be, the craftsman attaches metal brackets. They are usually made from reinforcement. They are necessary so that in the future it will be possible to secure the fireplace grate by welding.
One of the options for a fireplace grate attached to pre-installed brackets Source kuznia-diadi-vani.narod.ru
On a note! If a specialist uses a grid with brackets in his work, then he fixes it on the masonry while creating the second row.
- To lay the third row you need 19 bricks.
They begin to create combustion walls and channels for the movement of combustion products. At the same time, do not forget to leave openings where doors will later be installed to ventilate and clean the interior of the stove.
On a note! The master always provides a minimum of 17 cm between the oven and the smoke channel, which will be formed in the vertical direction.
The cleaning and venting doors are also installed at this stage of work. They are attached using wire by twisting it. In this case, such fasteners are embedded between brick rows.
Cleaning and blowing chamber (position 2 and 3) in the furnace masonry, where the corresponding doors are subsequently installed Source ahbanya.ru
- Laying the fourth row when installing a stove is carried out using 18 bricks.
With their help, all cleaning and blower doors are thoroughly secured. In this case, the seams between the rows may turn out wider, because there is still wire here.
- For the next, fifth row, use 24 brick blocks.
When a specialist places them above the blower chamber, then he first makes grooves in them. They are needed to secure the grate. At the same time, the master prepares a place for the oven. It is usually a metal box. To mount it, the height of the front bricks must be 2.5 cm.
Important! The installation of a stove in a private house made of brick with a stove is carried out using heat-resistant fireclay blocks. They are used for laying out firebox walls.
Kiln fireclay bricks Source taldom.favoright.ru
On a note! The oven metal box is installed in its place only after it is lined with asbestos. The material creates a gap that will allow the material to expand when heated and maintain its integrity.
Care and combustion
Let's start with the fact that constant use of the fireplace causes the formation of a large amount of soot, which must be removed regularly. This applies not only to the firebox itself, but also to the chimney. Of course, you shouldn’t clean the chimney after every use, but once a year you still have to take a closer look at it. For these purposes, it is advisable to provide convenient access to its outer part at the construction stage. As for the firebox itself, it must be cleaned after each use, since the resulting soot does not have a beneficial effect on the human body. By the way, its quantity depends on what to heat with. The classic source of fire in a fireplace is wood. At the same time, it is best to use birch and avoid conifers. But, since wood is now quite expensive and requires additional storage space, owners are increasingly using coal and briquettes. Although this fuel produces more soot, it is still less “troublesome”, and it produces more heat. Despite the fact that brick fireplaces are distinguished by the simplicity of their design, they require only a professional approach. This is due to a number of features that must be taken into account when constructing them. In addition, it is a source of open flame. Improper execution may cause a fire. Therefore, remember that building any fireplace, even the simplest one, BY YOUR OWN STRENGTH is IMPOSSIBLE! If you want to decorate your home with a modern masterpiece that will delight you with its warmth, then the specialists of our company are always ready to help you in its construction.
Video description
You can clearly see one of the options for arranging a Swedish stove without a fireplace compartment in the following video:
- The next, tenth row is created with bricks in the amount of 17.5 pieces.
They cover the front part of the place where the oven will be. The blocks are mounted directly on metal strips. Their installation allows you to combine the space above the firebox and oven. In this case, cutouts are first made at the top of the bricks used. They will allow you to subsequently lay the cast iron hob.
On a note! At the same stage, a place is designed where in the future a small door will be installed, allowing the upper part of the fireplace chamber to be cleaned.
- For the next, eleventh row, use 18.5 bricks.
From these they begin to build the walls of the brewing compartment, where there is already a cast iron panel. The brick blocks laid on the right should close the gap between the fixed cooking plate and the already created wall. At the same time, the blocks that are used to create the back wall of the fireplace chamber are pushed forward 4 cm and then pulled together. This allows you to continue creating the inclined surface.
Size calculation
Like any heating device, size affects its thermal performance.
Therefore, before designing it, it is necessary to determine its exact dimensions. For these purposes, a proportion of 1:50 – 1:70 is used. The volume of the room itself and the combustion opening is taken as a ratio. As for the depth of the firebox, it should correspond to the height in a ratio of 1:2 - 2:3. It should be taken into account that the back wall is made approximately 12 cm thick, and the side walls - 25 cm. By calculating these values, you can get the exact size of the future fireplace and optimally place it in the chosen location. Based on the size of the firebox, the chimney is also calculated, which should be 8-15 times smaller in diameter. Calculation of the dimensions of a brick fireplace
| Fireplace elements | S-12m² | S-15m² | S-20m² | S-25m² | S-30m² | S-35m² |
| Portal width | 50 | 60 | 70 | 80 | 90 | 100 |
| Portal height | 42 | 49 | 56 | 63 | 70 | 77 |
| Firebox depth | 30 | 32 | 35 | 38 | 40 | 42 |
| Height of the rear wall of the firebox | 36 | 36 | 36 | 36 | 36 | 36 |
| Firebox rear wall width | 30 | 40 | 45 | 50 | 60 | 70 |
| Smoke collector height | 57 | 60 | 63 | 66 | 70 | 80 |
| Section of a brick chimney | 14x27 | 14x27 | 27x27 | 27x27 | 27x40 | 27x40 |
| Cross section of a metal chimney | 200 | 200 | 230 | 250 | 300 | 300 |
Video description
Another option for creating a stove is shown in the video:
- Further, in the twelfth row, exactly 18 bricks are used.
With their help, the door of the cleaning compartment is closed and the formation of the rear wall of the fireplace chamber continues.
- At the next stage - for the thirteenth row, 19 bricks are used.
When using blocks in a fireplace compartment, they are pulled out and cut away. The same row allows you to raise the walls of the open hob.
- Also 19 bricks are used in the next, twentieth row.
They begin to form a shelf above the fireplace insert. To do this, each brick is pushed 3 cm not only forward, but also to the side. The result is an overhanging row over the firebox.
- Further, in the twenty-first row, 20.5 bricks are used.
With their help, the walls of the cooking compartment are completed and the construction of the fireplace mantel continues.
- Then, in the twenty-second row, 15.5 bricks are laid.
They are reinforced with a steel angle above the cooking chamber. Metal strips are also used above this compartment. They are installed in the middle and rear part, the so-called ceiling of the cooking chamber. The elements are needed to subsequently cover the entire tier.
Selection of materials
Stove brick is used as the main building material for a classic fireplace. It’s worth noting right away that such a brick must comply with certain standards, which are determined by the master immediately before using it. This process appears to be quite simple: lightly tapping a brick with a hammer produces a certain sound, by which the suitability of the building material is determined. If you build without taking this factor into account, there is a possibility of its incorrect functioning.
The mortar, which consists of clay and sand, is also important during construction. As for clay, almost any will do. But, as experienced craftsmen say, the best results can only be achieved using “red” clay. As for finishing materials, today the choice is wide. The material for the portal can be either natural materials: various stones, wood, or “products” of progress – metal alloys and a number of other materials. In this case, it all depends on the required design.
Briefly about the main thing
A brick heating and cooking stove, installed by professionals, may additionally have a fireplace section, a heated bench, a chamber for drying vegetables and other useful compartments. Today, many projects of such structures for private houses have been created. Moreover, they have a T-shape, wide or narrow design.
The stove is selected depending on the area of the room and the entire residential building. Its location is also taken into account. After all, it can be located at the corner, in the middle or against the wall of the room.
One of the interesting options is the Swedish stove-fireplace, designed by Ryazankin. This is a small but functional design. During the laying of each row, from 5 to 36 bricks are used.
Preparation for construction
The beginning of the implementation of the idea of arranging a stove in the house should be characterized by the preparation of the project. Without it, all manipulations will be spontaneous and this will lead to the fact that the oven simply will not work. The functionality of the furnace is ensured by strictly defined compliance of certain sizes of significant components.
We begin our calculations by measuring the area of the room. The dimensions of the firebox are directly dependent on the calculated value. A firebox that is too small will not provide the required furnace power, and a large one will waste fuel. The area of the combustion hole is calculated from the area of the room by dividing by 50. Then, the height and width values are selected so that their ratio is 2/3. To determine the depth, you need to multiply the height by 2/3. Remaining village
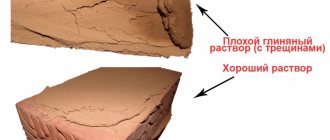
Preparation of the solution
To prepare the solution, you need to stock up on a suitable container, as well as a sieve with 3x3 mm cells. To work with the mixture you will need a shovel, a drill mixer and a small board. The solution will include water, sand and clay. The harvested water must be clean, without the smell of mold and with a minimum amount of mineral additives.
If the tap water in your area is contaminated, try to bring it in advance in the right quantity. Its volume depends on the number of bricks that the masonry will contain: for example, for every hundred there are from 15 to 20 liters of liquid. The solution requires fine sand. It is sifted through a sieve to remove pieces of crushed stone and gravel. In addition, you need to purchase high quality clay: the strength of the solution depends on it.
Preparation of the mixture begins by mixing water and clay in such proportions that the mass is not too liquid, but not too thick, homogeneous mass.
After it becomes plastic, add sifted sand in a ratio of 1 liter per bucket of water. You can check the readiness of the solution by lowering a board into it: the thickness of the mixture adhering to it should be at least 2 cm. When the desired result is achieved, stop adding sand.
Basic concepts for making your own brick kiln
To lay the furnace, you can contact specialists. But to save money, you can make a brick oven with your own hands. This will not be difficult even for a beginner, as it does not require special knowledge.
First you need to choose the type of stove, then find a masonry diagram. There are many DIY brick oven designs on the Internet for every taste.
After the scheme has been found, it is necessary to make a foundation. It should be slightly larger than the oven itself on each side.
The chimney is also made of brick. After completing the laying of the stove, you can line it with finishing materials to give it a beautiful look.
It is also very important to choose the correct installation location. If the stove has a cooking function, it is better to install it so that the cooking part is in the kitchen and the heating part in the living room.
