Furnaces created according to the designs of Igor Kuznetsov are currently among the most efficient among all existing designs. For half a century now, such stoves have been used by a huge number of people not only in our country, but also abroad. You can build such a stove with your own hands in your home or country house if you follow the recommended laying pattern for a certain model.
- 2 Design and its distinctive features
2.1 Design features of bell-type furnaces
- 5.1 Useful tips for craftsmen before starting work
- 6.1 Step-by-step instructions for laying a Kuznetsov stove with your own hands - ordering (photo)
- 7.1 Video: building a Kuznetsov stove with your own hands
Features of the Kuznetsov furnace
Since the main goal of Kuznetsov’s developments was efficiency and productivity (he worked to increase the efficiency value), this required a fundamentally new and improved approach.
If you look at the drawings of Kuznetsov’s furnaces, every professional sees that he has thought out the system of internal gas movement most competently. As a result, thanks to the design solution, hot air lingers in the unit for a longer time and retains heat, and cooled air masses quickly fly away into the chimney through a special recess.
Such furnaces are called “bell-shaped” furnaces. Inside, they combine the hearth and the lower part, creating a kind of cap. Its functional purpose is to separate gases into cold and hot. The last of them rise into the bell and, lingering in it, concentrate the heat. The combustion temperature in such units is higher, and their efficiency is 95%. How much more efficient the functioning of the structures developed by Kuznetsov is is evidenced by the fact that for a traditional Russian stove this figure is 25-40%.
Design and its distinctive features
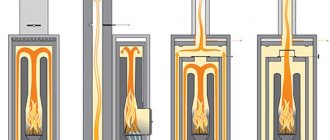
The design principle of bell-type stoves is quite simple and lies in the fact that the lower tier of the structure and the hearth are combined into a common space. It is called a cap, inside which hot gases circulate.
The lightest hot gases, which are formed during the combustion of fuel, rise to the top of the bell. There they will remain until all their heat is transferred to the brick walls of the masonry.
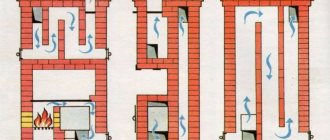
Standard bell furnace design
As they cool, they become heavy and sag. The following hot gases “come” in their place, and such a cycle occurs as long as the fuel burns in the hearth. Thus, the hot air is always under a kind of hood until the brick absorbs all the heat. It won't be able to come out until it cools down completely and becomes too heavy to go down.
Design features of bell-type furnaces
In order to understand how such a stove works, we can consider the option with a glass container, when the hot smoke in it cannot escape anywhere and gradually falls down as it cools.
But you need to know that the cooled gas that goes down is not cold in the literal sense of the word. It has a temperature of more than 200°C, and the combustion temperature of solid fuel is about 800°C, so the air rising will be just as hot. Cooling down, the gas falls to the exhaust channels, which are located at the bottom of the furnace masonry. And then it enters the next cap, located above the first. And if for this cap the gas was cold enough, then for the top one it will be hot and therefore will again rise to the very top. There they will also heat the material of the furnace walls. After cooling, they will go down, as in the first case, but with a temperature of about 130°C.
That's the whole process of how the stove works, but, like every effective device, there is a small nuance here, which is called a “dry gap”. It is an opening located vertically in the oven, about 2–3 centimeters wide, which combines the firebox with the lower hood from the floor to the end point of the chamber. Thanks to the dry gap, heavy cold air can directly exit into the pipe without mixing with rising hot gas and without reducing the efficiency of solid fuel combustion.
Dry joint in the masonry of a bell furnace
A sauna stove has the same operating principle as a heating stove, but its design is slightly different.
- The lower cap is equipped with a special metal baking tray with stones.
- There is access for water to enter and special holes for hot steam to escape.
- The oven has thicker outer walls, which allow the stones to heat up as much as possible, and the room itself does not overheat.
- The hood has a circuit for heating water in the washing room.
The stones are heated by two methods:
- Directly from hot gases.
- In a steel closed pallet.
Since the stones are located at the top of the first cap and therefore they are heated to the maximum temperature. This occurs due to the fact that the hot air “envelops” the stones from all sides at the same time.
For such a stove, it is best to purchase round, streamlined stones. This shape will cope well with heating the air.
If possible, you can add 1/3 of the cast iron pigs to the stones.
Basic rules for creating a heating stove
- To make Kuznetsov stoves, the ordering (masonry diagrams) should be printed in advance.
- The refractory shell located inside the furnace must be free on all sides, since the brick expands during the heating process.
- Internal refractory masonry when using fireclay bricks is always done on edge. If the bricks are made of clay, on the inner walls and on the posts, they are laid at the discretion of the stove-maker.
- To strengthen the bond, a wire is laid every two brick rows.
- When a Kuznetsov stove is created, the ordering of brick stoves for a home provides that various elements (for example, doors) are installed in such a way that there is room for expansion. A special gasket is placed between the brick and the metal element.
- After completing the construction of a brick structure, it should be treated with a fire-resistant compound.
- The first kindling begins at a minimum temperature and is then gradually increased.
Why blacksmiths?
But is it worth focusing specifically on Kuznetsov’s stoves? Worth it because they are worth it. From the very beginning, Igor Viktorovich viewed Russian-style stoves not as a protected relic of the past or an expensive luxury item, but as an indispensable attribute of the economical energy sector of the future, which is now the present. The rest realized, as they say, when the roast rooster pecked.
As a result, a 4 kW blacksmith heats a house of 100 square meters. m. the same as a 12 kW firebox. Which, by the way, does not speak about the invention of a perpetual motion machine, but about the fact that branded advertisers are creating their prospectuses, perhaps, sniffing out the “path of happiness.” In any case, it is a fact that Kuznetsov constantly receives orders from the USA, Canada, Sweden, Finland, which themselves are not trailing behind the furnaces. Specifically, the advantages of blacksmiths are as follows:
- High efficiency - 80% is not surprising for Kuznetsov furnaces.
- High temperature of fuel combustion without the use of technologies and materials that require industrial production.
- As the first consequence of the previous one - omnivorousness. In blacksmiths, any fuel burns to ash, and soot deposition is minimal.
- The second consequence is easy care: because. Soot also burns, Kuznetsov stoves may not be cleaned for years.
- Lower material consumption combined with uniform heat transfer between fireboxes: in a city apartment with central heating, the temperature fluctuates more during the day than in a house heated by a blacksmith with 2 fireboxes per day.
- Wide possibilities for integrating a water heating circuit without compromising the technical parameters of the furnace.
- Good draft with a short chimney, which reduces the cost and simplifies construction and installation work during its construction.
- The plasticity of the design and appearance as a consequence of the two-bell design (see below): without deteriorating the stove, it can be designed to suit almost any room and design requirements.
- Automatic redistribution of thrust among the channels during the transition from heating to cooling, which guarantees against waste: the view almost never needs to be closed; it is intended more for emergency operating modes.
Note: the method of thrust redistribution invented by I.V. Kuznetsov is fundamentally different from the well-known gas view. Through it, the flow created by the draft is passed past the heated parts of the furnace body by special downstream channels, and when the flame burns in the firebox, convection from it pulls the air flow towards itself. As a result, a separate room ventilation system is not required. In addition, a gas tube can be blown out by reverse draft when blowing into a pipe, or, conversely, pulled out in a strong wind, and in a blacksmith any air flow will pass by everything that it could blow out.
Ordering the Kuznetsov furnace
Laying out the heating structure yourself is a completely solvable task, but it will require ordering a Kuznetsov sauna stove or another type of heating unit. The operating principle of the heating device is not so complicated that it is impossible to understand.
To create a high-quality heating unit, regardless of the bell-type version or the Kuznetsov stove for a bath, ordering will be required, as will a general drawing. What is order? This is a set of drawings that schematically depict the step-by-step construction of a stove with your own hands, in detail for each row of bricks. No changes should be made to them.
Second: thermal load
Nothing works on bare principles. In order for a theoretically absolutely correct stove to heat, dry and cook well, it must also be made correctly in the material. In relation to bell-type furnaces (and especially double-bell furnaces), this means that the thermal load on the material must be high. Making a bell furnace massive, with thick walls, is like lighting a fire in a cave. To feel the warmth, you need to sit next to the fire, and there will be soot...
Take a look at fig. It contains drawings and orders of some Kuznetsov stoves: a bathhouse, a heating and cooking stove, a double-circuit hot water boiler and an improved Russian stove with a stove bench. Not being an experienced stove maker, it is clear that the material per unit of output power (500 W * sq. m of outer surface) in the Kuznetsov stove uses one and a half to two times less than in traditional ones. In general, any bell-type oven is “emptier” inside than a channel oven of equal power.
Orders of some Kuznetsov furnaces
On the one hand, this is good; bricks and mortar cost money. But on the other hand, it requires careful development and adherence to construction technology (see below). The heat load, which would not cause a pile of cobblestones to move, would destroy a thin brick wall even during the accelerating fire.
Structural mechanics are also important for Kuznetsov furnaces. The strength of the wall with clay mortar decreases much faster when its thickness decreases than with cement-sand mortar. Therefore, the foundation for these furnaces must be done especially carefully in strict accordance with the author’s recommendations. They must be strictly followed during construction.
Note: I.V. Kuznetsov allows freely copying his materials for himself, for construction, but objects to republications. However, the pictures in Fig. small. An amateur cannot build anything using them, but a master knows where to get full-fledged drawings. Therefore, we hope that Igor Viktorovich will forgive us this small borrowing for the benefit of the cause.
Materials for building a brick kiln
- Fireclay brick
for interior masonry. You can calculate its quantity according to the order. For a simple design you will need a little of it. - Clay bricks
for external masonry, when created, including Kuznetsov bell furnaces - the order will help you find out its quantity. It is advisable to purchase products of the M150 brand. - Clay
in the amount of 100-150 kilograms. It must be of good quality. Otherwise, during the first firing of the finished structure, the solution will crack. - Cleaned sand
. It will require 2 times more than clay. Ready-made clay-sand mixtures are available for sale. They are needed for 500 bricks, approximately 0.2 m³. - Metal fittings
- grate, combustion and blower doors, 2 steel angles, 5 meters of wire.
Required materials and tools
To build a furnace we will need a fairly large amount of materials and tools. This list does not take into account the structure of the foundation and chimney.
- Red brick - about 450 pieces.
- For the installation of the firebox, refractory bricks (grade SHA-8) - 22 pieces.
- Door for the firebox (brand DT-3) size 210x250 mm.
- Blower door (DPK) size 140x250 mm.
- Grate size 250x252 mm.
- Cooktop (stove) with 2 burners, size 586x336 mm.
- Doors for the cooking furnace size 510x340 mm - 2 pieces.
- Gate valve for firebox size 130x130 mm.
- “Summer” valve size 130x130 mm.
- Valve for chimney pipe size 130x250 mm.
- Metal corner size 36x36x4x600 mm - 4 pieces.
- Metal strip size 40x4x600 mm.
- Metal sheet size 600x550x3 mm.
- Pre-ceiling metal sheet size 500x700x3 mm. Can be replaced with ceramic tiles or any fire-resistant material.
Brick for laying a bell furnace
Tools
- Trowel.
- Plumb and building level.
- Container for mixing the solution.
- Spatulas.
- Construction corner.
- Hammer.
- Bulgarian.
- Mixer attachment.
Order samples
This article discusses the Kuznetsov bell-type furnace, and more specifically, one of its variants. Each row should be laid out in a numbered order in full accordance with the images. This oven has a simple design and is a universal solution for household use.
Similarly, when there is an order on the Kuznetsov stove for a bathhouse, you can do the laying yourself (read also: “Ordering a stove for a bathhouse with your own hands”). After the work on creating a heating unit is completed for the first time, it becomes clear to every performer that this is not difficult and quite doable.
Next time we will be able to make a more complex design without any problems. It could even be a two-bell Kuznetsov stove - the order of one of the creation options of which is available as an example on the website. Perhaps in the future there will be a desire to bring into reality one of the many projects of the great master. Video of the phased construction of the Kuznetsov furnace according to the drawings:
Construction of a bell furnace
Before building a Kuznetsov stove with your own hands, you need to know some rules:
- It is not clear from all diagrams that the internal laying of refractory bricks should be done on edge. Ceramic bricks are placed at your discretion.
- Binding bricks with wire must be done every 2-3 rows.
- Perform the first kindling at minimum temperatures. Gradually increase the heat.
- Treating the outer brick with a refractory compound is desirable, but not required.
- Each metal element of the furnace must be installed taking into account possible expansion at high temperatures.
- Before starting brickwork, you need to check the brick for cracks, chips and various other defects.
- The base of the furnace is made separately from the foundation of the building.
- When arranging the bricks, a small gap must be left between the refractory and ceramic bricks. This measure will prevent the masonry from breaking due to thermal expansion.
The order is a set of drawings for the stage-by-stage construction of the furnace. The drawings show each row of bricks in detail. It is strictly not recommended to make amendments to these diagrams, since these are proven works.
Step-by-step construction of a bell furnace:
Step 1 - Foundation
After choosing the layout of the future furnace, it is necessary to make a high-quality foundation for it. The foundation of the stove should not be connected to the foundation of the house. The base must be level to avoid further deformation of the building. The foundation itself should be 20 centimeters higher than the floor level and 10 centimeters larger around the perimeter than the stove itself. After digging a hole and constructing the formwork, you need to pour a sand cushion of about 20 cm, secure a reinforcing frame made of metal rods and you can pour the solution.
Step 2 - laying the stove
After the base has completely hardened, you can begin bricklaying. Before laying the first row, it is necessary to lay a layer of reflective foil on the foundation. If the house is wooden, then a sheet of asbestos must be placed in front of the foil.
Orders of the bell furnace:
Red indicates ceramic bricks, yellow indicates fireproof bricks.
Some bricks will have to be divided in half, some will have to be ground down and made into a non-standard shape.
Laying must be done evenly. The side walls should be laid from right to left. In the second row there is a blower door and a window for cleaning the oven. At the end of the second row, you can begin to make a channel for the smoke.
Next, the rows are laid between the blower and the oven door. At the same time, internal partitions are created. On the 5th row you need to install a grate.
Constructing a furnace in order is not a difficult task, but you must do everything carefully to avoid mistakes.
Step 3 - verification
After finishing the masonry, at least a day must pass for the solution to fully harden. After this time, you can check the oven.
For the first kindling, a small amount of fuel is enough. Gradually the temperature must be increased. During such a test, the furnace will be fired to determine its operability, as well as its tightness.
If leaks are detected, they must be eliminated as quickly as possible. During test heating, the temperature needs to be raised to 700-900 degrees.
A special feature of Kuznetsov’s bell furnaces is the “floating firebox” technology.
For this type of firebox, a dry seam is used.
A dry seam is a special gap that is located at the bottom of the firebox near the extreme corner. Thanks to this seam, the gas in the firebox is safely separated into hot and cold.
When laying edges, you can use rounded bricks. It will suit different types of interior. Another advantage of rounded edges is less deformation from physical impacts.
When choosing a material for heat reflection, the question may arise about purchasing roofing felt instead of heat-reflecting foil. It is better to use foil due to the metal component.
To summarize, we can say that a Kuznetsov stove can be made by a person without experience according to ready-made procedures. However, it is worth remembering that strict adherence to the rules and technologies of finished drawings is a direct guarantee of success. You can change the size, but you should remember the correct order. Your own changes can lead to devastating consequences.
If certain difficulties arise, it is better to contact specialists. Especially when building a stove with 2 or more hoods.
About followers
Drawing of a homemade Kuznetsov stove
However, “blacksmithing” is not some kind of unspeakable miracle. There have already been many amateurs and professional craftsmen who not only repeat Igor Viktorovich’s original designs, but also create their own. In Fig. on the right is a drawing, and in Fig. in the section - the order of one of them.
She has two features. The first is kindling moves on the 21st row. They are quite similar to Kuznetsov’s idle air passages, but they are included in the work during kindling, speeding up and facilitating it. On a flame or smoldering, their throughput does not allow for the escape of gases, and these channels are drowned out by gas plugs.
The second is sawn along, and even at an angle, bricks in the 17th, 28th and some other rows. In fact, both stove makers and just builders know that bricks are not sawed lengthwise. But this belief arose at a time when the concept of “angle drill”, aka grinder, did not exist. People only heard about diamond tools back then, saying that they were used somewhere in the secret workshops of military factories.
But it’s still impossible to saw a brick lengthwise with a grinder while it’s in weight; its strength will drop below the minimum limit due to the beating of the tool in your hands. There are two options, the first is to install the tool in a frame with a lever running in a vertical plane to create a cutting machine. You can make this yourself, there are ready-made ones for sale.
Ordering a homemade Kuznetsov stove
Another method is suitable if the farm has a circular machine with at least 1500 rpm, and better - 2500-3000. Then a diamond wheel for stone is tucked into it instead of a standard toothed saw. This option is preferable: a support board with an angle stop provides a much cleaner and more accurate cut. And if necessary, you can finish it on the other side without the risk of getting a high step on the cut.
Video: the process of laying a 3 x 3.5 brick oven
LiveInternetLiveInternet
Kuznetsov's stoves are well known not only to stove makers - they heat many homes in Russia and abroad. I.V. Kuznetsov has been working on improving furnaces since 1962 and has gathered around him a strong team of like-minded people. The team has more than one and a half hundred developments to its credit, covering almost the entire range of household stoves.
Some of the furnaces of I.V. Kuznetsov
Many would like to build one of Kuznetsov’s stoves with their own hands, and this article will help them. But we are not going to reveal some hidden secrets of the “blacksmiths” - they simply do not exist. On Igor Viktorovich’s website stove.ru, those interested will find a huge array of stove information for free: from information on the design and construction of stoves to detailed drawings and recommendations for installing a stove in a house and constructing a blind area around a building with stove heating. We also do not intend to criticize or correct anything in this home-stove encyclopedia: we are, to put it mildly, far from I.V. Kuznetsov in the oven business.
The purpose of this article is to provide a kind of introduction to Kuznetsov’s body of information, allowing one to more freely navigate the source material. Let us explain with an example why this is necessary.
Let's say I'm a generalist auto mechanic with extensive experience and want to pass it on to others who are interested. A car is a complicated thing. If I begin to get distracted along the way, explaining in detail that how running and caster (let’s assume that readers are not exactly dummies, now everyone drives) affect the handling and directional stability of the car, and the valve timing diagram affects fuel consumption depending on road conditions. conditions, and so on, I will eventually become confused to the point that I myself will no longer understand how the car I drive works. Willy-nilly, I will have to present the material, albeit “on the fingers,” but in a professional, fluent manner.
However, it will be a little difficult to read even for specialists like me, but for an amateur it will make his head spin. Therefore, I will need someone to help me, who can be called a “half-teapot”. In fact, he is not a kettle at all; he can adjust the suspension and set the valve lifters himself. But in this case, his task is to describe how the entire filling of the car is assembled into one whole, controlled according to the principle: “steer with the steering wheel, gas with the gas, brake with the brake.”
In the automotive industry of the USSR, a similar situation arose in the late 50s and early 60s, when the industry began producing cars for wide sale to the public. Then the super bestseller of that time, “How a Car Works,” was published. Edited by none other than the most important designer of the legendary “Victory”, A. A. Lipgart.
Information “from the recipient” will not yet allow you to start working: it does not provide deep knowledge that will allow you to at least intuitively estimate the required values of numerical parameters along the way. But it is essentially fundamental: mastering it, a professional text can be read with understanding and faster. And, if somewhere in it something is still unclear, it no longer causes loss and wandering, but simply a mark in the mind: this is what you need to find out in more detail.
The government has not yet adopted any landmark resolutions on stoves and stove heating. But their role in household heat and power engineering in times of energy shortage is undeniable: already a heating stove with an efficiency of 70%, when used on a large scale, will provide fuel savings on a national scale, because The designs of new heating plants include heat losses in the mains of 35%, and it is not yet possible to reduce them. So, with the popularization of stove knowledge, you have to figure it out yourself, without being either Lipgart or Kuznetsov. Well, let's try.
Why blacksmiths?
But is it worth focusing specifically on Kuznetsov’s stoves? Worth it because they are worth it. From the very beginning, Igor Viktorovich viewed Russian-style stoves not as a protected relic of the past or an expensive luxury item, but as an indispensable attribute of the economical energy sector of the future, which is now the present. The rest realized, as they say, when the roast rooster pecked.
As a result, a 4 kW blacksmith heats a house of 100 square meters. m. the same as a 12 kW firebox. Which, by the way, does not speak about the invention of a perpetual motion machine, but about the fact that branded advertisers are creating their prospectuses, perhaps, sniffing out the “path of happiness.” In any case, it is a fact that Kuznetsov constantly receives orders from the USA, Canada, Sweden, Finland, which themselves are not trailing behind the furnaces. Specifically, the advantages of blacksmiths are as follows:
- High efficiency - 80% is not surprising for Kuznetsov furnaces.
- High temperature of fuel combustion without the use of technologies and materials that require industrial production.
- As the first consequence of the previous one - omnivorousness. In blacksmiths, any fuel burns to ash, and soot deposition is minimal.
- The second consequence is easy care: because. Soot also burns, Kuznetsov stoves may not be cleaned for years.
- Lower material consumption combined with uniform heat transfer between fireboxes: in a city apartment with central heating, the temperature fluctuates more during the day than in a house heated by a blacksmith with 2 fireboxes per day.
- Wide possibilities for integrating a water heating circuit without compromising the technical parameters of the furnace.
- Good draft with a short chimney, which reduces the cost and simplifies construction and installation work during its construction.
- The plasticity of the design and appearance as a consequence of the two-bell design (see below): without deteriorating the stove, it can be designed to suit almost any room and design requirements.
- Automatic redistribution of thrust among the channels during the transition from heating to cooling, which guarantees against waste: the view almost never needs to be closed; it is intended more for emergency operating modes.
Note: the method of thrust redistribution invented by I.V. Kuznetsov is fundamentally different from the well-known gas view. Through it, the flow created by the draft is passed past the heated parts of the furnace body by special downstream channels, and when the flame burns in the firebox, convection from it pulls the air flow towards itself. As a result, a separate room ventilation system is not required. In addition, a gas tube can be blown out by reverse draft when blowing into a pipe, or, conversely, pulled out in a strong wind, and in a blacksmith any air flow will pass by everything that it could blow out.
Basics
Most of the advantages of Kuznetsov furnaces come from the principle of free passage of gases. Let us explain again with an example.
Let's imagine a stove with a complex system of smoke ducts: an ethermark, a four-five-turn Dutch oven. In this cramped labyrinth, strong turbulence will inevitably arise. Have you heard the furnace humming? This is only a minor manifestation of the vortex energy raging within her. And there’s nowhere to get it from except from the fuel stash. If the channels are long and narrow enough, then at first glance there is nothing terrible here: the vortices, by the time they reach the pipe, will dissipate, cooling, and will still give their energy to the body of the furnace, and it to the room. But in reality, nuances appear, which will be discussed later in the text. Because of them, the efficiency of a channel furnace over 60% is an exceptional rarity.
In a channel stove, while it is being heated, a huge flow of energy rushes about, and only a small part of it can be used for heating or heating water without disturbing its operation. Such a furnace is somewhat similar to a nuclear reactor. Don’t be alarmed, just because of the synergy, i.e. along the paths of energy circulation in it. A nuclear reactor has to be loaded with tens of times more fuel than is necessary to ensure the design energy output. Otherwise, the neutrons will simply fly out without having time to meet the uranium atoms ready to receive them. In a channel furnace, hot vortices, without having time to cool, will fly out into the chimney or, conversely, will cool down immediately, producing smoke and soot.
But the Kuznetsovkas (details below) are closer in synergy to the thermonuclear reactors of the future. “Thermonylus” sounds scary, but this is only due to its association with the hydrogen bomb. In fact, fusion reactors are quite safe.
Why? Because they generate exactly as much energy as the consumer needs, and the technological power reserve required for rarefied plasma is scanty. If suddenly the chamber of a tokamak or stellarator suddenly completely collapses, the plasma will be completely emitted (there are no heavy atoms in it) and will cool down before it reaches the walls of the room. The repairmen will curse - maybe the duty department is sharpening their laces - but after 5 minutes. will be able to blunt to elimination without protective equipment.
So what do Kuznetsov furnaces have in common with thermonuclear reactors? The fact is that, thanks to the principle of free passage, the energy of the flue gases does not rotate many times in the flow until it is pushed into the body of the furnace, but impregnates it immediately. And now she has nowhere to go from there except into the room and/or the water heating register.
First: cap on cap
The principle of constructing a furnace, which makes it possible to realize the advantages of free movement of gases, has been known for a long time. This is a two-bell furnace, the diagram of which is shown in Fig. Let's start the analysis with his left pose.
Schemes of two-bell furnaces
The outside air enters through the ash vent 1 into the firebox 2. The firebox can be equipped with a tapering nozzle - a heil - in which a gas view is formed in a single-bell furnace: the light heated gases under the hood with their pressure do not allow the heavy outside cold air to “blow through”, like water into an overturned cup. But in double-bell furnaces, the gas inlet often turns out to be unstable due to the draft from the second bell. Therefore, two-bell furnaces were rarely built before Kuznetsov.
Immediately after kindling, when the lightest and most energetic fractions of the fuel burn, combustion occurs in a mode close to the most efficient pyrolysis. In Kuznetsov furnaces - in pyrolysis mode, they are specially designed that way. Pyrolysis gases burn out under the roof 4 of the first bell 3. The under-roof space of the first bell is similar to the afterburner of a pure pyrolysis furnace.
Pyrolysis combustion under the hood turns out to be self-regulating: if the fuel is very hot, the “cushion” of burning gases expands downwards; the vault of the cap does not allow it to go up. Because of this, the outflow of flue gases is difficult, because it goes down. Accordingly, the thrust weakens and the combustion subsides a little. If the combustion weakens, the opposite happens.
When the combustion transitions to a low-activity mode or the coals are smoldering, both hoods simply work as heat sinks for channel furnaces, collecting residual heat from the fuel. But in Dutch and Swedish pipes it mostly “whizzes” into the pipe: according to Bernoulli’s well-known hydrodynamic law, in a narrow channel the flow speed will be greater. And under the hoods, the residual gases will slowly stir until their heat goes into the brick.
Note: in channel stoves, when there is a strong wind outside, you often have to remove still smoldering coals from the firebox and close the viewer, otherwise all the heat will “whistle” until the fuel burns down to ash. In bell-type stoves, this harmful effect does not exist - the sharp expansion from the chimney into the bell does not allow the wind to clear up in the stove, and you can calmly wait until the fuel gives up its energy reserve to the last calorie.
The ideal two-bell stove is round in plan. Then her body 5 is also the second cap. It also has an invisible thermochemical reaction zone 6 under the vault. It neutralizes the remains of carbon monoxide (carbon monoxide) and nitrogen oxides formed in the firebox due to a significantly higher combustion temperature than in a flame furnace. Only carbon dioxide and water vapor go into chimney 7.
Although a round brick stove of the usual type can be folded, if it is a two-bell stove, it is difficult to install cleaning doors in it, and it is difficult to clean it (one day, yes, you will have to). Therefore, in practice, two-bell stoves are made, if we draw an analogy with electronics, not according to a parallel, but according to a cascade sequential scheme: the second hood is placed on the first and the hoods are connected to each other by chimneys (or one continuous wide gap) from the rear of the stove, right pos. in Fig. In this case, the efficiency of a brick kiln drops by only 1-2 percentage points.
Note: in order for the gas view in a round two-hood to be stable, except for hurricane winds, the annular gap L2 between the first and second hoods must be wider than the same L1 between the firebox and the first hood.
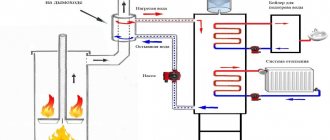
In both cases, a hot water register of any type can be built into the second hood without any fear. The main heat to the furnace body is transferred under the arch of the first hood. This, by the way, is also one of the reasons why two-caps were not used before: with cheap fuel, a small increase in efficiency did not pay for the complexity of the work, and washing in the kitchen in a trough was then commonplace.
Now fuel is more expensive, and the requirements for quality of life are higher. And then the second cap came in handy. No matter how much heat underneath goes into the water heater, the combustion mode will not be disturbed: the first cap, made of poorly conductive brick, reliably isolates the high-temperature cascade from parasitic heat loss.
And at the same time, the gases fit under the second cap, on the one hand, sufficiently cooled and reacted so that the heat exchanger can be made of ordinary structural materials without fear of its burning out and soot deposition on it. On the other hand, the temperature in the second bell with a furnace efficiency of 80% will be in the range of 200-400 degrees, which provides just enough temperature gradient for efficient heat transfer to water.
About multi-caps
In principle, it is possible to make a round bell-type furnace as a multi-stage one; each cascade - 2 caps, with a hole in the roof and a blank top, as shown in Fig. With three cascades (6 bells), the design, which can be conventionally called a furnace with free flow of gases (left position in the figure), can be made self-adjusting for any fuel, from fuel oil to dung, with an efficiency of up to 97-98% in any combustion mode . However, it cannot be accurately calculated analytically, and computer modeling requires a fairly powerful hardware and software platform.
Schemes of multi-bell furnaces
A furnace with even (with a hole in the roof) caps brought to its hearth (right position in the figure) is, in principle, capable of showing an efficiency of 85-90%, depending on the combustion mode and type of fuel. But both of them, firstly, are very difficult to clean. Secondly, the first cap turns out to be very small, and the temperature under it will be quite pyrolysis, about 1500 degrees. No metal can withstand it, except platinum. Tungsten will burn out like a light bulb with a broken bulb. No one has yet determined experimentally whether the lining for pyrolysis furnaces will hold up in weight.
Note: The black dotted lines in the pictures are not metal structures. These are generatrices (parabolas and straight lines) of the corresponding sizes: the diameters of the smoke holes and the distances of the lower edges of the caps from the hearth.
Video: example of a project for a two-bell heating and cooking stove
Second: thermal load
Nothing works on bare principles. In order for a theoretically absolutely correct stove to heat, dry and cook well, it must also be made correctly in the material. In relation to bell-type furnaces (and especially double-bell furnaces), this means that the thermal load on the material must be high. Making a bell furnace massive, with thick walls, is like lighting a fire in a cave. To feel the warmth, you need to sit next to the fire, and there will be soot...
Take a look at fig. It contains drawings and orders of some Kuznetsov stoves: a bathhouse, a heating and cooking stove, a double-circuit hot water boiler and an improved Russian stove with a stove bench. Not being an experienced stove maker, it is clear that the material per unit of output power (500 W * sq. m of outer surface) in the Kuznetsov stove uses one and a half to two times less than in traditional ones. In general, any bell-type oven is “emptier” inside than a channel oven of equal power.
Orders of some Kuznetsov furnaces
On the one hand, this is good; bricks and mortar cost money. But on the other hand, it requires careful development and adherence to construction technology (see below). The heat load, which would not cause a pile of cobblestones to move, would destroy a thin brick wall even during the accelerating fire.
Structural mechanics are also important for Kuznetsov furnaces. The strength of the wall with clay mortar decreases much faster when its thickness decreases than with cement-sand mortar. Therefore, the foundation for these furnaces must be done especially carefully in strict accordance with the author’s recommendations. They must be strictly followed during construction.
Note: I.V. Kuznetsov allows freely copying his materials for himself, for construction, but objects to republications. However, the pictures in Fig. small. An amateur cannot build anything using them, but a master knows where to get full-fledged drawings. Therefore, we hope that Igor Viktorovich will forgive us this small borrowing for the benefit of the cause.
Third: step right, step left...
High loads on the material in Kuznetsov furnaces require not only careful design development, but also compliance with some fundamental design principles. The main one is a floating firebox made of fireclay bricks of the ShB-8 or Sh-5 brand. The body of the furnace is made of ceramic brick of a grade not lower than M150.
What does a floating firebox mean? Firstly, there must be a dry seam around it entirely, or in places precisely calculated by the author. Making it is not so easy: after laying out the last row of fireclay (unless otherwise specified in the specification for the stove), the clay mortar from the seams between the fireclay and ordinary bricks is picked out, and instead of it, gaskets made of mineral cardboard - basalt, kaolin, etc. are inserted. .
Unlinked and linked building modules
Secondly, it is necessary to strictly observe the principle of incoherence of modules. What it is is shown in Fig. No protrusions of fireclay should fit into the grooves of ordinary bricks, and vice versa, even with damping joints. TKR and heat capacity of fireclay differ significantly from “brick” ones, and the firebox connected to the body of the furnace will tear the masonry during kindling. The “blacksmith’s” firebox should be a compact module installed in a nest made of ordinary brick. The author explains in detail how to arrange its exit into the chimney on the website.
You must also strictly follow his recommendations regarding the selection and preparation of materials. “Kuznetsovkas”, although made of brick, are high-tech, and tolerate replacement with ersatz and negligence no more than a rocket or submarine tolerates replacement of titanium and composites with tin. The consequences, however, will not be so catastrophic, but you will also have to see them at home, and not read them in the news. And pay out of your own pocket.
In general, in terms of technology: a Kuznetsov stove can be built by a diligent, attentive and careful beginner. But a truly experienced stove maker, half-drunk but thoughtlessly laying out a really good stove or Dutch oven, will definitely misfire on Kuznetsov’s stove.
About followers
Drawing of a homemade Kuznetsov stove
However, “blacksmithing” is not some kind of unspeakable miracle. There have already been many amateurs and professional craftsmen who not only repeat Igor Viktorovich’s original designs, but also create their own. In Fig. on the right is a drawing, and in Fig. in the section - the order of one of them.
She has two features. The first is kindling moves on the 21st row. They are quite similar to Kuznetsov’s idle air passages, but they are included in the work during kindling, speeding up and facilitating it. On a flame or smoldering, their throughput does not allow for the escape of gases, and these channels are drowned out by gas plugs.
The second is sawn along, and even at an angle, bricks in the 17th, 28th and some other rows. In fact, both stove makers and just builders know that bricks are not sawed lengthwise. But this belief arose at a time when the concept of “angle drill”, aka grinder, did not exist. People only heard about diamond tools back then, saying that they were used somewhere in the secret workshops of military factories.
But it’s still impossible to saw a brick lengthwise with a grinder while it’s in weight; its strength will drop below the minimum limit due to the beating of the tool in your hands. There are two options, the first is to install the tool in a frame with a lever running in a vertical plane to create a cutting machine. You can make this yourself, there are ready-made ones for sale.
Ordering a homemade Kuznetsov stove
Another method is suitable if the farm has a circular machine with at least 1500 rpm, and better - 2500-3000. Then a diamond wheel for stone is tucked into it instead of a standard toothed saw. This option is preferable: a support board with an angle stop provides a much cleaner and more accurate cut. And if necessary, you can finish it on the other side without the risk of getting a high step on the cut.
Video: the process of laying a 3 x 3.5 brick oven
More about round ones
Round stoves theoretically have a lot of advantages, but they are not very convenient in the house. However, there is also a significant demand for compact mobile ovens, and here the extremely high efficiency of round multi-caps can be a decisive factor, because when the size of the oven decreases, its efficiency drops sharply due to the square-cube law.
Such furnaces, of course, would have to be made of metal. This solves the problem of cleaning; the stove can be made collapsible. But the choice of metals suitable for the ratio of heat capacity and thermal conductivity is extremely limited. The only inexpensive ones are cast iron, but it is heavy and fragile.
However, there is a lighter and stronger metal material with similar properties. These are products of powder metallurgy. In relation to scissor knives, “powdered crap” is quite justified, but for a stove in which nothing works for shear, powdered parts can be a godsend.
The second problem, which has already been mentioned, is the heat-resistant lining on the arch of the first cap. If it can be solved, then perhaps the works and efforts of Igor Viktorovich Kuznetsov will bear fruit that is more extensive and significant than it now seems. published econet.ru
PS And remember, just by changing your consumption, we are changing the world together! © econet
