Russian stoves came to the current user from time immemorial. Modern interpretations are somewhat different from the ancient ones, but in general they repeat all the architectural and functional aspects. The effectiveness of a structure with a bench and a cooking stove is beyond doubt. The only question is whether to make such a stove with your own hands or order the project drawings (as well as masonry and test run) to specialists.
Materials
During the construction process, materials will be required to build a foundation for the device, laying the structure of the furnace and chimney pipe itself, as well as metal cast iron elements in the following quantities:
| No. | Name | Unit measurements | Quantity |
| Furnace design | |||
| 1 | Red burnt solid brick M-200 | Thousand PC. | 1,85 |
| 2 | Fireclay brick ShB – 8 | Thousand PC. | 0,02 |
| 3 | Oily clay | kg | 250 |
| 4 | Coarse river sand | kg | 300 |
| 5 | Blower door | PC. | 1 |
| 6 | Cleaning hatches “DP-1” | PC. | 8 |
| 7 | Grate “RD-6” | PC. | 1 |
| 8 | Fire door 25x28cm “DT-4” | PC. | 1 |
| 9 | Cast iron two-burner stove 70x40 cm | PC. | 1 |
| 10 | Gate valve | PC. | 2 |
| 11 | Strip steel | m | 20 — 25 |
| 12 | Angle steel | m | 1,5 |
| 13 | Steel wire | m | 20 |
| 14 | Sheet steel 5 mm thick | m² | 0,5 |
| 15 | Asbestos cord | m | 15 |
| Foundation | |||
| 1 | Portland cement | T | 0,65 |
| 2 | Construction sand | m³ | 3,5 |
| 3 | Crushed stone | m³ | 4,5 |
| 4 | Ruberoid | m² | 16 |
| 5 | Edged board 40 mm thick | m³ | 0,5 |
| 6 | Nails | kg | 1 |
| 7 | A1 fittings with a diameter of 12 - 14 mm | m | 90 |
| 8 | Steel knitting wire | m | 30 |
| 9 | Bitumen | kg | 10 |
Alexander Batsulin
Born in Moscow on September 7, 1976.
Graduated from the Faculty of Chemistry of Moscow State University with a degree in Chemical Kinetics. He has been involved in the furnace business since 2000. Interests: construction and design of stoves for heating individual houses. Traditional timber construction. Tel. 8 (915) 169 1733 8 (950) 259-6401 e-mail: sashbats (а) mail.ru and Marcus Flynn
Marcus Flynn
Born in England in 1961, lives in Montreal, Canada.
Member of the North American Stove Makers Association. He has been involved in the furnace business for more than 20 years and specializes mainly in the construction of Finnish counterflow furnaces in various versions. Area of interest: non-standard cladding made of antique bricks, Art Deco design, history of stove making. In filling its website, www.pyromasse.ca adheres to the “open source” policy. they put a Russian stove and a couch in the Russian outback,
and they are filmed by a hidden camera.
End of August 2009
Time passed, and at the end of February 2012, on the eve of Maslenitsa, inspired by our video about pancakes in a Russian stove, Channel One (ORT) made a short story for the Good Morning program with this stove.
26.01.2012
Author: A. Batsulin
Tools
To lay a Russian stove with a stove and a stove bench, you will need to assemble a set of tools consisting of:
- trowel - for applying oven mortar;
- hammer - pick - for splitting bricks into smaller parts;
- ordering - control of seam thickness;
- jointing - design of seams on the facade;
- rules - for smoothing the surface of the foundation;
- building level, plumb line, square, tape measure;
- measuring strip for measuring the width of masonry joints;
- two containers for the production of concrete and clay-sand mortar;
- shovels - for loading and mixing the components of the masonry mixture.
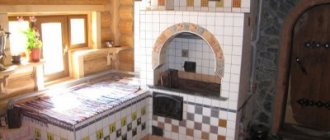
Stove with stove - multifunctional structure
The stove is so useful, convenient and ergonomic that building a structure without it simply loses its meaning. Perhaps this is why all modern modifications of Russian stoves have cast iron stoves - with one, two or even three burners.
In fact, models with a stove do not contradict one of the main features of a Russian stove - they have two fireboxes. It is the small firebox that is responsible for heating the stove. Moreover, in simple stoves it has a separate chimney, connected at the top to the chimney of the furnace.
One of the popular options for placing the stove is right in front of the mouth of the furnace. Heating is carried out independently of the large firebox, through the lower heating
For more complex designs, there is the possibility of “summer” and “winter” fireboxes: in the first case, the small furnace (furnace) operates autonomously, and in the second, with its help, the walls and the large furnace are heated.
There is a third option for locating the flooding - in the main structure, but on the side or on the opposite side. This solution is not always acceptable - for example, if the stove needs to be located in a corner. In this case, it is more convenient if both fireboxes are on one side and located one above the other.
A successful engineering solution in which a small stove with a cast-iron stove is placed separately, but has a common wall with the main structure. Disadvantage - takes up more space
The advantages of the design with a hob are obvious:
- autonomous heating with a lower degree of heat transfer;
- fast heating process of cast iron and walls;
- cooking all kinds of dishes on the stove;
- the ability to heat or store food warm;
- economical fuel consumption - firewood;
- easy maintenance - cleaning the ash pan.
On the stove, when it is no longer hot, but has cooled down a little, you can dry household items. For the same purpose, stoves are used - small recesses in the walls of the stove, as well as a brick perimeter around the cast-iron surface.
For summer residents, the model with flooding is much more convenient, as it is used more often. A large firebox is usually used either in early spring or late autumn, when the cold season sets in and the entire stove needs to be heated.
Preliminary work
Masonry mortar
The process of preparing a mortar for laying a furnace is much more complicated than a conventional cement-sand composition. The main component in it is fatty clay. First of all, it is cleaned of large foreign inclusions. Then soak for at least 24 hours. When the clay particles swell, it is rubbed through a metal sieve.
Another component is washed river sand, which it is advisable to calcinate before adding it to the mixture.
On average, for 2 parts of clay you need to measure 1 part of sand, but the percentage of fat content of clay is always different, so it is better to determine the correct proportions experimentally. To do this, mix a solution with different amounts of components in three small jars and roll them into flat cakes.
Comparison of solutions
After 3 days, they look at which of the samples has fewer cracks - this means that the entire masonry mixture must be mixed in these proportions.
Making the foundation
Such a massive structure, such as a Russian stove with a stove bench and stove, must have a reliable support underneath it, not connected to the foundation of the main structure. Therefore, installing the device in an already built house is much more difficult than at the stage of its construction.
The most reliable support for a Russian stove is a monolithic reinforced concrete slab. It is constructed using standard technology. The depth of its base must correspond to the level of the base of the foundation of the internal wall near which the device is installed.
There should be a gap of 5 cm between the walls of these structures, which is filled with sand. The upper plane of the slab should be 15 cm below the floor level. If a place is chosen for the construction of a Russian stove near the outer wall, under which there is a deeper foundation, then the foundation structure for the stove must be expanded.
Foundation diagram
The process of making the foundation itself is as follows:
- mark the dimensions of the oven;
- tear off the pit 25 - 30 cm wider from the intended lines on each side and 25 cm deeper than the future support;
- level and compact the bottom of the pit;
- pour a sand cushion 10 cm thick with water and layer-by-layer compaction;
- lay a 15 cm layer of crushed stone and also compact it thoroughly;
- install formwork;
- roofing felt is attached to the inner walls of the formwork;
- the reinforcement frame is knitted along the entire height of the support. The mesh is laid parallel in two rows in the lower and upper parts of the base and fastened together with transverse reinforcement rods;
- pour the concrete mixture into the formwork. Concrete should be laid in layers of 20-25 cm and thoroughly compacted with vibrators. This is done to prevent the formation of voids in the body of the structure. The upper plane is leveled using a rule or a regular board;
- the formwork is dismantled a week after the concrete has set and gained its initial strength;
- to protect against the effects of soil water, after 22 - 25 days the side walls of the structure are coated with hot bitumen, and the top surface is covered with two layers of roofing felt.
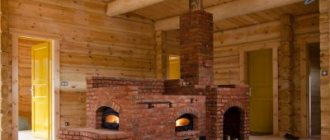
Construction of a Russian stove
Russian stoves may differ in size, shape and design features.
According to one definition, these are heating and cooking structures with 2 fireboxes, intended, in addition to heating functions, to also prepare typical dishes and bake bread. The process of burning firewood in the main firebox occurs as follows: the gases generated during the combustion of logs enter the 1st section of the hearth chamber, then through special holes - undercuts - enter the 2nd section. After this, they move to the upper cooking chamber, from where to the collection channel and into the pipe.
Diagram of the Russian stove. The main firebox is necessary for winter heating, the small one is used for cooking at any time of the year
When burning wood in a small firebox, combustion gases first enter the main firebox, and from it into the chimney. Here you can use not only dry logs, but also bark, wood chips, branches and other waste.
The Russian stove has a lot of advantages, but has one noticeable drawback: heat is released at the level of the hearth, that is, approximately 0.9 m from the floor, which prevents heating of the lower part of the room
The basis for the structure is a foundation, usually 0.1 m larger than the dimensions of the lower part of the Russian stove. Here, below, there is a storage area - free space for storing a poker, grip, spatula and other equipment.
The main part is considered to be the crucible - a cooking chamber with a hole (mouth) on the front side. The mouth can be rectangular or arched. Through it, fuel (logs) is placed inside the crucible and dishes with food are placed
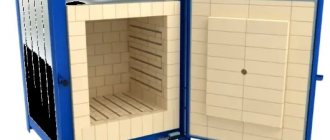
For laying the cooking chamber, and in particular for the vault, the most fire-resistant, selected bricks are selected. The thickness of the walls determines how long the heat will last.
The thin walls of the cooking chamber heat up very quickly, but cool down just as quickly. Standard thickness is 1 or ¾ brick. The front wall is thinner - ½ brick, like the partition in front of the furnace.
At the bottom of the cooking chamber there is a floor for which a strong, smooth brick is suitable. Often it is laid dry, without using a solution, on a backfill of coarse sand, to which crushed stone, gravel or broken glass is added. The floor is laid with a slope of 3-5 cm towards the mouth.
The shape of the vault affects the degree of heating and the complexity of the masonry.
For example, semi-circular vaults heat up slightly under and reflect gases unevenly, but are considered easier to construct with your own hands
Gentle vaults are more difficult to lay; steel ties must be used to distribute the load. However, with this design, the underfloor heats up more.
The technology for laying the roof of a Russian stove may differ, but the following rule is often followed: lay it out on both sides simultaneously and finish in the middle. A castle brick is laid in the center, and a clay solution is used to coat it.
The cooking chamber is arranged so that the fuel can be placed close to the mouth - in this case, combustion occurs more efficiently. Pots and baking trays are also placed on the underside near the mouth
If they are baking bread, then they clear the floor - they scoop out the ash, and sweep away its remains.
There is still a way to bake bread without baking sheets or molds, when it is placed on a special shovel, lightly sprinkled with flour, and then “put in the oven” - simply dumped with a sharp movement onto the floor.
Order and description of masonry
Arranging a Russian stove with a stove bench and stove
The laying of a Russian stove with a stove bench and stove is carried out according to the order (in the photo above), which clearly shows where each brick needs to be placed in rows and at what stage the stove fittings should be installed.
Description of masonry in rows:
- The 1st row is laid solid in the following order: first, the brick is laid around the perimeter of the structure, and then the middle is filled. This row determines the evenness of the entire structure, so it must be well aligned;
- in the 2nd row they begin to form under. To do this, bricks are placed on edge;
- in the 3rd row, install a blower door and continue to lay out the bottom of the cooking section with bandaging of the elements of the previous row;
- the laying of the 4th row is similar to the 2nd;
- The 5th row is the formation of a clearing passage and laying the foundation under the arched vaults;
- 6th row - they begin to narrow the cleaning channel and install the grate;
- 7th and 8th rows - installation of the combustion chamber door, placement of the steel sheet;
- from the 9th to the 11th row - formation of the firebox, installation of the stove;
- from the 12th to the 16th row - laying a niche on the hob;
- 17th and 18th rows - narrowing of the arches of the niche;
- from the 19th to the 21st row - completion of the laying of the bed;
- 22nd row - formation of a heil;
- from the 23rd to the 33rd - raising the chimney with the installation of valves and cleaning hatches.
When laying a stove, the seams are bandaged in each row, using bricks that are not full size. For proper dressing, you can also use the poke-and-spoon masonry technology, when the brick of the bottom row is laid flat, and in the next row - with the poke outward.
Ceramic products can draw water out of the joint material, so they are immersed in water for a few seconds before installation. Excess clay-sand mixture protruding on the internal surfaces of the parts of the device must be removed with special care.
Modern Russian stoves: what are they?
May vary in size and functionality. Traditional options have dimensions: length - 2.5 meters, width - 1.5 meters. Products can be of different sizes:
- small (178*124 cm);
- medium (213*147 cm);
- (231*160 cm).
In rare cases, furnaces can be built to non-standard sizes.
But few people were satisfied with the old ones - unattractive appearance, the ability to cook only inside the hearth, limited capabilities. Thanks to the work of craftsmen and changes in designs, Russian stoves have regained popularity. They have everything you need to heat your home, cook food and more.
Modern version
So, the latest additions:
- equipped with a cooking floor. Such designs are multifunctional and can replace any hobs and stoves;
- with fireplace. This option is a new trend. Its peculiarity is that the rear wall of the firebox structure is led into another room through the wall. Thus, it turns out that one design combines two: a fireplace with a flame effect and all the magnificent sounds of crackling wood, as well as a classic Russian stove that heats the house, has a firebox for cooking and a stove for cooking;
- with a bed. In the classic versions it was very large. Three people could fit on the sun lounger. An analogue has a sunbed, but only smaller. It is enough for one person to live comfortably. However, this disadvantage can be easily compensated for by an attached trestle bed.
According to fire safety rules, all furniture and equipment must be at a distance of 1 meter from the firebox!
Such designs are multifunctional
Pros and cons of designs
In addition to beauty and warmth, they have some advantages:
- uniform heat transfer and accumulation;
- high level of efficiency;
- bottom heating The classic versions were devoid of this. Only after some time, builders modified the stoves, making them more practical to use. This feature makes it possible to heat the room as a whole;
- high security. Since all structures are made of brick, the walls of the furnace do not heat up to such a temperature as to cause a fire or burn;
- built-in stove. Enables housewives to prepare food in their usual way;
- long service life. A properly made structure can last more than 30 years.
Minuses:
- you will have to stockpile solid fuel for the winter;
- the firewood will have to be dried, since wet wood cannot be placed in the firebox;
- When heating a house with a Russian stove, excess waste from the fuel occurs.
Warm and cozy sleeping place
The Russian stove cannot be called an ideal device - it has positive aspects and shortcomings. For example, in order to learn how to cook in it, housewives will have to go through a long training phase. For ignition you will need firewood, which will have to be prepared. These are, of course, not the electric or gas boilers that everyone is so used to. But the Russian stove also has a lot of positive aspects:
- there is an opportunity to cook excellent dishes. They turn out very tasty and differ from those cooked on stoves;
- depending on the design features, the Russian stove can be equipped with a sun lounger, allowing you to relax comfortably during the cold season. It can also have shelves;
- and finally, the effect of the flame, the sound of crackling logs and flickering fire - no device can replace this.
Staircase to the second floor in a private house. 290+ Photos of Options (wooden, metal, concrete)
Drying
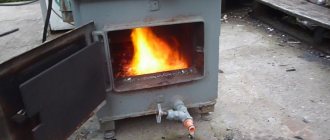
To dry a Russian stove with a stove bench and a hob, shavings, chips and small logs are used. The first combustion should be carried out with fuel in an amount of no more than 30% of the maximum volume. With each subsequent firebox, the volume of loaded firewood increases.
The drying time is influenced by the size of the oven, the degree of humidity of the brickwork and the temperature in the room. Typically, drying in the summer season takes a week; in the cold season, this period can last up to 25 days . All this time, the valves and combustion damper must be open.
You need to stop drying the oven at the moment when there are no damp spots left on its surface, as well as condensation on metal parts.
Variety of designs
A classic oven has an oven, and the lower part does not heat up. Polati, also called a couch, are intended for resting people, drying clothes and fruit. If you make them two-tiered, then the whole family can fit on them, for example, children can lie on the upper tier, and adults on the lower tier.
Water procedures are also performed on the beds, and to wash, water is heated in a vat. The heating unit is erected separately or in combination with other devices.
Trial fire
After drying is complete, perform a test fire in the following sequence:
- the combustion chamber is loaded as much as possible with dry wood, laying it in dense rows and set on fire. At this moment, the valve should be fully open, and the wellhead valve, on the contrary, should be tightly closed;
- after the first batch of firewood has burned out, the next portion of wood is loaded, but only 2/3 of the furnace is already filled;
- The intensity of fuel combustion is regulated using a valve;
- Complete closing of the valve is possible after all the firewood has burned out and the formed coals have gone out.
The next fire can be started only after the stove has completely cooled down.
Home heating options
The choice of heating method depends on the layout of the building - side or bottom. The first option is the best solution for houses with several rooms, since the adjacent room is heated using a side heating panel. The second method is used to supply heat to one room, but having a larger area.
The walls of the sub-floor space are heated from below. Currently, in order to increase efficiency, designs are equipped with a bell-type combustion, which makes it possible to ensure uniform heating and stable draft. In such units, fuel burns completely and less soot accumulates in them.
Return of traditions
It cannot be said that the Russian stove in the house is a museum exhibit that has unexpectedly returned from the past. In fact, it never disappeared; moreover, it is part of some Russian outbacks that are unfamiliar with main gas.
The massive return of the Russian wet nurse to homes spoiled by civilization is not a tribute to fashion. Most likely, what plays a role here is the desire of people to feel comfortable and cozy in the house, to fill it with the pleasant aroma of baking and to meet with the family in front of an open fire for a delicious dinner cooked in a real Russian oven. After all, not a single miracle of technology will give the sensations and emotions that people experience when they see a flame.
Will help you feel comfortable and cozy in your home
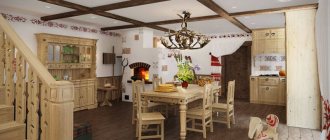
A Russian stove, finished with high-quality materials, does not look like an alien in the house. Today it has become more compact, practical and wear-resistant. A wood-burning stove, depending on its design features, is placed not only in the kitchen, but also in the living room and dining room. For the convenience of housewives, craftsmen integrate everything they need into them, right down to hoods.
A Russian stove without built-in hobs can easily take a central place in a library or bedroom. A lounger can easily replace even the most comfortable chair or even a sofa.
To choose the most suitable project for your home, you need to consider several options in detail. They differ in size, functionality, and of course cost.
Installing a Russian stove in a country house is a job only for professionals. Regardless of construction skills, the construction of such a structure requires not only skills, but also knowledge of its features and technologies.
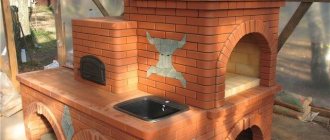
Interesting design solution
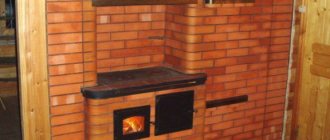
"Alya-Rus" - a designer hit
This model has quite compact dimensions. It does not have additional equipment, such as a hob, a large sun lounger or the ability to observe the flame effect. This option is suitable for a small kitchen. Such a stove is decorated with decorative elements that are associated with Russia. It looks light and charming in a wooden house. Peculiarities :
- Despite the primary simplicity of the decor, such a stove should not be overloaded with accessories. A few decorations will be enough;
- it can be installed not only under the wall. Due to its compactness, it will look good in the center of the kitchen, if space allows.
This option is budget friendly. And if you want a Russian stove in your home, but your budget does not allow for luxury, you can choose this option.
Suitable for rustic style homes
We make the foundation
Before you start building a heavy structure, you need to pour its foundation. But if you make a stove in an already finished house, then you will create the foundation for it right there. It is important to ensure that the base of the house does not come into contact with the stove. The depth of its foundation depends on how large the stove is: the larger the structure, the deeper the foundation needs to be made.
Foundation
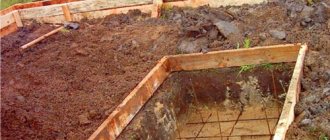
Creating a pillow
Before pouring the foundation, it is important to carry out preparatory work. First of all, you need to put markings. Afterwards, you can proceed to digging a pit of the required depth. When you have thoroughly compacted its bottom, add slightly damp sand there and compact it again. The thickness of the compacted sand ball should be 10-20 centimeters. Now fill everything with crushed stone to a height of 15 centimeters. It also needs to be compacted.
We create formwork
Before pouring the solution, you need to build and install the formwork. Any wooden slats are suitable for creating side walls. If there are any gaps, cover them with plastic and secure them with a stapler. The formwork must be higher than the soil and reach the foundation. It can be done right along the edge of the pit.
Fill the solution
When the formwork is installed, fill the foundation with mortar. For it you will need coarse gravel, cement and sand.
Coarse gravel
The minimum fill height is 15 centimeters. When the first layer has been poured, place reinforcing bars vertically in it - this will connect this layer to the concrete mixture.
Fill in the lightweight solution
Fill the reinforcement sheets with lighter concrete, the layer of which should reach the ground. When everything is done, level this mixture and wait until it hardens a little. After this, cover it with steel reinforcing mesh and fill it with concrete to the thickness of the formwork. Level the poured screed and leave to dry for 27-30 days.
Creating a waterproofing surface
When the screed has dried, remove the formwork. Cover the base with a layer of waterproofing made from glued roofing felt balls. When everything is ready, start laying the stove walls.