Surely, you don’t know what difficulties you may encounter if you decide to use stove heating with a water circuit in a wooden house! There is a “hackneyed” stereotype that it is difficult to heat a house with a stove if you do not run a water circuit throughout the house, but this is not true! The water circuit in the furnace causes a lot of problems both during installation and operation.
In this article I will try to weigh the pros and cons, and it’s up to you to decide... And at the end I will show a short video from a real house under construction, where the furnace-boiler is made with a water circuit. We will talk about wood stoves.
Why do we need a water circuit in a heating system?
It is believed that in a house with stove heating, the corners and floors are always cold. There is also an opinion that in a house with stove heating the windows always “cry”. The whole point is that the heating device - the stove in the house - heats in a fairly localized manner. There is a stove in one place...
So, in order to reduce heat loss near the windows - from the windows. And also in order to distribute the heat from the stove to the edges of the house - to the corners and places where the walls meet the floor - we need a water circuit.
It can be assumed that a water circuit is necessary if there is at least one room in the house where the surface of the stove does not directly open. And if there are 2 or three such rooms, then even more so...
Briefly about how a water circuit is usually made in a house with a stove.
In old houses, in villages without gas, stove heating with a water circuit in a wooden house was solved as follows. a boiler was built into the furnace - right into the firebox. From the stove, by gravity, through a regular open expansion tank (under the ceiling), water was released through wide pipes. This could be done either in a circular pattern around the house. Most often they did it closed - supply and return along one wall.
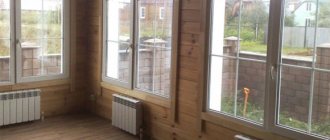
Modern building materials make it possible to make wiring with the transition to plastic. The wiring is already done on aluminum radiators under the windows. This allows you to significantly reduce the need for heating; the coolant releases heat “in doses” through radiators, which can also be adjusted.
In this way, you can try to solve one of the main problems of stove heating with a water circuit in a wooden house - the rapid cooling of the coolant. Still, plastic has lower thermal conductivity than steel. Moreover, a plastic pipe can be thermally insulated.
But modern building materials cannot solve some problems of furnaces with a water circuit.
Watch a short video about a stove whose customer refused to connect the already installed heating registers:
Possible improvement methods
To service and repair the heater, it will need to be disconnected from the piping, so it is recommended to install “American” type connections made of brass on the threaded pipes of the tank. The lower pipe is connected directly to the water supply system through a shut-off valve. Also in this place you can make a drain outlet with a tap and a fitting for connecting a flexible hose.
If the water heater is located outdoors, it will not be superfluous to provide thermal insulation to the tank. It is quite easy to do with ordinary basalt wool. You will need a wide piece of steel reinforcing mesh, rolled into a ring to form a gap from the tank walls of about 50–70 mm. The insulation is attached to the mesh with thin wire, then the resulting casing is wrapped around the water heater and tightened with wire clamps.
The main problems with furnaces with a water circuit.
The main problem with furnaces with a water circuit is the other side of the coin of its main advantage. Water, being a good coolant, heats up quickly and transfers heat well. And metal conducts heat well...
This is why furnaces with a water circuit cool down quite quickly. It is a well-known fact that for effective heat transfer and heating of a house, a certain surface temperature is needed. So, a stove with a water circuit gives this temperature during heating and for a short time after. Then the following happens.
The stove, having a water circuit inside, cools down quite quickly, with some exceptions (some models). And the pipes themselves, due to the above characteristics, give off heat quite quickly and also cool down.
A familiar story - a stove with a water circuit is fired twice a day, if not more. But for me, twice a day is already too much to fire up the stove. So it’s better to install two stoves in the house, there will be less hassle, and the effect (efficiency) from firewood will be greater. I'm not kidding…
But quickly cooling down and firing the stove “like at work” twice a day is not so bad...
Such intensive use of the furnace—frequent firing—leads to accelerated destruction of the furnace masonry. Old hydronic furnaces look old not because of their age, but rather because of their essence. They are constantly oiled, because they are constantly drowned, the masonry collapses and cracks. I have a friend who heats her stove in cold weather without stopping... She has a stove with a water circuit.
The third problem arises when the register is installed not in the firebox, but, for example, in the hood. When lighting such a stove, when the coolant has cooled down, a large volume of condensate occurs. According to our calculations, during the first heating of such a furnace, up to 2 liters of condensate leaks into the furnace! If you do not make special devices for collecting condensate, this stove will always get wet...
And this is fraught with constant problems with lighting the stove, huge amounts of soot on the register and rapid clogging of the stove.
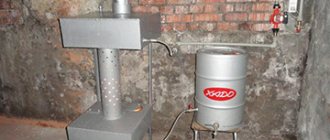
How to make “Bubafonya” from a balloon
Most often, top combustion furnaces are made from old propane vessels with a wall thickness of 3 mm. But there is a problem: the propane-butane mixture is heavier than air and does not want to leave the tank on its own. That is, the cylinder probably contains a small residue of flammable gas, which can flare up when cutting metal with a grinder.
To avoid a flash or explosion, the cylinder cap is cut off according to the following scheme:
- Lay the metal vessel on the ground, open the valve, then turn it out with a gas wrench.
- Using a hose, fill the tank with water to displace the propane. Then hammer a wooden chop into the hole.
- Carefully cut off the cover along the weld seam with a grinder. When water flows from the slot, rotate the tank and continue working.
Advice. On old cylinders you come across stuck valves that do not want to be unscrewed. In such situations, the brass tap is sawed off with a hand hacksaw (not a machine with a wheel!), then hammered with a heavy hammer.
First, mark and cut out an opening for the ash pan door at the bottom of the vessel, and a chimney hole at the top. The further procedure for making the Bubafonya stove with your own hands looks like this:
- Make grates from fittings or corners exactly to the internal size of the firebox. Install the grill inside the cylinder.
- By measuring the height from the grate to the cover, determine the piston stroke. Cut the air pipe to this size plus an extra 30 cm.
- Make a piston. Make a disk with a hole, weld the air duct and distributors from a steel strip 40 x 4 mm or an angle 45 x 45 mm. Install a damper at the end of the pipe.
- In the center of the removed cover, make a Ø60 mm hole for the air duct, which should fit in with a minimum gap. For convenience, handles can be welded to the lid, and for tightness, a steel strip around the body can be welded.
- Make the ash pan door and its frame. Install the locking handle.
- Attach the chimney pipe. You can weld a straight piece of pipe or a 90° bend to the top.
- Insert the weight into the firebox and close the lid. “Bubafonya” is ready.
The connection diagram for the stove to the chimney is standard - we connect the horizontal section and take it outside. Laying a pipeline directly through the roof, as is usually done in a bathhouse, is extremely undesirable. When burning slowly, condensation may form in the Bubafoni chimney, and it is inconvenient to clean the vertical pipe.
When do you need stove heating with a water circuit in a wooden house?
I spent a lot of time talking with furnace customers who were convinced of the need for furnace heating with a water circuit. In general, I can describe the main reasons why we have to put up with all the problems of furnaces with a water circuit. Here they are:
- The house is poorly insulated.
If the house, even if it is small, is poorly insulated. Moreover, we are talking about walls, and about the foundation, and about floors, and about ceilings... and about everything taken together... Then, without water heating, drafts probably cannot be avoided... Although it may not be avoidable with water heating. But still, with a water circuit in such a “leaky” house it will be warmer near the walls... But you will have to heat it “mercilessly” and often.
- Poor layout.
If the house has a useless space-planning solution and the heat from the stove cannot or will not be able to heat it. Neither convective heat nor infrared radiation. This can happen with excessively high ceilings, remote bedrooms, long corridors, and so on...
- Large area of the house.
It also happens that the layout seems uniform, but the rooms are large. It also happens that a large total area of premises is combined with the first two “flaws” of houses... Then you cannot heat the house with one stove and you have to think about dividing the radiators... If you don’t make two stoves. But we won’t talk about that here, although the option deserves close attention.
- Full autonomy is required.
In homes that do not have access to electricity. And those who are susceptible to the above problems will also have to do the wiring of batteries in order to autonomously heat their houses - without the help of electricity and gas...
At the same time, even if you have a large house that is poorly insulated, you can do without a water circuit, if desired. If the house is connected to the electrical grid, there is an option to think about fairly economical heating, but without a water circuit. The fact is that it will be difficult to do without electricity during the installation and operation of the water circuit, more on this later...
By the way, I have an interesting article about fireplaces with a water circuit, you can read it here (clickable, will open in a separate tab). There I also show our fireplace inserts, into which you can build a heating register.
Fireplace design
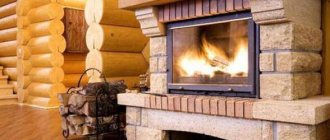
Compared to the fireplaces with which we associate, a fireplace with a water circuit has some differences, since it must be able to heat water. This happens with the help of a heat exchanger; a metal tank in which water circulates is heated by a flame. To increase the active area, the heat exchanger is made in the form of a labyrinth or coil.
The heated water does not immediately enter the heating system; it accumulates in the container. This battery allows you to select hot water as needed. It is possible to connect a water supply to supply the house with hot water.
Piping built into the fireplace
An accumulator in a fireplace will lead to an unjustified increase in the size of the latter, so the tank is installed separately, immediately after the line leaves the heat exchanger. The heat exchanger itself is less and less likely to feel the direct action of the flame. To prevent active destruction of the metal, the coil is immersed in the fireplace cavity filled with water. Such a fireplace with a water jacket is increasingly used when organizing heating of small country houses.
Good to know: Adhesive for stoves and fireplaces: heat-resistant, heat-resistant, fireproof
How to avoid problems with stove heating with a water circuit in a wooden house?
Let's start by separating the “flies” from the “cutlets”. The fact is that a stove and a boiler are two different things. A stove with a water circuit should rather be a boiler. And when they simply build a register into the stove, what happens is that the stove is destroyed, the pipes are not heated, a vicious circle of firing the stove 2-3 times a day.
Bake.
The stove is designed to absorb heat from burning wood into bricks. And it takes a long, long time to give it away. Therefore, the heat capacity of a furnace is one of its main indicators.
A good stove with one heating per day, located in a house that is suitable for it, and it is suitable for it (in terms of volume, area of the premises and other thermal indicators) - will heat such a house.
Boiler.
Boilers are made to trap as much heat as possible inside. For what? In order to transfer it as much as possible to the coolant of the water heating system.
This is why, technically, a furnace and a boiler are diametrically opposed things. In a house with a boiler, the coolant is water (antifreeze) and, one might say, the pipes themselves, although this is usually neglected.
And in a house with a stove, the heat carrier is the stove itself.
By building a water circuit into the oven, we mix “flies and cutlets”. How to get out of this situation?
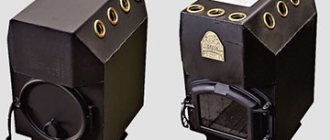
- Make a cauldron or stove-boiler.
In short, a boiler stove is a double-circuit stove with a water circuit. It retains more heat inside, keeps it longer after heating - thereby preserving it for the coolant. The coolant in such a furnace takes longer to cool.
- Increase the heat capacity of the coolant.
To do this, you need to make a heat accumulator - an insulated tank with a large amount of water. When the water heats up, even if the volume is large, it will take a long time to cool down. And not just to cool down, but to release heat into the house. The volume of the heat accumulator must be calculated individually, but, as they say, the more, the better.
- Install a pump and temperature sensor.
In order to increase the efficiency of the furnace and reliability, it is necessary to install an electric pump for the coolant. This will solve many problems. Firstly, efficiency - the water in the register will not overheat, because the greatest heating effect is achieved at a medium temperature of 60 to 80 degrees. With such heating, you need to “pull it out” as quickly as possible into the radiators at home. This way the oven will not overheat - we will increase its reliability. And the efficiency of heating with wood will increase very significantly.
With a pump, even during heating, the coolant will “circulate” the entire system faster and its temperature will stay longer at high degrees - more heat will come into the house.
- Integrate an electric boiler with a temperature sensor into the system.
This solution will not only make heating your home convenient. There will be no need to get up at night in the cold and add firewood when the coolant cools down. And believe me, this is quite possible. The electric boiler will automatically turn on when the coolant temperature drops. This will again save the stove from soot and eliminate problems with heating.
The electric boiler will turn on when the coolant temperature drops and turn off when it reaches critical temperatures. And the pump will turn on at high temperatures to quickly deliver heat to the house.
With all the convenience, this will not prevent you from saving, because at any time you can light the stove and the boiler will turn off very quickly...
PVC installation
If in a country cottage it is planned to install water heating from a brick stove (wood-burning), the heat exchanger is designed individually, for a specific stove. Such a device is practically beyond repair, so for installation a specialist stove specialist is hired who can professionally perform all the work:
- Make a heat exchanger and double check its quality - before and after installation.
- Install the heat exchanger at the required stage (after completing the foundation), then continue laying, observing certain rules. When installing the heat exchanger, compensation gaps are left, leaving 1-1.5 cm to the walls of the combustion chamber. Gaps that take into account thermal expansion are also needed when installing pipes.
- When installing a heat exchanger with pipes and for insulation, use only heat-resistant seals.
Steel pipes for the manufacture of a heat exchangerSource 36doors.ru
Masonry technology
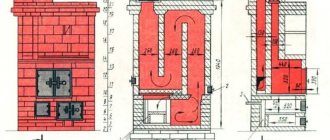
Before you start laying the stove with your own hands, you need to choose a diagram and draw an order plan with your own hands; it is better to use ready-made, proven diagrams. An example of such a stove is the Kuznetsov stove with a heating register built into the smoke duct on one side of the stove.
Kuznetsov stove, video
To lay such a stove with your own hands in a private house, you will need the following materials:
- concrete for the foundation;
- red solid brick;
- refractory fireclay brick;
- masonry mortar or its components: clay, clean dry sand, clean water;
- metal pipes for making a heat exchanger.
You also need to buy ready-made elements: grate, doors, dampers, dampers, roof penetrations. The price for these elements is usually quite high, so you need to calculate in advance what exactly is needed.
Required tool:
- trowels and trowels;
- rubber hammer;
- grinder with a circle for bricks;
- levels, plumb lines, twine;
- roulette.
Do-it-yourself sequence of operations
- Mark the position of the future furnace and pour a rod-reinforced foundation 5 cm below the finished floor level. It should not come into contact with the foundation of a private house.
- After the foundation has completely dried, two rows of masonry made of red solid bricks are laid out according to the order scheme and drawing on ordinary cement masonry mortar; their purpose is to level out possible unevenness in the foundation and lay the foundation of the furnace.
- The next rows are laid on clay masonry mortar according to the chosen pattern, observing the dressing indicated on it. The solution is made from pre-soaked red clay, quarry sand and clean cold water. The optimal ratio of clay and sand is determined experimentally.
Properly prepared masonry mortar should not be too plastic or crumbly. You can check it this way: roll a ball the size of a tennis ball out of the solution and drop it from a height of 1 m onto a flat surface. It should be slightly deformed, covered with small cracks, but not crumble.
- The thickness of the joints between the rows of bricks is no more than 5 mm. The smaller the seams, the more uniform the structure of the stove and the better the heat transfer. The jointing is carried out immediately as the laying proceeds.
- The doors are installed like this: an asbestos sheet in the form of a strip is placed on the previous row of bricks at the location where the door is installed, and the door is placed on it. Annealed wire, each at least 40 cm long, is pre-inserted into the holes in the corners of the frame. This wire is fixed between the rows of masonry. If this is not done, sooner or later the solution will crumble and the door will fall out. They lay several rows, all the time checking the position of the door according to the level. An asbestos strip is also laid over the door and brick is laid on top.
- The firebox is lined with fireclay bricks. Red ceramic is not suitable for these purposes - it will crack over time, and the vault may collapse. In diagrams, fireclay bricks are usually indicated in yellow.
- Under the hob, grooves are made in the brick to the thickness of the slab. This is done to reduce heat loss and prevent smoke. The plate is placed on the solution.
- A homemade heat exchanger is installed in the smoke channel during the masonry process at the stage of laying the row through which the lower fitting exits. It is installed in the combustion chamber when laying the bottom row of the firebox. There must be a gap of at least 5-7 mm between the heat exchanger and the brick.
- It is imperative to provide cleaning doors in the smoke channel with the heat exchanger, since soot will settle on the register, which will worsen its heating. The number of doors must provide access for cleaning to any part of the heat exchanger.
- The upper part of the smoke channel is equipped with a damper or damper. The chimney itself can be either brick, or you can buy and install a sandwich chimney. In this case, you need to follow the rules for passing pipes through the roof, and make fluff on brick pipes.
The distance from heated metal elements to combustible structures must be at least 25 cm! Passages through the ceilings are insulated with basalt fiber or other non-combustible materials!
- After the oven has dried, it is carefully heated, without overheating, several times. Check the draft, stability of firewood combustion, and absence of smoke leaks. After this, you can install an external heating circuit and fill the system with water. The oven is ready for use.
