In the courtyards of private houses, as a rule, there are cellars. Where else can you store supplies of vegetables, fruits and all kinds of canned goodies? In such a household facility, ventilation of the cellar must be provided in winter. Proper air exchange will prevent dampness and mold in the room. After all, uncontrolled constant air circulation also spoils vegetables, they become limp and dry. To maximize the natural flow of fresh air, you need to install supply and exhaust ventilation. Only then can the desired temperature and humidity be created.
Features of air exchange in the cellar in winter
From the outside, the air duct is protected by a mesh.
In cellars, the ventilation system consists of pipes, their number depends on the size of the cellar. In small areas, 1 pipe with two valves is sufficient. With their help, you can regulate the removal of air and its supply.
Cellar ventilation for the winter requires some maintenance - before seasonal changes, it is recommended to insulate the box with mineral wool and cover it with waterproofing material. This will ensure normal uninterrupted operation of the ventilation system.
On frosty days, cold air circulates faster, so the room temperature can drop sharply. Because of this, it is recommended to adjust the valves on the supply and exhaust pipes. In severe frosts, the valves are closed. Depending on temperature changes, the owner decides whether to close the cellar ventilation partially or completely in winter, taking into account the characteristics of a particular object.
Sometimes, even with good ventilation insulation, in winter frost may form on the exhaust pipe or condensation may freeze. Naturally, this will interfere with normal air circulation. You can make this part of the pipe removable to make cleaning easier. As an option, an elbow can be installed at the end of the pipe.
Do I need to close the vents?
FORUMHUSE member with the nickname Bazil also does not close the vents in an unheated house with an insulated floor for the winter.
Basil
With closed vents and an insulated floor, the result is “reverse insulation” - the underground will be warmer than in the house. The films were laid on the assumption that there would be heat in the house, so steam from the underground would penetrate into the insulation and condense there.
Bazil thought like this: according to all the rules, it should be like this: warm room - vapor barrier - insulation - cold room. And in winter, in an unheated house with closed vents, the underground becomes a warm room. No matter how you look at it, this is wrong.
This kind of “reverse insulation” was achieved by our participant with the nickname Sektor from Moscow. He insulated the basement, made a warm blind area, and closed the vents. In winter the house was not heated. In May, when the weather warmed up, Sektor opened the hatch in the floor and was unpleasantly surprised by the sight that opened: the film was literally strewn with drops of condensation!
Our participant from Novosibirsk with the nickname serj58 does not close his food for the winter either. He believes that in winter it is necessary to ensure that the soil under the floor of an unheated house freezes as soon as possible. The soil under the floor cools down for too long, the floor does not fit tightly enough to the walls, so the entire lower part of the walls in the house is covered with frost.
serj58
If you close the vents, then this gimmick will simply stretch out over time - but the ground will still freeze, and it’s not a fact that to a much shallower depth. And it will thaw later.
Therefore, our participant believes, with open ventilation the soil will freeze faster, thaw faster and will not bring any unpleasant surprises.
If you close for the winter in an unheated house, then in the spring you may need either forced ventilation or heating of the underground.
Do-it-yourself supply and exhaust ventilation installation
PVC pipes are ideal for ventilation - they are not afraid of corrosion and temperature changes.
It is not so difficult to make supply and exhaust ventilation yourself. Consider a cellar measuring 6x8 m and 2 m high. In this case, pipes with a diameter of 180 mm will be needed. This size is ideal for a pre-designed hole (180x180 mm) in the ceiling of the cellar. It is important that the box intended for ventilation easily fits into the hole in the ceiling along the vertical axis. Then we insert it into the ventilation riser, which is located against the wall in a strictly vertical position.
Important! The ventilation duct with a wind catcher must be raised 1 meter above the cellar roof.
The pipe itself, with a smooth inner surface, can be installed in any shape, the main thing is that it is of high quality and does not quickly corrode. Galvanized or asbestos material is often used.
Ventilation draft should be checked periodically
It’s quite easy to check whether the ventilation is working or not; you just need to light a match. If it goes out, it means there is no air exchange and the amount of carbon dioxide is increased. In such a situation, it is necessary to install pipes of larger diameter. To do this, it is enough to use a simple formula: 1 m2 of cellar area should be provided with 26 cm2 of air area.
When can you create a foundation without vents?
It is not always necessary to create vents in the foundation. They are not needed if:
- The floor is located in a closed underground space. An example is a building whose underground space is covered with sand. A concrete slab is laid on top of the sand. After completing such work, you don’t have to worry about the appearance of condensation. It is worth noting that such floors are more reliable, since they do not deform under load.
- The soil is covered with a layer of vapor barrier film that protects against moisture penetration into the subfloor.
- The underground floor is equipped with a ventilation system with a capacity of at least 1 liter/second per 10 meters. It is worth considering that the foundation and base must be insulated. In this case, there is no need to create vents.
- The underground space has a constant connection with the heated room. This is possible when the basement is used to store various household items.
Ventilation in the foundation.
In other cases, it is necessary to create vents in the base.
Natural ventilation of the cellar in the garage
If the cellar is located in the basement, then two types of ventilation can be used:
- forced;
- natural.
The latter is good because it does not require large financial costs. It is preferred when the cellar is more than 20 m3 in volume. Natural ventilation consists of a supply pipe and an exhaust pipe. With the help of the first channel, fresh air comes from the street, with the help of the second, the basement air is discharged outside. To prevent cold spots and air stagnation in the room, it is necessary to install pipes in opposite corners.
Ventilation duct in the cellar wall
In the cellar the hood is made as high as possible. It can be mounted in 2 ways:
- through, through the ceiling of the garage floor with access to the roof;
- make a hole in the cellar wall.
In the first option, the length of the exhaust pipe should be 50 cm higher than the ridge part of the roof. Finally, a canopy or deflector should be installed in the ventilation duct. It will protect ventilation from precipitation and dust and create additional vacuum.
The pipes themselves can be chosen from any material, most often they are plastic sewer pipes with a diameter of 10-20 cm. You can use asbestos. The diameter of the ventilation ducts is calculated using the following formula: for every 1 m2 of room, there should be 1.5 cm of pipe diameter.
Important! The supply channel is installed 50 cm above the cellar floor. It is advisable to cover its entrance with a fine mesh, which will prevent the penetration of harmful insects and rodents.
The channels are equipped with dampers so that during frosts the pipes can be easily closed. It is important to install them correctly; dampers come in round and rectangular shapes. Any type of ventilation is equipped with them, regardless of residential or commercial premises.
Rules for installing ventilation ducts
There are certain recommendations for installing ventilation pipes in the cellar:
- Ventilation pipes should be on opposite sides of the cellar. Ventilation will not work properly if the pipes are placed next to each other. It will turn out that the air that has just arrived after some time, without “walking” around the cellar, will leave through the exhaust pipe.
- The supply and exhaust pipes should have approximately equal radius. Ventilation will simply be impossible if the exhaust pipe has a smaller radius (in winter, the temperature in the cellar will begin to drop below zero, and in summer, on the contrary, it will rise to critical values for the storage facility).
- If possible, the pipes should not have any bends at all. With many bends, ventilation will be difficult. And this will negatively affect the indoor microclimate in winter.
- The supply channel should be located at a distance of 20-30 cm from the floor. This is necessary to ensure that fresh air enters the lower part of the room. It is recommended to close the upper end of the pipe with a metal mesh and a cap, which will prevent rodents and insects from entering the room in the summer, and snow in the winter.
- The lower end of the exhaust duct must be located directly under the ceiling of the cellar. Again, the laws of physics play a role here, because warm air will accumulate in large quantities just under the ceiling. The top of the pipe must be above the roof of the building, and the outlet must be protected with a cap that will prevent rain and snow from entering the pipe.
- To be able to control the exchange of air in the cellar, it is recommended to equip the pipes with dampers. It is worth noting that dampers play a big role in winter, when their use will help to maintain the conditions necessary for storing crops.
It should also be taken into account that only warm air will escape through the exhaust duct. This is why quite a lot of condensate droplets will appear in the pipe during the winter months. These drops, under the influence of negative temperatures, will soon begin to freeze, as a result of which the exhaust pipe will be completely clogged.
Insulation for pipes is polystyrene foam.
To avoid such problems, the exhaust duct must be well protected from exposure to negative temperatures. In other words, it is recommended to insulate the entire pipe using modern thermal insulation materials. It is important that the heat insulator is resistant to constant exposure to moisture; in addition, the entire structure must be systematically cleaned of frost and snow. It is ideal if the outlet part of the exhaust duct is removable.
If you have installed natural ventilation, then no problems will arise when operating the cellar in winter: air exchange (unless, of course, the channels are clogged) will be carried out in full, and no maintenance (except for cleaning the pipe) will be required. But difficulties will await you in the warm months, when the temperature outside rises higher than in the cellar. The only salvation in this case seems to be a forced ventilation device.
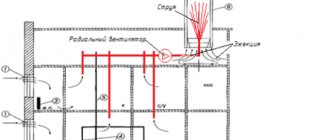
Installation diagram
Supply and exhaust ventilation diagram
- A visor is installed at the end of the exhaust duct.
- To ensure proper ventilation, it is necessary to place the upper end of the exhaust duct higher above ground level.
- The radius of the air ducts must be the same.
- When calculating the diameter of the pipe, you need to use the formula: for every 1 m3 of the cellar located below ground level, there should be 20 cm2 of the diameter of the ventilation pipe.
This approach is used for both natural and forced ventilation. To properly install ventilation, you must first make a calculation, namely, establish the cellar area and air flow rates. This ensures proper air exchange and will allow in the future to completely renew the air in the cellar every 30 minutes. This level of circulation can be ensured by laying 25 cm of channel for every 1 m2 of space.
Important! After installing any type of ventilation, there should be no extra holes in the pipes through which air will penetrate into the room. The gaps significantly reduce ventilation, so damp air can enter the garage. Therefore, condensation can settle on car parts, which is very undesirable.
In principle, installing ventilation in the cellar is a job that can be done independently by the homeowner with great desire and ordinary non-professional tools. Start with design - basic drawings, calculations of materials, determination of the operating features of the ventilation system under different temperature conditions.
Be careful of gases!
It is known that gases accumulate in closed cavities near the surface of the earth, from which people suffer. If you climb into a deep, unventilated cellar or well without protective equipment, you can suffocate. This will not happen in residential premises, but harmful gases, for example, radon, methane and others, can leak into the rooms through micropores.
Another unpleasant feature of radon is radioactivity. Although the concentration of radionuclides is low, they accumulate and can cause dangerous diseases.
How to install air ducts correctly
In the case of a large room, you will need to install two air ducts. Regardless of whether you are going to arrange ventilation for the basement of a private house, or a separate cellar, you must adhere to the following recommendations:
- Air exchange will be uniform if the pipes have the same cross-section. If you want the air to be exhausted faster, choose an exhaust pipe with a slightly larger diameter (the total cross-section should not change).
- The pipes are installed at the maximum distance from each other, that is, on opposite walls. The greater the distance, the better the room is ventilated. It is important for the process that the pipes have no bends or turns.
- The exhaust pipe is installed so that its lower edge is located under the ceiling (not lower than 1.5 m from the floor). Then all the warm air will be forced out without stagnation.
Pipe insulation with mineral wool Source ytimg.com
Selection of materials
If the cellar or basement has a small area, then installing one two-channel pipe would be optimal. For a free-standing cellar, you can use boards carefully matched to each other.
For manufacturing, lumber with a thickness of 3-4 cm and a width sufficient to build a box with a side of 18 cm is selected. A diagonal partition is installed inside, and a control valve is made for each channel. It is important to understand that the gaps between the boards significantly reduce the efficiency of air exchange. Therefore, it is necessary to take care of the tightness: coat the joining lines of the boards with molten bitumen.
Plastic ventilation pipe Source ytimg.com
To organize ventilation in the basement or cellar (including two-pipe), round or square pipes made of the following materials are used:
- Asbestos-cement . Asbestos-cement pipes are convenient because they are long enough, and you don’t have to think about how to connect them correctly. The material has additional advantages: relatively light weight and affordable cost. The products are resistant to corrosion, are not afraid of frost and humidity fluctuations, and have a long service life.
- Plastic . They are made from different types of polymers and are suitable for installing hoods due to their low cost and light weight. Polymer pipes are chemically inert, do not rust, do not require cleaning, and are durable in use.
- Galvanized (metal) . Cast iron and steel pipes are galvanized, and it is preferable to use the second option, as it is lighter. Galvanization enhances corrosion resistance; The products themselves are relatively cheap and easy to install. During installation, it is important not to damage the galvanized layer, this will reduce the service life of the product.
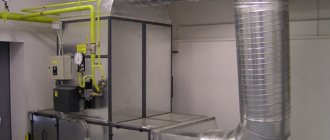
Metal pipes for ventilation Source gidroguru.com
