Expanded polystyrene insulation "Penoplex" is more expensive than many analogues, but the unique performance properties of this material have made it quite popular when carrying out internal work on insulating floors between floors, attics, walls and partitions. The versatility of this material allows it to be used in a screed when installing a heated floor system. To properly manufacture an insulated screed, you need to find out the sequence of actions to be performed. The big advantage of this method of floor insulation is that it is relevant not only for private houses, but also for ordinary city apartments. Today’s material is about how to properly use penoplex under floor screed.
Penoplex under floor screed
Features of the material
The advantage of this insulation is its light weight, therefore, combined with the weight of the screed, it does not exert a significant load on the ceiling and does not weigh down the structure. Heat loss through the floors in a private house, as experts have proven, is at least 10%. This leads to daily overpayments for electricity and heating. It would be more logical to make a one-time investment in the design of a heated floor, the payback of which will occur by reducing the monthly payment for energy.
Insulation structure
There are two types of floor bases - concrete in the form of reinforced concrete slabs and primed. Their insulation with Penoplex occurs in different ways. This must be taken into account in order to obtain an effective underfloor heating design.
Preparing the floor for screeding
Experts agreed that laying penoplex in a screed on a concrete base is one of the simplest, proven and reliable methods of floor insulation. The technology is accessible even to those who have minimal experience in construction and repair work.
Pouring screed using the “warm floor” system
Penoplex is not so simple - it is a universal material that combines several important properties:
- The material has high strength when working under bending and contact pressure - you can walk on the surface of the penoplex in shoes without causing significant consequences to the material.
- Working with penplex does not cause discomfort, as, for example, with mineral wool, when it is necessary to use respiratory protection, mucous membranes and skin. The unique properties of extruded polystyrene foam, which is used to make Penoplex, are that the material does not generate dust, gas and volatile substances.
- Another property that makes this type of insulation so attractive is its ability not to absorb moisture, which allows it to be used in a screed on a floor slab above an unheated subfloor. The insulating properties of this material are guaranteed by the manufacturer for 30 years of operation.
Penoplex is stored in sealed tight bags
Briefly about the main thing
Penoplex is characterized by two properties. The first is its low thermal conductivity, due to which it has good thermal insulation. Secondly, the slabs are not susceptible to mold and mildew; they create a good soundproofing layer, while rejecting moisture.
Another advantage is that penoplex is universal in use - it can be used regardless of the base flooring.
But here it is important to understand what thickness of penoplex to use for the floor under the screed. Further load on the surface (purpose of the room) has a huge impact.
If this is, for example, a warehouse or a garage where a car will be stored, it is better to choose denser slabs.
The type of finishing does not matter. It all depends on the preferences of the owner of the premises. You can choose laminate, tile, plywood or parquet.
Another mandatory point is waterproofing. If this layer is skipped or installed incorrectly, spilled water may accumulate under the finish coat. Penoplex does not absorb moisture, and it will be quite difficult to dry it.
Source
Material characteristics
It’s worth starting with the fact that, depending on the scope of application, a material of one density or another is chosen. Insulation of the floor structure is carried out using penoplex grade 35 or 45. There is also material of grade 31, 31C and 45C.
Characteristics of penoplex grades 35 and 45
Penoplex insulation grade 35 is a universal insulation material and can be used not only for floors, but also for walls with a foundation.
Table 1. Excellent performance qualities of grade 35
| Indicator name | Units | Meaning | Explanation |
| Density | Kg/m3 | From 28 to 38 | The material can withstand significant loads. |
| Coefficient of thermal conductivity | W/m×°С | 0.03 | This is a fairly low figure that guarantees the energy efficiency of the floor structure. |
| Hygroscopicity | % | 0.4 | When testing was carried out during the day, the material absorbed moisture in the specified volume only in the first 10 hours. |
| Flammability | Category | G1 | When combined with a concrete screed, which is not subject to combustion, such insulation, which already belongs to a high category of fire resistance, is completely fireproof. |
| Noise absorption | db | 41 | Relevant for apartments and multi-storey buildings |
| Tensile strength | MPa | 0.4 – 0.7 | The material allows you to create a reliable, solid base. |
| Temperature range of application | °C | -50 to +75 | It will be an ideal material for insulating screeds on cold concrete floors. |
Penoplex insulation grade 45 has a higher density, therefore it is more often used for insulating screeds on a soil base. This heavy-duty material is even used in road construction.
Application of penoplex in road construction
Table 2. Excellent performance qualities of grade 45
| Indicator name | Units | Meaning |
| Density | Kg/m3 | From 40.1 to 47 |
| Coefficient of thermal conductivity | W/m×°С | 0.03 |
| Hygroscopicity (tested during 24 hours) | % | 0.2 |
| Flammability | Category | G4 (together with a heat-resistant coating does not play a role) |
| Noise absorption | db | 41 |
| Tensile strength | MPa | 0.4 – 0.7 |
| Temperature range of application | °C | -50 to +75 |
Standard marking on the packaging of Penoplex insulation
On the packaging of penoplex you can see the following types of markings:
Characteristics of the main types of insulation
To summarize, we can distinguish several types of penoplex that are used to insulate floor screeds:
- "Penoplex" grades 35 and 45, suitable for roofs, floors above warm and cold basements, in garages and storerooms.
- “Penoplex Foundation”, which has high moisture resistance, heat and sound insulation properties and can be used not only for insulating foundations, but also for ground screeds.
- "Penoplex Comfort" is a common type of insulation for interior work and is not afraid of high humidity. Placed on a rigid base (concrete floor slabs).
Advantages and disadvantages
Floor insulation is an important step in arranging a living space. As previously noted, the floor is also the surface through which heat escapes from the room. Therefore, the more attention you pay to insulating the floor structure, the greater the chances of minimizing heat loss, increasing living comfort, making the floor surface warmer and more pleasant, and also ensuring the longevity of the floor structure.
Material advantages
When additional floor insulation is required, the insulation is combined with a screed. The advantages of penoplex include the following:
- Moisture resistance - the structure of penoplex is not inclined to absorb moisture, which causes the formation of mold and mildew, which eventually destroy the material. This is especially true when installing a floor in a private house above an unheated subfloor.
- Heat loss when using this material is reduced by 20%, which allows us to talk about the energy efficiency of the material.
- High compressive strength eliminates the possibility of deformation of the insulation and screed.
- The material is environmentally friendly and harmless.
- It is light in weight.
- Special processing of the ends of the slabs ensures a tight fit of the mats.
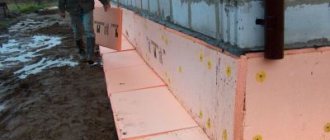
Screed in an apartment on a concrete base
Note! Penoplex has a significant drawback - instability to ultraviolet radiation and solvents. But when installing a screed, he is not threatened with such influences. However, it is important to remember that treating the concrete screed with a primer must be avoided.
Insulation of a concrete base in a typical city apartment
Compare with foam plastic
The question is quite reasonable: why buy expensive polystyrene foam, if you can buy cheap polystyrene foam - it is produced in the form of mats of the same thickness and size. But it's not that simple. These two insulation materials have significant differences, and polystyrene foam is inferior to expanded polystyrene in many respects:
- In terms of strength with the same thickness and density, it has been experimentally proven that penoplex is 4 times stronger than polystyrene foam, which is why it is used even in road construction.
- Due to its low density and special structure, foam is susceptible to crumbling.
- The degree of water absorption of polystyrene foam is 10 times higher than that of expanded polystyrene. It follows that penoplex can be used without vapor barrier.
- The density of penoplex is much higher than that of polystyrene foam.
- The thermal conductivity of penoplex is not much, but it is superior to polystyrene foam.
- The flammability of penoplex is lower.
Polystyrene foam is laid on a sand bedding
A special method for producing extruded polystyrene foam makes it possible to obtain a material with closed pores, so this material is definitely better than polystyrene foam.
Polystyrene foam in the body of the screed when pouring stairs
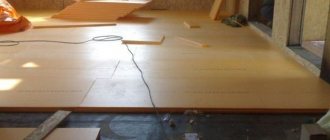
Installation of screed with penoplex on a concrete base
The production of the screed takes place in two stages. At the preparatory stage, the base is prepared for pouring, and at the main stage, the screed is poured.
Preparing the base
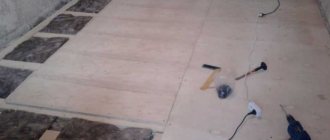
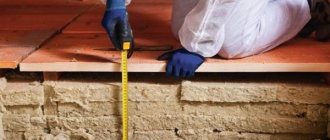
The base for penoplex can be in the form of a reinforced concrete slab or a wooden covering. The main thing is that the height difference is no more than 10 mm. If the difference is large, then a cement-sand mixture is used for leveling. On a wooden base, gypsum fiber board sheets or plywood or DSP are used.
Plates for forming a level base
Table 3. Preparatory stage
| Illustration | Description |
| The concrete base is inspected visually, identifying defects. | |
| Recesses and holes are sealed with polyurethane foam. | |
| When the mounting foam dries, it is cut flush with the plane of the base. | |
| Any protruding elements are also removed. | |
| If weak fragments of the base are detected, they are removed. | |
| The base is freed from fragments of large debris and dust. | |
| The base is treated with a deep penetration primer. | |
| Self-leveling mixtures are used to level the base. | |
| Along the perimeter of the room, the wall is coated with a primer for more reliable fixation of the damper tape. | |
| The damper tape is cut into strips of foamed polystyrene with a width equal to the height of the screed with insulation. | |
| The damper tape is stretched along the wall and glue is applied in several places. | |
| The tape is glued to the wall around the perimeter of the room. |
Stage of laying penoplex
Various experts have different opinions about the method of laying penoplex on a concrete base. Some argue that it is not necessary to firmly fix it to the base, since the slabs are laid tightly due to the L-shaped edge at the ends, and then pressed down with the weight of the concrete screed. Others advise fixing the slabs with a special glue for insulation that has a mineral or foam base. In addition to rigidly fixing the insulation to the base from above, the slabs are additionally fastened together using mushroom-shaped dowels.
Floor pie with insulation
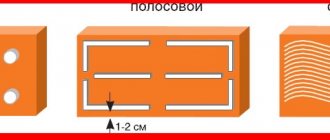
L-shaped edge bridges cold bridges
Important! Penoplex is laid with offset seams - in a run-up. The second row begins with an element equal to half the slab.
Extruded polystyrene foam is easy to cut using a special saw.
The role of a damper tape can be played by a perforated membrane placed on the wall, but it should be noted that experts recommend leaving a gap of at least 5 mm around the perimeter of the room.
A perforated membrane placed on the wall acts as a damper tape
There is a split opinion about the need to seal seams to eliminate cold bridges. Some argue that the L-shaped edge, simply by the fact of its existence, excludes their formation. Others recommend treating the joints with polyurethane foam a day after gluing the mats.
Sealing joints with polyurethane foam
Instead of polyurethane foam, you can use ordinary moisture-resistant tape to seal joints, which will prevent the screed material from penetrating into the joint.
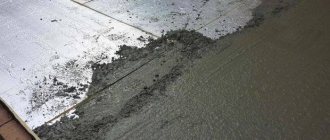
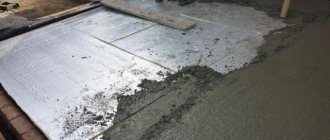
Screed pouring stage
To make the screed strong, it is reinforced with a mesh with a cell size of 10 x 10 cm. In this case, the rods must be connected to each other.
Reinforced mesh with cells 10x10 cm
The mesh should be located at a distance of 2 cm above the surface of the insulation, so it is placed on special plastic cups.
Spacers for mesh
The screed is poured along beacons in the form of a metal profile fixed on a gypsum mortar. After the screed has been poured and set a little so that you can walk on it, the profile and plaster are removed from its body, and the resulting voids are sealed with mortar.
Don't know how beacons are installed? Read about this in the article “Beacons for leveling the floor” . We tell you how to determine the floor level, prepare it for installing beacons, what types of beacon mounting exist and what is their difference, and how to install it.
Installation of beacons on gypsum mortar
When laying beacons, the step between them is taken depending on the length of the rule. Experts recommend working with a rule of 2 meters in length. Thus, the distance between the beacons should be 1.8 - 1.9 meters. The farther the beacons are located from each other and the fewer there are, the stronger the screed.
Optimal distance between beacons
The process of pouring the screed takes place in the traditional way. The solution can be prepared independently from the necessary components - cement, sand and gravel in small quantities, or you can purchase a ready-made dry mixture ( sand concrete ), which just needs to be diluted with the required amount of water. The solution is thrown between the beacons and, using the rule, pulled towards itself. After this, the surface is smoothed using a plaster trowel.
Calculating the required amount of material is one of the most important stages in preparation for pouring the screed. In a special article we will tell you how to calculate the amount of ingredients.
Working with the 2 meter rule
The screed matures within 28 days at the rate of 1 week for drying 1 cm of screed.
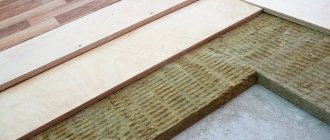
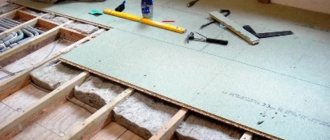
Use for wood floor
Penoplex here is laid directly on a wooden base: fiberboard, plywood or boards. First, remove the baseboards and remove the finishing coating. Some of the boards are lifted and the joists are checked, and those that are rotten or eaten by bugs are replaced.
It is important that the floor surface is flat and strictly horizontal. Protruding areas of the floor are removed by sanding, and the cracks are covered with putty
The sheets are adjusted to each other so that there are no gaps
Protruding areas of the floor are removed by sanding, and the cracks are covered with putty. The sheets are adjusted to each other so that there are no gaps.
The floor surface is primed. Boards made of highly absorbent material are coated with primer several times. When the surface is dry, install the insulation. The joints between the sheets are sealed as much as possible. The gaps are filled with mounting foam that does not contain toluene, which corrodes the insulation. The insulating layer is covered with a vapor barrier, then plywood or chipboard slabs are attached. The flooring is laid on top.
Penoplex is a popular floor insulation material. It has a high level of insulation and is good protection against moisture and steam. It can be used for self-insulation of balconies and rooms with different floor subfloors.
Penoplex insulated ground screed
The soil base is fundamentally different from concrete and requires a different technology when insulating it with penoplex. Most often, this method of flooring is used for strip foundations in private homes. There are several conditions that allow you to use penoplex for screeding on the ground:
- No serious loads on the floor.
- The location of groundwater is below 5 meters.
- Presence of heating in the room.
Option for installing a floor on the ground
In addition to penoplex with an L-shaped edge to prevent the formation of cold bridges, you will need to purchase other materials for preparing the base and pouring the screed in the form of:
- Clean sand.
- Rubble.
- Waterproofing material (roll and mastic).
- Cement.
- Self-leveling mixture.
- Damper tape.
- Reinforcing mesh.
Insulation schemes
Before you begin installing the floor, you must choose one of three flooring schemes for laying the floor on the ground with polystyrene foam.
Scheme 1
The first scheme involves laying insulation directly on compacted sand located on the surface of a durable crushed stone cushion.
Scheme 2
The second scheme involves the installation of two screeds - rough and finishing, between which insulation with a waterproofing layer is laid on both sides. A “warm floor” system can be installed in the final screed.
Scheme 3
The third option differs from the second in the absence of a rough screed and the laying of penoplex directly on the sand cushion. This scheme differs from the first option only by the presence of waterproofing.
Insulation under “warm floor”
The main task of insulating underfloor heating is to reduce the consumption of thermal energy in undesirable directions. Due to the lack of heat dissipation, energy costs are reduced. Otherwise, not only your floors are heated, but also the ceilings of neighboring apartments or the basement.
List of materials and tools needed to complete the work:
- penoplex;
- polyurethane foam;
- polyethylene film;
- foil;
- reinforced mesh;
- adhesive solution;
- self-tapping screws;
- separation tape;
- cement, sand or self-leveling mixture;
Insulation technology under “warm floor”:
- Preparing the base. The floor is leveled using screeds on beacons.
- Laying insulation. Plates are placed on the screed, the joints of which are filled with polyurethane foam. Slabs up to 5 cm thick can be used as thermal insulation. The insulation can be fixed using an adhesive solution after treating the surface with a primer mixture. If the base surface is flat, it is permissible to lay the material directly on the floor, followed by fixing it with dowels with plastic attachments.
- Installation of a waterproofing layer. The insulation is covered with a polyethylene film on top, which serves as waterproofing. The joints of the film are covered with tape, its edges are placed on the walls, and dividing tape is glued along the markings.
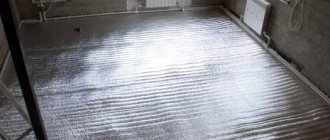
- Laying the substrate. A backing – foil – is placed on the waterproofing layer, which helps reflect heat.
- Placement of the "warm floor" system. If a water system is used, then a reinforced mesh is placed on top of the substrate, which is fixed using dowels and washers. The heating cable can be mounted directly on the foil backing.
- Finish screed. The screed is applied in a uniform layer of 5 cm. The base can be a cement-sand mortar in a ratio of 1:3, respectively, with the addition of a plasticizer or a special mixture for heated floors.
The process of making a screed with penoplex on the ground
In the room where it is planned to install a floor on the ground, it is necessary to select soil to a depth of 60 cm in order to then compact the resulting soil base well. This will ensure its reliability and eliminate the possibility of shrinkage, and therefore deformation of the screed.
Composition of the floor according to the soil - main layers
The next step is to fill in crushed stone, gravel or a mixture of these two materials, forming a layer of 300 mm after careful compaction. To increase the thermal insulation properties of the floor on the ground, a backfill of medium-fraction expanded clay with a thickness of 100 to 150 mm is made on top of crushed stone.
Crushed stone of medium fraction
The next layer is medium-grained sand, from which a tightly compacted cushion is formed. During the compaction process, sand must be shed with water using a special tool (vibratory roller or hand tamper). The result should be a layer with a thickness of 100 to 120 mm. To control the horizontality of the plane, use a building level.
Expanded clay bedding
A damper tape is fixed around the perimeter of the room with a width exceeding the height of the screed by 120 - 150 mm.
Damper tape
Penoplex is laid on a compacted sand cushion, fixing them with the help of end edges. Starting from the second row, the slabs are shifted by a distance equal to half the penoplex mat. The joints are sealed with waterproof tape. Thick polyethylene film can be used as a waterproofing layer on top of penoplex. After this, I lay down the reinforcing mesh, install the beacons and pour the screed.
Laying penoplex on a sandy base
At the stage of laying the mesh, if necessary, a heated floor system is installed. The surface of the penoplex allows the use of special plastic brackets to fix coolant pipes.
Now there are several types of “warm floors” on the construction market. They differ in the type of coolant and operating efficiency. How to choose a heated floor? We'll tell you in our article.
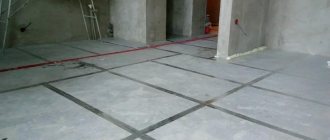
The screed is leveled with a grater
The screed can be done wet or semi-dry. Experts recommend periodically moistening the screed after 2 days until it gains strength. At the final stage, after the screed has fully matured, its surface is leveled using self-leveling mixtures. If the screed is filled with a solution based on sand concrete containing fine sand, then additional leveling of the finished screed will not be required. You can safely lay laminate or parquet boards on such a coating.
Basic properties of self-leveling mixtures
Final leveling of the screed
Prices for penoplex for flooring
penoplex for floor
How to insulate a wooden floor
You can lay a layer of penoplex directly on top of the plank base if it is in good condition.
Sequence of actions for insulating floorboards:
- We remove the baseboards and finishing coating. Subsequent insulation should be carried out only after checking the quality of the lag. To do this, you need to remove a couple of boards and assess their condition. Any damaged areas with mold, black spots, or eaten away by insects must be replaced. If the logs are well preserved, you can nail the boards into place, and then check the horizontal position.
- The wooden base is leveled with a grinding wheel, and cracks and recesses are filled with wood putty.
- Next, the boards are treated with antiseptic primer and allowed to dry thoroughly. Very porous wood is covered with 2 or 3 layers of primer.
- Penoplex can be laid on a dry base. The laying method is similar to the previous one - the slabs are placed on glue, placing them apart. If gaps have formed between the plates, they should be foamed. The foam should not contain toluene, which destroys penoplex.
- A vapor barrier is laid over the insulation. The canvases are overlapped by 10 cm, and the edges should overlap the walls slightly. Subsequently, all excess will be removed.
- Next, lay a layer of plywood or particle board, spacing them halfway across the width of the canvas so that the seams do not converge in one place. During the installation process, it is necessary to control the level relative to the horizon. The laid surface should be absolutely flat.
- At the final stage, the final coating can be laid.
That is, insulating the floor with penoplex over joists is simply not advisable. Therefore, we recommend using cheaper materials for such a base, for example, mineral wool or polystyrene foam.