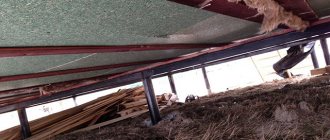
Cold floors in a wooden house are a common occurrence. This is all due to cold air currents rising from the ground cover. They penetrate through cracks and make the floor surface temperature uncomfortable. Will help insulation of the floor in a wooden house from below.
This is what floor insulation looks like during construction
It is necessary to carry out work on insulation from below technologically correctly. This provides a number of undeniable advantages:
- the height of the floor of the room does not change;
- there is no need to select the rigidity of the insulation, which can withstand the weight of furniture and equipment;
- the line of condensate settling outside the structure is reduced, which prevents the process of rotting of the house.
Placing insulation is an effective measure of protection from the cold
Floor insulation options
When starting work, you need to choose the material and method of laying the insulation. The determining factor will be the design features of the building , as well as the wishes and financial reserves of the owner. It is important to take into account the key details of the installation and subsequent operation of the wooden structures from which the house itself is made.
Foundation options:
- foundation on piles;
- strip foundation;
- frame type;
- screw piles.
There are also generally specific points that are important to consider:
- Use of waterproofing. A radically important measure. Prevents the appearance of swollen boards. It is best to use single-sided fiber.
- Two-layer insulation method. The best way to keep your home warm. To prevent the effects of temperature fluctuations and humidity, the wooden parts of the building are pre-treated with special protective equipment.
- Stability of thermal insulation material when adjacent to wood. The selected thermal insulator must be inert with respect to the elements of the floor and foundation.
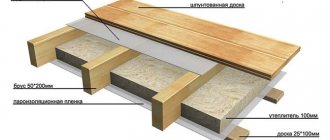
1-joists, 2-cranial block, 3 – subfloor, 4 – lutrasil (glassine), 5 – shavings (sawdust), 6 – lime mixture, 7 – finishing floor
First stage of installation
Insulation of a wooden floor consists of creating a multi-layer cake, the basis of which are logs or beams on which the flooring will rest. To install the structure you will need:
- lumber (bars 50x50 mm or 40x40 mm, edged board);
- waterproofing film;
- vapor barrier membrane;
- reinforced tape;
- woodworking tools;
- stapler with staples;
- screwdriver + self-tapping screws;
- sheet material for flooring (plywood, OSB boards, etc.).
All wooden elements prepared for installation are impregnated with an antiseptic and treated with a fire retardant. Or use a universal fire-bioprotective composition.
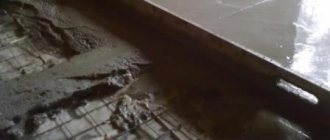
At the bottom of the joists or beams, you need to fill the skull blocks - the basis for laying the rough flooring. For flooring, edged boards are cut, and the elements are simply laid with their ends on the skull blocks - they do not need to be fastened.
How to insulate a wooden floor with penoplex - step-by-step instructions
Penoplex is the latest generation material. This is a foamed polymer produced by extrusion. It has low thermal conductivity due to its durable structure with a large number of cells.
Penoplex is produced in slabs, the thickness of the slab is from two to 10 centimeters . Outwardly, it strongly resembles polystyrene foam. Does not increase the weight of the structure.
Does not absorb moisture . Foamed polystyrene is not affected by fungi and rotting processes.
It should be noted that the thermal conductivity of penoplex is 25 times lower than the thermal conductivity of expanded clay concrete. This factor significantly increases the insulating characteristics.
Penoplex density is 22 t/m
Therefore, the material is mechanically strong and does not require a frame to work with it.
If necessary, this thermal insulation material can be used to install “warm floors” (electric and water type). Penoplex is fire resistant .
The cost of penoplex is slightly higher than the cost of other insulation materials, but it easily pays for itself in the cold season.
Let's figure out how to act correctly when carrying out insulation work.
The most convenient way to place expanded polystyrene foam is to alternate with logs and lay the floor covering on top of them.
Find out how to make a water heated floor in our specialized article.
Prices for thermal insulation materials Penoplex
Thermal insulation materials Penoplex
Video - Error in insulating the floor in the house
Step 1. Prepare the base for laying the material.
We install the logs on the completed foundation elements. It is important to maintain a distance from joist to joist of 1-1.2 meters . Next, we mount thickened plywood (possibly chipboard sheets) and use self-tapping screws.
Blank for a new floor
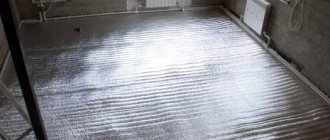
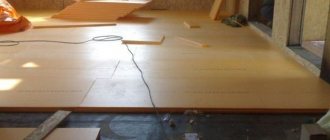
Step 2. Lay the penoplex.
The insulation has already been laid, all that remains is to cover the floor with a finishing board
The height of the insulation layer varies. However, it is worth remembering that it should not be higher than the level of laying the logs. We must not forget about the layer of waterproofing material. They need to cover the subfloor itself and the joists and the insulation layer itself before laying the floor covering. It is also advisable to use wood treatment with solutions of antiseptics and antifungal mixtures.
Step 3. Seal the joints.
We glue the waterproofing joints with metallized tape to maintain tightness. Such measures will prevent the absorption of condensate by wooden beams and the growth of mold and fungi.
Penoplex slabs
Experts recommend sealing the joints of insulation boards using polyurethane foam .
Step 4. Work on the finished floor.
We fix the finishing boards on top of the waterproofing layer.
Find out how to lay laminate flooring on a wooden floor, and also read the step-by-step instructions in a special article on our portal.
Key points of installation work
All materials used for floor insulation have their own methods of fastening. However, there are the main points of the thermal protection device. They are recommended to be observed when installing any material.
The order of arrangement of the main layers when installing floor insulation in a wooden house with your own hands:
- waterproofing layer;
- thermal insulation layer;
- vapor barrier material;
- direct structural elements of the floor;
- flooring.
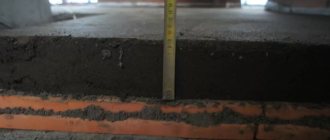
When choosing insulation, it is worth calculating the height of all layers
Experts say that this arrangement of the main layers will allow for optimal thermal conditions inside the room. This technology maintains the necessary circulation of moisture in the house.
Helpful advice! When insulating the basement floor in a wooden house, you can choose beams with a cross-section from 50 to 100 mm. They are fixed from below, and a layer of insulation is laid between them. Additionally, the resulting “pie” should be covered with boards.
Waterproofing
When insulating the floor in a private house, you cannot do without waterproofing. Due to the ability of cold air to condense on a warm surface, the wooden floor is exposed to moisture. Its constant presence in the room leads to the active development of fungus, mold and causes rotting of the structure itself. Especially if no special means were used during the construction of the house.
Layout of waterproofing for floor insulation
When laying thermal insulation without a waterproofing layer, exposure to moisture negatively affects the thermal conductivity properties of the material. The result is an increase in indoor humidity and a decrease in temperature. Waterproofing helps to avoid these unpleasant moments.
A waterproofing layer is laid on the side exposed to cold air currents.
Vapor barrier laying
Human heat and equipment operating in the home release warm air. It passes through the ceilings and condenses when it encounters cold air. The problem with this phenomenon is that moisture settles inside the structure. As a result, the tree swells and begins to rot from the inside. It will not be possible to prevent this process by treating with special means. Therefore, when insulating the floor in a wooden house from below with penoplex or other material, the presence of a vapor barrier is mandatory.
Scheme of laying a vapor barrier during insulation of a wooden floor
When carrying out installation work from below, the vapor barrier layer is laid first. The simplest and most affordable material for this is polyethylene film. It is excellent for both vapor and waterproofing.
The presence of such layers in the floor covering must be designed in advance. If this was not done on time, then it is necessary to lay the film immediately after putting the house into operation.
Helpful advice! Moisture-windproof membranes are an excellent material for hydro- and vapor barrier. This material allows air to circulate and retains moisture from it. It can be used when insulating the floor with penofol or other insulation.
Thermal insulation materials for floors
1. Mineral wool.
A commonly used heat retaining medium. Non-flammable lightweight material with good sound insulation properties .
There is slag, stone, and glass wool.
Mineral wool in a roll is convenient for work
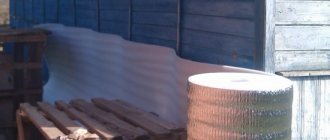
2. Expanded clay.
Expanded clay is a natural material
Prices for expanded clay
Expanded clay
It is made from clay or slate. Expanded clay is fired at elevated temperatures.
Table 1. Properties of expanded clay.
| Advantages | Flaws |
| Excellent sound insulation | The density of the insulation mass increases under the influence of its own weight |
| Can be used in sub-zero temperatures | May cause subsidence of the structure |
| Eco-friendly, safe for the home microclimate and human health | Absorbs moisture |
3. Sawdust.
Small wood shavings, waste from the wood processing industry.
They are quite cheap, but they provide a good insulating effect and can create sound insulation. They require special treatment to prevent rodents and insects from appearing in the sawdust. Next, it is mixed with cement and water and applied as insulation. It also makes sense to use clay. This will increase the thermal insulation properties of sawdust.
Sawdust is cheap and practical for do-it-yourself home insulation
When working with sawdust, it is extremely important to carefully lay the material, obtaining a dense and fairly even insulating layer. If the technology is not followed, the effectiveness of thermal insulation is greatly reduced.
4. Foam plastic.
Aka polystyrene foam. Resistant to moisture, fire, chemical factors. Good thermal insulator . Easy to install and remains in good condition for a long time.
Modern foam looks like this
5. Ecowool.
80% consists of cellulose fibers . For production, waste paper, waste and waste from paper production are used. It also contains sodium tetraborate, which makes it resistant to fire. Boric acid in ecowool provides protection against bacteria and fungi.
Ecowool applied dry
It is advisable to use ecowool for insulating houses with high humidity , as this prevents the appearance of abundant condensation in the walls and other internal environments of the structure.
There are three ways to apply ecowool. These are dry, wet and glue methods.
- dry application mainly works for country houses;
Cellulose wool is supplied using specialized equipment. During the work, dust is created, which is why it is better to use masks, respirators and goggles for safe installation of insulation.
- the wet application method is used when there is a need for further wall covering;
Water is added to the raw material.
When the resulting mixture hardens, it forms a dense mass.
- The adhesive method is used to insulate reinforced concrete or metal structures.
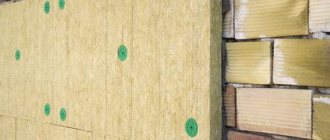
Mineral wool - fiber insulator
Mineral wool is a building insulation material consisting of many fibers, presented in three separate types: glass; stone or basalt; slags For working with the floor, basalt cloth is preferable, because... it is easiest to install under the floor structure. Of the two options - rolled and mats in the form of slabs - choose the second one, because... it holds its shape well. Advantages:
- good level of thermal insulation;
- simple installation technology;
- relatively low level of perception of moisture from the environment;
- reasonable price;
- heat resistance and fire safety;
- The material does not harbor bacteria, mold or mildew.
Flaws:
- When laying with your own hands, you must use special protection - gloves, clothing, a respirator, glasses, because... there will be many particles of fibers and dust in the air, causing irritation to the skin and respiratory system;
- protection from moisture is required, because the structure is susceptible to vapor absorption;
- If installed incorrectly, severe shrinkage may occur;
- when laying between the joists, you need to leave a gap of 5 centimeters to the main structure.
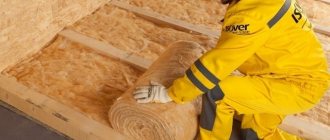
Floor insulation with mineral wool
If you decide to choose mineral fiber, select the material of the desired thickness. Specific data depend on the climatic zone, for example, for central Russia, an indicator of 100-150 millimeters is suitable. Basalt wool is suitable for all types of floors, including attics.
Insulation of a wooden floor with mineral wool
You can find various modifications of insulation on the market. There is mineral wool in ready-made rolls and slabs.
Capable of absorbing moisture, which means good vapor barrier is extremely important. At the same time, it is able to protect the wood of surrounding structures from excessive moisture and decay .
Experts recommend taking precautions when working with mineral wool: using protective clothing
The required attributes also include gloves, a mask and goggles. The small fibers of the material may cause severe itching, redness of the skin or irritation of the respiratory tract.
Installation of heat insulator and vapor barrier layer
Mineral wool slabs are cut with an allowance of a couple of centimeters in length and width - then the elements will fit into the cells by surprise, without gaps. If slabs made of polystyrene foam or extruded polystyrene foam are used, they are cut as accurately as possible to size, and after installation, all interfaces of the elements with the wooden frame and among themselves are filled with polyurethane foam.
A vapor barrier is necessary to prevent moisture from penetrating into the insulation from the room. If warm steam enters a porous material, it will pass through, cooling and turning into water. This will lead to an increase in the thermal conductivity of the insulating layer and will cause rotting of the wooden joists or beams that serve as the basis of the structure.
The vapor barrier membrane is laid on top of the cells with insulation and secured around the perimeter and along the joists with staples. Next, along the joists, counter-battens are placed - wooden blocks that will serve as the base of the floor. Sheets of plywood or other sheet material are fastened staggered along the slats.
Such an insulated base is ready for waterproofing and screed (if floor tiles are to be laid) or floor installation of any finishing coating - parquet, laminate, linoleum, etc.
Floor insulation with penofol
Penofol looks like a layer cake. Foamed polyethylene is covered with pure aluminum foil. Available for sale in large rolls. The penofol sheet has a thickness of three to ten millimeters. It retains heat perfectly, provides high-quality sound insulation, and is safe for the environment of the home.
Foil penofol is an easy-to-work material
The effectiveness of penofol is based on the reflection of thermal radiation . This is how heat is retained indoors. This is due to high quality aluminum foil. Here its properties are close to those of precious metals.
I distinguish between penofol with two and with one layer of foil. In addition, there is self-adhesive penofol.
Penofol is susceptible to moisture. However, it is not capable of absorbing moisture on its own.
Penofol does not support combustion
The disadvantages of the material include low rigidity, which can create additional difficulties when working with it.
Attaching penofol may also require additional effort. Punch-out fasteners cannot be used, because this will lead to deterioration of properties. All that remains is special glue, which will also have to be purchased.
To work with vertical and inclined surfaces, it is advisable to take self-adhesive penofol .
Recommended for use as additional insulation. Serves no more than 5 years .
Features of insulation
Until a certain point, the most popular material used for insulating walls and other surfaces was polystyrene foam. Although it is still used today, there are products that have been able to surpass it in some characteristics. It is made from polystyrene granules. They go through processing stages during which the base is filled with air bubbles. They provide thermal insulation properties. But the strength of the final product is low. Polystyrene foam breaks and crumbles easily, so when using it as insulation, it is imperative to take care of the protective layer. Several decades ago, a new method for processing polystyrene granules was developed. The result was a new material called extruded polystyrene foam.
Most often, this insulation is not called extruded polystyrene foam. It is better known by the names of the companies that produce it, for example, one of them is Penoplex. Manufacturers Stirex and Technoplex also produce analogues. The insulation itself has the following properties:
- low thermal conductivity of penoplex;
- high density;
- ease of installation of penoplex;
- relatively high strength;
- protection against moisture penetration;
- impossibility of fungus developing on the surface of penoplex;
- light weight;
- absence of harmful secretions;
- additional sound insulation;
In terms of density and strength, extruded polystyrene foam or Penoplex insulation is several times superior to polystyrene foam. During the manufacturing process of penoplex insulation, reactions take place under high pressure, which makes it possible to reduce the size of air bubbles to a diameter of 0.1 mm. This means that per unit area of penoplex insulation there will be more of them than in polystyrene foam, which means the heat-insulating properties will increase. In its normal state, polystyrene foam does not have harmful emissions, which means that floor insulation with penoplex is absolutely safe for the inhabitants. If noisy neighbors live near the house, then penoplex insulation will also provide sound insulation, ensuring sound sleep and vigor in the morning. The material is available in several variations.
Note! Varieties of penoplex insulation are designated by the first letter of the word of the surface for which it is used, for example, “K” - roof, “S” - wall, “F” - foundation. Each type of penoplex insulation differs in density, weight and thickness of the slab
Accordingly, it has different thermal permeability. For example, the one used for roofing has a lower density and, accordingly, less rigidity. There's not a lot of pressure on him there. But its insulating properties remain high, and the price is lower.
Some types of foam do not tolerate simultaneous exposure to moisture and low temperatures. This is due to some looseness of the material, which allows water to seep into the pores. When exposed to frost, it simply bursts, so it requires additional protection. With penoplex insulation, things are more rosy. In the tests carried out, a sample of penoplex insulation was immersed in water for 30 days. At the same time, only 6 grams of additional weight were added to the weight of 100 grams. And this was due to the raw edges along which the trimming took place.
Due to the fact that under pressure, bubbles of the correct spherical shape are formed in the penoplex insulation, the resistance to compressive forces increases. But there is also a nuance that should be taken into account when handling penoplex insulation. For example, penoplex insulation does not withstand the effects of various solvents. The insulation can simply dissolve in acetone. Therefore, if painting is planned along with the installation of penoplex, then it is better to first cover the insulation with film or completely complete the installation of penoplex insulation, postponing work with paints.
Types of cellar ceilings
When the pit has been dug and all the preparatory work has been done, it is necessary to decide on the type of cellar roof, as well as what materials to use for its arrangement. Let's look at the types of ceilings for the cellar.
Support beams
If you decide to make a cellar roof from load-bearing beams, we recommend using railroad rails. You can purchase the product by ordering them in special workshops or at scrap metal collection points. To install the beams, it is necessary to leave special beds, which perform the additional function of firmly fixing the entire structure (the photo shows a roof made of steel beams)
Installation of the floor with load-bearing beams is carried out in the following way:
- iron reinforcement rods are fixed between the beams and tied with knitting wire;
- when the reinforcing mesh is ready, make wooden formwork and lay a layer of waterproofing on it;
- a frame is installed directly under the formwork to hold the concrete mass;
- the structure is poured with concrete, the pouring process must be continuous and uniform;
- the finished ceiling of the cellar is additionally insulated with any building material, for example, you can use ordinary roofing felt.
Wooden roof
The ceiling in the cellar is made using wooden beams. The photo shows an example of a wooden roof
Installation of wooden beams is carried out as follows:
- install beams on the basement walls;
- to obtain additional support, small bars are mounted to the side of the beams;
- the roll is laid using self-tapping screws;
- a vapor barrier is performed, and thermal insulation is laid on top;
- install plywood sheets and treat them with antiseptics and mastic;
- lay roofing material.
Prefabricated monolithic slab
When choosing a prefabricated monolithic floor in the basement, you should consider the use of a construction crane. Before installing the roof, you should make sure that the width of the slabs corresponds to the width of the cellar.
These plates are considered the best and most durable material. The photo shows a roof made of a prefabricated monolithic slab
You can learn more about how to make a monolithic ceiling from the video
Monolithic slabs
Monolithic slab flooring is made using concrete and reinforcement cage. The photo shows a cellar roof made of a monolithic slab
To install a monolithic floor, you must perform the following steps:
- the slab should be located on the walls of the room, the walls serve as support;
- to maintain the integrity of the structure, beams are fixed under the formwork;
- so that the solution does not leak out during pouring, it is necessary to seal the boards and formwork;
- knitting the frame with reinforcing mesh is performed after the final installation of the formwork;
- when the mesh is ready, concreting is performed;
- To avoid the formation of internal cavities, the solution is subjected to a vibration process, this is done using ordinary timber or special equipment.
When a structure is poured with concrete, it must be allowed to dry well and harden; as a rule, this process lasts about a month. It is worth noting that experts recommend double reinforcement to obtain greater reliability of the entire structure.
The need for basement insulation
Under the influence of humidity and dampness coming from the ground, as well as condensation formed on wooden elements due to temperature differences, the wood becomes moldy, becomes covered with fungus, and cracks appear on it.
In such conditions, wood becomes a conductor of cold, although initially it is a good heat insulator. In addition, the wood begins to rot and its structure is destroyed. All this requires careful consideration of the issues of basement insulation, without which the service life of the house will be noticeably reduced.