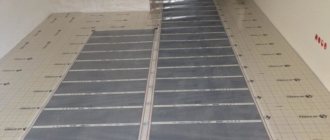
Today you won’t surprise anyone with alternative heating systems; the heating system has long ceased to be perceived as a wall-mounted line with radiators. Warm floors are one of the most popular heating methods, used as an additional or independent circuit. There are two types of underfloor heating systems - with a liquid coolant, most often water, and electric - with heating elements. Although infrared heated floors belong to the second type, they can hardly be called electric. Although these systems have been in use for almost a decade, less is known about them than their traditional counterparts, despite many positive characteristics. Naturally, this system did not pass by our forum members; many FORUMHOUSE participants heat their homes using infrared heated floors.
What is infrared film heated floor
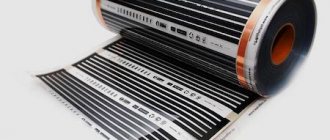
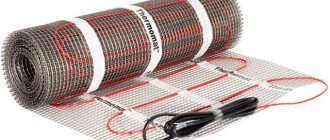
Infrared film coating is a roll material. This is a carbonate paste that is sealed in polyester or polypropylene film. Special conductive busbars are installed along the edges. Most often these are strips of silver and copper. It is through them that electric current is transmitted. Once it passes through the carbon, heat is generated.
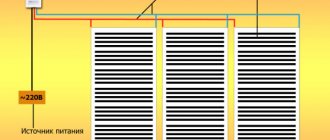
Conductive strips are collected in sections, with a dividing strip between each of them. It is convenient to cut material using it. The advantage of such a system is that if one lane fails, all the others will continue to work.
REFERENCE. The width of one roll of a set of film heated floors can vary from 50 cm to 1 m. The thickness of the film is from 0.2 to 2 mm.
Film types of flooring are safe for human health. Infrared heated floors do not generate electromagnetic waves. By heating the furniture, the air temperature in the room is lower, but at the same time it is quite comfortable. When objects are heated, there is no air movement, so dust does not rise. This minimizes the risk of developing an allergic reaction. This type of flooring is completely neutral. It does not create any noise, chemical or mechanical effects.
Installation and connection
Before starting installation, it is advisable to sketch out the laying scheme, that is, approximately position the film pieces as they will lie on the floor. It is important to maintain all the necessary distances, distances from walls, etc. You need to retreat from walls and other heating systems by 10-20 cm. The free space between the strips themselves should be no more than 5 cm.
Connection diagram
Let's consider what is needed to install a heated floor on an area of 8.6 m2.
Table. What will you need?
| What do you need? | Characteristics |
| Substrate | It is best to take isolon with a thickness of no more than 0.5 mm, area - 10 m2. The material is needed for additional thermal insulation and in order to soften the mechanical impact on the film during operation. |
| Polyethylene film | It is advisable to lay it for additional waterproofing in case of accidental water leakage. The size is exactly the same as that of the isolon in terms of area. Thickness – about 50 microns. |
| Modular box | Enough for 4 modules. |
| Switch | It is better to take automatic ones for 10 amps. |
| Clip-on clips | These are connecting elements that will help make individual pieces of film into a single system. Take 2 pcs. for one heating mat. Total - 10 pcs., 2 clips are taken in reserve. |
| PuGV wires | Two segments of red and blue colors. 10 m long is enough. |
| Scotch | You need a regular one - for fastening individual elements of the substrate, and a bituminous one - for insulating electrical elements. |
Clamps for film heated floors
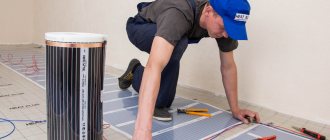
So, let's look at how the installation of IR film will take place.
Step 1. First, you should thoroughly clean the surface of the subfloor from debris and level it. If the floor is level after cleaning, there is no need to level it further. But in some cases it will be necessary to make a cement screed or pour a self-leveling mixture.
The floor needs to be leveled and cleaned
Step 2. Next, you should determine where the film will be laid on the floor surface. For convenience, you can apply markings directly to the surface of the subfloor. It is worth remembering that the film is installed only on spaces free from furniture and other interior items.
Markings can be applied directly to the subfloor
Step 3. You also need to select in advance a place to install the thermostat. It must be located in an accessible place. In the wall from it to the floor you need to make a shallow groove into which the wires located inside the protective corrugation will be laid. A thermostat sensor will be connected to this system. You can also use cable ducts to hide wires.
The location for the thermostat must be chosen in advance
Step 4. Then you need to lay a substrate or thermal insulation material over the entire floor area. Individual strips cannot be laid overlapping, only parallel to each other. They can be connected to each other using ordinary household tape. You can secure this material to a wooden surface using a stapler. You can glue the underlay onto a concrete floor using double-sided tape.
Strips of material are laid parallel
Fastening with a stapler
The joints are taped
Step 5. Next, you can begin laying the film itself. It needs to be rolled out to the required area, having previously been cut into separate pieces. It is important to remember that the film can only be cut along specially marked lines, which are located at a distance of 17.4 cm from each other along the entire length of the material. The film cannot be cut anywhere else. The material is laid out on the base with the copper strip down. You should also ensure that the film strips are located at a distance of 10 cm from the walls.
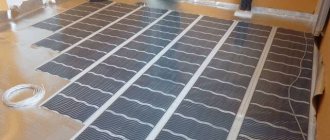
Laying IR film
The film can only be cut along specially marked lines.
Step 6. The film strips need to be secured with tape. It is enough to glue them together so that they do not move separately from each other.
The strips are fixed with tape
Step 7. Next, you need to insulate the cut areas in the area where the copper strip is located with bitumen tape. The insulating material should cover the entire cut in this area.
The cut area in the area where the copper strip is located is insulated with bitumen tape
Another photo of the process
Step 8. Then, in the places where the wires will be connected, you need to install clamps in the area of the copper bus. One side of the clamp should go inside the thermal film, and the other side should go outside on top of the copper strip.
One part of the clamp is installed
Clamp side installed
The second part of the clamp is attached over the copper strip
Step 9. Next, you need to tighten the clamps with pliers.
The clamp is clamped with pliers
Step 10. Then you need to insert the pre-stripped ends of the wire sections inside the clamps for connection. You should also fix the wires inside the clamp using pliers, clamping the elements.
The ends of the wires are inserted into the clamp
Fixing wires with pliers
Step 11. Next, you need to seal the clamps with two pieces of bitumen tape, closing the clamps at the top and bottom.
Each clamp must be sealed with two pieces of bitumen tape
The second piece is glued
Step 12. Now you can connect the thermostat. A temperature sensor is included in its package. This sensor must be installed on the black stripe on the film underneath, fixing the sensor itself with bitumen insulation.
Installed temperature sensor
Another photo of the temperature sensor
The sensor is fixed with bitumen tape
Step 13. In the isolon, at the location of the sensor, you need to make a small cutout so that the floors in this place remain level after installation is completed. The same cuts are made in the area of the clamps.
Cutout at sensor location
The same cuts are made in the area of the clamps
Step 14. The wires themselves, coming from the heated floor, can also be laid in small recesses in the isolon and secured with ordinary tape.
The wires are fixed with ordinary tape
Step 15. Now you can connect the wires to the thermostat. It is important to follow the instructions in the instructions for use of the device. Next, the thermostat needs to be mounted on the wall.
Connecting wires to the thermostat
Connection process
Step 16. Then the system needs to be tested for functionality. To do this, you need to turn it on and check whether all the elements heat up. Before turning it on for the first time, it is important to make sure that all contacts are insulated and everything is done correctly.
Turning on the system for the first time
Checking the system for functionality
Attention! Before laying the final floor covering, you need to walk on the film carefully so as not to damage it.
Prices for infrared heated floor "Kaleo"
infrared heated floor Kaleo
Types of films and their characteristics
Most infrared films operate on the same principle. However, different types of film coating are intended for different types of premises. Depending on the maximum heating temperature, the following types of flooring are distinguished:
- high temperature IR film;
- low temperature;
- universal.
High-temperature types of infrared heated floors are excellent for laying under tiles. The maximum heating temperature is 50°C.
Low-temperature infrared floors can be combined with laminate, linoleum and other heat-sensitive coatings. In this case, the system warms up to 27 °C.
There are also a number of universal systems that can be combined with any floor covering. They are the most popular, since the buyer does not need to worry about the compatibility of coatings.
The second classification option is based on the type of heating element. There are several types:
- carbon;
- bimetallic.
When choosing a heated floor, you must also pay attention to the power density indicator. According to this characteristic, there are 3 main types of infrared films:
- weak - 130–160 W/m²;
- average - 170 and up to 220 W/m²;
- high - above 220 W/m².
Low power film is used in small spaces. It is best combined with light floor coverings. Medium-power coatings are installed in medium-sized rooms. An excellent option for tiles and porcelain stoneware. High power films are installed in large rooms. For example, this could be a sauna or a workshop.
Reviews
“We made a warm film floor in the bedroom around the bed. The film was placed between the substrate and the laminate. Due to the joints between the sheets of film, the laminate turned out to be uneven. Warmth is only felt if you set the sensor to 28 degrees. In general, it can be adjusted from 0 to 60 degrees.” Alexandra, Samara
“We have warm Kaleo flooring under linoleum and carpet. We set the temperature to 23-24 degrees and walk only barefoot - it’s very comfortable. Costs about 1200 per square. Nothing is being done to the linoleum, but the pile of the carpet has turned red in the place where the sofa stood. I’m sure nothing can happen to the legs of the furniture - their area is too small.” Vladimir, Kazan
“We were afraid to install film flooring in the children’s room. What if there is a short circuit or fire. Therefore, we made a cable floor under the screed and laid linoleum. The floor is on all day, we turn it off at night or when we leave for a long time. Now we are sure that our child is warm and comfortable.” Svetlana, Tver
“The whole house has warm floors. We made cable because we heard that film can ruin the coating if you turn on a high temperature. For some friends, the film ruined all the tiles. The seams between the tiles burst and the tiles came off. The tiles are now rattling. It’s nice to walk, but in extreme cold it doesn’t help and you have to turn on additional heaters.” Yaroslav, Yakutsk
Benefits of infrared floor
The main advantage of infrared flooring is its long service life. Other benefits include the following:
- no need to create a concrete screed for installation;
- installation in a few hours;
- compatibility with almost all types of flooring;
- minimum film thickness, which does not affect the calculated thickness of the floor finish;
- low heating inertia;
- Can be used in offices, gyms and public places;
- uniform heating of the room;
- ability to connect to the “smart home” system;
- minimal energy consumption;
- no negative impact on human health.
In a room with such heating, the air does not dry out and maintains a comfortable level of humidity. The installation and dismantling process is simple. If necessary, the floor can be dismantled and the film used in another room.
Accurate calculation required
An example of an infrared heating project
Before purchasing components, you should determine the characteristics of the heating system by making preliminary calculations. You will have to take into account not only the volume of the heated space, the climatic conditions characteristic of the region and the specific power of the heating elements. Meaning:
- The thickness of walls and ceilings, as well as the characteristics of the materials from which they are made.
- Glazing area and design features of window frames. In the accompanying documentation, bona fide manufacturers indicate thermal conductivity parameters.
- Thermal conductivity properties of floor covering laid on top of IR film.
- The presence of other, main or auxiliary heating systems.
Disadvantages of infrared floor
Film floors have a large number of hidden contacts. Before laying the floor covering, it is necessary to check the functionality of the installed system.
Other disadvantages of infrared flooring include the following characteristics:
- work from 220V network;
- the inappropriateness of using such a heating system as the main one;
- the locations of infrared heaters should not be blocked by equipment or furniture;
- the need to create an intermediate layer with high strength when installing soft floor coverings.
Working from the network is a potentially dangerous factor. Despite the fact that there is grounding, as well as an automatic shutdown system, there is a risk of electric shock.
REFERENCE . Infrared flooring is not as economical as water flooring.
A particularly large gap in the cost of heating occurs if natural gas is used to operate the water floor. It is recommended to use such a heating source as an additional one.
Before laying soft flooring, it is necessary to create an additional durable layer. For this, plywood, fiberboard and chipboard can be used. Creating an additional coating not only improves strength, but also increases financial costs.
Laying technology
Laying the substrate is an important step when installing infrared heated floors. Therefore, when installing it, you must follow a number of rules:
- when using fiberboard sheets or magnesite boards, the screed should first be covered with aluminum foil;
- in cases of polymer metallized film, its reflective side should be positioned upward;
- the insulating material must cover the entire surface of the heated room.
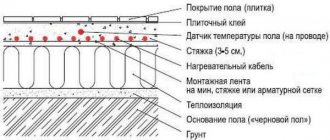
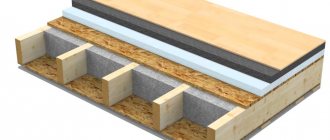
As when installing the underlay into the “pie” of any heated floor, the underlay for infrared film is mounted on a clean base equipped with a vapor barrier layer (polyethylene).
The insulation is spread over the entire area of the room, reflective side up, with a distance of 100 mm from the walls. These openings are closed with a tape damper. The joints are taped with special metallized tape. To prevent the material from moving when the floor is in use, it is attached to the base with double-sided tape.
After this, the infrared film is mounted; there should be no air gaps between it and the substrate. Then the finishing coat is applied.
The efficiency of the floor, and therefore the comfort in the house, depends on the correct and high-quality installation of the underlay.
Material Specifications
The data below on infrared film for heated floors is of an overview, average nature. The specific characteristics of the product must be clarified when purchasing.
The proposed data is sufficient for planning the location of the canvases, marking the base, and calculating power. Based on the technical features, you can understand whether the IR system is suitable for use in specific conditions.
Thermal film performance:
- Roll width is 50-100 cm. For domestic purposes, as a rule, coverings with a width of 50-60 cm are used. When arranging a bathhouse, office or industrial facility - 70-100 cm. The total energy consumption is almost the same, but wider material will cost more.
- Strip length – 6-50 m. The maximum permissible value is determined by the manufacturer. In a long room, it is advisable to make separate connections in halves with the installation of two thermostats.
- Power supply is 220 V. A household single-phase power supply is used.
- Peak power consumption – up to 150-230 Vm. The parameter depends on the manufacturer and type of film. On average, to maintain the room temperature at 21-24°C (30°C on the surface of the film), energy consumption will be 25-45 W/sq.m.
- The melting point of thermal film is 210-250 °C. If all rules for laying heated floors are followed, the surface temperature of the IR coating will never reach critical values.
After switching on, the film heats up to maximum temperature in 2-3 minutes.
The efficiency of long-spectrum infrared rays reaches 90-95%. The efficiency of heating largely depends on the high-quality thermal insulation of the room. In order for the system to warm the room, the area of the thermal film must be at least 70-80% of the floor surface
Calculation of UNIMAT rod mat
The UNIMAT infrared rod mat has a self-regulating function, so it is not afraid of being blocked by furniture and the area of the set should be equal to the area of the room.
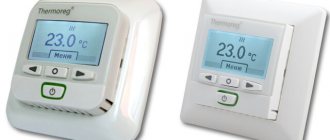
For convenient control and economical use of heated floors (up to 35%), a thermostat is designed. There are mechanical (manually controlled) and programmable thermostats with functions of saving settings, modes to reduce energy costs, etc.
Our stores offer a wide selection of multifunctional thermostats for heating systems from European manufacturers, the most popular among them are:
- TI 200 and TI 950, THERMO;
- 320 and UTH-130, CALEO;
- from DEVI – Devireg Touch.
Possible mistakes
Despite the simple installation of infrared heated floors, beginners make some mistakes during operation that negatively affect the operation process:
- Using film flooring in wet areas. When water gets on the film, a current leak occurs, to which the protective equipment reacts. As a result, the floor will not work due to constant auto-shutdown. If protection is excluded from the circuit, due to current leakage, the wiring insulation will begin to melt, and this will lead to a short circuit or fire.
- Installation of film in screed or tile adhesive . The binder or adhesive composition is an alkaline medium, which quickly corrodes the laminating layer. The contacts, being in the screed layer, are subject to electrochemical corrosion, which will lead to their rapid destruction.
- Laying wires over a layer of thermal insulation substrate . Mechanical load is transferred through the floor covering to the wires and over time the insulation wears out, leading to a short circuit. It is necessary to cut grooves for the wires in the substrate. If the thickness of the substrate is more than 4 mm, then the depth will be sufficient even for overlaps.
- Poor quality clamping of clips. This should be done with special crimping pliers. But many craftsmen, due to the lack of them, use simple pliers, which do not provide sufficient contact density or, conversely, excessive force contributes to the brittleness of the connection. A loose contact will spark and burn until it burns out completely. In the worst case, contact sparking can lead to voltage surges, which is dangerous for the entire intra-apartment network and turned on household appliances.
- Incorrect installation of the clip. The connecting clip must go inside the film on one side, in direct contact with the copper busbar.
What is it made of
It is based on a sprayed graphite (carbon) heating element applied to a polymer base. It is graphite that heats the floor covering when heated to a temperature of 40-45 degrees. The conversion rate of electrical energy into thermal energy is close to 100 percent. The electrical connection of the carbon emitters is made using copper foil and low current resistance silver plating to reduce transient resistance. The result is a sealed heating structure laminated on both sides with electrical wear-resistant polyester, providing waterproofness of the film floor and increased protection against electrical breakdown.
Popular brands
The next stage is the choice of a manufacturer and a specific model of heated film floor. Judging by expert assessments and user reviews, the most popular are products from companies from South Korea :
- Caleo. The company specializes in the development and manufacture of infrared heating systems. In a short period of time, it gained a foothold in the climate control equipment market and became one of the recognized leaders in its price segment.
- Eastec. Another manufacturer actively promoting its products in different regions of our country. Consumers like not only the good quality of the products offered, but also their affordability.
- RexVa. Having made a choice in favor of this brand, you can not only purchase ready-made installation kits, but also buy cut-to-length IR film, completing it as you wish.
It is curious that the well-known company Electrolux, whose catalog also includes heated film floors, manufactures products in this category at factories also located in South Korea. But you have to pay for a well-promoted brand, and high prices force many buyers to look for products at more affordable prices.
Preparing the base
Having finished cutting, we begin to prepare the base for laying the heated film floor. The efficiency and service life of the heating system depend on how correctly and carefully this work is done. Necessary:
- Level the surface by filling potholes and removing bumps. On an area of 1 sq. meter height differences should not exceed 3 mm. This means that the concrete will have to be sanded and the wood will have to be sanded.
- Lay and secure waterproofing. Polyethylene is not suitable for these purposes. Materials with increased heat resistance are needed.
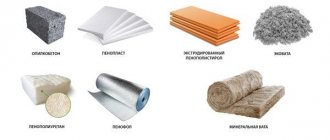
- Provide thermal insulation. Aluminum foil is prohibited! It is recommended to use panels based on lavsan or polypropylene foam, sheets of pressed cork chips, magnesite or fiberboard boards.
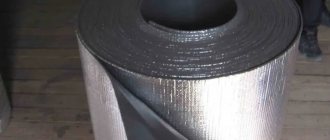
Foamed polyethylene backing with Mylar coating
Only when these stages of work have been completed can you proceed to the main thing with a clear conscience.
Thermoreg TI 200 thermostat
| Manufacturer: | Thermo |
| Model: | TI 200 |
| View: | electronic thermostat |
| Power: | 3600 W |
| Installation type: | recessed |
for comparison
old price 3,544 rub.
RUB 3,190
Product added to cart
| Photo | Name | Price per piece | Quantity | Price |
| Thermoreg TI 200 thermostat | RUB 3,190 | < 1 > | 3,190 3,190 rub. |
There are 0 items in the cart worth 0 rub.
Go to cart
Buy
Availability
Invisibility, silence
The infrared heating film is installed under the floor. It is silent and inconspicuous. Does not contain PVC and lead. Doesn't burn oxygen. In addition, this is not convective heating, but comfortable heating of the entire floor area, causing virtually no air circulation and not drying out the air, which is especially important for people with respiratory tract diseases and joint diseases. Let’s not say anything about the fact that infrared film placed in the floor kills all known and unknown types of bacteria, ozonizes the air in the room, and emits life-giving rays, because this is not the case. We kindly ask you not to believe unscrupulous sellers who declare the magical properties of their heating films or rods. Building materials for floor coverings (except glass) have a practically zero transparency coefficient throughout the entire infrared range. But a low level of electromagnetic radiation is indeed present.
Thermostat Caleo UTH-130
| Manufacturer: | Caleo |
| View: | mechanical thermostat |
| Power: | 4000 W |
| Installation type: | overhead |
for comparison
RUB 3,664
Product added to cart
| Photo | Name | Price per piece | Quantity | Price |
| Thermostat Caleo UTH-130 | RUB 3,664 | < 1 > | RUB 3,664 3,664 |
There are 0 items in the cart worth 0 rub.
Go to cart
Buy
Availability
