Home » Equipment » Warm floor
When installing a heated floor system, it is extremely important to securely secure the coolant circuits to the thermal insulation. For this, an anchor bracket for a heated floor is used. It is used if it is decided to install the system without reinforcing mesh.
Anchor brackets for heated floors
Using such a mesh, there is simply no need to use staples. In all other cases, you simply cannot do without it.
Fastening underfloor heating pipes
In order to securely fix the pipes or heating cable, it is necessary to resort to the use of special clamps.
Today they are presented on the market in a huge variety, so finding the necessary consumables will not be difficult. The most popular options for installing heated floors are:
- metal mesh. They may have different pitches between cells, but it is better to immediately decide which option is better. In this case, it will be much easier to calculate the pitch of laying pipes or cables, which will ultimately help you save a lot. In this case, the pipes are attached to a metal mesh using wire or clamps;
- mounting tape. Today, both metal and polymer mounting mesh are available on the market. The advantage of metal ones is that the petals are bent here, making it much easier to attach cables or pipes. Plastic tapes are equipped with grips into which the water supply or heating cable is pressed. This type of mount is very popular today. The first reason is the affordable cost of such consumables. The second is simple installation, which does not require special skills, so fastening can be done without the help of third-party specialists;
- expanded polystyrene boards. In such products, the fastenings for heated floors are already installed by the manufacturer. The disadvantage of this option is its high cost, but it combines two parts of the system at once - high-quality thermal insulation and the necessary fasteners for pipes and heating cables. Installation in this case is simple and easy. Plus, you can save a lot on high-quality thermal insulation. Expanded polystyrene boards are used if it is necessary to meet the deadlines and with the least amount of effort;
- single clamps (brackets). Most often they are used in combination with heat insulators, where appropriate markings are applied. The clamps are attached to the subfloor using a preliminary installation board. Despite the fact that such work turns out to be very tedious and painstaking, it still has its merits. Such consumables are excellent for underfloor heating systems and create unique operating conditions if you resort to the use of high-density polystyrene. In this case, fastenings are installed manually or using special equipment (construction gun or stapler). Having done this work, it will be possible to achieve reliable fixation of pipes that will be invulnerable to vibrations and mechanical stress.
We recommend: How to connect a mixing valve for underfloor heating?
Expanded polystyrene boards with fixation
Option 1
A very creative way to install pipes. Since with the help of volumetric protrusions on the coating, pipes can be laid in any pattern as you wish. Despite the small distance between the protrusions, many people think that this is what will fix the pipe, but this is far from the case. For fixation, special clips are also used, which guarantee the reliability of a strong fastening of the pipe.
Advantages: The pipe is protected by special bosses from mechanical damage. Such a system can be freely purchased both on the market and in a specialized store.
Disadvantages: Quite a high price for all components. To fix the pipe, additional elements must be used.
Option 2
This installation method is very similar to the previous one, but there are significant differences. There are special protrusions on the coating that firmly fix the pipe without any additional equipment. You can fix the pipe in a very simple way: by carefully pressing the pipe between these protrusions.
Advantages: This method of attaching a pipe is considered very convenient and reliable. The slab is not damaged when moving across the floor. An excellent combination of functionality, quality and price.
Disadvantages: The cost is much higher than the earlier examples. Such a specimen is quite difficult to find in markets and specialized stores.
What are anchor brackets for heated floors?
An anchor bracket (clip) for a heated floor is a special product with teeth at the end, which is made of high-strength polymer. On straight sections, pipes should be fastened with staples no more than 50 centimeters between clips.
On bends and turns, it is recommended to place such fasteners at a distance of 10 centimeters from each other. Fastenings are installed using a special device - a construction gun or stapler.
It is not difficult to find everything necessary for such installation of a heated floor system on the market today. High-quality consumables in Moscow are presented in a huge variety and at the most affordable prices.
Installation of a water floor on polystyrene slabs with anchors
Among the methods of fastening water floor pipes, the use of brackets with pointed edges is of interest. Let’s briefly consider the technology of creating a heated floor “pie” on smooth polystyrene slabs.
Installation
The process algorithm is as follows:
- Clean debris from the surface of the base.
- Inspect the floor for unevenness. If there are differences in height of more than 2 mm, then use a leveling mixture on the concrete floor. If the floor is wooden, then sort it out.
- Apply a waterproofing layer of polyethylene film. The canvases are laid overlapping each other by 10 cm and overlap the walls. They are attached to each other with tape. The use of polyethylene film is necessary to protect the polystyrene foam boards from moisture on the underside.
- A damper tape is laid around the perimeter of the room.
- Polystyrene mats are laid out on polyethylene film. They are connected to each other by a special lock system, and the rows need to be oriented with a slight staggered shift. If the mats are thin, use an adhesive compound at the joints for better fixation.
- The mats have special markings that facilitate the process of contour formation. Having calculated the length of the future contour in advance and compared it with the possibility of forming along the lines, start laying pipes from one of the ends and fix them with staples along the way. It is difficult to carry out all the actions alone, so you need an assistant. One lays the pipeline, the other fixes it with staples.
Important! To improve fixation, you can first prepare small recesses in the mats for the pipeline using a special thermal knife.
- The anchor bracket for heated floors is used in such a way as to ensure reliable fixation, while the distance between the brackets on turns and bends is less than on a straight section. When cornering, more deformation forces are created, so you need to hold it better.
- The final stage is covering with gypsum fiber sheets in 2 layers. Recommend 10 mm thickness.
In the video you can see how to use a stapler with a bracket for a water-heated floor:
It’s not difficult to make a warm floor with your own hands; there are many options for arrangement. Each method requires adherence to certain technologies and consideration of nuances.
Average score of ratings is more than 0
Share link
Comments There are no comments yet, but you could be the first...
Description of anchor shackle
Anchor brackets hold the pipes in the desired position.
Fastening of pipes to the floor surface using special brackets is organized according to time-tested methods, which are based on a manual or semi-automatic principle. These methods are especially effective on turns or bends of thermal contours with a significant length of laid routes. On extended sections of the pipeline, the fixing points are located at a distance of about 50 cm from one another, and in fracture zones this interval is reduced to 10 cm. Compliance with this step allows you to fasten the pipes efficiently and reliably, significantly extending their service life.
Anchor shackles are made of material that is highly durable and can withstand significant overloads. The design of the fastening element includes special spacers, thanks to which the teeth and clamps of the pipeline are fixed as reliably as possible. Once the installation of such products is completed, it is almost impossible to release them without an external tool.
We recommend reading: How to make a muffle furnace with your own hands
Reinforcement mesh
The most inexpensive element for attaching a floor water line is reinforcing mesh. Select a material with a cell of a certain size. It depends on the step length with which the pipeline is laid: 10*10 cm, 15*15 cm.
Among the advantages of this fastener, the reliability of the fittings is noted. It serves as additional reinforcement for the concrete screed, which is formed for the water-heated floor.
- The pipes are secured using staples or tape. The brackets are made of heat-resistant plastic. They have spines pointing downward; securely hold the pipe in place.
- The staples are installed in a certain order on the entire surface of the reinforcing mesh. They have hooks on the underside. With their help, fastening to the fittings is made. The step between staples is 30-40 cm.
- In places where the pipe bends, it is necessary to place 3 staples. One is designed to hold the pipe in the center, the others provide a certain bending radius.
- The outline is drawn with a snake; push the pipe into the fastener with your foot. Use soft shoes.
Instead of staples, the line is reinforced with plastic tape. It has teeth on the inside. There is a loop at the end. The tape is wrapped around the pipe and inserted into a loop. In this case, the teeth are held by the edges of the loop, securely fixing the contour.
The work is more labor intensive. In this case, the plastic comes into contact with the reinforcing mesh. When using staples, the product is placed on a slight elevation. The grid remains at the bottom.
Specifications
Pipe clips are selected based on diameter.
Anchor clips in the category of fixing devices are classified according to the typical size corresponding to the width of their base fastening. This parameter is decisive when familiarizing yourself with their technical characteristics. According to the existing classification, they are divided into samples of the following type:
- U-shaped brackets of the “STK” brand, suitable for fastening pipe blanks of various diameters;
- plastic anchor fasteners used for fixing pipes of the “DN 16” type in the “water heated floor” system;
- the same products designed for pipe size “DN 20”.
In the practice of installing underfloor heating systems, 16 mm anchor brackets for underfloor heating are especially common; they are optimally suited for attaching polystyrene foam insulating flooring slabs. The dimensions of such a bracket in height are about 51 mm. It contains double hooks in its design, thanks to which the fixed pipe is securely fastened and does not jump out of the insulating material.
Anchor products are suitable for installing underfloor heating from such well-known manufacturers as Uponor, Rehau, KAN and others. The approximate consumption of U-shaped staples of the STK brand is 2 pieces per linear meter. They are made in the form of red clips, which contrast well with the gray plastic pipes.
Installation features
As a rule, the length of the pipeline does not exceed 100 meters, which is necessary to create normal pressure in the system and circulate the coolant. In this case, the number of staples required will be about 250 pieces.
It is allowed to install two brackets per meter of water circuit. In this case, it will be possible to ensure reliable fastening of the pipes without damaging the concrete screed.
By securely securing the pipeline, it will be possible to make it as resistant as possible to any mechanical stress that could lead to depressurization of the system and its failure.
In addition, durable clips can protect pipes from deformation during high pressure in the system, which can also lead to coolant leakage and, as a result, expensive repairs.
Without taking care to securely fix the pipes and encountering their damage, you will have to completely or partially dismantle the floor covering and concrete screed, which will always be accompanied by large financial costs and loss of time.
Advantages and disadvantages
Using a special device, you can quickly secure pipes.
The advantages of anchor brackets include:
- high speed and ease of installation of products in comparison with other methods;
- reliability of fastening of pipe blanks;
- durability;
- relatively low cost.
The fastening element can be used to fix other types of pipelines that are not related to heated floors. Due to the presence of protective plastic teeth, the products in question are highly resistant to impact loads. The disadvantages of fasteners of this class include the complexity of installation on some types of water and electric heated floors.
Common installation steps
Typically, pipes are laid so that the distance between them is 100-300 mm. More precisely, the step is determined only after calculating the total length of the pipeline and determining the heating area (room area minus the area of bulky furniture). In practice, the distance is calculated approximately (see below), and then a diagram of laying the heated floor is drawn and the step is specified.
The approximate distance in bathrooms is 100-150 mm, in living rooms - 250 mm, 300-350 mm in corridors, lobbies, kitchens, utility rooms, storage rooms, etc. The interpipe distance may vary in different parts of the same room - it can be smaller near the outer walls and more in the rest of the room. Any method of arranging warm pipelines may have different pitches in different parts of the room.
Types of heated floors
There are only two types of heated floors: water and electric.
Water
The water heated floor system operates on the basis of water pipes laid under the floor covering. The coolant enters them either from the heating system or from a separate heating device (boiler, boiler).
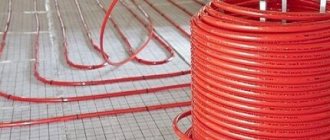
For pipeline installation, pipes made of metal-plastic, polyethylene or polypropylene are used. The installation diagram begins with the collector, the circuits are calculated before purchasing materials.
The piping is installed both in a concrete screed and without its use, directly on the polystyrene base under the floor covering.
Electric
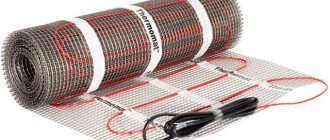
This type of floor is heated by electricity supplied to the system through wires (cable electric underfloor heating), special heating films, and carbon rods.
Construction of polyethylene pipe
Reinforcement.
Almost all cross-linked polyethylene pipes have a complex multilayer structure. It could be:
- polypropylene;
- fiberglass;
- aluminium foil;
- perforated aluminum;
- solid aluminum sheet.
The reinforced layer is able to neutralize sudden pressure changes inside the PE-S pipe when used in a hot water or heating system.
The design of cross-linked polyethylene products provides for the presence of a reinforced layer both on the surface of the product and at various depths. If it is necessary to solder two or more pipes, the reinforcing layer is stripped to 1 cm.
Pipes made of cross-linked polyethylene for underfloor heating are practically not reinforced. This material is also called “pure”.
Oxygen barrier. The manufacturer also calls it a “diffusion barrier” or “anti-diffusion protection.” This layer is mandatory for all types of cross-linked polyethylene products.
The reason for its appearance in HDPE pipes is the ability of oxygen molecules to penetrate into the material through a three-dimensional lattice, as a result of which cross-linked polyethylene is slowly but surely destroyed.
The diffusion barrier can also be either inside or outside the pipe.
The mounting method depends on the base
The choice of method for attaching the circuit depends on the base under the pipes. Let us dwell on the options for bases and methods of attaching underfloor heating pipes.
Mats with bosses
Modular mats for laying heating elements
The use of mats with bosses provides the following advantages:
- The possibility of using a concrete screed over the mat without a special protective layer, since the cement will not react with the elements of the mat. The surface of the mat has its own protective film.
- Easy installation. Putting the modules together is not difficult.
- Simple pipe fastening. To secure the pipes, no fasteners are needed, since the slab bosses securely fix the pipes.
- Relief reverse. This provides several advantages at once: increased thermal insulation, sound insulation and the ability to use on uneven ground.
Important! There are polystyrene plates that do not have bosses, but special markings that facilitate the process of forming the contour.
When using mats with bosses, there is no need to worry about how to attach the heating elements to the polystyrene foam.
Reinforcement mesh
A reinforcing mesh is laid on top of the concrete screed to add strength to the structure. When laying pipes on reinforcement mesh, the following fastening methods are used:
Fastening with plastic clamps is reliable and quick
- plastic clamps. Securing with silicone clamps is easy and simple, because the process of tightening the pipes takes place in a couple of deft movements. At the same time, the connections are reliable. It is impossible to break such a clamp.
- wire. Do not pull too hard, otherwise the pipe will be damaged.
- iron clamps. Average between the two previous methods, but it takes more time and the clamps are more expensive.
Conclusion: plastic clamps are suitable for attaching warm water floor pipes to reinforcement mesh.
Foam insulation
Anchor brackets
If the insulation layer consists of polystyrene boards, then special brackets for warm water floors made of plastic with pointed and hook-shaped teeth are used, which is why they are called anchors.
When using staples you need to be careful and careful. It is necessary to correctly calculate the distance between the pipes using foam plastic and only then proceed with fastening. It is not recommended to pull out staples and drive them into new places. It is possible to crumble and degrade the technical qualities of the thermal insulation material.
We recommend reading: Buleryan stove with a water circuit: device, advantages, principle of operation, how to do it yourself
Concrete base
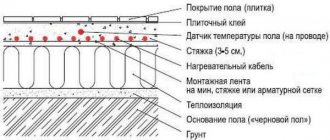
Often a concrete screed without an insulating layer is used as a base. In such cases, special perforated tapes are needed, which have special places in the structure for securing pipes. The profile is fastened to the concrete base with self-tapping screws, and the circuit of heating elements is attached to the fixing rail.
To attach pipes directly to a concrete base, use clips for warm water floors. A plastic clip is attached to the concrete using a self-tapping screw, and a pipe is placed on the clip. For example: if the pipe for a water heated floor is 16 mm, then the clip has a larger diameter and a cut-off arc for connection. Don't be alarmed if the pipe is slightly loose on the clip. The main thing is that the contour does not move during operation.
Conventional insulation with a system of wooden logs
Wooden modules
To heat wooden floor coverings, use a special wooden module, which is installed on top of the logs. It turns out that a water circuit of the pipeline is laid on top of any type of insulation, securing the pipes to special wooden logs with grooves. And there is no need to rack your brains over the process of forming the contour, because the distances between the grooves have been calculated.
The fastening method is selected depending on the base for laying the pipeline. It is necessary to take into account all the nuances during the design process in order to complicate installation.
Types of fasteners
To ensure that the pipes are securely held on the floor surface, in addition to the substrate, fasteners are used for fixation. There are different types of pipe fittings for heated floors:
- Cable tie or clamps. This fastening material is used only for reinforcing mesh. The products form a loop that fits around the pipeline and grabs the reinforcing mesh bars.
- Serrated staples. Plastic brackets for attaching heated floors are used for polystyrene backing. They are mounted on top of the pipe and carefully pressed into the polystyrene backing. The notches located at the tips of the staples grip the substrate and securely secure the product in a stationary state.
- Clips. The mounting strip is made of plastic and looks like a horseshoe. The clip has a flat base on which it is mounted.
- Metal hinges. The fastening element has the shape of a loop, which corresponds to the diameter of the pipe. Inside the hinge there is a hole for a nail or self-tapping screw. Fixation is carried out directly to the rough surface.
Alternative options for mounting heated floors
To fix heated floors, not only a bracket is used, but also other devices:
- Mats with bosses do not require additional fastening. They are easy to install and fix, and their thermal insulation qualities are above average;
- Masonry reinforcing mesh for pipelines is fixed with plastic and metal clamps. The design is reliable and highly durable;
- If the base is made of foam plastic, then the pipes are secured with an anchor bracket;
- Concrete base requires perforated tapes during installation;
- Wooden floors are usually heated with pipes installed on wooden modules.
Mats with bosses
Advantages of using mats with bosses:
- You can make a concrete screed directly onto the mats without making a protective layer. Cement does not enter into chemical reactions with mats that have a protective film on the surface;
- Easy installation - modules are assembled by hand;
- Pipe fasteners are not required; the bosses on the plates themselves firmly fix the pipeline;
- The reverse side with a relief increases thermal insulation, noise protection, and also makes it possible to build the system on an unleveled base.
Some polystyrene boards are supplied without bosses, but with markings for the heating circuit.
Reinforcing mesh
The concrete screed can be additionally strengthened with reinforcing masonry mesh. The design becomes several times more durable. To do this, the grid must be laid in a special sequence:
- Clamps made of plastic or silicone make the fastening easy and simple, so the installation of the pipeline will be completed in a few movements. Connections of this type are very reliable and do not break;
- The use of wire limits the installation process - strong tension should not be allowed, since there is a high risk of damage to the pipe;
- An iron clamp is a compromise between plastic clamps and wire. Iron fasteners are more expensive, but the installation process will be lengthy.
Having considered all the options, we can conclude that the installation of the water circuit pipeline is carried out on a reinforcing mesh using plastic clamps.
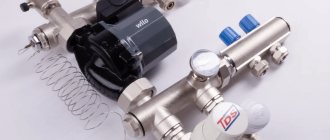
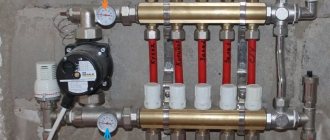
Collector connection diagram
The choice of a ready-made mechanical or automatic collector model depends on the characteristics of the heating system.
The first type of control module is recommended to be installed for heated floors without a radiator, the second can be used in all other cases.
Valtec collector groups are the most popular. The manufacturer provides a 7-year warranty on its products. The installation diagram for the liquid circuit manifold is already included in the package of the finished mixing unit
According to the diagram, the assembly of the distribution comb for heated floors is carried out as follows:
- Installation of the frame. The following can be selected as the installation area for the collector: a prepared niche in the wall or a collector cabinet. It is also possible to mount directly to the wall. However, the location must be strictly horizontal.
- Connection to the boiler. The supply pipeline is located at the bottom, the return pipeline is located at the top. Ball valves must be installed in front of the frame. They will be followed by a pump group.
- Installation of a bypass valve with a temperature limiter. After this, the collector is installed.
- Hydraulic test of the system. Check by connecting to a pump, which helps build up pressure in the heating system.
In a mixing unit, one of the required elements is a two- or three-way valve. This device mixes water flows of different temperatures and redistributes the trajectory of their movement.
Shut-off valves and fittings are installed on both pipelines, return and supply, connected to the manifold installation, designed to balance the volume of the coolant, as well as to block any of the circuits
If servo drives are used to control the manifold thermostats, then the mixing unit equipment is expanded with a bypass and bypass valve.
Foam insulation
In cases where the insulation is made of polystyrene boards, special brackets are used for the water circuit. The bracket is made of plastic, at the end there are teeth in the form of hooks with pointed edges.
Outwardly, its appearance resembles an anchor. The use of staples during installation must be accompanied by accuracy and special care.
The distance between the laid pipes on the foam sheet is calculated, markings are made, after which fastening can be done.
Experts do not recommend removing the bracket and changing its installation location, since the thermal insulation sheet crumbles and becomes of poor quality.
Types of pipelines for a water system
Currently, the consumer market offers several options for materials and components for water heating systems. When choosing a pipeline for a heated floor, you need to take into account their cost, characteristics and service life.
Let's look at the most common types of pipelines and their characteristics.
Polypropylene
In a building materials store you can find two options for polypropylene pipes, such as metal-polymer and polymer. They are characterized by good resistance to corrosion, resistance to the abrasive action of the coolant and a durable top layer that does not deform when in contact with cement mortar. Manufacturers of metal-plastic pipelines guarantee that they will last about 40 - 45 years, polymer products - more than 50 years.
Polyethylene
A distinctive feature of these pipes is that no components are needed for installation. The joining of products is carried out using a soldering iron. To make the pipeline elastic, it will be enough to warm it with a hairdryer. Polyethylene products are reliable and durable, but for a water floor they must have a reinforcing layer. The average lifespan of a pipeline is 50 years.
Stainless
Corrugated pipes made of this material are considered the most durable; their service life has not yet been established. They do not corrode, do not deform from high temperatures and do not freeze during frosts. The flexibility of the material allows the pipeline to be laid in increments of different sizes, which simplifies installation work. The only drawback of stainless pipes is that their rubber seals have a service life of only 30 years.
Copper
According to consumer reviews, pipes made of this material have the highest heat transfer. You can use coolants such as antifreeze or antifreeze with them. They are easy to use. Due to its optimal size, the strength of the concrete screed is not reduced during installation. Their service life is about 60 years.
In addition to the above characteristics, when choosing pipes for laying heated floors, you need to pay attention to their technical parameters. They must meet the following requirements:
- Linear expansion no more than 0.055 mm/mK;
- Thermal conductivity is no less than 0.43 W/mK;
- Diameter – from 1.6 cm to 2 cm.
It is also worth paying attention to their purpose. Many beginners make a big mistake by choosing conventional hot water pipes for heated floors.
Therefore, before purchasing, it is very important to read the attached instructions, where you can make sure that the product is suitable for the heating system
Concrete base
The base of the room is most often made of concrete; the screed is not always covered with a layer of insulation. To fasten pipes to such a base, perforated tapes are used, the structure of which has special recesses for laying pipes.
The profile on a concrete base is fixed with self-tapping screws, the heating elements are installed with special fastening bars. The pipe can be secured to concrete using clips for the water circuit.
A plastic clip is installed to the concrete using self-tapping screws, and a pipe is placed on top of the structure.
For a diameter of 16 mm, staples are chosen with a larger size, and the arcs for connection are cut off. The pipe may wobble slightly when fixed, which is acceptable given thermal expansion.
We recommend reading: Inclined hood in the kitchen interior: photos of design options, how to choose it
Mounting rails
The liquid line circuit can be strengthened using mounting bars. They represent a single system of anchor brackets. The material is produced in the form of tapes.
- The tires are placed on the surface of the insulation in increments of 1 m.
- They are attached to the concrete surface using dowels.
- They are installed on the thermal insulation material using mounting brackets.
- The locks are connected in increments of 5 cm. The size is chosen according to the pipe diameter of 16 mm or 20 mm.
We recommend: How does a water heater for underfloor heating work?
Installation of the circuit using tires is quick. Among the disadvantages of this fastener for heated floors is the insecurity of the pipe bend. To fix the contour at the turning points, contours are laid or reinforced mesh is used.
Before installing the floor line, a design is carried out. It determines the pipeline laying step. In places where household appliances or furniture are supposed to be installed, the distance between the hinges will be greater.
On the active area, the recommended step is 15 cm. To determine the distance between turns, it is necessary to calculate the power of the heating system and the number of pipes. Calculations can be performed using an on-line calculator.
Insulation on wooden joists
The heating system for floor coverings made of wood requires installation on wooden modules. Each module is placed on logs, so the water circuit is always on top of the insulation.
The pipes are fastened into special grooves, so the installer does not have to think about how to form a heating circuit - the distance between adjacent grooves has already been adjusted. Fixation and type of fastening are selected based on the base, which is located under the pipeline. It is important to take into account all the features so as not to complicate the installation processes.
Velcro
suggests using the Rautherm Speed system as a fastener for the floor water line. It consists of a covering on which there are small loops and a tape with hooks on it. The system works on the Velcro principle. Purchase the fastening system from dealers in Moscow and St. Petersburg.
A tape is wound around the pipe and placed on mats with loops. The hooks fit into the loops and fix the contour in a certain place. If necessary, the location of the highway can be adjusted.
The mats have a thickness of 3 mm. They are an additional thermal insulation material for the floor and prevent noise from entering the room.
On the outside they have a sticky surface, which is protected with tape. When laying the mats, the tape is disconnected and the roll is rolled out over the floor surface. The material is designed for pipes with a diameter of 14-20 mm. Withstands pressure 6 bar, temperature 95 0C. The installed system is filled with concrete screed.
A variety of devices are used to secure the floor water main pipeline. Methods are selected based on installation efficiency and product cost. Small costs will be required to lay the highway using reinforced mesh and mounting tape.
YouTube responded with an error: The request cannot be completed because you have exceeded your quota.
- Related Posts
- How to install heated floors in a country house?
- What kind of base can be used for a heated floor?
- What kind of warm floor can be laid under a carpet?
- What characteristics does Shtein underfloor heating have?
- How to lay a water-heated floor under tiles?
- How to lay polystyrene foam for heated floors?
Which way is better?
The choice of the best method is influenced by the quality of fastening and the price of the issue. For professional craftsmen who perform large volumes, convenience and speed of installation play an important role.
Fastening to reinforcing mesh has been used for a long time, its advantages are ease of installation and minimal costs. However, it is difficult to call the method convenient: you have to work all the time bent over, tying nylon ties with your hands. And the use of a grid does not cause unanimous approval. There is an opinion that it gradually cuts the plastic and over time the pipes begin to leak.
More and more craftsmen are resorting to working with a tucker, which allows them to produce large volumes of work in a short time. At the same time, the quality does not suffer compared to other methods.
The same can be said about the use of polystyrene foam mats with fixation. Time will tell which method will become the most common.
This video shows common installation methods
Using a tucker
Heated floor pipes can be secured using a tucker. This is a mounting stapler. It has a long handle and a mounting location for staple cartridges. One cassette contains 100 staples. They are metal, made of aluminum alloy.
- Before installing the pipeline, markings must be made. A pipe is laid across it.
- The tucker is adjusted to a certain pipe diameter.
- The work is carried out by 2 people; one lays the contour, the other strengthens it with a tucker.
- The staples are attached to the insulating material. Recommended pitch is 30 cm.
- At the point where the contour turns, 3 brackets are installed that hold a certain bending radius.
The installation of the main line is quick, but it requires careful preparation. It will be difficult to detach the bracket from the floor. This can damage the insulation material.
Distance between fasteners
In order for the floor heating system to work efficiently and without unnecessary costs, you need to calculate the optimal pitch between the pipes in the floor. The standard distance is from 10 to 20 cm. The step can be either constant or variable:
- a constant contour step of 20 cm wide is used for systems with a heating load of up to 50 W per 1 sq. m;
- a distance of 15 cm is made with a heating system load of 80 W per 1 sq.m.
Variable pitch is used in other cases. If the installation of a water circuit near external walls is done with a distance of 10 cm, then, moving towards the center, this distance is gradually increased to 20 cm. For economical floor heating, it is recommended to make a distance of 15 cm.
Choosing the optimal step
After selecting the material and method of pipe placement, you need to determine the distance between adjacent turns of the circuit. It does not depend on the type of placement of coolants, but is directly proportional to the diameter of the pipes. For large sections, too small a pitch is unacceptable, just as for pipes with a small diameter, a large pitch is unacceptable. The consequences may be overheating or thermal voids, which will no longer characterize the heated floor as a single heating system.
Video - Warm floor "Valtek". Installation instructions
A correctly selected step affects the thermal load of the circuit, uniform heating of the entire floor surface and the correct operation of the entire system.
- Depending on the diameter of the pipe, the pitch can range from 50 mm to 450 mm. But the preferred values are 150, 200, 250 and 300 mm.
- The spacing of coolants depends on the type and purpose of the room, as well as on the numerical indicator of the calculated heat load. The optimal pitch for a heating load of 48-50 W/m² is 300 mm.
- For a system load of 80 W/m² or more, the pitch value is 150 mm. This indicator is optimal for bathrooms and toilets, where the floor temperature must be constant according to strict requirements.
- When installing heated floors in rooms with a large area and high ceilings, the coolant laying step is taken to be 200 or 250 mm.
Warm water floor installation project
In addition to a constant step, builders often resort to the technique of variable placement of pipes on the floor covering. It consists of more frequent placement of coolants in a certain area. Most often, this technique is used along the line of external walls, windows and entrance doors - maximum heat loss is noted in these areas. The value of the increased pitch is determined as 60-65% of the normal value, the optimal value is 150 or 200 mm with an outer pipe diameter of 20-22 mm. The number of rows is determined during the laying process, and the calculated safety factor is 1.5.
Schemes for enhanced heating of external walls
Variable and combined laying steps are practiced in external and peripheral rooms due to the urgent need for additional heating and large heat losses; in all internal rooms the usual method of placing coolants is used.
The process of laying underfloor heating pipes is carried out in strict accordance with the project
Water circuit installation diagrams
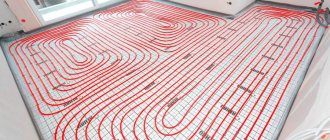
Schematically, laying pipes for arranging a liquid circuit can be done in one of the following ways:
- coil;
- double coil;
- snail.
Coil. The method of laying such a contour is the simplest and is performed in loops. This option will be optimal for a room divided into zones with different purposes, for which it will be convenient to use different temperature conditions.
The first loop is installed around the perimeter of the room, then a single snake is inserted inside. Thus, a maximally heated coolant will circulate in one half of the room, while a cooled one will circulate in the other, and accordingly the temperature will be different.
The coil turns can be spaced evenly, but the bends of the water circuits in this case will have strong creases.
The serpentine pipe placement method is ideal for rooms with little heat loss. They are used not only for apartments and private houses, but also for industrial facilities where there is a need to heat all year round
Double coil. In this case, the supply and return circuits are located next to each other throughout the room.
Angle coil. It is used exclusively for corner rooms where there are two external walls.
The advantages of the serpentine shape include simple planning and installation. Disadvantages: temperature changes in one room, pipe bends are quite sharp, so you cannot use a small pitch - this can cause a pipe break.
When laying the contour in the edge zones of the room (floor areas where external walls, windows, doors are located), the pitch should be smaller in comparison with other turns - 100-150 mm
Snail. Using this arrangement, supply and return pipes are installed throughout the room. They are placed parallel to each other and installed starting from the perimeter of the walls and moving to the center of the room.
The supply line in the middle of the room ends in a loop. Next, parallel to it, a return line is installed, which is laid from the center of the room and along its perimeter, moving towards the collector.
The presence of an external wall in the room may require double laying of pipes along it.
Due to the alternation of two lines when laying using the snail method, temperature fluctuations in the supply and return lines can be up to 10 °C
The advantages of this method include: uniform heating of the room; due to smooth bends, the system has little hydraulic resistance, and savings in consumables can reach 15% compared to the serpentine method. However, there are also disadvantages - complex design and installation.
