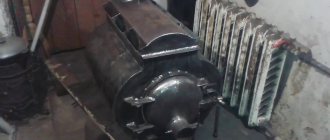
With rising energy prices, more and more people are seeking to obtain as much energy as possible from sources previously considered waste. In this case, used oil, household waste, and old car tires are considered as fuel.
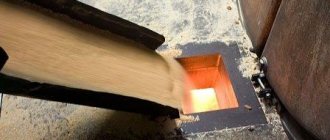
Today we will talk about how to build a sawdust stove inexpensively and with your own hands, and it will be a unit that works on the principle of long-term combustion.
After all, it will not be a secret to anyone that in our country there are regions where wood chips and sawdust can be used for heating for practically nothing, except for the cost of their delivery.
Smaller area – less heat
There are long-burning stoves with connected water and air circuits. Thanks to this, a sawdust stove can heat a fairly large area.
In the article about heating stoves for greenhouses, we have already considered a do-it-yourself version of a sawdust stove, but this version of the stove is capable of heating a relatively small area, and this is not due to the lack of a water or air circuit, but to the small area where hot gases are used.
The figure shows drawings of this furnace.
Sawdust stove from a 200 liter barrel
Furnace heating area
As you can see, when fully loaded, the thermal area of the furnace is approximately 1/3 of the total area . In the figure, this area is highlighted with red shading.
With this arrangement, there is a loss of thermal energy escaping through the chimney. Of course, you can try to get as much heat as possible by increasing the length of the chimney through the heated room. But this is not entirely rational, and in some cases it is simply impossible due to the design features of the room and its area.
This long-burning sawdust stove is good for its simplicity, because by and large it can be made within a few hours from scrap materials.
Review of brick kilns
There are many models of furnace devices, which are different both in their form and in their functions. The most popular are Russian, Dutch and Swedish stove units. They are slightly inferior to the Finnish, Kuznetsov stove and housekeeper.
Russian stove
This multifunctional design with large dimensions is one of the oldest models. In past times, it was very common: in every home, the presence of a beautiful Russian stove was mandatory.
Russian stove
The main advantages are:
- possibility of heating the room, beds;
- cooking food;
- use as a drying device for clothes and shoes;
- With regular heating, it provides an even, long-lasting temperature;
- creates a special Russian flavor and will become the main decoration of any room.
Despite their advantages, such brick stoves for wood-burning homes have several disadvantages:
- massiveness requires the installation of a solid foundation;
- occupies a significant area in the room;
- the need for regular cleaning;
- difficulty in installation;
- The efficiency is only 60 percent.
Dutch
Another very popular model is the Dutch oven. This design, which looks like a column, really appealed to the owners of country houses and small-sized premises. Its height is significantly greater than its width, so the Dutch model takes up little space.
Dutch oven
Advantages of a brick stove for a Dutch-type wood-burning cottage:
- compactness;
- low cost of masonry material;
- possibility of rapid heating due to thin walls;
- long breaks between fireboxes do not affect the quality of heating;
- You can heat a medium sized room.
Disadvantages of this model:
- relatively low efficiency, which is equal to 40 percent;
- requires regular cleaning of the ash pan. Without proper care, cravings can get worse;
- requires constant attention during combustion and some skills in maintaining the fire.
Swede
This model is designed taking into account the cold climate of northern countries, so it is ideal for our region.
Stove "Swedish"
Advantages of this model:
- compactness;
- high performance;
- fast heating;
- possibility of heating adjacent rooms.
Flaws:
- the cost of construction increases due to the use of fireclay bricks;
- the need for good thermal insulation to avoid heat loss through the floor;
- not suitable for houses and areas that are rarely heated. If it cools completely and is not heated frequently, the furnace masonry may be damaged.
Housekeeper
This small Russian brick stove for a summer house or home can be installed even in a small room. Its design is very simple, but the oven can also be used for cooking. This model is becoming increasingly popular, because its dimensions contribute to the rational use of space.
Housekeeper
Advantages of the economy stove:
- does not take up much space;
- heats the room well;
- you can cook food.
Flaws:
- You cannot fire two fireboxes at the same time;
- requires constant ash removal;
- takes time to heat up;
- For better combustion, you need to use firewood of noticeably the same thickness.
Finca stove
This heating device differs from other types in its special design: one firebox body is located inside the other.
"Finka"
Advantages of the furnace unit:
- high heat transfer efficiency;
- ease of manufacture;
- low cost;
- fast heating;
- safety and environmental friendliness.
Disadvantages of this type of furnace device:
- relatively large dimensions;
- It is necessary to carefully monitor the amount of fuel in the firebox.
Kuznetsov furnace
The heating device received its name thanks to the name of the developer Kuznetsov. The operating principle of such a unit is based on the movement of free gases.
Kuznetsov furnace
Advantages:
- excellent thermal efficiency;
- complete combustion of fuel;
- no soot;
- a small amount of masonry material.
Flaws:
- difficulty in installation due to the design;
- high requirements for material;
- Some skills are required to fire such a device.
Other stove models
In addition to the above models, there are other, less common:
- V. Bykov's stove, which is only suitable for heating a small room;
- Podgorodnikov’s two-bell stove, which can be heated with either coal or wood.
Solving the problem - circuit design
But today we are interested in a long-burning sawdust stove, which can be used to heat rooms as large as possible.
Of course, you will need to install a water or air circuit, but first let’s solve the question: is it possible to increase the thermal area in a stove of this type without increasing the length of the chimney?
External circuit device
The first one shows a long-burning stove with an external smoke circuit. The device completely replicates the previously presented sawdust stove. The only changes are the circuit through which the hot flue gases pass and the lower position of the chimney.
The first one shows a stove with an external smoke circuit. The device is completely identical to the previously presented oven. The only changes are the circuit through which the hot flue gases pass and the lower position of the chimney.
As you can see, the changes made it possible to significantly increase the thermal area of the long-burning furnace without increasing the length of the chimney. The volume of the firebox remained unchanged.
As you can see, the changes made it possible to significantly increase the thermal area of the furnace without increasing the length of the chimney. The volume of the firebox remained unchanged.
Internal contour of a sawdust stove
In the second case, the internal circuit is installed inside an existing furnace. The thermal area has also increased. The only drawback of this installation is the reduction in sawdust loading volume.
But there is also an advantage: setting up such a circuit will not be difficult; the only thing required is installing a 200-liter barrel of a smaller diameter inside and rearranging the chimney.
As you can see, a small modification will significantly increase the efficiency of using such a seemingly simple stove.
Bubafonya - the most popular long-burning potbelly stove design
The practicality of the Bubafonya stove is proven by its popularity. The fact that this is one of the most popular long-burning stoves is evidenced by the fact that it is used in almost all small greenhouse farms.
The great advantage of this stove is its practicality and ease of use - it is practically omnivorous; dry firewood, sawdust, pellets and briquettes made from straw or sunflower can be burned in the firebox. This stove also shows one of the highest results in terms of fuel combustion duration.
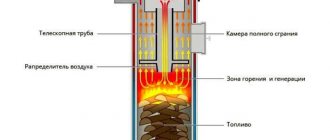
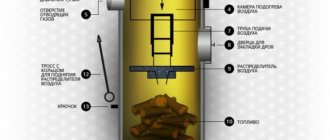
The basic concept of this heating device is that the fuel combustion process combines the process of burning conventional fuel with a controlled supply of oxygen and the process of pyrolysis. The design of the furnace is a metal body with an open top. For the body, a 200 liter thick-walled metal barrel is most often used. It contains a central rod, made of a thick-walled pipe, with a rigidly welded metal disk slightly smaller than the internal diameter of the barrel. The height of the pipe is 10-15 cm higher than the barrel. Ribs are welded on the bottom side of the disk so that there is a small space between the disk and the bottom of the barrel - this is necessary for oxygen access to the firebox. The third element of the design is a structure similar to a guide with a disk. The difference is that the diameter of the pipe is larger than the guide, and the disk itself has holes throughout its entire area. It is put on the internal guide and gradually moves down as the fuel burns. The lid is made of thick metal so that the hole allows the press to lower evenly as the fuel burns. The chimney is sealed in the upper part of the body at a distance of 5-7 cm from the top.
How bubafoni works
Before use, the central guide is inserted into the housing. The entire volume of the body is filled with fuel - firewood, briquettes, flights. The firewood is stacked vertically very tightly. The height of the bookmark should be 5-7 cm below the top cut of the barrel. After this, the upper press is installed on the guide and the cover is put on. Ignition is carried out from above. After the fuel combustion process begins, a process of gradual temperature rise occurs - oxygen enters through the pipes into the combustion chamber. When the temperature rises to 300 degrees, the process of gas formation begins. The gases rise upward and the flame moves into the space between the lid and the upper press. Thus, the process of combustion of gases begins. To regulate the burning speed, an adjustable damper is installed on the pipe of the upper press. When using such a stove, one load of firewood is enough for 48-72 hours of burning.
New system on old principles
Sawdust boiler with a register for connecting to a radiator heating system
But that's not all. A homemade sawdust stove allows you to create even more efficient designs.
The picture shows a long-burning boiler with the ability to connect to a water heating system. What’s remarkable is that the boiler can be made with your own hands; it works on sawdust, small wood chips and various household waste. But of course, first of all, it is designed to work on sawdust.
Cover with blower
Upon closer examination, our readers will notice some similarities between this boiler and the Bubafonya stove. But it is not so.
The pipe passing through the lid, although it is a blower, does not have the shape of a piston and is completely motionless when the boiler is operating. This picture shows a fully charged boiler. As you can see, the pipe is recessed almost completely inside; in a “bubafoni” it would protrude significantly from the boiler.
Fuel requirements
The productivity of the heating process depends on the quality of raw materials loaded into the boiler. The main requirements for wood fuel are:
- Density. The efficiency of the heating device is significantly affected by the size of the raw material. The lower the density of the material, the greater the heat transfer during its combustion. The best option is sawdust from a milling machine. The density of such wood waste is on average 120 kg/m³. From 250 grams of such material you can get 1 kW of thermal energy.
- Humidity. Dried sawdust significantly increases the efficiency of the combustion process. The moisture content of wood waste for the boiler should not exceed 20%.
Some models of factory heating units are able to function normally on sawdust with a moisture content of up to 40%. Such designs have a built-in element that rotates the wood fuel. When exposed to high temperatures, sawdust dries quickly.
The humidity of sawdust should not exceed 20%For ease of storage and loading, compressed sawdust is often used. The amount of thermal energy from such a material corresponds to the volume of heat that is released during the combustion of the same portion of natural wood.
Materials for the device
Let's look at how to make such a sawdust stove with your own hands.
To make it, without a register, you will need:
- Pipe with a diameter of 400 mm, wall thickness 10 mm . You can, of course, use a thinner wall, but then the service life of the boiler will be significantly reduced.
- Blower pipe with a diameter of 76 mm . If it burns out, it can always be replaced, so the wall thickness does not matter much.
- Metal for the lid with a thickness of at least 10 mm . In this case, the lid must be strengthened at the edges. Otherwise, she will suffer from high temperature.
- Chimney pipe with a diameter of 100 mm .
We build a boiler on sawdust
How to make such a boiler yourself?
A plug is welded to a pipe with a diameter of 400 mm on one side. This will be the bottom of the boiler. The height of the boiler depends on your needs. Calculate in this way that during normal operation one bag of sawdust is enough for 8-10 hours.
Our advice: a 1500 mm high boiler with a full charge can operate for up to 40 hours without recharging.
- A cover is cut out of metal 10 mm thick.
- In the picture above you can see that it is made in the form of a polygon, this is not important, it’s just that it’s much easier to cut thick metal if you use a guillotine.
- Exactly in the middle of the lid, it is necessary to cut a hole of such a diameter that a pipe with a diameter of 76 mm can be freely inserted into it. The gap should not be too large.
Our advice! Cutting a completely even hole in thick metal at home is quite difficult. Therefore, use a lathe to make a thick washer. It should fit freely onto the 76th pipe and at the same time cover the irregularities in the cover hole. By electric welding the washer to the lid, you will get a completely even hole into which the 76th pipe fits perfectly.
- On the side of the upper part of the boiler body it is necessary to weld a chimney outlet from a 100 mm pipe.
Advantages and disadvantages of long-burning stoves
The main and main advantage of this type of furnace is its low cost. Depending on the region, it can start from an amount of eight thousand rubles. The ranking of the 10 best-selling boilers is given below.
- Klondike
- Buderus
- Sogra
- Siberia
- Thermal
- Bubafonya
- Germa
- Alaska
- Slobozhanka
- Teplodar
You can make such a stove at home, then its price can be reduced almost to the cost of the material
When making your own, special attention should be paid to the quality of the metal used. It must be heat resistant
The absence of open fire is a big plus for the fire safety of your dacha. A long burning time allows you to maintain the microclimate in the room for a long time. It should be noted that the stove is simple in design and easy to operate. All control consists of adjusting the air using the lower damper, as well as adjusting the damper of the upper pipe. Moreover, the boiler firebox is designed in such a way that even with the pipe damper completely closed, it is almost impossible to get carbon monoxide poisoning.
If used correctly, a long-burning boiler will be your faithful assistant for a long time. At your dacha, thanks to the influx of fresh air and the exhaust of hot air, natural ventilation will constantly occur, which will also have a beneficial effect on the room climate. Scientists have proven that a smooth transition from heat to cold and vice versa is optimal for human health. This is precisely the transition that these furnaces provide.
The following disadvantages should be noted:
- the need to prepare firewood
- small size of the heated room
- periodic cleaning of the ash pan
- availability of storage space for firewood
It should be noted that you don’t need so much firewood for your dacha, cleaning the ash pit is not difficult, and making a shed for firewood is very simple. So with creativity and a positive attitude, all these disadvantages can easily be turned into advantages.
Making a blower
Blower installation
The boiler is basically ready. All that remains is to make a blower.
The picture shows how it is arranged.
- A piece with a length equal to the height of the boiler is cut from a pipe with a diameter of 76 mm.
- In the lower part, 3 or 4 pieces of reinforcement or steel rod are welded so that the blower increases in length by 100-150 mm. This is exactly the distance by which it rises above the lid.
- Using a grinding machine, holes 100 mm long and 5-7 mm thick are cut in the blower. The quantity directly depends on the diameter of the housing pipe and its height. They are located on 1/3 of the blower.
Features of using the oven
The operation of sawdust stoves has significant differences from traditional wood or coal devices. Fuel is loaded into a special fuel chamber, which is completely filled up to the chimney pipe. Thin branches, paper or rags soaked in a flammable mixture are laid on top of the sawdust mass. Next, the press is installed, and the chamber is closed with a lid.
After the combustion process begins, the damper remains motionless, and the device is warmed up until the next fuel supply.
The combustion process itself begins in the center of the embedded fuel mass, then moves to the circumference of the walls. As it smolders, the compressed sawdust significantly decreases in volume, which ensures a burning duration of up to 10 hours.
The heat transfer coefficient of a sawdust stove directly depends on the diameter and volume of the fuel chamber. Long and tapered designs provide accelerated heating, while large-diameter devices provide slow heating and high heat transfer.
How to load fuel correctly?
Firebox and chimney
The illustration shows an empty firebox. How does the stove work and how to use it?
Unlike, for example, “bubafoni”, the blower pipe is inserted directly into the firebox with the pins down. They should rest against the bottom, with the blower located in the center.
- Fuel loading begins.
- Fuel is loaded up to the chimney level.
- Sawdust must be compacted.
- The better the sawdust is compacted, the more efficiently the stove operates, and this significantly affects the operating time.
- In this case, as the fuel is compacted and loaded, the blower must be slightly rocked to the sides so that a small gap is formed between the blower and the compacted fuel.
- Otherwise, the ignition process will be significantly delayed.
Fuel loaded - start
Boiler ready for operation
- You can ignite the fuel.
- You can set fire without the lid installed, but it is better to install the lid right away, and pour a little waste with kerosene or gasoline into the ash pit, 50 g is enough.
Our advice: to regulate the draft on the blower, you can install a damper in the chimney.
- After the fuel ignites, it is necessary to close the damper to ¾ of the hole.
- After 2-3 minutes, the damper must be slightly opened and the required air supply adjusted.
- When the oven reaches operating mode, you can hear a steady hum. Using the damper, the operating mode of the oven is regulated.
Installing a coolant register
Installed register
Now you can think about connecting the boiler to the heating system. To do this, you will need to install a register at the chimney outlet of the boiler.
The figure clearly shows the installed register with the connected supply and return connected to the central heating system. This is one option, you can use a completely different one. The main thing is that it corresponds to the thermal parameters of the boiler you have manufactured and fully satisfies the volume of the installed radiator heating system.
We will not dwell in detail on the structure of the register. Let's say one thing: the closer to the boiler it is installed, the more efficiently it works.
Pipelines connected to the register
Greenhouse heating options
Familiarize yourself with the main features of the systems most commonly used to heat greenhouses.
Steam heating
Steam heating
This option should be considered if it is possible to connect the heating of the greenhouse to the heating system of the house.
Pipes laid from the house to the greenhouse require high-quality insulation. The boiler power reserve must be sufficient to provide the required level of heating for both the house and the greenhouse.
There is also a way to organize autonomous steam heating. In this case, the boiler is installed in the greenhouse. Pipes and batteries are connected to the heating unit, and the coolant supply is ensured. Water is traditionally used as a coolant.
To ensure forced circulation of water, the system is usually equipped with appropriate pumping equipment.
Air heating
Air heating
To organize air heating, air heated in the firebox of a special boiler is used. Such heating is characterized by minimal monetary costs for fuel and high thermal efficiency.
Air heating
About half an hour after starting the equipment, the air temperature in the greenhouse can rise by 20 degrees. An additional advantage of the system is that there is no need to use any intermediate coolants.
Gas heating
Gas heating
In such a system, heat is generated as a result of gas combustion. The system can be configured either by connecting to a permanently supplied gas or by using fuel in cylinders.
Gas heater
During operation of the system, there is an intensive intake of air from the heated room, accompanied by the release of water, carbon dioxide and other waste that pose a danger to humans and, of course, plants. In view of this, the installation of gas heating will entail additional costs for organizing the ventilation system.
This type of heating is well suited for small greenhouses. When used over large areas, the costs and complexity of maintenance may be prohibitively high.
Electric heating
Electric heating
Modern electric heating units allow you to efficiently heat a greenhouse without much effort.
Among the main advantages of such devices, it should be noted that during their operation, only the heating of plants and soil occurs. The air does not warm up. It gradually receives heat from the heated earth. This allows you to equip the most efficient and economical heating system.
IR heaters
Modern systems are equipped with sensors and temperature controllers, which provide ample opportunities for dividing the greenhouse into different thermal zones and providing the most comfortable conditions for each group of plants.
Prices for popular models of infrared heaters
IR heaters
Stove heating
Greenhouse stove
The main unit in such a heating system is a solid fuel boiler, usually burning wood or coal.
The simplest stove heating system includes a solid fuel boiler and a smoke exhaust pipe leading from the greenhouse to the street. Additionally, you can equip the system with pipes and radiators, which will allow you to organize the most efficient and high-quality heating.
Both conventional wood-burning stoves and modern long-burning boilers are available on the market. Such devices do not require frequent fuel supply and use it as efficiently as possible.
Installing a solid fuel boiler directly in the greenhouse will lead to drying out of the air and soil, as a result of which the cultivated plants may simply die. To prevent this from happening, when installing a solid fuel boiler in a greenhouse, it is necessary to equip an air humidification system. Usually it is enough to install a large container of water.
Stove heating
Stove heating of a greenhouse is the most popular heating option. In addition, there is nothing complicated in setting up such a system - even a novice master can handle the job. Also, solid fuel heating unconditionally outperforms electric heating in terms of cost. That is why the procedure for organizing heating of a greenhouse will be considered using the example of stove heating.
Basic rules of thermal insulation
But that is not all. You can significantly increase the efficiency of the boiler if you insulate it.
We have talked many times on our pages about the thermal conductivity of materials. In the article Iron stove for a bath with your own hands - knowledge is power there is a video that clearly talks about such an effect as thermal radiation.
Let us briefly note that during the operation of any furnace, thermal radiation is generated that freely passes through the metal. If our boiler worked without a register, it would be great; it would easily heat the room in which it is installed.
- But our boiler is mainly aimed at heating the coolant passing through a register installed on the chimney.
- This means that we absolutely do not need heat losses escaping through its walls; they must be directed into the chimney.
Thermal radiation without loss
The above article and video discuss this issue in detail. It becomes clear that lining the boiler with bricks close to its walls will create an excess of thermal radiation in the boiler firebox, which, together with the exhaust hot gases, will rush into the chimney. That’s what we need, and a damper installed in the chimney after the register will allow us to well regulate the operation of the boiler and the heating of the coolant.
You can line the boiler and register with basalt wool, and make a casing of tin on top.
What have we learned?
From an article on biology (6th grade) we learned that in many plants, the roots perform, in addition to the main ones, some additional functions, which are associated with corresponding modifications of the roots. Although these functions are considered additional and specific, they still relate to the support and nutrition of the plant. The types of modified roots are very diverse.
Boiler installation on a permanent basis
“Underground” installation of a boiler with thermal insulation
If there are no problems with sawdust in your region, and this heating method is the most profitable, you can install this boiler more rationally and conveniently.
The figure shows the boiler installation diagram:
- A pit of the appropriate size was dug for its installation.
- A foundation is laid at the bottom of the pit.
- The walls of the pit must be strengthened against crumbling.
- The boiler is installed in a pit.
- Thermal insulation is installed around the boiler, inside the pit.
- The boiler cover is thermally insulated separately so that it can be removed.
- Coolant pipelines are connected.
- The register is also insulated.
- The chimney is connected.
- The boiler is ready for operation.
Service? No problem!
As can be seen from the figure, excellent thermal insulation of the boiler is achieved and maintenance is much easier. With a fairly high boiler, loading fuel is not entirely convenient, but in this option it is not difficult.
- It is enough to open the lid, located almost at floor level, and you can load fuel.
Many people may have a question: how to clean a boiler? We dare to assure you that there will be no problems.
- During operation of the boiler, the fuel burns completely.
- At the end there remains a small handful of ash that fits into one scoop.
- It seems that for a person who makes sawdust stoves himself, it will not be difficult to make a brush and dustpan with a long handle.
Is it possible to install the boiler outside?
What else is worth noting is that you can install the boiler in this way outside the heated room. You just need to install a box on top and insulate the pipelines well. In this option, the boiler will not cause any trouble at all and will not take up extra space in the room.
Having considered the issue of constructing a sawdust boiler assembled with your own hands, it becomes clear that with certain skills and knowledge, a simple unit can turn out to be quite a decent heating boiler.


