On trading floors, plaster for stoves and fireplaces is presented in a wide range of compositions and brands. Let's consider the features of each component that are used for factory or self-preparation of the solution. As well as classic time-tested recipes.
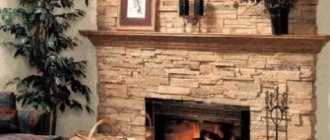
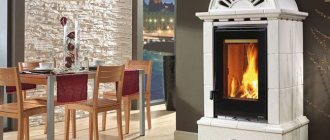
Example of finished products Source sogonkom.com
Advantages of plastering the stove
Without decoration, the walls of the stove do not look aesthetically pleasing, since building bricks are used for masonry without the use of neat facing bricks. Such heating structures are always finished with finishing materials. Here are a few reasons why the use of plaster is important:
- The fine-grained mortar fills the pores in the masonry mixture. This prevents carbon dioxide from entering the room.
- The leveling mixture can be used as a stand-alone coating or as a base for any heat-resistant facing material.
- Plaster is acceptable for finishing any stove or fireplace. This could be restoration, strengthening or decoration. At the same time, the universal mixture can be considered an economically advantageous choice due to its relatively low cost.
In addition, this material, to one degree or another, has insulating properties, which helps to retain the heat of the furnace walls for a longer time. The solution is easy to work with and dries quickly. You can give the oven surface a smooth, rough or decorative texture.
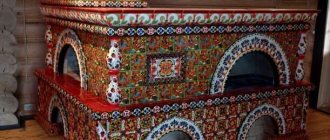
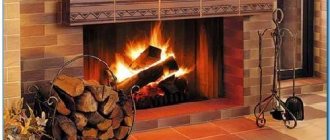
Decorative plaster on the stove Source www.elitfasad.rf
Applying the solution to a previously prepared surface
Stove plaster can be classified as one of the types of plaster for interior decoration.
Let us remind you once again that you can only work with a previously heated stove . It is very important! But let's not forget about some other subtleties of the stove business. Thus, it is recommended to install a large-mesh metal mesh (the cells should not be larger than 2x2 cm) on the stove before applying the solution.
This will greatly strengthen the plaster layer, giving it additional strength.
Application of the solution
Do not forget that the plaster is applied in several layers (the thickness of each of them should not exceed 5 mm, and the total thickness should not exceed 1 cm). After applying each such layer, you should give it a little time to set on the surface. The solution must be applied evenly, from top to bottom.
Don't forget to rub the plaster with a special trowel to make it smooth and neat. It is recommended to do this in a circular motion, without strong pressure on the surface.
Next, you should let the plaster dry and set. Usually this takes 12 hours. If after this period you find cracks on the stove, you should carefully moisten it with water and rub it with the solution that we used earlier.
Choosing plaster for finishing the stove
The main requirement for what to plaster a stove with is resistance to regular heating and cooling. At the same time, the shape must be maintained, which means thermal expansion should be minimal. The issue of mechanical stability and wear resistance is also considered. If cladding is planned further, the coating must cope with the additional load.
All solutions are conventionally divided into simple and complex. The determining criterion is the presence of one or more binding components in the composition. This may be cement, clay, lime, gypsum or asbestos.
Cement
M150-M500 grades of cement are used for working with furnaces. A simple mixture is unacceptable, since concrete is characterized by low elasticity, fragility and poor resistance to heat. Additionally, clay pulp is added to the solution.
Clay
This material may vary in terms of fat content. The degree is determined by the sand content. The less it is, the better the adhesion, strength and resistance to temperature changes.
Checking the fat content of clay Source remont-book.com
If you prepare your own plaster mixture from clay, you must exclude stones, debris and vegetation debris. This can be done by soaking for 4-5 days and rubbing the raw materials on a metal mesh with small cells.
Among the advantages of using clay plaster for stoves and fireplaces are environmental friendliness, plasticity and long working time of the solution. It is also noteworthy that it can be applied without using a painting tool, that is, by hand. But it is important to take into account the fact that the minimum layer is 10 mm. If it is not followed, the coating will crack and peel off from the base within a short time.
Gypsum
This material is used to give the solution strength, which is especially important for the formation of stucco. But simple mixtures with its participation are not suitable for working with furnaces, since cracking of the coating occurs. As a rule, additional lime and clay are added to increase strength, elasticity, and reduce drying time. The main mineral typically hardens after 10-15 minutes, so you need to mix the solution in small portions.
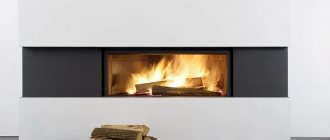
Decorating the fireplace with stucco Source masterdel.ru
See also: Catalog of house projects with a fireplace and stove
Asbestos
It is not recommended to use asbestos as the main component, since when heated it releases harmful substances. It is added to the solution as a reinforcing additive before plastering the stove to prevent the finish from cracking over time. Also, this mixture lasts a long time, is resistant to moisture, and fireproof.
Lime
This material is used to impart plasticity to the solution and increase adhesive properties. Lime also has a positive effect on the inertness of the coating to biological activity. That is, the risk of insects is reduced.
Technical parameters of bricks
Brick size and shape
One of the unchanging rules for constructing stoves is the accuracy of the design. Most projects are designed for specific brick sizes. Therefore, which brick is best to build a stove from is a very important question.
Brickwork plans usually indicate not only the number of bricks, but also their dimensions. It is generally accepted that the standard dimensions of bricks correspond to the dimensions of a single type - length 250 mm, width - 120 mm and height 65 mm. This is considered the “gold standard”. However, it is worth noting that these are the dimensions established by the Soviet standard. Today, in addition to this traditional size, there are other sizes used for laying stoves:
- “Euro standard” - with the same length and height as the normal standard, its width is 85 mm (it is often designated 0.7 NF);
- Thickened brick (KU) - differs from the usual format in height, it is 88 mm (designation 1.4 NF);
- Single modular brick (KM) - length is 288 mm, width 138 mm, height 65 mm (designation 1.3 NF);
- Thickened brick with horizontal voids (KUG) has dimensions of a thickened brick of 250x120x88 mm (indicated by 1.4 NF).
There is another specific brick for laying stoves - a stove module, its dimensions are 230mm x 125mm x 65mm. Despite the fact that this standard is considered outdated, many successful stove designs have designs designed specifically for this size. The popularity of this kiln standard is such that many manufacturers of refractory bricks for individual kilns still produce bricks with dimensions specifically for the kiln module - 230x114x40 or 230x114x65 mm.
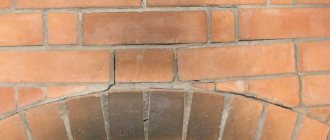
For the construction of firebox vaults and cladding arches, there is also a specific type of brick - wedge-shaped or arched. Its peculiarity is that the dimensions indicate both the wide side and the narrowed side, for example, 230x114x65/45 mm.
Ceramic bricks for stoves used for decoration can have different shapes. For example, have rounded corners, convex or concave sides, or have a glossy surface. The use of this type of material must be indicated in the ordinary furnace laying diagram.
Brick strength
The second point that you need to pay attention to when choosing bricks for laying stoves is brand strength. This characteristic shows how much load a brick can withstand without showing signs of deformation. The marking is usually indicated by the letter “M” and a number corresponding to the maximum load expressed in kilograms / square centimeter
Thus, the M150 marking is allowed for the construction of most stove designs. M 200 is suitable for the construction of a furnace for heating two floors. But higher grades, for example M-300 or M-500, are usually not used for the construction of stoves. The fact is that special chemical additives are used to mold a material of such density, so when heated, such a material partially loses its properties, which negatively affects the condition of the structure.
Frost resistance, thermal conductivity and hygroscopicity
Frost resistance of brick is especially important for the construction of stoves in houses where permanent residence is not planned in cold weather. It is usually designated by the letter F, next to which is indicated the minimum number of freeze-thaw cycles without loss of strength and the beginning of the process of mechanical destruction
This indicator is important for such structural elements as the base and head of the chimney pipe.
When choosing bricks for masonry, you should also pay attention to such an indicator as thermal conductivity - the ability of the material to retain heat
This is especially important for laying the walls of the firebox and chimney. For these purposes, material is taken with indicators not lower than 0.61 W/m×°C
For these purposes, material with indicators not lower than 0.61 W/m×°C is taken.
But as for hygroscopicity, you should choose the material with the lowest indicator. The lower the coefficient, the less the brick is able to absorb moisture. For the base and chimney, this is a very important indicator of the quality of the brick, since these are the parts of the structure that are most susceptible to moisture.
Proportions in a self-prepared solution
To plaster stoves, you can use a simple mixture of fatty clay and sand. The classic version of the composition involves 2 parts of filler to one of binder. Additionally, you can add 1/10 of reinforcing asbestos in a fluffy state.
In the case of cement, the proportional composition looks like this: 4 parts binder, 9 sand and a third of water for the additive. With the use of asbestos, sand is halved, and the reinforcing filler occupies 10% of the total mass of the solution (no other additives except water are present).
Preparing the mixture manually Source fasad-exp.ru
Less commonly used is liquid glass or chalk. As a rule, they are relevant for facing work. Then mix dry cement, clay and chalk 1 part each, sand - 3. Then add pulp to the desired consistency and 1 part liquid glass.
Lime is added to a solution of clay and sand with asbestos reinforcement. Proportionally, it looks like this: one part each of binders, two parts each of sand and water, up to ⅕ asbestos fiber. The question of how to plaster the stove so as not to crack is also approached by using alternative materials: crushed straw or fiberglass, hemp, chaff, slag wool.
Self-preparation of the solution always begins with preliminary mixing of the dry ingredients. This way the finished mixture is as homogeneous as possible. To ensure uniform drying, reduce the risk of cracking of the coating and increase working time, add about 200 grams of table salt per bucket of the mixture.
If the stove is designed to use coal or peat briquettes, then fireclay powder is additionally added to make the plaster resistant to high heat.
Fireclay powder Source wasteinfo.ru
See also: Catalog of companies that specialize in finishing materials and installation of stoves
Is it worth buying a ready-made mixture?
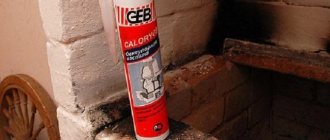
Undoubtedly, a factory-made mortar purchased on the construction market will be more reliable when plastering the stove. They are made from special components for interior decoration, which give the mixture many useful properties: it will be able to withstand higher temperature changes (up to +200...+250⁰C).
Plastering a stove with such a solution is practically no different from the process of applying a clay solution prepared by yourself. In addition, all factory mixtures have special instructions, which indicate the subtleties of working with the composition you have chosen.
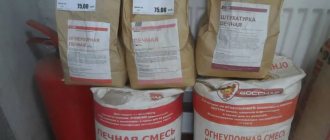
Ready mix
The disadvantage of this approach is the price: the cost of a solution prepared by yourself will be slightly lower than the cost of a product purchased on the market.
Technology for plastering a stove
To carry out work on plastering a stove, a set of tools for a mason and a painter is required. You will need a hammer and chisel to work with the base. For the solution, use a container for mixing, spatulas, trowels, graters with smoothers. For alignment, a rule and a level are used.
Additionally, a construction knife, brushes with a roller, and a brush with metal bristles may be useful. The list of consumables looks like this: mixture, water, soil, beacon and corner-forming profile, reinforcing fiber or plaster mesh, gloves, whisk attachment for a drill or hammer drill for preparing the solution. It is also necessary to provide protection for adjacent walls and floors from contamination. For this you will need film and masking tape.
Preparatory work
In the case of a new stove, it is permissible to begin finishing work only after several thorough heatings over a period of 2-3 months. Then shrinkage of the structure, which leads to cracking of the plaster coating, will be eliminated. For older units this requirement is not relevant.
New stove for finishing Source yandex.net
Next, before plastering the stove, you need to carry out preparatory work. The working base is considered to be a clean, grease-free and flat surface. Protruding excess masonry mixture or previous decorative finishing must be removed. Damaged bricks are restored or replaced completely. The depth of the seams must be at least 10 mm. Notches are applied to a durable concrete surface.
What results can be expected after finishing its cladding?
The results that indicate the successful completion of the stove plastering work are:
- The deviation from the vertical plane along the entire height of the structure should not exceed 1 cm.
- The horizontal deviation of a similar indicator should not be more than 2 cm.
- The deviation of the thrust between the corners from the straight line should not exceed 0.3 cm.
- The depth of differences from a flat plane formed when applying the two-meter rule should not exceed 0.2 cm.
Briefly about the main thing
The problem of how to plaster a stove to prevent it from cracking can be solved in different ways, using various compositions based on cement, clay, gypsum, asbestos or lime.
The main requirements for leveling materials: elasticity, heat resistance, safety, mechanical strength and low thermal expansion.
The plastering itself is carried out in two ways: a reinforcing mesh made of steel or fiberglass is attached to the walls, or environmentally friendly fibers are added to the solution.
The consistency of the prepared mass depends on the purpose: roughing and grouting - liquid, leveling - like cottage cheese, for installing profiles - thick. At the same time, at each stage of work it is important to comply with the permissible standards regarding the layer. Enlargement causes improper drying, flaking and cracking.
What about fireplaces?
Unlike a stove, which accumulates heat in its mass, a fireplace is a less heat-intensive heating device. Heating of the room in an open fireplace occurs mainly due to radiation. A warm fireplace gives off its heat as long as the wood is burning and only a small part of the heat accumulates in the walls of the firebox. As a rule, country houses are chosen to install fireplaces, but in some cases this can be done in a city apartment.
Installing fireplaces in an apartment is associated with significant difficulties and the need to obtain permits, as well as the complexity of the work, and therefore its high cost. They arise against the background of the requirements imposed by the relevant services for such apartments. Serious difficulties may arise due to the need to redevelop the premises, as a result of which the fireplace may be moved to a new location with the need to equip a new chimney and lay down the old one. Connecting a fireplace also depends on the design features of a particular house, the ability to withstand the weight of the fireplace, otherwise it will be necessary to create a solid foundation for the fireplace and chimney or reinforce the interfloor ceilings.
Use of materials is permitted only if there is an indexed link to the page with the material.
An unlined stove is always an unaesthetic sight. And outwardly there is nothing beautiful here, and dust accumulates in the cracks, and over time the seams crack and life-threatening carbon monoxide begins to be released. In order to avoid all these unpleasant phenomena, the stove is tiled or plastered after one or two months. For cladding, ceramics, glazed tiles, or facing bricks are used. For plaster - clay or special compounds. In this article we will discuss what the plaster of a brick oven should be like and what materials are suitable.
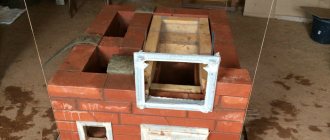
What solutions are used when laying individual brick oven elements?
The choice of solution for work must be carried out depending on which part of the stove it will be used for laying. Using the diagram below, we will consider each of them in detail.
General structural diagram of a standard furnace masonry
- The reinforced concrete base of the furnace foundation, which is also called the pillow or root. It is manufactured using standard technology, however, in order to avoid unpleasant consequences, it must be physically separated from the foundation of the house itself. The need to comply with this condition is explained by differences in the degree of shrinkage of the building and the furnace in it.
- Waterproofing layer. To create it, roofing material is perfect, which needs to be laid on top of the foundation in several layers.
- Actually, the stove foundation itself. Since it is not exposed to powerful thermal effects, it does not require the use of particularly heat-resistant mixtures when laying. At the same time, the reliability of the entire structure depends on the quality of assembly of this furnace element. There are cases when, due to errors in laying the foundation, it was necessary to completely disassemble the stove and redo it in a new way. Complex, three- or more-component cement-lime mixtures are used for work. Well, red solid brick is best suited here as the main building material.
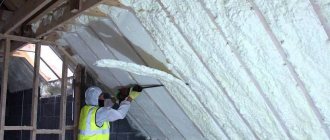
- A layer of thermal insulation with a fire protection area. It is made from a mineral cardboard or asbestos sheet, on which a sheet of iron is placed on top, covering the entire structure with a finishing layer of felt cloth soaked in so-called clay milk (this is a solution of very thinly diluted clay; we will describe how to prepare it below).
- A heat exchanger that accumulates the energy released during the combustion of wood. It is one of the main parts of the so-called furnace body. During kindling, it rarely heats up above six hundred degrees, but is subject to very active influence from the smoke and other gaseous substances released during combustion. It is not uncommon for destructive acid condensate to settle on the inner surface of heat-storing masonry. The brick used here is special: stove type, M150 grade, solid red ceramic. The bricks are fastened together with a simple one-component clay solution. It should be noted that the term “simple” refers only to the composition of the building mixture. Its preparation is a rather labor-intensive process, the features of which we will consider below.
- The hot part of the stove body is also called the combustion chamber. It is subject to moderate chemical influence from gases, but heats up to very high temperatures, up to 1200 degrees. For masonry, so-called fireclay bricks and fireproof clay-fireclay mortar are used.
- The source of the chimney. It is made from the same brick and fastened with the same mortar specified in point No. 5, since this element of the furnace is subject to similar temperature and chemical influences as the heat-accumulating part of its body.
- "Fluffing" of the stove chimney. Its task is to create a flexible mechanical connection connecting the ceiling and the chimney itself. Allows you to avoid a situation where ceiling subsidence is possible. The fluff can be repaired separately; it does not require complete disassembly of the entire structure. The bricks used for masonry are standard stove bricks, and lime-type mortar is ideal for laying this part of the stove.
- A fireproof cutting is a special metal box filled with a non-flammable heat-insulating substance.
- Chimney pipe. This element is susceptible to wind and precipitation. It heats up weakly, so the pipe is laid from standard red brick. However, for greater reliability and heat resistance, they use lime mortar.
- Fluffing the chimney pipe (11). It is made from the same materials that are used when laying the main part of the pipe.
Results
What should be the finished mixture for plastering stoves? This material must have special characteristics. Namely, elasticity is a must, this is very important. When preparing a solution according to the instructions discussed above, or if some store-bought mixture is used (the range of such products is large today), we must not forget about this recommendation.
More details about solutions for plastering stoves can be found in the thematic video supplement to the article:
The already prepared solution is applied to the surface of the masonry - this is done easily and evenly. Then, the applied is smoothed out - there shouldn’t be any problems here either. It is important to monitor the viscosity; its level must be adjusted with water. It is not recommended to exceed the sand norm - the plasticity of the solution will certainly suffer from this. Everyone can cope with this work and the result will be worthy - if you do not deviate from the recommendations.