The sealed volume of any vessel has a volume limitation. The automotive cooling system should contain only coolant (antifreeze, antifreeze, some use water). Therefore, the presence of air in the cooling system is unacceptable, because it completely stops or disrupts circulation in the system, and you should know how to expel an air lock from the cooling system.
General recommendations for prevention
The first thing you need to pay attention to is the level of antifreeze in the cooling system.
Always monitor it and, if necessary, add it. Moreover, if you have to add coolant very often, then this is the first call indicating that something is wrong with the system, and additional diagnostics are necessary to identify the cause of the malfunction. Also check for stains from antifreeze leaks. It is better to do this in the inspection hole.
Remember to periodically clean the cooling system. You can read how and by what means to do this in the relevant articles on our website.
Try to use the antifreeze recommended by your car manufacturer. Make purchases in trusted, licensed stores, minimizing the likelihood of purchasing a counterfeit. The fact is that low-quality coolant can gradually evaporate during repeated heating, and instead of it, an air plug forms in the system. Therefore, do not neglect the manufacturer's requirements.
Instead of a conclusion
Finally, I would like to note that if the described signs of airing in the system appear, it is necessary to carry out diagnostics and check it as quickly as possible. After all, an air lock significantly reduces the efficiency of the cooling system. Because of this, the engine operates under conditions of increased wear, which can lead to premature failure. Therefore, if you detect airing, try to get rid of the plug as quickly as possible. Fortunately, even a novice car enthusiast can do this, since the procedure is simple and does not require the use of additional tools or devices.
Prevention of air pollution causing engine overheating
To eliminate cooling problems, you need to follow the recommendations:
- periodically check the antifreeze level;
- use only tested coolant (coolant);
- when replacing, it is recommended to pay attention to the color of the coolant and buy a similar new one;
- problems that arise must be eliminated immediately after they appear, without waiting for the situation to worsen.
The main recommendation of experts is to carry out maintenance by trusted technicians and not to pour water into the system.
Method for removing a traffic jam
Drive onto a flat surface or inspection hole, squeeze the handbrake, turn on neutral; Using a jack, lift the front of the car about 35-45 cm from the surface;
Open the expansion tank cap
Be careful, as careless handling may result in burns;
Start the engine and stove radiator with the temperature set to maximum; Carefully begin adding antifreeze or antifreeze to the expansion tank to the maximum; Increase engine speed to 3000 rpm; Wait until the thermostat opens and begin to squeeze the lower pipe leading to the radiator with your hand. Be careful, carry out the procedure with gloves, following safety rules; Continue doing this until you are sure that the liquid coming out of the expansion tank is clean, without air bubbles; Check the entire lower part of the pipes with your hands, make sure they are hot; Start the stove heater with radiator
Check the supply of hot air flow into the car interior; Lower the car from the jack, secure it with boots for safety; Add the missing amount of refrigerant at a level above average. Never fill at the top level as this may cause expansion and overflow of the lid. Antifreeze particles will corrode the car's paintwork over time; If the airiness is severe, a repeat procedure may be necessary. See this for yourself.
{banner_content}
Second way
- Drive the car onto a flat surface or inspection hole, squeeze the handbrake, turn on neutral;
- We do not turn off the engine, but warm it up to a temperature of 90°C when the thermostat opens and the liquid begins to circulate in a large circle;
- Do not open the expansion tank cap;
- We turn off the engine;
- Loosen the clamp on the throttle body pipe and remove the pipe. Be very careful and attentive, as temperatures above 90°C can cause burns. Carry out work only with rubber gloves;
- Having removed the rubber hose, wait until all the air mixed with antifreeze or antifreeze comes out of it;
- We put the pipe back on, clamp the clamp;
- We start the engine and test the car. It is advisable to drive both on the highway and around the city at low speed to recheck the system in full.
Remove the air lock from the Priora vehicle
Priora air from the fuel system
Here's how it's done:
- the VAZ 2107 tank is checked to make sure there is fuel in it;
- the air release fitting on the fuel filter opens;
- Fuel is pumped up with a hand pump until fuel flows through the fitting without air bubbles;
- without stopping the pumping, close the air release fitting;
- Continue pumping until resistance is felt.
Now we need to try to start the engine. If this does not work, it means that air has entered the vehicle and must be expelled from there. On Priora it is done like this:
- the union nuts on the injection nozzles are loosened;
- the starter spins until the fuel comes out;
- Now the nuts are tightened and the engine can be started, as the air will escape along with the fuel.
In this way, the system of the Priora car is de-aired.
The reason for the appearance of an air lock in the cooling system
Cooling systems of modern vehicles are designed for stable high pressure (up to 100 kPa). This design makes it possible to increase the boiling point of the liquid to 120-125 degrees.
However, such a temperature range and effective cooling of the motor are only possible when the system is fully operational. One of the most common problems in the cooling system is the occurrence of air plugs.
The main causes of air locks include:
- entry of air through leaky joints of pipes, hoses, tubes due to changes in pressure that occur during the movement of the working fluid of the cooling system, which lead to air being drawn in through loose joints;
- injection of air when using a funnel with a wide neck, while in the process of adding liquid, its flow prevents gas from escaping, trapping it in the tank;
- increased wear of individual parts of the water pump (fiber, gaskets and seals), through cracks and cracks in which air can be sucked in;
- leakage of coolant through pipes, heater and cooling radiators, hoses, which causes a decrease in the level of antifreeze and filling of the free space in the expansion tank with air;
- obstruction of the channels in the radiator, which causes cooling problems and the appearance of air bubbles;
- malfunction of the valve releasing excess pressure in the cover of the expansion tank, which leads to air being sucked in and the impossibility of releasing it through the same valve;
- damage to the cylinder head gasket, leading to coolant entering the oil through the crankcase (a sign is an increase in the oil level and a change in its color) or into the exhaust system (smoke from the muffler becomes white), which causes a decrease in the volume of antifreeze and filling of the free space with air.
How to remove an air lock using the example of a VAZ-2109
To ventilate the cooling system, three methods are used, each of which copes with the task.
The simplest method, which is applicable both for the VAZ-2109 and other cars, is to remove the air lock from the engine. To do this, find a steep slope and drive the car up onto it with the front end up.
Air accumulates at the highest point of the system - in the stove radiator. After installing the car on a slope, the highest point becomes the upper tank of the main radiator, connected by a return pipe to the expansion tank.
After placing the car on the slope, we immobilize it with the handbrake (chocks or other stops will not hurt).
It’s easy to remove air in this way - after installing the car, set the engine speed to medium and hold it. The pump actively pumps liquid and pushes the plug to the top point.
During work, the liquid circulates and its level in the expansion tank may drop, so monitor the amount of antifreeze and add it.
Since the radiator is connected to the expansion tank, when the pump operates intensively, air will first enter the radiator and then be forced out by liquid into the expansion tank.
An indicator that air has left the cooling system will be a stable stream of antifreeze without air bubbles coming out of the return pipe coming from the radiator.
You can remove the cork using another second method.
To do this, find the carburetor heating pipe (throttle valve - on the injection version of the VAZ-2109) and remove it. Then unscrew the cap of the expansion tank and add fluid if necessary.
To expel the plug, create pressure in the system. To do this, blow forcefully into the tank. But it’s easier to find a suitable cap and embed a spool from a tubeless tire into it, then create pressure in the system with a pump or auto-compressor.
The essence of the method is that by creating pressure in the tank, we push the liquid out of the tank. In this case, the liquid, having reached the plug, will begin to shift it to the place where the pressure drops. This is a removed carburetor (throttle) heating pipe. A signal that the plug has come out will be the appearance of a stream of antifreeze from the pipe.
The third method is built on the same principle as the second, but it uses the engine itself to create pressure. We start the engine and let it run for 15-20 minutes (during this time, pressure will build up in the system due to the expansion of antifreeze when heated).
Then we unscrew the carburetor (throttle) warm-up pipe and wait until the pressure causes the plug to come out and antifreeze flows out of the removed tube. But this method is only applicable if the expansion tank cap valves are working properly and do not allow air to pass through.
Using such simple methods, you can de-air the cooling system of the VAZ 2109. The main indicator that the procedure was a success is the restoration of the functionality of the interior heating system. But if the stove does not heat, the procedure will have to be repeated.
Air removal methods
If you observe on the dashboard that the operating temperature of the engine is constantly exceeded (100 degrees or more), follow a number of steps to identify the problem:
- examine the joints of the pipes, the water pump and the expansion tank for leaks;
- check the fluid level in the tank;
- make sure that the cabin heater is functioning properly;
- If the temperature sensor is installed outside the cylinder head, check the operation of the electric fan by closing the contacts.
Before bleeding the cooling system, it is necessary to eliminate all leaks, if any are found. A water pump seal that has lost its seal should be replaced (as a rule, together with the pump), hose clamps should be tightened, and so on. There is no point in removing an air lock from a leaking cooling system.
Checking the heater and fan sensor will help you more accurately determine the location of the air bubble. When the engine temperature reaches a critical threshold and the heater does not heat up, it means that the plug is in a small circulation circuit - in the stove itself or in the supply pipes. If the sensor does not turn on forced airflow in time, then it has entered an area where the movement of antifreeze has stopped - the bubble is in a large circuit.
Method one - blowing
This simplest method requires caution from the car enthusiast, since it is performed on a fully warmed-up engine. The order of operations is as follows:
- If necessary, add fluid to the minimum level and warm up the power unit to operating temperature. Carefully unscrew the cap of the expansion tank.
- Wear gloves and disconnect the thin coolant pipe at the highest point. For an engine with an injector, this is the throttle valve heating unit; on a carburetor engine, it is the intake manifold or the lower part of the carburetor itself.
- Wipe the reservoir neck thoroughly. Place a wide bowl under the removed hose and blow into the expansion tank. When clean antifreeze flows from the pipe, put it on the fitting and secure it with a clamp.
If your vehicle has a thermostatic main radiator cap, try removing the air lock through it. Open both plugs and blow into the neck of the expansion tank.
Method two - complete replacement
This option is suitable for all cases when it is not possible to detect and push a bubble out of pipelines. The point is to completely empty the system and fill it back with antifreeze, following all the rules. The disadvantage of the method is the difficulty of implementation in road conditions.
The procedure is performed in the following order:
- Drain the antifreeze into a wide basin, placing it alternately under the plug on the cylinder block and the main radiator.
- Replace all caps and tighten them.
- Loosen the clamp and remove the throttle body or carburetor heater pipe (the highest point of the system).
- Insert a funnel into the neck of the expansion tank and slowly pour coolant in a thin stream. Air will be removed through the removed hose.
- Monitor the moment when antifreeze runs out of the pipe and immediately put it on the fitting.
Before emptying, be sure to fully open the cabin heater tap.
When the throttle (or carburetor) heating hose is put on and secured with a clamp, add fluid to the container to the required level. Next, check the functionality of the cooling by completely warming up the engine until the thermostat opens and the electric fan turns on.
Method three - road
When faced with overheating of the power unit on the road, try to remove the airlock using this method:
- Having secured the car with the handbrake, lift the front part with a jack to a height of 0.3–0.4 m.
- Slowly unscrew the expansion tank cap, start the engine and turn on the cabin heater to maximum mode.
- Pour antifreeze into the tank in a thin stream until its level reaches the upper limit. Increase the crankshaft speed to 3000 rpm and wait until it warms up completely.
- Squeeze the lower hose leading to the radiator with your hand. The air should escape through the expansion tank. Use gloves or thick cloth to avoid getting burned.
The procedure ends when air stops coming out of the tank. Feel the remaining pipes - they should warm up. Make sure the stove produces a hot stream.
To avoid having to fuss with removing air pockets, always fill in antifreeze according to the instructions described in the previous section. This is the best way to force air out of the system. Fix leaks in a timely manner, do not drive with endless additions of coolant.
avtoexperts.ru
It was only in the poem about charging that air and water were friends, they walked through life hand in hand and helped each other; in a car cooling system, the proximity of these two components usually leads to problems, sometimes very serious ones. Airing is an insidious disease, it occurs in the bowels of the car, is not noticeable to the eye, and is often difficult to determine, as if something is wrong in the car, but it is not immediately clear what. In addition, it often appears not as a result of the driver’s actions, but due to mechanical problems; the car owner may not even suspect that he has an air lock. However, if it is not always easy to diagnose the presence of air in the system, then removing it is a task that even novice motorists can cope with.
Places of air lock formation. Cooling system pipes for heating the throttle valve
Symptoms
The difficulty of diagnosing an air lock is due to the non-obviousness and subjectivity of the main parameters - engine cooling and the quality of the stove . If there is air in the system, then it will perform these functions worse than it should - the engine will overheat and the interior will not receive enough heat. However, this is not always noticeable to the eye. It’s good when the car has a coolant temperature sensor, it’s easier to see increased values, but modern cars don’t always have it. In addition, the sensor may also begin to malfunction due to air.
The efficiency of the stove does not measure anything at all; everything is based on the driver’s personal perception. Has it gotten colder in the cabin? Or maybe it just seems like it? In addition, no one uses the stove in the summer; for a whole six months one of the signs is irrelevant. Of course, if there is a lot of air in the system, then the deviation from normal operation will be too large, the problem will become obvious, but a small air lock may not be noticed immediately.
It will be noticeable to the driver if bubbling suddenly starts in the expansion tank - this is also a bad signal, so much air gets in that it comes out on its own, but it is very easy to determine the problem.
Bubbles in the expansion tank
Reasons for airing
The fight against air in the cooling system must be carried out simultaneously with the reason for its appearance there. Otherwise, the fight against the air will be reminiscent of a confrontation with a hydra - I removed one plug, two appeared. The most popular reason for air locks is improper replacement of coolant . Not everyone manages to replace the coolant without leaving air in the system. The air lock must be removed after each antifreeze change. It happens that air gets into the system even during trivial topping up, especially if you pour it in a wide stream into a narrow neck, and then immediately close the tank lid. But this is still rare.
Air lock in the cooling system
Other reasons include:
1. Depressurization of the system . A very insidious problem, the system itself is sucking air somewhere. This usually happens at joints. Pipes, fittings, hoses, radiators - there is a lot of this in any car. If a defect occurs at the junction, the pressure in the system perfectly acts as a pump and gradually sucks in air. By the way, depressurization does not always lead to leakage of antifreeze; it often happens that air enters the system, but the coolant level remains in place. How to fight? Looking for a weak joint is not difficult, but it is tedious.
2. Special cases of depressurization may be problems with the pump , which, due to breakdown or wear, begins to force air into the system, or a breakdown of the cylinder block gasket . In the second case, antifreeze begins to enter the engine, and exhaust gases rush into the cooling system. It is in this case that gurgling occurs in the expansion tank. Problems with the gasket are usually easy to notice (at least by the white smoke from the exhaust pipe), but a pump that begins to break down can cause a lot of trouble with minor problems before it reveals itself.
Blown cylinder head gasket
3. The air valve of the expansion tank plug has failed . It also happens that, as a result of a breakdown, the valve begins to work in the opposite direction - it does not relieve excess pressure from the system, but rather allows air to pass through. If in doubt, the plug can simply be replaced.
Disassembled expansion tank cap
Alas, the cause of airing is not always obvious; very often you have to look for the problem, especially if the whole issue is a violation of the tightness. But without this, dealing with air jams is practically useless.
Two ways to remove air
If the cause of airing is clear to you and you have eliminated it, then you can proceed to removing air from the system. Auto mechanics use many different methods, but they all boil down to two variations that are similar to each other - either push out the air using coolant, or expel it through active circulation . Which one to choose and how exactly to do it depends on the make of the car and the design of its cooling system. The principle diagram is the same for everyone, but there are differences in the nuances. Some cars have a special fitting for bleeding air, but some don’t, somewhere the filler plug is located on the expansion tank, and somewhere on the radiator, the majority of cars have one thermostat installed, and some have two, and so on Further. Therefore, today we will rather talk about the theoretical foundations of the methods, but you will need to think more about how to apply them on your car.
Ventilation hole
1. The first method is based on the fact that air is lighter than water and always tends upward, so you just need to remove it from the highest point by “squeezing it out” with antifreeze. The easiest case is if the car is equipped with a special fitting or valve for removing air . They are specially located in the upper pipes. You need to warm up the car so that the thermostat opens and air from the large circle can enter the small circle, and then unscrew the air bleed valve and keep it open until coolant flows out.
If there is no fitting, then its role may be the highest (and preferably small in diameter) pipe in the system. For example, some cars have a heated throttle assembly; there are usually thin pipes there and they are located high - they are well suited for this role. The principle is the same as with the fitting, only instead of unscrewing the fitting, we pull off the pipe, and when the coolant flows out, we quickly put it in place and tighten it. Yes, the accuracy of the work in this case is lower, the requirements for the dexterity and dexterity of the person performing the operation increases, and the loss of coolant will be noticeably higher, but still this is a relatively simple option if you correctly find the pipe to pull off.
Throttle valve heating pipes
2. The second method seems similar to the first, but everything is based on the active circulation of liquid through the system. It is necessary to jack up the part of the car where the expansion tank or radiator filler plug is located, remove the plug, open the heater tap (if there is one) and actively gas it, creating increased circulation. Air will begin to escape through the filler hole, you can see this by bubbles. When the bubbles run out, you need to add coolant to the level. The method is quite effective, but you need to be more careful with it, because it is easy to get burned on hot pipes or antifreeze. In addition, it is not always convenient to both gas and control the air output alone; you may need an assistant.
Experienced mechanics probably have their own variations of this operation; on the Internet we even came across descriptions where it was necessary to blow into the expansion tank, but, in general, the principle is similar, the choice depends only on convenience and the specific car model. You just need to think a little and remember the school physics course.
Author - Alexander Nechaev
How to remove a plug from the system, the second method, detailed instructions
- We drive into a viewing hole or a flat surface, again squeeze the handbrake and engage neutral gear.
- In this case, the engine does not need to be turned off. It must be heated to a temperature of 90 degrees Celsius so that the thermostat opens and the liquid begins to circulate in a large circle.
- We do not open the expansion tank cover.
- We turn off the engine.
- Then you need to loosen the clamp in the throttle body pipe and remove the pipe. Be extremely careful and careful, wear rubber gloves when working, as the temperature is quite high (90 degrees).
- After removing the rubber hose, you need to wait a while until all the air along with the antifreeze comes out.
- Now you need to put the pipe back on and tighten the clamp.
- At the final stage, we start the engine and test the vehicle. To double-check the system in full, it is advisable to drive it at both low and high speeds.
When is hissing normal?
In most vehicles, hissing from the tank is normal and may be related to weather conditions or the design of the fuel system.
On days when the ambient temperature rises above standard values, and there is also a decrease in air pressure due to the lack of precipitation, the fuel in the gas tank begins to heat up and release more volatile substances.
In a confined space (in a hermetically sealed gasoline tank), they create the pressure that is necessary to facilitate starting the engine and create conditions for its uniform operation.
The tank is almost empty
Both in the heat and in the cold season, hissing in the gas tank can be caused by a lack of fuel (sometimes a small amount).
When depressurization occurs, the vapors filling the tank are the first to rush out.
This physical phenomenon is accompanied by a clearly distinguishable noise, which the human ear perceives as a whistle.
Car feature
In some brands and models of modern cars with ergonomic design and modified gas tanks made of plastic, hissing when the cap is unscrewed is due to design features.
To understand whether your car belongs to this category, follow the manufacturer’s explanations. You can find out about them from the user manual, from the sticker on the hatch or the inscription on the lid.
Ventilation is broken
Another prerequisite for the appearance of strange sounds from the fuel tank of a vehicle may be faulty ventilation.
Most often this is due to the fact that the cap covering the neck fits too tightly or, conversely, does not completely cover the entrance to the fuel tank. The solution to the problem may be to replace the unusable element.
How to bleed air
There is another method, which is most practical for a unit with a working volume of 1.6 liters. Since in this option air accumulates at a high point. Therefore, the air plug is removed from the throttle assembly.
Accordingly, you will need to use the plastic cover located on the unit itself. You will have to unscrew the cap to add oil. After completing the steps, you will need to remove all the pads, which are held in place using a special rubber seal.
Closing the lid for filling liquid, that is, oil, is quite easy and simple. Once the hose is found, you will need to carefully remove the clamp. Naturally, you should blow into the pipe so that the air comes out completely. Then, you need to quickly insert the hose to avoid air getting inside. By carrying out testing, you can verify the serviceability and functionality of the unit.
Filling the heating circuit with coolant
In order for the heating system to work correctly, it must be flushed and then refilled with water. It is often at this stage that air leaks into the circuit. This occurs due to incorrect actions while filling the contour. In particular, air can be trapped by too fast a flow of water, as mentioned earlier.
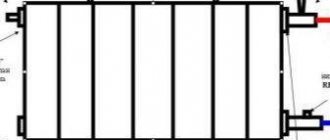
The diagram of the expansion tank of an open heating circuit allows you to get an idea of the procedure for filling such a system with coolant after flushing
In addition, correct filling of the circuit also facilitates faster removal of that part of the air masses that are dissolved in the coolant. To begin with, it makes sense to consider an example of filling an open heating system, at the highest point of which the expansion tank is located.
Such a circuit should be filled with coolant starting from its very bottom. For these purposes, a shut-off valve is installed at the bottom of the system, through which tap water is supplied to the system.
A properly designed expansion tank has a special pipe that protects it from overflow.
A hose of such length should be attached to this pipe that its other end is brought out into the area and is located outside the house. Before you start filling the system, you should take care of the heating boiler. It is recommended to disconnect it from the system at this time so that the protective modules of this unit do not work.
Once these preparatory steps have been completed, you can begin filling the contour. The tap at the bottom of the circuit through which tap water flows is opened so that water fills the pipes very slowly.
The recommended filling flow rate should be approximately three times less than the maximum possible. This means that the tap should not be turned off completely, but only to one third of the pipe lumen
Slow filling is continued until water flows through the overflow hose leading outside. After this, the water tap should be closed. Now you should go through the entire system and open the Mayevsky valve on each radiator to bleed air.
Then you can reconnect the boiler to the heating system. It is also recommended to open these taps very slowly. While the boiler is filling with coolant, you can hear a hissing sound produced by the air release safety valve.
This is normal. After this, you need to add water to the system again at the same slow pace. The expansion tank should be approximately 60-70% full.
After this, it is necessary to check the operation of the heating system. The boiler is turned on and the heating system is warmed up. Radiators and pipes are then examined to identify areas where heating is missing or insufficient.
Insufficient heating indicates the presence of air in the heating radiators; it must be bled again through the Mayevsky taps. If the procedure for filling the heating circuit with coolant was successful, do not relax.
For at least another week, the operation of the system should be closely monitored, the water level in the expansion tank should be monitored, and the condition of pipes and radiators should be checked. This will allow problems to be quickly resolved.
In a similar way, closed-type systems are filled with coolant. Water should also be supplied to the system at low speed through a special tap.
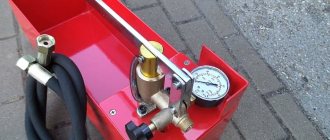
You can fill a closed-type heating system with working fluid (coolant) on your own. It is important to arm yourself with a pressure gauge for this.
But in such systems, pressure control is an important point. When it reaches a level of two bars, you should turn off the water and bleed air from all radiators through the Mayevsky taps. At the same time, the pressure in the system will begin to decrease. It is necessary to gradually add coolant to the circuit to maintain the pressure at two bar.
It is difficult to perform both of these operations alone. Therefore, it is recommended to complete the filling of a closed contour together with an assistant. While one person bleeds air from the radiators, his partner monitors the pressure level in the system and immediately corrects it. Collaborative work will improve the quality of this type of work and reduce its time.
How can you remove air from the system?
There are several simple and effective ways to remove air from the heating system of a VAZ-2109, which are also suitable for other cars.
There are three most popular methods; they are based on the principle: oxygen molecules are lighter than water molecules and, therefore, they accumulate at the top, where they are removed.
It is important to fully open the heater valve to the maximum air temperature before starting work.
- The first method is universal for cars in which you can unhook the hose, which heats up the throttle assembly or carburetor. These steps can be done on most VAZ cars.
Here the carburetor is the highest point of the engine cooling system. Therefore, this place is most suitable for removing air.
Progress:
- Remove both protective covers and anything that prevents access to the heater.
- Unscrew the heating hose clamp and remove it from the fitting.
- Unscrew the cap of the expansion tank and pump air into it until coolant flows out of the throttle body or pipe.
- The moment liquid appears from the hose or fitting, quickly put the hose back in place and screw everything back as it was.
The above-described manipulations will allow you to get rid of the airlock by 99%.
- The second method is implemented by removing the pipes that heat the throttle assembly. It is a little similar to the one described above, but it does not require blowing out the tank.
Progress:
- Similar to the first method, you need to remove the protective covers and warm up the engine to operating temperature and turn it off.
- Leave the cap on the expansion tank, but remove the hose from the fitting.
- When the cooling starts, put all the pipes in their places and put everything back together.
- One attempt may not be enough and the procedure may not give a positive result; it may need to be repeated a second time.
Important! Remember self-safety measures. The coolant in the circuit may be under pressure and its temperature may be above 85 degrees
If it gets on your skin, it may cause a burn. Try to protect your hands using at least improvised methods. For example, wear cloth gloves with rubber gloves on top.
- The third method is the simplest; it does not require disassembling the system. But unfortunately, this method is not as effective as the previous 2.
Progress:
- Drive the car uphill so that the top is raised and the radiator cap is the highest point.
- Remove the cap from the expansion tank and radiator.
- Turn on the ignition and warm up the engine to operating temperature.
- Antifreeze will gradually enter the system. It will be necessary to add it from time to time to maintain the desired level.
- To increase coolant flow, increase engine speed. In this case, the antifreeze level may drop sharply and should be added urgently. The procedure should be continued until bubbles from the return line stop appearing.
A hot stream from the stove air ducts is a sign that the air has disappeared.
Signs and consequences of an airy system
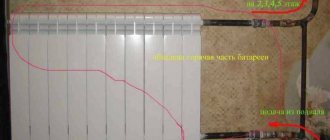
If the boiler unit is working properly, the supply temperature of the coolant is normal, but the battery cannot cope with heating the room, check the presence of air in the heating system. Air pockets in radiators are a common occurrence; their presence is indicated by uneven heating of the device when the upper part remains cold. Airiness of the battery at first slightly reduces its heat transfer, but if the problem is not solved in time, the accumulated gas will block the path of the coolant and the room will not receive full heating.
Air bubbles interfere with the free movement of the coolant due to the narrowing of the channel, and this provokes the appearance of specific sound effects. Signs of a traffic jam include noise in the pipes, bubbling, and seething. In difficult cases, pipe vibration is also added.
Airing the heating system
Small air bubbles that have not yet formed a plug, but are already actively released from the coolant, turn it into a water-air mixture. It is dangerous for a circulation pump that is not equipped to pump gas. Sliding bearings are installed on the shaft of the pump unit, which must be located in a liquid medium. High air content in the coolant leads to premature wear of elements due to the effect of dry friction.
If you do not bleed air from the heating system, its excess in the coolant can lead to stoppage or breakdown of the circulation pump
. This is dangerous for solid fuel boilers that are not equipped with automation: when the circulation stops, cooled coolant will no longer flow into the water jacket of the boiler. Overheating and boiling of liquid in a confined space threatens to explode if the safety group does not work.
Knowing how to remove air from a heating system, you can deal with air lenses in radiators made from materials prone to corrosion and overgrowth. The air contains carbon dioxide and oxygen, and they contribute to the breakdown of calcium and magnesium salts that are dissolved in water. The reaction proceeds with the release of carbon dioxide. Under the influence of high temperatures, hydrocarbonate compounds form a layer of limescale, and carbon dioxide promotes corrosion of metal surfaces. As a result, the battery deteriorates faster.
Accumulated dirt in the heating system contributes to radiator failure
To avoid unpleasant consequences when starting the heating system at home after the summer break, you should check it for air pockets. If it is airy, quickly take measures to eliminate the problem.
Principles of designing cooling systems
A decrease in the efficiency of the cooling system leads to an increase in the temperature of the pistons and a decrease in the gaps between the piston and the cylinder. Thermal gaps are reduced to zero. The piston touches the cylinder walls, scoring occurs, overheated oil loses its lubricating properties and the oil film breaks. This mode of operation can lead to engine seizure. Overheating is accompanied by uneven expansion of the cylinder head, mounting bolts, engine block, etc. Subsequent destruction of the engine is inevitable: cracks in the cylinder head, deformation of the joint planes of the head and the cylinder block itself, cracks in the valve seats, etc. — it’s unpleasant to even list all this, so it’s better not to let it come to that!
The engine and oil cooling system is designed to prevent such developments, but in order for the system to cope with its tasks, it is necessary to use high-quality coolant (coolant). Low-freezing coolants are called antifreeze - from the English word “antifreeze”. Previously, coolants were prepared based on aqueous solutions of monohydric alcohols, glycols, glycerin and inorganic salts.
Currently, preference is given to monoethylene glycol, a colorless syrupy liquid with a density of approximately 1.112 gcm2 and a boiling point of 198 g. The task of coolant is not only to cool the engine, but also not to boil over the entire operating temperature range of the engine and its components, to have high heat capacity and thermal conductivity, not to foam, not to have a harmful effect on pipes and seals, and to have lubricating and anti-corrosion properties.
In the 70s, antifreeze was produced based on an aqueous solution of monoethylene glycol with a crystallization temperature of 40 degrees. It did not require dilution with water when added to the cooling system. This drug was called TOSOL - after the name of the laboratory “Technology of Organic Synthesis”. Because the name is not patented, then TOSOL is a ready-to-use product, and “antifreeze” is a concentrated solution (although TOSOL is also antifreeze).
Ready-made antifreezes are colored for safety and catchy colors are chosen: blue, green, red. During operation, antifreeze loses its beneficial properties - its anti-corrosion properties decrease, and the tendency to foam increases. The service life of domestic coolants is from 2 to 5 years, imported 5-7 years.
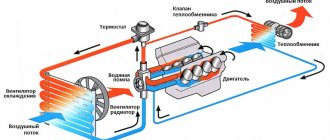
The figure below shows a diagram of the car's cooling system. There is nothing special or complicated in the cooling system and yet...
When the engine starts, the water pump begins to rotate. The pump drive may have its own pulley driven by an accessory belt or driven by the rotation of a timing belt. The cooling system contains an impeller, which rotates and drives the coolant. To quickly warm up the engine, the system is “shorted”, i.e. The thermostat is closed and does not allow fluid to enter the radiator. As the temperature of the coolant rises, the thermostat opens, transferring the system to another state when the coolant passes along a long path - through the radiator of the cooling system (the short path is blocked by the thermostat). Thermostats have different opening characteristics. Typically the opening temperature is marked on the edge. It’s probably not worth explaining the design of the radiator. A fan switch sensor is installed at the bottom of the radiator. If the coolant temperature reaches a certain value, the sensor will close, and because If it is electrically connected to the break in the power supply circuit of the electric fan, then when it is shorted, the cooling system fan should turn on. As the coolant cools, the fan turns off and the thermostat closes the long path to a short one. It's simple, but not very...
This scheme is the basis, but life does not stand still and various manufacturers are improving cooling systems. On some cars you will not find a sensor for turning on the cooling fan, because... The fan is turned on by the engine ECU depending on the readings of the coolant temperature sensor
It is worth paying attention to the situation in which when the ignition is jammed, the cooling system fan immediately turns on. Either the temperature sensor is faulty, or its circuits are damaged, or the engine ECU itself is faulty - it “does not see” the engine temperature and, just in case, immediately turns on the fan
On some cars, special electric valves are installed on the way to the heater, allowing or blocking the path of coolant (BMW, MERCEDES). Such valves sometimes “help” the cooling system fail.
How do traffic jams appear?
First of all, it’s worth finding out why plugs form in the engine cooling system. Their main reason is the leakage of the system itself. Air bubbles enter the cooling system from outside and clog the system. In this case, it is better to contact a car service specialist. Remember – prevention is always cheaper than cure, and you should never neglect diagnosing your car’s cooling system.
You can try to cope on your own. When diagnosing on your own, you need to find out where the hole through which air enters is located. The most common places where the cooling system is depressurized are presented below:
- Connections of tubes, pipes and fittings. There are pressure differences, and when it decreases, excess air enters the system, and if there is a large amount, it forms bubbles, forming plugs and clogging the system.
- Expansion tank. If the valve is faulty, it may suck in air at low pressure.
- The pump, or more precisely, a violation of its tightness, can also cause the formation of traffic jams. Please note that depressurization of the pump can lead to its complete failure.
- Cylinder block gasket. Violation of its tightness can cause not only a decrease in the level of antifreeze, but also a large number of other problems. Its main “symptom” is white smoke from the engine. This means that antifreeze enters the cylinder, and the combustible mixture and gases leak into the cooling system. It is very serious. Urgently go to a car service center.
- The radiators themselves are both cooling and cooling (in common parlance - “stove”). In case of defects, they can allow both air into the cooling system and antifreeze in the opposite direction. As a result, plugs appear in the system and the antifreeze level drops. Without creating panic, you need to move towards the service station.
Also quite often problems are associated with the refrigerant used in the cooling system. At that time, when water was poured instead of antifreeze in the summer, it happened that the new refrigerant was mixed with the old one, which was not completely removed from the system during flushing. This happens even now, when replacing one antifreeze with another.
Therefore, when flushing the cooling system, do it carefully and fill in antifreeze as stated in the instructions for its use to prevent bubbles from mixing in the system.
This is interesting: The history of the appearance of automobile signs
Often the problem is with the refrigerant itself. Antifreeze produced by the unknown Vasya Pupkin is, of course, cheaper. However, it not only cools the engine worse, but can also delaminate and clog the cooling system. There is a way out - installing an antifreeze filter, but they have to be changed quite often, and replacing a filter is certainly more expensive than the most expensive refrigerant. So it’s better not to skimp on coolant.
There are cases when, even if good antifreeze was added, the cooling system became clogged with air. The new antifreeze still differs from the used one (albeit slightly) both in composition and temperature. In addition, bubbles form when mixed. In general, only drivers of air-cooled cars are fully insured against this misfortune.
Reasons for appearance
There are several reasons why air accumulates in the cooling system channels. An air lock is formed due to:
- System leaks. Leaks at the junctions of the pipes lead to the fact that when the liquid flow moves, a vacuum is formed, which sucks air into the system. Gradually the amount of air increases, then it accumulates in one place, forming a plug.
- Loss of tightness in the water pump. If the sealing gasket under the pump is damaged, the unit will suck in air during operation.
- Violation of technology for replacing or adding antifreeze. If you immediately pour a large amount of liquid, the air in the pipes will not escape and the antifreeze will push air bubbles into the system with its own weight. After starting the engine, the air will gather in one place, interrupting the flow.
- Damage to the cylinder head gasket due to overheating. If the resulting breakdown connects the cooling system channel to the atmosphere, the liquid will draw in air from outside. Airing appears if a breakdown connects the channel to the cylinder. In this case, exhaust gases will break into the cooling system, which, in addition to the appearance of an air lock, is accompanied by the bubbling of antifreeze in the expansion tank.
If you suspect that a plug has formed in the cooling system, first make sure that air has occurred. Overheating of the power plant occurs due to jamming of the thermostat, which is also an unpleasant situation.
Determining the cause
Video: Second car with a problem: the stove does not heat - there is air in the system!
The main indicator of the appearance of an air lock is that the stove is not working or is not working well. But this can also happen due to the fault of the same thermostat. If it gets stuck in the open position (the antifreeze constantly moves in a large circle), then the engine simply will not reach operating temperature and the stove will not heat up.
Therefore, if you decide to fix problems with the cooling system, first check the operation of the thermostat. This is easy to do; let’s look at the steps using the VAZ-2109 as an example.
Start checking with the engine cooled down. We start the engine, open the hood, find the upper large pipe going to the radiator - it is a supply pipe and comes from the thermostat, we test its temperature with our hands. If the thermostat is working properly, the pipe remains cold until the engine warms up to operating temperature. As the engine reaches temperature and the thermostat opens, the pipe will begin to heat up.
If the thermostat is functioning normally, but the heating system is not working, there is likely an air lock in the system that needs to be expelled. But before that, eliminate the cause of its appearance. To do this, carefully inspect the connections of the system pipelines to see if there are any leaks.
Inspect the water pump and motor where the cylinder block meets the head. Traces of antifreeze leakage indicate damage to the gaskets. Eliminate the cause of the air lock, and only then solve the issue of airing.
A common cause of a plug is a violation of the technology for replacing and adding antifreeze; the problem with a non-heating stove is associated with it.
Video: How to avoid air in the cooling system when filling with antifreeze.
This will reduce the risk of an air lock.
If you adhere to the rules of car operation, you can significantly reduce the risk of an air lock in the car. These recommendations look like this:
- compliance with the requirements of the service book for undergoing technical maintenance;
- checking the coolant level at least once a month;
- Fill only with recommended, high-quality coolant. Very often, if low-quality coolant is used, the system becomes airy.
Bottom line
It's time to take stock. The cooling system in every car plays a major role in providing the necessary cooling and maintaining the desired temperature of the internal combustion engine, and is also responsible for heating the interior. If you carry out scheduled maintenance on time and monitor the coolant level, then problems with the engine will not arise. After all, if airing in the system is not noticed and eliminated in time, this can lead to serious problems, in some cases to a major overhaul of the internal combustion engine.
Why is an air lock dangerous?
An air lock is an accumulation of air inside the channels of the cooling system, which impairs the circulation of coolant. It acts as a gap in the flow that antifreeze cannot overcome. The consequences of an air lock are serious:
- uneven heat removal from the components and mechanisms of the power plant;
- motor overheating;
- incorrect display of information from engine sensors;
- thermostat damage;
- the interior heating system stops working.
Dangerous consequences include uneven heat dissipation and overheating. Due to the temperature difference in the nodes, uneven expansion of the metal occurs, which causes warping of the composite mechanisms. And overheating of the motor leads to a violation of the geometry of the block head.
Why is aeration dangerous?
- An air lock present in the stove and cooling system of the VAZ-2109 will cause you a lot of trouble. Since the motor will warm up unevenly and there is a high probability of overheating due to poor cooling. The presence of air in the circuit prevents the coolant from circulating, which interferes with the heat extraction of antifreeze from the engine. An air lock also prevents the coolant from penetrating into the radiator, thereby causing the engine to overheat.
- Airing can also occur due to a car's heater not working for a long time. In this case, the antifreeze does not penetrate the heater radiator and remains cool, and the air does not heat up either.
Reasons for airing
The air that has penetrated into the system is collected into one bubble, moving through the channels to a certain place. Having reached the highest point or narrowing, it stops and blocks the flow of antifreeze (antifreeze). Practice shows that most often an air lock occurs in a large circulation circuit, including the main radiator. Although the opposite situation also happens, for example, airing of the heat exchanger of the cabin heater (in common parlance - the stove).
How air enters the cooling system of a car engine:
- the most common case is incorrect filling with antifreeze;
- due to antifreeze leaks through loose connections or faulty parts, for example, a leaky pump seal;
- due to jamming of the bypass valve built into the expansion tank plug.
The main task solved during the process of filling antifreeze is to simultaneously expel air from the cooling system. If you perform the operation in a hurry and do not follow simple rules, the formation of an air lock is guaranteed. Quick filling allows air to enter the system along with the liquid through the funnel, and then collect into one bubble.
Important point! An obvious sign of airing is a critical rise in coolant temperature at any engine operating mode.
The inclusion of an electric fan depends on the make and model of the car: if the temperature sensor is in the cylinder head, forced airflow will definitely work.
If the meter is located differently (in the main radiator, on the pipe), the fan may not start due to the sensor being in a stagnant zone. How will air get through leaks in a pressurized system, you ask? The algorithm is simple:
- During the heating process, the antifreeze increases in volume and displaces the air layer from the expansion tank through the plug valve.
- After the engine stops, the coolant cools and compresses to its previous volume, and the valve lets the air back in.
- As the antifreeze cools and contracts, leaks in the system elements will turn into sources of additional air leaks.
Similarly, airing of the cooling system occurs due to the jamming of the bypass valve. Cooling and shrinking antifreeze provokes the formation of a vacuum, which is not replenished by air flow from the outside. Then suction occurs in the weakest connections.
Possible consequences
If a plug in the cooling system has been diagnosed, you should not put off removing it for too long. Impaired coolant circulation will very soon lead to dire consequences. Engine cooling efficiency drops significantly. Operation at high temperatures leads to accelerated wear of unit components. In extreme cases, naturally, there will be deformation and jamming. It will no longer be possible to do without major repairs, and this pleasure is extremely expensive.
The second is problems with the stove. Its functioning directly depends on the complete circulation of coolant. In the summer, a non-working stove will not create any inconvenience, but in winter it will become a real test for the driver. Also, operating a car with an air lock will lead to increased fuel consumption and damage to individual sensors. If you really want to save money, renovate now!