The design of a unit capable of warming and feeding
The industrial heating and cooking stove is very different from its classic predecessor. In it, the designers managed to combine the following functions:
- Heating unit
- Fireplace
- Hob
This allowed us to save a lot of space, fuel and costs for purchasing decorative elements. After all, a modern oven has small dimensions, is multifunctional in terms of cooking and can become the main element of any design.
Such units have become an integral attribute of country life, thanks to the successful combination of several functions. The fuel for them can be firewood, peat and even coal. Of course, wood-burning stoves are most often used, due to the availability and low price of wood waste.
Heating and cooking stoves can be used to heat several rooms. In this case, air ducts or models with a water circuit are used, which are connected to the heating system. And even despite the fairly high cost, their use is economically justified, since by purchasing the unit you will not have to purchase another stove and fireplace. But there is also an opportunity to save money; if the heating and cooking stove is assembled with your own hands, then its cost will reach a minimum value.
This equipment also has its own peculiarity. Unlike standard devices, which are not capable of maintaining heat in a room for a long time, these models can operate for up to 10 hours in smoldering mode, thereby not reducing the air temperature.
Structurally, they are a metal unit that runs on solid fuel. And the operating principle of this model is based on the process of pyrolysis. This allows you to use firewood economically with a guaranteed high level of efficiency.
But despite the peculiarities of their functioning, almost anyone can assemble heating and cooking stoves with their own hands. It won't take much time or cost much, so the choice is yours. The only thing you need to do is find the instructions for heating and cooking stoves online and carry out all masonry work in accordance with them.
Step-by-step instructions for making a mini-oven
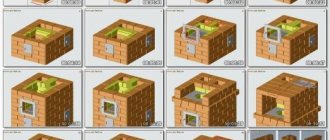
Taking into account the layout of the mini-oven for the dacha, let's get to work.
Masonry from 1 to 12 rows
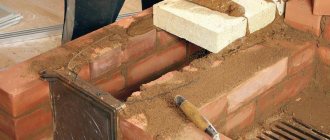
The first row is laid out, and in the second it is necessary to provide space for the blower door. The rows must be coated with the solution. Before installing the blower door, it must be wrapped with asbestos, and the door will be secured with wire.
Next, a row is laid out using refractory bricks and a mixture of refractory clay.
During the laying of the row, a grate is installed. Starting from this row, right up to the masonry, it should be done with refractory bricks.
A firebox door should be installed in the row, with which the same work should be done as with the door for the blower (wrapped with asbestos, secured with wire).
We lay out the row according to the layout. Each layer must be coated with a solution. 8, 9, 10, 11 and rows are laid out in accordance with the layout.
Masonry from 13 to 24 rows
From the row we begin to form the combustion chamber and vertical channels. The main thing here is to carefully follow the procedures, otherwise you may violate the correctness of the design.
On the 15th row it is necessary to lay out a layer of clay-cement mortar. It will strengthen the bottom of the cleaning chamber, after which you can install the door itself.
Masonry from 25 to 35 rows
Further up to the row we lay the masonry in accordance with the instructions.
In the 25th row, the bottom surface of the second cleaning chamber should be sealed, also laying this row with clay-sand mortar, and then install the door.
Next, we lay the bricks in accordance with the order, forming a chimney channel.
In the 28th and 32nd rows, two valves should be installed, with the help of which the draft will be regulated.
Next we begin to raise the chimney pipe, as shown in the layout.
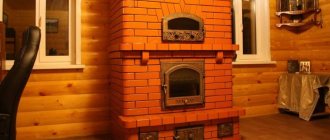
If everything is done correctly, after completing all the work you should end up with a compact model like this.
This model has the following dimensions: 51 cm width, 89 cm depth and 2.38 m height. Even beginners can make such a stove. In addition, if you do not have experience in the furnace business, then it is not recommended to make more complex models, since you can get confused in the procedures and damage the integrity of the structure, which will affect the quality of its operation and service life.
Small size and the ability to quickly and efficiently heat are the main reasons for the construction of small-sized brick stoves. These characteristics are achieved in a variety of ways, differing in masonry and design options.
What is this article about?
What else is important?
The main fuel for fireplace stoves is wood. Logs can be of different sizes, and this must be taken into account. The larger their size, the easier and faster it is to prepare firewood and put it in the firebox. The manufacturer usually indicates the maximum allowable log length, and it is better if in your stove this value is not less than 300 mm. If you go to the store, be sure to take a tape measure with you. With it, you can not only estimate the size of the loaded firewood, but also estimate the volume of the firebox, which manufacturers often do not indicate in the specifications.
- Steel body
- Several modifications of different power;
- There are models with a hob;
- Long burning up to 8 hours;
- Heat transfer by convection;
- Firebox protection;
- Chimney connection from above or behind
- Steel body
- Hob;
- Heat transfer by convection;
- Chimney connection from above or behind
- Cast iron body
- Large firebox;
- Heat transfer by radiation;
- Large glass in the door;
- Clean glass system
- Steel body
- Many cladding options;
- Lining with fireclay bricks;
- There are models with a hob
- Steel body
- Air supply from outside through a separate pipe;
- Lining with fireclay ceramics;
- There is a rotating model;
- Clean glass system
- Cast iron body
- Lining with fire-resistant ceramics;
- “Clean glass” system;
- External air supply
- Cast iron body
- Long burning up to 10 hours;
- Clean glass system
- Cast iron body
- Heat transfer by convection;
- Additional side fuel loading
Furnace installation at home
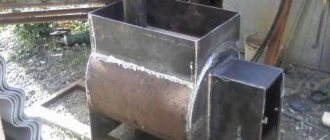
To make a stove for your summer house with your own hands, you can use a simple diagram of a potbelly stove. For the walls of the furnace, a sheet of metal at least 5 mm thick is taken. For the chimney pipe, you need to prepare a pipe with a diameter of 100 mm and a length of about 250 mm.
A drawing is applied to the metal sheet according to the plan, and then 6 parts are cut out, which include two surfaces for the bottom and top, and 2 end and side walls.
A hole is cut in the lid for a pipe with the appropriate diameter. A pipe is inserted into it and welded with one seam. When assembling the structure, the grille must be welded until the cover is secured.
Corners for the legs are welded to the bottom surface. And at the end there are holes for the firebox door and air vent. You can also build a stove from an old metal barrel or can.
The stove in the dacha is an integral element of the interior, providing comfort to the residents. With it you can not only heat a room or boil a kettle, but also, if necessary, connect a hot water system.
Fire-battery (TMF, Russia)
The Termofor company (after rebranding in 2022 - TMF) is a Novosibirsk manufacturer of stove equipment for home, garden and bathhouses. Positions itself as No. 1 in Russia. One of the company’s know-how is the development of the Fire-Battery steel stove. According to the manufacturer, when creating this long-burning model, all the shortcomings of existing designs were taken into account. Available in four modifications: the basic model without additional identifiers - with a cast iron burner, glass in the door; Light is the simplest model, without a hob and a viewing glass in the door. Both options may have an additional water heat exchanger for heating water, then the stove is designated respectively as Fire-battery B or Fire-battery Light B. The power of the equipment varies depending on the size of the housing and the number of sections of the slot convector, which can be 5, 7, 9 or 11 pieces.
The feature of the model is the fine tuning of the draft and a special lock in the ash pan, which prevents uncontrolled air leaks. You can enter the smoldering mode, in which the operation of the furnace from one load is extended to 8 hours. There is a jet to ensure complete combustion of fuel. The chimney vents either backwards or straight up. The model is durable, because it provides replaceable protection for the firebox - inclined intermediate steel sheets are installed in its lower part above the cast-iron grate.
Principle of operation
The operating principle of stoves operating on wood and electricity is based on the possibility of automatically turning on electric heating elements when the temperature drops (after solid fuel burns out). This happens as follows:
- Kindling and heating of the stove is carried out using firewood. Since the firebox is located at the bottom of the device, it transfers heat from the burning wood to the upper part of the device - to the heat exchanger. An increase in coolant temperature is detected by a sensor installed in the system line;
- when the temperature begins to drop due to fuel burning, the electrical circuit is automatically closed and electric heaters are connected to operation;
- from this moment on, the specified coolant temperature parameters are maintained by the heating elements, based on the readings of the air or water sensor;
- when loading the next batch of solid fuel, the electrical part is automatically switched off, as the coolant is heated
- already from the side of the combustion chamber.
This transition from wood heating to electric heating and vice versa ensures continuous heating of water in the heat exchanger, which allows you to maintain the optimal temperature in the house around the clock.
Wood and electric stoves come in two types:
- single-circuit - connected to the heating system and used only for heating;
- double-circuit - designed to heat the coolant in the heating system and hot water for domestic needs.
Selecting a location
Before you begin construction, you should decide where the stove will be located. If there is only one small free area in the house, there is nothing you can do about it. But to obtain maximum heat transfer, it is recommended to place the stove in the central part of the house or room. Thus, none of its elements will touch the street wall, and accordingly, warm air will not escape outside. In addition, when adjacent to the supporting structure, temperature changes may occur, which negatively affects the durability of the heating device and the operation of the chimney.
What to consider when purchasing?
Various wood-burning stoves for home and summer cottages are presented in a huge assortment on the market. In order not to get confused by all their diversity, you need to determine the purpose of your purchase. This is the only way to find your ideal stove of a suitable design.
1. Convection wood-burning models.
Suitable for quickly increasing the temperature in one room if you come to the dacha on holidays and weekends and want to immediately warm up. As a rule, these are steel wood-burning stoves that gain maximum power within half an hour, but also cool down quickly after burning out. In order for the device to serve for a long time, you need at least a firebox lining. Some manufacturers use cast iron, others use fireclay slabs. If the basic configuration does not have any of this, you will have to retrofit the stove yourself, otherwise it will not last even 5 years.
2. Heating and cooking.
Functional units that allow you not only to heat the room in which they are located, but also to cook or warm up food. The simplest and most inexpensive stoves such as potbelly stoves are suitable for temporary shelters or as an additional source of heat. But you can buy a serious option with an oven and a built-in water circuit for a private home with permanent residence.
Hybrid appliances that are used in the country all year round are encouraged to have “summer” valves. Only with their help will it be possible to continue to operate wood-burning stoves after winter ends, supplying all the energy to the stove and oven, and not to the heating circuit
However, some models do not allow lighting at all when the heat exchanger is empty, so pay attention to this
3. Country wood-burning fireplaces.
68054cf3a62e00071cf8c19f49d4754c.jpe
c74c3500c243e2caabd1a43932fc2e5a.jpe 98600ae633cd3b75e78e9d6666885efe.jpe
If you add a glazed door and a stylish design to the description of the previous devices, you will get a real stove-fireplace for a summer house. Today, such products are the most popular because they combine all the advantages of wood-burning models. They can be made of cast iron, heat-resistant steel, but combined units are more common.
4. Heating.
Cast iron stoves heat the house mainly due to infrared radiation coming from the walls. Heat-resistant glass on the doors of products stylized as a fireplace gives the same effect. They are perfect for constant heating of large rooms and serve as their decoration. However, this is not enough to heat neighboring rooms - slightly improved models are needed here.
5. Fireplaces with a water circuit.
Another type of decorative heating devices suitable for the main heating of a residential building. Such a serious task is best handled by long-burning stoves that operate around the clock on 3-4 stacks of firewood. What is important here is the large size of the firebox, the power on the heat exchanger and the ability to regulate the air supply.
Cost of models
| power, kWt | Dimensions, mm | Price, rubles | |
| Termofor Cinderella | 4 | 460x300x465 | 6 300 |
| Meta Neva | 6 | 870x640x490 | 24 900 |
| Germa | 13 | 1080x450x645 | 27 200 |
| EcoStove Torn | 7 | 460x610x410 | 28 980 |
| ABX Admiral | 7 – 9 | 1121x486x486 | 132 600 |
| La Nordica TermoCucinotta | 22 | 682x860x653 | 210 000 |
Everyone can afford a real hearth!
Due to their small dimensions, the price of wood-burning mini fireplaces for a cottage, home, apartment or restaurant is most often at a quite affordable level. And if we talk about compact cast-iron models, then you can generally get away with a slight fright, spending only a couple of tens of thousands of rubles on a fireplace that, in a small space, will cope with heating tasks at the level of a large full-fledged fireplace product.
Long gone are the days when the hearth was almost a member of the family - after all, it helped prepare food, was the only source of heat for all residents of the house, and every evening it gathered a close circle of household members around itself. However, those times when the hearth was a certain indicator of the special status and prestige of its owner are also gone, remaining in the distant 90s. After all, today almost everyone can afford a real fireplace, regardless of income level.
Choosing a stove for a country bath
The choice of a heating unit for a steam room has a number of features, and they need to be taken into account:
- The temperature of heated stones is 550-600 degrees. The oven is heated for 4 hours. Among the main disadvantages of the heater stove is its heavy weight and significant dimensions. And also in the cold season, additional heating will be required not only for the steam room, but also for the entire bathhouse.
- An easier way to heat a steam room is to install a stove made of steel or cast iron. Steel structures are inexpensive. Cast iron units retain heat remarkably well, and in addition, do not burn out. Metal appliances have a reservoir for stones. The more of them there are, the more evenly the heat is released and the longer it is retained (read: “How to install a stove in a bathhouse, tips for self-installation”).
Features of metal furnaces:
- they can be melted in less than an hour;
- they are small in size and light in weight;
- cool quickly because they have a low heat capacity;
- emit harsh heat.
Brick stoves installed in bathhouses are subject to certain requirements:
- their kindling cannot take more than 4-5 hours;
- brick stoves for a bath should have high heat capacity, not overheat the steam room and retain heat for a long time;
- It is necessary that the heat generated is soft and pleasant.
Which stove is better for a bath - types of heating sauna stoves Which stove to choose for a summer house, watch the video:
A simple baby brick oven for the home
Beginner stove makers are advised to pay attention to just such a simple brick stove. The finished structure is small in size - the total occupied area is no more than 0.5 m2
Set for laying a mini brick oven
Start by preparing the devices necessary for the construction of the unit in question. You will need the following:
- red stove brick;
- fireproof brick;
- fireclay and building clay;
- sifted fine sand;
- roofing iron;
- roofing felt;
- doors for combustion, cleaning and ash chambers;
- grate;
- stove for one burner;
- valve;
- steel pipe;
- plumb line;
- yardstick;
- protective gloves;
- trowel;
- level.
Constructive decisions
Fireplace stoves are made, in most cases, from steel and cast iron.
Steel - have impressive weight and thick walls. They heat up quickly and cool down just as quickly, designed for small spaces - dachas, country houses.
Cast iron - not much larger in weight, but they take longer to warm up, can heat large rooms, and are more expensive. Cast iron stoves and fireplaces are chosen mainly for home use.
Facing - ceramics, stone, less often - brick. They will quickly heat the room. A sufficiently large viewing glass will allow you to admire the play of fire.
Doors can be straight, semicircular or three-sided. The opening mechanism can also vary - to the side or up. To ensure that the door glass always remains transparent, fireplace stoves have a clean glass option - an air flow is supplied to the glass from the inside, forming an air cushion that prevents soot from settling on the glass. Firewood is also inserted into the combustion chamber through the door. The efficiency of closed fireplace stoves is quite high - 80-90%.
You can control the combustion process and wood consumption yourself by increasing or decreasing the air supply. You can save even more on fuel by using fuel briquettes - compressed sawdust, which are much more efficient in their fuel qualities.
Some models have a built-in heat exchanger in their design. With its help, you can heat adjacent rooms by installing radiators, even if there is a blank partition. It is especially worth noting designs with a water circuit - this is a good solution for permanent residences.
Beauty, comfort, warm home. What else can stoves and fireplaces give you? Delicious dinner. Like a traditional Russian oven, you can cook and heat food in them and even cook shish kebab over an open fire. It’s up to you, of course, to choose a stove or a fireplace, or two in one.
6a438c8c5c28014ff21990d5f9fc2b1e.jpe
784a646852ee9c09e40f45d13d388294.jpe 98d3be78ccb442b6a30969b46295175d.jpeFireplace power
To choose the ideal unit for your garden or home, you first need to decide on the power. It will not be difficult to calculate this: based on calculations of 1 kW of energy per 10 sq.m. with a ceiling height of 2.5-2.7 meters.
For example, if the house area is 350 sq.m, you will need a fireplace stove producing 35 kW
It is also worth taking into account the number of window and door openings, rooms - heat in the room constantly circulates as it heats up and cools down. Do not forget about the climatic features of the region in which the building is located
Based on all these parameters, we calculate with a reserve and add another 15-30% to the estimated power (depending on the listed factors).
The most popular wood-burning fireplace stoves are models that have a secondary combustion system, which will dramatically reduce wood consumption. Ceramic cladding allows you to warm up the room even after the fire has died down. Glass also gives off heat. Dark cladding is less of a mark. The manufacturer has a line of stoves made of cast iron.
If all the calculations have been made and you have decided on the type of heating device, let’s consider the most popular models in this segment.
VIDEO: Operating principle and difference from the Russian stove
Negative qualities
Cast iron stoves are not without their drawbacks. Among them the following are noted:
- Fragility. This applies to almost all similar products. The material has a high fragility factor and therefore requires careful handling. He is afraid of strong blows and falls.
- Large mass. For example, a 9 kW oven weighs approximately 70 kg. In a private home, to install such a device, you need to make a reliable foundation.
- Instability to sudden temperature changes. When lighting the stove, no damage occurs, since the device heats up and cools down gradually. But if cold water accidentally hits a hot surface, the cast iron may crack.
- Price. Of course, the cost is much higher than other analogues. However, this is justified: the product is highly reliable and designed for long-term operation.
- Fire safety. Storing flammable materials near such a stove is prohibited. They can catch fire from the high temperature of the walls of the unit.
- Nuances of operation. The room in which the cast iron stove is installed should not have high humidity. Because of this, rust may appear. Any damage requires immediate repair. Models from foreign manufacturers are heated only with pellets or peat, so there is no need to put long logs in them.
Furnace fuel
The fuel for long-burning stoves is wood with a moisture content of no more than 20% - this can be whole logs of the same length, waste from the wood processing industry, wood chips and other lumber. In addition, pellets, fuel briquettes, and coal are used. For this type of furnace, it is better to choose brown coal, since other types are more energy-intensive, which can lead to burnout of the surfaces of the walls of the device, especially if the furnace is made in a combined version, that is, assembled from different materials, and steel is used as the walls of the firebox.
The quality of heating is greatly influenced by the moisture content of the fuel, since damp wood significantly reduces the efficiency of the device and also contributes to the formation of soot deposits on the walls of the chimney. In addition, the pyrolysis processes in such wood are defective.
Heating in the country and requirements for it
Heating of a country house differs primarily in that it is periodic. Most people go to their dacha only on weekends and holidays. It is not always advisable to heat a country house constantly and install expensive gas or universal boilers for this. It is easier and more efficient to use a wood stove or an electric boiler to heat the dacha.
- The following requirements apply to heating devices for summer cottages:
- quick heating of all rooms even from sub-zero temperatures;
- simple ignition of the stove or starting the boiler from a cold state;
- the ability to maintain a comfortable temperature for a long time with minimal maintenance;
- low price of equipment;
- small dimensions and weight;
- easy installation and installation.
Wood-burning stoves equipped with a long-burning function, as well as simple models of electric boilers, meet these requirements.
Advantages and disadvantages
Advantages of mini-ovens:
- small dimensions allow installation in small rooms, taking into account the recommended distances from the walls without loss of total area;
- quality and compliance with fire safety standards make them safe for installation in wooden garden houses;
- in winter, the stoves can be easily dismantled and stored in the pantry to prevent theft;
- the quality of the materials allows the devices to easily withstand long-term interruptions in operation and being in a damp and unheated room;
- stoves – small fireplaces cost significantly less than large models. Therefore, you can buy them and enjoy the sight of a burning fire;
- simplicity of design and a small amount of materials allow you to make such devices yourself;
- With a little imagination, you can make such a little thing into an interior decoration item for your home.
The only disadvantage that can be highlighted is that little firewood can be placed in a small firebox, therefore the burning time of the firebox is reduced. This can be inconvenient, especially if you need to add fuel at night. Otherwise, the advantages of small structures are undeniable.
What to choose from: types of stove equipment for a summer residence
Information about the efficiency and features of popular stoves for summer cottages will help you decide on the choice of heating equipment. It is installed once and for many years, so the choice is approached thoughtfully and thoroughly.
The choice of stove must be approached carefully
Russian
A real Russian stove is a large and heavy structure that requires a spacious room. Today, the original Russian model has been modernized to suit modern conditions and has smaller geometric parameters, but still efficiently heats large areas.
Russian stoves are equipped with stoves, ovens and stove benches. The efficiency of brick structures of this model is high, at least 75%. The peculiarity of the stove lies in its design, consisting of a system of channels and a chimney. Therefore, it heats up quickly, accumulates heat and gradually releases it, thereby maintaining a stable temperature in the room.
The original Russian stove model has been modernized to suit modern conditions.
Dutch
The Dutch oven is one of the most efficient and therefore popular country stoves. Its design has its own characteristics:
- a winding system of channels located one above the other;
- lack of grate;
- variety of furnace body shapes: round, semicircular, rectangular, with protrusions;
- The walls are laid using 1 brick, which results in low weight.
The Dutch oven quickly warms up the room and retains heat for a long time. It features economical fuel consumption. Can be equipped with a stove and a bench.
3cd8b61881a6967e1f08dde8b9fb9536.jpe
The oven can be equipped with a cooking plate
Brick Swede
The Swede is an impressive and cozy stove, the efficiency of which is at least 60%. The structure is lightweight and therefore does not require a large amount of materials for construction. The Swede is one of the best stoves for heating country houses and residential buildings. Ideal for small buildings, suitable for year-round heating.
With water circuit
The main “minus” of any stationary stove is weak heating of remote areas of the building. The problem is solved by installing a heating system consisting of a heat source, piping and radiators. The system can be single-circuit or double-circuit, but in any case it requires a coolant with a constant temperature.
The system can have one or two circuits
Furnaces with a water circuit are designed to solve this problem. The design of this heating equipment includes a boiler - a container of water that is heated by the stove and fills the pipeline. Circulation is provided by a special pump. A stove of this type can be brick or metal. Regardless of the material of manufacture, this is the best choice for heating a summer house.
Stove-fireplace
The fireplace stove is highly decorative and attracts with the ability to feel the warmth of a live fire and enjoy it. There are a large number of models of structures of this type. You can choose the most suitable one in terms of power and visual appeal.
There are various designs of fireplace stoves on the market.
Small-sized potbelly stoves
A potbelly stove is a small metal stove for a summer residence, characterized by ease of assembly and installation. Most infrequently visited country houses are equipped with just such stoves. They are quite economical, easy to maintain, and can heat a small room well.
With hob
Models with hobs are the most convenient to use. The ability to cook food on a stove allows you to save electricity and will help you out when there is no electricity. Therefore, practical summer residents choose just such multifunctional heating equipment.
These ovens are very easy to use.
Long-burning stoves for summer cottages
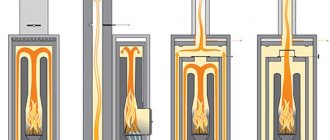
Such furnaces are otherwise called “pyrolysis”, since they operate on the principle of producing pyrolysis gases and secondary combustion of fuel. The work flow is as follows:
- the firebox is filled with fuel;
- Wood chips and fire paper are placed on top of the firewood;
- they set fire to wood;
- when they flare up, they almost completely block the access of oxygen to the firebox;
- the resulting pyrolysis gas rises upward into the afterburner;
- in the chamber, the gas ignites with the release of heat, which ensures double use of one portion of fuel.
Such stoves are beneficial in all respects. They are more expensive than usual, but quickly pay for themselves.
Pyrolysis ovens - a profitable purchase
Device
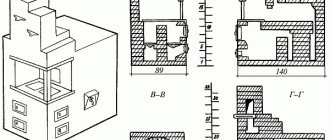
In the presented furnace, hot gases rise through the firebox channel into the bell (their path is indicated by arrows in the diagram). Next, the gases descend, go around the “undercut,” enter a vertical channel and rush into the chimney, where two valves are installed.
In the absence of a convective system, the solid fuel stove would not have time to heat up. The cap serves to slow down gases and increase their contact time with brick walls.
You can download the drawing in high quality from this Link.
Features of installing a cast iron stove
A few words need to be said about the features of installation work on installing a long-burning cast iron stove and preparation for it.
The installation of a cast iron appliance itself is not particularly difficult, with the exception of transportation - due to the large weight of the unit. However, before buying it, much less installing it, you need to carry out preparatory measures:
- To choose the right device, you need to collect some data - this is the size of the heated area, it is necessary to determine the power of the stove. In addition, you need to take into account the height of the ceilings of the rooms.
- Next, you need to draw up a plan of the room where the stove will be installed and the attic floors located above it. The last parameter will be needed if the chimney will go outside through the attic floor and roof.
- Having received all the data, you can go to the store to buy the device and all the additional accessories that are necessary for its installation. Very often, for such an installation, sandwich chimney kits are purchased - they are perfect for devices of this type.
The site for future installation of a cast iron stove must be prepared accordingly
- Next, you need to prepare the place where the stove will be installed. To do this, the walls and floors are finished with ceramic tiles, bricks, artificial stone, or the surfaces are sheathed with non-flammable material - this can be asbestos (for residential premises - not recommended) or plasterboard. Drywall must have a heat resistance designation - GKLVO. A screen can be installed on the wall using these materials. If necessary, the ceiling under the flooring is reinforced, and their surface is leveled with a screed, and then decorated with ceramic floor tiles.
- The stove is installed on a prepared surface, leveled to the building level. All chimney pipe connections are sealed with a special heat-resistant sealant. The material from which it is made is heat-resistant silicone. Additionally, it will be necessary to insulate all chimney penetrations through walls or ceilings.
- The section of the chimney located on the street must be insulated, or special sandwich pipes that already have an insulating layer must be used for its installation.
- If a cast iron stove will be installed in a wooden house, then in addition to arranging the installation site with heat-resistant materials. a number of certain rules must be followed. Such requirements include:
— the combustion chamber must be of a closed type with heating of gases no more than 400 degrees;
— the outer surface of the chimney should not heat above 85 degrees, and in passages through ceilings or walls, the pipe is separated from them by heat-resistant insulation with a width of at least 100-150 mm.
The process of constructing a small-sized furnace
The small-sized oven occupies only 0.4 square meters.
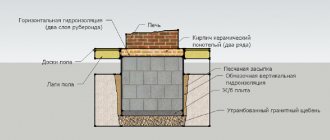
It is laid out from bricks placed on edge or flat. If you know the basic rules for building a stove, then you won’t even need a diagram or preliminary calculations to build it. Due to the relatively light weight of the mini-oven, it does not require a foundation, but in this case a thick, durable board, well secured to the joists, should be used for the floor.
Order of masonry
- The first stage is traditionally choosing a place and preparing it for the construction of a furnace. To do this, you need to lay a piece of plastic film, roofing felt, hydrosol or glassine measuring 78 by 53 centimeters on the surface. Pour dry sand on top of the litter (layer thickness 1 cm) and level it.
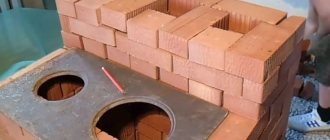
The first row of bricks is laid out on the sand (12 bricks are used without fastening) strictly horizontally, which can be checked with a level. On top of the first row we thinly apply a clay solution and install the blower door. Pre-wrap the door with a piece of asbestos cardboard or wrap it with cord. Secure it with wire.
- We are laying the second row of our stove.
- We lay out the third row of fireclay bricks. We install a grate on it, which will be located strictly above the ash pit.
- In the fourth row, the bricks are laid edgewise. And inside the chimney, a stand is mounted on which the internal partition will be installed. When laying the back wall of the stove, do not use clay, but use so-called knockout bricks (for this they should protrude slightly outward).
- The next essential element of any stove is the firebox door. Wrap it with asbestos cord before installation. We secure the door with wire, use two bricks for temporary fixation: one on the back, the second on the first, and install the door on top of them.
- We lay the bricks in the fifth row flat, following the contours of the fourth row.
- We place the bricks of the sixth row on edge, and then rub the walls of the oven with a damp rag.
- For the seventh row, we again lay the bricks flat. At the same time, in order to ensure a connection between this and the next row, you need to start with three-quarters. Then place two bricks on edge and begin building the back wall.
Stoves for heating summer cottages
The range of heating stoves is wide, it’s easy to get confused, so even before going to the store you need to clearly understand what functions the stove should have. To do this, it is worth understanding the capabilities of heating units.
96be7b255fe7a372957510ef0493aadd.jpe 70160cf0235ae453a8e2744ed1d3e6b1.jpe
Power
The most important characteristic, the wrong choice of which will make the stove ineffective. All heating devices have a certain thermal power, it is expressed in kW. For a normally insulated residential building, the calculation is usually made by area: divide the total number of square meters of the house by 10 and get the required power in kW.
For a country house, this calculation is not entirely suitable. When selecting power, the following subtleties must be taken into account:
- material of walls, floors and ceilings and its thermal insulation properties;
- seasonality - will the house be used in winter, or is heating needed only on cool days in spring, summer and autumn.
The greatest power of the stove will be required if the house is made using lightweight technology, and visits to the dacha are planned in winter, in frosty conditions. In this case, it is necessary to choose a stove with a power greater than the calculated one or install additional heating devices.
Long burning mode
Some wood-burning stoves can operate in a long-burning mode. It is due to a special combustion mode of fuel - pyrolysis. Pyrolysis stoves can operate on wood or pellets. When ignited, the firewood heats up, and the process of decomposition begins into a solid fraction - coals and ash, and a gaseous fraction - smoke.
Flue gases contain many combustible elements; in conventional stoves they are not completely used and exit through the chimney, heating it greatly and releasing heat into the atmosphere. Thus, the thermal resource is used at best by 60%.
In stoves equipped with a long-burning mode, flue gases are burned in a special zone, it is called smoke circulation. The smoke passes through these channels, and its combustible components burn, giving off heat to the walls of the stove.
For this process to proceed successfully, it is necessary to limit the flow of air into the firebox in order to cause smoldering of the wood and increased formation of smoke. It is adjusted using a valve on the combustion door, and the optimal mode is selected experimentally.
Body and firebox material
- The debate about which stove is better, cast iron or steel, has been going on for a long time. What is the difference?
- Weight. Cast iron models have thicker walls and a massive structure, so they are heavier, their weight can exceed 250 kg. If the floor in the country house is wooden, it may need to be strengthened, which will lead to additional costs. Steel models are approximately twice as light.
- Corrosion resistance. Cast iron is not subject to corrosion in a slightly acidic environment - for stoves used periodically, this is a big plus. The temperature difference during kindling leads to the formation of condensation in the firebox. Mixing with soot deposited on them, water forms weak carbonic acid. Steel structures corrode under these conditions.
- Burnout resistance. Due to their thick walls, cast iron models are more resistant to burning even at very high temperatures.
- Price. Steel models are 1.5-2 times cheaper than cast iron ones.
Inexpensive models popular among summer residents are usually combined. The highly heated and corrosion-prone surfaces in them are made of cast iron, the remaining structural elements are made of steel, which allows them to combine durability and low weight. The price of such devices is in the average range.
Additional functions
The main task of heating stoves is to quickly warm up the house
- . Depending on the model, they may be equipped with additional useful features:
- hob, solid or with burners;
- possibility of connecting a heating circuit, water or air;
- decorative elements that allow you to create a cozy atmosphere at the dacha - panoramic glass in the fire door, decorative inserts, forged grilles.
Whether these functions are needed or not is a matter of personal preference, but it is worth considering that their presence affects the price of the stove.
Miniature stove made from a can
This stove option is perfect for those who like to relax in nature.
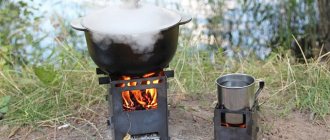
The finished product has minimal weight and takes up very little space in a hiking backpack. Despite the simplicity of its design, a stove made from a can is very convenient and productive - you can boil a liter of water by spending a few small dry branches. Miniature stove made from a can
Moreover, such a homemade stove can work not only on branches, but also on leaves, cones and even hay. You definitely won't remain hungry!
The first stage is preparation of components
Prepare three tin cans of different sizes in advance. Canned food containers are perfect. From the largest can you will make the body of the stove, place a medium-sized can in the body, and from a small container you will make an impromptu burner.
Cans
Additionally, prepare scissors, a block, an electric drill and a felt-tip pen.
Wood block
The second stage is making a template
First step. Insert a wooden block vertically into the largest jar and, approximately at the level of the lid, mark a couple of lines on the wood at a distance of about 8 mm.
Insert a wooden block vertically into the largest jar and, approximately at the level of the lid, mark a couple of lines on the wood at a distance of about 8 mm
Second step. Cut a rectangular recess according to the markings, such a size that the upper edge of the container can freely fit into it.
Insert the block into the jar and draw two lines with a marker approximately at the level of the lid
Drill a hole according to the markings
Third step. Place the block so that the can rests steadily on it, and the upper edge of the large can is held in the previously prepared recess in the block.
We put the jar on the block
The third stage - preparing a large jar
First step. Draw a line over the bottom edge of the largest can. This line will serve as a marking to create ventilation holes. The line can be drawn with an ordinary felt-tip pen.
Making the markings
Second step. Drill holes along the marking line. The optimal number of holes can only be selected experimentally. Excessive ventilation will cause fuel to burn too quickly, and if there is insufficient draft, the stove will simply not be able to operate normally.
Making holes
Therefore, make a small number of holes to begin with, and then, if necessary, drill them after the initial tests of the stove.
Stage four - preparing the middle jar
Drill holes under the top edge of the middle can
Drill many holes in the bottom of a medium-sized container. Select the size and number of these holes so that the loaded fuel does not fall out in the future. As a result, the bottom of the jar will look like a sieve.
Drilling the bottom of the middle can
Fifth stage - stove assembly
Place a medium-sized jar into the largest container. The connection should be quite rigid, but not tight - a small gap is required between the walls of the two cans for air circulation.
Insert the middle jar into the large one
Stage six - making the burner
To create the burner, use the smallest tin can.
Cut off half of a small can, make holes closer to the edge, as well as one hole in the bottom
First step. Prepare holes in the side of the jar in the same way as you did with previous containers.
Second step. Cut out the bottom of the can using tin snips.
Third step. Carefully align the edges of the burner and clean them with a file.
Stage seven - checking the stove
Stacking the wood chips
Load the wood chips into the middle jar and set it on fire.
Take the main part of the stove (a middle container inserted into a large one) and load fuel into it (cones, wood chips, leaves, small branches, etc.). If possible, load dry branches directly from trees into the oven, because... Fuel from the ground may be damp.
The smallest part is the burner. We put it on top
Light the load and let it warm up. At first you may not be very good at it, but very soon you will learn how to light a stove with just a couple of matches.
We heat up the food or put on the kettle. The camping mini-stove is ready
Let the fuel burn intensely, place a burner on the stove, and a saucepan, kettle or other container on it.
An improved model of a supercharged mini-stove
