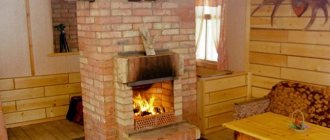
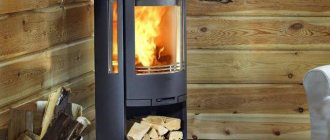
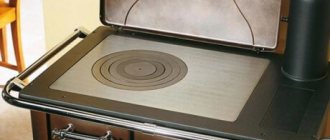
Buildings of any type with a steam room require a heating structure capable of heating the air to high temperatures. However, purchasing a finished product entails considerable financial expenses, so individual developers very often make sauna stoves from iron with their own hands. It is metal that is a good conductor between the combustion chamber and the environment.
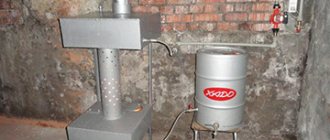
The photo shows a homemade iron structure.
Initial information
Self-made structures made of steel, when compared with their brick counterparts, are distinguished by the speed of construction and increased heat transfer. To carry out the work, it is enough to find a pipe whose diameter will be approximately 50 centimeters. Such products are especially relevant for small objects.
Requirements
Approximately the following pipe needs to be prepared.
- The heating structure must be located in a place where reliable fire protection is provided for materials subject to easy ignition.
- The area occupied by this object should not exceed 0.15 percent of the useful square footage of the heated room, since it is not very comfortable to carry out water procedures in a cramped environment.
- The side surfaces of the structure must be covered with heat-insulating materials so that the risk of burns is minimized.
- When installing, you should take care of the correct location of the stove, because the heat emanating from it should spread in different directions, thereby ensuring high-quality heating.
Basic elements
When making an iron stove for a bathhouse with your own hands, every novice craftsman must familiarize himself with the main components that make up the structure.
Any of the fragments listed below performs some function, so it is important to study all the details in full.
The structure of a sauna stove with water supply.
- The firebox is the main chamber where organic fuel is usually burned to heat the walls and then the surrounding air.
- The ash pit is located below the previous chamber, ensuring the collection of ash, which is formed as a result of the combustion of organic substances.
- The stone container allows you to lay cobblestones of jadeite, gabbro-diabase, crimson quartzite or other high-temperature resistant analogues.
- The pipe is a hollow product that is necessary to remove combustion products from the main chamber.
- The grate is an element inside the firebox that makes it possible to hold a layer of solid substance intended to produce thermal energy.
- Blower and firebox doors allow you to control the flame by covering it, which leads to a decrease or increase in oxygen inside.
- A pipe valve is usually made in the form of a control element that moves perpendicular to the working medium.
Shown is a homemade grate made from rebar.
Attention! If the building combines a washing compartment and a steam room, then the hot water tank is installed directly on the stove. However, in such a bathhouse it is also possible to have stands above the stones.
Recommendations
The fuel material must be completely burned, and to achieve this goal, an optimal amount of oxygen must be supplied. Therefore, the total area of the distance between the grates is no more than 60% of the total area of the grate. If the distance is smaller, a small air flow will enter the stove; this will not be enough to maintain the combustion process in the combustion chamber.
If the distance between the grates is large, the fuel material will fall without having time to burn out. This will lead to an increase in combustion consumables.
The cast iron grate for the stove provides good traction and is used for burning wood, coal and fuel briquettes. Cast iron still occupies a leading position in the manufacture of grates. Since it is least susceptible to deformation at high temperatures.
What is a grate for?
This important element of the furnace combustion chamber allows you to get the maximum effect from fuel combustion. The structure of modern stoves is constantly being modified and improved, and only the main structural element of the firebox remains unchanged. The combustion equipment retains its grate configuration.
The platform supports any type of solid fuel (firewood, coal and briquettes). Through the through openings, air is sucked in from below, which creates effective draft inside the combustion chamber. Combustion products (ash) fall into the ash pan (ash pan), freeing up space for the top layer of fuel. The grate promotes uniform combustion of fuel, thereby achieving maximum thermal energy transfer from the fuel placed in the combustion chamber.
Grate design
The size of the grate depends on the fuel that will be used in the future. For everyday use, two designs are recommended - solid and composite.
The first option consists of a cast iron grate, which is selected according to the size of the combustion chamber. The second type is assembled from individual elements.
The size of a composite grate is determined in the same way as a solid one, based on the size of the firebox. In addition to differences in type, devices are also divided by functionality.
The design of the cast iron grate comes in two types: full-rotating and swinging. In the first case, the elements have the ability to rotate horizontally by 180 degrees, which allows you to dump ash and slag.
This design involves grooves in the combustion chamber for additional holes. It is extremely difficult to make a full-circle system at home.
In the second design, the elements have cradle-like movement elements, rotating around at an angle of 30 degrees. This system has the ability to loosen accumulated slag.
By design, the grate can be chain or pipe. In the first case, the model resembles a conveyor belt. In the second, it is made of pipes and has a cooling function.
The cooled grate consists of a cast coil, which is made of cast iron. This type is used in water heating and pipe water supply systems. Coolant circulates inside the cooled grate device. Cooling is used when burning coal, since its temperature is a thousand degrees.
Types of grate
The grate is made from elements of different shapes, but only from cast iron and steel. Other materials do not withstand frequent calcination or are too expensive. Depending on the design, grate bars are divided into several types:
- tile grating;
- beam grate
- basket;
- mobile grid.
Tile grate
One of the most common types of grate is the tiled grate. The main feature of this design is the observance of strictly fixed dimensions. This grille is designed for an installation site of a certain size. A mandatory condition must be met - the presence of a gap between the outer perimeter of the grate and the walls of the firebox of at least 5 mm. If this size is not maintained, the cast iron grate may expand greatly when heated and damage the firebox.
Beam grate
The grate consists of a set of individual grate elements. On opposite sides of the installation site, grooves are made into which cast iron bars are placed. Such a system is not entirely convenient for cleaning grates, and today these designs are practically not found. However, it should be noted that when using an antique stove, this is an acceptable option for installing a grate.
Basket
The basket is the same lattice, only with high sides. This type of grate was used in open fireboxes, but now such equipment is practically not used
Mobile grid
The movable system allows you to avoid manual control of the grate. Automated long-burning furnaces are equipped with designs of this type.
Grate - grate
Stacked and solid options
In different furnaces, the fireboxes may differ not only in size, but also in shape. In this regard, grate manufacturers produce a wide range of products, so you can choose grate bars for even non-standard shaped fireboxes.
By structure they are distinguished:
- Solid cast grate bars . In this case, a product is produced that cannot be disassembled into parts. They are produced in several standard sizes, so when selecting a product you need to rely on the total area of the fuel chamber of the furnace.
- Prefabricated gratings are assembled from several parts. From these components you can assemble a grate for a furnace of the desired shape and size.
How to choose a grate and install it yourself
The choice of grate depends on several reasons:
- Type of fuel;
- size of the firebox opening;
- furnace operating mode.
For example, if the stove is heated with wood, then the size of the firebox opening is 350×260 mm, the operating mode is year-round. The most suitable option would be a factory-made grate with a rectangular configuration with sides of 300 and 252 mm, made of cast iron. It will be very easy to install the grate with your own hands.
Drawing conclusions
The optimal choice of grate for a fireplace or potbelly stove is cast iron, as it is durable and has a large margin of safety. Another advantage is the possibility of installation in metal and brick ovens . The main criterion when choosing a grate type is the area of the gaps and the mass of the fuel to be installed .
Installation of monolithic models is somewhat simpler, while stacked models are the best choice for gratings with non-standard dimensions. When installing, be sure to leave gaps for the possibility of metal expansion .
Similar articles:
Adhesive for stoves and fireplaces Doors for stoves and fireplaces
The use of heat-resistant adhesive for lining fireplaces and stoves Cast iron hobs for stoves
Due to the fact that many works on cars, and others, are delayed or postponed into winter, it was decided to build a potbelly stove, with one hand itching to cook. This scheme was taken as a basis.
How to make grate bars with your own hands
The grates that are permanently installed in the furnace eventually burn out and become unusable. If the opening for the grate was made individually, then you can only install a grate of a certain size. A simple way to make a grate with your own hands is to weld a grate frame from a steel angle. To do this you need to prepare tools and materials.
Tool
List of required tools:
- welding machine;
- angle machine;
- sander;
- drill;
- vice;
- hammer;
- tape measure and ruler;
- square;
- pencil.
Materials
- corner 40×40×2840 mm;
- steel strip 100×40 mm.
Grill installation
To make a grate for a boiler, a fixed beam structure is most often chosen. This is a composite model, based on a square or rectangle of four beams.
This square must be made according to the size of the combustion chamber in which the grate will be used. Small beams are welded into its base, and the distance between them must also be taken into account. It should be such that the material does not fall during the combustion process, and the burned residues can easily leak through these holes.
Step-by-step instructions for making a grate
Before you make grate bars with your own hands, you need to clarify the initial data. The firebox opening subframe is made from a 50×50 mm corner with an internal perimeter of 265×335 mm. Therefore, the grate frame should be made with dimensions of 260x330 mm along the outer perimeter. Having prepared tools and materials, the following work is carried out:
- Using a corner machine, a corner 1180 mm long is cut.
- The side of the corner 40x40 mm is successively marked with a pencil into segments: 260, 330, 260 and 330 mm.
- Perpendicular lines are drawn in marking areas. From the top point, lay 20 mm in both directions. The sides of the equilateral triangle will be the cut lines.
- Using a corner machine, triangular fragments of the corner are cut out.
- Alternately clamping the steel workpiece in a vice, bend it into a frame with a hammer.
- The sides of the folds are connected by welding. The right angles of the frame are checked with a square.
- The remaining section of the corner is divided by a corner machine into 5 sections, each 322 mm long.
- The corners are welded into the frame with the feathers facing outward with 10 mm gaps between them.
- A grinder is used to remove all burrs and metal deposits after welding.
- A piece of strip is welded to one of the sides of the frame, having previously made a hole ø 6 mm in it with a drill. This is done so that when cleaning the grate it can be easily removed from the subframe.
- The finished grate is lowered into the subframe.
It is necessary to comply with safety regulations during work on assembling the grate. The master must have special clothing and shoes, especially for welding work.
The proposed manufacturing method is not suitable for everyone. You must have skills in handling welding equipment and power tools. As a last resort, a grate of this design can be ordered at any mechanic shop. It won't cost much, and the order will be completed quickly.
You can go another way. Instead of corners, cast iron grates 330 mm long are placed in the frame. To do this, appropriate grooves are made under the beam elements in the vertical corner of the frame. Despite the fact that the grate may initially seem difficult to implement, making it with your own hands is not difficult.
Author: geras, February 15, 2011 in General
Grill installation
Metal tends to expand at high temperatures, so the grate must be installed with a small gap of no more than 5 millimeters in each direction.
The ledge in the combustion hole needs to be cut off; the grate itself will be located on it in the future. In a brick stove, the location for the grate is generally chosen below the opening of the firebox door by one brick. This must be taken into account to ensure that burning wood and coals do not fall on the floor.
At the installation stage, you should not install the grates tightly, since when heated the material is capable of deformation. This can lead to product failure and cracks in the oven itself.
It is also necessary to take into account that if triangular rods are installed in the grate, then it must be laid with triangles down.
Let's sum it up
- The best material for grates is cast iron. It is reliable and durable, it can be installed in brick and even steel ovens.
- When choosing a grate, you need to take into account the weight of the fuel and the area of the gaps. Monolithic models are easier to install, while modular models are well suited for assembling gratings of non-standard sizes.
- When installing, be sure to leave gaps for metal expansion and do not fill the grooves with cement.
If you take into account all these nuances, the new grate will last for decades, and you will not need to think about replacing it.
Metal heater stove, is it suitable for a bath?
This furnace design is the simplest. For work you will need sheets of steel with a thickness of at least 5 mm, a welding machine and a grinder (or a gas cutter), pipes for water supply and drainage, refractory bricks, stove clay solution, stones, pipes for the chimney, tap, stove doors with latches and hinges, metal profile for mounting the stove support.
The structure itself consists of a water tank with pipes and a tap connected to it. The tank is heated from the back wall of the stove, the internal space of which, in turn, is zoned into a firebox and an open heater. Flue gases are disposed of through a chimney exiting the firebox through the heater and the walls of the bathhouse.
First of all, it is necessary to cut out the bottom and side walls of the future stove from steel sheets and connect them by welding. We weld corners inside the stove - they will support the sheet of metal on which we will lay the stones.
On the front wall we cut out a rectangular hole for the door, and from the cut out rectangle we make a door. You can weld it around the perimeter with strips of steel for a tighter fit. We drill several holes in the lower part of the door or front wall of the firebox to allow air to enter the stove. We weld the door hinges and the hinge for the bolt.
To make a chimney, we will prepare a pipe and make a hole in the sheet of metal on which the heater will be located. We weld the pipe to the steel sheet.
Let's start installing the water tank. It consists of three walls and a bottom, hermetically welded together and the back wall of the furnace. We weld the inlet and outlet pipes for water to one of the side walls of the tank. Then we weld the tap at the bottom of the tank. We install the entire structure on a frame made of steel profiles or on a brick base 20-30 cm high. We cover the metal parts of the stove with fireproof paint. We lay stones on top (soapstone, porphyrite, basalts, etc.) ranging in size from 5 to 12 cm. We install the chimney and chimney, pour water into the tank, cover it with a lid and ignite the finished stove, checking the structure for the presence of draft and the absence of smoke in room.
To modernize a potbelly stove for a bath, you can equip it with an ash pit with a grate and a box for collecting ash. This will greatly simplify cleaning the stove, and the ash door will help to better regulate the draft, and, accordingly, the temperature and rate of fuel combustion. For the same purpose (regulating the heating temperature of the stove), as well as to reduce heat loss through the chimney, it is equipped with a valve. It can be a gate type or any other.
Chimney maintenance
First of all, good care of the smoke exhaust pipe from a potbelly stove ensures the safety of people and property in the room.
It also provides an equally important property - good heat transfer from the chimney and draft. And in order for the chimney to faithfully serve the entire period allotted to it, a visual inspection of the chimney pipe must be carried out at least once every six months. There should be no traces of burning or corrosion on the metal, it should not burn out, crack or rust
There should be no traces of burning or corrosion on the metal; it should not burn out, crack or rust.
The presence of one of these defects is a signal of the need to urgently replace the damaged area: smoke will flow into the room through the cracks, which, at a minimum, will negatively affect the health of the people in it. In addition, by burning and cracking in certain places, the metal of the chimney can weaken, and the entire pipe will soon simply collapse.
Traditional cleaning methods will come in handy here - you can use the method of cleaning the chimney with potato skins. An original, but dangerous method of raising the temperature to the maximum so that the soot burns and flies out is strictly prohibited: high temperatures not only contribute to rapid wear of thin metal, but can also easily cause a fire.
A potbelly stove is the best option for those who need a portable and convenient stove
And the only problem - the construction of a chimney - is no longer a problem! It turns out that making a high-quality and efficient chimney for a potbelly stove is quite easy; it is only important to follow the technology. A finished chimney does not require special attention, only regular but rare care, for which it will repay with years of good work! In order for the potbelly stove to always have good draft and to avoid smoke in the room, it is necessary to carry out preventive measures that will help keep the chimney in order
In order for the potbelly stove to always have good draft and to avoid smoke in the room, it is necessary to carry out preventive measures that will help keep the chimney in order.
Any chimney requires periodic preventative maintenance:
In order to keep the pipe clean from soot deposits, it is necessary to periodically add chemicals specifically designed to loosen carbon deposits to the wood being burned. Aspen firewood is also used for the same purposes, which helps clean the internal walls. To clean the pipe with their help, only aspen firewood is used for preventive combustion. It is advisable that they do not burn out quickly, but smolder for as long as possible in the firebox. To create such conditions, the draft is artificially reduced by closing the ash pit after the wood has burned well. The pipes are mechanically cleaned annually to remove carbon deposits and rust. To do this, you can use a special cleaning brush with a weight.
After each cleaning, be sure to inspect the surface, carefully lowering the switched-on light bulb into the chimney. This is necessary to detect burnouts or cracks in time.
Since any chimney must be extremely reliable, and all segments must perfectly match each other when joined to seal them, it is recommended to install parts manufactured exclusively at a professional level. It must be remembered that the entry of carbon monoxide into a room from poorly sealed seams or burnt holes is, without exaggeration, a mortal danger.
Tags: potbelly stove, dacha, chimney
Sauna stove made from a pipe or an old cylinder
The difference between this design and the previous one is that the water tank is located directly above the firebox. For work you will need: a pipe for the stove and tank (wall thickness 1 cm, diameter 50 cm, height 150 cm); pipe for the heater (the wall thickness is the same, and the diameter is 35cm); mortise valve; metal fittings; hinges for doors; steel sheets with a thickness similar to pipes; tools for welding, metal cutting.
- We divide a pipe of larger diameter in two using a grinder. From one part (length 60 cm) we will mount a water tank, from the second (90 cm) we will construct a heating device for a bathhouse.
- We make markings on a sheet of steel to cut out a circle equal in diameter to the pipe - the furnace body. To do this, it is convenient to use a can of paint or a marker. This circle will serve as the bottom of the structure. We weld it hermetically to the pipe.
- We immediately make the legs of the structure. To do this, we strengthen the bottom of the sauna stove with a metal frame made of profiles. Frame height 10-15 cm.
- After the stove stands firmly on its legs, draw a 25x7 cm rectangle on the body. This piece of metal will be the blower door. We cut it out with a grinder, equip it with hinges, a handle and a latch.
- We make a grate. Its task is to pass air from the ashpit into the combustion zone, hold fuel and not prevent ash and ash from entering the lower chamber of the furnace. Such a grid can be made from pieces of reinforcement or a sheet of metal with holes cut in it. The grate must be secured by welding in the inner part of the pipe at a height of 12-15 cm from the bottom.
- The firebox will be located above the grate. We cut out a door for it measuring 25x30 cm, departing from the level of the grate about 20 cm. We install the door in the same way as the ash door.
- We will construct the heater from rebar. By bending it in different directions, we give the reinforcement rods the shape of a basket, and fasten them together with plastic wire. This is where we will place the stones for the stove. We install the “basket” on the top of the pipe. Here we cut a door of any shape and again equip it with hinges and a latch.
- Next we'll take care of the water tank. The tank body is a pipe, 60 cm long. For this pipe we cut out the bottom, in which we in turn cut a hole and pass the chimney pipe through this hole. We secure the parts by welding. We cut in a tap closer to the bottom of the tank.
- Now we assemble the two parts of the stove together so that the tank is located strictly above the firebox. We make a weld.
- It is convenient to make the lid for the tank double-leaf. We cut out a circle, divide it into two equal parts, one of which is tightly welded to the tank, the other is attached to the first half with loops. To make it more convenient to open the tank, we equip the lid with a bracket handle made of reinforcement.


