The Russian stove, familiar to us from fairy tales and historical chronicles, has not lost its relevance to this day.
It is especially popular in rural areas and in the construction of country houses. A similar heating structure is used as a heat source for heating living rooms and kitchen areas. Thanks to the crucible's ability to retain heat for a long time, aromatic crumbly porridges, pastries and pies acquire an indescribable taste. This article is devoted to the construction of such a structure as an outdoor Russian stove. The process of constructing a structure is very labor-intensive and has many subtleties and nuances. But if you have the proper skills, abilities and desire, it is not something impossible.
It is considered rational to use heat-resistant bricks in the construction of an outdoor oven. In addition, we recommend providing a variety of cooking options. Such a device can be equipped in such a way that frying on the grill and skewers, baking, boiling, simmering and even smoking does not cause any difficulties.
Kinds
The main criteria for determining the type of fireplace are its functionality, as well as its mobility or, conversely, stationarity.
When choosing the best option for yourself, you should consider how the hearth will be used, as well as how much space on the site such an object can take up. There are fireplaces with a completely decorative purpose or with a decorative and utilitarian purpose. Exterior fireplaces, designed to serve only the purposes of design and harmony of the soul, can be made in the shape of a bowl on forged legs, lined with stone in a circle, made in the shape of a cube and other possible shapes.
Such products can be portable; for the winter or in case of departure, the decorative fireplace can be removed. Portable potbelly stoves have a wider purpose. This model may include a kebab maker, which allows you to fry a small amount of meat. A foreign option is a barbecue grill.
According to the design technology, outdoor fireplaces can be divided into the following types:
- Equipped open fire, decorated for decorative purposes. A kind of fire that can be shaped with stone, brick or any other heat-resistant material (even special glass).
- Barbecue oven. The design is equipped with a chimney and allows you to fry meat over an open fire and over coals. In addition, you can cook any food in special fire-resistant containers. May be permanent or portable.
- Smokehouse. It is not too difficult to build such an object with your own hands. The main thing is to stick to technology. There are ready-made factory-made portable outdoor smokers that are very popular.
- Brazier. This is the simplest structure for cooking meat and other dishes over an open fire or coals. It can be stationary or portable. A permanent barbecue can be built from bricks; portable models are usually metal.
- Outdoor bread or Pompeii oven. Suitable for those who like to bake pies, homemade bread, cook pizza on the street or pita bread. In such a structure, the heat is generated not by coals or open fire, but by highly heated internal walls, which are made of heat-resistant and heat-intensive materials. The firebox has a vaulted vault and only one narrow chimney. This design collects as much heat as possible and does not release it.
Given the wide range of possibilities for the size of a dacha plot or country estate, you can build a facility that will include several types of outdoor fireplaces at once. The most popular option is a barbecue oven with a smokehouse. This combination allows you to cook several dishes at once.
Outdoor fireplaces can be divided according to the type of material from which they are made:
Brick kilns. The most popular material for making outdoor fireplaces yourself is brick. It heats up quickly enough and then holds the heat for a long time, which allows you to cook for a long time and warm up next to the stove on a cool day. In addition, the material is easy to work with, it is relatively inexpensive and accessible.
There are several types of bricks. They differ from each other in composition, method of production of the finished product, and, consequently, characteristics
It is important that the fireplace does not crack under high heat and can easily withstand temperatures of 1000 degrees Celsius
Fireclay bricks are used directly for laying stoves.
However, this material is not suitable for lining a fireplace, as it tends to expand greatly when heated. For decorative finishing, it is better to purchase red solid brick. The smooth, uniform surface of the product, as well as various shapes for laying arches and portals, will allow you to create a beautiful and durable object.
The base, that is, the combustion part of such a structure, is laid out with fireclay bricks; decorative finishing in places where the temperature will be above 80 degrees can be made with dolomite or basalt. You should not choose materials that cannot easily withstand heat, for example, rubble granite.
Stone finishing combines very well with metal, forging, and facing brick, it can support any style on the site, it looks noble and luxurious.
Safety precautions
To cook in a Russian oven and not start a fire or get burned, it is enough to know how to properly heat the oven and follow the rules for cooking in an oven.
How to light a Russian stove:
- It is necessary to stack the firewood in the firebox as closely as possible to each other; add firewood after the first batch has burned out.
- During kindling, the damper must be closed, the stove damper slightly open, and the ventilation damper closed.
- Do not forget to provide access to oxygen in the stove - to do this, just stir the firewood with a poker.
- During combustion, the ash door should be open approximately 7 cm.
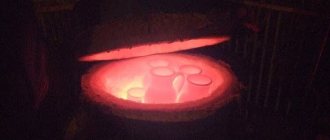
How to cook in a Russian oven:
The stove must be heated well and the wood must be allowed to burn out; only coals without open fire and well-heated walls should remain. The first courses are prepared in cast iron pots or ceramic pots without handles. Since the food in the oven simmers and does not boil, pour a little water into the container, no more than one quarter. All dishes except bread can be cooked together
The bread is cooked separately with the door closed until baked. When cooking in the oven, it is important to use oven mitts, towels or gloves to avoid burning your hands. It is better to place and remove dishes with a special wooden shovel or grip.
Drying
After completing the laying of the Russian stove, it will be necessary to carry out the drying procedure. There are two ways. You can, for example, open the blower door, views, and valves (to create a draft). After 2 days, start heating the fireplace at the lowest power (if the fireplace is wood-burning, then use only dry pallets).
When drying, the stove should operate in a gentle manner: 2 times a day for 40-60 minutes daily, until the walls become dry to the touch and the mortar between the bricks becomes light in color.
It is worth considering that moisture from the damp solution will evaporate. It is necessary to thoroughly ventilate the premises after the drying procedure. If condensation appears on the walls, the water must be wiped off with a rag.
Depending on the size of the stove, drying lasts 4-7 days. Then you can start using the oven at full capacity. If you start turning on the fireplace at full power without first drying it, the walls will crack.
Furnace designs and sizes
The design and size of an outdoor stove depends on its type.
Russian
This option has the most complex design, which consists of the following parts:
- Opechek is a cavity intended for storing firewood.
- A stove is a recess for drying fuel.
- A shelf is a platform in front of the firebox for placing dishes before placing them in the oven or after preparing a dish.
- Under - the lower surface of the cooking chamber.
- The firebox is a cavity where firewood is stored.
- The overpipe is a place for collecting smoke from the firebox, which goes into the chimney.
- Dushnik is a small window that serves as a place for smoke exhaust. It also leads directly to the chimney.
- View - a damper for completely blocking the chimney. Inside there is a second damper that controls the draft of the stove.
- A lounger is a space above the firebox that is used as a sleeping place or for storing kitchen utensils.
The external dimensions of the stove may vary and are selected in accordance with the wishes of the homeowner and the size of the site on which the structure will be erected. In addition, you need to take into account the length of the lounger and the presence of additional functional features, for example, recesses for a cauldron, etc.
The depth of the foundation depends on the external dimensions of the furnace and the characteristics of the soil, but cannot be less than 50 cm. There are established standards for cast iron structural elements.
| Name | Size in cm | Quantity in pcs. | |
| Door | Firebox | 20x20.5 | 2 |
| — | Blowing | 25x14 | 2 |
| — | Ventilation | Arbitrary | 1 |
| Lattice | grate | 38x25 | 1 |
| Gate valve | 26x26 | 1 | |
| 18x14 | 1 | ||
| 14x14 | 1 | ||
| View | 23 | 1 | |
| Damper | Firebox | 45x38 | 1 |
| Water heating box | 50x12x28 | 1 | |
| Hob with two burners | 40x70 | 1 | |
| Steel rods | 100x5x1.2 | 1 | |
| 143x2.5x0.2 | 1 |
Fireplace
When building an outdoor fireplace stove, the draft is not calculated, since the device is not intended for heating. To organize the correct chimney, you only need to comply with the established standards for fireplace pipes. The cross-sectional area should not be less than 12% of the diameter of the firebox inlet.
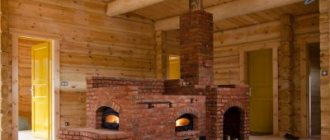
Photo 1. Outdoor brick stove-fireplace. Installed under the roof of the gazebo, it additionally has countertops and a sink.
The external dimensions of the fireplace depend on the wishes of the homeowner, but when laying the foundation, it is made 50 cm larger than the future stove. The depth of the base is from 40 cm or more. For construction you will need:
| Name | Size | Magnitude | Quantity |
| Concrete plates | 75x50x5 | cm | 5 |
| 50x50x5 | cm | 2 | |
| Aerated concrete blocks | 65x40x10 | cm | 3 |
| Fireclay slab for firebox | Depends on the desired size of the firebox | 1 | |
| Copper sheet | 1 (thickness) | mm | 1 |
| Brass corner | 20x20x2 | mm | 1 |
| Mineral fiber board | 120x60x1.9 | cm | 1 |
| Brass rod | Arbitrary | 1 | |
| Galvanized steel brackets | 15x15x0.5 | cm | 10 |
| Facing brick | 230x114x65 or 250x120x65 | mm | Depends on the external dimensions of the fireplace |
| Clinker boards | 20x20 | cm | 20 |
| Square rod | 8x8 | mm | 1 |
Tandoor
The tandoor has a round shape, so the foundation is made the same. Since this is the lightest version of an outdoor stove, its depth can be from 20 cm.
The exact value is calculated taking into account the characteristics of the soil.
The optimal height of the tandoor is 100 cm.
The lower diameter can be increased at the request of the owner, but the ideal parameters are from 60 to 80 cm.
The upper part of the structure is narrowed to sizes from 40 to 60 cm.
Important! The amount of narrowing is indicated taking into account the optimal diameter of the tandoor - 60-80 cm. When laying the first tier of the stove, a blower is made
This could be a removable brick or a damper. The blower is designed to supply air when igniting fuel or increasing the temperature inside the furnace
When laying the first tier of the stove, a blower is made. This could be a removable brick or a damper. The blower is designed to supply air when igniting fuel or increasing the temperature inside the furnace.
Composition of the biosphere
Structure of the biosphere:
- Living matter
- the entire set of bodies of living organisms inhabiting the Earth, is physico-chemically unified, regardless of their systematic affiliation. The mass of living matter is relatively small and is estimated at 2.4...3.6 1012 (in dry weight) and is less than one millionth of the entire biosphere (about 3 1018 tons), which, in turn, is less than one thousandth mass of the Earth. But this is “one of the most powerful geochemical forces on our planet,” since living organisms do not just inhabit the earth’s crust, but transform the appearance of the Earth. Living organisms inhabit the earth's surface very unevenly. Their distribution depends on geographic latitude. - A biogenic substance
is a substance created and processed by a living organism. During organic evolution, living organisms passed through their organs, tissues, cells, and blood a thousand times over most of the atmosphere, the entire volume of the world's oceans, and a huge mass of minerals. This geological role of living matter can be imagined from deposits of coal, oil, carbonate rocks, etc. - Inert matter
is products formed without the participation of living organisms. - Bioinert substance
is a substance that is created simultaneously by living organisms and inert processes, representing dynamically equilibrium systems of both. These are soil, weathering crust, etc. Organisms play a leading role in them. - A substance undergoing radioactive decay.
- Scattered atoms, continuously created from all kinds of earthly matter under the influence of cosmic radiation.
- Substance of cosmic origin.
What to consider during construction and operation
After choosing any of the models of garden stoves and deciding to build it, in order for everything to be successful, you need to understand some of the nuances of its construction and care.
- The foundation of the furnace must be raised to a certain height so that the furnace structure is not affected by melt water or flooded by heavy rains.
- Since clay mortars do not respond very well to natural influences (humidity, precipitation, direct sunlight, etc.), it is better to use cement mortar to seal external joints.
- The best option would be to place a garden stove under the roof in a closed gazebo - this arrangement will allow it to be used in winter, as well as in any weather.
- A gazebo for a garden stove should be spacious, so that you can install a table in it and seat guests.
- On the site, the gazebo and stove should be located away from the gas pipeline and power lines, but closer to the water supply so that water can be piped inside the gazebo.
The first thing you need to do when planning a building is to find or draw up a project. How convenient it will be to prepare your favorite dishes will depend on it. Therefore, when dealing with this important matter, you need to think through all the nuances of the functionality of the future stove.
Functions of the ozone layer
At an altitude of 20-30 kilometers from the Earth’s surface, “living” gas creates a unique protection. Ozone is essential for life on Earth, as it maintains the temperature regime on the planet and acts as a filter in the atmosphere.
The planet is regularly exposed to ultraviolet rays from the sun and cosmic radiation. If external influence completely reaches the surface of the Earth, it will negatively affect living organisms. The “protective field” becomes a partial barrier to harmful factors affecting the planet from the outside.
The ozone layer copes with external and internal threats. Enterprises and transport regularly emit a lot of gases into the atmosphere (including carbon dioxide). Triatomic oxygen neutralizes hazardous substances, purifying the air. In addition to neutralizing harmful impurities, the ozone layer retains oxygen inside the atmosphere, preventing it from “flying” into outer space in large quantities.
Neutralization of carbon dioxide
The greenhouse effect is caused by gases. On Earth, carbon dioxide is considered responsible for this phenomenon, the sources of which are natural (biosphere activity, volcanic eruptions, fires due to drought, biomass rotting) and anthropogenic (biomass burning, rock or fuel combustion, industrial production, cement production) factors.
Barring unnatural gas production, plants absorb most of the carbon dioxide. If a substance is excessively formed due to technogenic influence, the residue enters the atmosphere. Ozone molecules destroy organic compounds, including carbon and its derivatives, neutralizing excess dangerous gas.
The role of the ozone layer when interacting with carbon dioxide is to restore the balance of substances filling the atmosphere. The composition of air changes depending on climatic, weather and anthropogenic conditions. Reactions take place constantly in different parts of the “shield”.
Oxygen retention
The importance of the ozone layer for the biosphere is also expressed by maintaining the required level of oxygen. Ozone is formed under the influence of ultraviolet rays, but the contents of the protective barrier are dynamic because:
- Ozone is heavier than air and goes down lower after the reaction;
- wind moves gas in different directions;
- The intensity of UV radiation is variable.
For the ozone layer, which has a small volume of O3, it is normal to constantly change the amount of gas contained inside. The ozone that “leaves” the protective barrier is replaced by oxygen. After absorption and chemical reactions, O2 becomes O3. The ozone layer protects the atmosphere from a critical decrease in oxygen levels.
Reflection of cosmic and partially ultraviolet radiation
The ozone layer of the atmosphere protects all life on Earth from the effects of cosmic radiation and excess dangerous sunlight. In low concentrations, long ultraviolet waves are beneficial for people, animals and plants. The natural filter of the planet protects humans and other organisms from electromagnetic radiation of the sun of varying lengths (more than 90%). But it is short waves that are destructive for all living things. They call:
- skin burns of varying severity;
- mutations;
- neoplasms (malignant, benign);
- burn of the cornea of the eye;
- drying of mucous membranes and tissues;
- decrease in the body's defenses;
- with large doses and frequent exposure - fatal.
The ozone layer acts as a barrier to near ultraviolet radiation, ensuring safety for living organisms. This is due to the fact that the protective barrier of planet Earth has shielding properties and reflects UV radiation.
Another external factor dangerous to life on the planet is cosmic radiation, which is also “filtered” by the ozone layer.
The importance of the ozone layer as a thermostat of the atmosphere
The role of the gas barrier on the planet is not only to shield and absorb dangerous radiation (cosmic, ultraviolet), but also to maintain the Earth’s temperature regime.
The ozone layer partially transmits heat into open space, preventing it from escaping en masse. Ozone traps twenty percent of the Earth's thermal energy. This is required so that the temperature required for living organisms is maintained inside the biosphere.
If the barrier is completely impenetrable, a greenhouse effect will occur. If more heat is lost, the atmosphere will not warm up enough, which will lead to the death of plants and animals. Organisms living at the bottom of the World Ocean or inside deep soil can be partially preserved.
Preparation of tools and materials
We have decided on the type: it will be a brick oven. A place was chosen for her. It's time to prepare the necessary tools and materials, and then you can get to work.
To make a stove you need to acquire the following building materials:
- refractory bricks;
- facing bricks;
- clay, from which you will subsequently carry out the masonry (a special building mixture, which is more expensive but easy to use, can serve as a replacement for clay);
- cement, sand, crushed stone, steel rods (you will need them to build a pedestal);
- doors (the firebox and vent will be equipped with them);
- steel pipe (for mounting the chimney);
- asbestos cement sheet.
It is impossible to build even the simplest stove without having at hand:
- building level;
- trowels;
- shovels;
- cord for marking;
- hammer;
- "grinder" (angle grinder).
General Tips
- When laying out the firebox, the thickness of the seams should not be more than 3 mm (lining).
- It is easier to erect any ceilings when using a collapsible wooden frame.
- Lay out all rows neatly and evenly, immediately remove excess solution.
- It is better to place the door on a wire, which should be walled into the masonry, leaving the ends for a tie. With them you can easily and firmly pull the fire door frame into place.
- If you need to install a damper in the chimney or install a sink instead of a countertop, do not forget to make the necessary changes to the masonry.
- If the chimney is on the roof of a gazebo or shed, insulate it with a layer of asbestos or other non-combustible material, and the entire stove must comply with fire safety rules.
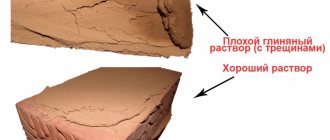
- Select the clay mortar required for masonry in advance. It should be too fatty, but it should also have the necessary plasticity. As an option, you can buy ready-made masonry mortar in hardware stores, but it will cost more.
Any garden stove is laid out approximately according to this plan. It is also possible to construct a furnace from iron materials. Craftsmen even make mobile ovens on wheels from iron barrels and old gas stoves. Such ovens are usually more mobile. But they burn out much faster. Of course, the industry does not stand still, and today you can find various types of stoves for your garden on sale.
Criterias of choice
You need to select equipment for heating your home in such a way that it provides complete heating of the existing room, based on its area. A wood-burning stove, for example, is a fairly simple and economical device that quickly solves the problem of warming the inhabitants of a country house.
The following features are important when choosing:
- compactness and simplicity of design, especially if the house is small;
- safe operation in houses made of any material, tightness of the chimney, compliance with draft parameters;
- resistance to natural factors during periods when the stove is not in use;
- quick kindling, quick heating of the room, heat retention for a long period of time;
- the presence of a convenient door that allows you to use the device as a fireplace;
- arrangement of the hob;
- preferred fuel for heating – it is advisable to opt for more versatile models;
- mobility, ability to move if necessary;
- built-in units for connecting the hot water system in the house.
Simple brick outdoor oven for bread and pizza
You can build an outdoor oven for bread and pizza from various materials - refractory bricks, concrete slabs or from special ready-made modules for the construction of ovens, which are assembled like a construction kit. It will take no more than three hours to build an outdoor pizza oven from ready-made parts, and more time is needed to build a house around it.
The location for the construction of an outdoor cooking stove should be chosen especially carefully. Although such a stove does not use open fire, it is still necessary to choose an area protected from the wind, away from wooden buildings and trees (at least 6 m), but not too far from the house, since you will have to carry food and dishes.
The mass of a simple outdoor stove is at least 400 kg, so a special foundation must be built at the site of its installation. To do this, you need to remove the soil to a depth of 20-40 cm and put a compacted sand-gravel mixture.
Reinforced paving slabs 5-10 cm thick must be laid on top. One row of brickwork should be laid on the foundation, which will serve as a support for the furnace walls. Then you need to build an underbowl - a frame made of 9x9 cm timber, overlapped with fastening bolts. A fireproof heat-insulating board 8 cm thick will be mounted on the finished frame.
The main part of a simple outdoor stove is the firebox, or crucible, which is a rectangular box where wood is burned. Food is also prepared in it. In the furnace there is a mouth for the exit of flue gases. Above it is a chimney. The depth of the furnace is usually 75-100 cm.
Brick or concrete slabs are used to build the furnace. In addition, you can purchase a ready-made construction kit for outdoor stoves, the parts of which are made of special heat-resistant concrete. This brick summer stove is easy to assemble as a construction set.
The finished blocks are connected to each other using a special heat-resistant mastic adhesive. Instead, you can use a solution of 2 parts ordinary cement, 4 parts heat-resistant cement and 4 parts mortar. Before laying, it is recommended to moisten the seams and then avoid gaps in the mortar layer. If you couldn’t get a ready-made kit for building a bread and pizza oven, you can build it yourself out of brick. For masonry, it is recommended to use normal fired red brick, and the firebox should be built from refractory brick. As a solution, it is best to use a mixture of refractory clay and sand (in a ratio of 1:2) and mix with water until the consistency of thick cream.
While the finished bread and pizza oven is drying, you can begin to protect it from precipitation. To do this, the rafters in the lower part must be fixed to the foundation slab and covered with clapboard formwork. In this case, you should leave at least 20 cm of space between the stove and the roof slope for further thermal insulation of the stove. The top of the roof should be covered with bitumen shingles, and the roof ridge with sheet steel.
The pipe should be inserted into a lead-lined sleeve filled with mineral wool. To protect the pipe from moisture penetration, it is necessary to fill the gap between the cuff and the pipe with high-temperature silicone. A layer of mineral wool should be laid between the pipe and the roof. Insulation is very important in outdoor ovens. Between the stove and the roof slope you need to pour a layer of non-combustible expanded clay 10 cm thick and lay mineral wool. This layer will protect the roof from overheating and create the optimal temperature for baking. In addition, high-quality thermal insulation will allow you to cook food even in the cold season - down to -10 C. At lower temperatures, it is not advisable to use an outdoor stove: a large amount of firewood will be consumed.
The roof overhang in front of the mouth of the furnace is a fire hazard, so it must be lined with fire-resistant slabs 30 mm thick. Due to the intense heat from the stove, it is recommended to build the pediment not from wood, but from cellular concrete 50 mm thick and tiled. For greater reliability, all wooden parts should be coated with a special protective compound - fire retardant. In addition, any open-air wooden structure must be protected from fungus, insects and rot. You can use special chemicals for this. The easiest way to protect wood is to apply moisture-resistant paint to the wooden parts of the structure.
Drying
To dry a Russian stove with a stove bench and a hob, shavings, chips and small logs are used. The first combustion should be carried out with fuel in an amount of no more than 30% of the maximum volume. With each subsequent firebox, the volume of loaded firewood increases.
The drying time is influenced by the size of the oven, the degree of humidity of the brickwork and the temperature in the room. Typically, drying in the summer season takes a week; in the cold season, this period can last up to 25 days. All this time, the valves and combustion damper must be open.
You need to stop drying the oven at the moment when there are no damp spots left on its surface, as well as condensation on metal parts.
Accommodation
If you decide to install a barbecue stove on your property, then regardless of the type of stove you choose, you first need to think about fire safety - the place where it will be installed. It should be understood that any device with an open flame, if neglected in its placement and rules of use, threatens serious burns, large fires, which result in harm to human health (often fatal), surrounding buildings and nature.
It is safest to place a resting place with a barbecue on an area that is located at a considerable distance from the main buildings (country house, outbuildings, premises with animals and birds). But this is not always convenient, especially for an open outdoor brazier and those models that are under a roof, but do not have electricity, running water and other amenities of civilization.
Gazebos with barbecues can be placed on the same foundation as the house and under the same roof. But in this case, you must adhere to all fire safety requirements for buildings and residential premises.
It is not recommended to place such devices in the following places:
- near the storage area for firewood, hay, lumber and their waste;
- near dry grass, fire hazardous debris;
- close to fences and walls;
- directly under trees and overhanging branches.
When installing a collapsible barbecue in the garden or on the street, you need to take into account the speed and direction of the wind. Smoke should not go towards neighboring buildings and houses, and in cases of installing a stationary outdoor barbecue (including in a gazebo), you should take an interest in the local “wind rose” and build a protective screen on the side of the most possible “wind blower”. Special portable protective screens are available for sale, which is the best option for solving the problem of wind direction.
You also need to take care of the convenience of using the stove in the selected location of the site.
The following questions must be addressed here:
- a free approach to the device from at least two sides, because it is always more convenient and fun to cook with an assistant;
- there should be space for a table and seats nearby;
- the ability to provide a recreation area with clean water and lighting;
- Convenient access to the place from the house.
The following points should also be considered:
- how much time is expected to be spent at the dacha (this means constantly or only in the summer) - the installation of the stove indoors or in an open gazebo depends on this;
- how many people the recreation area is designed for;
- what design to choose for the barbecue area and gazebo.
Each owner will probably have a lot of questions about the design and selection of stoves, but they can already be solved in the process of creating the interior.
Selection of location
Drawing up a project begins with linking the hearth to a place on the site. The best option is to place it next to a previously built gazebo, canopy or terrace. If the yard is being developed from scratch, the stove should be assembled as far as possible from the house to eliminate the possibility of smoke and fire.
The fireplace must be located at a distance of at least 1 m from the fence, barn, garage and other combustible buildings. There should be no trees or bushes nearby, and no underground utilities under the stove. If possible, you should build the fireplace downwind of the house. It is also recommended to provide for the future availability of space for a platform, tables, benches and chairs.
Let's get to work!
When all materials and tools are prepared, you can begin step-by-step work.
Laying the foundation.
The stove for the dacha will be based on a conventional strip foundation.
Stages of work:
- Mark the location of the foundation using a string. The base of the furnace must be built in accordance with strict geometric proportions. To do this, we recommend using a building level.
- Prepare a trench (a hole up to 50 cm deep).
- Having previously compacted the earth, place metal rods on the bottom, and then fill the hole with crushed stone. To prevent the soil from settling, you can additionally install rods across the hole.
- Dilute cement with sand (1:3) and pour the foundation. In a few days it will harden completely. To prevent the cement from cracking in hot weather, you can water it regularly.
- To protect the finished foundation from water ingress, cover it with a layer of roofing felt.
- To raise the base, install a cinder block base and cover it with a layer of asbestos. Another method is to install plank formwork, which is also filled with a solution of cement and sand.
- Mark the boundaries of the future structure.
We are building brick walls.
You can also do this yourself:
- Brick can be laid in two ways: horizontally or on edge. The direction can be controlled by a taut rope. Use a building level and a plumb line to ensure the masonry is level.
- After the first row has been laid, we proceed to install the blower door: using wire (its diameter is 3 mm) they will be attached to the brickwork. You must first make cuts in the bricks using a grinder.
- We continue laying, not forgetting to monitor the thickness of the seam: it should be 7 mm. Then the BRICK should be pressed and tapped with a hammer, and the excess mortar should be removed using a trowel.
- Don’t forget to include second ash doors on the OVEN drawing.
- When you finish laying the bricks, you need to lay an asbestos-cement slab on top of them, which should have holes for air. We need this stove for cooking or heating food.
- In the process of laying bricks, you can transform the design of the stove to your liking: equip places for an oven, a stove bench, etc.
We lay the stove arch.
Laying the arch is considered the most difficult stage in building a stove. And if the stove is located outside, the arch must be neater, because it will always be in sight of you and your guests.
Before laying bricks, it is good if two plywood are installed in the frying and combustion chambers, and the laying will be done on their surface.
We install a chimney.
Smoke from the stove is removed using a chimney. It is usually a steel pipe that is installed on the back wall of the furnace and cemented.
To prevent burns, the open lower part of the chimney is also covered with cement and lined with bricks.
We give the stove an aesthetically finished look.
Your garden stove can be turned into a real work of art using any heat-resistant material: finishing brick, tile or porcelain stoneware.
Use your imagination and create comfort around your fireplace: you can equip the stove with a bar counter, you can install a sink nearby, cabinets for dishes and food.
We check our stove, that is, we flood it.
It is necessary to pay attention to the draft, to the presence of cracks that may allow smoke to pass through. Once you are sure that your oven is working properly and has no defects, you can start cooking on it.
And don't forget to follow safety precautions!
Be sure to watch this short but very useful video:
- Decide on the type of stove to be installed outdoors.
- Decide on the location where the stove will be installed.
- Prepare a drawing of your future stove.
- Make a list of the necessary materials and tools, analyze the building materials market, and based on it, make a cost estimate.
- Develop a step-by-step plan for installing the furnace; this will help you navigate the time frame that construction will take.
- Start construction! And may your stove please you and your loved ones for a long time with delicious dishes cooked on it.
Laying order of rows
Since the first three levels are practically not subject to heating, it is allowed to use superheated bricks when performing them. However, if a Russian stove has bottom heating, it must be completely lined with high-quality refractory bricks.
First six rows
Since sweating is excluded, the foundation does not need a screed, and the masonry is carried out dry. Initially, the front left corner is made, where a three-quarter brick is placed with the butt facing outwards (in figure “a” under the number 1). With it, 12 full-sized bricks go in one row exactly up to the corner indicated by the number 2. In the first three levels of masonry, the seam remains expanded, which ensures the formation of a ledge in the fourth row.
The corner indicated by the number 2 is created using 2 three-quarter bricks, laid with the butts facing outwards. Further to corner a-3 there is a double level of full-length ones. The segment from a-3 to a-4 is laid according to the same pattern as a-1, as well as a-2.
In the front front part, a space is left empty, which subsequently forms the underlay. To do this, the laying of the first row is completed with two full-sized bricks, which will create an opening measuring 54 cm.
As can be seen in figure “b”, the pokes of the first row in the left and right corners are covered with spoon bricks. Each corner consists of two three-quarter blocks laid using spoons. One level of three-quarter bricks is laid on top of the full-size bricks of the opening. In this case, the seams must be tied.
The third row is designed similarly to the first row.
To complete the fourth level (Figure “d”), a brace is pulled, while the bricks are positioned in the same way as in the second row, and the seam is narrowed to 0.5 cm. As a result, a small ledge 2.5 cm wide is obtained on the sides of the stove. The work performed is checked by the level.
The diagram of the fifth row is shown in Figure “e”. 2 three-quarter bars are placed in corners 2 and 3. The back side consists of 2 spoon levels, and the side structural elements are made in bonded rows. The bricks used to lay the wall of the oven opening are pulled together under the heel of the arch. On top of the 5th level, circles of the arched lintel are installed on wooden supports. The sixth row is designed similarly to the fourth. The laying of the vault to cover the under-kiln begins here.
The first of the arches
When making arched lintels and vaults, the following conditions are met:
- all seams must be bandaged;
- their thickness decreases from the top of the arch to its base - from 1.3 cm to 0.5 cm;
- It is allowed to remove formwork and circles only when the solution is completely dry.
If the arch does not continue into the vault, it is not necessary to use formwork to lay it. The work is done directly in circles.
Rows 7 to 10
The order of laying the seventh level repeats the arrangement of the bricks of the fifth, and the eighth - the sixth row. On the inside, the butts are squeezed under the base of the arch. Starting from level 8, we lay the subfloor.
It is necessary to make three rows of full-sized bricks, laid with butts. In this case, the middle pin level is tucked under the arch of the arch.
By analogy with the seventh, the ninth row is also designed, but the second level of the sub-pile must be made with spoon bricks.
The masonry diagram of the tenth row is shown in the figure on the right. The corners are decorated with three-quarter bricks, the sides with full-size spoon bricks, and the front with full-size butt bricks. The front part of the furnace is laid out from three levels of full-sized bars, located butts deep. Each row consists of seven bars laid flat. It is they who subsequently form the sub-height.
Bedding
We use clay mortar mixed with broken bricks to fill the furnace. Please note that it must be stretched and compacted, as shown by the arrow in the image. It’s quite difficult to do a crooked job on your own. Not every stove maker is capable of such a task, therefore, without the proper skills, it is better not to take on this task.
Laying rows 11 to 17
Starting from 12, all even levels are performed according to the same scheme as the tenth. The odd ones are laid out on the sides with pokes, and at the back with spoons. It must be taken into account that the 15th and 16th rows should be tucked under the arched bases.
Upon completion of level 17, the masonry is interrupted until work is completed on the front side of the furnace up to the vertical part of the rear wall of the mouth.
Complex structural elements, as well as arches and vaults, are built using auxiliary wooden devices - circles. The side walls of the corner - the section of the hearth where hot coals are raked - are laid out the width of a brick, and the head and mouth - half a block. In this case, the base of the arch of the pharynx falls on the 15th row, and the mouth – on the 16th.
It can be difficult for non-professionals to smooth out the walls of the heil from the inside, because the view is very limited. A similar procedure is performed from above, and the correctness of its implementation is checked using a template.
Row 18 and beyond
In the figure shown above, you can see that the odd levels repeat the arrangement of the bricks of the 11th row, and the even ones - 10. In the event that you decide to make a floor on a clay basis, then all the bricks starting from the 19th level will have to be trimmed so that they lie on the the roof of the furnace.
Types of outdoor stoves
When choosing a design, many factors are taken into account, but the main ones are the performance and purpose of the device. They take into account in advance which dishes will be cooked on the outdoor stove more often and how many people they are intended for. Other topics to think about are financial capabilities and assessing your construction skills.
B-B-Q
This hearth is distinguished by its simplicity and versatility. This design allows you to cook, fry, bake foods. The body of the device is made of brick. A firebox compartment is constructed below. A platform is made on top, and dishes, grates, skewers or skewers are placed on it. This is the simplest outdoor oven, the functionality of which can be somewhat expanded: for example, installing additional shelves for dishes or food.
Fireplace
This nice design is often installed not in the open air, but in closed gazebos. However, in the first case, it will serve as an additional decorative element. To make it possible to prepare dishes, a grate is installed above the firebox; it serves as a stand for dishes, skewers, and grates. Such a heating device can be made of stone, brick or metal, and then it is lined.
Brazier
A barbecue is a common attribute of country life. It is a rectangular container, in the lower part of which holes are made for air flow. In the upper part of the structure, recesses are cut out for fixing skewers. In this case, metal with a thickness of at least 6 mm is often used. This material is able to successfully withstand the heat coming from coals. The structures are made on legs (wheels, runners) and embedded in concrete.
Oven with stove
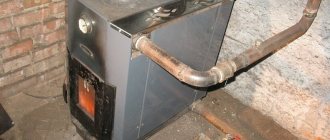
The hob design is the next device that claims to be the “simplest outdoor stove.” This option is chosen by those summer residents who go to the site periodically, and they need a stove to heat food or water. The body is usually made of thick sheet steel or cast iron. To protect the product from thieves, the stove is made portable, or attached to the foundation using mortgages embedded in it.
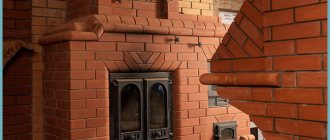
Russian stove
This traditional design is not the simplest outdoor stove, but it can become an excellent decorative element of the site. It is used for cooking, smoking and frying. If you make the hob removable, then it will be possible to cook kebabs in the Russian oven. It must be hidden under a canopy, as the clay will soften from moisture. To build such a device you will need from 2500 to 3000 bricks, the exact number depends on the size of the furnace.
Tandoor
This exotic oven is made of refractory brick or stone. When finished, the design has an unusual shape: it is a large jug, which not only does not spoil the appearance of the site, it also looks very exotic. Often a simple barrel is used to make it; it is coated with clay inside and out. All surfaces of the vessel are involved in the preparation of dishes: its neck and walls. A cauldron is placed on top of the stands and grates are laid.
Which stove is suitable for a garden house?
First we need to decide what function the hearth will perform for the garden house:
- If you are at the dacha only in the summer, and you only need it for cooking, a hob type stove is suitable for you. Its design does not provide heating. The combustion chamber, equipped with a chimney and an ash pan, is lined or made of brick, and a metal plate lies on top.
- Heating stoves are used by summer residents when they simply need heating, and have an electric stove for cooking. The design of such a stove is simple; it consists of a combustion chamber, an ash pan where ash is collected and a chimney. These also include fireplace stoves, with the help of which dacha owners try not only to heat their living spaces, but also to create country comfort. The efficiency of heat transfer of such structures depends on the thickness and origin of the material and the method of laying. Laying one brick allows you to heat the furnace walls up to 600 degrees; those laid out in this pattern are called Dutch ovens. Stoves can have different shapes, it all depends on the area of the room, the interior and the desires of the owners.
- In our country, the most popular is the heating and cooking stove; its design is more complex and consists of a combustion chamber, chimney, ash pan, hob and oven. To build such a stove you need a lot of space, but thanks to it, the house will be warmer, and a delicious dinner, simmered on the stove by a skillful housewife, is guaranteed. Such a stove has many accessories; it can be equipped with a drying chamber, a stove bench, and a tank for heating water can be placed in the structure. This stove option is the most multifunctional.
Design features
This design can have either one or two hearths. It consists of:
- internal combustion chamber for loading fuel;
- countertops for preparing dishes (optional);
- external hob;
- woodshed - a special compartment in which fuel is stored for drying (optional);
- space for a grate – can be combined with the internal combustion chamber.
Note! The larger the combustion chamber, the larger the dimensions of the structure itself and, accordingly, the greater the functionality. But remember that heating up an oven that is too large will take a long time, as will it take a long time to cool down.
The simplest outdoor stove: two ways
The previous option can be used to create a high-quality fireplace for any place: both inside the house and outside. Therefore, this option may not seem simple enough or very practical. Mini-structures have several advantages over their larger “relatives”. These include:
- high speed of creating a homemade mini-stove;
- the ability to use anything that can burn as fuel;
- saving on a foundation that is not needed;
- minimum waste, since the fuel burns almost completely;
- mobility if a collapsible design is planned;
- heat transfer greater than from a fire;
- fast cooking.
Elementary design
For those who want to get results, but not invest a lot of money and labor, there is another way, which couldn’t be more elementary. Such a heating device can be installed in an hour, even by a master without skills.
This stove requires only 20 bricks and two halves, and the ordering scheme is “obscenely” simple, so it does not require any explanation. Here the same clay solution is used as a binder, but the advantage of this design is that it is quite easy to make without it. When traveling, you can simply fold the stove, cook what you need on it, and then disassemble it. In this case, the work on creating a mobile version will not take more than 5 minutes. There is a downside to the hiking option: it is the need to carry extra weight with you.
Simple stove with chimney
This heating device is a little more complicated, but it also guarantees the absence of any difficulties. This L-shaped design consists of three compartments - the first is where fuel is supplied, the second is where it burns, and the third is the chimney duct.
Creating a simple stove will require a minimum of bricks (from 30 to 40) and mortar. This option will take the debutant master no more than an hour. If you already have work experience, then you won’t need much time: manufacturing the device will take a matter of minutes.
The simplest outdoor oven, made from a minimum of bricks and mortar, allows you to get what you want without qualifications and a lot of wasted time. The stationary option will require more effort and money, but the result will be a serious structure: reliable and durable if, in addition, a canopy protection is built over it.
This video will tell you how to make a simple stove for your site:
Recommendations for using a small stove
In order for the stove to be useful and save money, it is necessary to monitor its condition. Even a minor crack increases the loss of efficiency. For better heating, use only dry wood for kindling. Be sure to close the view.
Major cleaning of soot is carried out once - in the summer; in winter, minor cleaning is done, but at least 3-4 times per season. Accumulated soot reduces the heat output of the device. If the viewer, valves or door are faulty, you cannot light the stove, because they control the draft and help carbon monoxide evaporate.
Despite all the nuances in the construction and operation of a mini-oven, it acts as an excellent heating device and can compete with modern gadgets in the speed and delicacy of preparing many dishes. It’s not for nothing that our ancestors considered the stove to be the soul of the house and placed the structure in the middle of the hut.
Not even a few centuries passed before she returned to us, only in a slightly different form. But its small size is not the main thing, because in terms of its functions and the wonderful atmosphere that is created in every home, the device is very similar to the good old Russian stove.
Combined brick garden stove
This model is designed to be built in a gazebo. It combines the advantages of a Russian stove and barbecue. To build such a unit, enough space is required. Benches, chairs, tables should be located away from the structure.
The main stages of laying a garden stove:
You need to decide on the parameters of the device, prepare a drawing, and also purchase everything necessary for the work. It is important to make a solid foundation of cement and sand. How to lay the base was discussed earlier. You need to wait a few days for the foundation to harden well. The furnace is laid according to the drawing
The solution is mixed from sand and clay in a ratio of 3:1. The Russian garden stove is equipped with two grates, which should be located at a height of 1 m above the stove. One of them is intended for lighting a fire, and the second will be used to prepare food. The barbecue must be placed on a concrete base. You need to organize two compartments: a cooking table where you can build a sink, and a roasting pan equipped with a smoke pipe. The chimney is the main part in the construction of the gazebo. The most convenient and correct shape is trapezoidal. When installing this system, you must be careful, because the slightest mistake can lead to structural failure. Using the drawings, there will be no problems with the construction of a Russian stove and barbecue. The main thing is to accurately observe the dimensions and required shapes.
Do-it-yourself construction of a stove for burning garbage, cooking or decorating a site
In order to choose the right project for the construction of a furnace, the following conditions are calculated:
- functions are the main criterion; the type of device chosen and its features will completely depend on it; it is also better to immediately decide whether the stove will be used only for cooking or will also have a decorative function;
- availability of sufficient space - it is best if a separate area is allocated for the stove, where it will be convenient to place the devices themselves, and then put up a gazebo or canopy for relaxation;
- foundation - more compact varieties, for example, a stove under a cauldron will require only a special platform, larger and heavier devices are provided with a serious foundation;
- budget - depending on the amount of funds, more expensive and high-quality or more economical materials are used, the dimensions of the stove and decorative elements are also calculated.
After choosing the type of device, it is best to make a detailed drawing, taking into account the dimensions and costs of materials.
Materials
Refractory bricks are well suited for building a garden stove; for an economical option, fireclay bricks are used only for laying out the combustion chamber.
The walls of the furnace are made of ceramic bricks; you will also need a mortar made from a mixture of fire-resistant cement and sand.
It is recommended to use ready-made mixtures, which are sold in construction stores). The necessary parts are purchased - dampers, doors, hinges, most often made of cast iron.
Preparing the site
Installation of a garden stove is ideally planned at the same stage as the construction of a house. It is most advantageous to place it next to a relaxation terrace, a gazebo, or next to a convenient clearing or the shore of a pond, where it will be good to organize family evenings and relax with friends. The location near the house is most convenient, as it will save time in the future - it will be close to carrying food for cooking, fuel, and it will be easier to maintain equipment.
The foundation is made based on weight and dimensions. A pit is dug, at the bottom of which a cushion of crushed stone and sand is poured, formwork and a mesh of reinforcing rods are installed on it. Then the foundation is poured with concrete and left for a week to dry. The resulting platform protrudes above the ground by 10 - 15 cm.
Photo 1. Scheme of preparing the foundation for an outdoor stove with dimensions and explanations.
Step-by-step instructions for laying a stove. Order
Before starting, it is recommended to lay out the masonry according to the scheme without mortar, prepare and cut the bricks, mark them - this will greatly facilitate the work process and help avoid mistakes. Laying is carried out in the following order:
- Waterproofing is laid on the dried foundation.
- The base is laid out according to the diagram - while carefully monitoring the evenness of the rows (check with the building level).
- The combustion chamber is laid out - when using ceramic bricks, two rows are often made - an outer ceramic one and an inner one made of fireclay bricks. To lay out the device under the cauldron, bricks are cut according to the diagram to obtain beveled walls of the firebox.
- The cooking chamber is laid out - in models of two-chamber fireplaces.
- A chimney is laid out, and in some cases, smoke channels are laid out.
- Very often, garden stoves are lined to protect them from the elements, to better seal seams, and also for decoration.
Photo 2. Layout diagram from the first to the seventeenth row of a simple oven with one oven and a cutting table.
After construction is completed, the stove is left to dry, and after several days they begin to gradually heat it - first only with paper, then increasingly increasing the amount of fuel and heating temperature.