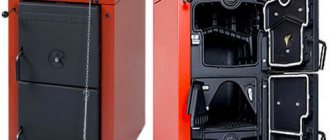
Device diagram
Long-burning stoves are an option that allows you to use solid fuels, one load of which lasts for several days. Simple designs require two bookmarks per day, and complex ones require one bookmark every few days.
In any case, long-burning solid fuel stoves are an economical option that operate for a very long time without human intervention. There are several models that are common in many regions of Russia - these are Bubafonya and Stropuva. One of their distinguishing features is their simplicity of design. Is it possible to make a Stropuv boiler with your own hands?
The main difference between Stropuv and other types of long-burning furnaces is the fuel combustion zone. In this design, combustion occurs from above, as in a regular fire. In other types, the combustion zone is located below on the grate.
What are the advantages of the first option? The zone will gradually decrease from the highest point to the grate. In this case, there is no specific effect of high temperatures on any boiler height level. This allows the use of material with a smaller thickness for the manufacture of the furnace, which not only saves money, but also ensures convenience during work.
Boiler classification
Let's start with the stove model range, which is divided depending on the fuel used:
- Boilers running on wood, sawdust and other similar types of fuel. This is the simplest design, energy-independent and cheap when it comes to making it yourself.
- Coal or other more durable types of solid fuel are used. In this case, the solid fuel boiler is equipped with a small fan that will supply oxygen to the combustion zone. Hence the more complex design of the heating unit and its energy dependence. The last criterion complicates the manufacturing process and increases the cost of the product, so we will not consider it.
Drawings of this type of long-burning boilers can now be found freely available on the Internet. So in this regard, there will be no problems if someone takes the drawings as the basis for production. But even without them, it’s not very difficult to assemble homemade boilers based on Stropuva.
Manufacturing of the Stropuva boiler
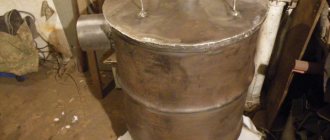
To make this type of furnace, metal products with a thick wall are not needed. Therefore, we will take an ordinary two-hundred-liter metal barrel as a basis. If you can find a Soviet-style barrel, this would be ideal.
In addition to the barrel you will need:
DEFORT DWM-161. 4 510
- A metal sheet 4 mm thick - we will use it to make a load.
- A pipe with a diameter of 100 mm for making a pipe for the chimney and pipes for supplying fresh air to the combustion zone.
- Wire 6 mm thick or several corners for making a grate.
- Channels for weighting the load.
Tools needed:
- welding machine;
- Bulgarian;
- hammer;
- chisel;
- roulette.
Additional materials you will need are fiberglass and asbestos cord. Please note that a welding machine is used, which you must be able to operate. Without it, you cannot make a Stropuva solid fuel boiler with your own hands.
How to start a Stropuva boiler
First, you need to purchase a piping kit to connect the equipment to the heating system. We recommend purchasing a kit with the ability to connect an indirect heating boiler. It includes a set of pipes, a safety group, an expansion tank and a circulation pump. Also on sale are kits for connecting underfloor heating.
It is not recommended to use damp firewood - this will interfere with the normal operation of the boiler.
Ignition is carried out in the following way - here are brief instructions for use:
- We load the wood combustion chamber full with the air distributor raised.
- We fill the finished masonry with sawdust.
- Open the flap for switching to wood.
- Open the air damper 3-5 cm.
- We light the top layer, close the loading door, leaving a gap 3-5 cm wide.
- We wait for reliable combustion, close the loading door and immediately lower the air distributor.
Please note that the cleaning door must be closed. A new portion of firewood can be added to the Stropuv boiler at any time, but doing this with coal is dangerous
In any case, the manufacturer recommends that you always wait until the fuel burns out completely before adding a new portion.
A new portion of firewood can be added to the Stropuv boiler at any time, but doing this with coal is dangerous. In any case, the manufacturer recommends that you always wait until the fuel burns out completely before adding a new portion.
Manufacturing sequence
Type of homemade installation
- A lid with a small side is cut out of the barrel, for which a grinder is used. A hole is made in the lid right in the middle for a pipe with a diameter of 100 mm.
- Next, a grate is made from wire or corners. In fact, this is a regular grill, where it is important to determine the size of the cells. The smaller they are, the better, especially when it comes to such small fuels as sawdust or husks. By the way, the grate is not used in all models - sometimes you can do without it. If there is one, then it is installed inside the barrel closer to the bottom. Fastening is done by electric welding.
- Now let's move on to making the load - the press. To do this, a round pancake is cut out of a 4 mm thick steel sheet, the diameter of which is 2–3 cm less than the diameter of the metal barrel. A through hole with a diameter of 100 mm is made in it.
- We weld the pipe to the pancake. Please note that the length of the pipe should be 20–50 cm greater than the height of the barrel. Now 4 channels need to be welded on the back side of the pancake. They are needed to weigh down the press and create a small space under it - this will be the combustion zone. The channels are welded in such a way as not to cover the hole in the pancake. The usual fastening pattern is criss-cross.
- In the barrel just above the location where the grate is installed, you need to make a door through which you can clean the boiler from ash and ashes. This device must be sealed using an asbestos cord.
- A through hole is made on the side of the upper part of the barrel, almost near its upper edge, and a small pipe with a diameter of 100 mm is welded to this place from the outside. This will be the location where the chimney will be installed.
- Now you need to take care of the removable cover. The upper part of the barrel, which was cut out, must be brought into proper shape. To do this, its sides are slightly expanded - you can simply tap them with a hammer. It is necessary to weld two handles on the top side, with the help of which the cover will be installed manually. On the outside of the side around the entire perimeter, you need to glue an asbestos cord or a strip of fiberglass, which will contain the smoke coming out of the combustion zone.
At this point, all parts of the boiler are ready, and you can begin adding fuel, as well as assembling the structure.
Procedure for assembling the structure
Attention! The closer you pack the firewood, leaving minimal space between them, the longer it will burn. As for sawdust, everything is simpler - you just need to compact it well.
Combustion chamber
The press is installed on the stacked fuel with the pipe facing up, and the barrel lid is put on it. The chimney is connected to the pipe. Long-burning furnaces have a unique design that ensures the removal of carbon monoxide only through a horizontal pipe. That is, the chimney will not be vertical, but horizontal with a slight upward slope. This is another distinctive feature of long-burning stoves.
Before placing the press, it is necessary to ignite the top layer of fuel. Then the press and lid are installed. In this case, the firewood or sawdust in the combustion zone will simply smolder, releasing a large amount of thermal energy. At the same time, as it burns out, the zone will gradually settle under the influence of the load. Smoke from the combustion of solid fuel comes out of the zone between the gap formed by the walls of the barrel and the edges of the metal pancake. It is then discharged through the chimney. Oxygen enters the combustion zone through a pipe welded vertically to the pancake.
Since the metal from the barrel will become very hot, the structure is considered unsafe in terms of fire. Therefore, experts recommend:
- Install such a stove near walls that are built from non-combustible materials.
- A foundation needs to be poured under a long-burning furnace. It can be concrete or fire brick.
- To increase operational safety, you can install a protective heat shield made of metal or bricks.
Foundation and chimney installation
Boiler design diagram.
During operation, the boiler will become hot, so it is recommended to make a permanent foundation. Despite the relatively light weight of the finished unit, the foundation must be as strong and fireproof as possible, but not necessarily deep.
Install the formwork, prepare concrete mortar and red fire bricks. Lay out the base, wait until it is completely dry, and you can start building the chimney.
The chimney for such a boiler can be made from a pipe with a diameter of 2 cm. It makes no sense to use a larger diameter pipe for this. Drill a hole in the barrel for the pipe. It needs to be done on the side that is opposite to the side with the bookmark door. Weld a piece of pipe in a horizontal position.
The length of the straight horizontal section extending from the boiler must be no less than the diameter of the chimney pipe. Only after this can the pipe be bent, but not more than 45 degrees per step. Design the smoke exhaust system so that it has as few curved sections as possible. It is better if there are no more than two.
Stropuva boiler or Bubafonya stove
List of structural elements of the Stropuva boiler.
In the previous article we talked about long-burning stoves for homes, cottages, bathhouses, and how to heat them. Today we will talk about two units that are similar in their principle of operation - the Lithuanian boiler Stropuva and the Bubafonya from Kolyma, and we will even try to compare them. Those who think whether it is possible to make a Stropuv boiler with their own hands will have to be disappointed, most likely this will not be possible.
Some structural elements are very complex and can only be manufactured in production conditions using machine tools. But a domestic, simplified analogue can be assembled in a day. Of course, it does not have such high characteristics as factory units, however, it will heat a dacha or garage in no time. The option is super economical and practical, like the AK-47.
Boiler design Stropuva
To answer the question of whether it is possible to make a Stropuva cauldron with your own hands, you must first honestly determine the degree of your skill. If you are a jack-of-all-trades with a lot of ingenuity, then the process may be within your power. If you are a homemade DIYer, then most likely there will be no point, because the task is really not an easy one. To see this, let’s look at the design of the Stropuva boiler. It consists of the following main structural elements:
- double body;
- telescopic air duct;
- air distributor;
- automatic air supply control system.
Of course, long-burning boilers in Stropuv are equipped with doors and pipes for supply and return coolant. There will be no difficulties with simple elements, but it is simply impossible to make basic ones at home. Let's start with a telescopic pipe, how to make it yourself? This is unrealistic without factory equipment. In principle, we can end this here; the attempt failed. Hypothetically, let's say that you managed to make a telescopic duct that can be folded by pulling a cord.
Surely you have identified the ring on the string in the long-burning boilers of Stropuvo. It is designed to lift the air supply pipe.
The layout of the unit is really complex. You need to do the following:
- connect two pipes of different diameters;
- cut in pipes for supply and return coolant in the outer pipe;
- attach a chamber for heating the air in the inner pipe from above (exactly in the middle);
- in the chamber from below, fix an already manufactured telescopic air duct with an air distributor at the end;
- You should also make a pipe to remove smoke from the inner pipe;
- install doors;
- install an air supply control system.
In this case, everything should be as airtight as possible. Can you cope with such a difficult task? Most likely not. So Mr. Afanasy Budyakin from Kolyma thought that this task was impossible, so he came up with an analogue of the Stropuva boiler. He didn’t call him anything, but simply posted it online under the nickname “bybafonja.” That’s how the name “Bubafonya” stuck to the domestic long-burning stove. We'll tell you about it a little later.
Before choosing a convector heater for your home, calculate the required power.
What is the best quality heater for your home? Answer .
Operating principle and design
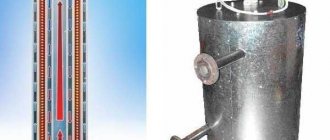
The main technological feature of the Stropuva boiler is the use of a “top-down” combustion scheme. Combustion is ensured by air supply through a diffuser telescopic pipe on which a round seal is mounted. Acting like a piston, the pipe with the seal under the influence of its own weight constantly descends towards the burning layer of fuel, providing an oxygen supply. The compactor compresses the ash that remains at the top. The heated gases transfer their heat to the walls of the firebox and are then removed through the chimney.
Oven Stropuva
Diagram 1. structural elements of the Stropuva boiler
- Blower damper.
- Damper regulator.
- Damper regulator support.
- Thermometer coupling.
- Air heating chamber.
- Telescopic diffuser.
- Fuel loading door.
- Nozzle.
- Fuel.
- Ash collector flap.
- Foundation.
- Air flow adjustment lever for different types of fuel (station wagon models only).
- Window for air supply to the heating chamber.
- Heating circuit supply connection.
- Chimney socket.
- Thermal valve connector (burst safety valve).
- Telescopic diffuser control cable.
- Travel limiter.
- Return supply.
This scheme provides the following advantages:
- A large amount of fuel can be stored.
- By burning out in stages, rather than all at once, fuel can be used more economically and efficiently.
- Long burning in this design contributes to maximum heating of the heat exchanger, reducing heat loss through the chimney - the flue gases enter the chimney almost cold.
Table 1. Long-burning boilers Stropuva SU. Specifications
| Thermal power, kW | 10 | 20 | 40 |
| Efficiency, % | 91,6 | ||
| Heated area, m2 | 50–100 | 100–250 | 200–400 |
| Maximum fuel volume, l | 120 | 200 | 330 |
| Power of electrical units, W | 20 | 20 | 20 |
| Time for complete combustion of one maximum load of coal, days | 4 | 5 | 5 |
| Fuel | Wood, coal, | ||
| Weight, kg | 196 | 246 | 333 |
| Water temperature, оС | 85 | 85 | 85 |
| Maximum water pressure in the unit, bar | 2 | 2 | 2 |
Since Stropuv heating devices do not produce excess heat, there is no storage tank in the design. Thanks to this fact, the boiler, compared to analogues, is smaller in size.
Stropuva stove piping
The design includes a bimetallic draft regulator (does not require power), which allows the consumer to regulate the supply of oxygen to the firebox, changing the combustion strength and coolant temperature.
Note: The length of the chimney for such a boiler is generally 4.5 m. According to this characteristic, Stropuva boilers are not inferior (and more often superior) to other solid fuel analogues. These dimensions allow you to save on the initial costs of installing a chimney.
Structure of the Stropuva boiler
Other advantages:
- non-volatile operation or extremely low power consumption for embedded systems;
- high efficiency – up to 90%;
- reliable layout and quality of production ensure safe operation. The boiler belongs to the “non-explosive” class: when overloaded, it contracts inward (where a vacuum is formed) without destroying the room.
Table 2. Dimensions of universal boilers Stropuva SU
| Rated power, kW | 10 | 20 | 40 |
| Height, mm | 1920 | 2120 (1920*) | 2120 (1920*) |
| Diameter, mm | 450 | 560 | 680 |
* - available upon request
Operating principle of the Stropuva boiler
Once the flame is sufficiently hot, it will burn from top to bottom.
Both the original and the analogue of the Stropuva boiler work on the same principle. First you need to load the firebox with bitters. Let us immediately make a reservation that this can only be done after the boiler has completely burned the previous fuel supply, since the source of smoldering must be at the top. To start the boiler you need:
- pull the ring and lift the telescopic air duct;
- remove ash through the bottom door (1-2 times a week);
- fill the firebox with wood or coal, depending on the model of the unit (there are wood-burning and universal ones);
- Set fire to paper or cloth soaked in gasoline on top;
- lower the air duct and close the doors.
From one load of firewood the boiler works for a little more than a day, from a briquette - up to two days, and on coal - for five whole days.
As the fuel burns out, the air distributor moves down until it reaches the bottom. The air supply is controlled by a bimetallic plate. The developers have increased the efficiency due to the fact that an air heating chamber is built into the Stropuva boiler design. The latter enters the furnace at a temperature of about 400 degrees. At this temperature, pyrolysis gases ignite. But, unfortunately, the plate loses its properties and every month you need to make adjustments to the settings, and after a year, completely replace it with a new one.
Due to the fact that the air is supplied in doses, it is possible to avoid temperature surges that occur during the operation of ordinary solid fuel boilers. Therefore, the Stropuva boiler piping scheme does without a storage tank, the so-called heat accumulator for the heating system.
Modern autonomous heaters for the home are energy-saving units with high efficiency.
Infrared lamp heaters for the home, unlike lamp TVs, are the latest heating equipment. you will find both types and characteristics.
Stropuva boiler connection diagram
Piping diagram with backup heater, hot water boiler and heated floor.
After the purchase, when filling out the documents, the seller will ask you: “Do you need the help of a specialist in installing the heater?” Do not rush to answer: “No.” The connection diagram for the Stropuva boiler is somewhat different from other types of solid fuel boilers. On the official website you can find three strapping options:
- with backup heater, hot water boiler and underfloor heating system;
- only with boiler;
- with a boiler and low-temperature underfloor heating system.
Maybe for some it is, as they say, “a piece of cake,” but for a person without specialized knowledge, these schemes cause stupor. This is not to mention connecting the Stropuva heating boiler yourself. In general, it is better to use the services of experts in this matter. By the way, opinions have been heard more than once on the forums about the complexity of tying this equipment.
Bubafonya stove with water jacket
Pyrolysis furnace Bubafonya from a gas cylinder with a water jacket.
Finally, we got to the domestic analogue of the Stropuva boiler, which is much simpler to implement, since it has a non-folding pipe for supplying air to the firebox. There are already so many instructions on how to make a Bubafonya stove with your own hands that only a blind person would not have seen them, unless, of course, they were interested in this topic. And why all? Yes, because the process is so simple and if you take the matter seriously, you can get a finished product from scratch in a day. What is the Bubafonya stove made from with your own hands:
- from a gas cylinder;
- from a barrel;
- from pipes
It can be either round or square. Let’s not repeat the same thing, just read the article: “Bubafonya stove from a gas cylinder” - and everything will become clear to you. Today we will consider a version of the product with a water circuit, as if we will try to repeat the principle of operation of the Stropuva boiler. All that is required is to make a simple Bubafonya and insert it into a pipe of a larger diameter. Thus, we obtain a gap in which the coolant will be heated.
Naturally, this space above and below is sealed so that various debris does not get there. What is important when making a Bubafonya stove with a water jacket with your own hands:
- use of heat-resistant steel;
- wall thickness of at least 4 mm;
- the presence of a tap for draining and replenishing water.
Immediately provide a hole in the upper part through the outer and inner walls for installing a chimney into it. There should also be enough space for water. The distance from the outer to the inner wall is about 10 cm. When connecting, do not confuse the supply and return pipes (supply from above).
Recommendations for operating a long-burning solid fuel boiler in Stropuva
- When filling the firebox with firewood, it is recommended to place larger logs in the upper part of the stack along the edges, and smaller ones (no more than 0.5 kg) in the central part. This is necessary to prevent the formation of a large amount of smoke during kindling.
- It is necessary to fill the firebox completely, this will allow the boiler to operate longer on one fill.
- When using firewood, the ash should be cleaned out once a month. When using coal, the ash is removed each time before adding a new batch of fuel.
- Air penetration into the firebox through the ash cleaning door is not allowed. The lower door must be closed while the unit is operating.
- The humidity of the firewood should not exceed 30%, otherwise, most likely the fuel will not burn at all, or will not burn enough, which will not allow the required coolant temperature to be reached.
- The air distributor should not be lifted during combustion, as Most likely, after lowering, it will take an incorrect position and sink deep into the combustion zone, this in turn will affect the service life of the boiler.
Comparison of the Stropuva boiler and the Bubafonya stove
We will begin our analysis with the scope of application. If we are talking about a residential building, the Stropuva boiler definitely has the advantage. The characteristics of this unit allow it to work for a long time on one load, it is stable and reliable. At least, cases of complete failure have not yet been encountered. The operating principle of the Stropuva boiler allows you to connect to it both high-temperature heating and a hot water supply system with heated floors. Bubafonya cannot boast of this.
It is more suitable for heating greenhouses, garages, or, at most, summer houses. For more serious projects it is simply not applicable. Advantages of the Stropuva boiler design:
- continuous operation on coal for 5 days;
- temperature stability;
- ease of fuel loading compared to Bubafone.
There are also disadvantages, such as the complexity of the piping, the need for a separate room and the impossibility of repairs until a complete stop. It is also impossible to add fuel while the stove is operating and therefore you have to relight it every time you reload the firebox. But at the same time, of the two units being compared, only the Stropuva factory furnace is still suitable for serious projects. But Afanasy Budyakin’s invention is excellent for utility rooms, since the Bubafonya stove can be made quickly and inexpensively, which in this case is of decisive importance.
How the device works
Stropuva boiler with fuel storage tank
The operating principle of Stropuvo heating equipment is based on burning fuel in its upper part. This effect is achieved by supplying oxygen to the top layer of wood waste, coal or briquettes. As it burns out, the hearth moves to the lower part of the firebox until all the material is exhausted.
The efficiency and high efficiency of the equipment is due to slow combustion and smoldering, in which almost all the thermal energy is used to heat the water in the circuit. Due to the fact that the flame in the firebox is not intense, in most cases overheating and boiling of the coolant is impossible, so in a heating system of this type you do not need to use an expansion tank.
If firewood is used as fuel, on average the supply in the combustion bunker needs to be replenished once every 30 hours. With a more powerful energy source - coal - it is enough to fill the firebox once every five days.
How to light a boiler
The most difficult thing in cycling is not to ride, but to start and finish the movement. It’s the same in the operation of a boiler - the most difficult thing is to light it. Do not expect that lighting the boiler will take you little time: you will have to allocate about an hour for this procedure.
Firing a wood-burning boiler is a responsible task
The beginning of the firebox is removing the ash and preparing the boiler for operation. After the ash pan and combustion chamber are cleaned, you can proceed to kindling.
Warming up the boiler firebox and chimney
For your own comfort and proper startup of the boiler, you need to warm up its firebox and chimney. If the heating device is not equipped with a forced smoke removal system, in order for the fuel to start burning, it is necessary to create draft. The formation of thrust is based on Archimedes' law: heated gases become lighter and tend to “float”. For their movement and removal, heating devices that burn fuel are equipped with a chimney.
Boiler diagram. Photo from the site www.viessmann.ru/
The design of the boiler is such that the path for smoke is difficult: in its path there is a heat exchanger and a complex convective surface, which reduces the speed of movement of combustion products. And the chimney pipe is usually located horizontally, which also makes it difficult for smoke to move. Therefore, if the boiler is not heated up, combustion products look for the easiest way. And most often the smoke begins to seep into the room.
In some cases, the vertical part of the chimney is equipped with a firebox (a small firebox used to warm up the chimney) with a door, by opening which you can burn a small amount of flammable fuel (for example, paper) directly in the chimney itself. When used, the heating element warms up the inside of the chimney duct.
If this possibility is not provided, then kindling is placed in the firebox - crumpled paper, birch bark - something highly flammable. On top of the kindling are chips and splinters, then logs of small thickness. The combustion chamber must be filled with firewood to no more than half the calculated volume.
At the moment of kindling, you need to open the chimney damper and the blower valve, ensuring the flow of air for combustion.
There is advice before starting the fire to open the window in the boiler room, if there is one: do not forget that the physical and chemical process of combustion requires oxygen.
How to properly heat a boiler with wood
To burn a kilogram of wood, about 5 cubic meters of air are required. If the air flow into the boiler furnace is from the boiler room, then it is necessary to arrange supply ventilation - especially if the boiler room does not have windows or they are sealed (with double-glazed windows).
After laying the logs, the kindling is ignited. When a stable combustion appears, the firebox door must be closed and the filling should be allowed to burn out.
Output to design power
As soon as the combustion chamber and chimney have warmed up sufficiently, you can proceed to the main stage of boiler operation. To do this, repeat the kindling process using well-burning materials. Now the main load of firewood is already complete, in order to fill the combustion chamber, according to the instructions for the device.
After the fuel has ignited, the boiler will reach its design capacity after some time. Now the combustion process will occur independently for some time. How long depends on the volume of the combustion chamber and the operating principle of the boiler. After the stack of firewood burns out, you will need to make a new one.
A properly functioning boiler is a source of heat and comfort in a country house
Important! When lighting, do not use lighter fluid or flammable gasoline, diesel fuel, etc.
How does the Stropuva boiler work?
Design features of the unit
The Stropuva boiler has an original design, which is built on the following elements:
- Housing with water jacket. This is the load-bearing part of the apparatus, equipped with a double wall with an internal space filled with coolant. At the bottom and top of such a tank there are supply and return pipes.
- Firebox. A cylindrical container in which firewood or other flammable material is placed. There are two shafts with doors leading into it: one for supplying wood, the second for removing ash, as well as a smoke removal channel.
- Air heating chamber. It is necessary so that oxygen coming from the street into the fire burning area does not reduce the temperature and does not cool the heat exchanger.
- Oxygen distributor. The element is made in the form of a nozzle with stops, in the middle of which there is a hole connected to the air heating chamber using a telescopic pipe. The distributor is controlled by a ring and a cable.
- Manual air damper. It serves to reduce or increase the flow of oxygen into the combustion chamber.
- Thermometer and pressure release sensor.
The Stropuva long-burning solid fuel boiler is installed on a concrete base that has a strictly horizontal position.
Installation and installation of the Stropuva S20 boiler
The Stropuva S20/S20U/S10 boiler is installed in premises that meet state requirements for boiler room premises. The height of the room in which the device will be installed must be at least 215 cm.
The floor must be concrete (at least in the place where the boiler will stand). The room must be isolated from heated living spaces, and it must have a vertical ventilation duct and a window or hole in the external wall so that outside air can easily penetrate the boiler and the ventilation duct.
Using a mirror, the inside of the chimney is inspected through the chimney cleaning hole.
The chimney must be clean. There should be no fittings or bird's nests and no unclosed openings into hollow ceilings or adjacent shafts.
It is checked whether there are any holes in the chimney from the outside through which parasitic air can penetrate, cooling the chimney and reducing the draft in it. All openings and joints in the chimney must be sealed.
If there are internal holes in the chimney in the ceilings or adjacent shafts and it is impossible to seal them, you need to insert an oval or cylindrical liner made of stainless steel (rectangular liners are unreliable due to holes formed at the joints due to temperature changes).
The Stropuva S 20 boiler is installed directly on a concrete floor, and the resulting gaps between the floor and the boiler are closed with heat-resistant material (silicone (180˚C) or a solution of lime and cement with sand or other materials).
The boiler can be placed on a concrete bottom for installation with a sealing rope.
When carrying the unit, its parts are sometimes deformed, so after installing it in the chimney and closing all the doors, as well as the openings for cleaning the chimney, check the operation of the upper damper, whether it is adjacent to the surface of the air supply opening, as well as the tightness of the doors using a candle flame or matches.
Standards and requirements for installation of the Stropuva S20/S20U boiler
Chimney requirements
The diagonal of the chimney opening may be 10% less than indicated in the basic technical data, but not more than twice.
Types of boilers
The manufacturer produces Stropuv equipment, like other types of devices operating on solid fuel, of different capacities. In addition, there are simpler models that work on wood and waste of this material, and there are more universal ones. The combustion chamber of the latter allows you to burn different grades of coal (except for those used in blast furnaces), as well as various fuel briquettes and pellets.
Long-burning conventional solid propellant
Types of fuel for the universal solid fuel boiler Stropuva
The devices operate only on firewood and wood waste. Technical characteristics of the medium power device:
- Thermal energy output is 10 kilowatts.
- The recommended heating area is no more than 100 square meters.
- Efficiency is about 87%.
- The volume of the water jacket is 34 liters.
- The capacity of the firewood hopper is about 25 kg.
- The length of the log is no more than 0.35 meters.
- The parameters of the firebox are 0.350X0.210X0.250 meters.
- Weight and dimensions – 1.92 meters height, 0.45 meters diameter, 185 kilograms.
The original models of devices are produced in the Republic of Lithuania.
Long-burning boilers Stropuva universal
For the unit you need to allocate a separate combustion chamber
These units are floor-mounted and can operate on various fuels of natural origin: wood materials, coal, peat and briquettes. The models are equipped with a forced air fan and a spacious combustion chamber, which allows fuel to be stored for a long time. Technical characteristics of high power equipment:
- Heat transfer power – 20 kilowatts.
- Heated space – 200 square meters.
- Efficiency is within 85%.
- The heat exchanger capacity is 45 liters.
- The volume of the coal bunker is 130 kilograms.
- Weight and dimensions – 2.1 meters height, 0.56 meters diameter, 246 kilograms.
Due to its compactness, the device can be placed in a small furnace room.
Wiring diagrams for solid fuel boiler Stropuva S40U
___________________________________________________________________________
- Stropuva S20 – Mounting and installation
- Stropuva S40U - Characteristics
- Stropuva S40U – Operation and service
- Stropuva S40U – Assembly and installation work
Wiring diagram for a long-burning solid fuel boiler Stropuva S40/S40U with connection of a backup boiler, boiler and heated floor Fig. 4. Components of the boiler room assembly 1. Safety valve for pressure 1.5 bar, 2. Air vent, 3. Balance valve ø 15, 4. Reduction ø 25 - 15, 5. Tee ø 25, 6. Tee ø 25-15, 7. Coupling ø 25, 8. Nipple ø 25, 9. Split coupling ø 25 internal, 10. Elbow ø 25 internal, 11. Reduction ø 32 – 25, 12. Ball valve ø 25 internal, 13. Elbow ø 25, 14. Thermostatic valve DT 25, 15. Detachable coupling ø 25, 16. Circulation pump, 17. Balancing valve ø 25, 18. Valve ø 15, 19. Three-way valve ø 25, R – to/from radiators, F – to/from floor heating, B - to/from boiler/s, K2 - to/from other boilers. For all models of devices, the piping units are assembled from ø 25 parts.
Fig.5. Recommended circuit diagram for long-burning boiler Stropuva S40/S40U (option 1) Operation of the circuit with connection of a backup boiler, boiler and heated floor The circulation pump (P) supplies coolant from the heating system, driving it through the boiler. The coolant, passing through the boiler, heats up. Through the balance valve (bk1), the heated coolant enters the nearest radiator (without a thermal valve), which, in the event of a power failure, can operate as a gravity radiator. The reserve boiler must be connected to the taps (k2), the boiler for preparing hot water to the tap (b). The heated coolant passes through the backup device (2k), which turns on after the main boiler (1k) stops burning, or when the main one (1k) supplies hot coolant, turns off. If the system has a reserve boiler (2k), the valve (2) is closed, and if it is absent, it is open. The heated coolant from the main boiler Stropuva S 40 (1k) passes into the reserve one (2k) and enters the indirect heating boiler (B). After heating domestic water (DHW), the coolant enters the radiator system. (bk3 – 17) – balancing valve designed to regulate the flow. With its help, the flow from the circulation pump is distributed so that it is enough to heat the radiators, and at the same time, so that it is sufficient for the unit itself. The total flow volume depends on the power of the circulation pump and can be changed by switching the pump speed settings. A circulation pump with a power of 50–100 W is sufficient. (bk1 – 3) – balance valve of the protective gravity radiator, with the help of which the flow is adjusted so that the radiator return pipe is approximately 40°C colder than the supply pipe. Recommended wiring diagram for a long-burning solid fuel boiler Stropuva S40/S40U with a boiler connection, without a backup boiler and heated floor Fig. 6. Details of the boiler room assembly 1. Pressure safety valve 1.5 bar, 2. Air vent, 3. Balance valve ø 15, 4. Reduction ø 25 – 15, 5. Tee ø 25, 6. Tee ø 25 – 15, 7. Coupling ø 25, 8. Nipple ø 25, 9. Split coupling ø 25 internal, 10. Elbow ø 25 internal, 11. Reduction ø 32 – 25, 12. Ball valve ø 25 internal, 13. Elbow ø 25, 14 . Three-way valve ø 25, 15. Nut connection ø 25, 16. Circulation pump, 17. Balancing valve ø 25, 18. Valve ø 15, R – to/from radiators, B – to/from boiler/s
Fig.7. Recommended wiring diagram for a long-burning boiler Stropuva S40/S40U (option 2) Operation of the scheme with a boiler connection, without a backup boiler and a heated floor. The circulation pump (P) supplies coolant from the heating system, driving it through the boiler. The heated coolant from the Stropuva S 40 (1k) boiler enters through the indirect heating boiler (B). If the diameter of the incoming pipes of the boiler is sufficient, the valve (3) closes and the entire coolant flow goes through the boiler, which is connected in series, so the water in it heats up faster. After heating domestic water (DHW), the coolant enters the radiator system. (bk3 – 17) – balancing valve designed to regulate the flow. With its help, the flow from the circulation pump is distributed so that it is enough to heat the radiators, and at the same time, so that it is sufficient for the boiler itself. The total flow volume depends on the power of the circulation pump and can be changed by switching the pump speed settings. A circulation pump with a power of 50–100 W is sufficient. (bk1 – 3) – balance valve of the protective gravity radiator, with the help of which the flow is adjusted so that the radiator return pipe is approximately 40°C colder than the supply pipe. Recommended wiring diagram for a long-burning solid fuel boiler Stropuva S40/S40U with connection of a boiler and heated floor, without a backup boiler Fig. 8. Elements of the boiler room assembly 1. Air vent, 2. Reduction ø 25 – 1, 3. Reduction ø 32 – 25, 4. Nipple ø 25, 5. Tee ø 25, 6. Connection ø 25, 7. Elbow ø 25 internal, 8. Nipple ø 15, 9. Pressure safety valve 1.5 bar, 10. Ball valve with nut ø 25 internal, 11. Ball valve with nut ø 25 internal, 12. Circulation pump nut connection ø 25, 13. Circulation pump, 14. Ball valve ø 15 internal, 15. Three-way control valve ø 25, 16. Valve nut connection ø 25, 17. Elbow ø 15 internal/external, 18. Elbow ø 25 internal/external, 19 Filter ø 25, 20. Balancing valve ø 25, 21. Reduction ø 25 – 20, 22. Expansion tank, 23. Plug ø 25 male, 24. Cross ø 25, 25. Tee ø 25 – 15, 26. Three-way mixing valve ø 25, 27. Balance valve ø 15, R – to/from radiators, B – to/from boiler/s, F – to/from floor heating, Н – to/from dryer/s with thermostatic controls valves Three-way control valve ø 25 (15) can be installed manually.
Fig.9. Recommended piping scheme for a long-burning boiler Stropuva S 40 (option 3) Operation of the scheme with the connection of a boiler and a heated floor, without a backup boiler The coolant heated in the Stropuva S40/S40U boiler passes through steel pipes ø 25. Air from the device is removed through an automatic air vent ( 0). A safety valve (9) is installed on the external circuit. The coolant is directed along the external circuit to a three-way mixing unit (12). The mixing unit (12) in the lower part of the circuit is necessary for mixing the return coolant after the circulation pump. The temperature difference between the supply and return lines should be within 15-20°C. Accordingly, with a supply line temperature of 75°C, the return line temperature should be 55-60°C. The boiler (4) is connected in a small circuit through a valve (8a, 8b). After heating the boiler, water enters the nearest radiator (2) through the balance valve (8c). The additional radiator (2) must be connected independently. The radiator is necessary to prevent the boiler from overheating when the circulation pump (7a) is turned off. The radiator system is connected at the top of the small circuit via valve (8d). The return line from the radiators is fed to the circulation pump (7a) through the valve (8f). On the small circuit, after the coolant is drawn off to the radiators, the heated floors are connected through the circulation pump (7b). The coolant from the return line of underfloor heating is supplied to the three-way distribution valve (6) through valve (8e). A three-way mixing valve (6) is necessary to mix the flow and return lines and bring the temperature of the underfloor heating flow line to a temperature of 25-35°C. The three-way separating valve (12) is connected to the circulation pump (7a) to the common return line. In the lower part of the circuit, after the mixing unit (12), a balancing valve (13) with a flow meter is installed to regulate the water flow into the boiler. In the return line after the balancing valve (13), drain valves (14a, 14b) are installed to replenish and drain coolant from the system, as well as an expansion tank (10). The pressure in the expansion tank should be 0.5-0.8 atmospheres.
___________________________________________________________________________
___________________________________________________________________________
- Malfunctions of the AOGV-23 ZhMZ boiler
- Parameters and design of gas boilers AOGV and AKGV
- Boiler automation Baxi Luna-3 Comfort
- Installation and installation of the Baxi Slim boiler
- Adjustments and maintenance of the Beretta Chao boiler
- Determination of error codes and malfunctions of Rinnai boilers
- Errors and malfunctions of the Termet gas boiler
- The meaning of error codes and malfunctions of Vailant boilers
- Determination of malfunctions and errors of Visman boilers
- Questions about servicing Navien boilers
- Questions about malfunctions of Kiturami diesel boilers
- Junkers boilers - Experts answer user questions
- Experts answer questions about Electrolux boilers
___________________________________________________________________________
___________________________________________________________________________
- Answers from Nova boiler repair experts
- Questions about Hermann boiler service
- Answers from Daewoo boiler service technicians
- Questions about servicing Ferroli boilers
- Questions from users regarding the repair of electric boilers Evan
- What causes an AKGV gas boiler to light up and immediately go out?
- What is wrong with the Alpha Color boiler if it shows error code E01
- Why does the AOGV boiler light up and go out quickly?
- How to eliminate error E01 on the Baltgaz boiler
- What is the problem if Dani’s boiler lights up but immediately goes out?
- Why does a Danko boiler light up but quickly go out?
- The Demrad boiler has stopped holding pressure, what is the problem?
- Why did the Gaslux boiler start to get hot and make noise?
- What is the reason if the Keber gas boiler lights up but quickly goes out?
- How to eliminate error code 01 on the Kiturami boiler
- What causes a Conord boiler to light up but immediately go out?
- What is the reason if the Lemax boiler lights up and goes out quickly
- Why does a Mimax boiler light up but suddenly go out?
- Why does the Hearth boiler light up but immediately go out?
- Why does a Ross gas boiler light up but go out quickly?
- What is the problem if the Siberia boiler lights up and goes out suddenly?
- Why does the boiler Signal light up and suddenly go out?
- What can cause a Termet boiler to make noise and get hot?
- Why does the Termotechnik gas boiler light up but suddenly go out?
- How can you eliminate error E01 on a Thermon boiler?
- For this reason, the Electrolux double-circuit boiler began to hum and heat up
- For what reasons does a Ferroli gas boiler display an error code A01?
- For what reason does the Immergaz boiler not operate on hot water supply?
- Why does the Navien gas boiler constantly turn off when heating and then turn on immediately?
___________________________________________________________________________
___________________________________________________________________________
- Heating boiler piping
- STS boilers
- KVT boilers for solid fuel
- Pellet boiler Peresvet
- Steel floor standing boiler Raton
- Solid fuel boiler Thermology
- Errors and malfunctions of the Termet gas boiler
- Termona boiler repair
- Boiler repair Nova
- Hermann boiler service
- Comparison of gas boilers Lemax Premium-20 and Danko-20s
___________________________________________________________________________
- Daewoo boiler maintenance
- Demrad boiler malfunctions
- Mora boiler malfunctions
- Westen boiler repair
- Malfunctions of Immergaz boilers
- Types of solid fuel boilers
- Models and design of combination boilers
- Liquid fuel and double-circuit boilers
- Cast iron boilers on coal
- Boilers with modeling burners
- Imported boilers for heating systems
Advantages and disadvantages
The advantages of such models of heat generators include:
- High efficiency of about 87%.
- Long-lasting action on one tab and the absence of excessive heat leading to boiling of water in the system.
- The frequency of cleaning the ash pan is 3-1 times a month.
- The wood-burning version of the equipment is completely energy-independent; it is controlled by a bimetallic plate. Universal models require electrical power of only 20 W.
- The height of the chimney pipe for such devices can be from 4.5 meters.
- The equipment is safe; at critical temperatures, the structure contracts and does not explode.
Boiler power depending on design
In practice, Stropuva devices reliably serve for over 10 years.
Disadvantages of the Stropuva boiler:
- The duration of combustion of the unit specified by the manufacturer on different types of fuel is possible only under certain conditions. This includes good insulation of the house and a properly assembled heating system, and this is rarely the case in practice.
- You cannot throw firewood into the firebox during the combustion process - you need to wait until everything burns out, as a result, the effect of cold batteries is always observed.
- The bimetallic regulator does not allow you to accurately adjust the temperature in the system.
The unit is considered energy-independent, but the system to which it is connected requires forced circulation by a pump.
Experts recommend not adhering to the rule of 1 kilowatt of thermal energy per 10 square meters of room, but choosing top-burning boilers that are twice as powerful as the design option. This approach is guaranteed to provide greater efficiency of the device and the certified duration of operation on one tab.
a brief description of
STROPUVA solid fuel boilers are long-burning boilers and are suitable for various operating conditions. The main value of the equipment of this Lithuanian brand is that the boilers can operate for a long time without additional fuel loading. The burning time of one load of fuel is: wood – 30 hours, coal – up to 5 days. A simple design, made in compliance with technology, guarantees trouble-free operation.
Furnace Stropuva
The company presents two groups of equipment:
- The S index marks boilers designed only for use with wood. Equipment power: 7, 10, 20 and 40 kW.
Stove Stropuva S
- The SU index denotes universal models designed for heating with both wood and coal (power: 10, 20, 40 kW).
Stropuva SU stove
What you need to know for normal and efficient operation of the boiler:
- you need to choose the right power of the equipment (calculate it yourself or trust a specialist);
- degree of protection of the room from heat loss;
- fuel quality (when using “slightly” damp wood, the thermal power drops by 10% or more);
- installation and connection of the boiler must be carried out in compliance with technical requirements.
All Stropuva boilers are easy to use:
- The boiler is loaded at predictable intervals.
- Cleaning – several times a month.
About the Stropuva boiler
System piping
The boiler piping is no different from other solid fuel units
When piping the device, in addition to conventional heating radiators, you need to include a safety battery in the system, on which you do not need to install a thermostat. This convector must be embedded first on the jacket supply pipe through a balancing valve and mounted in such a way that the coolant can move in it by gravity in the event of a power outage.
All other radiators go through a different circuit through regular valves and are connected by return to the circulation pump. The pump itself is bypassed through a three-way valve, which is connected through a second channel to the return pipe of the unit and is controlled by a temperature sensor installed on the return pipe of the batteries.
Among the most popular models of solid fuel boilers Stropuva are the wood-burning unit Stropuva 10S and the universal device Stropuva 20U, with 10 and 20 kilowatts of power, respectively, intended for heating country cottages.
