The appearance and strength characteristics of ceramic products are formed under the influence of high temperature. For this purpose, a ceramic kiln is used. The devices differ in design, thermal source, temperature limit and other parameters. Craftsmen can either purchase industrial equipment or make a stove themselves.
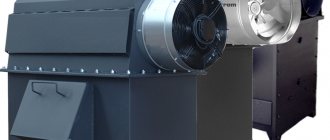
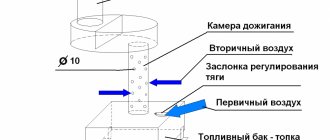
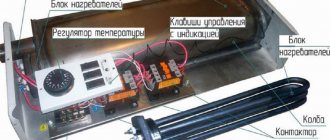
Figure 1. Kiln for firing ceramics
Article on the topic - types and types of stoves.
Classification of ceramic furnaces
Devices for heat treatment of ceramics are classified according to a number of characteristics. Thanks to the variability of kilns, ceramists have the opportunity to choose a device based on their needs and capabilities.
Types by location of heating elements
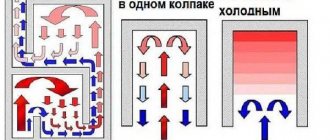
There are muffle and chamber furnaces. In the first case, the heating elements are located around a chamber made of fire-resistant material (muffle). In chamber types, the heating sources are located inside the container.
Figure 2. Muffle equipment
*
The heat loss of chamber furnaces is lower since the heat is not dissipated by the refractory. But in some cases, to achieve higher quality products, an intermediary in the form of a muffle is necessary.
Devices in which there is only a chamber space between the ceramics and the heat source are characterized by a higher temperature. Most units of this type are professional - with wider capabilities.
Device
Regardless of whether you are making a ceramic kiln from a barrel or using an industrial version, each design is made from several main parts:
- The outer casing of the unit can be made of stainless steel or an old refrigerator. Its main task is to create a power frame around the internal firebox and oven. Steel structures are not competitors to brick buildings, which will last a long time. To manufacture the steel outer casing we use steel, sheet thickness from 2 mm.
- Inner layer of thermal insulation. To do this, use fireclay brick or other heat-insulating material that can withstand heating temperatures above 2000. The performance of the device and heat loss depend on the heat-insulating qualities of this layer.
- A layer of thermal insulation between the inner layer and the oven body. Use mineral wool, basalt wool, and perlite. It is not recommended to use sheet asbestos. At high temperatures, the material releases substances harmful to humans.
- Chambers for laying clay products and heating elements. For electric furnaces, nichrome spirals or air heating elements are used. These devices are installed in grooves that are selected in fireclay bricks. Nichrome wire is the best option for electric furnaces. Gas burners are installed for gas.
What to look for when choosing a stove?
*
Muffle units are more suitable for amateur ceramists. For professionals engaged in more or less large-scale activities, the best option is camera equipment. When choosing a device, you need to rely on:
- on the volume of daily firing;
- product dimensions;
- electrical wiring requirements (some units are designed for three phases).
The format of loading ceramics is also important. You need to build on your own preferences and financial capabilities. Vertical loading equipment will be appreciated by specialists with a limited budget. Moreover, the result in the “cheap” case is no worse than in the other case. The degree of comfort in viewing products from above depends on individual characteristics.
Figure 7. Top-loading wood burning equipment
When loading horizontally, it is not so easy to assess the distance between products, but there is an excellent overview of the tiers. To get a 360-degree view of the ceramics being processed, you should purchase bell-type furnaces. It is also the most expensive.
The cost of budget, “home” models starts from 30,000 rubles. The lower price level for professional options is about 100,000 rubles. The price of powerful, productive furnaces reaches half a million rubles.
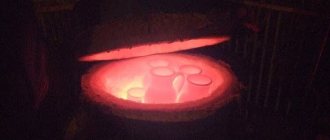
Figure 8. Furnace chamber with hot ceramics
Principle of operation
Furnaces for firing ceramic products, regardless of the type of fuel, operate according to a certain scheme:
- air-dried clay products are placed in the cavity for placement. We place large items at the bottom and place the rest of the toys or plates like a pyramid;
- The oven door closes tightly and the temperature in the oven gradually increases. First we bring it to 1500-2000;
- after preliminary heating of the parts for 2 hours, the temperature rises to 3500-4000;
- after 2 hours we increase the temperature by another 2000 and so bring the heating to 9000;
- turn off the heating devices or extinguish the flame in the oven and leave the products to cool gradually. The door must always be closed until the finished ceramic is removed.
Uniform and gradual cooling makes ceramics strong and durable. After the entire firing stage, you can begin to apply a layer of glaze or other decorative finishing.
Important! Using an oven for baking polymer clay, we achieve volume of products and give them additional attractiveness. A flower bouquet that has been hardened will look like a real one.
Method two. We make a stove without having a metal casing at hand
The manufacturing process in this case is not much different from that described above, but there are definitely some nuances here. Let's start with the fact that the working volume of the design below will be about 13 liters. The spiral, as mentioned above, can warm up to a thousand degrees in just 1.5 hours, while the temperature of the outer walls of the device will not exceed 100 degrees. The algorithm of actions should be as follows.
Step 1. First, using a 4x2 centimeter profile pipe (with a square cross-section), we build a stand for the device. After this, we paint the finished stand with enamel.
Step 2. We attach a sheet of galvanized steel on top of the stand (its thickness should be approximately 0.1 centimeters), using “metal” self-tapping screws.
Step 3. We make the walls from fireclay bricks and a special fireplace composition (everything is the same as in the previous version). After the solution hardens, we make grooves for the spiral.
Step 4. We assemble the bottom from brick separately, and use the same mortar for fastening. Before continuing work, wait until the structure is completely dry. Do not forget to wet each brick immediately before laying.
Step 5. We lay a thermal insulation layer on top of the metal base (we can use the same basalt wool for this). In order to maximize compaction of this layer, it must be moistened before fixing the brick bottom.
Step 6. We continue the traditional laying of the stove, but we try to ensure that all voids and seams are carefully filled.
Step 7. We traditionally make the lid for the chamber from fireclay bricks, but at the same time we fasten them together with a metal tie.
Step 8. Place the spiral in the prepared grooves and insulate the structure from the outside with thermal insulation material. Next, we cover everything with sheets of galvanized steel, which are cut according to the dimensions of the resulting chamber.
As you can see, this requires knowledge not only in the furnace business, but also in the field of electricity. You can see another possible manufacturing method in the video below.
Video - wood burning stove
How to make a Bubafonya stove yourself
Previously, we talked about how to make a Babufonya stove on your own, in addition to this article, we advise you to read this information, see all the details here
Species and types
Such furnaces are divided into several groups.
| Characteristic | Description |
| Type of fuel | Run on gas, electricity or solid fuel |
| Operating temperature of devices | Available:
|
| Device power | In this category, the choice is influenced by the size of future products. The average power of firing furnaces is 5-10 kW. To calculate, use the formula - for 1 liter of volume you will need to provide a power of 0.7-1 kW. |
| Configuration type | Such devices are manufactured:
|
Industrial furnaces should be made only from high-quality fireproof and heat-resistant materials, with a low thermal conductivity value and capable of withstanding being in an aggressive environment for a long period.
Gas kiln for firing ceramics with fireclay bricks - this design is not popular. Fireclay has been replaced with modern materials.
It is important to consider all qualities when choosing an industrial furnace and when developing a homemade design.
Electrical equipment
Devices can have different configurations, but usually electric furnaces are understood as front-loading chamber units.
Figure 5. Electrical equipment for firing ceramics
Average equipment characteristics:
- metal base;
- lining (protective internal lining) made of fire-resistant bricks and fibrous materials;
- loading pallets are also made of fire-resistant materials;
- spiral heaters are located inside the chamber (in grooves);
- the design involves automatic shutdown of electric heating elements when the chamber door is opened;
- maximum temperature – 1200-1400 degrees; the maximum is enough for most types of ceramics;
- high heating rate; this parameter is achieved due to good thermal accumulation of the lining;
- relatively small size; such devices can be placed even in a small workshop.
The disadvantage of electric furnaces is the need to pay considerable electricity bills.
How to choose?
In this matter, be sure to pay attention to several factors indicated in the table.
| Characteristic | Short description |
| Price | If you plan to purchase a muffle structure, be sure to remember its high price. We do not recommend looking at cheap, even promotional sales. It is worth understanding what makes up the high price of such devices:
|
| Power | We do not recommend buying a powerful machine with a large compartment for blanks if you plan to produce clay whistles. For such work, it is better to make or buy a small, low-power design. The formula for calculating the required performance of the device is given above. |
| Product loading type | Top loading on furnaces reduces the final cost of the device, but the quality of firing remains at the same level. And it becomes easier to control the firing process. But you will need to lay clay products very carefully. Side loading makes it easier to stack parts and will allow you to place them at the optimal distance, but such a stove is heavy and large in size. The most expensive and productive is the bell furnace. |
Important! The price of ceramic kilns is the main criterion for choosing and identifying a possible fake. Professionals pay 100,000 rubles for such a design; for handicraft production and top loading, the cost will be up to 35,000 rubles.
Model overview
| Model | Characteristics. Dimensions in mm (W, D, H) | Price in rubles |
| Furnace "Bossert Technology PM-1700 p" |
| 48000 |
| "ROSMufel 18/1100/3kW/220W" |
| 105000 |
| Oven "Master 45" |
| Price is negotiable, depends on the level of automation, finishing material of the inner layer |
| "ARIES.11.M.00" |
| 123000 |
| "Master 45 AGNI" |
| From 109000 |
1 … Next →
- Paul:
01/15/2012 at 23:30
Good afternoon I want to make myself two muffle furnaces, one for melting metal with a capacity of 5 liters and one for calcining molds with a capacity of 30 liters. Of the large number of furnaces we reviewed, I liked your option the most. Could you help me with advice? Why does it take so long to dry the oven? And in general this is a fundamental factor or simply a desirable one. Are these drying bricks or adhesives? And if this is super necessary, then how can you speed up the process. By the way, I also live in Togliatti!!))) If you help, I would be very grateful!!! Thank you in advance!
Answer
- gorniy:
01/16/2012 at 08:43
Hello, Pavel! When laying the stove, I had to soak each brick in water so that the masonry mixture did not dry out. And lightweight brick absorbs like a sponge and gets wet through. Therefore, if you dry it immediately after laying using spirals, they will quickly burn out due to water. Perhaps, when using a mortar for masonry, it will be possible to avoid getting the bricks wet, then you can dry them immediately. Another option is to dry the stove with some kind of heat gun. If anything, please contact me, I will be glad to help))
Answer
- rita:
02/03/2012 at 08:41
Well done!!! Thank you very much, you helped me out!!!
Answer
- @1-Idreu:
04/24/2012 at 18:08
How long does firing take, and what firing mode does it take, and is it possible to do it automatically?
Answer
- Elena:
05/01/2012 at 05:16
Hello! to burn toys, how to turn on the stove, step by step at intervals from speed 1 to speed 3? Or straight to 3rd speed?
Answer
- gorniy:
05/01/2012 at 10:36
Elena, we have a separate lesson planned on firing, although the author is slowing down a little)) In a nutshell, you need to heat it up gradually: first at first speed, periodically turning it on and off. For example, 5 minutes on. - 5 minutes off, then 10 - 10, then 15 - 10, then you can leave it on the first for an hour and a half until the ceramics slightly redden. Then at second speed also 5 minutes, 10 minutes until done. Moreover, you can not turn off the second one, but switch to the first one. The third speed is switched on as needed if a high temperature is required at the end of firing. The firing mode may also differ depending on the size of the toys, the composition, etc., etc. In general, try it) First, you can play it safe - turn it on and off more often.
Answer
Elena:
05/03/2012 at 04:37
Thank you.
Answer
- Oleg:
10/23/2015 at 11:15
I dry it not according to time (5/5 minutes - heating and turning off) but according to glasses or nose. Literally. I lean over the slightly open door with my bespectacled muzzle and see if my glasses are fogged up or not. If they fog up, I turn off the stove until the moisture comes out. Then I turn the stove on again. I forgot to say that the stove turns off as the glasses fog up at the very beginning of warming up. Take the time to dry the items in the kiln before firing. This is the most important thing!!! If there is a defect or shooting, it means it was dried quickly. That's all. The critical starting temperature for firing is 150-200 degrees. Or, if you don’t have a thermometer, until it smells like burnt earth. Then turn on the oven and steam it to 950 degrees.
Answer
- Elena:
06/02/2012 at 03:13
Hello! For masonry in the same building, a 20 kg bag of fire-resistant masonry mixture will be enough? How much cement?
Answer
- gorniy:
02.06.2012 at 17:19
There is enough mixture, there will still be some left... But it’s still better to look for mortar, otherwise the mixture will crumble over time... And you need even less cement. I can’t say exactly how much, 5 kilograms is probably enough.
Answer
Elena:
06/03/2012 at 09:36
Thank you!
Answer
- Sergey:
06/29/2012 at 15:39
Hello. What is the power consumption of the oven? And how to calculate it depending on the length of the spirals?
Answer
- gorniy:
07/02/2012 at 15:17
The power of each of the two circuits is 2.3 kW (i.e. in total with parallel connection 4.6 kW). We calculate the spirals using the formula: L=SR/ρ where L is the length of the wire (m); S—wire cross-section (mm2); R—wire resistance (Ohm); ρ - resistivity (for nichrome ρ=1.0÷1.2 Ohm mm2/m). Our wire is nichrome 1.5 mm. We calculate the cross-sectional area S: S = πD2/4 S = 3.14*1.52/4=1.77 mm2 We calculate the current strength for a power of 2300 W and a network voltage of 220 V: I = P/U I = 2300/220 = 10, 5A Now we calculate the resistance: R = U/I R=220/10.5=21 Ohm We substitute the obtained data into our formula and get the wire length: L = 1.77*21/1.1 = 33.8 m
It is also very important that the wire does not overheat. You can read more about heater calculations on the forum: forum.goncharnoe-delo.ru/…nagrevateleispiralei-pechi-dlya-obzhiga
Answer
Konstantin:
09/08/2012 at 08:12
Hello, help me understand the calculations for a muffle furnace. The volume of the furnace is 760 liters; 2.5 mm nichrome; connected by a triangle. According to calculations, I need 6.3 ohms for each phase, in fact (I selected it empirically) I need 15-17 ohms, and the footage does not add up; according to calculations you need 28m, but when measuring nichrome it turns out 10-11m. I can’t find my errors in the calculations, tell me if you know how to calculate.
Answer
Dmitriy:
27.11.2012 at 16:55
this results from the temperature coefficient of resistance. That is, as the temperature of the coil increases, its resistance increases and its power decreases.
Answer
- Tatiana:
26.11.2014 at 17:20
Hello, I have a 30 liter oven, is it possible to make 1 spiral in a circle? At 2.5 kW do I need 14 meters? temperature at 1000 degrees. and what kind of spiral is it nichrome or fechral? Thank you.
Answer
- Yuri Gorniy:
26.11.2014 at 19:17
You can feed 1 mm 14 meters - about 2 kW. True, then the wire becomes overcooked. It is better to take two pieces of 23 meters each and connect them in parallel. Or take a thicker wire - for example, 1.5 mm, 2200 W - it will be about 28 meters. The heater calculation calculator will help you.
Answer
- Space:
08/03/2012 at 08:29
Greetings! I have a question about the temperature. For example, we built a stove, we only know its volume and the desired temperature. I want to make a stove that could provide a temperature in the chamber of 1300-1350 Celsius. How can you calculate based on this?
Answer
- gorniy:
08/03/2012 at 08:56
Space , if we know the volume, then we can determine approximately the power: For a 10-50 liter oven, a power of 100 W is needed for each liter of volume, for a 100-500 liter oven - 50-70 W for each liter of volume. And then according to the comment above. The temperature will depend on the heating time. For temperatures of 1300 Nichrome cannot be used. At least fechral. Here you can read in more detail about the calculation of heaters.
Answer
- Elena:
08/06/2012 at 12:06
Hello! 1) Is it possible to use mineral wool from a refrigerator for thermal insulation in a stove along with kaolin wool? First a layer of mineral wool, then kaolin? 2) Have you tried using heat-resistant Hercules glue instead of mortar for gluing bricks?
Answer
- gorniy:
08/06/2012 at 15:14
Elena, kaolin wool was not used in this version at all, only basalt wool was used between the brickwork and the body. It is sold where everything for the bath is. And it's inexpensive. Mineral wool from the refrigerator can probably also be used, it all depends on the thickness of the masonry. In principle, you can do without it altogether. I haven’t tried rolled oats, only in the form of porridge)) If you succeed with it, write. By the way, the topic of the stove is still being discussed on our forum.
Answer
Elena:
08/08/2012 at 03:43
Thank you
Answer
- Anastasia:
08/14/2012 at 12:42
Hello, I would like to make a kiln for firing clay and ceramics, the firing temperature is from 900 degrees to 1150 degrees, so that the volume of the kiln chamber itself is 160 cm wide, 100 cm long (depth), 100 cm high. what size will the whole oven be and how to make it or where to buy it?
Answer
- gorniy:
08/14/2012 at 14:38
Anastasia, the principle of building a large stove is the same, only the brickwork should be wider, the heaters should be thicker, and should be secured with ceramic tubes. Well, accordingly, the switch and other electrical parts must be different, designed for higher power. It is better to place them in a separate block, which is placed on the side of the stove so that they do not heat up too much. You can order the oven, for example, here.
Answer
- boris:
08/19/2012 at 08:18
I live in Israel. I want to order a small kiln of 10-15 liters for firing ceramics, with a power of 2-2.2 kW, up to 1200 degrees. The catalogs are mostly of large capacity and power. I could assemble it myself, but I don’t know where to find the components. Poor knowledge of the country and language makes it very difficult. Help or tell me please. I will be grateful.
Answer
- gorniy:
08/19/2012 at 16:58
Boris, try asking in the group “We love ceramics” on the Odnoklassniki website: https://www.odnoklassniki.ru/group/42893834387549 There are a lot of different “foreigners” there, maybe some from Israel.
Answer
- Elena:
08/23/2012 at 12:11
Hello! Is it possible to use a metal casing from an old refrigerator with rust inside for the stove? If so, approximately how long can it last if fired once a week?
Answer
- gorniy:
08/23/2012 at 15:17
Elena, it’s hard to say how long such a building will last. It all depends on how hot it gets. The only place on my stove that is slowly starting to deteriorate is above the door, because... it doesn't close tightly. This can be solved simply by laying a small layer of kaolin wool. And the rust inside the body can be covered with a neutralizer and painted with fire-resistant paint.
Answer
Andrey, Dmitry:
09/17/2012 at 12:12
The announcement about oven manufacturing services has been moved to the forum.
Answer
- Fedor:
03.11.2012 at 17:00
Good day. I haven’t built a single stove yet, but this is exactly the task now! I have a question about thermal insulation. Your wall thickness is one brick. If you do it in 2 or 3, then the heat loss through the walls will be 2 or 3 times less, respectively, and then the firing power will be less. Why did you make it into one brick? Second question. You take the ends of the spirals out through the wall and cover them with masonry mixture. Where will the spiral burn out faster, in this place or in one of the turns?
Answer
- gorniy:
03.11.2012 at 17:35
Fedor, you can make 10 bricks, but heat loss will not be reduced 10 times. For such a volume of the oven, the thickness of one and a half lightweight (!) bricks is quite sufficient. You can lay the brick flat - the wall will be thicker. If you need a larger oven, the lining can be made even thicker. The coils usually burn out inside the chamber because... the temperature is higher there. And to prevent the ends from burning out, you can twist them like this:
Answer
Fedor:
04.11.2012 at 04:30
If you fire at a temperature of 1000C, what is the surface temperature of the stove wall? If, again, you finish firing and turn off the stove, how long does it take for the stove to cool down, for example, to 300-400C?
Answer
- Elena:
07.11.2012 at 06:59
Hello! Is it possible to burn in this oven at 1200*? And is it possible to fire products with blue glaze?
Answer
- gorniy:
07.11.2012 at 07:20
It’s possible up to 1200, but it’s not nichrome that needs to be used, but fechral, and it’s better to use thicker wire. What is confusing about lead glaze?
Answer
- Valery:
11/17/2012 at 12:16
If the spiral is not seated correctly, it will hang down during operation and may short out and burn out.
Answer
- gorniy:
11/17/2012 at 14:07
I agree, I forgot to write in the article that in this version the spiral is secured with small pieces of wire inserted vertically. You can cut the grooves a little differently - at an angle, so that the spiral does not fall out. The best option is to place the spiral on ceramic tubes.
Answer
- Alexei:
11/18/2012 at 00:48
Thank you so much for the detailed story and the website, my dream is getting closer), it’s nice to come across non-commercial, interesting and necessary material on the Internet! Ps I hope the site will develop.
Answer
- Yuri Gorniy:
11/18/2012 at 08:51
Thank you for your kind words too)
Answer
1 … Next →
Making a stove with your own hands
Wood stoves
Wood-burning kilns for firing ceramics are made mainly from brickwork, although the kiln can also be made from a barrel, but in any case it will need to be lined with refractory bricks. To do this, first of all, you need to prepare the foundation, and only then begin laying bricks. The foundation is also made of brick. Then it is necessary to install the body on the foundation; what it will be, in the form of a barrel or made of brick, everyone decides for themselves. But a body made from a barrel is convenient because it will be enough to cut a hole for firewood, it will take a minimum of time, but building a brick body will take much more time and effort.
Having cut a hole for firewood and cut out the bottom, we move on to the next stage. We install the barrel on the foundation and line the inside with bricks to the very top. In the middle of the masonry it is necessary to install a grate on which the products will be fired. The lid will be the bottom, which was cut from the barrel.
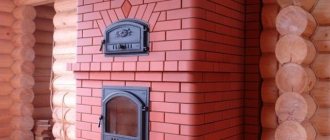
This is the kind of wood-burning kiln you should get for firing ceramics. This stove can only be installed outdoors. Today, wood firing of ceramics is becoming less and less common, since for the desired temperature you have to wait a long time before sending the product into the kiln. And besides, a wood-burning oven is only suitable for a small batch of firing.
Electric oven
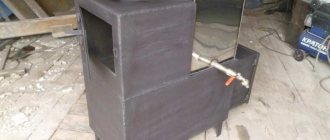
An electric pottery kiln can be made from improvised means such as an old refrigerator or washing machine. But if you do not have such housings, then you can use a galvanized sheet from which you need to make a housing. The body can be of absolutely any size and shape.
Next, we strengthen the bottom, for which you can use either corners or pipes that need to be welded to the bottom. It is necessary to weld legs made of pipes of larger diameter to the corners of the structure so that the stove stands firmly.
We lay basalt wool 10 mm thick on the bottom and walls of the structure. It is necessary to place several pipes on the bottom of the cotton wool so that the wool does not wrinkle and only then lay the metal sheet. There is no need to lay pipes on the sides; a galvanized sheet on top is sufficient.
Next, the inside of the structure must be lined with bricks. You need to start from the bottom and you need to prepare a fire-resistant masonry mixture in advance for sealing the seams, which should be no more than 6 mm. Before laying the brick, it must be wetted so that the mixture on it does not dry out quickly.
Now we move on to the walls of the structure, so that the brick is supported on galvanized sheets, about 30% cement must be added to the mixture. We do the same with the top.
Next, you need to make a door, which will consist of the same galvanized sheet and bricks. The bricks must be laid out on a sheet according to the same principle as the walls of the stove were laid out. After this, you can weld the hinges and install the door.
At this stage, the oven should be left to dry for some time. After it dries, we proceed to installing the heating element. To do this, we make 7-8 mm grooves inside the walls, since we will use a spiral of the same diameter as a heating element. When heated, it will expand, so to prevent the spiral from coming out of the grooves, it is necessary to secure it with wire.
It is necessary to make 2 spiral circuits so that you can regulate the temperature inside the oven with a switch.
We bring the ends of the wire up.
At the top we install a ceramic plate, which must be secured and the ends of the wire attached to it with bolts.
In this design we will use a switch like this.
The switch must be installed so that its protruding part is outside on the front panel, and we connect the wires. Phase and zero are suitable for two contacts.
To the rest we connect the wires that go to the plate. One wire (blue in the photo) closes the 2 outer contacts.
Upon completion, it should look like this: at the first “speed” the circuits of the spirals are connected in series, this is the lowest temperature. And the third “speed” is the highest temperature.
The chamber kiln for firing clay is ready, now all that remains is to wait until it is completely dry and can be used for its intended purpose. It may take about a month to dry the stove, after which it must be connected to the network at low speed and left until steam stops coming from it. It is better to connect such a stove to a reinforced outlet.
If you need a muffle furnace for firing ceramics, then it can be made according to the same principle, only the heating elements will have to be located around the muffle.
This version of the stoves is more popular and easier both to operate and to manufacture. If you want to make a clay kiln with your own hands on gas, then in this case, you can use a 200-liter barrel as a body. It must be cut into two parts so that the lower part is larger. Than the top, since the top will be the lid.
The barrel must be lined inside with high-temperature mats in 3 layers and attached to the base with homemade ceramic buttons, and do the same with the lid. Don’t forget to make a small hole at the bottom for a gas burner, 20 by 20 cm. The lid also needs a hole for moisture evaporation. As a result, you should end up with a simple oven like this, to which you only need to install gas heating elements.
Making a clay kiln at home is quite simple, but the benefits are much greater.
Scope of application of muffle furnaces
Today, the muffle furnace is a fairly popular device. It is used in various industrial fields. An important feature of a muffle furnace is the ability to regulate the temperature, reach high temperatures, and isolate the material from external factors. The furnace not only heats materials. They are suitable for storing samples if certain temperature conditions are specified.
The main areas of application of muffle furnaces can be identified:
- Hardening, tempering, annealing, normalization of metal, as well as other methods of heat treatment.
- Firing ceramic products.
- Ashing of organic samples.
- Cremation.
- Cupellation of ores to determine the presence of noble metals in them.
- Synthesis and growth of single crystals.
- Conducting laboratory research.
- Melting of precious metals in jewelry production.
- Drying.
Muffle furnaces have also found application in dentistry. High-quality metal-ceramic structures used in prosthetics are produced only in such furnaces, where each product is evenly heated to high temperatures.
Experience in constructing a kiln
The burner we used was the simplest one, purchased at a hardware store. The flame is started under the bricks to avoid direct spread of the flame to the product. But the height of the structure is too high - there is a lot of emptiness above the product. It could have been designed lower and heated well to the desired temperature, it would have worked much faster. To obtain the required pressure, it was necessary to remove the regulating part from the gas pressure reducer - there was not enough adapter fitting. The pressure is now simply regulated by the valve on the cylinder. For the exhaust from above, I make a hole in the cotton wool and adjust the exhaust by attaching it with a piece of cotton wool or a piece of tin.
Firing ceramics in a Russian kiln
You can also fire ceramics in a Russian kiln. There is some addition to make it burn better, but in general, there is nothing complicated. In five hours you can bring the shard to a red color, then maintain it for about forty minutes. The temperature there is 800-850, maybe more. By the way, the outside of the oven is a little warm by this time. It will only take another five hours to warm up. It takes about three to four armfuls of firewood. In general, for 20-30 ceramic pieces this is quite reasonable.
The stove had already been installed, and all further work proceeded from it. Inside the furnace, along the walls, the bricks were placed on edge (two in height), with transverse iron blocks on them. Iron trays with pots were placed on these blocks. Bricks stand on them. distance from the wall, and gaps were deliberately left between the bricks. There are no bricks near the mouth of the furnace, therefore, air blows behind the bricks and blows to the far side of the structure. The combustion takes place with ordinary birch firewood. At first, a small fire is maintained right next to the hearth for 1.5 hours, but gradually the structure moves inward. Next, the fire gradually intensifies to the maximum that the firewood can produce throughout the entire volume. For the last half hour, the fire is done in small chunks - the wood is cut into three parts and chopped very finely. Throwing occurs in armfuls, they quickly flare up and burn out. Just at this time, the distant pots turn into a clearly red color, while the front ones are not visible at all. At this point the firing is complete, you can take out the elements and leave them to cool. But in this case, pots are made with smoking, so the firing must be prolonged.
Six bricks and one bucket of mortar are taken, the last armful of chocks is thrown in and the mouth is sealed tightly. Unfortunately, the stove is quite old and has cracks. Therefore, first smoke comes out through the cracks, and then, accordingly, the air itself begins to enter. From the outside, the design of the stove looks like an ordinary Russian stove, and all changes occur inside the firebox.
Clay and ceramic mixtures. Properties of clay
Clay is the basis for the production of tiles.
It consists of oxygen, hydrogen, silicone and aluminum, and when water is added, it changes its structure, becoming more flexible and viscous. When water is removed, the clay hardens and becomes rigid. It is very important to know that clay that has only recently been dug out of the ground is not yet ready to be used as a raw material for ceramics. The working qualities of newly mined clay leave much to be desired
The main characteristics of clay that will be important to you are plasticity, firing temperature range and degree of shrinkage.
Plasticity of clay
Plasticity allows you to obtain complex shapes (such as the corners of steps, for example)
If the clay is too plastic, it will not have sufficient strength to make large-shaped products from it, and it will collapse at high temperatures. In this case, it is worth adding coarse-grained materials to it. Clay with a coarse-grained structure will not be sufficiently plastic, it will tear when twisted and molded, and it will be impossible to obtain the desired shape from it. To make it more convenient to work with, add stickier or more plastic clays to the composition.
The plasticity of clay can be easily determined by eye by squeezing and rolling out a lump. You can do a simple test - make a sausage out of clay and start bending it in an arc. The smaller the radius of the arc along which the clay bends and does not crack, the more plastic it is. Another simple way to determine plasticity is to tear a clay sausage into 2 parts. If the ends of the edges are thin and stretch like threads, the clay is plastic. If the ends are thick and dry, like stumps, and the clay itself crumbles in your hands, it has low plasticity. Potters call plastic clays fat clays, and low plasticity clays lean clays.
Let us repeat that none of these types of clays can be used in their pure form to prepare tiles; they will definitely need to be mixed to obtain the material of the desired consistency.
Clay firing temperature range
Each type of ceramic clay and each added ingredient has its own specific melting point, which determines the firing temperature required to sinter the clay when it turns into ceramic. The clay mass formula or formulation may include several different clays, as well as other non-clay materials that are added to obtain a material with certain properties, depending on the purpose of use of the product.
Potters distinguish low-melting clays (with a melting point below 1350 degrees), medium-melting clays (temperatures from 1350 to 1580) and refractory clays (temperatures, you guessed it, above 1580 degrees). The more plastic the clay, the lower the firing temperature it can withstand. To increase the temperature, add fireclay or pumice to the clay (with pumice the temperature will drop to 800 - 950 degrees).
Clay shrinkage rate
Your piece will change in mass and size during drying and firing as the water evaporates from it. When you are making tiles that are specifically designed for a limited space, you need to learn as much as possible about the shrinkage rate of the clay in question.
The greatest shrinkage occurs during firing, when chemically bound water leaves. Next, a continuous process of hardening and compression occurs with the formation of glass crystals in the fired clay, which transform the clay mass into ceramics. The higher the firing temperature, the more the clay shrinks. To reduce shrinkage, increase the amount of fireclay in the ceramic mass.
How to avoid cracking and deformation of clay
Whether you succeed or fail in your tile making venture depends on choosing the right type of clay. One of your biggest challenges will be to avoid cracking and warping during drying and firing. Fortunately, this task can be made easier by adding a significant amount of granules or particles of a coarse material such as fireclay to the clay. Ideally, the amount of fireclay should be from 15 to 40 percent, and it is desirable that the particles be of different sizes.
A good tile clay should contain 12/2? percent finely ground chamotte and 25% medium grinding. For those who already have experience working with ceramic masses, this amount may seem extremely large (and it is not suitable for making small ceramic figurines, where the fireclay content is unlikely to exceed 20%), but the open porous structure that is obtained thanks to the fireclay, allows the tiles to dry more evenly and avoid deformation.
