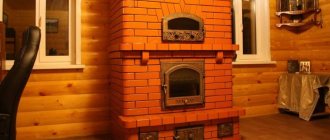
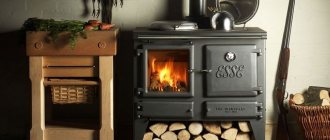
Most owners of country houses have already appreciated the convenience and ease of operation of the Shvedka stove. In addition to the function of heating the premises, such a device provides for cooking food, turning this process into a pleasant activity. A built-in fireplace allows the home owner to:
- create comfort in the room;
- decorate the interior of the home;
- enjoy the sight of a living flame.
The design of this stove, heated with wood, was developed by master A.I. Ryazankin. It was he who managed to effectively combine a fireplace and a Shvedka heating and cooking stove.
Design features
For the first time this unit came to Russia from Scandinavia, when the Swedish troops were defeated near Poltava. Even then it was popular due to the following characteristics:
- economical in operation;
- ability to retain heat for a long time.
These parameters were achieved by creating a unique system of several channels for gas removal.
Thanks to this, the stove simultaneously made it possible to heat the room, cook food, including baking bread, and dry things. The design of the Shvedka stove involves various designs with arches and other unusual shapes. In this case, simultaneous use is allowed:
- fireplace;
- beds;
- heating tank with water;
- drying chamber.
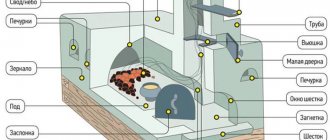
The Shvedka brick stove is equipped with the following elements:
- hob;
- hood;
- oven;
- heat shield.
When constructing a similar stove in a house, the rear surface of the structure should be placed in the living room. The front side of the unit with the firebox is usually installed in the kitchen. The device involves installing a chimney capable of functioning in the following two modes:
- winter: gases move through specially equipped channels, warming up the home;
- summer : combustion products are sent directly into the pipe.
An important advantage of the Shvedka is its small dimensions: 2.17x1.03x0.88 m (HxLxW). By design, the furnace can be combined or bell-type, with three or five channels.
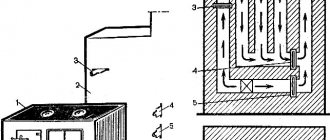
1 – fireplace hearth; 2 – two L-shaped pins; 3 – grid; 4 – fireplace walls; 5 – vent with a window; 6 – blower door; 7 – gas duct; 8 – cleaning window; 9 – transition window; 10 – cleaning window; 11 – grate; 12 – oven; 13 – combustion door; 14 – gas duct; 15 – jumper; 16 – ceiling above the fireplace portal; 17 – iron corner; 18 – plate; 19 – door for cleaning; 20 – overlap; 21 – overlap above the space of the stove and the side wall of the furnace; 22 – cooking chamber; 23 – fireplace shelf; 24 – displacement of the septum; 25 – gas collector; 26 – window for cleaning the gas collector; 27, 28, 29 – partitions; 30 – cleaning window; 31, 32 – valves; 33 – cleaning window; 34 – valve.
About history and design
The right to invent the Swedish stove is disputed by the Germans and Swedes. It is assumed that the first versions of this design appeared on the territory of modern Germany. From there, the Swede spread throughout the countries of Northern Europe, capturing the Scandinavian Peninsula. In Russia, they became acquainted with it during the time of Peter I, and since then it has firmly entered into the life of the northern territories with their frequent cold and dampness.
According to another version, the stove appeared when the Swedish king Adolf Frederik Holstein-Gottorp ordered the development of a design for the harsh climate of his country. At that time, there were Dutch women in Swedes' houses, but they were gluttonous, and the people of Sweden were already thinking about the environment and saving fuel resources.
In Russia, the growth of interest in the stove began a couple of decades ago; it began to spread even in regions where Russian stoves were traditionally used. The reason for its popularity was a successful combination of qualities - the Swede is a heating and cooking type design, and copes with both responsibilities equally well.
Swede with a hob for two places Source pechiexpert.ru
The tall rectangular structure has a recognizable appearance. It is difficult to confuse it with other stoves, although several varieties have appeared in recent years. As in a traditional Russian stove, the Swede has a combustion chamber, and the air passes through the ash pan and grate, and then enters the firebox. However, the combustion products are then directed into long smoke channels, linger there and do not allow the furnace walls to cool for a long time.
The stove on which food is cooked is located above the fire. Therefore, the dish is fried as on a gas stove, and not baked as in a Russian oven; During cooking, the smell spreads throughout the house. Unlike the grate design, in the Russian stove the fire was lit in the depths, and air entered through the crucible. Food was prepared in two ways: either they placed pots in front of the fire, or they waited until it burned out, closed the stove with a damper, and baked the food. There was no smell.
Structurally, the Swede is designed so that it can be installed in a wall. In Scandinavian housing, this was traditionally the space between the kitchen and living space. In modern country houses it is placed between the kitchen and living room.
Stove with fireplace in the kitchen-living room Source aviarydecor.com
During cooking, the kitchen room warms up well and quickly, but the accumulated heat, thanks to the rather long smoke channels, is redistributed and gradually goes into the adjacent room.
Operating principle of the Shvedka stove
Describing the operating features of the device, it is necessary to dwell on the operation of its various sections:
- Fireplace area. During the combustion process, warm air and smoke are released, which rise, bypassing the open valve, and exit through the installed pipe.
- Kitchen area. The operating principle assumes the following:
- combustion of wood in an equipped fuel compartment located under a two-burner stove;
- the warm air released passes between the hob and the oven;
- bypassing the oven on the right side, it falls into the chimney;
- the heated gases, rising to the top of the furnace, rush into the horizontal channel;
- Warm air moves through installed flue ducts into the smoke channel, where it enters directly into the pipe through open valves.
What should it be
It would seem that there is nothing easier than replacing the suitable surface of a brick oven with a metal insert with your own hands, getting a stove for cooking. In reality, everything is much more complicated. A stove is a complex device, and the thermophysical processes occurring in it depend on the correct arrangement of its elements.
There are special requirements for furnaces of this type. On the one hand, it must effectively accumulate heat in the thickness of the brickwork, on the other hand, it must take a significant part of the heat to heat the hob. In the summer, when heating the house is not required, the hob should warm up quickly with economical fuel consumption.
Requirements
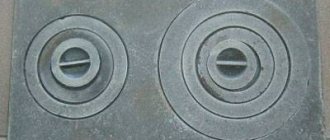
Theoretically, the hob can be made from any material that can heat up to high temperatures when the stove is fired. In practice, they use cast iron plates with holes covered with a removable lid.
This design allows you to create zones with different temperatures on the stove.
The thermal conductivity of cast iron, unlike steel, is not very high, so you can heat food on the plane of the stove, as well as cook or stew it over low heat.
And by removing the ring from the hob, you can achieve direct heating of the cookware with an open flame, which allows you to quickly boil water or fry food in a frying pan.
The most practical are the burners shown in the photo, consisting of concentric rings of different diameters - they can be adjusted to the size of the bottom of the cookware.
In addition, the gaps between the rings compensate for the thermal expansion of cast iron that occurs when overheated, and the plate can withstand multiple heating and cooling cycles without damage. Solid cast iron stoves are less reliable and require more careful firing.
Where can I buy a hob for a stove and at what prices?
Materials
Which brick is preferable for laying a stove equipped with a hob? In most cases, on the ordering diagrams of stoves for a home, cottage or bathhouse, you can see two types of bricks: regular solid ceramic and fire-resistant fireclay - it is most often indicated in yellow. From fireclay bricks, they lay out with their own hands those parts that experience the greatest thermal loads during combustion: the firebox and the roof of the furnace, part of the smoke channel directly after the combustion chamber.
The main difference between fireclay bricks is its increased heat capacity. It is able to accumulate and release the resulting heat for a long time more efficiently than ceramic. For laying a heating stove, and especially a sauna stove, this is an undeniable plus.
But if the stove is used primarily as a cooking stove, then the increased heat capacity of fireclay is rather a disadvantage: it will absorb a significant part of the heat, and cooking will take more time.
In the summer it will be impossible to cook on such a stove - the room will become hot and stuffy.
If the stove is used primarily for cooking, it is recommended to use a minimum amount of fireclay bricks!
Necessary materials
For the longevity of the stove, it is recommended to use only high-quality bricks, which must be purchased with a reserve. To build a unit with a fireplace, the following elements will be required:
- red brick – 717 pcs. (excluding pipe);
- white sand-lime brick – 154 pcs.;
- grate 20x30 cm;
- cleaning chamber doors 14x14 cm – 8 pcs.;
- firebox (21x25 cm) and blower (14x14 cm) doors;
- cabinet-oven 45x36x30 cm;
- hob 41x71 cm;
- valves 13x25 cm – 3 pcs.;
- 2 steel corners 50x50x5x102;
- 2 metal sheets 50x70 cm;
- steel strips 50x5x92 cm - 3 pcs.; 50x5x53 cm – 2 pcs.; 50x5x48 cm – 2 pcs.;
- reinforcement for laying the foundation;
- cement, crushed stone, sand, clay;
- boards for formwork construction;
- fireplace grate (you can make it yourself from fittings);
- sheet of roofing material for waterproofing the base in 2-3 layers;
- baked steel wire for securing the doors;
- pieces of asbestos or asbestos rope.
As mentioned above, the structure has dimensions of 102 × 89 × 217 cm. The fireplace protrudes from the general plane by 13 cm. Therefore, the foundation should be larger than the building itself by 10-12 cm on each side.
Briefly about the main thing
The Swedish stove is a popular heating and cooking design that provides enough heat to heat your home and cook. There are various models of Swedes, not only with a stove, but also with a fireplace, oven or stove bench.
Regardless of functionality, they all require the use of high-quality, especially durable materials. You should not skimp even on clay for masonry mortar; reliability and durability of operation depend on it.
The oven is manufactured strictly according to a plan, including an order - a separate detailed diagram for each row. It is recommended to lay out the rows dry first, this will help to avoid mistakes. After the masonry is completed, the oven is left to dry, which includes a natural and forced stage.
Preparing the base
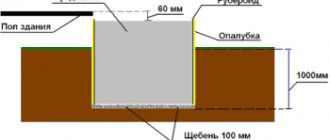
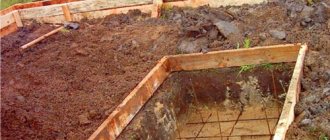
Since the design of the furnace is quite massive, it is necessary to create a reliable foundation for its construction. Its depth must be determined from the regional characteristics of the area in terms of soil composition, the presence of moisture and its freezing. It is recommended to use deep foundation pits - at least 0.6-0.8 m.
When constructing the foundation, the following work algorithm must be observed:
- Dig a pit.
- Carefully compact its bottom.
- Place a 0.1-0.12 m layer of sand in the recess.
- Fill with crushed stone at 0.15-0.17 m.
- Install the formwork in that part of the foundation that will rise above the ground level.
- Build a monolithic foundation.
- Reinforce the entire thickness of the monolith being created using a mesh of reinforcement, which imparts rigidity to the foundation and reliability of its operation.
- Pour concrete solution into the pit. It is recommended to carry out this procedure in several stages, allowing the mixture to set. In this case, a cement-gravel composition should be used in the lower layers, and a sand-cement composition closer to the top.
- The elevation of the finished foundation above the floor level should be approximately 0.05-0.1 m.
- Roofing felt is laid on the base, providing the necessary waterproofing.
Construction of an additional foundation
The Swedish stove with fireplace and boiler has a large mass due to the use of brick. In order for the structure to be distinguished by its strength, reliability and stability, it becomes necessary to install an additional foundation according to the following scheme:
- At the first stage, it is necessary to dig a fairly deep pit (at least 0.5-0.9 meters);
- The bottom of the dug hole is well and thoroughly compacted with a shovel and leveled;
- Pre-prepared sand with a fine fraction is laid in a layer of 10-13 centimeters and also compacted;
- The next layer of crushed stone is placed about 15-18 centimeters thick;
- In places where the ground is elevated, there is a need to install formwork;
- We create a monolithic layer and give it greater rigidity through the use of reinforcing mesh;
- Pour in a pre-prepared mixture based on cement and graphite. The second and subsequent layers should be mixed on the basis of cement and sand - this composition makes it more durable and reliable;
- We waterproof the completely dry surface with several sheets of roofing felt.
Components of an additional foundation
The first row is laid flat and sets the required shape of the fireplace
You can learn more about building a foundation by watching the video in this article.
Furnace order
Following the instructions, such a unit can be built without much effort. The algorithm for making brickwork and arranging a chimney in the Shvedka stove assumes a certain sequence.
Row 1. The brick is laid on roofing felt used as foundation waterproofing. It is important that the first layer is laid evenly, since the harmony of the entire structure depends on it. To do this, experts recommend making markings on the roofing material using a corner, a long ruler and chalk. According to the outline of the installation it will be easy to complete the work.
Row 2. We construct the hearth of the fireplace using metal elements. After the construction of the “Swede” is completed, a grille is welded onto them. It is possible to mount a ready-made decorative product, which is attached according to the attached instructions.
Row 3. During installation of the third level, two metal doors are installed in the blower chamber and the cleaning compartment. To ensure the necessary fire safety conditions, they need to be covered with asbestos pieces or wrapped with asbestos rope. To secure the metal elements in the required place in the masonry, you need to thread steel wire through the hinges of the doors, which is fixed using bricks and cement composition temporarily placed around it.
Row 4. The bars are laid out according to the pattern. It is required to install perfectly even bricks on the sides of the doors, despite the protrusions of the metal elements.
Row 5. Fire-resistant silicate material is used to lay the combustion chamber. The grate bracket is placed on the solution. The oven box wrapped with asbestos rope is attached to it.
Row 6. The bars framing the fuel chamber are installed on the rib at the rear on the right side. They should not exceed 75 mm in height. The bricks of the back wall of the fireplace protrude 35 mm, and their lower parts are cut at an angle.
Row 7. The bars framing the fuel chamber on the right and back are installed on the edge. The bricks on the back wall of the firebox of the fireplace are extended another 35 mm and cut at an angle from below. To cover the combustion chamber, two steel strips measuring 50x5x530 mm are used.
Row 8. The firebox of the fireplace is closed. The bricks on the back wall of the chamber extend another 35 mm and are cut diagonally from below.
Row 9. Access to the firebox door is limited. The brick at the back wall of the chamber is cut diagonally from above. The bars extend inward another 20 mm and are cut diagonally from below. To cover the oven door, two steel strips measuring 50x5x480 mm are used.
Row 10. Access to the oven door is limited. The oven and firebox chambers are combined. The brick wall separating them is not placed in this row. A cutout is made to install the slab. A cleaning door is installed at the top of the firebox. A cast iron two-burner stove (410x710 mm), a cleaning flap (140x140 mm) and a corner at the entrance to the cooking chamber with parameters 50x50x5x1020 mm are mounted.
Row 11. We begin to form the cooking chamber. The bricks installed on the right side have a size of 210 mm. They cover the resulting gap between the stove and the right wall of the oven. The bricks above the fuel hole of the fireplace are protruded into the chamber by 40 mm and cut from below at an angle.
Row 12. The cleaning door is closed. The bricks of the front wall of the firebox of the fireplace extend inward another 40 mm and are cut diagonally from below.
Row 13. The bricks of the front wall of the firebox extend another 40 mm into the open hearth and are pressed together.
Row 14. On the front side of the structure we begin to make a mantelpiece. We move the bricks in this place to each of the three sides by 30 mm.
Row 15. We continue to make the shelf. We extend the bricks another 30 mm in each direction.
Row 16. Laying is done according to the diagram. The size of the oven at this level is 1020x890 mm. A corner (50x50x5x1020 mm) and three steel plates (50x5x920 mm) are also installed here.
Row 17. Cover the cooking chamber.
Row 18. Laying is carried out according to the diagram.
Row 19. We begin to form the upper flue ducts of the furnace. To clean them, two doors will be installed. We shift the jumper between the fireplace and vertical channels to the left by 30 mm. At the same time, we cut off the lower left and upper right edges of the brick diagonally. We install cleaning doors (140x140 mm).
Row 20. The jumper between the fireplace and vertical channels is shifted another 30 mm and cut obliquely as in level 19.
Row 21. We lay the cleaning doors. The fireplace chimney narrows by another 30 mm. In this case, the main vertical channel is blocked to the size of 3/4 of a brick, forming a shelf inside the space. A place is prepared for installing a cleaning door in the fireplace channel, then a 140x140 mm sash is mounted.
Row 22. In the area where the shelf is formed in the main chimney, a place is prepared for installing a cleaning door. The jumper between the channels continues to move to the left. A sash measuring 140x140 mm is mounted.
Row 23. The displacement of the structural element continues. The cleaning door installed at level 21 is closed.
Row 24. Cutouts are made in the bricks to install the fireplace damper. The cleaning flap installed at level 22 is closed. Two bars in the furnace channels are cut obliquely from above. A fireplace damper measuring 130x250 mm is installed.
Manufacturing instructions
Building a cooking and heating stove out of brick should be done by people who have at least minimal skills in laying brick structures. The contractor is required not only to perform competent installation using the diagram, but also to follow safety standards. Like any stove, the Swede is a source of heating, and therefore is built taking into account the rules of SNiP: with safe indentations and the use of thermal insulating materials.
Site selection and preparation
The Swede is usually installed between two adjacent rooms; in this case, the firebox goes into the kitchen, and the wall opposite it goes into the adjacent room. The location for the stove is chosen taking into account its size and the following factors:
- Area of premises, location of doors.
- How the chimney will be installed, what are the features of the roof.
Example of ordering (layer-by-layer masonry scheme) Source pinimg.com
Small stove for a summer residence
Buslaev’s Swedish stove is ideal for use in a dacha, where people live throughout the field work season
The design has a niche where you can quickly dry shoes and clothes, which is very important if you have to do this often
The stove fittings correspond to the fittings of the previous version. The building's oven is capable of producing a heat wave. Due to the small size of the materials, little is spent, but the small size of the furnace also influenced the thermal output in the direction of its reduction. The Swedish stove is designed to heat a house with an area of no more than 20-25 square meters. m. at an outside temperature of more than 15 degrees. The design is light, the order is quite clear.
The small stove is a channel structure and includes a hob, the dimensions of which are slightly larger than the dimensions of a Dutch column. If the oven is installed, then it is located at a considerable distance from the firebox. The first heat does not affect the oven in any way; when the oven is lit, there is no heat wave from the oven.
There is no chamber near the combustion part in which afterburning occurs, which is what distinguishes a small stove from ordinary structures. In its operation, the stove is more reminiscent of a Dutch stove than a Swedish stove; only the name is taken from the Swedish stove.
Small stoves are decorative devices, are based on special alloys and are installed ready-made. These are modern products, the dimensions of which are calculated by refractory computers. Outwardly, they may look different than the old version of the Swede, but the calculation is carried out taking into account the same principles.
Home heating options
The choice of heating method depends on the layout of the building - side or bottom. The first option is the best solution for houses with several rooms, since the adjacent room is heated using a side heating panel. The second method is used to supply heat to one room, but having a larger area.
The walls of the sub-floor space are heated from below. Currently, in order to increase efficiency, designs are equipped with a bell-type combustion, which makes it possible to ensure uniform heating and stable draft. In such units, fuel burns completely and less soot accumulates in them.
How is it arranged?
In this stove design, the main and most favorite compartment for most people is the fireplace. It is located in the direction of one of the living spaces - a bedroom or a living room.
As a disadvantage of this design, it should be noted that there is no tank for heating water and a drying compartment.
However, on the other hand, the compact dimensions make it possible to install the stove in a house that has a modest area. This point can be noted as a significant advantage.
Advantages
The Swedish stove has a very “flexible” design - it can be adjusted to the conditions and desires of the owner, modified and improvised with functions. The stove not only heats rooms, it can be folded so that:
- cook food on it,
- dry herbs;
- bake in the oven;
- dry outerwear and shoes;
- equip a warm sun lounger;
- additional shelves;
- admire the open flame.
But that's not all. Swedish oven:
- Has a high level of efficiency.
- With good efficiency, it is small in size.
- It heats up quite quickly.
- The combustion process is regulated (by dampers).
- Can be done with “winter” and “summer” running.
A Swedish stove will produce 20% more heat than a Dutch oven built from the same amount of materials. And it’s more convenient to cook on it than on the Russian one - you don’t need to bend over and use a grip.
9632bce10363354e248c1329617a273c.jpe 0f9144b4c66791468fef78ad9393f49f.jpe b906bdd2e27548d30c2db6edec3f39da.jpe
You can place food prepared the night before in the cooking niche above the stove and close it with a damper. Then in the morning you can save time on heating up breakfast - it will still be warm.
This is how metal valves are installed
- From rows 18 to 26, the masonry proceeds strictly according to the ordering scheme, without any special features.
- On row 27, a second chimney damper is installed.
- Next comes the laying of the chimney.
If you compare the two models, you can see that the second is no more difficult to install than the first. Therefore, if you choose a design based on the complexity of construction, then they can be called equivalent. All that remains is to make a choice only based on functional features.
The installation of metal elements of furnaces follows the same pattern using steel wire, which is embedded in the seams between the bricks. It is imperative to use asbestos protective windings, which will help seal the seams around the fire doors and protect the thin metal of the oven box from rapid burning.
Video: example of building a Swedish stove with a stove bench
A little should be said about the laying of the chimney pipe
When installing it, special attention should be paid to insulation from flammable materials when the structure passes through the ceiling
The ceiling can be secured by using an asbestos gasket between it and the pipe, or by backfilling with a layer of expanded clay, for which a metal box is made with a square hole for the chimney in the middle of its bottom.
After passing through the attic, the pipe is brought to the roof and rises above it by no less than one and a half meters. The gaps between the roofing material and the brickwork of the pipe must be well sealed.
For such purposes, you can use a special material - onduband, which is produced in the form of a tape and already has an adhesive layer.
