How to make refractory bricks with your own hands (step-by-step instructions)
Refractory (i.e. fireclay) bricks are used for industrial and domestic construction. This material contains up to 70% chamotte, which is a fireproof clay.
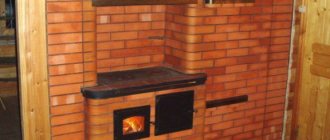
The material is used to build buildings that will be exposed to high temperatures. It is suitable for building barbecues, bathhouses, stoves and fireplaces with your own hands.
Fireproof is a material that can operate without loss even at high temperatures.
Why plaster the stove at all?
In what cases and why are stoves plastered? The answer to this question is no less important than the first, since, having learned it, you can understand whether this process is worth carrying out at all, or whether you can leave the stove without finishing, or decorate its walls with ceramic or fireclay tiles.
Reasons that require finishing walls with plaster include:
- If the stove is old and was previously plastered, but for some reason the finishing cracked and began to fall off, and sloppy masonry was discovered underneath.
- If the stove is old and there is a danger of cracking of the masonry mortar in the seams and the penetration of carbon monoxide into the room.
- If there is a need to transform this structure, giving it neatness and aesthetics, for example, when updating the entire interior and changing its design style.
- Over time, various insects can take up residence in the seams between rows of bricks, especially in cases where the kiln masonry work was carried out on natural materials. Timely processing and plastering will help prevent their occurrence.
- If the stove has just been erected, but the masonry is done sloppily, without jointing, and the structure does not look aesthetically pleasing, plaster will help correct this situation.
The advantage of plaster over other finishing materials:
- It should be noted that plastering the stove is the most affordable and easiest way to tidy up the surface of the stove.
- By choosing plaster for wall decoration, you can save a lot, since the price of ceramic tiles or stove tiles is several orders of magnitude higher than the price of plaster mixture.
- Plastering can be applied to any of the existing types of stoves, both for the restoration of an old stove and for finishing a newly built one.
- Plaster increases the thickness of the wall, which increases the heat capacity of the building and leads to fuel savings, since the stove takes longer to cool down.
- Plaster increases the level of fire safety and reduces the possibility of carbon monoxide entering the room.
- The plastered surface can be covered with water-based paint, whitewash or decorative plasters.
What is fireclay clay, description
Fireclay clay can be found in stores in the form of dry building mass, which is added to masonry and plaster mortars. Fireclay bricks are also sold. Fired kaolin can be white with creamy tones or gray-brown, depending on the firing.
Compound
Fireclay is made from clay, which contains highly dispersed hydroaluminosilicates. This clay is formed into pieces of any shape or pressed briquettes and fired in special ovens heated to a very high temperature.
There are many recipes for making fireclay mass. Some compositions add more calcined powder, others consist of coarse powder, more water in one mass, etc.
Fireclay also varies in duration and firing temperature. As a result, masses of different colors and textures come out of the ovens.
Fire clay consists of many chemical elements:
- Quartz (Si02);
- Aluminum oxide ceramics (Al2O3);
- Calcium oxide (CaO);
- Potassium oxide (K2O);
- Magnesium oxide (MgO);
- Sodium oxide (Na2O),
- Iron oxide (Fe2O3.
Bentonite clay is a material of natural origin, which is distinguished by the fact that it can be used almost everywhere.
Its main component is montmorillonite. Due to the wide variety of types, clay has found application in many industries and spheres of life. Find out what you can make from clay here.
Clay selection
When choosing refractory clay, you should pay attention to the packaging labeling. It has a special digital combination showing the fire resistance of the material. You should know that large values indicate high fire resistance of the clay. In addition, by the markings you can find out about the area of use of the material and for laying which bricks clay of this type is used. The shelf life of chamotte clay is of great importance, since after a certain time kaolin loses its technical properties. Therefore, you should not purchase material after the end of the sales period.
Types of clay, its characteristics
It comes in different colors: blue, white, red, red, gray, black. White or kaolin was formed during the destruction of granite, juicy red contains metallic impurities, gray consists of kaolinite minerals, the composition of the black mass is the same.
Based on the presence of the main component (clay minerals), there are several types:
- Fat;
- Medium fat content;
- Skinny (non-fat).
In fact, there is no fat in it and it is impossible to determine its presence. But high plasticity allows us to talk about the softness, slipperiness and soapiness of the material, and this almost always correlates with the presence of fat.
Determination of clay fat content
How to determine the fat content of clay yourself? This is necessary in order to know how the finished mass will behave. And how to improve its qualities. Initially, it already contains some amount of sand, and it is this that affects the fat content. If there is too much of it, then the clay is skinny. To check, you can conduct a small experiment.
You should soak it, you can soak the whole mass, because it is pre-soaked to prepare the solution. After a couple of days, roll 2 small balls, leaving fingerprints on them, dry them and carefully look at what happens. If your lumps have shrunk in size and cracked, you have a fatty variety. If the lumps crumble, then this is a skinny version of the material. If the lump has not crumbled, but there are no fingerprints or are hard to see, then the clay is thin. And if your product does not have cracks and has not crumbled, then it is an almost ready-made masonry mortar. Having established the level of fat content, you can independently prepare clay mortar for laying stoves.
Experts say that a mixture oversaturated with fatty clay will not affect the quality of the heating structure. But too much sand in the solution can have a negative effect: the dried solution will crumble and crumble. Clay and sand should be mixed in the required proportions. High-quality clay is the main condition for the durability of the structure being built. One of the main requirements is plasticity. Plasticity is the ability to take any shape, without the appearance of cracks, tears or seams, and the “ability” to maintain these shapes due to aggressive environmental influences.
Plasticity of clay
Each type of clay has plasticity to a greater or lesser extent; due to the presence of this quality, it comes in three types:
- highly plastic;
- medium plasticity;
- low plasticity.
How to determine plasticity at home? By the way, plasticity is directly related to fat content. This means that you can independently increase or decrease the plasticity of the solution. So, knead it, roll it into a tight ball the size of a small fist, then press it between two boards. Press until cracks appear. If cracks appeared under low pressure, then the material is thin and low-plasticity; if cracks appeared after passing half the radius (close to the cake), then it is a highly plastic building material. The appearance of cracks at 1/3 of the compression height indicates medium plasticity.
There is another way: roll up flagella with a diameter of about 20 mm and a length of more than 20 cm and bend them into an arc. Flagella from low-plastic varieties will break when slightly bent. And the fatter the product, the more it will bend without cracks; this type can be bent into a ring or a ball. Based on the results of the experiment, the composition can be enriched (by adding clay) or depleted (by adding sand). A mixture mixed based on accurate data about the individual components will be of high quality.
Technical characteristics and properties
When purchasing fireclay clay, you must make sure that its expiration date has not yet expired and that it has been stored under the correct conditions. Since during long-term storage kaolin loses its properties. Humid air is especially dangerous for it.
Fireclay clay is produced in accordance with GOST - 6137-8 and has the following technical characteristics:
- The average grain size is approximately 2 mm.
- Moisture absorption: for high-burnt fireclay from 2 to 10%, for low-burnt fireclay – up to 25%.
- Humidity – no more than 5%.
- Fire resistance – from 1550 to 1850 °C (depending on the composition);
A package of fireclay clay weighing 20 kg is enough to lay 20-30 bricks. For one cubic meter masonry will need 100 kg of calcined kaolin. The finished solution hardens within two days at an air temperature ranging from + 10 to + 25 ° C.
Fireclay clay can be stored in its original packaging for no more than three years, based on the date of manufacture. Full strength is achieved after 28 days.
How to make fire brick
Although there are many different types of fireclay bricks commercially available, you can make your own.
This is practiced quite often, since in this case it is possible to make a brick of the required size or configuration. for work you need:
- Fireproof and extremely flexible clay. It would be a good idea to add kaolin if possible.
- To minimize the formation of deformation changes during drying, crushed brick or fireclay from previous firing is used.
- Sawdust - they can be taken as waste from furniture production, and sometimes sawdust is combined with charcoal, which has minimal shrinkage.
- Wallpaper glue is used to bind wet brittle bricks.
- Liquid soap is used to prevent the development of bacteria in the molding compound.
Manufacturing instructions:
- Dilute dry clay in an amount of 5 kg with a mixer.
- Add to it 1 kg of fireclay, adhesive for gluing wallpaper and 50 grams of soap.
- Next, take 4 kg of sawdust and gradually add it to the mixture, stirring constantly.
- The resulting mixture should be kept for up to 2 days.
In this case, the freshly prepared mass should not be liquid or dry. The consistency should be such that the mold can be adjusted to the required size. The formation of raw materials should be carried out taking into account the fact that when dried, the brick will decrease in size by up to 15%. The finished raw material is dried on a board for quite a long time, and then fired at a temperature of +1200 degrees for 10 hours, of which the temperature will increase within 7 hours, and the exposure will take 3 hours.
Description of species
Refractory fireclay is a component on the basis of which solutions for various purposes can be prepared. Clay is divided into lump and ground. The lump variety is used for the manufacture of clinker, ceramic and heat-resistant products, and fireclay powder is used to prepare working solutions used for coating or plastering surfaces. In addition, stuffing and molding mixtures are prepared from the powder.
Kaolin clay is also divided by composition, depending on the proportion of fireclay sand. To prepare solutions use:
- binder type clay containing 55% sand;
- smooth type, where sand can be from 20 to 48%;
- depleted type with sand content not exceeding 21%.
Depending on the content of aluminum oxides, the fireclay composition is divided into the following varieties:
- highly basic – no more than 40%;
- main – from 25 to 37%;
- semi-acid – no more than 27%.
In addition, fireclay clay powder is divided into varieties. There are 4 grades in total depending on the composition of impurities and the degree of fire resistance:
- special;
- I grade;
- II grade;
- III grade.
Self-cooking method
As a masonry mortar I use fireclay clay with the addition of cement.
To make decorative items at home, you don’t need to use refractory clay. In most cases, another material that will be just as flexible and durable will be perfect. But before you make polymer clay, which is what we are talking about, you need to prepare the following ingredients:
- PVA glue;
- Starch (you can use potato or corn);
- Vaseline or hand cream;
- Baby oil.
The composition is quite simple, since almost all the elements can be found in any home. You will also need a container of the required size and a plastic spatula, which will be used for mixing.
Bottom of the firebox, grate installed in place
Starch, petroleum jelly and PVA are placed in a container and mixed thoroughly. When the mixture becomes homogeneous, add two tablespoons of oil and mix thoroughly again. After this, the resulting solution must be placed in the microwave for exactly one minute. Then you need to mix the polymer clay again. Next, the surface of the table needs to be lubricated with a cream that does not contain silicone. Place the resulting mass on it and soften it with your hands. After some time, you should get a dough that has the properties of polymer clay. If you do not need to use it right away, the mixture can be wrapped in plastic and stored in the refrigerator.
The difference between chamotte and ordinary ceramic bricks
Fireclay brick cannot be confused with any other block, even with other refractories. Mostly yellow or even light yellow in color, with a whitish tint. The main difference between fireclay bricks is the high content of aluminum oxide in various chemical forms and modifications.
In comparison with ceramic bricks, with a high content of iron oxide and silicon oxide, fireclay bricks have their own characteristics that affect their durability:
- The surface of the block is highly porous, but these pores are very small; the solution penetrates poorly into them, but moisture and air penetrate well;
- The coefficient of thermal expansion of each brick is strictly individual, which will require difficult and painstaking selection of the composition of the mortar for masonry;
- The refractoriness and ductility of fireclay bricks largely depends on the operating mode of the furnace, and not on the composition of the mortar or the method of laying.
Advice! For lining one furnace, you cannot use fireclay from different batches or a set of randomly selected bricks; in extreme cases, different types can be converted into broken or fireclay powder.
Application
Refractory types of clay are used to produce molding mixtures, bricks, plaster compositions, and masonry mortars. For the manufacture of each type of product, a specific brand of fireclay clay is selected, taking into account the technical characteristics and price.
Furnace laying
The most popular products are refractory bricks, which are used to lay out the most critical parts of stoves.
Only fireclay types of brick products can withstand maximum furnace temperatures. The remaining kiln layers are usually made from cheaper ordinary bricks. Masonry compositions must have the same coefficient of expansion when heated as the main brick of the firebox. Therefore, mixtures based on refractory clays are used to prepare solutions.
Before starting work, you should make a calculation, taking into account that for one hundred bricks you need to make approximately 3 buckets of masonry mortar
To prepare mixtures that fix bricks, a clay product with a significant concentration of sand is used. When the mass fraction of silicon oxide is equal to 55%, the clay is called a binder; from 19% to a maximum of 48% - smooth. When the sand concentration is less than 21%, the refractory clay is considered depleted.
Methods of using fireclay clay
Fireclay clay is used to make dry mixtures for preparing plaster and masonry mortars and creating fireproof bricks.
Furnace laying
When building a stove or fireplace, many stove makers try to use heat-resistant bricks made from a clay-fireclay mixture. When choosing it, you should pay attention to the labeling; the letter “Ш” should be indicated on the packaging. Since such a brick is much more expensive, only the firebox is built from it, and the rest of the stove is laid out from ordinary red brick.
Fireclay bricks must also be laid on refractory clay, which has the same expansion coefficients as bricks. For 100 bricks you will need approximately three buckets of mortar.
The video will tell you about the specifics of laying bricks on fireclay clay:
Plaster
Working with fireclay clay is similar to the familiar plastering process. To finish the stoves, you do not need any specific tools; you only need two spatulas - one large and the other medium. They will be quite sufficient for high-quality plastering of stoves.
When applying the solution, do not forget to pick up any spilled drops with a spatula and smooth out any unevenness in a timely manner. The layer should be no thicker than 1 - 2 mm. There is no need to wet the fireclay brick with water. At the end of the work, allow the plaster to dry; the required drying time can be found on the packaging of the mixture. Finishing work can only begin after complete drying.
Other products made from fireclay clay
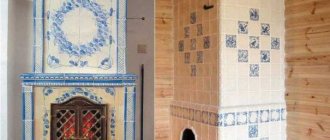
Designers really like this fire-resistant, especially durable material for its special texture and discreet beauty. Craftsmen make figurines, ceramic dishes, tiles and other things from it. Products made from fireclay clay can decorate the most sophisticated interior.
And all thanks to the fact that fireclay clay, when impurities are added to it, becomes a very plastic material. They also love it for its environmental friendliness, because fireclay clay does not contain toxic impurities. To make artistic ceramics, they take plastic clay of different compositions and add fireclay chips to it. Its share is approximately 40%.
To make a product from fireclay clay, a ceramic artist first develops a sketch. Then they make a mold and fill it with fireclay clay, after which it is sent to dry. The product must dry naturally for a long time so that its geometric shapes are not disturbed.
Use Cases
Kaolin can be used for furnace masonry. It is also used as plaster and for making decorative items. This is interesting: other types of non-combustible finishing materials.
In addition to being used for decorative purposes, chamotte clay is actively used when laying stoves and fireplaces. When building stoves, look at the markings applied to the surface of the products. Usually the letter "Ш" is indicated. The material most often used is for masonry of the firebox, since its cost is high, so it is impractical to use it for the rest of the work. They lay it on special clay. Its characteristics are the same as those of brick.
For use in plaster, large and medium spatulas are used. It is necessary to apply the material in a layer of no more than 2 mm. As soon as it dries, you can begin finishing work.
Fireclay fireclay has a unique texture and composition. That is why designers paid attention to it and began to use it to produce unique blanks. These can be ceramic dishes, original figurines. To ensure greater plasticity, various impurities are added. The finished products look beautiful, and they are absolutely safe. Most often, fireclay chips are used as additives in the production of decorative objects. It is added to plastic clay.
Advantages and disadvantages
When constructing a furnace, it is imperative to use refractory material for both internal and facing work. Among the advantages of chamotte mortar are:
- High level of environmental friendliness.
- Excellent steam permeability.
- Resistant to high temperatures and temperature changes.
- Long service life.
However, the masonry mixture is not famous for its advantages alone. It also has certain disadvantages. First of all, it is necessary to address the issue of price. Even if you prepare the solution yourself, its cost will be very high, when drawing an analogy with other materials in this group.
The mixture contains phenolic resin. This element has a high level of toxicity, and accordingly, environmental pollution occurs during production. And the work itself at the enterprise does not benefit anyone, since a lot of harmful dust is generated during the entire work process.
As for efficiency, it is not as high as we would like. For example, if you need to lay only 25 bricks, then you will need to purchase about 20 kg of clay mass, but to lay one cubic meter of structure you will need as much as 100 kg of material.
Preparing a mortar from fireclay clay for brickwork
In order to get mortar for brickwork, you don’t use the first crushed fireclay you come across. Fireclay clay, like cement, has its own brands. The properties of this material depend both on the size of the fraction resulting from grinding crumbs or powder, and on the degree of fire resistance. In addition to the fraction, it is necessary to understand what type of material was obtained - it can be either crushed briquettes, fired specifically for this purpose, or crushed kaolin bricks rejected in production. The second option is very simple to determine - the bag should have the designation “U” on it, indicating the “recycling” appearance of the material. Fireclay mortar based on it cannot be used in critical work.
The best solution for masonry is a solution of fireclay clay made from one part of kaolin and two parts of fireclay sand with a fraction of no more than 0.5 millimeters.
Another option, much more complex, is to mix 1 part kaolin clay, the same amount of blue clay and 4 parts fireclay sand. Why fireclay sand itself? Traditional quartz filler has the tendency to increase at high temperatures, which can, in turn, lead to unnecessary cracks in the masonry itself, especially when it comes to difficult temperatures that arise in the middle of the furnace. River sand is also unsuitable, since it does not provide sufficient adhesion to other elements. For greater strength, Portland cement is occasionally added to such compositions, however, such a fireclay solution will somewhat reduce its own heat-resistant qualities - the highest heating threshold will be about 1550°.
It is best to combine the use of fireclay clay with fireclay bricks. The point is that they will have a similar rate of increase when exposed to heat, and this, in turn, contributes to greater strength of the entire structure. Laying a red brick or any other of these ideas is not correct, although a similar option cannot be ruled out if the stove is rarely used and is not brought to difficult temperatures. And yet, it is preferable to lay traditional bricks on a traditional mortar prepared according to a traditional recipe: to one part of clay, from 3 to 5 parts of sand (depending on the fat content of the first element) and one part of cement.
Requirements for the solution
A well-prepared solution is the basis for long-term use of the stove. Before choosing a mixture, familiarize yourself with the main characteristics that you need to focus on when purchasing:
- Heat resistance. The basic and main requirement, after which the rest are not so important. The applied solution must be able to withstand high temperatures - up to 95⁰C.
- Thermal conductivity. The stove, as a heating source, must release heat indoors when a certain temperature is reached.
- Elasticity. When heated, the applied coating should be slightly stretchable. Thanks to this, the layer of plaster will not burst, will preserve its appearance and prevent subsequent restorations.
- Environmentally friendly. The solution should not contain toxic chemicals, since when heated they will be released into the air, which is not good for rooms.
Checking the quality of the solution
The first testing is carried out before preparing the clay for laying the stove. In order for the solution to be of high quality, you need to accurately determine the fat content of the clay. It will depend on what additional components are required.
How fatty clay is for a stove is determined as follows:
- A small amount of clay - approximately 1 kg - is thoroughly cleaned using one of the methods described and soaked for several days.
- The resulting mass is divided into five equal parts. Nothing is added to the first, the second is mixed with 25 percent of sifted sand, the third with 50 percent, the fourth with 75 percent and the fifth with 100 percent.
- Each part is kneaded separately. If necessary, add a little water until a paste-like structure is achieved. You can determine the readiness of the solution with your hands. If it does not stick, the mixture is considered ready.
- The resulting material is tested for plasticity. Each of the five particles is rolled into a small ball and flattened into a flat cake. All resulting samples are marked with labels indicating the proportions of sand and sent to dry. It will take 2-3 days for the fragments to dry.
- The resulting samples are tested. The cake should not be cracked or collapse when compressed. If you throw it on the floor, it should remain intact. Based on the results of such testing, the correct proportion of sand and clay components is revealed.
You can test for fat content and plasticity in another way. Roll balls about 3 cm in diameter, place each one between two carefully planed boards. Gently, smoothly press on the top one and check the condition of the ball. If it immediately cracks, the composition lacks fat content. If cracks occur at half compression, the mixture is too oily. With the correct proportion of components, most of the sample will flatten, but will not collapse.
A properly formulated solution will not crack immediately after application.
Additionally, oven clay is tested before use. It is better to redo the solution than to waste time building a stove that will crumble. To check, scoop the composition with your hand and rub it with your fingers. A good binder solution should be slippery and oily. Experienced stove makers determine the readiness of the composition by ear when kneading.
A correctly made mixture “whispers” - makes a kind of rustling sound, and lags behind the shovel. You can also dip the trowel into the mixture, pull it out, and then turn it over. If a thick layer sticks, the composition is too greasy, you need to dilute it with sand. If the mortar layer falls away, there is excess sand, you need to add clean clay.
Installation procedure
The beginning of the masonry process should be careful marking. An excellent help will be the so-called dry laying, when they select bricks, adjust them to each other and set the size of the gap between the bricks. Upon completion of dry laying, the bricks are removed in the order they appear in the test laying. Do not forget that the seam should be covered with the top brick, which will provide greater reliability to the masonry
Particular attention should be paid to the quality of the seams to avoid problems after completion of the work.
The quality of the solution preparation directly affects the thickness of the seam of the refractory masonry. Accordingly, seams according to this indicator are divided into four groups:
- Category 1 - seam thickness less than 1 mm;
- Category 2 - the seam is 2 mm;
- Category 3 - the seam is 3 mm;
- Category 4 - seam thicker than 3 mm.
The category of masonry is determined by the temperature conditions for using the masonry. The higher the planned temperature, the thinner the seam should be, and the more thoroughly the solution is mixed. Means for checking the quality of refractory brick masonry. The first step is to control the seam category. To do this, use a special probe with a width of 15 mm and a thickness equal to the thickness of the seam. Such a probe should not penetrate the seam to a depth of more than 20 mm.
No masonry is complete without tapping each brick with the handle of a trowel. This ultimately leads to uneven masonry. The defect must be corrected while the solution is fresh enough. To ensure even horizontal laying and equal width of seams, order strips are used. A thin, durable cord is attached to them, which sets the correct styling parameters.
Each subsequent layer is placed along a cord stretched on nails inserted into a fresh seam. At each stage of the process, you should carefully monitor the uniform distribution of the mortar between the bricks. Uneven distribution significantly degrades the performance of refractory masonry. As with conventional masonry, the brick should be moistened generously. Otherwise, the brick will actively suck water from the mortar, thereby significantly worsening its characteristics.
The best result will be if the bricks are kept in a container of water for some time before laying. This procedure will clean the material from dust and saturate it with water. Laying refractory bricks using properly prepared mortar is not an easy process, but if everything is done according to the rules, your stove or fireplace will delight the eye with beauty and the body with beneficial warmth for many years.
Optimal fat content
To check the fat content of this main component of the masonry mortar, there is an elementary way. You need to take 0.5 liters of clay and mix it with water until the consistency becomes like stiff dough. Then the resulting mass must be thoroughly kneaded and formed into a ball with a diameter of 4–5 cm. When it dries, it must be placed between two planks and squeezed.
If as a result the ball cracks when squeezed halfway, its fat content is high, which means the mixture does not have enough sand. If it disintegrates almost immediately, you need to add clay. In the event that cracks appear when the ball is compressed by a third, the composition of the oven mixture is selected ideally.
To ensure the reliability of the future furnace, the clay solution for laying it must be prepared from thoroughly cleaned components and have normal or high fat content.
The obvious advantage of the solution, the ingredients of which are carefully selected and dosed, is that the masonry will have a neat appearance due to the thin seam. In addition, a stove mixture of normal fat content will provide the structure with sufficient reliability and durability. True, such a solution still has one drawback: such a solution is not resistant to environmental humidity.
Preparation of the solution
It’s worth saying right away that no one can name the exact proportions of the components; accordingly, they will need to be determined independently. The difficulty is that initially the clay already contains sand, hence the distribution of the material. It can be fat (if there is a lot of sand) and skinny (if there is little sand). On average, the proportions range from 1:2 to 1:5 volume.
Preparing the composition
To mix a medium-fat solution with your own hands, do the following:
- We take a construction bucket and fill a third of its volume with clay.
- Then add sand to the remaining volume until it is completely filled.
- Mix thoroughly, adding water if necessary.
- We check the thickness of the solution (the mixture should not fall off the spatula if it is turned down, but if placed vertically, it will flow smoothly).
When the solution is prepared accordingly, this ratio of clay and sand must be remembered in order to know in the future how much and what to use. If the fireclay solution falls off the spatula, you should add more clay and check the density again, and when it does not flow down vertically, then you should add sand.
It is important to mix the correct mortar, because if it is greasy, then when it dries, the structure will become covered with cracks, but if you mix a thin mixture, the masonry will not be strong.
Good to know: How to dry a stove after laying and when it can be lit
How long does fireclay clay take to dry?
Experienced craftsmen say that a large oven can contain a whole barrel of liquid. It is contained in a composition that seals all the seams of the structure and firmly fastens the bricks together into a single reliable thermal system. In order to remove all moisture from a newly built stove and allow the fireclay composition to dry completely, it is necessary not just to wait, but to gradually and slowly heat the stove with a small amount of firewood, thereby helping the moisture to leave the pores of the clay. It is important to observe the ambient temperature - clay contains a large amount of moisture at temperatures below 10 Co, which looks light and dry from the outside.
To drive this moisture out of the composition, you need to maintain the temperature outside the oven in the region of 18-20 Co. You need to heat the stove 2 times a day with a very small amount of firewood - about 4 logs each time. The stove should operate in this mode for approximately 6-10 days (depending on the size of the stove and the depth of the masonry) in the summer and about 2-3 weeks in the winter. Until the structure is completely dry, the stove cannot be used!
In conclusion, it is worth saying that it is absolutely not necessary to resort to the services of experienced stove masons in order to put together a structure for which, in most cases, fireclay clay is used. However, if the homeowner is not sure that he will succeed, and it is a pity to waste material on experiments, then it is better to turn to professionals.
Instructions for use, consumption of solution, how long it takes to dry
Working with fireclay clay is not easy; many beginners have problems: the masonry turns out to be fragile, cracks appear on the plaster and it crumbles. This happens because when fired, kaolin clay almost completely loses its plastic properties, and when mixing the solution, it needs to regain its plasticity. To do this, add special glue or ordinary quartz sand to the solution.
How to use and breed
Dilute fireclay powder with ordinary water. The proportions are taken depending on the further use of the resulting solution.
Possible problems
Fireclay composition for masonry has practically no negative reviews from builders; it is difficult to imagine a more reliable solution for stoves. This material is very durable, lasts a long time, without compromising reliability. It is environmentally friendly, safe and does not deteriorate from external influences of temperature and moisture. Adhesion is at the highest level.
However, all these advantages do not exclude the presence of some disadvantages that are worth considering:
- the cost of fireclay composition is quite high, the production of this material is associated with technical difficulties;
- the dust of the composition is very fine and can damage the respiratory system if protective equipment is not used;
- the solution cannot be stored for a long time, you need to carefully calculate how much of the composition you need on a particular day;
- the required consistency can be difficult to achieve even for a professional: after three days of swelling, the composition may turn out to be completely different from what is needed, this is influenced by the level of humidity and temperature;
- To achieve the ideal consistency of thickened sour cream without lumps, you need to take your time, add water in small portions, control the amount of components and the resulting composition so that it does not go to waste and is of really high quality.
Ready-made formulations
Of course, it is more convenient to use ready-made masonry mixtures, which you only need to dilute with water and stir according to the instructions. The advantage is obvious: there is no need to wash sand, sift components, or wait for the clay to swell. Many of them even speed up the laying process, as they have fast setting. But if you're on a budget, check out the cheaper option outlined above.
Ready-made masonry materials include powdered mixtures and adhesives for masonry stoves.
Powdery
Special powder mixtures for laying stoves. Usually these are prepared, standard mortars for masonry - clay (clay-sand, fireclay mixtures), cement, lime, requiring dilution with water.
Advantages:
- The components have already been selected and purified;
- Usually special modifiers are added to improve ductility, strength, and heat resistance;
- Information about the area of use and guidance is on the packaging.
Disadvantages - they are more expensive than making them yourself.
When purchasing a mixture, pay attention to its consistency. Do not buy mixtures with lumps, open packets from your hands, or those that have been stored in questionable conditions.
Heat resistant adhesives
Advantages:
- Information about the solution is on the packaging, including the recipe for its preparation;
- Preparation of the solution takes about half an hour;
- Sets quickly;
- Excellent strength and fire resistance.
Cons: high cost.
Adhesive mixtures are divided into 3 types:
If you have never done this before or seen it in practice, our advice is this: invite someone with experience in this area. Unlike fireplaces, stoves retain combustion products in the chimney and the slightest crack due to improperly mixed masonry mixture practically guarantees carbon monoxide poisoning, and sometimes the collapse of the masonry and fire.
Preparing the necessary materials
First of all, it is necessary to dwell on one point. Thanks to technological progress and the widespread production of building materials, there is currently one technique using which it is not difficult to prepare clay for laying a stove.
The technology is suitable for those people who do not have practical experience in this area, as well as for those who decided to invest once, build a brick structure in their home and never worry about it again.
We are talking about a wide range of ready-made masonry mixtures. They are available for free sale and are packaged in branded bags. All you need to do is purchase the required amount of material and, using the recommendations on the packaging, dilute it correctly.
The disadvantage is that such a solution for laying a stove is not cheap, and if it is prepared incorrectly, it will be impossible to use, and this is an additional expense. Knowledge in the field of traditional creation of masonry mixture will help you save.
First of all, it will be necessary to obtain clay of the type that is available in a particular region. It will be most convenient to stock up on it in those places where mining has already been carried out on the ground, in ravines or under the river coastline.
After the raw materials have been extracted in the required quantity, they should be transported to the place where the structure is supposed to be erected. Fireclay clay is poured into a prepared container and filled with water. Liquids and material should be taken in a ratio of 1:4 according to volume. Soaking lasts for 48 hours. When the time is up, you will need to mix the mass into a homogeneous consistency. This process is most easily accomplished using a construction mixer rather than tinkering with your own hands.
The hammer drill makes the job much easier
Next, you need to strain the mass through a mesh with cells measuring 3x3 mm, which will make it possible to rid the material of various impurities and stones. Unfortunately, it is almost impossible to obtain sand in the same way. Firstly, it lies deep, and secondly, it can be punishable by administrative liability, so it is better to buy it legally.
Good to know: Why iron stoves heat a room faster than brick stoves
A high-quality solution can only be made if you use dry sand, preferably pre-cleaned. Adding wet material is not acceptable, so if it gets wet, it needs to be given time to dry. When the mass is dry, it is also sifted through a mesh with cells of about 1.5 mm.
Once you have figured out what fireclay mortar is, and have also prepared all the components, you can begin the mixing procedure.
Is it worth buying a ready-made mixture?
Undoubtedly, a factory-made mortar purchased on the construction market will be more reliable when plastering the stove. They are made from special components for interior decoration, which give the mixture many useful properties: it will be able to withstand higher temperature changes (up to +200...+250⁰C).
Plastering a stove with such a solution is practically no different from the process of applying a clay solution prepared by yourself. In addition, all factory mixtures have special instructions, which indicate the subtleties of working with the composition you have chosen.
The disadvantage of this approach is the price: the cost of a solution prepared by yourself will be slightly lower than the cost of a product purchased on the market.
When can you light the stove after laying?
There are two main stages in the oven drying process:
- Natural drying of the stove after laying for 5 - 7 days. At this time, heating it with wood is strictly prohibited, since the main removal of moisture from the structure occurs
- Drying by heating lasts from 7 to 14 days, depending on the intensity and number of ignitions of the oven.
In total, the entire process from laying the last brick to complete drying and full use of the stove takes about 2 - 3 weeks.