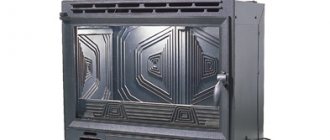
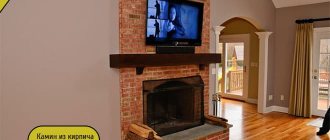
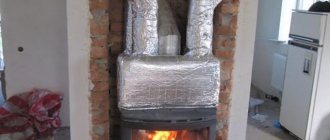
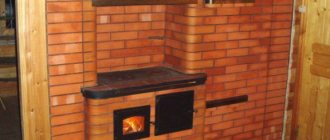
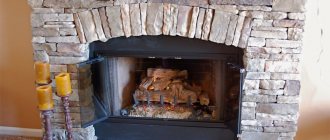
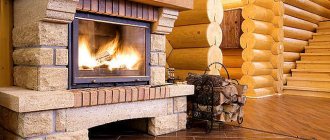
Cast iron firebox with glass
A fireplace is a symbol of home and comfort. For a country house and cottage, this is also a way to heat the house, so in this article we will talk about how to choose the right inserts for cast iron fireplaces with glass and install them yourself.
Having decided to install a fireplace in their dacha, people wonder which firebox to choose. Today you can find many options on the market and each of them has its pros and cons.
One of the main parts on which the effectiveness of a fireplace depends is the firebox. It is the “heart” of the fireplace where fuel is burned. The duration of operation of the fireplace and its performance depend on the material, design and successful installation of the firebox.
Fireplace in the country
Types of fireplace inserts
Before considering the type of firebox, let's remember that the design of a fireplace includes 3 main elements:
- chimney;
- outer facing part;
- firebox
Basic elements of a fireplace
There are two types of fireboxes: open and closed.
The first option is more cozy and romantic. It’s so nice to sit in front of an open fire on a cold evening, admiring how the logs burn in the fireplace. But this design has a number of disadvantages:
- Insecurity. You cannot leave such a fireplace unattended.
- Inefficiency. Approximately 15% of the heat remains in the room. The rest evaporates through the chimney.
Therefore, the open-type design can be safely called decorative luxury, which allows you to create an atmosphere of warmth and comfort in the house. In addition, it will not be possible to regulate the fuel combustion power in such a fireplace. The only way of adjustment is a view, which allows you to open or close the damper in the chimney by controlling the draft. Such a design will not be used effectively as a heating system.
Open firebox type
But a closed fireplace is much more efficient to use for heating a country house in cold winter or in the off-season. It will not only perform a decorative function, being the main decoration of the living room, but also provide effective heating of the room.
Stylish fireplace with closed firebox
The efficiency and high performance of a fireplace with a closed firebox is due to a completely different operating principle compared to an open design. Heat accumulates inside the firebox and does not come out with combustion products. Thanks to this, a high efficiency is achieved. With a properly installed fireplace, the efficiency reaches 90-92%.
In addition, modern manufacturers equip closed fireboxes with a long-burning system (wood smoldering system), thanks to which the heat can be maintained for up to 12-15 hours after one filling. This is not only effective, but also very economical. You can adjust the degree of oxygen supply, which affects the intensity of combustion, using the knob.
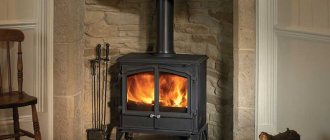
Closed fireplace
With such a heating system, you can calmly go to bed, and the fireplace will slowly release heat. The next morning, the house will have a good temperature and atmosphere.
The advantages of a closed firebox include:
- High performance (up to 92% efficiency).
- Residual combustion products (ash and ash) are collected in a special ash pan, which guarantees cleanliness in the house.
- High fire safety. There is no chance of sparks hitting the flooring or furniture.
- Long service life.
- Fuel efficiency.
- The fireplace can operate automatically without the constant presence of a person and control of the flame.
- Possibility of adjusting combustion intensity.
The disadvantages of a closed type of firebox include narrow glass in budget versions, which makes it impossible to admire the open flame.
Closed cast iron firebox
It should be noted that a closed type of fireplace can be made from an open structure. To do this, it is necessary to insert a closed cast-iron firebox into the overall structure of the fireplace. The firebox itself is a fireplace insert (cassette), which is closed with a glass door.
This liner is connected to the chimney, from where combustion products are then removed.
Hull masonry technology
It is not difficult to guess that each master begins work according to his own personal scheme, which provides step-by-step instructions. We will describe the most popular of them.
- The pedestal is laid out in several layers of bricks with regular shapes. It has a cavity that will serve as an ash pan, but the main portion of air enters through the gap between the walls of the fireplace and the combustion chamber.
- Do not rush into work, as a special degree of accuracy is required at this stage. After installing the next row, you should check the horizon. You can turn the bricks with a mallet. Excess fragments of the solution are immediately removed.
- The ash pit is completely covered by the fourth row, but how to provide support for the bricks above the void? The answer is to use corners that are laid parallel, these corners will support the masonry. Having filed each brick with a grinder, we build a base on which we will install the product. Don't forget about the level, check it.
- Before installing the fireplace insert with your own hands, let the masonry dry a little; you may have to make some changes. Any cast iron fireplace should have a mantel; this is a horizontal surface that is decorative. The shelf can be cut out of a piece of porcelain stoneware. The edges of its contact with the wall are deepened, providing additional support. Now everything is ready to continue working.
- The installation of a cast iron firebox itself is not difficult. The contact area between the firebox body and the stove is treated with heat-resistant sealant or glue. The firebox must not be moved close to the wall. Measure the distance from the back wall of the chamber to the wall of the house on one side and the other several times. Equality of indicators indicates that the design is straight and symmetrical.
- All joints formed by the installed firebox and mantelpiece are sealed with gypsum mortar. The cladding of a cast iron firebox consists of laying a brick frame around it. As before, it is necessary to observe the level when laying. Another similar slab is attached on top of the masonry. It is recommended to apply more glue under it, since with its help you may have to adjust the desired level. Remaining glue is immediately removed.
- When laying out the cladding, you can use creativity. If the outer bricks are pushed forward more with each row, you will get a cornice along the perimeter of the portal, and some facing bricks are already specially prepared for this; they just need to be laid in the last row.
Advantages and disadvantages of a cast iron firebox
Now that we have decided on the type of fireplace design, we need to choose the material for the firebox. The firebox can be lined with fireclay bricks or made of cast iron or steel. Unlike steel structures, cast iron fireboxes are inexpensive and practical.
Cast iron fireplace in the country
The advantages of such cast iron fireboxes include:
- fire resistance;
- resistance to deformation;
- ease of installation;
- low price;
- high performance;
- good thermal conductivity;
- excellent chamber sealing;
- the ability to warm up a room of up to 300 square meters;
- high heat storage capacity.
The special design of the cast iron closed firebox with glass allows you to accumulate thermal energy and release up to 70% into the room.
The outer part of such a firebox is covered with a special protective paint that can withstand high temperatures of up to 700-700 degrees Celsius. The front side is equipped with a glass door, which allows you to monitor the intensity of the flame, admire the hearth and add firewood.
Cast iron firebox
And the lower part of any combustion chamber requires the presence of an ash pan. This is the place where combustion products accumulate: resins, ash, ash. This part of the fireplace also performs another function. As you know, the combustion process cannot occur without oxygen. It is through the ash pan that air enters the cast iron combustion chamber.
The disadvantages of cast iron fireboxes with glass include:
- small view of the viewing window;
- the window quickly becomes covered with soot, which further reduces the view;
- All products are produced in black, which does not allow you to vary the design of such a fireplace.
But the last point can be easily corrected if you install a decorative grille on the fireplace in the form of a bronze openwork mesh.
Chimney
Now the work related to the implementation of the main task has ended. As we noted, installation of the firebox occurs without certain difficulties, but there is a large number of related works, so the whole process takes a long time.
The chimney in a cast iron fireplace is represented by a pipe; this will make the task of its installation easier, since you will not have to do brickwork. The pipe is hidden under a frame made of a metal profile. From the outside, the frame is covered with plasterboard, but thermal insulation must first be carried out. It will prevent the formation of condensation and increase the service life of the pipe.
Finishing of the building begins
The insulating material is laid in a frame around the chimney. It is most convenient to sew up the two side walls of the frame and lay insulation through the facade. When everything is ready, you can install the facade sheet. Assembling the chimney is quite quick if you have the skill to work with drywall.
The goal of installation is always fire safety. It is better to spend time during construction than to later become convinced of the destructive power of fire. The most vulnerable areas are those where the pipe runs very close to the ceiling. The gap can be finished with metal, but since this element will be hidden by the chimney body, they are limited to mineral wool.
All that remains is to work on the chimney
How to choose the right firebox?
Having decided on the type of design and material for making the firebox, all that remains is to choose a model. What parameters should you use to choose a cast iron firebox, given that the market today offers many different models and manufacturers?
- Furnace power.
This is perhaps the main parameter on which the efficiency of the fireplace will directly depend. In order to choose a fireplace that will actually heat the room, and not just perform a decorative function, you should correctly calculate the area of the room. The furnace power we need will depend on this parameter.
The power of the firebox depends on the area of the room
Also, the power of the firebox determines its weight, diameter and length of the chimney.
We calculate the total area of the room using the standard formula:
We measure the length and width of the room in meters, multiply the results. Now that you know the square footage of the room, you can determine the required furnace power.
We measure the area of the room
Important! Consider not only the total area of the room, but also the number of windows, their width, and the presence of doorways. All this will increase power requirements.
We take into account the number and width of window openings
For a room area of 50-100 m2, the furnace power should be at least 10-12 kW.
For a room over 100 m2, choose a firebox power of at least 15 kW.
- Door material. The door is one of the most important parts of the firebox. In order for the door to withstand high temperatures of 750-8000 C, it is made from quartz heat-resistant glass or ceramic crystal.
Attention! Fireplaces with transparent glass doors are made of refractory ceramics. But models with cloudy yellowish glass are made from quartz heat-resistant glass.
The door is made of glass
Today on the market you can find budget models with a small glass door, but you can also buy more expensive fireboxes with double-leaf or curved glass doors. Of course, the difference is purely in decorative functions, because it is much more pleasant to admire the glow of the fire when the fireplace is equipped with a firebox with a large glass door. Improved fireboxes are equipped with doors with automatic window cleaning. Due to the supply of hot air, the glass is easy to clean from dust, soot and soot.
- Firebox shape: regular (front) and angular. Here the choice, of course, depends on the location of the fireplace. The front firebox, in turn, can have the shape of a trapezoid or rectangle.
Corner firebox
The advantage of a conventional front firebox is its affordable price and high performance. Due to the fact that the chimney is located next to the firebox, without unnecessary bends, the draft in such a fireplace will be better. But in a corner firebox, such productivity is reduced due to the remote location of the chimney pipe.
- Glass door shape: flat, circular or segmented. Of course, the most budget option would be to buy a firebox with a flat door. But if you want to add originality to your interior, then pay attention to stylish models with a circular spherical glass firebox.
Semicircular shape of the fireplaceYou can also find a combined type of door, when one part is made of steel, decorated with decorative forged elements, and the view behind the fire is provided by the glass part. This style of stained glass will help add a special touch of comfort and antiquity to the interior.
- Price. The final price of the firebox is greatly influenced by the quality of the glass, so you need to be careful when choosing this product. It can be single-layer or multi-layer. It is also important to consider parameters such as service life and heat resistance. The product passport usually indicates the guaranteed operating time (indicated in hours). And the heat resistance of glass depends on its strength - a parameter specified in the technical data sheet in millimeters. The optimal glass thickness in terms of price and quality is 4 mm.
Recommendations for selection
It is recommended to pay attention to:
- Power. You should not buy powerful units to heat a small room.
- Price. It is impossible to buy a high-quality device for pennies. We need to find a “golden mean”. There is no point in buying cheap stuff from China. It will not last long and may be unsafe.
- Design.
Semicircular
Angular
- Door material.
Glass door
Features of glass doors for cast iron fireboxes
As mentioned above, ordinary glass will not be suitable for installing a glass door in the combustion chamber. It must have a high heat-resistant index.
The main task of such glass is to protect the house from fire, because a fireplace always represents increased fire safety. No matter how beautiful and romantic the process of lighting a fireplace and admiring an open flame is, there is always a risk of fire from the slightest spark.
Glass door of cast iron firebox
Installing such glass in a cast iron firebox requires certain knowledge and skills.
The main difference between heat-resistant glass for fireboxes and ordinary tempered glass is the casting expansion when heated. It does not develop cracks or chips during use. When purchasing glass for a cast iron firebox, pay attention to its maximum temperature. A material of 600 degrees will withstand a long period of time, but if it is exposed to a temperature of 750-800 degrees, then such glass will not withstand even several hours.
The performance properties of glass for fireboxes are affected by the type of fuel. Each type of fuel has its own technical characteristics and maximum combustion temperature. This must be taken into account before purchasing and installing.
Glass door of cast iron firebox
To extend the life of the firebox glass, you must adhere to basic safety measures:
- Do not douse the flames with water in the fireplace. A sudden change in temperature can affect the technical characteristics of the glass.
- Do not use harsh abrasive substances when cleaning the door and combustion chamber. The scratch itself will not violate the technical characteristics of the glass, but soot will accumulate faster at the point where it occurs, obscuring the view.
- The service life is also affected by the correct installation of the door. If the draft in the fireplace is disrupted and the glass is constantly exposed to flame, then such a door will not last long, no matter how durable heat-resistant glass it is made of.
Attention! To ensure a beautiful aesthetic appearance of the glass door, you should monitor the quality of the firewood. If you use well-dried logs, the likelihood of soot formation will be minimized. If you throw foreign debris into the fireplace and use firewood with a high resin content, the door will be constantly covered with soot, ruining its beautiful appearance.
Preparatory stage
Before laying brick over the fireplace insert, you need to go through a mandatory preparatory stage, which is as follows:
Preparatory work stage
Choosing a location
A fireplace insert lined with bricks must have the correct and most convenient location.
To do this, choose the most spacious room, with good ventilation and air circulation.
Pay attention to where the chimney is installed, if it is already in the house, based on this, determine a convenient place for installation.
If the fireplace has an oven or hob, it is recommended to place it in the dining room or kitchen.
Covering a fireplace with brick requires a correctly drawn up and selected diagram, which will display the step-by-step process of work, according to which the heating unit will be assembled.
This procedure can be taken from the Internet, but it is better to seek help from a professional.
Calculation and purchase of building materials
The price of materials and different brands of bricks can be very different. However, it is worth noting in advance that the construction of such a structure is not the most inexpensive and budget-friendly.
According to the prepared diagram, calculate all materials, fasteners and accessories, purchase them with a small margin, since some bricks may have defects and damage that are not noticeable at first glance.
To make the frame you will definitely need a stove brick. You should not save money by buying cheaper silicate, as it does not tolerate high temperatures and their sudden changes.
You can either buy a mixture for masonry work or make it yourself. This composition should be based on sand, cement and clay, which, if desired, can be combined or replaced with plasticizers.
Important: to complete the assembly you also need to buy reinforcing mesh and thermal insulation. If in the future you plan to cladding a brick surface, think in advance about what kind of finish you will use and also purchase it.
Tip: when preparing a mortar for masonry, it is recommended to first soak the clay in water for several days and only then use it to prepare the mortar.
You can learn more about the preparatory stage of work by also watching the video in this article.
Features of installing a cast iron firebox
Of course, installing a fireplace and installing a firebox is a very tricky and tricky business. If you are not confident in your abilities and knowledge, then it is better to entrust this matter to professionals. After all, improper installation of the firebox can be fraught with serious problems, ranging from poor draft to the risk of fire.
If you are confident in your abilities and want to install a cast iron firebox with glass yourself, then we suggest you follow our detailed step-by-step instructions.
The finished design of a cast iron firebox can be purchased at the store, or it can be made in advance. The latter option requires serious skills and professional tools. Therefore, in this article we will dwell in detail on the installation and installation of a ready-made cast iron firebox design.
The installation option also depends on whether you are building the firebox into an already prepared fireplace structure with a chimney or building a fireplace from scratch. If you have decided to replace only the old firebox with a new cast-iron one with glass, and you have a fireplace portal, along with a system for removing combustion products, ready, then feel free to proceed to step 3.
We offer here detailed instructions on how to set up a fireplace with a cast-iron firebox from the very beginning.
Video. Step-by-step installation of a fireplace with a closed cast-iron firebox
Option number 1. Block homemade design
It doesn’t matter whether you are planning to install a fireplace or stove, you need to start by preparing tools and purchasing materials.
Tools and materials
From the tool you will need:
- Master OK;
- hammer and preferably a rubber mallet;
- Notched spatula with a blade width of 100–150 mm;
- An ordinary metal spatula with a blade width of 50–70 mm;
- Containers for mixing the solution (buckets);
- Hammer;
- Screwdriver;
- Mixing attachment for an electric drill or construction mixer;
- Construction bubble level;
- Hydraulic level;
- Plumb line, tape measure, pencil or marker;
- Screwdriver;
- Bulgarian;
- tile cutter (required for brickwork).
You can't build a fireplace without quality tools.
Fireplace installation material
- Red stove brick M-200;
- Facing brick;
- corner 50x50 mm;
- strip 50x5 mm;
- Self-tapping screws and wide washers for them;
- dowels for self-tapping screws;
- masonry mixture for stoves and fireplaces;
- mastic for laying tiles;
- cement and quarry sand;
- Thermal insulation boards 50 mm, preferably foil-coated (superizol or something similar);
- Minirite slab (for installation in a wooden house);
- Porcelain tiles or ceramic floor tiles.
- UD and CD profiles for drywall;
- Drywall sheet;
- 3 decorative grilles for ventilation windows;
- Heat-resistant sealant.
Let's start installation
The installation diagram for a fireplace with a homemade platform is selected individually according to location, depending on the dimensions of the firebox and installation conditions. I will tell you step by step about the simplest option.
| Illustrations | Recommendations |
| Foundation in a permanent house. Compared to a large brick stove, the weight of a small fireplace is not so great, so here you can do without a reinforced concrete foundation. The floor slab or screed is quite capable of supporting such a structure. But you shouldn’t start installing a fireplace directly on bare concrete; the floors, or at least the area under the fireplace, need to be tiled; porcelain tiles are best suited here. | |
| Foundation in a wooden house. To lay ceramic tiles or porcelain stoneware under a fireplace in a wooden house, you need a durable heat-resistant layer. We will use minirite sheet with a thickness of 15 mm. It is not advisable to use an asbestos cement sheet, since its thermal conductivity is higher, which means it will get very hot. We fasten the slab to the floor with self-tapping screws, clearly under the chimney, on the center line. To make it easier to navigate, you need to lower a plumb line from the chimney hole in the ceiling; in the photo on the left it is shown with an arrow. | |
Laying tiles. It is advisable to lay the tiles end-to-end under the fireplace, without seams.
On the sides, the base is made wider than the future fireplace by at least 150 mm, and in front of the firebox doors there should be a platform of at least half a meter. If the fireplace is installed on the upper floors, then there is a limitation on the weight of the structure:
| |
| Laying the first row. We will lay out the fireplace body from red stove brick M200, although in this case you can also use facing brick, it is lighter but more expensive. We place the platform on a cement-sand mortar, and the frame around the firebox on a heat-resistant clay-fireclay mixture. The first row of the platform is made solid. | |
| 2nd row. Starting from the second row, the platform is laid out in the form of the letter “P”. In addition, near the arch of the letter “P” a square brick column is laid in the center. | |
| 3–4 rows. These 2 rows are laid out exactly the same. In total, the height of the platform will be 4 rows of bricks.
| |
| Laying out the slab near the firebox. The bottom plate of the firebox is one of the most noticeable places. We will lay it out of shaped facing bricks, but if you have the funds, you can order a slab of natural or artificial stone. On the back side, a ceiling (arch in the center) made of shaped bricks is supported by a 50x50 mm corner. Plus, 2 more strips of 50x5 mm are laid under this overlap. The slab protrudes beyond the platform by a quarter of a brick. | |
| Laying side overhangs. The width of the side overhangs is determined individually; if space allows, then shaped bricks can be laid at full size, then the corners are cut at 45º. In this case, the side overhangs were made a third of the way from the façade platform; accordingly, the corners were cut off individually. We lay out bricks from the inside for installing the firebox. | |
| Installation of the firebox. We installed the firebox with the approach to the façade slab. On the back side, the firebox rests on the same square column, and on both sides of the column we have 2 small gaps. These gaps are needed to ensure air leaks from below; they must be there. | |
Gaps. Do not try to make the brick “jacket” for the fireplace insert too bulky.
| |
| Rear thermal insulation. In this case, we decided to lay stove bricks behind the firebox, but this option is only suitable for plastered block walls. Instead of back brickwork, you can attach thermal insulation with a thickness of 50 mm or more to the wall, for example, superisol or foil-lined basalt wool. This insulation is attached to self-tapping screws.
| |
| Protection. In a wooden house, the wall in the area of the fireplace will need to be treated 2-3 times with a fire retardant and when the wood dries, the wall will need to be covered with thermal insulation. | |
| Box laying. The height of the front part of the firebox was 7 rows of bricks. The first 6 rows are laid out evenly, and in the 7th row there is an overhang of 25 mm. In the 8th row, an overhang of 25 mm is also laid out. This is a purely decorative protrusion and is optional. | |
| Laying the pediment above the firebox. We made the upper gable from ordinary facing bricks, the technology was the same as when laying the lower slab.
| |
| Top plate. Since the facing brick on the upper pediment of the firebox was installed on edge, the rest of the masonry turned out to be below the upper cut of the pediment, so it was decided to fill the missing space with cement-sand mortar. To do this, we installed formwork around the perimeter of the masonry box. | |
| The cement-sand mortar for pouring the slab is made using the usual 1 part cement, 3 parts sand. We laid a reinforcing mesh inside the slab. By the way, in order for the slab on top to be perfectly level, the formwork is mounted clearly along the horizon, and after pouring the mortar is simply “cut off” with a wide spatula. | |
| Chimney finishing. Installation of a fireplace chimney indoors consists of 2 parts:
The photo on the left shows the structure of the supporting cage for the frame. The cage is assembled on the basis of metal UD and CD profiles for drywall and screwed together with metal screws (fleas). The design consists of two sectors, in the lower sector a regular steel pipe is mounted, and in the upper sector a sandwich pipe with a heat-insulating layer is already connected. | |
| Installation of insulation. Installation and installation of the box is also carried out in 2 stages:
All joints of heat-insulating sheets from the inside must be taped with foil tape. Ventilation hatches are cut on both sides of the box, then we will cover them with decorative grilles. | |
| Sector separation. The lower and upper sectors of the chimney duct also need to be separated from each other; they should not communicate in any way. We also use foil insulation board for fireplaces and stoves as a separator. All joints are coated with heat-resistant sealants and sealed with foil tape. | |
| Assembling the box for the chimney . Step 1. Cover the lower sector with thermal insulation and install a sheet of drywall on top of it; | |
| Step 2. We arrange a ventilation window in the center of the upper box and thermally insulate the plane around the window; | |
| Step 3. Attach the top panel of gypsum cardboard and insert decorative grilles into the ventilation openings. | |
| Trial by Fire. It is advisable to light the firebox no earlier than after 3-4 days; you need to let the masonry mortar dry. Now all we have left is the decorative trim of the fireplace and chimney:
|
Carrying out maintenance
In order for the fireplace to serve for a long time, you should adhere to the basic rules of operation:
- it is impossible to forcibly increase the combustion force by replacing firewood with another fuel or coal,
- Under no circumstances should the flame be doused with water.
- The system should be serviced at least once every two months.
After each kindling, a 1 cm thick layer of ash should be left on the bottom of the fireplace insert; the body itself should be cleaned with a rag and warm soapy water. It is obtained by adding liquid soap to water, since liquid soap has a lower degree of acidity. It is recommended to clean the inner walls several times a year with a stiff metal brush in order to remove carbon deposits.
It is necessary to provide a technical hatch in the design of the firebox in advance for the convenience of servicing the fireplace. It is also advisable to take care in advance about the possibility of cleaning the chimney pipes from creosote. It is formed during free combustion, when, during the process of gas release, smoke and steam are mixed, and the resulting sediment accumulates on the inner walls of the chimney. It is important to remember that creosote produces a very strong flame when ignited, so periodic cleaning of the chimney should be carried out to remove sediment. Intensive operation of the fireplace can significantly reduce the level of creosote formation.
The use of wood, especially wet wood, leaves soot marks on heat-resistant glass in a closed firebox. They can be removed quite easily using simple alcohol-based glass cleaners, which allows cleaning work to be reduced to a minimum. In general, it is worth saying that if you carry out maintenance work on the fireplace and firebox in a timely manner, the structure will last quite a long time.
DIY assembly
In order to properly brick the fireplace insert, it is necessary to carry out all work strictly in stages. The first stage is the assembly of the lower base of the furnace.
Assembly instructions:
- The lower part of the base is shaped like the letter M. In order for the fireplace to have the necessary stability in the future, each of its angles must be ninety degrees;
- We prick the first row in the shape of the letter M. Next, each row should lag slightly behind the previous one by about half a brick, thus the structure will have T-shaped joints;
- The number of rows from which the lower base of the furnace unit is assembled depends on the order you used. On average, their number can range from 3 to 7;
Laying is done at a slight bevel
The first rows should go at the same angle
The key point is to assemble the first rows of the fireplace
- At the location of the firewood box, it is necessary to make several gaps. There should be enough of them so that air masses can circulate and move freely, but not too quickly. These gaps are the entrance for cold air masses that will enter the interior of the furnace.
Creating a shelf
In order for the design to be as convenient and functional as possible, we advise you to additionally equip it with a small tabletop or so-called shelf. Knowing how to line the fireplace insert from the bottom, you can proceed to the next stage.
Tip: this element is a reliable support for the combustion chamber. To create maximum comfort and convenience, you can install and place two shelves at once (bottom and top).
Step-by-step assembly of the shelf:
- Based on the size, shape and design features of the planned structure, you need to cut out the formwork from wood;
- Bricks are cut using a grinder according to the dimensions of the shelf;
- The brick is laid out in formwork and reinforced. For reinforcement, you need to use pre-prepared metal rods with a thickness of 3 to 7 millimeters;
Wooden shelf assembly diagram
If desired, a shelf or tabletop
The countertop makes the stove unit
The mantel serves as additional support
- This formwork is completely filled with cement mortar. We compact it in such a way that there are guaranteed to be no voids inside;
- We remove all excess solution from the side parts and leave to dry completely for 2-4 days.
Chimney pipe laying
After the installation of the main part of the fireplace is completely completed, it is necessary to begin the construction of the chimney pipe.
Important: depending on how quickly you want to complete all the construction work, you can make either the simplest chimney, which has standard straight outlines and shapes, or a more complex one (having a tendency to gradually narrow).
How to brick a fireplace, a step-by-step guide to assembling a tapered chimney:
- We calculate the optimal angle of inclination of the structure. The angle should not be more than 4-5 centimeters, this can lead to interruptions and improper operation of the traction mechanism;
- Each row should have the same angle of inclination;
- In order for heated air masses to escape and heat the room, at a height of 25-35 centimeters, you need to make several small holes that will act as ventilation;
Features of furnace installation depending on the material
According to the shape and design of the furnace, there are:
- horizontal;
- vertical;
- cylindrical;
- rectangular.
They are made from:
- cast iron;
- metal (steel, iron);
- bricks
Some models are equipped with a grid for stones and a tank for heating water.
Cast iron
Cast iron is an alloy of metal (iron, graphite, carbon). This is an environmentally friendly and safe raw material.
Advantages of a cast iron stove:
- Long service life - 30 years or more.
- The creation of the structure does not involve welding. The absence of seams has a positive effect on the quality and service life of the product.
- The material is highly resistant to temperature changes. He is not afraid of deformation.
- Heating rate. Cast iron heats up quickly and retains heat well. Such a stove can heat a large sauna in 2–3 hours. One load of fuel lasts up to 9 hours of heating.
- The device is assembled from individual elements connected to each other by locks. If one part breaks, it is easy to replace.
- A cast iron stove will fit perfectly into any room design.
Among the disadvantages of the unit:
- Heavy weight. It will not be possible to install such a structure alone. Its average weight is 200 kg.
- It is susceptible to corrosion, so it is not recommended to place such a stove directly in a steam room.
Any cracks or damage to the product must be repaired in a timely manner to prevent a fire.
The stove will look great in the dressing room or rest room.
Steel (iron)
Among owners of summer cottages and country houses, metal stoves are in great demand due to the availability and low price of the material compared to other types.
Advantages of metal stoves:
- Light weight of the finished product - from 80 kg.
- Many stove models do not require a separate concrete foundation to be poured.
- The oven will be easy to install. One person can handle this.
- Compact size - it won't take up much space.
- The metal heats up quickly, releasing heat, reducing fuel consumption.
- The housing is completely sealed. The risk of carbon monoxide leakage is minimal.
- Affordable price of finished products.
- You can make the oven yourself.
Among the disadvantages of the device:
- Rapid cooling of metal. To maintain a comfortable temperature in the premises, you will have to constantly heat in winter.
- Strong heating of the metal dries out the air.
- Hot surfaces not protected by partitions can cause burns.
- Steel and iron in conditions of constant humidity without additional protective treatment will quickly begin to rust.
In bathhouses with wooden floors, additional protection should be given to the areas around the stove by installing a covering made of non-combustible materials. The same applies to products with 4 legs. The floor underneath them, without protective flooring, will gradually collapse.
Brick
The furnace is laid with refractory bricks (fireclay), and the finished product is lined with ceramic.
Advantages of a classic heater:
- Long-term heat retention.
- Fire safety.
- Ability to heat large areas.
- Soft water vapor is produced.
- The building warms up evenly and gradually.
- The material is non-flammable and resistant to temperature changes.
- Durability. A properly laid stove will last for decades.
But this design also has disadvantages:
- Difficulty of masonry. Without knowledge of ordering technology, it is not worth taking on construction.
- High cost of materials and work.
- The large weight of the finished product requires pouring a reliable foundation.
This material will be useful:
- Installation of a foundation for a brick oven
- Which brick for the stove is better to choose?
Principle of operation
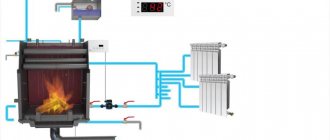
The key to an air-heated fireplace is the casing and ductwork throughout the home.
Principle of operation
The thermal casing of the fireplace not only accumulates heat, but also allows it to be redistributed in the desired direction. This minor detail greatly improves the efficiency of heating a room with a fireplace and increases its efficiency.
The convection method of heating a room works on the simplest laws of physics. The warm air that comes from the lower pipes rises and heats the room.
Fireplace with air jacket
Thanks to a special liner located in the firebox, the air is heated. In this case, the liner is surrounded by pipes that are connected to the pipe distribution. Due to the operation of fans, warm air begins to move and quickly moves around the room, heating it.
Diagram of air heating in the fireplace
Also, air movement can occur not due to forced ventilation, but due to the force of gravitational attraction. The temperature difference between cold and hot gas ensures air movement throughout the room.
But in this case, the number of pipe turns should be minimal, otherwise the gravity system will not be able to ensure natural air circulation.
Circulation of warm air in the house
Thus, the operation of a convection fireplace is realized in two ways:
- The upward flow from the fireplace insert lifts warm air to the top of the room.
- A downdraft, on the contrary, directs cooler air towards the firebox.
If the owner is faced with the task of heating a large house using one standard fireplace, then he will have to make a more complex air duct circuit, where hot air will be supplied to the rooms due to the operation of fans.
Scheme of operation of air heating in the house
With the correct organization of the system and strict compliance with all the laws of physics, with the help of one fireplace with an air casing, you can heat even a two-story house.
Fireplace linings
- Bestseller
- Style: classic
- Material: natural stone
- Style: rustic, country (with shelf)
- Material: marble
- Style: modern, art, nouveau
- Material: artificial stone
- Style: rustic, country
- Material: marble, natural stone
- Style: Rustic, Country
- Material: Marble, Natural stone
- Style: classic
- Material: natural stone
- Style: Middle Ages
- Material: marble
- Style: rustic, country (with shelf)
- Material: marble, natural stone
- Style: rustic, country
- Material: marble, natural stone
- Style: modern, art, nouveau
- Material: marble, natural stone
- Style: Rustic, Country
- Material: Marble, Natural stone
- Style: classic
- Material: natural stone, sandstone
- Style: Middle Ages
- Material: marble
- Style: rustic, country (with shelf)
- Material: marble, natural stone
- Style: rustic, country (with shelf)
- Material: marble, natural stone
Convection zone
If heated air is not used, there must be a gap of at least 6 cm between the firebox and the insulation layer (4, 15) for the rear and side areas. The convection zone must be isolated from all walls, with the exception of the walls that form the heat exchanger. The walls, floor and ceiling of the convection zone must be clean and abrasion-resistant. All convection pipes must be made of non-combustible materials. When laying the corrugation for supplying hot air: the corrugation must be securely connected to the hot air flange on the inlet grid. Operation of the air grid (hypocaust): heated air circulates in a closed space. Heat from the convective zone is transferred into the room through heat exchange zones. The heat load in the hypocaust convection zone is higher than that of conventional ventilation grilles.
