—>
05 Dec 2022 | Section: Electrics
Hello, dear readers of the site sesaga.ru. Tubular electric heaters ( TEH ) are designed to convert electrical energy into heat. They are used as a basis
in heating devices (devices) for industrial and domestic use that heat various media by convection, thermal conductivity or radiation. Tubular heaters can be placed directly in the heated environment, so their scope of application is quite diverse: from irons and kettles to furnaces and reactors.
Heating element device.
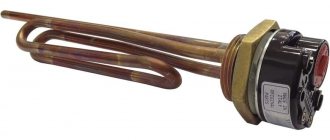
The heating element is an electric heating element made of a thin-walled metal tube (sheath), the material for which is copper, brass, stainless and carbon steel. Inside the tube there is a spiral of nichrome wire, which has a high electrical resistivity. The ends of the spiral are connected to metal leads with which the heater is connected to the supply voltage.
The spiral is insulated from the walls of the tube by a compressed electrically insulating filler, which serves to remove thermal energy from the spiral and securely fixes it in the center of the tube along its entire length. Fused magnesium oxide, corundum or quartz sand is used as filler. To protect the filler from the penetration of moisture from the environment, the ends of the heating element are sealed with thermal and moisture-resistant varnish.
The heater leads are insulated from the walls of the tube and rigidly fixed with ceramic insulators. The supply wires are connected to the threaded ends of the terminals using nuts and washers.
The heating element works as follows: when an electric current passes through a spiral, it heats up and heats the filler and the walls of the tube, through which heat is radiated into the environment.
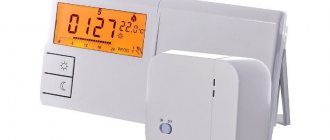
- Mechanical thermostat (thermostat) Ballu BMT-1
fins are used to increase heat transfer from heating elements.
, made of material with good thermal conductivity. As a rule, corrugated steel tape is used for fins, wound in a spiral on the outer shell of the heating element.
The use of such a design solution helps to reduce the overall dimensions and current load of the heater.
Finned tubular type electric heaters
Finned heaters also belong to the tubular type of elements, but they also have ribs that are located in planes perpendicular to the axis of the heater tube. Such ribs are made from metal tape, and they are attached to the tube using washers and clamping nuts. The device itself is made from stainless steel or structural steel.
This type of heating elements are used in heating devices that heat air or gas. They are often found in devices such as thermal curtains or convectors (read: “Electric heating convectors: how to choose - little tricks”). They are used to heat rooms using thermal air mass.
Schemes for connecting heating elements to a single-phase network.
Tubular electric heaters are designed for a specific power
and
voltage
, therefore, to ensure the nominal operating mode, they are connected to a supply network with the appropriate voltage.
According to GOST 13268-88, heaters are manufactured for rated voltages: 12
,
24
,
36
,
42
,
48
,
60
,
127
,
220
,
380 V
, however, heating elements designed for voltages of 127, 220 and 380 V are most widely used.
Let's consider possible options for including heating elements in a single-phase network.
2.1. Plugging in.
Heating elements with a power of no more than 1 kW (1000 W) can be safely plugged into an outlet through a regular plug, since the majority of electric kettles and boilers that we use to heat water have this power.
in parallel via a regular plug
two heating elements, but both heaters should have a power of no more than 1 kW (1000 W), since when connected in parallel their total power increases to 2 kW (2000 W). Thus, you can turn on several heaters, but their total power should be no more than 2 kW, and to plug into an outlet you must use a more powerful plug.
- How to connect the BALLU IR heater to a thermostat?
There may be a situation when you have several heaters lying around at home, designed for an operating voltage of 127 V, you can’t throw them away, and you can’t plug them into the home network. In this case, the heaters are turned on sequentially
, which makes it possible to apply increased voltage to them. When two heaters with a voltage of 127 V are connected in series, their power remains the same, but the total resistance doubles. For example, when two 500 W heaters are turned on, their total power will be 1000 W.
However, this scheme has one drawback: if any of the heating elements fails, then both will not work, since the electrical circuit will break and the power supply will stop.
You must also remember that when two heaters with an operating voltage of 220 V are connected in series, their total power decreases
twice as much, since due to the increase in total resistance, each heater will receive about 110 V instead of the required 220 V.
2.2. Switching on via circuit breaker.
It will be much more convenient if voltage is supplied to the heating elements using a circuit breaker. To do this, it is necessary to provide a machine in the house panel, or install the machine directly next to the heating device. The voltage supply and shutdown will be carried out by turning on/off
circuit breaker.
The next option for turning on the heaters is carried out with a two-pole switch, which is the most preferable, since in this case the phase and zero are broken simultaneously and the heating element is completely disconnected from the general circuit. Voltage is supplied to the upper terminals of the switch, and the heater is connected to the lower terminals.
If an electric heater is used to heat water and the house is grounded
, then to protect against electric shock in the event of a breakdown of the heater insulation, it makes sense
to install an RCD
or a circuit breaker.
- Connection diagram for a heated floor via a contactor
In this case, the grounding conductor
connected to the heating element body or connected to a special screw fixed to the container body. Next to such a screw there is a grounding sign. Let's consider a circuit with a difavtomat:
Protection with a difavtomat works as follows: when the heater insulation breaks down, a phase appears on its body, which, using the least resistance, will “go” along the PE
and will create
a leakage current
.
If this current exceeds the setting, the automatic circuit breaker will operate and turn off the voltage supply. If a short circuit
, then in this case the automatic circuit breaker will operate and de-energize the heating element.
When using an RCD, an additional single-pole circuit breaker must be installed between it and the heater, which, in the event of a short circuit, will cut off the voltage supply to the heater and protect the RCD from short circuit current. In the event of an insulation breakdown, the RCD will cut off the voltage supply.
2.3. Operation of heating elements in temperature control circuits.
In automatic temperature control circuits, the supply voltage to electric heaters is supplied through the contacts of starters, contactors or thermal relays. In total, the connection “ heater - thermal relay”
"or "
heater - thermal relay - contactor
" is the simplest temperature controller that can be used to maintain the temperature in rooms or liquid media. The contactor is used in the circuit for multiplying contacts and for switching powerful loads for which the thermal relay contacts are not designed.
The thermostat can operate in the “ Heating”
" or "
Cooling
", which are selected by a switch located on the face of the relay.
We will consider the operation of the heating element in the “ Heating
” mode, since this is the mode that is used most often.
Let's consider the " heater - thermal relay"
».
The 220 V supply voltage is supplied to the input terminals of the two-pole circuit breaker. From the output of the machine, voltage is supplied to the power terminals of thermal relay A1
and
A2
.
Zero is connected to the thermal relay terminal A2
and the left terminal of the heater.
The phase is connected to the thermal relay terminal A1
and is transferred by a jumper to the left pin of contact
K1
and is constantly present on it.
The right terminal of contact K1
is connected to the right terminal of the heater.
The temperature sensor is connected to terminals T1
and
T2
.
In the initial state, when the ambient temperature is above the set value, relay contact K1
is open and no voltage is supplied to the heating element.
As soon as the temperature drops below the set value, a signal will be received from the sensor and the relay will give a command to close contact K1
.
At this moment, the phase through closed contact K1
will flow to the right output of the heater and the heater will begin to heat up.
When the set temperature is reached, a signal will again come from the sensor and the relay will open contact K1
and de-energize the heater.
Let's consider the circuit “ heater - thermal relay - contactor
».
The 220 V supply voltage is supplied to the input terminals of the two-pole circuit breaker. From the output of the machine, voltage is supplied to the power terminals of thermal relay A1
and
A2
.
Zero is connected to the thermal relay terminal A2
, terminal
A2
of the contactor coil and the lower terminal of the heater.
The phase is supplied to the thermal relay terminal A1
and is transferred by a jumper to the left terminal of contact
K1
, the lower power terminal of the contactor and is constantly present at these terminals.
The right terminal of contact K1
is connected to terminal
A1
of the contactor coil.
The upper power terminal of the contactor is connected to the upper terminal of the heater. The temperature sensor is connected to terminals T1
and
T2
.
In the initial state, when the ambient temperature is above the set value, relay contact K1
is open and no voltage is supplied to the heating element.
When the temperature drops below the set value, a signal comes from the sensor and the relay closes contact K1
, through which the phase is supplied to terminal
A1
of the contactor coil.
When a phase appears at pin A1
coil, the contactor is triggered, its power contacts close and the phase reaches the
upper
terminal of the heater and it begins to heat up.
When the set temperature is reached, a signal will again come from the sensor, the relay will open contact K1
and de-energize the contactor, which in turn will de-energize the heater.
If you have any questions about contactors, you can get acquainted with their structure and operation, and also consider contactor connection diagrams.
You can also watch a video about heaters, which explains and shows the operation of each circuit.
Let's finish here for now, and in the second part we will look at the diagrams for connecting heating elements to a three-phase network. Good luck!
Share with friends:
Another interesting read:
—>
The thermostat (TR), or thermostat, plays an important role in heating equipment. This is a universal device that controls heating systems. Its design can be different, but the function is the same: TR stabilizes the temperature of a given environment for a certain period of time. You need to know how to connect the thermostat so that it correctly fulfills its purpose.
Mechanical thermostat
Power calculation formula
One of the important issues when choosing a heater for heating is power calculation. The energy efficiency of the heating system largely depends on this parameter. Excessive power leads to increased energy costs, as well as overload of the electrical network, which can cause a fire. If it is insufficient, the device will be ineffective in maintaining the required temperature regime.
The calculation of the heating element is carried out according to the formula Pm = 0.0011*m(T2-T1)/t, where Pm is the value of the design power, T1 is the starting temperature level, T2 is the final temperature of the coolant in the system, and t is the time for heating to the optimal level.
Let us give an example of calculating the required power for heating a 6-section aluminum heating radiator using heating elements. The calculation will be carried out as follows:
- In the passport of the radiator model you need to look at the volume of coolant. Let's say it is 3 liters.
- It is assumed that the coolant needs to be heated from 20 to 80 degrees. Estimated warm-up time is 10 minutes.
- Let's carry out the calculation using the formula with substitution of values Рм=0.0066*3(80-20)/10 = 1.118.
That is, to fulfill the set conditions, you will need to install a heating element, the power of which will be approximately 1.2 kW. If the initial conditions change, the required power value will also change.
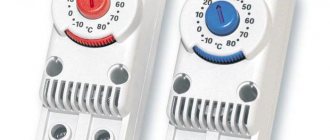
Types of thermostats
How to connect an ammeter
There are mainly 3 types of thermostats:
- Bimetallic plate;
- Thermocouple;
- Infrared sensor.
Bimetallic plate
Under the influence of heating or cooling, the plate bends in one direction or another. Thereby closing or opening the contacts that supply electricity to the heating elements. The plate is a two-layer strip welded from two metals with different coefficients of thermal expansion. Because of this, when heated, expansion forces “force” the plate to bend.
Thermocouple
The element is a V-shaped bracket made of a heat-sensitive metal alloy. A weak current passes through the wire. As the temperature changes, the resistance of the conductor changes, which affects the current characteristics. This factor acts through the control circuit on the heater power relay.
Infrared sensor
The photosensitive film of the sensor perceives the degree of heating of the surrounding space in the infrared range. Passing currents in the device change their characteristics, which affects the operation of the relay system for powering the heating elements.
Site headings
- DC-DC (4)
- Automatic pumping of water from a drainage well (5)
- Automatic (34)
- Car (3)
- Antennas (2)
- Assembler for PIC16 (3)
- Power supplies (28)
- Well drilling (6)
- Life (11)
- Generators (1)
- Signal generators (6)
- Sensors (4)
- Engines (6)
- For the garden (11)
- Chargers (14)
- Radio protection (6)
- Winter water supply for a bath (2)
- Measurements (29)
- Indicators (5)
- Indication (10)
- As my grandfather used to say... (1)
- Switches (5)
- Logic circuits (1)
- Feedback (1)
- Lighting (3)
- Programming for Beginners (12)
- Programs (1)
- Works by visitors (7)
- Radio transmitters (2)
- Radio stations (1)
- Regulators (5)
- Repair (1)
- Homemade products (12)
- Homemade mobile sawmill (3)
- Homemade water supply (7)
- Self-calculations (36)
- Welding (1)
- Alarms (5)
- Directory (12)
- Stabilizers (15)
- Construction (2)
- Timers (4)
- Thermometers, thermostats (24)
- Technologies (21)
- ULF (2)
- Signal conditioners (1)
- Electricity (4)
- (12)
Areas of application of thermostats
In everyday life, an example of using a thermostat would be a washing machine. A temperature sensor connected to a heating element in the tank “monitors” the level of water heating. In a car, the thermocouple of the cooling system “controls” the mode of turning on the radiator fan.
Car thermostat
Various room heating devices of a sufficient level of complexity must have a built-in temperature regulator. Not a single underfloor heating system can do without solid-state thermostats. In a refrigerator, the thermostat is an integral part. In all PCs and laptops, temperature sensors turn on fans, keeping the equipment from overheating. Air conditioners, microwave ovens, electric ovens - they all have thermostats. Various water heaters, electric boilers, gas boilers included in the heating system of buildings and structures operate only together with thermoregulatory control units.
Electronic thermostat
Additional functions of electric heaters
Above we discussed the simplest designs of devices that do not have any built-in adjustment mechanisms.
But electric water heaters can be equipped with simple automation that provides the device with additional functions.
These include:
- Thermoregulation. Heating elements with a built-in thermostat for heating have a temperature sensor that is triggered when the working environment is heated to a certain level. The electric heater is adjusted from the outside of the flange.
- Antifreeze. This function is provided by a simplified thermostat, which operates only when the temperature drops to 0-2°C. It prevents water from freezing in heating pipes, consuming a minimum of electricity.
- Turbo heating, which provides forced heating of the working environment during the initial start-up of equipment. It must be remembered that the electrical wiring of the room must withstand a short-term increase in power.
There are not many devices that support additional functions, because the operation of heating devices as a whole is often regulated using a separate automation unit.
Connecting and installing the thermostat
There are two known options for connecting a thermostat. These are methods for connecting two-core and single-core wires.
Connecting a two-core cable to the thermostat
A two-core wire is used in the case when the TR requires full power from the electrical network for the functioning of a closed system for controlling the heating mode of a certain volume. These are integrated circuits built on microprocessors.
The data received from the sensor in the form of changes in current strength and resistance values are analyzed by the device. As a result, commands are sent to the starter of the heating elements with a given period of time and a boundary threshold for heating a specific space.
Note! An example of connecting a two-core wire is a diagram showing how to connect a thermostat to the circulation pump of a water heating boiler.
Connection diagram to the circulation pump
Connecting a single-core cable to the thermostat
A single-core cable is used in the connection circuit of thermostats in the case when the device itself is installed in the break of the phase wire leading to the positive terminal of the heating element. That is, the cable serves as a phase break in the mains current supplying the heating elements.
Flushing
After the heating elements are removed, the boiler itself must be rinsed with clean water to remove all the rust and dirt that has accumulated inside. Therefore, for a quality replacement, the water heater still has to be removed from the wall.
Rinse the insides with an ordinary tap hose. Pour only a little water, since the boiler with a volume of 50-80 liters will still have to be lifted manually to drain all the scraps. Some people add citric acid when washing, others don’t.
Washing tip: It is best to rinse the tank in the bathroom, placing it vertically on a linen board. Twist the watering can from the mixer shower and insert the hose into the hole where the heating element was.
Connection options
- To the heated floor system;
- To the heating element;
- To the heater.
Connecting a thermostat to a heated floor system
A standard underfloor heating thermostat is supplied with detailed instructions for connecting the device to the underfloor heating system. You can connect the TP yourself using the markings under the terminal blocks.
Underfloor heating mat
On the back of the regulator there are three pairs of terminal sockets for wires. The first pair is intended for connecting a two-core network cable. Socket “L” – phase, “N” – zero.
The second pair of sockets is intended for connection to the underfloor heating terminals – L1 and N1. The fifth and sixth terminals are used to connect to the temperature sensor.
Connecting the thermostat
Floor temperature regulators can be inserted into a socket box or mounted on the wall. The temperature sensor can be either built into the body of the device or installed at the end of an external cable.
In the first case, the air temperature inside the room is measured. In the second option, the sensor measures the degree of heating of the final floor covering.
Connecting the thermostat to the heating element
The thermostat must be connected to the electric heater through a magnetic starter. This is due to the fact that the power of the regulator is far from comparable to the power of heating elements.
A magnetic starter (MP) is needed when the thermostat controls several heating devices at once. The MP is cut into the phase wire in parallel with the thermostat. Adjustment of the operating modes of the heaters is carried out by a thermostat, the supply current passes through the MP. This makes it possible to use a three-phase power supply, which allows the operation of high-power heating elements.
Many TRs are equipped with electronic microprocessors, which additionally provide indicators of the level of humidity, pressure and time required to achieve the values of the specified parameters.
Connecting the thermostat to the heater
Thermostats can be mechanical or electronic. Recently, the second models have been actively displacing their mechanical counterparts. The use of modern electronics makes it possible to more effectively control the temperature in a given environment.
TRs for room heaters are built into heater housings or placed away from heating devices. The regulator, first of all, is connected to the electrical network, then through the control circuit it is connected directly to the temperature sensor.
Additional Information. In most cases, infrared heaters are connected to a thermostat via a magnetic starter. To connect the device correctly, you must strictly follow the instructions provided.
Features of how temperature control devices are connected depend on the type of heating devices. This can be a single-core or two-core connection of TP underfloor heating. The connection of a two-phase thermostat to three-phase current heating elements is carried out only through a magnetic starter. For water heating, the thermostat is embedded directly into the radiator. Each specific case has its own thermostat connection diagram.
How to install your own electric heating system
Before using heating elements in heating radiators, it is worth deciding on the required heating power
It is also important to have information about the characteristics of the electric heating element, in particular its performance. This will avoid wiring burnout and unnecessary costs for purchasing a new cable.
You need to understand that independent installation of heating, if there are some errors, can lead to insufficiently efficient heating of the home or even incorrect operation of the system. In order for everything to function stably, it is recommended to acquire a thermostat. Additionally, it is worth installing a special protective box, the functioning of which is designed for the power of certain heating elements.
The number and performance of devices for heating a house based on an electric heating system is calculated taking into account the volume of the premises. To begin with, average power indicators are selected that are sufficient for high-quality heating of 1 m3 of living space.
Average values for premises:
- with reliable thermal insulation, equipped according to European standards - 20 W/m3;
- with modern double-glazed windows, effective insulation of floors and walls - 30 W/m3;
- with insufficiently reliable thermal insulation - 40 W/m3;
- with frankly poor insulation - 50 W/m3 or more.
Based on the above calculations, the required power for high-quality heating of a particular room is determined. Based on the same values, a sufficient number of heating elements is selected.
Doing the calculations correctly is extremely important. As practice shows, with proper selection of equipment and reliable installation, installing electric heating even in a wooden house becomes an absolutely safe solution.
Installation Tips
Some tips:
- Before purchasing a TR, you need to make sure that the characteristics of the regulator and heating elements are compatible.
- You need to choose to install the device in the most accessible location.
- When deciding whether to purchase a device, you should evaluate the economic feasibility of using a specific thermostat model.
- If you do not have enough experience in installing such devices, then it is better to seek help from specialists.
A person sometimes has no idea about the number of thermoregulatory devices around him. They became a part of everyday life. Their work brings significant savings in energy costs.
Criteria for selecting a device
Before you buy a seemingly simple Ariston device, you can take note of certain points:
- Equipment warranty. When selecting a heating element, warranty obligations cannot be ignored, because the device ensures normal and safe service of the water heater. Incorrect operation of the installed heating element is also manifested in the fact that the water unit will probably turn off continuously and even give an electric shock.
- Consumable materials for the heater. The standing magnesium anode used to protect the device must be changed once at least once a year. Therefore, when selecting, you need to choose modifications with available consumables.
- Power. It is necessary to take into account that the more powerful the boiler itself, the more powerful the water heating element must be. Productivity ranges from 2-9 kW.
- Types of thermostat. Particular preference is given to a thermostat with a heat-protective function.
- Temperature range. If the user knows what temperature he wants to achieve, then the heating element must be selected with the appropriate rating.
The length of the Ariston heating element and the tubes for the thermostat play a significant role in ensuring optimal power and heating speed. More famous are heating elements with a power of 2-5 kW. Also separately distinguished are those heating elements that are installed in instantaneous water heaters. Structurally, such devices do not take into account containers for storing water, so the purpose of the heating element is to heat the full flow passing through it to the desired temperature.
Heating elements with a regulator are used in everyday life and in various fields of industry. It, as well as the fitting - the fastening component - is made from different metals. More and more, a heating element is becoming a necessary component for obtaining warm water. And its use in conjunction with a thermostat will significantly reduce utility costs and increase the service life of the device.
Video
The thermostat is designed to maintain a set temperature by controlling heating (cooling) elements.
These devices come in several types, ranging from simple mechanical ones to electronic multifunctional and even smart devices.
The principle of operation is that the device has an external temperature sensor, which reports the ambient temperature to the device. A thermostat is used to maintain and adjust a given limit. They are used for maintenance in various devices, such as: refrigerator, heated floor, water heating or heaters, incubator, greenhouses, etc.
Conclusion
The connection diagram for an electric boiler with heating elements is considered. With basic knowledge of electrical engineering, you can assemble such a boiler yourself.
©elesant.ru
More articles
- Types of electrical circuits of distribution networks
- Electric boiler connection diagram TEN
- Switch connection diagrams
- Connection diagrams for sockets and control buttons
- Connection diagrams for television antennas and sockets for a computer
- Types of electrical circuits
Connecting a heating element with a thermostat
Let's consider the principle of operation and the connection diagram.
They are used for boilers and heating boilers. We take a universal one for 220V and 2-4.5 kW, a regular one, with a sensitive element in the form of a tube, it is placed inside the heating element, in which there is a special hole.
Here we see 3 pairs of heating elements, six in total, you need to connect as follows: set zero to three and phase to the other 3. We insert our device into the open circuit. It has three contacts, in the photo below you can see one in the center at the top and two at the bottom. The upper one is used to switch to zero, and which of the lower ones to phase should be checked with a tester.
We set the regulator to minimum - we ring the lower left with the upper with the tester - there is a sound signal, but not on the second, now we increase the degree and the tester rings the lower right with zero. This means that the power comes to zero (upper) and goes from it to the heating elements, i.e. are powered up. And the lower left pin can be used for an indicator to indicate when the heating element is turned off.
Installation
Sometimes situations occur in which the heating element of the water heater is functioning properly, but the thermostat for some reason has already failed - it does not turn off or does not work correctly. In this case, you can postpone the purchase of a new water heater and limit yourself to replacing the thermostat yourself. To do this, you should take the technical passport of the boiler and, based on its operational properties and technical characteristics, select the appropriate model.
For a more accurate choice, you should rewrite all the data from the markings of the old device, and based on the data sheet and these data, you can purchase a new thermostat.
Installing a thermostat with your own hands requires certain skills and knowledge in the field of electrical installation work. It is very important to comply with safety regulations, without knowledge of which work cannot begin. The thermostat should only be replaced with a model similar in its technical characteristics; the use of a home-made device for installation in a factory-made boiler is not allowed.
At the first stage, you should turn off the power to the water heater and stop supplying water to it from the water supply system. Then you need to drain the existing liquid and remove the bottom panel of the device, thereby opening access to the heating element. After opening the cover, you need to remove the pressure ring and remove the old thermostat along with the control unit.
Next, you should install and connect the new thermostat, put the pressure ring in place and fix the bottom panel. After installation is complete, you need to fill the water heater tank with water, turn on the heating element and check the operation of the new device by setting it to the minimum temperature value.
If the thermostat turned off the heating element after the water had reached the desired temperature, then the installation was carried out correctly and the thermostat is functioning in operating mode. At the last stage, you should adjust the thermostat, giving it the necessary operating parameters.
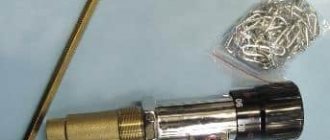
What will be needed for repairs?
If the presence of a malfunction is still confirmed, then it’s time to start replacing the heating element. But before you get started, you need to acquire all the necessary tools. The list is small, but without it it’s unlikely that anything will be done.
For repair you will need:
- spanners;
- pliers;
- rags or napkins - they should absorb water well;
- screwdrivers - it is advisable to stock up on Phillips and straight screws;
- phase meter - the tool is a screwdriver with a special indicator built into the handle;
- new heating element.
Armed with everything you need, you can proceed directly to the repair. For everything to be successful, you need to follow a certain order of actions, which will be discussed below.
Although the vast majority of boilers differ from each other in appearance and characteristics, as a rule, they have an identical design
How to extend the life of a water heater
For long-term operation of a storage water heater, certain rules must be followed. When connecting the water supply, it is advisable to install a reducer that can reduce the pressure to the required level. This value should not exceed 6 atmospheres. To clean the incoming water, you can install a special filter.
The boiler will work for a very long time if maintenance is performed on time. To prevent local overheating, scale can be removed from the surface of the heating element with citric acid. Additional services include a number of activities:
- check the condition of the magnesium anode and replace it;
- clean filters;
- do not allow maximum heating;
- check the operation of the check valve;
- turn off the device at night.
If the boiler will not be used for a long time (2-3 months), it is advisable to drain all the water and turn off the water supply.
Water heater Climate control technology
Examination
Storage water heater piping. (Click to enlarge)
Any danger has one amazing property - it appears as if out of nothing. Everything was so wonderful and suddenly there was a problem.
If it is as expected, it means something was done wrong.
Let's do everything right with the boiler:
- We check the presence of grounding. An RCD (residual current device) wouldn’t hurt either – life is more valuable;
- We install a safety valve against unacceptable pressure in the internal tank. It is also useful for draining water;
- We install a protective reducer against fluctuations in cold water pressure;
- We check the presence of a check valve on the cold side. It will help preserve heating elements in the event of a water supply cutoff, preventing water from draining back from the tank.
When purchasing storage type water heating equipment, you should check the availability of the above devices. Not all of them are fully equipped. The Ariston AM 50 SH2.0 Ei3 FE model takes into account all the tips in the article, including child protection.
Following these completely simple rules and advice will prolong the already flawless operation of Ariston equipment for many years.
Watch detailed video instructions for cleaning or replacing the heating element in an Ariston storage water heater:
Visual inspection of the heating element
Having disconnected the household electrical appliance from the network and drained the water from it, they begin to disassemble it. Having taken out the heating element, clean its shell from scale, if any.
When carefully examining the heating element, pay attention to the integrity of the part’s shell. If a visual inspection reveals the presence of cracks or ruptures in the outer shell, then the part can be safely thrown into the scrap yard, since it will not be possible to repair it
In this case, the water heater can be restored to service only by installing a new heating element.
The outer shell of the overheated heating element is torn to shreds. This is usually how heating elements made from low-quality materials fail.