Why is insulation necessary?
Everyone knows from school physics that warm air rises. That is why the main amount of heat loss in a building occurs through the ceiling of the top floor or roof pie. When building a house, it is necessary to calculate not only based on the cost of materials, but also take into account further costs of operating a private house, which insulation will significantly reduce. So how to insulate an attic?
In order to properly insulate attic structures, you need to understand in which cases additional measures are required. When insulating with your own hands, all responsibility rests with the owner, so you need to carefully study the issue.
About mineral wool
Insulation with mineral wool in the Russian Federation is breaking all popularity records: the material is inexpensive and easy to work with. This is explained primarily by large reserves of easily accessible raw materials and production technology that has been developed over many decades. The disposal of blast furnace slag in the USSR had to be taken care of even during the industrial leap of the first five-year plans, and for a breakthrough into space, thermal protection for return capsules was developed based on fibers from melted heat-resistant rocks. So “modern” methods of producing slag wool and stone (especially basalt) wool are actually not that new.
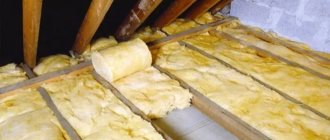
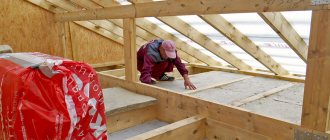
Professionals especially like mineral wool: it does not require expensive special equipment, but there is a wide range of special fasteners and accessories for it on sale. As a result, the ceiling area is up to 20-25 square meters. m can be insulated in less than 1 work shift, or even in 2-3 hours, it depends on who knows how. How it looks technologically can be seen in the video below.
Video: example of ceiling insulation with mineral wool
After reading what follows, you may have a question: where is the membrane between the insulation and the ceiling? It is quite possible that in this case it is not needed if the attic and roof are already insulated; Why do the owners have to shell out too much?
More attention should be paid to the following precautions when working with mineral wool:
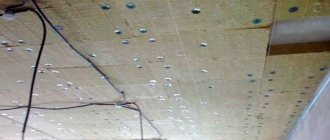
- The standard electrical wiring is rolled into a coil and hangs on the wall.
- Judging by the fact that a temporary light bulb is used for working lighting, the room is completely de-energized, and its wiring is disconnected at the nearest junction box or at the input panel - this is absolutely correct and absolutely necessary.
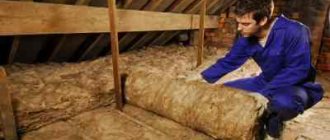
- The master puts on a full set of personal protective equipment (PPE): special overalls, gloves, goggles, and a respirator. For an amateur master, this is an important point, because... Quite expensive PPE will have to be used once.
It is already clear here that mineral wool is not without its drawbacks: it is a group 3 allergen and carcinogen, i.e. Suitable for residential premises, but it is necessary to work with it using PPE. In addition, which all manufacturers and sellers without exception are wisely silent about, under the influence of even insignificant amounts of moisture vapor and its own weight, mineral wool shrinks irreversibly, as a result of which its thermal conductivity drops by 50% in 3 years: air gaps in the insulation are the same thermal bridges , like metal jumpers, only based on microconvection. Gaps between slabs in 5% of the insulated surface area increase heat loss by 30-35%
This leads to another unpleasant circumstance: the simplicity of working with mineral wool is apparent. When cutting slabs/rolls to size, you need to give an overlap (usually 20-40 mm) so that the slabs fit tightly into the openings without sticking out, as on the right in the figure, but also so that further cracks do not appear due to shrinkage. Perhaps this is only based on experience, because... the properties of the material vary significantly from batch to batch.
Correct and incorrect installation of thermal insulation
Finally, the thermal conductivity of brand new mineral wool significantly depends on its humidity - in the direction of deterioration. An increase in air humidity in a room insulated with mineral wool from 60% to 85% leads to an increase in heat loss by 10-12%. Therefore, in further presentation, we, still focusing on mineral wool as the most popular insulation, will give, where possible, recommendations for replacing it with something better.
Subtleties of design
Before starting work on preparing the insulation of the attic space, it is necessary to understand exactly how it should be used in order to select the right set of actions that will make it possible to maintain the required level of humidity and temperature.
There can be three use cases:
- Unheated attic space. In this case, due to properly carried out thermal insulation, the temperature here should be maintained in the region of 5-50 degrees.
- Warm attic. This type of room can be provided with heat thanks to ventilation pipes from the living quarters. It is through them that warm air will enter the attic. Typically, such premises are typical for buildings with several floors.
- Attic in a heated attic. In this case, the attic will be a normal living space with heating. To insulate such a room, significantly less heat and waterproofing are required. In this case, a vapor barrier layer may not be used, but at the same time, it is simply necessary to properly seal the joints and gaps.
When it comes to a private building, the first and third options will be an excellent solution.
A little history of roofing
Since ancient times, people have built private households with such high quality that they could stand for 100 years. At the same time, it was not cold to live in them, and the roof frame made of natural wood was always dry. As for the shape of the roofs on such buildings, they were most often built with two slopes and had a slight slope.
This choice was explained by the fact that the snow that fell in winter was supposed to linger on the roof and serve as a natural insulation. One, or less often two, windows were made in the attic of the building. They were closed for the winter and then the air in the under-roof space played the role of a heat insulator.
In the summer, the windows were opened slightly at night to lower the temperature in the attic. When it was hot, they were closed, and the air did not heat up. This is how the temperature in the attic was regulated.
In winter, when snow fell, it covered the roof with a continuous carpet and thereby acted as a natural roofing insulator. Even in severe frosts, the temperature in the under-roof space did not drop below zero. As a result, the house was warm in cold weather.
The roof slopes were not insulated to prevent the snow on them from melting. The rafter system was left open, thereby allowing for its inspection and ongoing repairs. Therefore, in such attics only the floors were thermally insulated.
If the roof slopes are insulated, then the attic space becomes a heated attic, which has a different functional purpose.
How to protect the attic floor from moisture
Thermal insulation in its structure is a multi-layer cake. One of its layers is a vapor barrier film, which should prevent moisture from penetrating into the structure of the structure.
To protect the insulation from fumes, a vapor barrier film is installed in front of the insulation layer (from the side of the living rooms). The vapor permeability of the film should exceed that of thermal insulation - this will allow you to quickly remove moisture that has entered the insulation through the protection.
The result of water exposure to floor elements
There are 2 reasons for vapor deposition on floor structures. The first is as a result of the release of household fumes and their diffusion through the ceiling. The second is the occurrence of dew due to the difference in temperature inside the room and the unheated attic.
A vapor barrier is installed on the ceiling if it is expected that the attic will be unheated. The rest of the space is not subject to insulation, because... it is uninhabited. But the protection of slopes and rafters is necessary, these are:
- waterproofing - to eliminate external influences from the street.
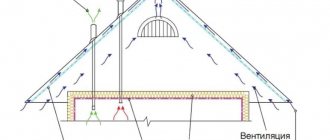
- natural ventilation - from condensation that appears due to the difference in temperature outside and in the house. According to the standards, the total area of all ventilation openings must be at least 1/300 of the floor area or roof projection (horizontally). If ventilation is arranged correctly, in winter the difference in temperature in the attic and outside will be no more than 5-6 degrees.
Polystyrene foam and polystyrene foam
A type of gas-filled synthetic polymer, small granules, are compressed into a homogeneous mass after steam treatment. The material has low mechanical strength. At the same time, it is very light and retains heat well.
Extruded polystyrene foam - to increase mechanical properties, the heated mass passes through an extruder, as a result of which the density of the polymer increases. The cost of this insulation is higher than standard foam.
Suitable for insulating concrete floors in houses made of blocks, brick or concrete. A prerequisite is the installation on top of a concrete screed. Everything else is a violation of fire safety standards.
Material properties:
- Flammability. During combustion, hazardous substances are released;
- Brittle edges. They may become deformed during installation;
- Low density is the reason why rodents choose foam sheets as a habitat.
Brands: Penoplex, TechnoNIKOL XPS Technoplex, Ursa XPS.
Types of attics
When carrying out work, everything depends on the method of using the under-roof space. There are three of them:
- Cold attic. Such an attic is not heated, and air does not flow into it from the premises. In this case, the room temperature is assumed to be +5 degrees Celsius.
- Warm attic. The presence of a warm attic is typical for multi-apartment residential buildings. All ventilation ducts with heated air open into the attic space, increasing the temperature in the room.
- Attic. The under-roof space becomes a full-fledged living space and is heated like all the rooms of the house. In this case, we recommend that you read the article on attic insulation.
In a wooden or any other private house, it is correct to use the first or third option.
This is how you can transform your attic, turning it into a residential attic:
Thermal insulation methods
There are two ways to eliminate heat loss:
- roof insulation;
- floor insulation.
It is not always advisable to insulate the roof - this procedure is performed for large attics that can serve as housing or for economic purposes. If the volume of the attic space is too small and its operation is not possible, then the ceiling is insulated. This can be done in two ways:
- internal:
- external
The most effective is external insulation, which preserves the heat-saving qualities of the ceiling and creates the correct mode for removing water vapor from the room.
Choice of insulation
The technological process of thermal insulation is determined by the design features of the building: wooden beam or solid reinforced concrete structure.
However, in any case, thermal insulation products for insulating the attic must:
- have minimal thermal conductivity;
- have moisture-repellent properties;
- be fireproof;
- resist rotting or mold formation;
- have little weight.
Based on this, today the following is usually used as insulation for attic floors using wooden beams:
- Mineral wool. Inexpensive, lightweight, durable material that is easy to work with. Typically, mineral wool is laid in the space between the beams in two layers with the expectation that the thickness of the material will be at least 20 cm. In this case, the joints are tightly adjusted, but not jammed. If you plan to further develop a living space or attic, then insulating the ceiling of a cold attic necessarily includes the installation of sheathing.
- Expanded clay. It is a loose mass of baked clay. Suitable for all types of floors, however, it is more often used for insulating concrete slabs. However, the use of this material can only be limited by the load-bearing capacity of the building structure. The optimal layer of expanded clay when constructing a thermal insulation layer is at least 16 cm; this must be taken into account when calculating the material.
- Styrofoam. The cheapest option used for insulating attic floors using reinforced concrete slabs or wooden beams. Its advantages include: ease of installation, light weight, excellent thermal insulation and low cost, however, polystyrene foam is not resistant to the formation of fungal mold and is susceptible to high temperatures.
- Sawdust. Inexpensive natural insulation, often used in the attics of private houses. It has excellent heat and sound insulation qualities. However, such material attracts rodents and insects, is easily flammable, is susceptible to mold, absorbs moisture, and cakes.
Application of extruded polystyrene foam
Polystyrene foam (expanded polystyrene) is a loose material, so it is used when it is necessary to insulate a floor made of joists and beams. For thermal insulation of slabs, extruded polystyrene foam is used, which is denser than conventional foam.
Before laying it, the surface of the base is leveled. On the warm side of the floor, vapor barrier is not needed, since concrete slabs have virtually no vapor permeability. A vapor barrier film is laid out on the prepared base. Then slabs of extruded insulation are laid out in a checkerboard pattern. Polyurethane foam is blown into the joints.
After it dries and becomes hard, the thermal insulation slabs are poured with a concrete mixture about 4–6 centimeters thick. After hardening, the screed becomes suitable for use as an attic floor. If desired, you can lay the final coating on the screed.
Preparation of materials and tools
Before insulating the attic floor in a private house, it is necessary to prepare lumber, hydro- and vapor barrier, standard carpentry and power tools. Thus, to carry out the technical part of the work, you will need:
From hand tools:
- a pair of hammers (heavy and light);
- rip and cross saw;
- plane;
- set of chisels;
- roulette;
- building level.
From power tools:
- drill;
- screwdriver with replaceable attachments;
- Instead of a crosscut saw, sometimes it is much more convenient to use an electric cutting machine.
Materials used for insulation
The roof and walls of the attic of a private house are more susceptible to freezing, so the insulation of this particular room must be carried out very efficiently.
The modern construction market provides the owner of a private house with a sufficient choice of materials, depending on the goals that are planned to be achieved with insulation.
Ecowool
Cellulose-based insulation is made from waste from the woodworking industry or waste paper. Ecowool is a cross between loose and cotton insulation.
In the video, the author of the video tells how he insulated an attic of 100 square meters. blow molding machine:
- Ecowool can be sprayed well onto walls and between rafters, but this requires special equipment.
- But if we are talking about insulating the ceiling along the beams, you can pour ecowool between the beams with your own hands.
The material is harmless and vapor-permeable, but ecowool burns when in contact with an open fire.
Polyurethane insulation
To insulate areas of complex geometry and hard-to-reach places in the attic, it is recommended to use sprayed universal polyurethane insulation PPU. It comes in cylinders. Useful properties of this insulation:
- absence of seams and cold bridges, which reduces additional heat loss;
- creating a sealed layer that prevents the formation of mold and mildew;
- good adhesion to any building materials;
- selection of the required thickness of the insulating layer;
- absolute lack of reaction to temperature changes.
One cylinder insulates a surface of two square meters within 2 minutes, with a layer of 3 cm.
The price of a cylinder of polyurethane foam insulation, depending on the manufacturer, ranges from 500 rubles.
Extruded polystyrene foam
When insulating the ceiling of a living space over attic floors, this material is considered the best option for many builders. This insulation does not cause any difficulties during installation; it can be laid under any beam ceiling.
It also saves space, since you can get by with two to three times less thickness than using the same mineral wool. Extruded polystyrene foam comes in different types, as it is produced by different manufacturers. To insulate attic floors, the density of such material should be about 32-34 kg/m, and its thickness should be from 40 to 100 mm.
Manufacturers also produce shaped elements from expanded polystyrene, which are used to lay out complex fragments in the attic ceiling. It is convenient to install this insulation in two layers: the first layer is laid between the attic floors, and the second layer is applied end-to-end along the bottom row, covering the wooden beams as well.
The main disadvantage of such insulation is that it is flammable. To reduce the fire hazard, you can lay mineral wool with expanded polystyrene, or add antipyrine.
Insulation of the attic with polystyrene foam
Mineral wool
Mineral wool, rolled or sheet, is one of the most popular materials for insulation today. Depending on the production technology and the raw materials used, there are several types of mineral wool.
Slag
The basis for the production of this insulation is the slag produced from the blast furnace. Slag wool has the following characteristics:
| Parameter | Magnitude |
| Fiber length | Up to 16 mm |
| Fiber thickness | 3-12 mm |
| Thermal conductivity | from 0.46 to 0.48 W/m×K° |
| Maximum heating temperature (without signs of material destruction) | 250 C° |
| Density | 30-220 kg/m3 |
But the use of slag wool for insulating attics is limited by the following disadvantages:
- increased residual acidity, which makes it unsuitable for insulating attics with metal structural elements;
- ability to absorb moisture;
- exposure to temperature influences, which reduces service life.
The advantages of slag wool include its good soundproofing qualities and affordability. The average cost of material ranges from 700 to 950 rubles per m3.
Glass wool
The starting materials for the production of glass wool are sand, soda, limestone and other components. By drawing out silicon melts, with the addition of the specified raw materials, insulation with the following characteristics is obtained:
| Parameter | Magnitude |
| Fiber length | 15-50 mm |
| Fiber thickness | 5-15 microns |
| Thermal conductivity | 0.03-0.052 W/m×K° |
| Maximum heating temperature | 500 C° |
| Density | 10-130 kg/m3 |
This material has sufficient strength and good sound insulation properties, but working with it, as well as choosing the area of application, must be done with some caution.
Due to the fragility of the fibers, irritation of the skin is possible upon contact with glass wool, so it is necessary to wear protective equipment when working
In addition, microparticles of dust generated during operation have a negative effect on the eyes and respiratory system. In this regard, it is not recommended to insulate a glass wool attic or attic planned for use as a living space.
The low density of glass wool limits its use in places where there may be a load on the insulation, including when installing a cement screed.
Otherwise, this material is quite suitable for use and is widely used for insulating non-residential premises above the top floor of a house, including due to its relatively low price. The average cost of fiberglass insulation from trusted manufacturers ranges from 850 rubles. per package, the area of which is 7-8 m2, with a material thickness of 10 mm.
Basalt (stone) wool
This type of insulation is considered one of the most popular. Basalt wool fibers are less brittle, so working with it does not cause allergic reactions in humans. This insulation is preferable to other materials in terms of environmental parameters and moisture resistance. Other characteristics look like this:
| Options | Magnitude |
| Thermal conductivity | 0.077-0.12 W/m×K° |
| Maximum heating temperature | 700-1000 C° |
| Density | 30-225 kg/m3 |
The question often arises whether it is necessary to carry out additional thermal insulation in places where the insulation meets heating structures in the attic, for example, a chimney. Basalt wool is an absolutely non-flammable material, so there is no need to perform this work.
Due to its good density, basalt wool does not shrink, which allows it to be used on the attic floor under a screed
Insulation of the space under the roof with expanded clay
Insulating the ceiling with expanded clay is more convenient and better done from the attic side. The material is baked clay, so it is an environmentally friendly option for thermal insulation. Expanded clay also copes well with sound insulation and is not interesting to either fungus or pests.
Among the advantages, one can note its long service life and ease of performing thermal insulation work independently. In addition, expanded clay does not absorb moisture, so waterproofing will not be required when performing work.
Creating a warm ceiling using expanded clay is very simple. It is enough to clean the surface on which the material will be poured from dust, cover the ceiling with a vapor barrier, and cover the surface with expanded clay. The layer thickness should be about 25 cm.
If it is desirable to leave the surface of the attic as a usable area, then floorboards are laid on top of the expanded clay. To insulate the roof, its surface is covered with a vapor barrier, then battens are stuffed on top and expanded clay is poured into the resulting cavity.
But if the house is located in a climate zone with very cold winters, the logic of using expanded clay is called into question. This material does not have such good thermal insulation properties.
To properly and efficiently insulate the ceiling, you will need a lot of expanded clay, and this will increase the load on the floors. Ceiling insulation with expanded clay is beneficial only when heat loss from inside the room is very small. In other cases, mineral wool or polystyrene foam is better.
Vapor barrier
The vapor barrier film protects wooden beam ceilings from moisture formed in the air of residential premises. In addition, it protects floors from the appearance of mold and mildew in the insulating material.
Regardless of how the attic floor is made, the vapor barrier for the floor should form a continuous carpet that does not allow condensation to penetrate. Particular attention should be paid at the joints with walls, where there is a high probability of condensation penetration. To do this, the covering film is overlapped and its edges are glued together with tape.
Vapor barrier under insulation
Review of the main vapor barrier manufacturers
There are several popular vapor barrier manufacturers on the market:
- surpasses all other companies in quality (according to the Test Purchase program).
- does not lag behind the leader either in quality or in the use of the latest technological developments. This is a domestic company that produces a very high quality product.
- The product is good for both industrial and residential construction, but is not suitable for creating temporary roofing.
Not included in the top three:
- Polish - the company's products are distinguished by the fact that they can withstand very low temperatures.
- "Ondutis" - low prices, excellent connecting tapes, rolled materials.
- Tyvek products provide ideal wind protection.
- German DELTA - steam and wind protection.
Sawdust as insulation for the attic
The technical characteristics of this material are in no way inferior to modern synthetic insulation.
Important! Sawdust is used extremely rarely for insulation, since the market offers a large selection of other materials that are much easier to work with.
Advantages of sawdust:
- Sawdust is an environmentally friendly material.
- Low cost.
- Long service life.
- Low thermal conductivity.
- To create such insulation, you do not need any special equipment or special tools.
Waterproofing
To protect the attic from flooding, and the ceilings and repairs from water stains, it is recommended to lay a layer of waterproofing material on the roof slopes.
- Fused - overlapped and joined using a torch. The cheapest option is synthetic materials.
- Sprayable. A one-piece membrane film is created.
- Powder. Water is added to it immediately before installation.
- Liquid – suitable for concrete floors, absorbing into their surface.
- Coating based on bitumen.
Before you buy waterproofing, you need to re-read the properties: the material must allow air to pass through, but retain water. Some cheap films create a greenhouse effect in a cold, unheated attic, causing the walls to become moldy.
Thermal insulation layer thickness
To insulate the attic in a house with a cold roof, you can use thermal insulation materials of any density, since the room is not residential. If you plan to lay mineral wool on the roof slopes, you can prepare a material of lower density and thickness, since as a result the ceiling insulation will be double, but laid in two places.
Builders recommend placing a thicker layer of insulation around the perimeter of the attic, since the greatest heat loss occurs in the corners.
For ease of movement on soft insulation, it is necessary to construct paths from wood or other material so as not to violate the properties when compressing the heat-insulating layer.
Comparison of the main characteristics of insulation materials
Insulation Density kg/cub.m Thermal conductivity W/(m*K) Flammability
| Minvata | 35 — 40 | 0,035 — 0,039 | NG |
| Glass wool | 15 — 20 | 0,035 — 0,042 | NG |
| Polyurethane foam | 60 — 80 | 0,023 — 0,032 | NG |
| Expanded clay | 300 — 500 | 0,09 — 0,1 | NG |
| Ecowool | 38 — 41 | 0,038 — 0,041 | G2 |
| Styrofoam | 10 — 37 | 0,033 — 0,041 | G1 |
| Extruded polystyrene foam | 26 — 32 | 0,028 — 0,031 | G4 |
| Sawdust | 0,10 — 0,25 | 0,07 — 0,09 | G3 |
Attic insulation technology
Any cold attic of a private house is insulated in 2 stages:
- Stage 1: arrangement of the ceiling and floor of the room.
- Stage 2: insulation of the rafter system.
As already mentioned, floors can be beams or reinforced concrete.
How to insulate a ceiling along beams
We will consider insulation with mineral wool, but these instructions are also suitable for bulk insulation, only the thickness of the backfill is approximately 2 times greater.
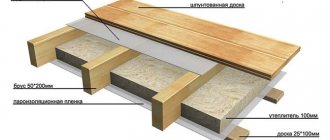
- STEP 1. The base of the ceiling of the lower room is hemmed first, it is also the subfloor of the attic.
- STEP 2. A layer of vapor barrier is laid on the beams and subfloor. The membrane rolls are rolled out across the beams and overlapped. The canvas is stapled, and the joints can be taped with double-sided tape.
- STEP 3. Mineral wool mats or slabs are laid in the space between the beams.
A ventilation gap of 50 mm is left between the insulation and the attic floor
- STEP 4. Lay another layer of vapor barrier on top. This membrane is nailed to the beams with a counter-batten. The vapor barrier should sag slightly between the beams.
- STEP 5. A floorboard is placed onto the counter-batten. If you plan to install laminate, then instead of boards you can sew plywood or OSB with a thickness of 10 mm or more.
There is an important nuance in this and subsequent arrangement schemes - when installing a vapor barrier or wind barrier, the membrane is laid with the vapor-permeable side facing the room so that steam can escape from the house to the street. And in the case of an attic - from the lower room to the attic.
How to insulate a reinforced concrete floor
Theoretically, reinforced concrete slabs can also be insulated with mineral wool or bulk materials, but then you will have to put wooden blocks (joists) on the concrete and arrange the floor according to the beam scheme described above.
If the reinforced concrete floor of the attic is level, then it is much easier to insulate it with EPS.
The technology consists of 5 stages:
- STEP 1. Putty the seams between the reinforced concrete slabs;
- STEP 2. Cover the concrete with Penetron waterproofing or something similar.
- STEP 3. Lay EPS in 1 or 2 layers.
- STEP 4. Lay technical polyethylene.
- STEP 5. If you plan to screed, then lay down the reinforcing mesh and pour the solution along the beacons. You can lay 2 layers of any durable board material spaced apart and fasten them together (OSB, plywood, DSP, etc.)
How to insulate a roof. Step-by-step instruction
When insulating between rafters, it is important that the thermal insulation layer is continuous, without gaps in the corners, near pipes and windows. The slightest gap leads to the formation of a cold bridge. If some part of the structure is less insulated, then the temperature there is lower, and - hello, condensation.
The roof insulation pie is the basis of the basics; you cannot swap layers in it or skip any of them. How to insulate a roof from the inside, from bottom to top:
- Internal cladding (lining, OSB, etc.);
- Ventilation gap;
- Vapor barrier;
- The frame on which the insulation is mounted;
- Vapor-permeable hydro-wind protection membrane;
- Counter-lattice made of a bar of at least 45 mm (usually 50);
- Lathing;
- Roofing covering.
You should step by step consider all the layers of the roof insulation cake of a private house and the installation technology.
Inspection of structures. If the house has been standing for many years with a cold attic, and it has been decided to convert it into an attic (and this increases the living space of the house by 35-40%), then the first thing you need to do is to revise the structure. Was the roof installed well and correctly? How well are the rafters and floor beams preserved? If any parts of the structure become unusable, they are replaced and treated with fire and bioprotection. Then they measure the thickness of the rafters and the distance between them, and cut the insulation so that its width is 1.5-2 cm greater than the distance between the rafters. This way the insulation will fit tightly, without gaps. But in houses, especially old ones, there may be the most unexpected distances between the rafters, and then you have to lay out a mosaic from insulation and waterproofing film, as a user of our portal with the nickname 214457 did. The distance between the rafters on the roof of his house is 1300mm, and the width of the vapor barrier is 1600mm.
Installation of hydro-wind protection membrane. At this stage of roof insulation there are a number of subtleties on which the result of insulation will depend. Usually waterproofing is done when the roof is covered, but if the roof of a private house, installed before historical materialism, is insulated, there may not be any waterproofing. It is better to buy a modern super-diffusion membrane - it will not let water into the room, but will release steam from it.
The film is attached to the rafters without tension, with a sag of 20 mm. It will be ideal if the distance between the rafters does not exceed 1.2 m. Why you should not stretch the waterproofing: it will shrink from the cold, and if you do not leave sagging, it will tear.
The waterproofing film is fastened either with a construction stapler or with galvanized nails, always with a wide head, and rolled out horizontally from the eaves to the ridge, always leaving an overlap. And here it is important that the size of the overlap matches the slope of the roof.
- The slope exceeds 31 degrees - overlap 10 cm;
- The slope is 22-30 degrees - overlap 15 cm;
- Slope less than 21 degrees - overlap of 20 cm.
It will be great if the overlaps occur on the wooden parts of the structures: rafters, or, if they are needed, spacer bars, etc. Overlapping areas are isolated with adhesive tape.
Also: it is very important not to mix it up and not to place the film with the wrong side up when using it. Homeowners often make this mistake, although the film always indicates which side is the outside and which is the front.
Laying thermal insulation. Then the thermal insulation material, cut to size, is tightly laid between the rafters, pressing against the waterproofing and shifting each subsequent layer to the side relative to the previous one so that cold bridges do not arise.
The insulation is cut strictly 2 - 3 centimeters wider than the width of the rafter span: it should fit tightly, but not bend over.
KabykiFORUMHOUSE Member
It is better to insulate in several layers with offset. Three times 50 is better than one time 150.
The slabs are secured using thin slats or lines that are pulled between the rafters.
Installation of vapor barrier. It is best to install the vapor barrier as recommended by the film manufacturer.
The vapor barrier must not come into contact with the insulation!
The first strip of vapor barrier is at the ridge, and the subsequent strips are closer to the eaves, with an overlap, and are secured in the same way as waterproofing, only they are tensioned, there should be no sagging. The gluing areas are reinforced with a pressure strip, especially if the roof slope is less than 30°.
When installing a vapor barrier, it is extremely important to ensure a tight connection to the surfaces. At junctions with walls inside the attic, chimney pipes and other complex surfaces, glue must be used; it needs to be made “for centuries”, and adhesive tapes and adhesive tapes will not be enough for this. The staples from the stapler are additionally taped.
Installation of counter bars. Counter beams are nailed along the rafters to provide a longitudinal ventilation gap. Counter bars must be at least 50 mm thick. Step lathing is nailed onto them .
An insulation pie is possible with one ventilation layer, the top one, and the vapor barrier is always adjacent to the insulation.
Nowadays, more and more often, the roof is thermally insulated directly during installation: such insulation is of higher quality.
KrovellForumhose Member
If only because otherwise there will be no possibility of high-quality insulation behind the Mauerlat. And this is a very important node!
The insulation pie in this case is performed in reverse:
- Install a vapor barrier on the lower surfaces of the rafters, starting from their base to the ridge, with overlaps at the joints, gluing the joints with construction tape;
- From below, the vapor barrier film is nailed across the rafters with bars with a cross-section of 30x40 mm in increments of 30-40 cm. The finishing material will be attached to them from below, and this structure will hold the thermal insulation.
- Insulation boards are placed on the waterproofing between the rafters; the surface of the boards should be flush with the top edge of the rafters.
- Vapor-permeable waterproofing is placed on the slabs with an overlap of 15 cm.
- The next layer is the sheathing, on which the roofing material is already placed.
We insulate communications
But the matter is not limited to floor insulation. If you are not planning to build an attic, then it is imperative to insulate the ventilation ducts, as well as all types of pipes that are available, since utilities in the attic require insulation without fail.
This can be done with mineral wool by simply wrapping it around the pipes, and then covering them with roofing felt and securing them with wire. Or you can buy ready-made shells for communications, including fan shells, which are made from polyurethane foam, polystyrene foam or other materials. To secure them, you just need to snap them onto the pipe and wrap them with electrical tape. By the way, the price of such insulators is low.
Polystyrene boards
This niche is represented by polystyrene foam and extruded polystyrene foam.
Their thermal insulation is excellent, but the problem is different - polystyrene foam and especially EPS do not allow steam to pass through at all.
EPS on floor slabs can withstand even a concrete screed
. They are suitable for insulating reinforced concrete floor slabs, but if you put polystyrene between the rafters or wooden beams, they will rot in a few years, and here even forced ventilation does not help.
Further in the video in this article, a specialist shows what happens when polystyrene is preferred when choosing insulation for wooden structures.
Advice! how to insulate a bathhouse ceiling from the attic side
Insulating the attic roof
To insulate an attic roof with your own hands, heat-insulating material is laid between the rafters. The most commonly used are rigid mineral wool slabs. They provide reliable protection and ease of installation. The clear distance between the rafters is taken to be 2 cm less than the width of the slab and it is held in place by friction.
From below, for reliable fastening, a lathing is made along which finishing work is carried out. It is necessary to provide an air gap on top of the insulation to remove the resulting moisture. The size of such a layer is taken to be 3-5 cm. It is ensured by the height of the rafters or by installing a counter batten.
Proper insulation of the attic and attic space with your own hands can reduce heat losses and maintain the strength of structures for a long time, which is why it is so important to pay attention to both the floor and walls, and the roof.
A wonderful example of how you can use insulation to turn an attic into a comfortable living space:
How to carry out the work correctly
Do-it-yourself insulation of an attic in a private house is carried out as follows:
- If the attic space is not planned to be inhabited, it must be made ventilated. For this purpose, ventilation gutters are installed in the roof.
- It is recommended to insulate the old roof with a layer of waterproofing of any type described above. This is necessary to protect the mineral wool. A wooden structure on which a film or sprayer is stretched is suitable.
- If you are simultaneously insulating the slopes, it is recommended to start with them. The slabs are coated with glue on one side and attached to the inside of the roof. You can use self-tapping screws, placing square wide plates under them. Rolled insulation can be cut after it is laid between the rafters.
- A vapor barrier film is mounted on top of the slabs.
- When installing insulation on the floor, logs are first constructed - a wooden frame, between which a rolled or tile layer is laid.
- A vapor barrier is laid in front of the slabs, then the slabs and waterproofing.
So that you can move freely throughout the entire area of the attic, the logs are covered with durable material - wood or sheets of plasterboard. This makes the appearance of the room more neat - if desired, you can arrange a workshop or storage room there. If you want to save money, you can only arrange paths to important objects, for example, to a chimney, dormer window, ventilation.
Thickness of mineral wool for attic insulation
Roll and slab insulation is produced in different thicknesses. In addition, there is such an indicator as density. The larger these parameters, the better the thermal insulation and sound insulation properties.
The thicker and denser the mineral wool, the higher its thermal insulation properties
There are no special requirements for density. This parameter is taken into account more when it is necessary to achieve resistance to loads. As for thickness, they look at the flooring material of the house. Concrete has high thermal conductivity. When insulating such a floor, mineral wool with a thickness of at least 100 mm is laid. Wood is considered a good heat insulator. If the floor is wooden, it is enough to insulate it with mineral wool about 80 mm thick.
It is not necessary to select the required thickness of insulation for a single-layer installation, because such material may not be on sale at the moment. Several layers of thin thermal insulation can be laid along the roof of the building in the attic. With this method of insulation, slabs or rolled mats are placed so that the joints of each row do not coincide. Otherwise, cold bridges will form in this place.
Polyurethane foam
Belongs to the class of gas-filled plastics. Under the influence of foaming substances, many voids are formed in the structure of the coating, which increase the thermal insulation properties of the material.
Polyurethane foam is evenly distributed over the surface being treated, filling all cavities. To treat large areas, a special installation is used that mixes the components and sprays the composition under pressure onto the surface, where it increases in size and hardens.
Characteristics:
- Low thermal conductivity - 0.02 - 0.025 W/i*K;
- High adhesion to wood, metal and concrete coatings;
- The thickness of the sprayed layer can be from 20 to 200 mm;
Advice from professionals
There are standards SNiP II-3-79, which provide formulas for calculating the thickness and density of thermal insulation for insulating the attic and other structural elements of the building. Professionals recommend using them before starting work.
Attic insulation will be effective if it complies with SNiP standards
In addition to the above formulas, they take into account the climate of the area, the specific heating of the building, the material of the floor and roof. At the same time as the ceiling in the attic, communications are insulated. The pipes are wrapped with mineral wool, and on top with foil-foamed polyethylene foam. You can use special sleeves or shaped shells to insulate the pipeline.
Fire protection of the attic
Fire retardant treatment of the attic is also of great importance. Despite the fact that many thermal insulation materials are difficult to ignite, wooden floors and slopes can burn. Typically, fire protection treatment of the attic is carried out using fire retardants - special agents that protect the treated surfaces from fire. There are also varnishes and paints, the application of which also protects against fire; in addition, a fire hatch is installed in the attic. The use of fire retardants is simply mandatory if the insulation is a combustible material - for example, this applies to straw as insulation, sawdust.
Fire protection of the attic is something that cannot be neglected, because in the event of a fire, the wooden floors and beams will burn instantly, and the roof will collapse on its head (read: “Insulation of the attic floor, materials and requirements”).
Insulating the attic not only contributes to a more comfortable microclimate in the house, but also allows you to use additional space - the attic can be turned into a living space or various things can be stored in it. Thus, an insulated attic space has many advantages, unlike a cold one. Read also: “Insulation of the roof attic, and its types.”
Wood sawdust
Wood chips were the traditional attic insulation before the advent of modern insulation materials. But due to many disadvantages, sawdust is practically not used.
- Fire safety - wood is highly flammable.
- Habitat not only for rodents, but also for insects.
- Hygroscopicity - without treatment they can cause the appearance of fungus and mold.
- It is impossible to use the attic space without flooring.
wikimedia
Video: we discuss the floor structure in detail
Review of the structural details of the attic floor insulation device. What is a sufficient layer of insulation for a cold attic? What are the specifics of the work on laying thermal insulation for the attic floor?
Sources
- https://DomZastroika.ru/krysha/sposoby-utepleniya-cherdaka-svoimi-rukami.html
- https://dekoriko.ru/cherdak/uteplenie/
- https://uteplenieplus.ru/kak-uteplit/krysha/paroizoljacija-i-vlagovetrozashhita-dlja-holodnogo-cherdaka-osnovy-primenenija-i-montazha/
- https://teplota.guru/teploizolyatsiya/uteplenie-cherdachnyh-perekrytij.html
- https://ZnatokTepla.ru/utepliteli/cherdaka-v-chastnom-dome.html
- https://nashicherdaki.ru/uteplenie/053-kakoj-uteplitel-dlya-cherdaka-vybrat/
- https://viascio.ru/krovlya/uteplenie-cherdachnogo-perekrytiya
- https://roof-project.com/uteplenie/utp-dlya-cherdaka.html
- https://pod-potol.com/remont-i-ukhod/teploizolyatsiya/kak-uteplit-potolok-cherdaka-kharakteristika-materialov.html
- https://StrojDvor.ru/otoplenie/kak-pravilno-uteplit-cherdak-v-chastnom-dome-s-xolodnoj-kryshej/
- https://nashicherdaki.ru/uteplenie/062-kak-uteplit-cherdak-v-chastnom-dome-poshagovye-instrukcii-i-rekomendacii/
- https://vdome.club/remont/dom/uteplenie-kryshi-cherdaka-minvatoy-plyusy-i-minusy-tehnologiya-montazha.html
- https://kryshadoma.com/uteplenie-teploizolyatsiya/kak-uteplit-cherdak-minvatoy-etapy-i-preimushchestva.html
- https://uteplenieplus.ru/kak-uteplit/krysha/uteplenie-cherdachnogo-perekrytiya/
