Let's talk about the rules of installation and operation
System calculation
If you decide to install the system yourself, you will have to make certain calculations.
It will be difficult to absolutely accurately calculate the dimensions and volume of the system, and there is no urgent need for this. For example, 5 kW is enough to heat a medium-sized room. This power can be provided by a heat exchanger with an area of 1 m². But the temperature in the furnace constantly fluctuates; when fully heated, 1 m² provides up to 9 kW, and when the furnace goes out, the power begins to drop rapidly and can drop by 5 to 10 times. Therefore, the area of the unit is taken with a significant margin, which makes it possible to equalize the heating of the liquid.
The configuration of the heat exchanger itself can be different; there is no consensus among experts. Some argue that stainless steel pipes are the best option, others prefer plates or manifolds consisting of 2 mating channels.
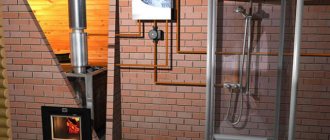
Connecting the system to the shower stall.
Tips for installation
If you decide to assemble the system yourself, then you should take into account several mandatory requirements.
- Tanks should be welded from metal with a thickness of at least 2.5 mm. The requirements for the upper, large tank are minimal; the main thing is that it does not rust or leak.
- The requirements for piping and the heat exchanger itself are somewhat higher; in the past, the most popular material for a heat exchanger was cast iron. Indeed, the material is very durable, does not corrode and holds the temperature for a long time. But cast iron also has serious disadvantages; it is heavy, which requires serious fastenings. And cast iron takes a long time to heat up.
- At this time, most experts prefer to assemble a system from stainless steel; its price is of course higher than that of cast iron or conventional steel grades that are susceptible to corrosion, but the savings here will cost more in the future. For the heat exchanger, stainless steel grades 08X17 (430) will be the most optimal; or 8-12Х18Н10 (304) they have optimal heat transfer parameters and meet all hygienic standards.
- As for the connecting pipes, naturally they should also be made of stainless steel. The drive pipe with cold water must initially, when leaving the large tank, fall slightly below the level of the heat exchanger; a drain valve is mounted at the lowest point and then rises at an angle of 2˚ to 5˚ to the entrance to the heat exchanger.
- The outlet pipe, through which hot water will flow into a large tank for a heated bath, must exit the heat exchanger, pass through the wall at an angle of at least 30˚ and connect to the tank.
The simplest samovar-type heat exchanger.
The system is designed exclusively for heating the room.
Do not forget that both the piping of the bath and the heat exchanger itself at all interface points must be equipped with special heat-resistant gaskets that provide sufficient damping clearance during thermal expansion of the metal.
Recommendations for safe operation of the system
- The pipework must absolutely not be rigidly fastened; all fastenings must be of the floating type, otherwise it will be deformed or fall off the fastenings.
- You should not get carried away with overly powerful heat exchangers; this system should take no more than 10% of the furnace power, because the main goal is to steam, and not to heat the water.
- The main tank for heating water in the bathhouse should be selected carefully; the best option is when the water in it becomes hot 2 hours after igniting the stove. If less, the water will boil and you will get excess steam. If it is more, you will waste a lot of fuel and the stove will take a long time to heat up.
- Wherever there is a threaded connection, the seals must be extremely heat-resistant, as a rule, it is an asbestos cord.
Hanging tank.
Closed type water heat exchanger
The operating principle of all closed heating systems is based on the elementary laws of physics - when heated, the density of water decreases and is pushed from below by colder water, it begins to rise through the pipe, entering the expansion tank, and from there it returns to the heater along the entire circuit.
In this case, the chimney acts as a heater, which with its energy pushes water along the contour of the heating system.
Homemade coil
The design shown in the photo is the most common and simplest way to use heat from a chimney. The upper edge of the tube is connected to the expansion tank, and the lower edge to the heating circuit.
Most often, such a system is used as an auxiliary one. With its help, you can heat small rooms in which heating was not previously provided, but nothing more. It will not be able to act as the main heating, since its design has several significant disadvantages:
- The temperature on the surface of the chimney is an unstable and difficult to control value, as a result, it is impossible to regulate the degree of heating of the coolant.
- Due to the variability of temperature, it is very difficult to calculate the optimal coil length. If it is too short, the water will begin to boil and rupture the tube, and if it is too long, the coolant will not warm up to the desired temperature at all.
- The water from the expansion tank cannot be used for showering or other purposes, and this is not just due to unregulated heating. When the tank is filled with cold water, it will begin to cool the chimney through the coil, resulting in the formation of condensation and accelerating the process of soot formation on the internal walls.
- The temperature to which the chimney heats up is not enough to warm up a long circuit. With conventional heating, water passing through the system loses only 25 degrees; to maintain this figure in this situation, the entire system must be small in size.
Register heat exchanger
To avoid problems with homemade devices, you can purchase a register heat exchanger for the chimney pipe. Of course, the price of such a device will be higher than that of a DIY one. But the quality characteristics cannot be compared.
How does a heat exchanger installed in a sauna stove work?
The design of a furnace with a heat exchanger has proven itself so well that various heat removal design options have emerged, with varying degrees of efficiency. The most common:
- Classic coil.
- Built-in flat-plate heat exchanger (similar to two hollow plates connected to each other).
- Samovar heat exchanger installed on a chimney.
A water jacket surrounding the combustion chamber is used extremely rarely and is found in only 1-2 models of factory-made stoves.
Meanwhile, sauna stoves with a heat exchanger have become the subject of consumer debate. Some argue that the use is not practical, others, on the contrary, point to convenience and comfort during operation.
What does a built-in or samovar heat removal device provide?
- A heat exchanger in a sauna stove is needed to produce hot water for washing. This task was the main one when designing the structure.
- The possibility of heating the bathhouse from a stove with a water circuit - in fact, a metal stove becomes a kind of heating boiler. During combustion, enough heat is released to warm up the coolant and heat the required volume of hot water.
The operating principle depends on the device used. Efficiency is determined by several parameters:
- Reliability.
- Sufficient heat dissipation.
- Possibility of operation without the use of a heat exchanger.
According to their design, all water heating devices can be divided into built-in and built-on (samovar type).
Built-in heat exchanger
Stoves for baths with a water circuit for heating and DHW needs began to appear after conventional water heat generators received good reviews. According to their design, furnace equipment with an integrated water heating circuit is divided into several classes:
- The coil is the simplest device used in classic solid fuel boilers. Inside the structure there is a bent metal tube. The shape is different and depends on the internal design of the furnace. The coil is positioned so that the flame does not directly affect it, and heating is carried out through flue gases.
- A flat heat exchanger is a more complex device compared to the previous one. A flat heat exchanger for a sauna stove looks like two hollow plates connected to each other. In terms of thermal efficiency, the design is superior to the coil and is used in modern models of furnace equipment.
- Built-in tank - a separate container is made in the furnace and installed on top of the combustion chamber. The built-in horizontal heat exchanger heats up quickly and maintains temperature while the oven remains hot.
- Water jacket - represents the cavity surrounding the entire combustion chamber and smoke channels. The design is often used in the production of solid fuel boilers, but is not widely used in the manufacture of sauna stoves.
The operating principle of the integrated heat exchanger in a sauna stove is as follows. The spiral or plate is heated by flue gases, the temperature of which reaches 450-500°C. When heated, pressure arises, forcing the coolant to circulate in the heating system. In schemes where an indirect heating boiler is used, the hot water supply is heated using heating heat.
Samovar type
Installing a heat exchanger on a sauna stove is a budget solution to the problem of hot water supply and heating. The water heating device is manufactured in two ways:
- Coil - a coil made of aluminum or copper is installed on the chimney pipe. For systems with natural circulation, up to a storage tank or water distribution taps, the dimensions of the coil should not exceed 3 m. The optimal dimensions of a heat exchanger with forced circulation are 5 m.
- The design of a samovar-type heat exchanger - experts agree that this particular design is optimally suited for a bathhouse. Hot water for showering is prepared gradually, preventing the liquid from boiling.
The movement of water in a samovar-type heat exchanger occurs according to natural physical laws. The heated liquid rises, creating pressure in the container.
The optimal volume of a samovar-type heat exchanger is selected so that the water reaches the required temperature after 2-3 hours of intense combustion. The design is optimal for providing hot water supply.
Tank with water circuit connection
The heat exchanger in the form of a tank located around the chimney is made of stainless steel or galvanized sheet. In this case, the design of the furnace should be taken into account. If it has a combustion mode for flue gases, and the smoke temperature at the furnace outlet does not exceed 200 degrees, you can use any material to make the heat exchanger.
In simple stoves without smoke circulation, the smoke temperature at the outlet can reach 500 degrees Celsius. In this case, it is necessary to use stainless steel, since the zinc coating releases harmful substances when heated strongly.
Most often, heat exchangers of this type are installed on a sauna stove and used as a water heater for domestic hot water. The tank is equipped with fittings in its upper and lower parts, and pipes leading into the system are connected to them. The hot water tank is installed in the shower or steam room. It is possible to use such a system for heating a utility room or garage.
Heat exchangers for industrial furnaces are sold complete with some modifications; when installing a new furnace, you can choose a suitable model with a ready-made water circuit. You can also make a heat exchanger for the chimney with your own hands. To make it you need the following materials:
- pieces of stainless steel pipe of different diameters with a wall thickness of 1.5-2 mm, sheet steel;
- 2 1-inch or ¾-inch fittings for connecting to the system;
- storage tank made of stainless steel or galvanized steel with a volume of 50 to 100 liters;
- copper or steel pipes or flexible connections for hot water supply;
- ball valve for draining coolant.
Manufacturing sequence for a sauna stove or potbelly stove:
- Work begins with preparing a drawing. The dimensions of the tank installed on the chimney depend on the diameter of the pipe and the type of stove. Furnaces of a simple design with a direct chimney are characterized by a high temperature of the flue gases at the outlet, so the dimensions of the heat exchanger can be quite large: up to 0.5 m in height.
- The diameter of the inner walls of the tank must ensure a tight fit of the heat exchanger on the smoke pipe. The diameter of the external walls of the tank can exceed the diameter of the internal ones by 1.5-2.5 times. These sizes will ensure quick heating and good coolant circulation. It is better to equip furnaces with low flue gas temperatures with a small tank to speed up its heating and avoid the formation of condensation and deterioration of draft.
- Using a welding inverter, the parts of the workpiece are connected, ensuring the tightness of the seams. Fittings for supplying and withdrawing water are welded into the lower and upper parts of the tank.
- The tank is installed tightly onto the smoke fitting of the furnace, coating the connecting seam with heat-resistant silicate sealant. An adapter from a non-insulated pipe to an insulated one is placed on top of the heat exchanger tank in the same way and the chimney is removed from the room through the ceiling or wall.
- Connect the heat exchanger to the system and storage tank. At the same time, the required degree of inclination is maintained: the cold water supply pipe connected to the lower fitting must have an angle of at least 1-2 degrees relative to the horizontal plane, the heated water supply pipe is connected to the upper fitting and, with a slope of at least 30 degrees, is led to the storage tank. The storage tank must be located above the heat exchanger level.
- A drain valve is installed at the lowest point of the system. In the bathhouse it can be combined with a tap for drawing warm water for the steam room.
- Before starting operation, the system must be filled with water, otherwise the metal will overheat and leak, which can lead to poor sealing of welds and leaks.
- The water supply to the storage tank can be done either manually or automatically using a float valve. When filling manually, it is recommended to place a transparent tube on its outer wall to monitor the water level in the tank, so as not to run the system dry.
A do-it-yourself water heater exchanger is shown in the video.
Step by step guide
Manufacturing of a ductless heat exchanger
- Prepare a container, preferably metal, plastic will take longer to heat up.
- Place the tank at the beginning of the heating system.
- Make 2 holes in the container for exits. One is at the top, through which hot water will be discharged. The second is at the bottom, cold liquid will flow from the system pipes.
- Place the outlets correctly; the rate of heat transfer will depend on this.
- Seal the holes hermetically so that the air temperature is not wasted on the battery, and the room is evenly heated.
- Use copper for the tube; it should bend well and transfer maximum heat into the room.
- Bend the tube into a spiral shape to create a coil.
- Place the spiral in the tank, the ends of the tube need to be brought out, and secure them well.
- Connect a threaded fitting to the ends of the parts.
- Connect a power regulator to the pipe; you can buy it in a store, it’s inexpensive, so you shouldn’t get hung up on making it yourself.
- The system will work properly without a regulator, but it is needed to regulate power and save energy. The power can be set at your discretion.
- Connect the terminals to the thermostat, and then the power wires.
- To prevent the tank from wearing out due to temperature changes, install an anode.
- Close all elements hermetically.
- Fill the tank with water, the heat exchanger is ready.
Material of manufacture
- Copper. Due to its ductility, copper is most optimal for the manufacture of a heat exchanger. A copper tube is easy to bend and give any shape. It has a high thermal conductivity coefficient - more than 380. But copper is also not a heat-resistant material and is expensive.
- Stainless steel. Also quite flexible and responsive material. Although it has a lower thermal conductivity coefficient. But it is resistant to temperature changes. Any configuration can be welded from it. IMPORTANT: Galvanized steel cannot be used; when heated, it releases toxic zinc compounds into the air.
- Metal-plastic. Easily accessible practical material. Easily found, but it has a low thermal conductivity! Almost two orders of magnitude lower than that of copper. But this material is durable and resistant to temperature changes.
Classification of fireplace stoves
The most popular fireplace stoves:
- Viking stoves and fireplaces
. One of the most efficient types of stoves. They have an amazing speed of warming up the room, regardless of its size. Wood or brown coal is used as fuel. The only drawback: the Vikings refuse to work with coal. - Pellet fireplace stoves
. As the name suggests, these stoves are “powered” not by the usual firewood or coal, but by pellets. Pellet is a type of fuel that is environmentally friendly and is produced in granules. It is made from waste from the woodworking industry by pressing. Such fuel does not pose any danger to the environment and is very cheap, which explains its high popularity. In addition, pellets will not smoke in the house, so their advantages include increased comfort. - Keddy stoves and fireplaces
. The design is of Swedish origin, available in two versions: corner and wall. The stoves have a number of advantages over their analogues: firstly, their design is significantly superior to other designs. Secondly, “Ceddies” are lightweight, so they do not need a foundation, and the installation process will be significantly simplified. The connection to the chimney and the duct system are also quite simple, which is why these systems are so popular. - Cooking stove with fireplace
. The main distinguishing feature of these designs is functionality. Such stoves are great for cooking, warm the house and look nice at the same time. These combination stoves have earned their popularity precisely for these qualities, which allow you to implement a wide range of tasks and at the same time mentally return to the past, when open fire was the main method of cooking and heating. - Baikal fireplace stoves
. This option is most often used in country houses. This model is extremely effective, and if you need a more precise choice, you can consider the entire model range. The fuel used is wood. The main characteristic of such stoves is their incredibly long heat retention, even with a long-extinguished fire.
Conclusion
Do-it-yourself washing of a plate heat exchanger
A homemade stove with a do-it-yourself heat exchanger is shown in the video:
At the location of the warm water tank
Depending on where the container with water is located, the following types of heaters are distinguished:
- The container directly in the steam room allows the water to heat up faster, since there is no or very short water supply. Heat loss is also reduced. The disadvantage is quite obvious: the usable area of the steam room is reduced.
- The container is located in the adjacent room where the shower is equipped. This option is often recommended. It is more convenient to wash in a separate shower and there is more space in the steam room. But the length of the water pipeline is increasing.
- The problem of low pressure can be solved by installing a coolant tank in the attic. This method is also not without its drawbacks. It is necessary to bring cold water upstairs, and the length of the hot water supply is longer. The container must be carefully insulated to minimize heat loss.
Element Functions
Surface-type heat exchangers are most often used when it comes to home heating systems. Thermal energy passes through the plane of the metal walls. This principle is best implemented in boilers:
- electrical;
- solid fuel;
- gas.
Water passes through curved pipes. They are installed inside the device and heated by suitable fuel. The carrier warms up and passes into the pipeline. Instead, the heat exchanger receives water from the radiator, which is in a cooled state.
Electric boiler is the best option
In private households, the heat source is still the stove. It is suitable for heating a small house, but its heating power is not enough if we are talking about a large cottage. For this reason, a heat exchanger in the heating system is necessary to transform the stove into a full-fledged boiler with the function of heating water. They make a heat exchanger for a wood-burning stove with their own hands; it has various shapes and sizes. You can connect heating radiators to it, in which case the house will receive more efficient heating.
Working principle and functions of the heat exchanger
The coolant in the heat exchanger can be water or antifreeze.
A liquid heat exchange device is a container, part of the furnace structure, equipped for connection to a pipeline. The tank heats up in contact with the products of fuel combustion and transfers this energy to water. Water, moving through the system, gives off heat to heating devices - radiators, from which the air is heated by convection. Heating of the container can be direct or indirect, and the circulation of the coolant can be natural or forced.
Coolant
Instead of water, antifreezes based on ethylene glycol, propylene glycol, alcohol or oil are often used. Their main advantage is their low freezing point, ranging from -30 to -70°C. The exact numbers depend on the chemical composition and concentration of the liquid. The use of such chemistry provides a number of advantages:
- protection of system elements from damage due to defrosting;
- anti-corrosion protection due to appropriate additives;
- absence of abrasives, salts and other impurities that destroy (clog) the pipeline or fittings.
Some heat exchangers, for example for a bath, serve not only heating devices, but also a shower or a separate tank. That's why water is used here. To avoid defrosting, the device is designed so that filling water does not take much time. If the bathhouse or sauna is heated frequently, and the enclosing structures are well insulated, the problem is eliminated.
Propylene glycol is expensive, alcohol and oil are fire hazards, and ethylene glycol is a highly toxic coolant.
Heat exchanger functions
The function of the heat exchange tank, as part of the furnace structure, is to receive and transfer heat to the coolant from combustion products. But as an element of a wider system (heating, water supply), it solves several problems.
- Distribute heat evenly and economically throughout heated rooms.
- Provide your home (cottage, cottage, bathhouse, apartment, etc.) with hot water.
- Accumulate thermal energy for use when the stove is not working.
A heat accumulator connected to a heat exchanger for a wood stove stores energy thanks to the thermal capacity of the storage agent. Therefore, it can be made by insulating any container. A barrel covered with polyurethane foam and partially filled with crushed stone or sand is already a heat accumulator. If you equip it with four pipes and connect it correctly, the unit will become a functional element of the system.
Cooling by 1°C, water heats 1 m3 of still ambient air by 4°C. The successful use of water heat accumulators is associated with this.
Ways to increase efficiency
Potbelly stoves are made in various shapes and sizes. But they have one drawback in common - low efficiency. More than half of the thermal energy, in the literal sense of the word, flies out into the chimney. The irrational use of heat has led to the fact that the owners of these heating devices began to think about possible changes in the design of the furnace to increase its efficiency. The solution to this problem could be a partial modernization of the potbelly stove. There was no single concept for solving this issue, and each stove owner began to solve the problem independently, by trial and error.
Increasing the efficiency of a potbelly stove means receiving additional heat from the heating device while maintaining a constant amount of burned fuel. This can be achieved in several ways:
- changing the heat transfer surface,
- increase in heat removal;
- using more high-calorie fuel;
- increasing the heat capacity of the furnace.
The potbelly stove gives off heat to the surrounding space not only with its body, but also with its metal chimney. You can increase the heat transfer surface of the device by revising its dimensions upward. This option is possible when creating a stove with your own hands. Having already made a potbelly stove, you can do it in another way. Usually a corner is welded to a chimney made of a metal pipe. Position it with its apex facing the element along its entire length. The angle is installed around the pipe. Thus, the area of the heat transfer surface can be increased by 3-4 times, depending on the size of the corner.
Another option for increasing the heat transfer surface is to make a chimney running inside a large area. For this purpose, a chimney with turns is made. They are performed in the form of smooth transitions. It is undesirable to create turns at right angles, as the potbelly stove may start to smoke. The last section of the chimney is installed vertically. A pocket is made on it with a hatch for cleaning soot.
Some general tips
When using heat exchangers, some problems arise that can “spoil your mood.” What are these problems and how can they be solved?
Temperature of heating water in the tank
Temperature of heating water in the tank
You need to “catch” the moment when it will be acceptable, but such a “moment” is almost impossible to catch. The fact is that while taking a shower, the stove continues to burn, and accordingly, the water temperature constantly rises. What to do? Putting out the fire in the stove? This, of course, is not an option.
We suggest solving the problem using a mixer. If there is a water pipe in the bathhouse, great; it will help not only create a comfortable temperature, but also, using simple automation, make filling the water container automatic. It will be possible to wash without saving water, and the risk of it boiling in the heat exchanger will be somewhat reduced. If there is no water supply, we recommend installing an additional container for cold water next to the warm water tank. It must be connected to the shower through a mixer.
Connection diagram
Water boils in the heat exchanger
Water boils in the heat exchanger
This happens especially often during installation of the heat exchanger directly in the furnace firebox. We guarantee that you will never be able to calculate the parameters of the heat exchanger in such a way as to completely eliminate such a phenomenon. The calculations are too complex and there are too many unknown and unregulated indicators. Calculations based on the speed of water flow can only be performed by a qualified design engineer who has an excellent knowledge of the laws of heat engineering, hydraulic engineering and installation. But the most important unknown quantity is the flame in the furnace.
No one will ever be able to say exactly how much heat a stove produces in each individual unit of time. It is impossible to quickly increase or decrease the flame intensity depending on the water temperature. We propose to solve the problem of boiling water using ordinary single-phase water pumps for heating systems. They are built directly into the pipeline, the power of the devices is 100÷300 W. Installing a circulation pump not only eliminates the risk of boiling, but also significantly speeds up the water heating time.
Circulation pump connection diagram
We hope that our information will be useful for bathhouse owners and will make it possible not to solve problems with heat exchangers, but to prevent their occurrence at the stage of manufacturing and installation.
Heat exchanger from a cylinder
To use already exhaust gases for additional coolant in the heat exchanger, you need to slow down the exit of smoke by creating a barrier in the chimney. For construction you will need three empty gas cylinders, sheet metal and scrap metal. The sequence is:
- Build a firebox from a cylinder - cut out the top so that the diameter of the hatch reaches 200-250 mm.
- Mark a rectangle measuring 50 by 20 cm on the wall, apply a mesh with cells 30 by 40 mm. Make holes in the crosshairs.
From a cylinder
- Build an ash pan slightly larger than the area with the holes. It must have a lid. This is a collection for ash. Supports are welded to the wall at the corners.
- At a distance of 4 cm from the bottom of the cylinder, at the rear wall of the firebox, a hole is first marked, then a hole 3 cm smaller than the cylinder itself is cut.
- It is better to make the door for the firebox from the head of the second cylinder, cutting a hole in the center of it. A piece of pipe with a diameter of 7.6 cm, equipped with an adjustable damper, is attached to the hole. The mobility of the sash is supported by hinges and locks of inventory drawers.
Balloon frame design
- Construction of a heat exchanger from the second cylinder. Make 3 bulkheads from 4-5 mm metal so that they cover the internal size of the cylinder. They cannot fit around the edges of the hole according to the diameter of the chimney pipe and for a margin of another 2 cm.
- Cut off the bottom of the cylinder, cut it in the shape of a fit on the firebox at an angle of 90 degrees.
- Cutting a hole for the chimney in the valve part.
- Installation of the bulkhead - holes in a checkerboard pattern.
- Installation of the heat exchanger, scalding, welding of the pipe.
Types of heat exchangers
Coil
A simple device can be effective in different ways, depending on the type. Classification is carried out according to several criteria. Different models of factory or homemade heat exchangers, for example, in a bathhouse, differ:
- design,
- installation location,
- material.
These factors influence each other and the features of the heat exchange unit as a whole: its cost, efficiency, productivity, system volume, installation complexity, etc.
Design
Design differences largely depend on the purpose of the product. For example, heating water for washing requires a significant volume and intense heat transfer. And use only for heating requires a gradual transfer of heat to the coolant.
- A coil is a pipe bent at different angles. Warms up quickly, but often does not have enough volume. Suitable for installation in a wood-burning firebox, behind the firebox, in a heater, on a chimney (if the coil is spiral-shaped).
- A register is an analogue of a pipe radiator, perhaps the most popular, universal, and energy efficient. As a rule, these are several large-diameter pipes connected by thin tubes. The choice of a specific form and installation location is limited by the author’s imagination, as well as the general design.
- A diplomat is one or more interconnected containers with pipes. This is a common model, easy to assemble and install. A sauna stove with a heat exchanger of this type will provide heat, heat, and hot water. Disadvantages - a significant volume reduces the heating rate and limits the choice of installation location. The primitive form does not contribute to complete heat transfer, interfering with the heating of parts of the stove itself. Therefore, it is only suitable for installation inside the heater (if we are talking about a sauna), behind it or behind the firebox.
- Water jacket is a casing installed on parts of the heat generator that are heated from the inside. Often this is a cylinder with pipes placed on the chimney. Difficult for DIY assembly, prone to leaks, but does not require disassembling the stove for installation and is quite effective.
Water jacket
Diplomat
Register
The choice of model is usually associated not so much with efficiency and price, but with the complexity of installation. For example, some modifications of water “shirts”, “coils” and “diplomats” are installed without disassembling the stove. The maximum is upgrading part of the pipe or replacing the cast iron stove (for cooking) with a “diplomat”.
Material
Copper heat exchanger
When designing a stove or fireplace with any heat exchanger, the engineer (or stove maker) takes into account the parameters of the materials. Necessary properties are fire resistance, elasticity, corrosion resistance, heat capacity, thermal conductivity. Only metals have these characteristics.
- Steel is excellent in all respects except corrosion resistance. However, if the coolant is always filled, it will not rust.
- Stainless steel has no disadvantages other than high price and difficulty in welding. Galvanized steel is almost never used due to toxic emissions associated with high temperatures.
- Cast iron, the disadvantages of which are the difficulty of welding and the high probability of cracking (due to sudden temperature changes due to uneven heating).
- Copper, which is good for everyone, except for the high price and connecting parts by soldering. Solder does not “hold” strong heat if the water is drained, so the use of copper is limited.
The choice is usually related to the availability or accessibility of the material. You can often find sauna stoves with a cast iron heat exchanger, which is a modified battery. The modification consists of welding the joints of the sections and plugs in the extra holes. Thus, a heat exchange register is obtained that has all the necessary properties. Its disadvantage is its bulkiness, which limits the choice of location.
Installation options for heat exchange structure
Installing a heat exchange device of any kind involves a considerable amount of work, especially if its efficiency is of serious importance. For example, the simplest spiral on a chimney may heat up poorly, and there will be no circulation at all without a pump. Then you have to take measures, including abandoning such a design. In practice, one heat exchanger for a furnace installed in different places produces different efficiencies. Conventionally, you can make such a TOP, starting with the most effective variety:
- cast iron or steel U-shaped register in the firebox;
- water jacket around the firebox or at any of its surfaces;
- U-shaped diplomat in the firebox;
- diplomat directly above or behind the firebox, with maximum contact;
- water jacket around the heater;
- register, diplomat or coil in the heater;
- diplomat or coil behind the heater;
- water jacket on the chimney.
A coil on a chimney is conventionally the least effective option. However, the simplicity of the device often offsets the disadvantages. In addition, efficiency is increased in various ways. Among them are lining the coil with a thermally insulated casing and filling the voids with sand, or installing the structure directly into the heater.
All names are conditional. For example, it is not uncommon to have a factory design where a cubic-shaped container is built above the heater. It can be considered a shirt or a briefcase.
Correct connection
A wood stove or fireplace with any heat exchanger is only part of the system. For its energy-efficient operation, coolant circulation remains a key factor. Even when the use of a pump is clearly necessary (for example, in a large two- or three-story house), natural circulation is important. Thanks to it, the pipes will not burst due to defrosting too quickly, and the water will not boil so easily if the electricity goes out. To improve circulation, it is advisable to adhere to the following rules:
- the higher the height of the heat exchanger pipes, the better;
- the expansion tank is placed as high as possible, next to the stove;
- a pipe goes to the tank from the top pipe;
- the pipe from the expansion tank goes to the lower inlet of the radiator;
- all horizontal sections are made at an angle (at least 3 mm per 1 m);
- The outlet from the radiator is only on the opposite side or diagonally.
Another important point is the permeability of the pipeline. The higher it is, the better. Therefore, you should not narrow the diameter, build in extra elbows, fittings, or use rusty or plastic pipes from the inside.
The heat exchanger is installed at the furnace assembly stage. If we are talking about an old structure, there is no need to be lazy in disassembling it. In this case, it will be possible to install the most efficient device where required. Along the way, a detailed inspection of the masonry, as well as other details, will be carried out. Defects and flaws will be eliminated.
Some recommendations
It’s not difficult to create a water jacket for a stove with your own hands. And it can already be installed in any stove - metal or brick. Heating a house with wood is fraught with frequent fiddling with heating equipment, but in the absence of gas, other alternatives look more expensive. To implement more efficient home heating, use our recommendations:
- Do not skimp on the thickness of the sheet iron - remember that the service life of the furnace depends on this;
- Be sure to use thermometers and pressure gauges to monitor the operating parameters of the heating system;
- Do not use alternative coolants that are not resistant to high temperatures;
- Ensure that you get rid of heat losses - this will allow you to count on economical use of firewood for heating your home.
How to choose?
The choice of a particular heater depends on the initial conditions and the tasks assigned to it. It will heat the liquid inside the oven much faster, but it may boil. Scale forms, which quickly damages the device. Correct calculation of the required power avoids this problem.
Located near the stove chimney, the external heater takes up more space and heats the liquid much more slowly. But there is always access to it. In case of breakdown, it is easy to repair or replace. The coolant rarely boils, it simply does not reach such a high temperature, so scale does not form. The choice is up to the owner.
Expert opinion Pavel Kruglov Stove maker with 25 years of experience
You can purchase a factory model, which will cost from 10,000 rubles, depending on the power. The cost of a high-quality brick stove with a heat exchanger starts from 20,000 rubles, but practice shows that it will not be so effective.
There is nothing tricky about the design of the device; how justified such a purchase is is a big question. Everything can be installed by hand.
Making the system yourself
Making a heat exchanger for fishing with your own hands is much easier than it seems at first glance. And although some fishermen believe that it is wiser to purchase a ready-made inexpensive design, craftsmen do not give up, continuing to produce a wide variety of designs with unique performance properties and operating efficiency.
This is not surprising, because this approach is justified for many reasons:
- The fisherman can save financial savings. A homemade heating device is much cheaper than store-bought models. And if we are talking about residents of remote settlements who simply cannot get to a specialized retail outlet where there is professional equipment for hunting and fishing, then, of course, you have to start the work yourself.
- By making a heat exchanger with your own hands, you can give it a certain set of functionality. In this case, you can simply upgrade a purchased model or try to create a design from scratch.
- If you make a system at home from available materials, this will significantly expand your capabilities and allow you to acquire new skills. By the way, many craftsmen practically cannot imagine their life without constant experiments in the workshop.
Types of homemade heating units
Currently, fishermen use several options for heating a tent:
- "Stove heating". Solid fuel units have always been popular, especially if we talk about those who like to build something with their own hands. However, the safety and operational convenience indicators do not always correspond to the desired ones, so the fisherman needs to constantly be on duty at such a design. And collecting firewood in the dark is impossible, which forces you to bring a certain supply of solid fuel with you to the reservoir. At the same time, too much heat often leads to icing of the tent and other unpleasant consequences.
- Gas heat exchanger. It is considered a more reasonable and convenient means of heating. Using it, you no longer need to install a smoke exhaust system, which is required in the previous case. In addition, such burners are safe and compact.
Beginners who want to know how to make a heat exchanger with their own hands for fishing should prepare the following materials and components:
- A gas burner that supports the ability to manually adjust the gas supply.
- Small gas cylinder.
- Oxygen hose with a length of 50 centimeters.
- Ceramic infrared heating element, which corresponds to the dimensions of the previously taken burner.
The first step is to remove the nozzles from the burner and leave only the tap and tube. Then the hose should be put on the tube and the burner fitting, but the fuel should remain in a gaseous state, so the cylinder should be held standing.
Naturally, a lot of other designs and solutions are offered on fishing forums, but this option is the most popular, especially among lovers of outdoor activities in the cold season.
https://youtube.com/watch?v=yZrUiRAgkZk
What types of homemade furnace heat exchangers can there be?
In addition to the structural differences in furnace boilers discussed above, which depend on the selected material for their manufacture, their designs may also differ depending on the type of furnace. for which they are actually intended. Such stoves can be heating or heating-cooking.
The design of the heat exchanger for a heating and cooking stove is different in that in its upper part there is an open space for the flame to access the cooking stove. In registers for heating stoves, the upper part, as a rule, is covered with a solid sheet or rows of pipes.
The shape and dimensions of stove boilers are selected in accordance with the size and shape of the place where they are supposed to be installed (most often this is the firebox of the stove), as well as depending on its required thermal power.
Boiler designs for heating furnaces with a water circuit
Here we will look at the three most common designs, made separately from sheet metal and pipes, as well as their combinations.
The heat exchanger is a solid U-shaped structure, welded from sheet metal, intended for placement in the firebox of a heating furnace. The heat transfer surface is its internal walls.
Sheet metal heat exchanger for heating furnace
Furnace boiler made of pipes. Cold water from the system is supplied through the “return” to the lower U-shaped pipe of the base of the heat exchanger (with a diameter of 40-50 mm and a wall thickness of 3-4 mm), gradually heating up, it flows through L-shaped vertical pipes (the same cross-section as A U-shaped base or smaller) rises up and enters the upper collector pipe, and from it, already heated, into the heating system of the house. Such a register is more efficient than one made of sheet steel, but also more difficult to manufacture, since you will have to make many pipe joints and weld them.
Furnace register for heating stove made of pipes
The side surfaces of this register are made of sheet metal 3-5 mm thick and are solid panels 40-45 mm thick, and the upper part is connected to each other by a number of horizontal pipes with a diameter of 40-50 mm.
The use of pipes instead of a solid surface (as in option 1) allows you to increase the area of contact with the heating medium, and the use of sheet metal for the side panels simplifies the manufacturing process, which is important if you decide to make it yourself
Furnace boiler made of sheet metal and pipes for heating furnace
Furnace boilers (registers) for heating and cooking furnaces
Heat exchangers for heating and cooking furnaces can also be made from both sheet iron and pipes (round or profile), as well as by combining them. Let's consider several options.
Heat exchanger for a heating and cooking stove or stove in the form of two solid side panels made of sheet metal (“book”) connected to each other.
Heat exchanger for heating and cooking furnace
A furnace boiler made of round and rectangular pipes: round ones (40-50x4 mm in diameter) are arranged horizontally and connected into a structure using rectangular ones 50-60x40x4 mm. This combination of different types of pipes facilitates the manufacture of the boiler. Dimensions a, b, c and d are calculated depending on the size of the firebox and the required register power.
Heat exchanger for heating and cooking furnace made of round and profile pipes
Heat exchange register made only of round pipes. It consists of two horizontal circuits connected by vertical pipes. Cold water from the system is supplied to the lower circuit, and heated water from the upper circuit is supplied back to the heating system.
Register for a heating and cooking furnace made of pipes
How to select or calculate the dimensions of a furnace boiler
After you have chosen the type of heat exchanger, you need to decide on its dimensions. On the one hand, its dimensions must correspond to the size of the place where it will be installed.
Most often, heat exchangers are placed in the firebox of a stove, but sometimes in the smoke ducts or chamber of a ductless stove. It is necessary to take into account that there should be a gap of 0.5-1 cm between the brickwork and the register, taking into account the thermal expansion of the metal.
In addition, you need to know the required power of the furnace heat exchanger. How to determine it?
It depends on the thermal power of the water heating system required to heat the house, which in turn depends on the thermal insulation properties of its external structures and the maximum negative outdoor temperature in winter. Simplified, you can focus on the average: 10-12 kW per 100 m2 of house area.
How to calculate the required area of a furnace boiler to provide such thermal power? On average, it is generally accepted that to provide a thermal power of 5-10 kW, about 1 m2 of boiler heat exchange surface is needed. The value of this indicator depends on the temperature of the hot gases in contact with the heat exchanger and the temperatures of water (coolant) at its outlet and inlet, which in turn largely depends on the combustion mode and type of fuel.
The total power of the heat exchanger can be calculated using the formula:
Q=SQsp,
where: Qsp – its specific power, kcal/hour; S – its useful area (contact with the heating medium), m2.
Specific power can be calculated using the formula:
Qsp = k(Tt)S,
where: k =12 kcal/hour per 1°C – gas-water heat transfer coefficient through a steel surface; T = (Tmax+Tmin)/2 – average temperature of the heating medium (flame, gases), °C; t = (tmax+tmin)/2 – average coolant temperature (input+output/2), °C.
If the stove operates periodically (about 2 hours) on wood, then the average temperatures of the medium and coolant will be a maximum of 500 and 70 ° C, respectively, and from 1 m2 of heat exchanger in this case it will be possible to obtain a maximum of 6 kW of thermal power.
If the furnace operates on coal and continuously, then the average maximum average values of the medium and coolant can be: 800 and 70 °C, respectively. In this case, about 10 kW can be removed from 1 m2 of furnace boiler area.
If the total required thermal power of the boiler and the combustion mode (and therefore its specific power) are known, then it is quite possible to determine what useful surface area it should have:
S =Q/Qsp, m2.
Depending on what material the heat exchanger will be made of, you can calculate how many pipes or sheet metal will be required to provide such a contact area with the heating medium. In this case, only the surface that will be in direct contact with hot gases or flames is taken into account.
For example, if the furnace boiler will be made solid (only from sheet metal), then only its inner surface should be taken into account. If it is made of pipes, then almost their entire surface will participate in heat exchange (their length x diameter x 3.14). When combining different materials, it will be necessary to calculate the area of contact with the heating medium of each element separately, and then sum it up.
If it is necessary to increase the thermal power of the boiler with the same overall dimensions, additional elements (for example, pipes) can be added to its design. If its power is too great, then its length can be reduced. In other words: in each specific case, it is necessary to calculate and adjust the register dimensions, linking them to the size and design of the stove itself, as well as the power of the house’s water heating system, which will have to be provided with thermal energy.
DIY making
Once the type of furnace boiler has been selected, the material has been selected, and the dimensions have been calculated, you can begin making it yourself. In this case, it is necessary to pay attention to the quality of welding work. It must be at a high level, since this unit will be operated in a fairly aggressive environment, and in order to repair it, most likely, you will have to disassemble the stove or part of it. Therefore, if you are not confident in your welding abilities, then it is better to entrust this work to an experienced specialist, having previously prepared all the necessary structural elements.
After completing the welding work, it is necessary to fill the register with water, check for leaks and perform pressure testing at a pressure that is at least 2 times higher than the working pressure in the heating system.
Power selection
Without knowing what the building's heating needs are, selecting equipment is difficult. The calculation can be approximate and accurate. The first option is preferred by sellers of heating equipment, as it provides a relatively accurate result. In this case, the thermal power is calculated in accordance with the area of the premises that are heated.
They look at a single room and find out what area it has. The resulting value is multiplied by 120. The energy required for the entire country house is determined after combining the indicators of all rooms. But the exact method is much better. It assumes:
Multiplying the area of premises where only one wall is in contact with the street by 100
It is important that there is one window on the same side. Multiply by 120 if we are talking about a corner room with one window. Multiply by 130, when we mean a room with two or more windows, as well as two external walls. When calculating using an approximate method, residents of cold regions may not receive enough heat, while those living in the south may overpay for overly powerful equipment.
In this video you will learn how to make a heat exchanger:
The exact calculation method is carried out by specialists. It provides a clear understanding of how much heat can be lost in any building. Before proceeding with specific calculations, determine the area of doors, windows and walls. Each building material has one layer thickness or another. It also needs to be taken into account.
What is a heat exchanger for heating a private home?
A heat exchanger is a device that transfers heat from the generator to the coolant. In private homes, surface-mounted appliances are usually used. Thanks to such heat exchangers, heat is transferred directly through the walls of the unit.
Installation in the boiler
The device provides maximum efficiency in gas, electric and other boilers operating on solid fuel. Pipes in the form of a coil are installed inside the heating device. When fuel starts burning in the boiler, the device heats up. Thanks to this, the coolant circulates throughout the system, transferring heat inside the room, and comes back to the coil.
Photo 1. Steel flow-through heat exchanger for boiler model Vitopend 100, .
If the house uses a stove rather than a boiler as the main heating device, then the use of a heat exchanger is also relevant if the building has a large area. The stove does not heat the cottage due to its low power. For this reason, a coil is installed inside the device. It heats the coolant to a high temperature, and this heat, thanks to radiators, is distributed throughout the house.
Types of devices
Among air types, the classic model for self-assembly is a tubular heat exchanger. But there are also a large number of other types. They remain relevant for chimneys of long-burning stoves, small-sized potbelly stoves, and stoves undergoing mining. Their heat converted from combustion energy is called dry heat. Pipes can be welded to the firebox horizontally and vertically. Vertical localization is many times more effective because the air flows better through the channels. The material is usually steel.
Another type of heat exchanger is a pipe that wraps around the firebox. For proper heat transfer, 2-3 curls are required. They move apart a little, increasing the heating area. The performance corresponds to the difference in the level of inlet and air supply. The draft corresponds to the temperature difference, so the hole for the fence is often exposed to the street.
Coil
Partitions in the housing are also a type of heat exchanger. The characteristic labyrinth is constructed from vertical metal plates. The optimal thickness of each part is 6-8 mm. The inlet and outlet openings of the air duct are formed opposite each other, and a cover is welded on top to seal the housing.
Partitions in the housing
The next option is pipes that pass through the firebox. The structure is constructed already at the stage of assembling a home-made device, before welding the walls. The channels are located parallel at the same distance. The cross-section of the pipes is not less than 50 mm.
Pipes through the firebox
In vertical channels, air moves more actively, therefore increasing productivity. Less commonly, horizontal channels or partitions are appropriate. Any described scheme is suitable for design, provided you have welding skills.
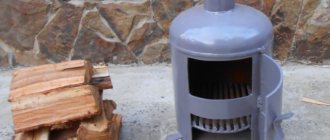
Air tank
You can improve an ordinary potbelly stove or sauna stove with a direct chimney by installing it on an air heat exchanger on the chimney. It is a cylindrical body through which several hollow pipes pass. Air is sucked in from below, heated in the pipe, it leaves the heat exchanger, increasing the efficiency of the furnace by 15-20%. The air ducts can be routed to an adjacent room, thus heating several rooms or sections of the garage from one furnace.
Video: how to make an air heat exchanger for a chimney
Another original design of a stove with an air heat exchanger on a chimney for heating a garage is shown in the video. With the help of such a stove you can heat not only a garage, but also any utility room, including agricultural buildings and greenhouses.
From corrugated pipe
A cheap and simple way to install an air heat exchanger is to use corrugated ventilation pipes for this purpose. They are wrapped around the uninsulated part of the chimney, as a result the air in the corrugation warms up and, due to thermal convection, enters the neighboring rooms. To make the corrugated pipe heat up more efficiently, you can wrap it together with the chimney in several layers of foil.
A system with a corrugated pipe is convenient for heating a garage in which a simple potbelly stove made of rough metal is installed. Such a stove quickly heats the air, but it rises to the ceiling, which is why the temperature at floor level remains low. If you move the air ducts closer to the floor, you can create natural circulation of heated air, and the temperature throughout the garage will become approximately the same.
Bell-type heat exchanger
Heat exchangers in the form of a bell are usually used for heating the attic or second floor. The principle of its operation is that the air heated from the chimney rises to the ceiling, where it is retained by the hood and, gradually cooling, falls down into the room.
The cap can be made of either galvanized metal or fire-resistant plasterboard and lead the air ducts to the desired location. Sometimes the cap is decorated with stones, which, when heated, serve as an additional heat accumulator.
Flaws
Despite many advantages, the installation of a heating element on a chimney pipe also has disadvantages. One of them, the most important, is a sharp decrease in the smoke temperature at the installation site of the heat exchanger. This can lead to deterioration of traction and the formation of condensation, increased soot deposition inside the pipe.
In addition, when connecting a heating system, for example, a garage, you need to calculate the volume of coolant to avoid boiling water and bursting pipes. Welds must be completely sealed.
Any heat exchanger design significantly increases the efficiency of the furnace. For trouble-free operation of the system, it is necessary to carry out a visual inspection of all its elements at least twice a year, and, if necessary, timely repairs, descaling, replacement of gaskets and other necessary maintenance work. In this case, water heating and heating systems will operate flawlessly for a long time.
Tags: steam room, heat exchanger, install
« Previous entry
Design features
Most often, a metal tank with a capacity of up to 5 liters with built-in pipes acts as a heat exchanger. There is no direct contact with fire. The device allows you to heat cold water, which then flows into radiators or a removable tank of larger capacity located in the same or an adjacent room.
As a result, by heating the stove in one room, it will be possible to heat another. According to its design, the heat exchanger for a furnace can be external or internal.
External
This type is very similar to a tank filled with coolant. Inside the container there is a part of the pipe used to remove combustion products. In terms of its design, the external heat exchanger is more complex than the internal one, as it places increased demands on welding work.
However, its maintenance is much easier. If necessary, the tank can be dismantled to remove scale or eliminate leaks.
Application specifics
Standard stove heating implies an uneven distribution of thermal energy - the further from the source, the colder. After connecting the radiators and filling with water, the stoves act as analogues of solid fuel boilers, providing heating of the coolant, smoke channels and walls. During combustion, such a system will allow heat to be transferred from the coil to the radiators, and after the fuel dies out, it will use the energy of the heated walls of the furnace.
When installing a heat exchanger, it is worth considering that its installation will reduce the usable volume of the fuel compartment and fuel will have to be added much more often. Correct design of the water circuit and its relationship with the dimensions of the heating chamber will help eliminate this problem. A good alternative would be to install a long-burning stove.
Such an upgrade of the heating system has its own nuances. The energy released during the combustion of wood will heat the heat exchange unit and the working fluid placed in it, but the walls of the furnace will not change their temperature.
The upper part of the housing with the smoke channels will be heated. If the building is used for temporary residence, the furnace will be turned on irregularly and can lead to freezing of the liquid inside the pipes. In order to prevent accidents, it is recommended to replace water with antifreeze.