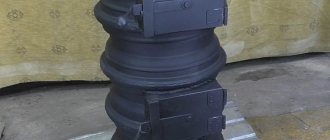
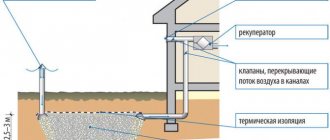
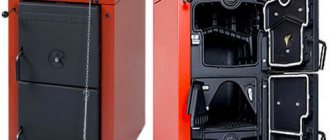
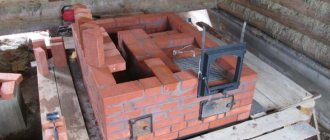
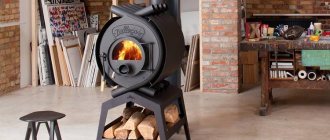
Women often do not understand the full value of a garage for men, for whom it is their second home (and for some, their first). They are ready to spend days and nights there. But to do this, you need to create comfortable conditions in the garage. And first of all, you should take care of the temperature. You can do this with your own hands quite simply - using a potbelly stove in the garage. Naturally, you can buy it in any store where this category of goods is available. But it will be much more pleasant for any man to make it with his own hands. There are a lot of ways to make a potbelly stove for your garage. The most popular and inexpensive ones are presented below.
Advantages and disadvantages of potbelly stoves for heating
A homemade potbelly stove fits perfectly into the garage. Small sizes, affordable materials, ease of manufacture.
A homemade potbelly stove is ideal for the garage
There are several options for making a potbelly stove from scrap materials:
- Made from an old barrel. Advantages: few materials are made quickly. Disadvantages: thin walls (low heat capacity, will burn out quickly).
- Made from an old milk flask. Advantages: there is even less work here - weld the legs, weld the pipe, install the grate and drill holes in the door for air access. Disadvantages: the thickness of the walls of the flask is the same as that of a barrel.
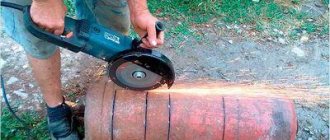
- Made from an old gas cylinder. Advantages: the walls of the gas cylinder are quite thick and made of high-quality steel. It's easy to find the old one. There are options for manufacturing vertically and horizontally. Disadvantages: you need to be very careful during the opening process. Even after standing open for a week in the air, the cylinder can cause an explosion when cut. It is recommended to first fill the bottle with water.
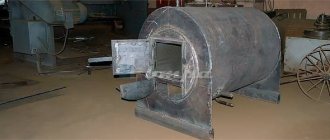
- Made from metal sheet. Advantages: you can choose any sizes and materials, make a screen and make technical additions to increase the heat capacity (for example, pour sand between the walls or cover it with bricks). Disadvantages: Weight gain will require building a normal foundation.
Calculation of basic parameters (with drawings and dimensions)
Despite its simplicity, for high-quality operation of a potbelly stove, you need to make some calculations. All structural elements are calculated.
Pipe
The main thing is to calculate the diameter of the pipe. If this diameter is too large, then all the heat will escape into the atmosphere. If it is small, there will be no draft, the stove will smoke. The diameter (in mm) should be 2.7 times the volume of the potbelly stove in liters. The capacity is determined without the volume of space below the grate (the height is equal to the distance from the top to the grate).
Example: height from the top wall to the grate is 25 cm, width is 40 cm, length is 50 cm, then the total volume in liters is 50 liters. The diameter of the pipe will be 50 x 2.7 = 135 mm.
There are several options for making potbelly stoves for the garage
Screen
The main task of the screen is to reflect heat inward to increase the combustion temperature. Then the gases will not cool down, but will completely burn out. The fuel must be burned by partial pyrolysis. The screen is installed at a distance of 50-70 mm from the walls on three sides. It is good to make a screen from red brick. It heats up and then gives off heat for a long time and gradually.
You can also make a water heating system throughout the garage using a potbelly stove.
Litter
Due to the fact that part of the heat is radiated downwards, the floor under the stove heats up. If it is wooden, then a fire is possible. Embers may fall out when opening the door. A bedding made of iron or other non-combustible material (for example, sheet asbestos) is required. The litter should overlap the contour of the stove at a distance of 350-600 mm.
Useful tips
A potbelly stove will be easy to use if you listen to the recommendations of experts:
- To check the quality of welded joints, the first ignition is carried out outdoors.
- To ensure tightness, the chimney running inside the garage is made from an all-welded pipe without horizontal sections.
- There should be a box of sand and a fire extinguisher next to the stove.
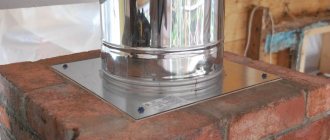
- The places where the chimney pipe passes through the wall or ceiling are insulated with fireproof material.
- A brick screen lined on 3 sides of the stove will protect against accidental burns and retain heat after the fuel burns out. The distance from it to the walls of the potbelly stove should be 5 - 7 cm.
Despite its simple design, a potbelly stove is considered the most reliable and cheapest way to heat a garage. Even garbage can be burned in such a stove. When choosing, it should be taken into account that horizontal structures last longer than vertical ones.
Required tools and materials
To make a potbelly stove you need the following tools:
- welding machine;
- hammer;
- chisel;
- rags;
- Bulgarian;
- sandpaper.
Of the materials, first of all, you need to have the basics - a barrel, or a milk flask, or a gas cylinder, or sheets of metal from which the stove will actually be made.
In addition to them you will need:
- sheet material;
- steel pipes;
- door hinges;
- grate bars or reinforcement bars;
- pipe with weather vane;
- fire brick.
This list may not be complete and some may be replaced.
Fuel selection
A potbelly stove is a stove that can be heated with a variety of fuels. This is firewood, peat briquettes, etc. Waste fuel such as waste oil is often used. This type of fuel requires some modification of the stove, but is available and cheap, especially in large cities, where it is not always easy to obtain firewood. And if this is a garage where they change the oil, then there is no problem with working out. Fuel in the form of oil gives more heat and burns completely. No ash.
Firewood for a potbelly stove
Firewood for a potbelly stove can be of any kind, but there are still certain preferences.
Softwood firewood burns quickly, produces less heat and produces a lot of soot, which clogs the chimney. There is a risk of fire.
It is better to use hardwood firewood:
- birch;
- acacia;
- aspen:
- oak;
- fruit trees;
- alder.
This wood burns long and hot.
Water heating in a garage from a potbelly stove has a special advantage - you can use any available fuel to heat the stove: wood, coal, vegetable waste.
Preparatory work before assembly
Before assembly and installation, you need to choose the right location. For safety reasons, the stove must be installed in a place away from the car at a distance of no closer than 1.5 meters. Optimally in a corner away from the entrance. The walls of the garage in this place are best protected with sheet asbestos.
Assembling a potbelly stove in the garage
The nuances of using propane
When using propane as a fuel, the following requirements for safe operation must be taken into account:
- It is prohibited to subject the gas tank to mechanical stress. The propane inside the cylinder is under pressure, so any damage can break the seal of the container and lead to a fuel explosion. When moving the tank, you need to ensure its integrity.
- Do not place the cylinder in places with high temperatures or open fire. The thermal effect provokes internal expansion of the gas and an increase in pressure on the walls of the container. If it reaches a critical point, gas may escape. The slightest spark will cause it to explode.
- The cylinder should be regularly assessed for damage and leaks. If propane is used frequently, the tank may become depressurized. Therefore, a routine check of its integrity is a prerequisite for safe operation.
How to make a potbelly stove in the garage with your own hands
If you have the skills to perform welding work, then installing a potbelly stove in the garage will be no problem. To do this you need:
- draw a preliminary design for yourself;
- choose a place;
- conduct an audit of available materials;
- select the required amount of materials;
- find or buy what is missing;
- mark and cut according to the sketch;
- cook the stove;
- install it in place and take the pipe out.
Do-it-yourself potbelly stove for the garage is ready!
Which brick to choose for masonry?
Each section of the kiln uses its own brick. The highest temperature in the firebox. The material must withstand such a load. Only fireclay bricks are suitable here.
All smoke exhaust channels and the firebox area are also subjected to a temperature test, although not so high. Here we will use fire-resistant ceramic bricks. It is cheaper than fireclay and can withstand the load.
As a base we will use frost-resistant bricks that can withstand high pressure. The weight of the entire structure will be distributed on it.
General recommendation - use brick:
- full-bodied;
- qualitative;
- with good heat transfer and heat capacity.
The bricks must have different sizes. Before purchasing, you need to clarify which order is calculated. Below are step-by-step instructions for laying a brick stove with your own hands. There you can use a brick measuring 250x120x65. Also, it is he who is taken into account in the order in photo No. 2 (below, in the section “Masonry of the furnace”).
If desired, you can use various decorative types of bricks for cladding. This will give the stove a more aesthetic appearance.
In our case, you will need 60 pieces of refractory ceramic bricks and 35 pieces of fireclay bricks (including possible losses).
Classic stove - potbelly stove
To make a classic potbelly stove with your own hands for the garage, you need to take 10 steps:
- Make 5 blanks from sheet material: a bottom, two sides, two to form a smoke circulation.
- Mark the places for attaching the grate and smoke circulation sheets on the side blanks. Weld a reinforcement bar or angle in these places for subsequent fastening of the grate and smoke circulation sheets in these places. You can buy a standard cast iron grate or weld a grate from strips 25 - 30 mm wide of thick metal (you can use reinforcement bars, tractor fingers or pieces of pipes with a diameter of 20 -30 mm).
Classic stove - potbelly stove - Weld the side walls to the bottom. Use a builder's square to weld vertically.
- Sequentially weld the lower and upper workpieces so that a smoke channel is formed.
- Weld the lid with the welded sleeve. Install a damper in the sleeve so that the chimney can be closed. Cut and weld the jumpers.
- Make a door. Equip it with hinges and a latch. Make the door large to make it easier to remove the ash later. Secure at the front.
- Weld legs from pieces of metal pipe 8-10 cm long. Nuts can be secured inside the pipe. By screwing the bolts into the nuts, you can level the position of the stove.
- Make a chimney from a pipe. Select the pipe diameter to be no less than the calculated one.
- Secure the chimney by insulating the transition in the wall.
- Place the stove in place and adjust the height. Secure the chimney in the sleeve.
Milk flask stove
Before you put such a potbelly stove in the garage, you need to know that the scale of welding work here is smaller. In fact, here the legs and the chimney pipe are welded to the body. The door remains standard. Holes are drilled in it for air flow. The grate is made from a metal rod. It is mounted horizontally at the bottom of the flask.
It is installed in the desired place and the chimney is attached to the sleeve.
Such a stove is more suitable for burning garbage than for heating.
Preparation of the solution
Let's start by preparing the solution. For masonry work we use a special ready-made mixture. Sold in construction stores. It is a yellow-gray powder in 25 kg bags. All that remains is to dilute it with water in the correct ratio and mix. Detailed instructions are always indicated on the packaging; you need to follow them step by step. This solution is the best choice. It has only one drawback - its high price.
You can prepare the mortar for masonry yourself. For this we need clay and sand. First, let's determine the quality of the available clay and the content of impurities in it. We follow the following instructions:
- Roll the clay into a rope. Thickness - 10-15 mm, length - 150-200 cm.
- Take a rolling pin with a diameter of 50 mm and wrap a rope around it.
- The tourniquet should stretch smoothly and break, stretching by about 15-20%.
Expert opinion
Pavel Kruglov
Stove maker with 25 years of experience
If the rope stretches more, the clay is “fat”; if it breaks earlier, the clay is “skinny.” In the first option, the solution will shrink greatly under the influence of temperature, in the second it will crumble.
The next step is to prepare the sand. First, sift it through a fine sieve. The cell should not exceed 1.5x1.5 mm. Next we follow the instructions:
- using a handle and burlap, we arrange some kind of net;
- pour sand into it and begin to rinse it under running water;
- Rinse until the draining water runs clear.
Thus, we have rid the sand of impurities.
We do the same with clay. Now it should be soaked. To do this, pour the clay into a previously prepared container. Pour water so that the entire surface of the clay is covered. After 24 hours, mix thoroughly. We repeat the process until the clay has a consistency similar to toothpaste.
There is no universal proportion for a solution. Everything is installed by trial and error, depending on the characteristics of the materials used. The main thing is that the solution is convenient to work with.
To increase strength, experts recommend adding a little cement or salt.
Expert opinion
Pavel Kruglov
Stove maker with 25 years of experience
Here is a basic recipe for masonry mortar:
Take 2 parts of clay. Add one piece of sand to it. Using a construction mixer, mix until smooth and thick. We will need approximately 40 liters of solution.
From a gas cylinder
How to make a potbelly stove for the garage with your own hands from a cylinder? A gas cylinder stove is made in various designs - horizontally and vertically.
When installed horizontally, the container itself is the combustion chamber. Instead of a grate, rows of holes are drilled in the wall and in this place I weld an ash pan box with a drawer. You can cut out a window and install a standard grate. A cutout for the door is made in the end part. The door can be made from this segment by hanging it on hinges and attaching a handle with a latch, or by welding a standard one. The chimney liner is welded on the opposite side.
The legs are attached at the bottom.
When installed vertically, the internal space of the cylinder is divided into two parts. At the bottom there is a round grate and an ash drawer.
A window for the door is cut out in the upper part and the chimney liner is welded. The upper semicircular part can be cut off and a metal sheet welded to form a hob.
Important structural components
To make a durable potbelly stove for the garage, it is recommended to use detailed diagrams; photos will not help here. The drawing will help you independently create a practical and very effective version of the stove, which will be an ideal solution for heating a garage or other room.
Manufacturing of the combustion chamber It is worth noting that the larger the firebox in terms of its area, the better it will be, since the stove, which runs on oil, wood, and exhaust, transfers the function of efficient heat transfer. In addition, it is important to have a decent area of the bottom of the chamber, then it will be possible to lay firewood or other coolant well. It is for this reason that the shape of the stove should be cylindrical and laid on its side. All rectangular ovens must also be oriented strictly horizontally. A vertical arrangement is only possible if the oven is large in size.
Making an ash pan This structural element is not always made, since ash can be removed directly from the fuel chamber. To ensure air supply, you just have to drill small holes in the door. If you plan to make a stove for a garage with an ash pan, then it may look like a box. This design makes it possible not to take up the space of the combustion chamber. In this case, the metal can be used quite thin, since there is no danger of burning. There is no need to weld it either, just screw everything in place.
Grate If such an element is used, it effectively separates the chamber and the ash pan located in the housing. It is quite possible to use factory grates made of cast iron. The distance rule must be observed. The interval between the gratings should be 10 mm. For fastening, it is quite possible to use a special corner, which with its outer edge is turned into the fuel chamber.
Openings and doors Similar elements, as a rule, are made of metal, which usually remains after the work on cutting out the necessary parts is carried out. The doors are connected to the body by welding and steel canopies.
It is mandatory to install a durable locking device - a bolt or bolt.
Openings deserve special attention, since here it is necessary to use standard dimensions that are shown in the drawings:
- For a firebox 250 by 250 mm.
- For the blower - height 100 mm and width 250 mm.
- Awnings are usually placed along one vertical line, with the distance between numerous openings being approximately 10 cm.
To prevent coals from falling out through the openings and doors, it is better to make the firebox opening about a couple of centimeters above the level of the grate. Gas and smoke removal
Pipes for this furnace should have a diameter of 100 to 150 mm.
This element is directly involved in the process of heat transfer, therefore it is made of high-quality steel and is also not insulated. A part such as a pipe is usually located on the side, as well as at the very top of the furnace, with the first option being the most preferable.
Pipes in a room are usually not led along the shortest lines, but strictly to one of the most remote points and in simultaneous inclined and horizontal sections. This design significantly increases the amount of heat received.
The pipes with which the furnace is equipped, as the drawings show, must be equipped with valves - moving along a guide or rotating.
The need for such elements is based on the fact that it is possible to regulate the process of smoke removal as efficiently as possible and shut off the chimney for the time when the firebox is not being fired.
A valve on the pipes must be installed without fail, especially if various measures are taken to increase the overall heat capacity of the furnace.
Parts to significantly increase combustion and heat capacity
Pipes in the manufacture of a furnace operating on waste oil are not the only necessary element. It is important to ensure an optimal long-term combustion process. For a furnace that runs on waste oil, a special suspended load is ideal. As the fuel burns, it will press the load against the grate by its gravity. A metal pancake with a hole can be used as such a load.
Stone can be used as elements that provide heat capacity.
Here you can note the following execution options:
- If the furnace runs on waste oil, a lining with special refractory plates is optimal. It is ideal because the metal body wears out much less, and the volume of the firebox is preserved;
- Another method is based on covering all the walls with bricks. As a result, you can get a furnace that runs on waste oil;
- There are drawings of oil-fired stoves that have an open box in their upper part. A stone or brick is laid in it.
- Very often, a potbelly stove that runs on oil is designed in such a way that there will be a mesh on both sides to firmly fix the stones.
