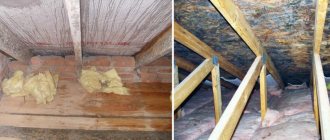
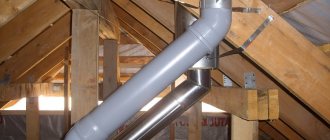
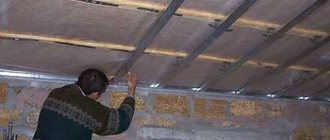
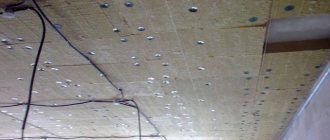
Using additional protection for the attic floor from condensation and water helps maintain a favorable climate in the main building, without high humidity, dampness on the walls and mold in the corners.
Steam and waterproofing of the attic floor completely protects against leaks and extends the service life of all structural materials that are part of the wall frame.
Is it possible to do without vapor and waterproofing, what are the basic requirements for its production and installation, what errors lead to, and other nuances, read more in this article.
The importance of vapor barrier in building a house
The role of moisture insulation in residential buildings cannot be overestimated. In everyday life, the air in rooms is constantly saturated with water vapor. This is moisture from cooking, running showers, evaporation from the human body and from his breathing. All this air with tiny suspended particles of water does not disappear without a trace. It is absorbed into the partitions and insulation of the walls and ceilings of the house, which leads to a deterioration in the properties of the materials from which they are made.
A visual diagram of the operation of an insulated and non-insulated attic
It is a well-known fact: fungi and mold thrive and actively multiply in warmth and moisture. This microclimate is formed in a room with high humidity, and it is detrimental to any building materials.
Most of the territory of our country is dominated by a cold climate, so almost all the time the temperature in houses has to be maintained at a high temperature. Warm, moist air from indoors moves, according to the laws of physics, into the environment. But on the way he encounters construction ceilings: the ceiling and the roof. To prevent evaporating moisture from being retained and deposited on structures, they must be protected in a special way.
If the vapor barrier was initially installed correctly, the process of moving air into the external environment will not cause any damage to the structure. But if the technology has been violated, excess moisture in the house threatens it with rapid cooling, especially in winter, as well as dampness in the rooms. The result may be the need for major repairs of the entire structure.
We insulate the wooden floor
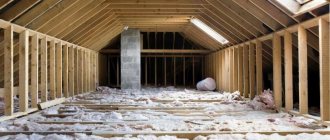
The question is often asked: “How to properly insulate an attic with a wooden base?” Many private households have just such a cold attic.
The procedure for insulating the attic floor is as follows:
- Carrying out treatment of load-bearing structures with special compounds to prevent rotting, pest damage, and increase fire resistance;
- Installation of a vapor barrier film on the side of the premises followed by installation of sheathing;
- Laying insulation of the required thickness;
- Construction of a subfloor from the attic side.
For ceilings with wooden floors, it is extremely important to obtain protection from pests, fire and moisture before starting insulation work, since in the future it will be impossible to do this without dismantling the insulation. Work on insulating the ceiling from the attic should begin with isolating the insulation from the steam coming from the heated premises. Vapor barrier of the attic floor is made with reinforced films made of polypropylene and polyethylene
These films have a multilayer structure, which allows them to prevent steam from passing through from the heated room into the insulation layer. One of the layers is reinforcing, which allows it to bear the loads of holding the insulating boards. The vapor barrier must be continuous and airtight. For proper laying of the strips, an overlap of at least 10 cm is made and the overlap is secured with double-sided construction tape
Vapor barrier of the attic floor is made with reinforced films made of polypropylene and polyethylene. These films have a multilayer structure, which allows them to prevent steam from passing through from the heated room into the insulation layer. One of the layers is reinforcing, which allows it to bear the loads of holding the insulating boards. The vapor barrier must be continuous and airtight. For proper laying of the strips, an overlap of at least 10 cm is made and the overlap is secured with double-sided construction tape
The arrangement of floor beams and sheathing is carried out taking into account the expected load. Thus, when insulating the attic floor of a cold attic using bulk materials, it is necessary to provide a reinforced base. The weight of this layer will place an increased load on the floor beams and sheathing.
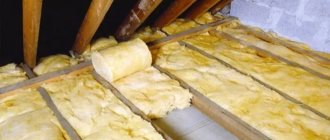
Mineral wool and basalt insulation, or bulk and foam materials are used as a heat-insulating layer. The most popular attic insulation is mineral wool due to ease of installation.
The bulk insulation must be leveled and all voids filled with it. The insulation of the cold attic floor is complete.
The attic floor can be arranged as follows:
- sheathing or subfloor made of edged (unedged) boards;
- finished floor made of plywood and other wood sheet materials;
- leveling screed (installation of waterproofing on top of the insulation layer is required).
Why do a vapor barrier in the attic?
The cold attic itself consists of a roof with two slopes, which is sheathed on the outside with roofing material, as well as a ceiling with insulation that separates the attic from the living rooms. It is mandatory to equip the attic space with ventilation windows - they prevent moisture condensation.
Features of arranging the ceiling with a vapor barrier layer
The attic floor is also the ceiling of the room below. When it's cold outside, the temperature in the attic also drops, but indoors it remains the same. Because of this difference, the top of the attic floor is cold and the bottom is warm. This is how condensation appears. To prevent moisture from entering the ceiling, it is covered with a special protective moisture-proof material.
A vapor barrier is installed on any floor base. During construction, floors are insulated with fiberglass (glass wool), special mats (for example, isover slabs) or loose thermal insulation. All structural elements must be insulated (only ventilation holes are retained). This material does not allow warm air to pass through, keeping it indoors. Thanks to this, you can reduce heating and save on heating costs.
Roof insulation
Vapor barrier and roof insulation are reminiscent of those procedures for the internal partitions of a frame house, but there are certain differences.
Waterproofing is installed along the rafters, on which the sheathing is mounted. Subsequently, the roofing material is attached to it. The space between the rafters is used for installing insulation in the form of slabs.
It is necessary to create a gap between the insulation and waterproofing to allow moisture to escape and ventilate the structure. It is very important to ensure that the waterproofing layer is sealed. When thermal insulation comes into contact with moisture, it loses its beneficial properties.
The inside of the rafters must be lined with a vapor barrier. A sheathing is mounted on top of it, onto which finishing materials are attached. When the attic is properly insulated and there is a vapor barrier, you can install heating there. This will allow you to use it as a full-fledged living space.
So, the best vapor barrier for the entire frame house is achieved thanks to high-quality installed and correctly selected material. Then the membrane will fulfill its purpose - to prevent moisture from coming into contact with the insulation, and, if necessary, remove liquid from the “pie” of walls, floors and ceilings.
Possible difficulties and errors in the process
The main difficulty is the incorrect placement of the two-layer hydro- and vapor barrier. What else you should pay attention to:
- The connecting seams of a water barrier or vapor barrier must be connected carefully, without gaps. Any penetration of moisture into the insulation will have a detrimental effect on its properties.
- It is encouraged to overlap steam and waterproofing on walls with a depth of 10-15 cm, so that the corners do not allow vapor and moisture to pass through.
- The vapor barrier is laid on top of the subfloor. It should not be locked inside the layers. The material itself must be tensioned and not sag.
- Before starting work, the subfloor is prepared, debris is removed, and the surface is cleaned. If there are cracks, they need to be repaired.
Errors when laying vapor barriers are discussed in the video:
Insulating the attic floor with expanded clay
Expanded clay is produced by firing clay.
- low thermal conductivity;
- naturalness;
- environmental friendliness;
- ease;
- availability.
The disadvantage is associated with the difficulty of lifting expanded clay to the height of the attic.
Expanded clay is usually used when it is necessary to insulate the attic floor using slabs.
Technology of attic insulation with expanded clay
The work is carried out in three stages:
The slab is inspected for the presence of cracks and cracks. They are sealed with mortar or covered with thick paper. Protruding elements do not create difficulties with filling expanded clay.
install timber sheathing. In the future, a subfloor will be laid on it.
loose insulation is poured onto the slab and leveled using a regular rake. Layer thickness 250-300 mm. You can move on expanded clay without restrictions.
Insulating the attic floor with expanded clay Tip: when filling expanded clay, it is better to combine granules of different sizes (diameters). This way you can avoid the appearance of voids.
Finally, a subfloor is installed or filled with sand-cement screed.
Please note that insulating an attic wooden floor has some nuances:
the tree is susceptible to rotting, which means the steam rising to the top must pass freely. Improper installation of films or the use of non-breathable materials, such as roofing felt, will lead to the destruction of wood in the future.
When using foil insulation, you need to place it with the foil down. This way the wood will be protected from water and at the same time will not accumulate steam moisture.
Errors in attic insulation
The “correct” way is to use a superdiffusion membrane or vapor barrier film
“Wrong” is to lay a special film without taking into account the markings or even ordinary film
The attic floor insulation diagram for various types of insulation is shown below.
Attic floor insulation scheme - 1
Attic floor insulation scheme - 2
Conclusion
In this article, we focused on the main stages and features of insulating the attic floors of a private house using various types of insulation. We hope this information is useful to you.
How to protect the attic floor from moisture
Thermal insulation in its structure is a multi-layer cake. One of its layers is a vapor barrier film, which should prevent moisture from penetrating into the structure of the structure.
To protect the insulation from fumes, a vapor barrier film is installed in front of the insulation layer (from the side of the living rooms). The vapor permeability of the film should exceed that of thermal insulation - this will allow you to quickly remove moisture that has entered the insulation through the protection.
The result of water exposure to floor elements
There are 2 reasons for vapor deposition on floor structures. The first is as a result of the release of household fumes and their diffusion through the ceiling. The second is the occurrence of dew due to the difference in temperature inside the room and the unheated attic.
A vapor barrier is installed on the ceiling if it is expected that the attic will be unheated. The rest of the space is not subject to insulation, because... it is uninhabited. But the protection of slopes and rafters is necessary, these are:
- waterproofing - to eliminate external influences from the street.
- natural ventilation - from condensation that appears due to the difference in temperature outside and in the house. According to the standards, the total area of all ventilation openings must be at least 1/300 of the floor area or roof projection (horizontally). If ventilation is arranged correctly, in winter the difference in temperature in the attic and outside will be no more than 5-6 degrees.
Anti-condensation vapor-permeable membrane
This film differs from the previous one in that it is cheaper, but at the same time it can protect the insulation from condensation (not from tens of liters of water), and also release excess steam from it.
Where is anti-condensation film used : In a cold attic - under the counter-lattice, that is, from inside the cold attic.
Use films correctly, and your frame house will last a long time and make you happy! If you have any questions, ask, or you can immediately contact us to select a team for you.
Sometimes it’s much easier to hire trusted builders than to understand all the intricacies of building a house yourself, so get in touch.
Main characteristics and advantages of Alucraft vapor barrier
One of the best options is the Alucraft vapor barrier material with a three-layer structure. The top layer is aluminum foil, the bottom layer is kraft paper, and the connecting link between them is molten polyethylene. A special feature of aluminum foil in this material is its high tensile strength, which is ensured by the paper base. In this case, the material allows vapor to pass through and at the same time reflects the heat flow, therefore, the heat returns to the room.
The material of this brand can be called an excellent option for creating a vapor barrier layer in a bathhouse and sauna, with brick, concrete and wooden walls. As for the ceiling of a private house with wooden floors, Alucraft is the best option in this case.
All materials with a foil layer do not pose a risk to human health. They do not tend to emit harmful substances when heated or exposed to solar radiation. In addition, foil vapor barrier for the ceiling is characterized by a very reasonable cost. The material is rolled into rolls, which simplifies transportation to the site and installation work.
Video description
This video clearly shows the consequences of improper formation of a vapor barrier on a ceiling in a wooden house:
There are several different techniques used to attach the vapor barrier to the supporting structure:
- Hardware.
Experts consider staples for a construction stapler to be the best option. This way, the material is fixed to wooden supports quickly, and damage is caused to a minimum. Some craftsmen place strips of cardboard under the staples before “shooting” in order to soften the blow and prevent through penetration.
In any case, it is recommended to additionally secure counter-lattice slats on top of the ceiling vapor barrier from inside the room. They are needed to reduce the likelihood of the film breaking due to stretching. Additionally, this creates a ventilation gap or space for laying utilities.
- Scotch.
This involves the use of double-sided adhesive tape with a foam backing. It is better to choose from a group of plumbing samples, as they last longer under conditions of temperature and humidity changes. For reliability, you can supplement the canvas with a counter-lattice.
Using vapor barrier tape to fix the canvas Source bauemotion.de
Which side to attach the vapor barrier
Laying a vapor barrier on the ceiling causes trouble for more than one craftsman. Many of them do not know which side to attach the membrane and film. We answer: there is no difference. Absolutely, unlike the walls and roof. For pedantic owners who carry out construction and repairs with their own hands, following instructions from “A” to “Z”, we clarify:
- the membrane should always be laid with the smooth side facing the insulation, the rough side facing outwards towards the attic space;
- The film is laid with the light side facing the insulating layer, and the matte side facing the outside, into the room.
To avoid making mistakes when laying a diffusion membrane, there are several tips from experienced craftsmen:
- You need to look at the pictograms - they indicate the outside.
- The outer side of the windproof film is always with a pile, the back is smooth. Determined by the touch of the palm, tactilely.
- The manufacturer's logo is always located at the top.
- The lighter side is placed next to the insulating layer.
- The roll is rolled out on the inside.
For vapor barrier films, it makes no difference how they are laid. If there is still a small pile on it, it is better to lay it with the smooth side facing the insulation, but this is only when insulating the ceiling from below. The fleecy side on top is useless - it does not work as the technologists intended.
Cold attic design
When building the roof of a house, many people think about making a cold attic or attic underneath it? The easiest way to organize a roof is with a cold attic space. Construction of an attic will cost several times more and require more labor.
. Although, it is undeniable that the attic will significantly expand the living space.
Cold attic roofs have the following main components in their pie:
:
How to choose a window sill?- Installation of PVC windows
- Covering the drain hole with your own hands
- roofing;
- attic external walls (applicable for gable roofs with gables);
- insulated ceiling between the living space and the attic.
Ventilation is provided by eaves and ridge vents. The air passing through the eaves openings is called supply air, and the air leaving through the ridge is called exhaust air. Additionally, ventilation can be done through dormer windows on the gables or roof slopes. The windows are equipped with louvered grilles to allow the ventilation intensity to be adjusted.
Dormer windows are located on opposite slopes of the roof so that there are no unventilated areas.
Dormer windows can be rectangular, triangular and semicircular in shape. Their lower part should be at a height of no more than 0.8-1.0 m from the floor of the attic, and the upper part should not be lower than 1.75 m from the floor in the attic. They can also serve as an exit to the roof of the house to inspect the roof, ventilation and chimney elements.
Rolling flooring recommendations
In order to make the ceiling of the first floor, it is necessary to roll up. This stage of work can be carried out using a wide variety of materials.
Skating plan.
In the most common version, skull blocks are nailed along the side of the beam. Such bars should have a cross-section of 40*40 or 50*50 mm. They should not protrude below the main beam. It is on them that smooth boards will subsequently be attached, the thickness of which should be in the range of 10-25 mm. In order to line the ceiling, you can use sheets of plywood. Using sheet material, you can get a perfectly flat ceiling. The minimum thickness of plywood in this case should be at least 8 mm
It is very important to ensure that the edges of the sheets lie exactly in the middle of the beam
Instead of using cranial bars, you can make special grooves in the beams. In order to use this method, the cross-section of the beam must be thought out in advance.
As an option for flooring, the lower part of the floor elements can remain open; for this, the cranial elements are nailed not flush, but slightly higher. Thus, the flooring is carried out between the beams.
After the rolling is done, you can begin laying the floor of the second floor. If instead of the second floor there is an attic, then a subfloor is sufficient. If there is a room on the second floor, then the floor must be made of high-quality material. Wooden boards will be laid directly on the joists.
How to properly insulate an attic floor with mineral wool
Mineral wool is a common and modern heat insulator. Available in rolls or slabs (mats). It does not rot or burn, rodents and various kinds of microorganisms are also not afraid of it.
Insulating the ceiling of a cold attic with mineral wool begins with laying lining material on the floor. For a budget option, glassine is laid on the floor, but a more expensive and high-quality option is flooring made from vapor barrier film. The film is laid with an overlap, and the joints are taped or secured with wooden slats, which are fixed with a construction stapler.
The width of the insulation is selected based on the requirements of thermal engineering standards for each region. Mineral wool is placed between the joists tightly and without gaps. The joints are taped with tape. After the insulation is laid, level boards are simply laid on the joists, thus forming the floor in the attic. This simple solution for creating a floor allows the mineral wool to “breathe” and ventilate normally if it gets wet. To prevent moisture from entering the mineral wool, waterproofing material is laid under the roof.
Mineral wool is laid using personal protective equipment: thick clothing, goggles, gloves, respirator.
Rules for installing vapor barriers and ventilation for cold roofs
There is no need to install a cold attic vapor barrier on the roof slopes. Films made of polyethylene and polypropylene, as well as roofing felt and glassine are not suitable for waterproofing a cold roof. These materials retain steam-saturated air, which leads to dampness and condensation on the inside of the film.
A cold roof made of corrugated sheets can be ventilated through the ridge: thanks to the counter-lattice, the air passes through the roof covering through the eaves overhang to the outside.
Option for installing a vapor barrier in a wooden floor
For good ventilation, it is always recommended to make a counter-lattice - a small gap between the film and the sheathing.
In a cold attic, there must be properly positioned dormer windows for proper ventilation of the space. If the attic is very large, then the system is supplemented with forced exhaust.
The ventilation system is a mandatory addition to the vapor barrier
Possibility of insulating a cold attic in the future
If the cold roof is intended to be insulated and converted into a living room, when creating waterproofing you need to use a special membrane rather than a perforated film. The reason is that it is impossible to attach insulation to the film without a gap - if this is done, it will allow moisture to pass through. To prevent this from happening, you need to leave a small gap (5 cm).
This does not happen with membranes; they can be placed on insulation without any problems, and they also reduce the thickness of the roofing pie by up to 10 cm. The downside is the high price.
The rebuilt roof does not require vapor barrier, because... moisture will not accumulate in the insulation, but will quietly escape into the atmosphere through the membrane or film.
Features of creating a vapor barrier
When creating a vapor barrier for attic floors, you need to select materials with minimal vapor permeability (evaporation volume per unit area - mg/m2). This indicator is indicated on all building materials.
Preference is given to materials with parameters of zero or slightly more, but always less than those of thermal insulation.
Wood is an excellent conductor of moisture, but its accumulation in this material can lead to its rotting and deformation. This feature is taken into account in the manufacture of building materials from wood. But when building a house, you must not forget about the vapor barrier of such elements and choose components with minimal evaporation rates to protect them.
The general procedure for laying vapor barrier is as follows:
- first materials with minimal vapor permeability;
- then, as this indicator increases, all the rest.
And when insulating an attic along beams in a wooden floor (if viewed from the room):
Vapor barrier - glassine, membrane, film. Placed on floors during construction. And during repairs, it is fixed with slats to the room ceiling.
Thermal insulation layer. Placed between beams; sometimes - on the floors. For a cold attic, waterproofing and wind protection are not provided (the roof protects the ceiling from the wind).
Waterproofing layer - membrane or polyethylene; laid only if the attic space is planned to be inhabited. Placed under decking or flooring. If the attic is uninhabited, waterproofing is done on the roof slopes to protect it from rain and snow.
The process of installing vapor barriers on floor beams in the attic
Important! When laying a vapor barrier over wooden beams, you need to form a continuous carpet that completely covers all structural elements. Additionally, it is necessary to provide an overlap on the walls or roof and prevent contact of the insulation with the wooden elements of the ceiling.
We must not forget about the need to create a system of ladders that allows for the repair and maintenance of the roof (for example, to prevent caking of the insulation, which impairs its functions). They are placed on logs - when using thermal insulation in rolls or tiles. Or they put it on posts - if the thermal insulation is bulk.
Procedure and tips for installing a vapor barrier
Protective vapor barrier material must be laid correctly: freely, with an overlap (in accordance with the instructions) on the walls and covering all structural elements of the attic - beams, compartments, cells, corners, ceiling from the inside (during repairs to improve insulation). Therefore, you need to cut out the material with a reserve. If necessary, strips of material can be glued together with reinforced tape, and foil insulators with similar tape (it is advisable to make joints on joists). The film must be secured with thin slats for better fixation and protection from damage.
Important rule: sagging or deformation of pieces of vapor barrier is not allowed; At the same time, they must lie freely so that they do not tear due to temperature changes.
The material is laid after preliminary preparation: when wood is used in the structure, insulation is laid, and then a ceiling vapor barrier. If the height of the logs and the thickness of the insulation coincide, a counter-lattice is installed. The vapor barrier for wooden ceilings under the attic must be continuous so as not to allow moisture to pass through.
An air gap between the insulation is required
When using concrete in floors or on a flat roof, first install the waterproofing and then the sheathing (its height should ensure free ventilation, and the installation step should be a few centimeters narrower than the heat insulator).
Video: example of laying a vapor barrier for a cold attic roof
Insulation technology
Wooden interfloor ceilings are the most common option in individual housing construction. Their design is the same in both a wooden and aerated concrete house. It is a plane with stiffening ribs, between which the material used for insulation is placed. The floor plan of the house is shown in the figure below (Fig. 6).
rice. 6
When installing attic and basement floors, the beams are usually left uncovered on one side, which makes adjustments to the technology of the work performed - to insulate the floor with bulk and slab materials (expanded clay, mineral wool), an additional raised floor is required between the beams. But you are free to choose the type of material yourself, based on knowledge of their properties.
Floor insulation
For these works it is best to use foamed polyethylene. All work is carried out underground. A piece is cut from the roll equal to the length of the gap between the beams. It is most convenient to secure it with a construction stapler, using staples with a height equal to two thicknesses of the material. It is not advisable to use foil material - there is no source of radiant energy in the underground.
Insulation of interfloor ceilings
rice. 7
The insulation between floors should also play a role in sound insulation, so the use of foam plastics for this purpose is undesirable. The best option is mineral wool or expanded clay.
Expanded clay backfill (Fig. 7) may be too heavy. To prevent it from tearing off the ceiling material in the lower room, slats with a section of 2 by 2 cm are nailed onto the beams. Boards are laid on them, which will serve as the basis for it. Waterproofing is not required, but geotextiles (non-woven material) must be laid on top of the expanded clay to prevent dust from entering the room.
rice. 8
Mineral wool (Fig. 8) requires waterproofing both above and below (the air coming from the lower floor is saturated with moisture). As an original waterproofing solution that allows you to combine business with pleasure, foil-foamed polyethylene foam is laid between the beams, directly on the ceiling boards of the lower floor (foil side down). Mineral wool can be placed directly on it if it is a roll material. The slab is denser and heavier. Therefore, you need to do the same as in the case of expanded clay - nail down the skull blocks and lay the plank sheathing on it. Then between the penofol layer and the ceiling there will be space necessary for the foil to reflect radiant energy. Without this condition, it will not work.
The mineral wool is covered with a film on top. It plays the role of waterproofing and also prevents mechanical particles (fiberglass) and volatile substances from the impregnation from entering the room. The film can be either ordinary or membrane, allowing steam to pass in one direction. It is laid with the waterproof side up, towards the floor (Fig. 9).
rice. 9
Insulation of the attic floor
rice. 10
Insulation of the attic interfloor over wooden beams crowns all the work. The amount of fuel spent on heating largely depends on its quality - more than half of all heat leaves through these gates.
If the attic space is not heated and the floor is non-residential, then sawdust can also be used for thermal insulation (Fig. 10) - a large open area guarantees their complete drying. But it is better to use this material as an additional one, and the main one will be foam (Fig. 11).
Fig.11
The first layer of foil polyethylene is laid. Foam plastic is lightweight, so there is no need to nail the cranial bars to the beams and there is no need to install additional lathing. Foam plastic slabs are placed on top of them, the joints - including those with walls - are filled with polyurethane foam, resulting in the formation of a continuous thermal insulation coating without seams. If cheap packaging foam is used (balls are visible when scrapped), then a layer of sawdust is poured on top of it, which not only increases the thermal insulation properties, but also protects the polystyrene foam from the destructive effects of sunlight. Extruded construction material - polyhedral bubbles are visible on its cut - is more resistant, but it won’t hurt to sprinkle it with sawdust.
In the attic, plank ladders must be installed on top of the insulation so that you can walk without destroying the structure or trampling the heat-insulating layer.
The proposed technology for insulating floors has been tested in practice and gives good results.
Which material to choose
For vapor barrier, several types of rolled materials are used: membranes, ordinary and foil films. Below we will analyze each material in more detail.
Polyethylene films
They are used in hydro- and vapor barrier of wooden floors. To give strength, it is reinforced with a special metal mesh. Due to the lack of air circulation, such insulation does not create the most comfortable microclimate in the room. Polyethylene film wears out quickly;
Polypropylene films
More durable compared to polyethylene analogues, but their cost is slightly higher. A layer of viscose and cellulose is usually rolled onto the film. It absorbs and retains large volumes of moisture. Installation is carried out with a glossy surface to the insulation, and a rough layer inside the room. A small gap is left between the film and the insulation for ventilation;
Membrane films
- with limited vapor permeability are used so that the removal of excess humidity from the room is controlled. The size of the output is determined by the design of the membrane;
- membrane film with variable vapor permeability for wet and dry air. As the humidity in the house increases, the film begins to allow more moisture to pass through;
- membrane films, which are equipped with aluminum foil. Such materials have reflective and increased vapor barrier properties. The metallized film also performs another function - it reflects and returns a certain part of the heat to the room. Such insulation is widely used in swimming pools, bathrooms, saunas and baths.
Vapor barrier films Ondutis
Ondutis films are the latest generation of vapor and heat insulating films; they combine environmental friendliness, reliability and durability.
Types of vapor barrier materials Ondutis:
- Ondutis B (R70), B (R70) Smart - three-layer polymer materials that provide a healthy microclimate in the house, protect thermal insulation and reduce heat loss. This insulation is applied from the warm room side;
- Ondutis R115 is a multilayer insulation, it consists of non-woven polymer fibers with a high level of heat conservation, vapor permeability and waterproofing of the structure. The material is used for vapor barrier of the building outside;
- Ondutis A100 is used for vapor barrier of interfloor ceilings, protects the internal structures of the house and insulation from the negative effects of condensation, moisture and cold air.
Types of materials for waterproofing
Vapor barrier is carried out using the following materials:
Polyethylene film of dense consistency .
Polyethylene materials are instantly laid and easily attached under the sheathing. There are no special problems when working with them. The main thing is that the consumable is of good quality, preferably indicating in the instructions or on the packaging that it has low-flammability properties.- Non-woven vapor barrier membrane . The membrane material allows air to pass through due to the special arrangement of pores in the fabric, but condensation and water do not. The peculiarity of this material is that during installation it can be laid closely with insulation, without creating special air gaps.
- Foil material . The reflective surface of the foil is always mounted indoors. In addition to water repellency, infrared rays are additionally collected, which has a simultaneous (and additional) insulation effect. The joints between the laid material are always sealed with foil tape.
- Polypropylene insulator . It is a thin reinforced polypropylene mesh, which is ideal as a vapor barrier, as it creates a good “breathing layer” that allows atmospheric air to pass through, but not water. Easily mounted to the surface. The joints of the product are sealed with acrylic or butyl tape.
Most often, polyethylene or a waterproofing membrane is used for the roof, as these materials are more affordable than others.
Waterproofing is achieved using durable but at the same time elastic materials that are resistant to UV rays, water and atmospheric changes:
- Liquid substances .
The most common waterproofing material of this type is Penoizol. Its peculiarity is that it is easily applied to the surface from a container (volume up to 850 ml). It is also sprayed from a spray gun or a special gun if it is purchased in specialized packaging. This waterproofing material ideally hides all imperfections on the surface and closes all cracks. It is always equipped with a vapor barrier. The layer must be at least 8 (mm), according to standards, ideally 25 (mm). Its only drawback is its high price. - Rolled bitumen-polymer .
These include roofing felt and special materials intended for roofing work, which are attached to mastic. Ruberoid is available in the form of sheets or rolls. Each master independently determines for himself what exactly is most convenient for him to work with. Fresh roofing felt fits perfectly on the prepared surface and is well attached under the sheathing. The material is affordable, can be easily installed, and wraps the timber along its entire length and ends with high quality.
A construction specialist will be able to suggest the type of suitable material for a particular building.
Tools needed to properly install a vapor barrier on a ceiling
Installing a vapor barrier is not difficult. This is simply attaching a film or membrane to the sheathing. To do this you need the simplest tools:
- knife or scissors to cut rolled materials to length;
- construction stapler - fastening with staples is the most convenient, but if you choose fastening with nails, you need a hammer;
- when using liquid vapor barrier, you will need a brush to apply the mixture;
- adhesive tape - single-sided or construction tape for securing overlapping material; if foil sheets are used, then it is better to choose metallized tape.
You will also need measuring tools like a tape measure.
Polyethylene and glassine
These insulating agents create a barrier that is impermeable to moisture. However, they not only prevent water from getting into the insulating layer or getting on cold floor structures, but also prevent air circulation. Therefore, in a room with polyethylene or glassine as insulation from moisture on the ceiling, it is necessary to install a ventilation system to ensure normal air exchange.
There are not too many advantages of such insulators, but to be precise, there is only one thing - price. Both polyethylene and glassine are very inexpensive. At the same time, polyethylene lasts quite a long time, while glassine is characterized by fragility and rapid wear.
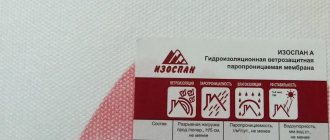
These are special materials with limited breathability. They allow air to pass through, but retain moisture. The most common and popular vapor barrier of the Izospan brand has a characteristic feature - a fleecy surface on which tiny drops of condensate accumulate and evaporate quite quickly.
The cost of such materials will be higher than that of polyethylene with glassine, but the efficiency of moisture removal is much higher, and air exchange remains within the normal range. At the same time, there are certain features of the installation of such membranes - to remove moist air vapors, a ventilation gap is necessary. Therefore, the installation of a decorative ceiling covering on the side of the room is carried out on a sheathing or frame, which will create the necessary space for ventilation.
Which vapor barrier to choose. Pros and cons of different materials
Choosing the right vapor barrier material is very important, since the effectiveness of the thermal insulation cake depends on it, and on its combination with insulation.
In ancient times, this role was played by clay mixed with soil and plants (peat, shavings, sawdust, leaves, etc.). It protected the floors from temperature changes.
Modern steam and heat insulators make installation procedures faster and easier. But, according to professionals, they are often inferior in quality to old materials.
For reference. Vapor permeability as a characteristic of a material indicates how many grams of water in the form of steam can pass through each square meter of film per day. If this amount is expressed in tens of grams, then such material is called vapor barrier. The lower this indicator, the less steam will pass to the insulation.
Types of modern vapor barrier
Glassine is an inexpensive option (70 mg/m2 per day) for domestic buildings with a stable humidity level. Plus - it perfectly prevents the passage of moisture, and minus - low air conductivity.
Polypropylene or polyethylene films (often reinforced; 3−5 mg/m2 per day). This material tolerates temperature fluctuations well; resistant to physical impact and ultraviolet radiation. Ideal for wooden structures. Polyethylene is suitable for warm regions of the country: at low temperatures it quickly loses its properties. The disadvantage of polyethylene is that it tears easily, so it is difficult to install.
Polyethylene film is the simplest type of film vapor barrier
Polypropylene film is stronger than polyethylene; can be produced with the addition of viscose and cellulose, which makes it stronger and more hygroscopic. The downside is that when installing it, good ventilation of the room is required, otherwise the water accumulating on the insulator will not be able to evaporate.
Polypropylene film is a more practical type of vapor barrier for the attic
Membranes with a foil shell (0.04−2.55 mg/m2 per day) are an option for houses with high humidity and frequent temperature changes (baths, swimming pools, etc.). Withstands high temperatures and prevents the passage of steam well.
Membrane is the most modern type of vapor barrier
Types of membranes:
- Kraft paper: foil - easy to install, but not resistant to microorganisms; poor hygroscopic properties.
- with lavsan coating - very high temperatures (ideal for saunas and baths), but does not tolerate the effects of cleaning chemicals.
Foil fiberglass
Anti-condensation diffusion membranes (3-15 mg/m2 per day) - a new product in vapor barrier; installation is possible on any side of the thermal insulation layer. The material is double-sided: the rough side is placed towards the flowing air steam, the smooth side does not allow water inside.
All membrane vapor barriers are capable of passing moist air in only one direction, which ensures rapid outflow of water and good air exchange throughout the entire room. When installing membranes, good ventilation is also required.
Liquid vapor barrier materials - varnishes and mastics. After application, they form a film that retains water but allows air to pass through. Plus - it practically eliminates the possibility of mold or mildew. The downside is that not all products, due to their composition, can be used in residential buildings.
Liquid hydro-vapor barrier
Modern new coatings are an analogue of varnishes and mastics, having properties similar to them; used for vapor barrier of the ceiling on the side of a cold attic or flat roof.
Table. Comparative characteristics of popular brands of vapor barrier
| Material | Weight, g/m2 | Vapor permeability in 24 hours, g/m2 | Longitudinal/transverse strength, N/5 cm |
| Glassine | 240 | 79,2 | — |
| Polyethylene film 0.16 mm thick | 120 | 3,2 | — |
| Isorok Foyle VB | 90 | 5,5 | 150/110 |
| Izospan B | 70 | 0,14 | 128/104 |
| Icopan, Monaflex classic | 110 | 0,22 | 285/260 |
| Icopal, Elephant Skin | 200 | 0,2 | 460/410 |
| Nicobar 85 | 85 | 0,8 | 300/200 |
| Ondutis P70 | 105 | 0,7 | 375/275 |
| Tyvek | 100 | 4,9 | 550/450 |
| Utah, Utahfol N96 Silver UV | 96 | 0,98 | 600/450 |
| Utah Standard | 118 | 1,1 | 230/300 |
Types of vapor barriers
To correctly install a vapor barrier, you need to correctly determine its type:
Type A - passes steam coming from the room through itself, allowing it to evaporate on the other side, but does not allow moisture to penetrate from the street (rain, snow). Installed on a sloping roof.
Type B is a classic vapor barrier that does not allow condensation. It is important to mount the side with the film to the insulation, and the rough surface to the outside. Minus - only suitable for insulated roofs.
Type C - dense, thick membranes, very strong and durable. Installation rules are similar to type B. Can be used as an addition to non-insulated or flat roofs.
Type D - polypropylene fabric; one of the sides is laminated. Has high levels of mechanical impact; wide range of applications, especially for places with high humidity.
A clear picture of the use of various types of insulating materials in structures
Insulation technology
Wooden interfloor ceilings are the most common option in individual housing construction. Their design is the same in both a wooden and aerated concrete house. It is a plane with stiffening ribs, between which the material used for insulation is placed. The floor plan of the house is shown in the figure below (Fig. 6).
When installing attic and basement floors, the beams are usually left uncovered on one side, which makes adjustments to the technology of the work performed - to insulate the floor with bulk and slab materials (expanded clay, mineral wool), an additional raised floor is required between the beams. But you are free to choose the type of material yourself, based on knowledge of their properties.
Floor insulation
For these works it is best to use foamed polyethylene. All work is carried out underground. A piece is cut from the roll equal to the length of the gap between the beams. It is most convenient to secure it with a construction stapler, using staples with a height equal to two thicknesses of the material. It is not advisable to use foil material - there is no source of radiant energy in the underground.
Insulation of interfloor ceilings
The insulation between floors should also play a role in sound insulation, so the use of foam plastics for this purpose is undesirable. The best option is mineral wool or expanded clay.
Expanded clay backfill (Fig. 7) may be too heavy. To prevent it from tearing off the ceiling material in the lower room, slats with a section of 2 by 2 cm are nailed onto the beams. Boards are laid on them, which will serve as the basis for it. Waterproofing is not required, but geotextiles (non-woven material) must be laid on top of the expanded clay to prevent dust from entering the room.
Mineral wool (Fig. 8) requires waterproofing both above and below (the air coming from the lower floor is saturated with moisture). As an original waterproofing solution that allows you to combine business with pleasure, foil-foamed polyethylene foam is laid between the beams, directly on the ceiling boards of the lower floor (foil side down). Mineral wool can be placed directly on it if it is a roll material. The slab is denser and heavier. Therefore, you need to do the same as in the case of expanded clay - nail down the skull blocks and lay the plank sheathing on it. Then between the penofol layer and the ceiling there will be space necessary for the foil to reflect radiant energy. Without this condition, it will not work.
The mineral wool is covered with a film on top. It plays the role of waterproofing and also prevents mechanical particles (fiberglass) and volatile substances from the impregnation from entering the room. The film can be either ordinary or membrane, allowing steam to pass in one direction. It is laid with the waterproof side up, towards the floor (Fig. 9).
Insulation of the attic floor
Insulation of the attic interfloor over wooden beams crowns all the work. The amount of fuel spent on heating largely depends on its quality - more than half of all heat leaves through these gates.
If the attic space is not heated and the floor is non-residential, then sawdust can also be used for thermal insulation (Fig. 10) - a large open area guarantees their complete drying. But it is better to use this material as an additional one, and the main one will be foam (Fig. 11).
The first layer of foil polyethylene is laid. Foam plastic is lightweight, so there is no need to nail the cranial bars to the beams and there is no need to install additional lathing. Foam plastic slabs are placed on top of them, the joints - including those with walls - are filled with polyurethane foam, resulting in the formation of a continuous thermal insulation coating without seams. If cheap packaging foam is used (balls are visible when scrapped), then a layer of sawdust is poured on top of it, which not only increases the thermal insulation properties, but also protects the polystyrene foam from the destructive effects of sunlight. Extruded construction material - polyhedral bubbles are visible on its cut - is more resistant, but it won’t hurt to sprinkle it with sawdust.
In the attic, plank ladders must be installed on top of the insulation so that you can walk without destroying the structure or trampling the heat-insulating layer.
The proposed technology for insulating floors has been tested in practice and gives good results.
Insulation materials
What is the best way to insulate a cold ceiling? The main thermal insulation materials used for insulating ceilings can be divided into the following categories:
- Solid. Such materials consist of foamed plastics, are little susceptible to moisture, and are easy to install.
- Fibrous. Mats or rolls are formed from compressed fibers. Inexpensive, have good thermal insulation. Sensitive to moisture, when wet they lose their thermal insulation properties.
- Bulk. Traditional bulk materials - sawdust, expanded clay, etc. The cheapest ones have the weakest thermal insulation. Ecowool stands out separately - an expensive, but extremely effective material.
- Sprayable. Modern coatings made of foamed plastics. They are sprayed locally and do not form joints or seams. The best thermal insulation, very expensive equipment.
How to insulate the ceiling, everyone decides for themselves, based on their needs and capabilities.
Mineral wool
Rolled mineral wool The most popular type of fibrous materials. Produced from several types of raw materials:
- Basalt wool from volcanic rocks. High strength and density, short hard fibers. High moisture resistance.
- Glass wool from recycled glass. Low strength, light and elastic, long elastic fibers.
- Slag from blast furnace waste. Low thermal insulation properties, low cost. Not applicable for residential buildings.
To insulate with mineral wool, no special equipment is required; the installation process is simple and quite fast. It is produced both in rolls and in slabs with insulation thickness up to 150 mm.
Mineral wool is harmful to health; during installation you must use a respirator, protective gloves and goggles.
An important feature of mineral wool that must be taken into account when designing and installing is the large number of joints and junctions. They need to be done so that the gap is minimal, the slabs are laid against the guides and apart from each other
Half-centimeter gaps between slabs can reduce the effectiveness of the coating by a third.
Correct and incorrect installation of insulation
The thermal insulation properties of mineral wool are reduced until they are lost when the material gets wet. Therefore, it is necessary to ensure the removal of vapors and condensate.
Monolithic
The most suitable and popular material for thermal insulation of ceilings is polystyrene foam. It is produced in the form of 1200*600mm panels equipped with tongue and groove. This allows you to make high-quality joints during installation. In addition, cracks and gaps are sealed with polyurethane foam. The material is resistant to moisture and temperature fluctuations. Works great when insulating ceilings both outside and inside
We suggest you familiarize yourself with: Table of copper wire cross-section by power
Its disadvantage is low fire resistance. When burned, it releases substances harmful to health.
Insulation with polyurethane foam
Installation procedure
Vapor barrier of a frame house is essentially no different from a similar procedure in houses built using a different technology and from other materials. However, there are still some differences. For example, the supporting structure does not have thermal insulation, which is the difference. The filling of the walls is as follows:
- Facade finishing (for example, siding or lining);
- Waterproofing layer;
- Wooden frame;
- Insulation;
- Vapor barrier;
- Lathing;
- Interior finishing (paint, wallpaper, plaster, etc.).
Installing a vapor barrier in a frame house is very simple. It is necessary to lay the material and secure it. For fixation, use tape, nails or a stapler. However, there are nuances:
- All joints must be glued with tape to eliminate cracks;
- Minimize the number of folds on the surface of the material;
- Apply an antiseptic substance to the wood in places of contact with the vapor barrier;
- Contact of the diffusion membrane with the insulation is allowed; when using another material, a gap of five centimeters must be left;
- The sides of the membrane must not be mixed up, which will result in loss of useful characteristics.
If something is not done as it should be, the vapor barrier of a frame house will not be effective, and it will have to be replaced along with the insulation, which will entail large expenditures of money. Haste is also not good for completing work. A poorly installed vapor barrier will cease to perform its function in two to three years and will require replacement.
The membrane should be laid from top to bottom. The fastening is done with an overlap of at least ten centimeters, after which the joints are glued. You can glue the places where the film and wood come into contact.
Stages and methods of installation of various materials
Before laying the vapor barrier material, it is necessary to prepare the base for its fastening. If roll vapor barrier is used, the surface is pre-puttyed. If a liquid paint vapor barrier is used on a concrete base, it is enough to smooth out the unevenness. Then the surface is primed, and after drying, a vapor barrier can be applied.
Preparing a concrete ceiling
The materials, which are panels, are attached to the base with a construction stapler. Particular attention should be paid to the corners. Insulation panels are attached along the perimeter of the ceiling with an overlap of 10-15 centimeters.
The film spreads with tension, without allowing sagging of more than 1.5 centimeters. To ensure reliable fastening, the panels are fixed with tape. For fastening between beams, nails with a special enlarged head are used. The pitch between nails is 30 centimeters. The joints are additionally taped with construction tape. If the vapor barrier is attached after the insulating material, slats are attached with screws on top of it.
Sealing ceiling vapor barrier joints
The sheet vapor barrier is laid on an aluminum profile frame, which can be purchased at retail outlets. The profile can be replaced with thin bars, but experts advise preferring a factory profile, which already has grooves for attaching vapor barriers. After installing the solid sheets, all joints are glued with PVC film.
Rolled materials are rolled out from the bottom up and secured with profiles or slats.
Foil materials are placed with foil inside the room. The purpose of this installation is to reduce heat loss due to the reflective effect.
Advice! When purchasing vapor barrier material, it is important to correctly calculate its quantity. It is definitely worth considering that the rolled material is laid overlapping and with allowances, so its size increases accordingly.
Tools for installing ceiling vapor barrier
Application of extruded polystyrene foam
Polystyrene foam (expanded polystyrene) is a loose material, so it is used when it is necessary to insulate a floor made of joists and beams. For thermal insulation of slabs, extruded polystyrene foam is used, which is denser than conventional foam.
Before laying it, the surface of the base is leveled. On the warm side of the floor, vapor barrier is not needed, since concrete slabs have virtually no vapor permeability. A vapor barrier film is laid out on the prepared base. Then slabs of extruded insulation are laid out in a checkerboard pattern. Polyurethane foam is blown into the joints.
Bathroom ceiling vapor barrier technology
Installation of a vapor barrier for a bath ceiling from the attic side is carried out as follows:
- wooden ceilings are covered with boards 6 cm thick. The top of the rough flooring is covered with 100 micron foil or thick cardboard treated with drying oil;
- then they soften and lay a layer of clay on which a layer of insulation is mounted. Additionally, the ceilings in the bathhouse are insulated with cotton wool (mineral or basalt). Thermal insulation is laid in a layer 5 cm thick. Expanded clay can be used as a seamless insulation material;
- the next stage is a foil vapor barrier between the floor beams;
- wooden boards or a membrane are placed on it, providing reliable protection from moisture.
If work is carried out from the inside of the bathhouse, proceed in the reverse order:
- install waterproofing;
- lay insulation between the floor beams;
- fix the vapor barrier layer;
- install decorative ceilings.
Vapor barrier with ventilation gap
If the walls of the house are decorated with “non-breathable” material, for example plastic, tiles or oilcloth, moisture may accumulate in their interior, since there is no way out. To solve this problem, it is necessary to create a special ventilation gap between the wall and the finishing layer. This will allow air flow to circulate.
Vapor barrier installed on the inside of the walls of a frame house is possible in two ways:
- The vapor barrier membrane is attached to the frame of the house, after which finishing is done inside the building;
- A vapor barrier layer is installed, on top of which a lathing for finishing is installed. The resulting ventilation gap will be about five centimeters.
The second option is more suitable for residential buildings, because the process of moisture accumulation there occurs at a more accelerated pace. No ventilation gap is only suitable for houses that are not intended to be used permanently. In this case, you can install a ventilation system (simple or supply and exhaust), which will allow you to promptly remove excess moisture.
If there is a good ventilation system, then the vapor barrier installed in a frame house will have virtually no effect. It will only be needed to prevent moisture from appearing inside the walls.
Step-by-step guide to creating a vapor barrier
As in the case of a roof, the ceiling structure is a multi-layer “pie”, each layer of which performs an important task:
The top layer is the attic floor. It protects the structure from dust and dirt, allowing you to move freely around the attic without the danger of damaging the heat-insulating layer. The attic floor is laid across the floor beams on counter beams laid along the beams. These bars press a layer of vapor barrier against the beams. As a result, a ventilation gap is formed between the floor and the film. A layer of heat-insulating material is laid between the floor beams. For this, slab or roll insulation is used: polystyrene foam, polystyrene foam, stone, basalt or mineral wool. Board materials are preferable because they do not wrinkle over time, and polystyrene foam and polystyrene foam practically do not absorb moisture. True, they are flammable, so it is also not advisable to use them. Thus, the most effective and safest are slab materials - stone or basalt wool
You should pay attention to their density and thickness. At winter temperatures below -250 °C, a material with a bulk density of at least 500 kg/m3 should be used. Rough ceiling boards are attached to the floor beams below
They are the basis for subsequent finishing of the underlying premises. A layer of vapor barrier is attached to the sub-ceiling. The vapor barrier layer is pressed against the rough ceiling using lathing, which is made from wooden blocks or metal profiles (if the ceiling is finished with plasterboard). The bottom layer of the ceiling is the finishing of the ceiling, which is made from any materials - wooden slats, lining, wood boards, plasterboard, etc.
The rough ceiling boards are attached to the floor beams below. They are the basis for subsequent finishing of the underlying premises. A layer of vapor barrier is attached to the sub-ceiling. The vapor barrier layer is pressed against the rough ceiling using lathing, which is made from wooden blocks or metal profiles (if the ceiling is finished with plasterboard). The bottom layer of the ceiling is the finishing of the ceiling, which is made from any materials - wooden slats, lining, wood boards, plasterboard, etc.
The structure of an insulated ceiling of a wooden house
Waterproof, vapor-permeable membrane
This film is completely different in properties from the vapor barrier. It prevents moisture from outside the house from entering the insulation and wooden parts of the house, while releasing steam from the inside. Despite the fact that we covered the insulation from the inside with a vapor barrier, a little residual steam still passes into the insulation and we need to release this steam. For this purpose, the membrane is also vapor-permeable .
In addition, these membranes are usually windproof and at the same time protect the insulation from heat blowing out.
Where is hydro-windproof film used in a frame house?:
The walls of a frame house - from the outside (or under the counter-lattice under a wooden facade or immediately under the siding according to OSB-3) In the floor of a frame house (lower floor) - from below under the insulation so that the wind does not blow in (column foundation) In the ceiling of a frame house (upper floor) - on top of the insulation so that the insulation does not blow out (if it is ecowool or sawdust, etc. loose insulation)
Advantages of vapor barrier work
The formation of water vapor is a natural process that depends on environmental conditions. The formation of high levels of humidity can be influenced by wet cleaning or intensive cooking, as well as other household activities. Warm steam tends to escape through the ceiling and, if its vapor barrier is not done correctly, it will settle on the insulation, as a result of which the insulation layer will lose its performance characteristics over time.
A properly constructed vapor barrier layer can increase the service life of the rafter system and roofing materials as a whole, reduce heat loss, prevent the formation of rot, mold and mildew, and increase the fire safety of the roof structure. In addition, high-quality insulating materials last a very long time and do not require restoration.
One of the most progressive insulation materials is foil-coated film. In addition to high insulating qualities, it is able to reflect heat into the room, which is especially important in winter. When laying insulation, you must pay careful attention to which side it is mounted on: if the sides are mixed up, all the work will be in vain.
The vapor barrier is installed using special staples, but you can also use nails with a wide head - they must be galvanized to avoid corrosion.
Design features of wooden floors
The solution is a horizontal plane of beams, which are laid at a certain pitch. They ensure the strength and reliability of the overall structure. The base of beams is sheathed with boards, sheet material, panel or slatted resources. The voids - the distances between the beams - are filled with an appropriate layer of insulation with the addition of a hydro- and vapor barrier membrane.
Among the features of wooden flooring, the following points are highlighted:
- ease of installation compared to the concrete option;
- the ability to independently implement the project;
- relative availability of lumber;
- environmental friendliness of the solution.
How to insulate a wooden floor
In addition, insulating floors using wooden beams is not a difficult job even for novice home craftsmen. The main thing is to choose the right materials for insulation and take into account the features of the technology.
Rules for laying vapor barrier
If both sides of the material are the same, then it does not matter how you lay the material. But if the parties are different, you must adhere to the following rules.
Distinguishing the sides of a vapor barrier
Usually an indication of the outer and inner sides of the material is in the instructions. If it is missing, but you need to follow the rule, then the side that is lighter in color is placed next to the insulation.
The roll insulation is wound up by the manufacturer so that it can simply be unrolled and laid without turning it over.
If the surfaces of the vapor barrier are different, the smooth side is considered internal (placed against the insulation), and the rough side is considered external.
Different sides of films
How to attach?
Strengthen the material using a stapler, nails with a large head or a counter lath.
Film mounting options
How to determine membrane leak?
The material will indicate how wide the overlap should be (8-20 cm). The width of the overlap depends on the installation location:
- on the roof horizontally from bottom to top - 15 cm;
- in the ridge - 18 cm;
- in the valley - 25 cm;
- on other elements - 10−5 cm.
The membranes must be inflated during installation
Is there a need for an air gap at the membrane?
It is always necessary to create an air gap (5 cm) near the membrane - it is necessary for ventilation. In the case of diffusion material, the gap is left outside, and the film is laid on the insulation.
Do joints need to be treated?
The places where the pieces of vapor barrier are connected to each other, as well as their connections to window and door openings, must certainly be glued with special tapes on a self-adhesive basis (they can also be used to repair torn insulation). Scotch tape is not suitable for this type of work.
Sealing vapor barrier joints
How to prepare an attic for insulation with mineral wool
It is better to carry out insulation work in the summer. In hot weather it is easier to dry out the attic. It is advisable to create a good draft by opening all existing windows, vents, doors, and ventilation holes. All foreign objects are removed from the attic. Leave empty space.
Before insulation, the attic is cleared of foreign objects and dried by ventilation.
After drying, work on the wooden elements of the roof. The first step is an inspection. If damaged rafter legs, supports, or lintels are identified, they are replaced or repaired. All wooden elements are treated with an antiseptic. Impregnation will protect against the formation of fungus.
Complex components of the rafter system can be reinforced with metal plates. These parts are treated with an anti-corrosion compound.
Review of the main vapor barrier manufacturers
There are several popular vapor barrier manufacturers on the market:
- surpasses all other companies in quality (according to the Test Purchase program).
- does not lag behind the leader either in quality or in the use of the latest technological developments. This is a domestic company that produces a very high quality product.
- The product is good for both industrial and residential construction, but is not suitable for creating temporary roofing.
Not included in the top three:
- Polish - the company's products are distinguished by the fact that they can withstand very low temperatures.
- "Ondutis" - low prices, excellent connecting tapes, rolled materials.
- Tyvek products provide ideal wind protection.
- German DELTA - steam and wind protection.
Which side of the heat insulator should I mount it on?
- The vapor barrier is usually installed on the inside of the thermal insulation. But most often a double-sided composition is created, which allows you to provide a reliable barrier between the outside of the building and the room.
- When insulating a façade, the film is placed on the outside of the heat insulator. When insulating the roof, the film is fixed on top of the mineral wool, as in a ventilated façade. When developing a cool roof, a vapor barrier is placed under the rafters.
- When insulating the top covering, when an attic space is created, the barrier is laid below the thermal insulation. When insulating the walls internally, the film is fixed on top of the heat insulator, inside the heated room.
Get estimate/project
Estimate only for customers in St. Petersburg, Moscow, Leningrad and Moscow regions
Projects from the FHDom studio with the FH prefix can be purchased regardless of region.
We have identified your region as Samara. If the construction site is located in the Moscow or Leningrad regions, indicate it in the message field
If you want to purchase a project from the FHDom architectural studio with the FH prefix, click YES.
Attention! Estimates are calculated only for construction customers in St. Petersburg, Moscow, Leningrad or Moscow regions. For construction in other regions, estimates are not provided.
Are you planning construction in MSC or St. Petersburg?
Adviсe
Compliance with simple installation rules and operating standards will help to significantly extend the service life of the vapor barrier.
- The film material should be secured using staples or small nails, placing a thin wooden strip under the fasteners. This will allow the material to be better pressed to the base and will reduce the likelihood of accidental damage to the film.
- The size of the overlap when installing any materials should not be less than 15 cm. The joints should be glued using a wide tape, and when installing materials made of foil, you should use foil tape.
- Laying vapor barrier materials should only be done with thermal insulation.
- During installation, it is recommended to carefully monitor the tension of the material: the film should be in a free position. This will prevent the material from rupturing when it is stretched and compressed under the influence of thermal changes.
- To form insulation for the ceiling of a residential building, it will be sufficient to use a membrane or reinforced polypropylene film, and during the construction of bathhouses only foil vapor barriers should be used.
Vapor barrier is one of the prerequisites for the construction of houses and baths with a cold attic.
Properly selected material and proper installation will extend the service life of the ceiling, significantly reduce heat loss and make staying in the room pleasant and comfortable.
For more information about ceiling vapor barrier, see below.
What is the difference between the external and internal sides
Specialized vapor barrier films are made from impermeable polymer materials and cannot change physical properties depending on the side. But for ease of use, manufacturers apply markings on the outside, and some even technical markings that simplify installation. The rolls are also usually wound with the front side facing outwards and it is easier to unroll them “along the wool”, rather than from both sides.
If we consider the two-layer vapor barrier offered by some brands, then one of its sides is smooth and the other is rough.
But this does not in any way affect its ability to retain steam, just as it is not able to additionally prevent the formation of condensation. A rough surface only retains droplets of moisture on the surface, preventing them from falling and rolling off. Considering that this is a vapor barrier, and not a diffusion membrane, and condensate, subject to insulation technology, is promptly removed and dried due to ventilation, there is no particular profit from this property.
IzospanForumHouse participant
Which side of the vapor barrier, smooth or rough, by and large, makes no difference; vapor barrier does not allow either steam or water to pass through on either side. We recommend that in horizontal structures the rough side is downward - droplets of condensation do not hang on this side and, accordingly, do not drip. We recommend the diffusion membrane with the pattern facing outwards - but this is pure marketing. In fact, a vapor-PERMEABLE membrane allows steam to pass through and retains water in any direction.
