High humidity and poor ventilation lead to mold on bathrobes, towels and bathroom trim. To dry things and air in the room, you can use a heated towel rail - a device that is connected to the mains or water coolant.
Most often, the device is installed in a hot water supply or heating riser, so in order to avoid accidents, you must strictly follow the rules for installing a heated towel rail.
Principle of operation
A heated towel rail is a heating tubular structure that is attached to the wall or installed on the floor. The heat source can be hot water from the domestic hot water system or an electric heating element.
When connected to a water pipeline, the operation of the dryer depends entirely on the operating mode of the system. Unlike water ones, electric heated towel rails are autonomous and can be used regardless of the time of year or the availability of hot water supply.
Types of heated towel rails
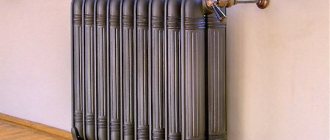
Nowadays, instead of outdated and not particularly aesthetically pleasing coils of the Soviet period, modern models of heated towel rails are increasingly being installed in bathrooms, which can be divided into three main groups.
- Water appliances connected to the pipes of the hot water supply circuit.
- Electric models operating from a general power supply.
- Combined heated towel rails, the main feature of which is the ability to operate both from the hot water supply circuit and from the mains (in the event of a temporary shutdown of hot water in the house).
From a technological point of view, connecting a water heated towel rail is considered the most difficult: installing such a plumbing fixture without the proper experience is quite difficult. At the same time, errors in the connection often lead to the fact that the bathroom remains cold and damp, and the coil pipe itself warms up unevenly or does not heat up at all. That is why connecting water models should be trusted exclusively to professionals who have practical experience working with such plumbing equipment.
An electric heated towel rail is a device that requires only free access to the power supply to operate. Its connection is a standard installation of a household electrical appliance and usually does not cause difficulties. As for combined models, they are usually installed in the bathroom if there is periodically no hot water in the house, and the rules for connecting such heated towel rails are generally similar to the rules for installing water coils. Let us immediately note that the article will focus on the nuances and features of installing and connecting water-type devices.
Connection diagram requirements
If there are no problems connecting electric towel dryers, they are simply plugged into an outlet, but for water structures there are certain restrictions:
- it is advisable to place the device closer to the heating riser and make the outlets as straight as possible, without bends or loops;
- You cannot place a shut-off valve on the main pipe;
- do not narrow the bends so as not to increase the hydraulic resistance of the radiator;
- install a bypass between the outlets - a jumper that preserves the possibility of coolant circulation when the heated towel rail is turned off;
- the diameters of bends and valves should not be less than the cross-section of the inputs on the device.
If any of these conditions are not met, the dryer may not operate efficiently. You will need to reinstall it or connect a pump for forced circulation of the coolant.
Schemes with an offset or narrowed bypass
A heated towel rail with an offset/narrowed bypass is rarely installed. As a rule, plumbers use a similar tap-in technology when it is necessary to install an offset or slightly narrowed bypass on an existing heated towel rail. In this case, the pipe is connected according to one of the standard schemes, selected by a specialist.
In practice, in most cases this technology is not used. This is explained by the fact that the coil pipe, which, in fact, is a heated towel rail, is still not an additional heating radiator, and fundamental alterations in this case will be impractical. Moreover, the installation scheme for a heated towel rail with an offset or narrowed bypass is effective only if the bathroom is equipped with an overhead hot water supply system.
Features of installation with an offset bypass
As a rule, offset is used when wiring radiators. This option is often used when plumbers are installing the heating system. At the same time, this approach is often justified when installing heated towel rails, when there is a need to preserve the old outlets on the riser, to which the old coil was connected (it was discussed at the beginning of the publication). In most cases, there is no need to replace the entire riser: the device can be installed with a bypass. The only condition in this case is the circulation of coolant water from top to bottom. If this condition is not met, the pipe acting as a heated towel rail may end up remaining cold.
Installation diagrams
Depending on the layout of the bathroom and the design features of the heated towel rail, 3 connection methods are used:
- side;
- diagonal;
- lower.
Side connection
A heated towel rail with a side connection without displacement or narrowing of the bypass works well in any direction of coolant supply. In this case, a slight reverse slope must be observed in the connections to drain water back into the system.
With a side connection, there is no need to bleed air at the top of the dryer, since there is no area for it to accumulate. Maximum efficiency. An important condition is that the diameters of the bends must be no less than the cross-section of the PS pipes.
Diagonal connection
Just as with a lateral connection, the direction of movement of the coolant can be any. Due to the fact that there is a pressure difference between the upper and lower outlets, hot water circulates freely.
The air in the dryer does not form a plug, so there is no need to bleed it out. Shut-off valves are installed on the branches; in this case, the riser serves as a bypass.
Bottom connection
With this scheme, the efficiency is slightly lower than with a lateral or diagonal one, but there are certain advantages. The hot water supply can be hidden under the floor, and in order not to pull pipes along the walls, the heated towel rail is connected from below.
The bends can be installed even close to each other. This does not affect the operation of the dryer. But they must be located no higher than the bottom of the device to ensure the outflow of liquid in case of repair.
Types of heated towel rails
Based on the type of coolant, towel dryers are classified into:
- Mermen. These devices are connected to the hot water or heating riser. The metal pipe serves both as a rack for drying items and as a conductor of hot water. The advantage of water heated towel rails is minimal heating costs, but the disadvantage is the high risk of flooding if connected incorrectly.
- Electrical. They are mounted close to the outlet and connected to the network. The advantage of the device is that it can be connected to the network without interfering with the water supply system. Its main disadvantage is its high energy consumption: the specific power of an electric coil per 1 square meter of a bathroom is 150-160 W, which corresponds to 0.6-1 kW for an average bathroom.
- Combined. They consist of two working frames. One of the surfaces heats up when hot water passes through, and the second - when the electric heat element (TEH) heats up. Many combination instruments are equipped with a rotating inner frame.
Depending on the shape, heated towel rails are divided into the following types:
- bracket (U-shaped);
- coil (M-shaped);
- "Ladder";
- “Foxtrot” (bracket with internal coil);
- “Modern” (staircase with offset supports and lintels).
The size and shape of the device are selected depending on the design of the room and the volume of heated air. Heaters such as “Ladder”, “Foxtrot” and “Modern” are suitable for a spacious bathroom, and brackets and coils are suitable for a small bathroom.
The towel rail can be made from brass, copper, carbon steel or stainless steel. The steel surface is protected by chrome plating. The type of device is selected depending on the design of the bathroom and the material from which the riser is made.
To avoid the formation of a galvanic couple, which leads to rust, a dryer made of the same material is connected to the metal pipe. Polypropylene (plastic) riser allows the use of any material.
Connection errors
If the heated towel rail does not heat up well or does not work at all, the selected circuit is ineffective. Here are examples of some incorrect choices.
If it is not possible to redo the connection, there is a way out - install a supply pump with a temperature sensor and idle protection. The coolant will circulate forcibly.
How can you tell if your heated towel rail is connected incorrectly?
In the event that the household appliance was connected with gross technological errors, the drying coil will at first seem to be fully operational. At the same time, the main problem that invariably accompanies the listed installation errors is a noticeable difference in temperature (the lower part of the loop-shaped pipeline will be colder than the upper). As a result, the coolant will begin to circulate through the hot water riser, bypassing the heated towel rail, which will turn into an inoperative and useless element of bathroom decor.
Materials and tools for installing a heated towel rail
In addition to the device itself, you will need:
- metal-plastic tubes for outlets and bypass;
- Ball Valves;
- crimp connections - “American”;
- transition couplings;
- sealing synthetic threads;
- clamps with dowel and pin;
- overlays for masking connection points;
- adjustable wrenches;
- level to control the position of the dryer.
In addition, water sockets may be needed if the heated towel rail is built into a system with natural circulation.
Device form
The shape of the heated towel rail affects the speed of water movement, the presence of airy places, and stagnant areas. The most effective are M-shaped (snake) and U-shaped “towels”, the insertion of which does not require bends and transitions. In such devices, water directed into the inlet of the end of the pipe passes freely through the entire volume of the dryer, without slowing down or stopping.
The most popular heated towel rails are made in the form of ladders or complex spatial structures made of stainless steel. They differ from standard dryers in having an increased area for placing linen and towels.
DIY installation of a heated towel rail: step-by-step instructions
Step 1. Before starting work, you need to turn off the water in the riser and install taps for supply and discharge - one above the heated towel rail, the other below. The diameter of the valves should not narrow the lumen of the pipeline, otherwise this will lead to partial obstruction.
To service the taps, access must be left. If the pipeline is hidden by finishing, inspections are arranged - small openings with a door. It is possible to move the shut-off valves closer to the dryer and leave them in sight if you select taps that are suitable for the design.
Step 2. Markings must be made on the wall. For this, a bubble level or a laser plane builder is used. Mark a horizontal line for attaching the dryer and points for installing dowels. When marking, you need to ensure that between the outlets there is no less than the center distance between the heated towel rail tubes.
Step 3. Drill holes in the wall for clamps. The diameter of the hole should be 1-2 mm less than the cross-section of the dowel. Install the fasteners so that there is a gap between the wall surface and the heated towel rail. Its size is indicated in the device manufacturer's instructions. As a standard, 4 fasteners are required, which are usually included in the kit.
Step 4. Hang the dryer on the wall and secure it with clamps. Check the level of the device with a level and adjust the position if necessary. The centers of the inlet and outlet tubes must coincide with the markings.
How is the fastening done?
The process of hanging a battery in the bathroom is quite simple, so you can even do this work yourself. It is important to remember that replacing a water heated towel rail is carried out only outside the heating season, otherwise you will have to turn off the entire heating riser, which causes inconvenience for other residents.
The installation technology consists of the following stages:
- Shut off the riser, if necessary.
- Fixing brackets on the wall.
- Installation of heated towel rails on brackets.
- Connection of the heating riser to the coil entry point.
- Sealing of connections.
- Checking the tightness of joints and seams.
Important! Experienced plumbers recommend connecting the coil in the bathroom using ball valves. This simple measure will help shut off the water supply to the device in the event of a leak or accident and will save you a lot of nerves in the future.
Preparing hidden wiring for installing a heated towel rail
Step 1. If the wiring is hidden in the wall under the finishing, grooves are prepared for it - shallow channels. To cut them, use a wall chaser or a hammer drill. The work is labor-intensive and dusty, so preliminary marking must be done very accurately. Step 2. Install bends and shut-off valves according to the accepted connection diagram. The threads must be wrapped with sealing materials. FUM tape is the most convenient and technologically advanced. It is made of elastic fluoroplastic and reliably fills all gaps in the joint.
Step 3. Water outlets need to be deepened into the wall to the protruding thread. To do this, use a hammer drill with a round nozzle. If the mounting socket is too deep, the sockets are secured with dowels in the correct position, and the gaps are filled with brick chips and mortar. To prevent debris from getting into the tubes, install plugs. Step 4. Fill the grooves with a waterproof solution and level the surface. After hardening, you can hang the heated towel rail.
Installation of structures with bottom connection
Let's look at how to carefully and quickly install a heated towel rail with hidden wiring on a wall already finished with ceramic tiles:
Step 1. Remove the plugs from the taps using a wrench and remove dirt.
Step 2. Tighten all connections of the heated towel rail, tighten with a wrench to be secure. It is recommended to use gaskets made of paronite, which are not afraid of heat and high pressure and retain their elastic properties for a long time.
Step 3. Install decorative caps and adapters on the bends.
Step 4. Place the gaskets in the adapters, attach the heated towel rail to the outlets and secure with nuts.
Step 5. At this stage, the dryer is fixed to the wall using dowels. Since the finishing is already ready, you need to act very carefully. Remove the heated towel rail, drill holes, install fasteners.
Step 6. Hang the device on the wall again, check its position with a level and, if necessary, adjust vertically and horizontally.
Step 7. Tighten all the nuts completely. Start testing. If the heated towel rail heats up evenly as the coolant passes through, the work has been carried out correctly. Otherwise, you need to try to bleed the air using the Mayevsky tap (if available) or by slightly unscrewing the nuts in the upper corner.
At what height is the correct height to hang a heated towel rail?
There are certain SNiP standards that regulate the installation of equipment of this type, such as heated towel rails.
The heated towel rail must be installed at a distance of 120 cm from the floor level and must be at least 60 cm away from all nearby objects, such as a bathtub, sink, shower and other plumbing equipment.
In this case, the heated towel rail can be placed directly above the washing machine, and in such a way that it does not interfere with the free opening of the lid of a front-loading machine.
If a ladder-type heated towel rail is installed, it should be located at such a height that an adult can have free access to the top rail of the dryer.
the system chose this answer as the best
There are no height requirements in any regulatory document; if I’m wrong, then indicate the document number and the chapter that says at what distance the heated towel rail must be installed from the floor.
There are only recommendations from specialists, and they mostly lead to two characteristics:
- Ease of use.
- Bath heating.
Although it is clearly stated everywhere that a heated towel rail is not a heating system, it is more designed to maintain the microclimate in a humid room such as a bathroom.
And since it does not apply to heating systems, it means there is no special law regarding its height on this side.
Read Corner between tiles and bathtub
Everyone refers to plumbers' directories, which were written back in the 50s and reprinted in more recent years.
So in these reference books there are recommendations for the bottom, which should be at least 60 centimeters, i.e. the lower, the more space it will warm up.
Nowadays they produce heated towel rails that are installed almost on the floor.
The requirements for installing a heated towel rail directly depend on its size, because contrary to its intended purpose, not only towels, but sometimes socks and nose caps are hung on it, and their size and configuration are very different.
Naturally, when installing a heated towel rail, you need to take into account the convenience of those who use it, that is, install it so that you can easily reach, for example, from the bathroom or shower for a towel, take into account that the things drying on it are not sprayed with water from the tap or shower, so that water can circulate freely around them. air and naturally so that they do not disturb others.
The height from the floor must be chosen so that it is comfortable for everyone, this is approximately 120 - 130 cm, and at this height the middle of the heated towel rail should be placed, both children and adults can reach it comfortably - the only thing that cannot be installed is the heated towel rail on the wall where there are electrical sockets , so as not to close it and for safety reasons it would be incorrect, reach for the plug from the hair dryer, pushing away the damp towel.
add to favorites link thank
There are some requirements, but to be honest, no one pays attention to them. Why? because modern heated towel rails themselves are quite small products, the requirement is 120 centimeters from the floor (from its horizon), but how can this be achieved if the heated towel rail is a meter long, and the height from floor to ceiling in the bathroom is only 2.20? (there are also such) answer: yes in no way (not to mount it to the ceiling)
I have been working in this area for many years and have never even heard that representatives from the Housing Office or another organization walk around with a tape measure and “look” for those same 1.20s. But if you want to do everything according to the law, then at least 90 cm from the floor, and if the heated towel rail is above the bathtub or washing machine, then at least 60 cm from them (not from the floor). Even Soviet heated towel rails (if a curved pipe can be called a dryer) were mounted at different heights, in other words, there is a norm, but no one bothers with this.
add to favorites link thank
Installing a heated towel rail in a small bathroom with a side connection
This option is easier to implement than with a bottom connection.
Sequence of work when installing a small M-shaped heated towel rail on ready-made steel outlets:
- Wrap fum tape or thread around the threads of all connecting elements.
- Place decorative covers on the connection tubes in advance.
- Using an adjustable wrench and a gas wrench, install American couplings and nuts onto the dryer inlets, and screw their mating parts onto the riser outlets.
- The ends of the connections must be strictly vertical; check this with a building level.
- Connect the heated towel rail to the outlets, tighten the nuts until they stop.
If finishing has not yet been carried out, first fix the structure to the wall temporarily. Finally fix after finishing cladding.
Connecting a water heated towel rail to hot water supply or central heating
Heated towel rails can be connected to a hot water supply (DHW) or heating system. The first option allows you to dry bath accessories throughout the year, because... hot water is not turned off during the warm season. The dryer pipes heat up only when the coolant is consumed, so the device cools down completely overnight.
When connected to the heating network, you can use the heated towel rail only in the cold season. However, due to the forced circulation of hot water, it will remain warm around the clock.
Copper and brass heaters must be marked as galvanized and suitable for water supply risers.
Installation in a riser
The dryer is inserted in the following sequence:
- Preparation of materials and tools. To install a water heater you will need an adjustable wrench, a grinder, dies for threading, a low-speed drill, telescopic brackets, dowels and screws, American type taps, a Mayevsky tap (for air release), straight and corner fittings (depending on the type connections), sealant and sealant for joints. The system itself is assembled from a heated towel rail, a bypass jumper and several pipes, the length of which is selected depending on the layout and location of the device.
- Dismantling of old equipment. Work to remove the old device and/or install a new one will require permission from the management company (MC). Its employee closes the common hot water or heating riser for a regulated time. If there is an old dryer, it is removed from the threaded connections or cut off, and then removed from the mounts (brackets). If you are just planning to install the device, then a gap is cut out in the riser, which is slightly larger than the width of the heater.
- Preparation of bends and lintels, laying tiles. Ball valves are installed on the branches after the bypass. You can fix the system before finishing the room, but in this case the thickness of the glue and tiles is added to the distance to the wall.
- Marking for fastenings. It is carried out taking into account the slope of the branches, the horizontal position of the heater and the distance between its parts. After checking the markings, you can drill holes, screw in dowels and install brackets.
It is recommended to install a towel dryer during a major renovation of an apartment or when replacing a water riser. This will allow you to choose more reliable material options and a convenient connection diagram.
Self-installation of a simple configuration
Installation of the coil is carried out after completion of the preparatory work. Branch pipes, angles and fittings are connected to the finished bends. Each connection is sealed with fum tape or silicone gasket.
Installation of the heated towel rail is carried out simultaneously on the bends and installed brackets. The device is secured with screws.
Upon completion of work, the system is tested for functionality and tightness. The DHW or heating riser is temporarily opened, filling the heater with water. If the connection is made correctly, it circulates freely in the system, the joints do not get wet, and the metal surface remains hot.
Before installing the system yourself, you should watch training videos with instructions for installing the dryer (step by step and with all fittings).
Technology for working with the “Ladder” model
For heated towel rails of the “ladder” type, predominantly lateral and diagonal installation schemes are used. For bottom connections, you can install rotating angles and additional pipes on the bends, which will allow pipes to be brought in from the side.
The installation sequence of the device is the same as for the coil. The shape of the heater is taken into account only when choosing the layout and marking of the mounting. The brackets are installed at 2 points at the level of the middle of the “ladder”.
Connection to a centralized heating system
Tapping into the heating system can only be done outside the cold season. To do this, you will have to obtain permission from the management company, shut off the riser and drain the cold water.
To prepare the bends, it is better to invite a specialist from the management company. Having a document with a list of work performed will allow you to relieve yourself of responsibility in the event of an accident. The risk of leaks on the heated towel rail itself is minimized by shut-off taps after the bypass.
A significant disadvantage of tapping into the heating system is a delayed leak test.
If the heated towel rail does not heat
Problems often arise after water is turned off for repairs or a summer break. After starting the hot water supply, it is discovered that the dryer is cold. The reason is an air lock that has become an obstacle to the passage of coolant. You can get rid of it using the Mayevsky crane.
You need to remove the decorative plug at the top of the heated towel rail, turn the valve and bleed the air. When water flows, close the tap.
The cause may be clogged with rust, especially if the pipes in the system are already old. To get rid of it, unscrew the connections, drain the water and rinse with strong water pressure from a hose. You can use a thin cable with a brush at the end, and chemical reagents.
Installation features of the combined model
The design combines water and electrical sections, so the connection includes algorithms for working with two types.
Installation rules:
- First, water towel dryers are connected to a common riser using the direct, corner or bottom method.
- They work with electricity after checking that the water part is connected correctly.
- Select the optimal location with ease of connection to the riser, electrical outlets, and take into account the ease of use of the dryer.
- The parameters of sockets and machines are selected according to standards similar to those that apply when connecting electric models.
On underwater collectors, close the valve, and cut an angle valve or tee under the heating element into the riser. The electric heater pipe is cut vertically into the heated towel rail through a tee. After tightening the nut with a wrench, the heating element is considered installed.
The heating system tap is opened to supply water, air bubbles are released using the Mayevsky tap, then the shut-off valves are closed. The heating element is turned on, it works until the thermostat automatically turns off. After this, the Mayevsky tap is turned off. This cannot be done before, because water expands under the influence of heat.
How to install a pump
If a new heated towel rail does not heat, there may be several reasons - narrowed outlets or bypass, taps of the wrong diameter, bends in the inlet, incorrect connection diagram, or a decrease in pressure in the heating system. An electric pump with a “wet” rotor will correct this unpleasant situation. When the impeller rotates, the coolant is forced into the tubes of the heated towel rail, and all dangerous electrical elements are enclosed in a sealed housing and do not come into contact with water.
Pump power 25-75 Watt, maximum temperature up to 110°C. It is built into the bypass in accordance with the recommended direction of water flow. The automatic fuse is installed at a distance of at least 50 cm from the dryer.
Installation rules
Powering the “towel man” from the hot water supply should not violate the rights or cause inconvenience to neighbors in a multi-storey building. Therefore, the installation of the device should be carried out in compliance with the rules and regulations.
Primary requirements:
- mandatory installation of a bypass;
- the absence of shut-off valves on the circuit, by means of which the flow of hot water is blocked to neighbors living above;
- the dryer must be placed at a distance of no more than 2 m from the pipe, otherwise the water entering the device will quickly cool down;
- The bypass capacity must meet the requirements for the existing line and not block the water supply of neighbors.
Important! Circulation features should also be taken into account. The intensity of water movement in the dryer circuit is low. If it is installed far from the riser, then the pipes should be placed at a slight slope. The upper pipe slopes towards the riser, and the lower pipe - away from the riser. This creates conditions for the free release of air bubbles and improves water circulation.