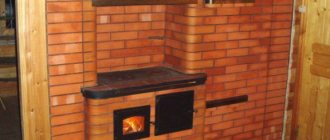
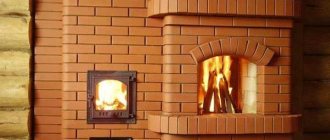
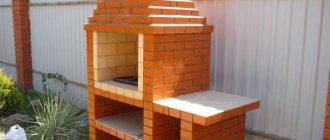
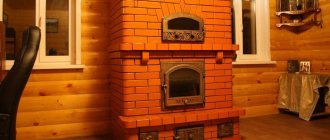
The classic means of heating in a country house in Russia has been a brick stove since ancient times.
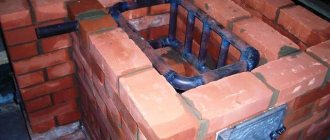
Brick heating stove with natural finish and gray seams
Despite rapidly developing technologies, the stove still remains a reliable tool that effectively improves comfort in the home. Of course, now you can buy electric or gas heating or cooking appliances, but nothing compares to a traditional brick stove, with which you can heat your house and cook delicious food. They will fill your home with cozy warmth from a living dancing fire, and food cooked on them will have a unique taste.
Selection of sand and mortar
To lay a stove with an oven, use a clay mixture, for which you take fireclay or red clay.
The kaolin-sand solution is prepared in a consistency of 2.5:1 (sand, clay, respectively). River sand with a grain size of 1 - 1.5 mm without impurities is used, and clay is taken with high fat content. In the store you can purchase ready-made dry mixtures for laying stoves, which are brought to readiness by adding water and stirring. They use heat-resistant and fire-resistant types that can withstand temperatures up to +1000°C without irreversible deformation.
The solution must not react with chemicals. They do not use ordinary cement-sand mixtures, which are destroyed in difficult conditions and do not have plasticity.
How to make a tandoor
The most important part for making a stove is the cauldron. You should choose the largest and deepest. It needs to be placed upside down, greased with sunflower or olive oil and wrapped in paper sheets. Then a special mixture is prepared: clay is mixed with sand in proportions 1:2, a small amount of wool is added. This solution is coated with the outer surface of the boiler. A hole with a diameter of 40 cm is left in the upper part. The layer of the mixture should be quite thick - about 8 cm, and closer to the base - 10 cm. Be sure to let the product dry for 7-10 days.
There is another way to make a casing: a thick solution is rolled out onto rollers (5 cm in diameter), and then tier by tier is wrapped around the cauldron. For the strength of the structure, it is necessary to tightly connect the resulting turns to each other - press them with your fingers and make tucks. After drying, the cone is removed from the cauldron and placed on a brick or stone foundation. A blower is made at the bottom of the furnace. In Asian countries, adobe is used for the foundation - a building material consisting of clay, straw and various additives.
You can decorate your creation with figures and patterns sculpted from mortar. Next, the tandoor should be fired - close the lid, heat it with dry wood and leave to cool slowly. Such a product will become the pride of the owner of the dacha, because he created it with his own hands.
Specialized classification of stoves for baths and saunas
There are a number of different criteria that contributed to the development of a large number of types of stoves for baths and saunas. Let's look at the main classification types to understand what other sauna stoves there are.
The method of heating the premises determines the following types of stoves:
- “Black” - stoves without a chimney, in which smoke is exhausted exclusively through the room and natural air openings: roof, floor, window and door openings.
- “White” stoves are more common because their design involves the installation of a chimney.
Based on the method of heating water, the following furnace designs are distinguished:
- with a water container suspended above the stove or built into the body itself. A boiler or tank is usually used as a container;
- with a coil passed through the oven, through which cold water moves and, when heated, is collected in a special container.
According to the method of placing stones in a special compartment for them:
- in the case when the heater is closed, the stones are placed directly in the chimney and this is not the best option;
- in the open type, the stones are placed in special cast iron or steel containers placed above the firebox.
By type of fuel combustion:
- periodic - allow you to start procedures in the steam room only after all the fuel has burned out;
- constant ones are more popular, since they can maintain a constant combustion process by occasionally adding the material chosen as fuel. When using them, the only question that arises is how exactly the firebox will be placed: inside the stove or it will be taken to the desired room in the bathhouse to simplify the process of adding fuel.
Finally, stoves are divided into several categories based on the type of fuel used:
- solid fuel - on wood, peat or coal;
- liquid fuel or gas - using diesel fuel, bottled or liquefied gas (more details: “How and which one to choose a gas stove for a sauna”);
- electric - furnaces that provide high-quality heating due to heating elements operating from the electrical network.
https://youtube.com/watch?v=m83JFLg4LIo
Bottom line
If you correctly use the information presented in this article, you can choose the most efficient, reliable and durable sauna stove. To do this, when purchasing, you need to focus on all the specified criteria. Also, if desired, you can entrust the choice to specialists who will take responsibility not only for the purchase, but also for the installation of the stove and its subsequent commissioning.
Furnace mortar
The brick is placed on clay mortar. It is worth noting that red clay is used for red brick, and if the stove is planned to be built from fireclay bricks, then it is worth stocking up on fireclay clay.
The mortar is prepared from river sand, where the grain fraction is from one to one and a half millimeters and clay in a ratio of 2.5 to 1. Water is added to the solution in the amount that is needed to obtain the desired consistency of the masonry mortar. If you don’t want or have the opportunity to prepare this solution yourself, then you can purchase a ready-made baking mixture in a specialized store.
The solution is prepared as follows:
- The required amount of clay for kneading is soaked in cold water for 24 hours.
- The resulting mass is divided into five equal parts.
- Sand is added to each part in the proportion required. This can be ¼, ½, ¾ of the total mass of sand.
- All parts are combined and kneaded until smooth, after which the resulting mixture is left for three to four hours to allow the water to drain.
All stoves, without exception, consist of a foundation, an array that includes a firebox and air duct, and, of course, a chimney.
Foundation
This element of the furnace plays an important role, because it is the foundation on which the furnace structure will stand. In some cases, it is made separately from the main foundation of the house. And this is no coincidence:
- The stove is quite heavy and during subsidence the soil will be much lower than under the main building.
- Since the temperature in the furnace is unstable, the furnace itself can move, and this is very dangerous for the walls of the house.
- A separate foundation for the stove structure provides an acceptable distance between the stove and the main building. This reduces the risk of fire.
Among other things, in this position it will be easier to maintain it: carry out repair work, remodel or make adjustments if necessary.
The base for the stove is made of bricks or rubble, which are placed on a mortar of either lime or cement.
The use of clay mortar for foundations is strictly prohibited. Indeed, under the influence of high temperatures, clay begins to collapse.
When building the base, it is worth considering that it should be five to seven centimeters larger than the base of the stove itself on all sides. To go deeper into the ground, you can take about 75 centimeters.
If the building is one-story, then fifty is enough, but if it is a two-story building, then it is worth deepening the base by one meter.
Array
Among the elements that are included in the stove array are the body, firebox and chimney. Red brick is used for masonry, and refractory brick is used for cladding. The body itself and the chimneys are laid out on a solution of refractory clay and sand. The cladding uses a composition of fireclay powder with fire-resistant clay. The thickness of the seams should be minimal, no more than five millimeters.
The most important thing that should not be forgotten is the fact that it is necessary to adhere to the bandaging of the seams, otherwise, over time, the destruction of the furnace walls will occur.
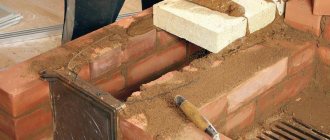
Before you start building the stove, you need to soak the red brick in water for about fifteen minutes. This is done so that the bricks do not draw water from the masonry mixture; refractory bricks are simply wiped with a damp cloth.
During the work, a number of conditions must be met:
- Checking the horizon and diagonals to prevent tilt. If it is present, you will have to redo the upper rows and eliminate the error.
- Filling of joints with mortar. The oven must be periodically cleaned with a cloth to remove excess solution.
- The chimney will need to be scrubbed with a wet brush to remove dirt and grout.
As experienced stove makers advise, before laying out a row, it must be duplicated in a separate place without using a solution. This move will allow you to see all possible errors and neutralize them in time. Among other things, cutting bricks in this form is much easier and faster.
Pipe
This element of the furnace is made exclusively of red solid brick. At the attic level, a cement and lime mortar is used as a binding element, and on the outside only a cement mortar is used, because the clay will simply be washed away by rain over time.
The smoke channel is built in an exclusively vertical position with a precisely maintained cross-section and height.
Where the pipe will come into contact with the wooden ceiling, a widening is made that is not adjacent to flammable materials and tow or asbestos soaked in clay mortar is inserted into the hole formed.
A deflector made of metal is placed on top of the pipe. It not only prevents precipitation from penetrating inside, but also extinguishes the sparks that form, which is very important from the point of view of fire safety.
Swedish masonry
In general, the construction of a Swedish heating and cooking stove does not differ from the construction of other stove structures. You should start working by preparing a place - for Swedish stoves it is chosen either in the wall between the kitchen and the room, or in the corner near two adjacent walls. Walls must be protected from high temperatures. To do this, they are lined with any fire-resistant material, for example, ceramic tiles.
Work on any furnace begins with preparing the foundation. Depending on the design of the heating device, the foundation may differ, but in any case it must be reliable in order to withstand considerable weight. It is carried out in a pit, the size of which exceeds the dimensions of the future furnace by at least 10 cm. A pit about 30 cm deep is sufficient to ensure the reliability and safety of the structure.
Crushed stone and broken brick are laid in layers at the bottom of the pit. The layers are carefully compacted and filled with cement mixture. After the concrete has hardened, a layer of waterproofing is laid flush with the floor. On crumbling soils, it is worth making formwork, which is removed after the cement mixture has completely hardened.
It is important that the surface of the foundation is level and strictly horizontal.
The foundation is ready and the stove can be installed. The laying is carried out in accordance with the chosen order. The versatility of Swedes has given rise to a huge number of orders. The appropriate option is selected depending on the specific conditions and architectural features of the house.
Despite the variety of masonry patterns, there are a number of rules that must always be strictly adhered to.
Masonry rules
- If the order provides for technological voids, they can be filled with broken bricks. Smoke ducts should not be made with right angles. It is better if all corners are rounded. This will ensure normal movement of flue gases in the furnace.
- During laying, it is imperative to control the verticality of the corner bricks. Even the slightest deviation will cause the stove to tilt. This is not only an aesthetic problem - one can only guess about the degree of reliability and efficiency of a crooked stove. Corner bricks are beacons during laying.
- To ensure good adhesion, the bricks must be moistened with water before laying. You can't wait for the brick to dry. Immediately after wetting it must be used in masonry.
- Expansion joints must be provided in places where metal elements are installed. It is better to reinforce the seam where the doors are installed with steel wire. Otherwise, there is a high risk that the door will simply fall out during operation of the oven.
- The fully folded oven should dry thoroughly. The first fire is carried out after the masonry has dried, and then the stove needs to be heated for about 2 weeks.
Preparatory work before assembling the stove
An important part of the preparatory stage is choosing the location of the stove in the overall layout of the house. Since the main task of the stove is heating, the optimal location is considered to be the center of the room
But usually, for practical reasons, the location is shifted closer to the front door. As a rule, the stove is folded simultaneously with the construction of the walls and roof. To do this, the foundation is prepared in advance, because the stove weighs about 3 tons. Only a well-filled, well-established foundation can withstand such a load per 1 m2.
The optimal location of the stove in a residential building is at the intersection of interior partitions near the entrance doors
If the stove is being built in a house that has already been built, it is necessary to take into account the chimney outlet above the roof
When installing the pipe, it is important not to violate the rigidity of the roof frame and not to get on the rafters, as this will significantly complicate the task of building a chimney
The summer-autumn period is considered a favorable time for carrying out preparatory work. It is best to give the foundation time to dry for at least 1 month, but ideally six months, filling it in advance in the fall.
Holes in the attic or interfloor ceilings are made immediately before laying the stove.
The roofing covering is disassembled last, when the laying of the chimney riser is completed.
Pouring the foundation
Let us dwell in more detail on the manufacture of a foundation for a Swedish stove, since this is a very important point for its further operation.
- The depth of the foundation is determined depending on the region. The starting point is the depth of soil freezing in winter. If you make the foundation higher than this layer, displacements in the horizontal plane are possible. Therefore, on average, a depth of 0.8 to 1.0 m is selected.
- Linear dimensions are calculated according to the dimensions of the furnace itself. The foundation is laid 10–15 cm wider and longer than the dimensions of the stove. This is a generally accepted standard for the construction of soil supports.
- A sand cushion 15–20 cm high is poured between the soil and concrete. With its help, the base of the future foundation is leveled and the pressure on the soil is evenly distributed. In addition, sand perfectly allows water to pass through it. In the future, it will remove moisture from the foundation when groundwater enters.
- After sand, it is allowed to use a large fraction of crushed stone, broken brick, slate, tiles and other construction waste. They are bonded with cement mortar. If possible, use natural stone, which is highly durable.
- The reinforcement is placed closer to the upper layers. Its purpose is to strengthen the concrete mass and evenly distribute temperature changes throughout the entire area. Therefore, the metal mesh is laid in a horizontal plane 10–15 cm from the surface of the concrete screed.
- Immediately after pouring, the upper plane is leveled with a rule (or a wide spatula). And after setting and drying, several layers of roofing material are laid on it, which will act as waterproofing. Some craftsmen prefer roofing felt to roofing felt. Others are synthetic materials with metal foil on one side. In any case, waterproofing is necessary, and you should not forget about it.
- The hole in the floor is cut in such a way that it is convenient to make the stove masonry. And after completing the work, add flooring directly to the stove body and install baseboards. To do this, add at least two additional joists on which the edges of the floors rest. They are usually made from construction timber (50x75 mm and above) and attached to uncut floorboards with self-tapping screws. The logs are placed along the walls of the furnace after work on the foundation is completed.
Practice has shown that a feature of the Swedish stove, like the Dutch stove, is a powerful downward flow of thermal energy. Therefore, before starting masonry, several layers of heat-insulating material are laid under the base of the furnace. Usually this is basalt cardboard - an inexpensive and durable heat insulator with a thickness of 5 mm. A more expensive, but also widely practiced method is to lay the first row of the stove base with fireclay bricks. The low thermal conductivity of the brick prevents the foundation from heating up.
Basalt cardboard is an inexpensive and reliable heat-insulating material for constructing furnaces
Swede is the best solution
Perhaps the best cooking and heating stove for centuries has been the Swedish one.
Note! In terms of its design, it is much simpler than Russian stoves, but in terms of efficiency, efficiency and versatility it is in no way inferior to it. These stoves embodied the harsh life of the ancient Scandinavians
The devices heat the house and are great for cooking, drying clothes and storing kitchen utensils. You can easily attach a bed to the Swedish bed or make a combined structure with a fireplace. No other stove is as multifunctional and at the same time simple as the Swedish one
These stoves embodied the harsh life of the ancient Scandinavians. The devices heat the house and are great for cooking, drying clothes and storing kitchen utensils. You can easily attach a bed to the Swedish bed or make a combined structure with a fireplace. No other stove is as versatile and at the same time simple as the Swedish one.
Heating devices of this type have considerable advantages:
- Versatility. The Swede is a universal stove in the full sense of the word. There is not a single function that Swedish ovens cannot do.
- Compactness. Compared to Russian stoves, Swedish stoves are small in size. They do not take up much space, save usable space and at the same time show the efficiency characteristic of massive furnace structures.
- Simplicity. It is simply impossible for a person who is not a qualified stove maker to build a Russian stove. The situation is completely different with the Swede. You can take a ready-made project and order as a basis, so that the result is a unique heating device that meets specific operating conditions.
Advantages and disadvantages
Before deciding how to properly lay a brick wall, you need to evaluate all its advantages and problem areas.
Experts highlight the following advantages:
- compactness – base area up to 1 sq. m and height no more than 2 m;
- possibility of use both for heating and for cooking, relaxing, and drying things;
- excellent performance indicators - high efficiency and heat transfer;
- simplicity of design;
- decorative function of room decoration;
- the ability to regulate heating modes;
- efficiency of heating;
- ease of maintenance and infrequent fuel stowage.
Effective use of the Swedish stove is only possible with regular combustion processes. If the room is not heated too often, then it is necessary to dry it.
The optimal area for a heated room is considered to be 40 square meters. m. When laying a stove, you must use high-quality raw materials, and the door of the combustion chamber must be cast.
Do-it-yourself heating and cooking stoves
The modern heating equipment market offers a huge selection of a wide variety of units that can satisfy the needs of any owner. Despite this, traditional heating and cooking stoves continue to be very popular, especially in regions without the possibility of organizing water or gas heating.
Do-it-yourself heating and cooking stoves
There are several most popular design options for heating and cooking units. We offer you detailed guides on how to install stoves yourself. Choose the most suitable option and get to work.
Do-it-yourself heating and cooking stoves
Contents of step-by-step instructions:
How to make a brick sauna stove
When starting work on laying bricks for the stove, you should familiarize yourself with the order. It depends on both the material and the size of the oven. In this case, it is necessary to measure the edges each time. Because with any gap, even a miniature one, smoke will enter the room. The bricks always fit very tightly, which depends not so much on effort. How much from a high-quality prepared solution.
The thickness of the seam in each row of bricks should not be less than 3 mm and more than 5 mm.
Ordering a sauna stove
Photo 8 Sauna stove arrangement diagram
- The first row, as mentioned earlier, must be laid out on a previously prepared base. To do this, the foundation under the furnace is covered with bitumen waterproofing or roofing felt. Wet all bricks from the first row with water.
- Install a plumb line with a weight, as shown in the photo
- Lay the second and subsequent rows of bricks in a checkerboard pattern.
- On the 3rd row, as a rule, the blower door is mounted and reinforced with strong wire.
- To securely fasten the door, the bricks around it should be trimmed
- On the 4th row, check the evenness of the walls and the future stove using a plumb line
- The laying of the ash pit and grate begins from the same row. Before installing the grate, make holes in the surrounding bricks that will level out expansion when heated.
- In the 6th row, a door for the blower is installed. In the 7th, a door for the firebox and a grate are installed. From the 8th row, the laying of the chimney begins, which continues until the fourteenth inclusive. On the 14th row, corners are mounted, and on the front side an opening is prepared for a container of water. It is imperative to cover the tank and all doors with asbestos.
- From rows 15 to 18, the walls are laid out in half a brick and at an angle. This begins the formation of a dividing wall, where each subsequent brick will cover the joint in a checkerboard pattern.
- In the nineteenth row, a door is installed that removes steam. Before laying 20-21 rows, steel strips are laid on the bricks to strengthen the fastening (this is where the water container will be installed). Next, the entire container is covered with bricks, possibly even incomplete parts or leftovers.
After laying the bathhouse, it is recommended to plaster it and/or sew it with stones on the mortar in order, on the one hand, to decorate it, and on the other, to eliminate the risk of fire.
General recommendations
For laying the stove it is recommended to use the so-called. fireclay brick containing refractory clay
Such a brick can withstand even the highest temperatures and does not burst when water gets on it. In addition, its decorative characteristics are beyond praise. When planning to build brick ovens for your home, drawings with procedures and safe operation are the most important things you should pay attention to. The minimum permissible distance from the pipe to the wooden surface is 10 cm; The gap between the roof and the chimney must be insulated with a sheet of metal; The area in front of the stove is insulated with a similar sheet
Step-by-step instructions: design with a bed
The model of this design is very bulky due to the sun lounger attached to the back. But this is a great idea for replacing a bed in a country house. A house of 30 square meters will be perfectly heated by a stove measuring 1781x1280 millimeters, where the length of the sunbed itself will be 1781 millimeters, and its width will be 630 millimeters.
Required materials (table)
| Material/element | Amount) | Size (mm) |
| Red brick M-200 | 900–920 | |
| Fireclay brick Ш-8 | 200–215 | |
| Firebox door | 1 | 210x250 |
| Cleaning channel doors | 3 | 70x130 |
| Blower door | 1 | 140x250 |
| Chimney dampers | 2 | 130x260 |
| grate | 1 | 250x400 |
| Hob | 1 | 310x610 |
| Steel strip | 5m | 50x5 |
| Steel corner | 80 cm | 60x60x5 |
| Clay, sand | ||
| Fireclay mortar | 160 kg | |
| Oven | 1 | 450x360x300 |
Foundation
It is recommended to do it at the stage of laying the foundation of the house itself, where the stove will be located. But the stove is not always planned at the stage of building a house, so you often have to make holes in the finished floor. But in any case, the foundation of the stove and the base of the concrete building must be separated from each other. Otherwise, if the shrinkage of one side is unsuccessful, the other side may also warp, thereby deforming the entire masonry.
To build such a powerful unit, you need an appropriate foundation, which will go almost a meter deep into the soil, or more precisely 70 centimeters. If the soil freezes deeper, then the hole, accordingly, should be dug deeper. This information should be taken care of in advance.
If the construction of the stove takes place in an already finished house, and not at the construction stage, then marking the future Swede should be done directly on the floor with the condition that the hole in it should be 10–15 centimeters larger than the size of the foundation in all directions.
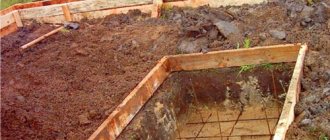
After the marking and hole in the floor are made, you need to mark the soil and dig a pit. Cover the bottom with sand moistened with water. Compact it too. The thickness of the compacted sand layer should be 10–20 centimeters. Specific data depend on the depth of the excavated pit. Then there is a layer of crushed stone of 15–15 centimeters, also well compacted. Next, install the formwork and attach roofing material to its walls for waterproofing. The formwork should rise above the soil layer to the entire height of the foundation, which is either 1 layer of brick short of reaching the floor, or rises 8–10 centimeters above it.
Coarse crushed stone + cement + sand = concrete for pouring a pit. This layer should be approximately 15 centimeters thick. Install the reinforcing mesh and press it into the concrete solution.
The next layer is a thinner cement mortar. It is poured to the height of the soil, leveled and left to harden. The reinforcement structure is again laid on the slightly hardened surface and concrete is poured to the height of the entire formwork. Level this layer and leave until completely hardened, for about a month.
When everything is ready, it is necessary to remove the upper part of the formwork and lay waterproofing on the foundation (2-3 layers of roofing felt, which must first be glued together in thickness).
Another option for a foundation for a stove
The foundation is finished. Now you can proceed directly to laying the furnace itself.
Furnace laying
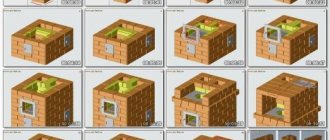
The laying is carried out according to the order scheme.
Scheme of the order of the stove with a stove bench
If you follow this scheme, the work will proceed as follows:
- The first two rows set the direction of laying the entire structure. They are laid flat.
- On the third row, gas outlet channels and a blower chamber begin to form and the door is installed.
- The fourth row provides for the installation of doors for the cleaning chamber and preparation of space for the grate.
- 5th row - installation of firebox doors and laying of the grate.
- 6th row - the oven is installed.
- The 7th row finishes laying the deck chair and begins laying the stove hob.
- The 8th, 9th and 10th rows are laid according to the pattern. The walls of the firebox are erected in them, and a chamber is also built around the oven.
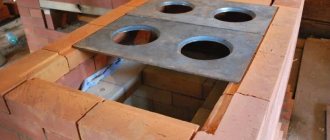
- The 11th row provides for the installation of a hob. It is necessary to lay pieces of asbestos under its edges, and fix its front part with a steel angle.
- Rows 12–16 - a wall surrounding the hob is built.
- On the seventeenth row, the niche needs to be covered with strips of metal and reinforced with a corner. At the same stage, the first chimney valve is installed. First, the valve frame is mounted on the mortar, then the moving part is mounted on it.
- Rows 18–26 are laid out strictly according to the pattern.
- The second chimney damper should be installed on the 27th row.
- The last stage is the construction of the chimney pipe.
Advantages
When the layout is well thought out taking into account a specific heating system, the installation of the stove practically does not depend on the building material from which the home is built. It is suitable for both wooden and brick houses. Its advantage is that there is always a wide choice of fuel for heating premises: coal, peat, firewood, even cardboard and dry tree branches. The user himself decides what to heat with, what is more accessible and costs less.
Layout of a house with a stove 6×9 meters
The ability of a stove to create a cozy and comfortable atmosphere is well known. Thanks to this quality, no other heating system can compare with it. It’s nice to sit with a book by the stove, inhale the smell of resinous wood and listen to its quiet crackling. This is reminiscent of distant times, shrouded in romance. In addition to these advantages, the stove can be equipped so that it becomes an original addition to the interior.
The Russian stove gives the room a special charm. In terms of heat capacity, nothing can compare with it. It is able to accumulate heat and then gradually release it, maintaining constant coziness and comfort in the hut. In the past, it performed a cooking and heating function. Today it is quite rare.
Only those who like the rustic design style of the house will decide to decorate their apartments with it. True, there are no more stove makers who don’t need a drawing to build one.
The century of technological progress has made its own adjustments. Today, it is common to have a house with a stove that runs not only on solid fuel, but also on electricity, gas, and fuel oil. But the most affordable heating material is still firewood.
The importance of heating panels
Due to their compact size and excellent functionality, Zhirnov's Swedish stoves and potbelly stoves are very popular. They have only one significant drawback: a small working surface, which does not allow them to fully warm up the room.
In addition, ovens have high operating temperatures, which can cause fire. To prevent this from happening, it is important to properly install an insulated chimney. Sometimes a minimal error during its construction is enough for heat to escape into the pipe in huge volumes, without having time to heat the room. How to solve such a problem?
There are two possible solutions: either install a water heating system with natural or forced circulation of coolant, which requires constant monitoring, or build a slab with a heating panel. It is this that can almost double the heat capacity of the stove, which will allow you to regularly save on raw materials. The reduction in heat loss in this case is due to the passage of combustion products through a chimney made of bricks with high thermal conductivity.
Visually, the heating panel is an attached compact wall made of brick, inside of which a well-coordinated smoke circulation system is organized.
Important nuances and tips
Experienced stove makers sometimes ignore the dry masonry stage, but for novice craftsmen it is mandatory. This will help you understand the internal structure of the stove, all its channels and cavities, in order to prevent possible errors.
For the firebox, fire-resistant fireclay brick is used, the pipe and the stove mass are made of solid red brick. It is prohibited to use sand-lime brick in the construction of furnaces. Each element must be cleaned of any contamination before laying.
In almost every row, some bricks are adjusted to size. Experienced stove makers advise that when dismantling dry masonry, separately fold the elements of each row. You can also take a marker and put the row number and the number of the element’s place in the masonry on each brick.
Instead of mortar for dry masonry, it is most convenient to use wooden slats of the same thickness. They will also be useful in the future to control the amount of mortar between the bricks.
The work is carried out as follows:
- During “wet” masonry, each row is first laid out dry to once again check the position of all elements.
- On the bottom row, narrow slats that were used previously are placed on the sides.
- A layer of solution approximately 10-12 mm thick is applied on top.
- Lay the brick and hammer it with a rubber hammer until it settles on the mortar to the level of the slats.
- The laying continues in the same way.
- After removing the slats, the resulting cavities are filled with solution.
- The resulting fresh seam must be immediately embroidered to give the masonry an aesthetic appearance.
The slats are removed only when the row is third or fourth from the top. Now they can be reused. To carry out the work you will need about four sets of such slats.
Each row that is laid on the mortar must be checked by level and plumb for its position relative to the horizontal and vertical.
Crushed bricks cannot be used in laying parts of the furnace that are subject to constant temperature loads. In general, it is undesirable to use elements with cracks and chips in the construction of solid wood and chimneys. Crushed bricks may only be used to fill the base for the foundation of the stove.
Old brick obtained from dismantling destroyed structures is suitable for laying a foundation if it is not severely damaged.
The quality of the masonry largely depends on the adhesion strength of the brick and mortar.
To improve this point, experienced professionals recommend:
- Before laying, red brick is soaked for 7-10 minutes. Fireclay only needs to be dipped in water and shake off the drops.
- Place the brick in place in one clear movement, without moving or tapping it.
- Apply only the required amount of mortar to the masonry site. The seams in the solid wood should not be more than 5 mm, in the firebox - no more than 3 mm.
- During the laying process you need to “mop”, i.e. use a stiff brush to rub the inside surface of the smoke ducts and oven chambers to create the smoothest possible surface along the flow path of the flue gases.
If it was not possible to immediately put the brick in place, you should completely clear the mortar from both the element itself and the place where it is installed, and lay the brickwork on a fresh layer of mortar.
When laying pipes, it is allowed to use only red solid bricks, which are well resistant to acid deposits and temperature changes. The smoother the internal surface of the chimney, the better the draft and the less blockages. You can treat the insides of the pipe with liquid glass.
On our website there are articles with a detailed description of the technologies for constructing different types of brick kilns, we recommend that you read:
- DIY mini Russian stove: specifics and procedures for building a compact stove
- Do-it-yourself Russian stoves with a stove bench: construction manuals with diagrams and procedures
Brickwork
By following this construction scheme, you will get an excellent heating and cooking installation, made by yourself.
The first row must be perfectly level, because the entire harmony of the future heating installation depends on this. As in other stove models, the masonry is continuous, without gaps or holes.
In the second row everything is repeated, and it is also completely filled with ceramic material. The place of the fireplace insert is laid out with sand-lime brick, and after the installation of this row is completed, the holders are attached and the fireplace grate is welded.
Blower chamber
In the 3rd row there is a blower chamber, cleaning channels and a place for an oven (if the Swede comes with an oven). Here they begin to form a vertical chimney. A fireplace fuel chamber is installed on the reverse side of the structure. Also, at the same time as the masonry, the doors tied with wire are fixed.
On the back side of the oven installation site, a corner of the brick is cut off to ensure connection with the cleaning chamber. The 4th row completely repeats the previous one, but fits into the dressing.
In the 5th row above the blower, a place for the grate is formed, but otherwise there are no differences from the previous stages. In the area of contact with open fire (grid), silicate material is used. An oven rewound with asbestos rope and a grate are also installed here.
At the next stage, the firebox door is installed. The silicate brick between the firebox and the oven must be placed on the rib part, which will contribute to better heating of the oven (the channel between it and the vertical one must be blocked here).
The 7th row is no different from the previous one, and two strips of metal are laid on top of it, which will serve as a support for further masonry.
Stages 8 and 9 are performed according to a given pattern, but in the last stage two metal strips are laid above the oven. This will help relieve the load on the supporting areas of the camera.
Hob
The 10th row is distinguished by the formation of a place for the hob, under which asbestos strips are laid. We use a corner to strengthen the area above the oven and the firebox door. On the left you need to provide a gap for the purifier door, into which you can immediately install it.
Stage 11 provides a cooking niche. The bricks to the right of the stove should bridge the gap between it and the oven wall. At level 12, the bricks that cover the firebox are cut obliquely, which helps direct the smoke in the right direction. Row 13 - according to the diagram.
Levels 14 and 15 involve the installation of a fireplace mantel. The sixteenth is covering the cooking niche with strips of steel and laying a corner on the front edge.
Until stage 19, everything is carried out according to the scheme, and then the chimney openings are formed. Doors are also installed on the cleaning channels. Then everything follows the diagram, and in rows 21 and 22 the doors are mounted on the cleaners.
23 - according to the diagram, 24 and 25 - installation of valves on the fireplace chimney. Row 26 involves installing the last door on the purifier and combining the gas outlet with a vertical channel. Next, the next two rows follow the pattern.
Levels 29 and 30 are solid masonry with all channels blocked, excluding the chimney, on which a damper is installed in the next row. From the 32nd row a chimney is formed, the height of which depends on the height of the ceiling, and the thickness should be at least half a brick.
General recommendations for masonry
Before you start building a stove, you need to decide on its location, type of structure, purpose and size.
The following recommendations will help you make the right choice and calculations:
A stove that requires more than 500 bricks to lay requires a foundation that protrudes more than 5 cm on each side. The chimney should not come into contact with attic beams or other wooden roof elements. When buying bricks, you should pay attention to the quality of firing, integrity and strength of the material. Before laying, the brick is soaked in the solution for several minutes. 5. The seams between the bricks in the fuel combustion chamber and the ash pan are up to 10 cm wide, in other areas - at least 3 mm. Each new row begins with corner bricks, the evenness of the masonry is checked with a level or ropes stretched around the perimeter. To avoid cracks on the surface of the stove, dressings are made during laying. It is recommended to leave a hole of a few millimeters between the hob and the brick wall. Tiled or ceramic finishing will allow the stove to fit harmoniously into the interior.
Requirements for the arrangement of shields
It is important to remember the strength of the foundation and its high-quality waterproofing (for example, with a layer of roofing felt). This will prevent moisture from getting on the shield.
It is also necessary to strictly take into account all fire safety requirements.
To prevent the formation of excessive condensed moisture and reduce draft, it is necessary to control the maximum temperature of the exhaust smoke, which should be no more than 120 degrees.
Features of materials
It is better to build the chimney wall from smooth and chip-free brick. All joints between rows, all seams must be properly and evenly sealed with mortar. The solution that has fallen down the unit should be removed from there through special openings to clean the oven.
The ideal size for laying the shield is considered to be half a brick in size, which prevents it from cooling quickly.
To build the shield, it is permissible to use ordinary brick. The only condition is that it should not be hollow. It is better to seal the seams between layers of brick not with cement mortar, which is not adapted to the influence of high temperatures, but with a clay mass.
A correctly folded heating shield increases the efficiency of the stove from 30% to approximately 65%.
Swedish masonry
In general, the construction of a Swedish heating and cooking stove does not differ from the construction of other stove structures. You should start working by preparing a place - for Swedish stoves it is chosen either in the wall between the kitchen and the room, or in the corner near two adjacent walls. Walls must be protected from high temperatures. To do this, they are lined with any fire-resistant material, for example, ceramic tiles.
Work on any furnace begins with preparing the foundation. Depending on the design of the heating device, the foundation may differ, but in any case it must be reliable in order to withstand considerable weight. It is carried out in a pit, the size of which exceeds the dimensions of the future furnace by at least 10 cm. A pit about 30 cm deep is sufficient to ensure the reliability and safety of the structure.
Crushed stone and broken brick are laid in layers at the bottom of the pit. The layers are carefully compacted and filled with cement mixture. After the concrete has hardened, a layer of waterproofing is laid flush with the floor. On crumbling soils, it is worth making formwork, which is removed after the cement mixture has completely hardened.
It is important that the surface of the foundation is level and strictly horizontal.
The foundation is ready and the stove can be installed. The laying is carried out in accordance with the chosen order. The versatility of Swedes has given rise to a huge number of orders. The appropriate option is selected depending on the specific conditions and architectural features of the house.
Despite the variety of masonry patterns, there are a number of rules that must always be strictly adhered to.
Masonry rules
- If the order provides for technological voids, they can be filled with broken bricks. Smoke ducts should not be made with right angles. It is better if all corners are rounded. This will ensure normal movement of flue gases in the furnace.
- During laying, it is imperative to control the verticality of the corner bricks. Even the slightest deviation will cause the stove to tilt. This is not only an aesthetic problem - one can only guess about the degree of reliability and efficiency of a crooked stove. Corner bricks are beacons during laying.
- To ensure good adhesion, the bricks must be moistened with water before laying. You can't wait for the brick to dry. Immediately after wetting it must be used in masonry.
- Expansion joints must be provided in places where metal elements are installed. It is better to reinforce the seam where the doors are installed with steel wire. Otherwise, there is a high risk that the door will simply fall out during operation of the oven.
- The fully folded oven should dry thoroughly. The first fire is carried out after the masonry has dried, and then the stove needs to be heated for about 2 weeks.
The construction process of the Swedish
The process of constructing a Swedish stove. For the construction of the furnace, the following calculations are taken: for the stove - 71 by 41 centimeters; for the firebox (height, width, depth) 30 by 35 and 45 centimeters; for oven 30 by 35 and 50 centimeters. These dimensions may vary depending on the oven version. The metal walls for the oven must be at least 4 millimeters. The distance from the edge of the grate to the oven should be about one brick. There should be a gap of a quarter brick from the back of the oven to the firebox. The oven is made of dense cast metal.
Orders of the Shvedka stove
When the oven approaches the firebox, the walls are additionally protected with vermiculite. The door must be cast iron. It is attached to the masonry, which guarantees reliable fixation.
Before laying the brick stove, thermal insulation of the floor is done. Insulation can be made from basalt cardboard. The insulation is laid so that at the end a 1.5 centimeter layer is formed. The middle layer is made from a foil sheet. The foot of the oven (the first 2 rows) is laid out with widened centimeter seams, this creates a protrusion. The brick is moistened before laying. The next two rows form an ash pan and three doors are installed for cleaning the oven. The doors are mounted with a gap. An asbestos cord is inserted into the gaps.
| ORP Shvedka (Swedish stove) No. 3 |
With a two-layer stove made of red and fireclay bricks, a distance of 6 millimeters is made between them. The internal lining of the furnace is lined with fireclay bricks. The grate bars are inserted. And the oven is inserted into the same row. From the sixth to the ninth the combustion chamber is formed. The door is inserted. The tenth row covers the oven.
Next, the slab is laid and smoke channels are made. When laying the slab, quarters are cut out of the bricks. From the twelfth to the sixteenth, the cooking chamber and smoke exhaust channels are laid out. The next two are laid with trimmed bricks. From the twenty-first to the twenty-eighth there is a chimney. In the twenty-seventh, a valve is inserted with a basalt cord gasket in the gap. From the twenty-ninth row there is an extension for the cornice of 5 centimeters. The channels (except the pipe) are closed.
The next row is made even wider by 5 centimeters. Then the size is reduced to the original size. The pipe is laid out in 5 bricks. In front of the ceiling, 3 rows of pipes are fluffed up. The thickness of the pipe is one and a half bricks. An iron smoke cap is placed on top of the pipe. The pipe running outside the house is lined with cement mortar.
