Insulation of a flat roof is an obligatory stage in construction, when the question of whether to do or not to do is not even raised. According to the law of distribution of thermal energy (convection), heat tends to rise, so its loss through the roofing should be minimized and the likelihood of condensation should be reduced.
Features of flat roof insulation
Since a structurally flat roof tends to retain moisture and snow on its plane, and is also sensitive to physical, mechanical and temperature effects, special requirements are imposed on its installation. A feature of the insulation of such roofs is the creation of a hydrophobized layer, which eliminates the possibility of water penetrating under the layers of the roofing cake.
The basis of the load-bearing surface of a flat roof is the floor panel, which can be made of profiled metal sheets and reinforced concrete slabs. Each type of base has its own characteristics of installation under a flat roof.
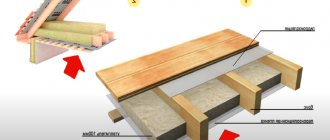
The diagrams below show options for layer-by-layer installation of a flat roof on floors made of reinforced concrete and metal profiles, as well as methods for their design.
The design of a flat roof can be of a classic (otherwise known as “soft roof”) and inversion type.
A flat roof in the classic version is a roofing pie consisting of a main slab, a vapor barrier, a thermal insulation cushion, a waterproofing bitumen layer and an additional insulating layer. Such flat roofs are used in industrial or civil construction and can be unused or used.
An inversion flat roof is the same classic flat roof, with an improved design and a change in the order of the coating layers. It is installed layer by layer in the following order: gravel, filter material, thermal insulation layer, waterproofing, cement screed and reinforced concrete slab.
The fundamental difference between a classic roof structure and an inversion one is the sequence of arrangement of the coating layers. In the first option, the heat-insulating layer is laid under the waterproofing layer, and in the second option, under it. This fact significantly improves the performance properties of the inversion roof and increases its service life.
Important! The design features of inversion flat coverings make it possible to use the roof area as additional management facilities. For example, on a flat roof you can arrange a garden, a recreation area, a cafe or a parking lot.
Inverse operating surface
A common problem with a roof in use is wear and tear of the waterproofing layer. Once the integrity of the insulation is compromised, the roof begins to leak and often cannot be repaired. Manufacturers of roofing products have thought about this problem and released a completely new material. Their brainchild was polymer membranes. They were different from all types of roofing and were very elastic. Over the course of several years of actual use, it became clear that such a product can easily withstand sudden temperature changes, does not lose its properties even in extreme cold, and is resistant to direct sunlight and mechanical damage.
The polymer membrane is laid using heat welding.
This is a completely safe method for humans, but it is unlikely that you will be able to carry out such work yourself. The fact is that a welding machine for this task costs quite a lot, however, if desired, you can rent it.
Now, let's return to the inversion sequence of roofing layers. If you make a cross section, you can immediately notice the differences from traditional installation, namely: the thermal insulation material is located above the waterproofing. It is laid on the base and acts as a vapor barrier layer. A strengthening solution is applied on top of the thermal insulation boards, but most developers simply pour another layer of cement-sand screed.
This surface has some advantages:
- Waterproofing material that is covered with a thick roofing pie will last much longer than usual.
- Moisture will never penetrate into the thermal insulation product, therefore, the properties of this material will always be at a high level.
- Roof repairs are very easy. To do this, the external screed is dismantled and the thermal insulation slabs are pulled out.
If you plan to create a serviceable roof, then it is best to do this using the inversion method.
Types of insulation for flat roofs
Insulation for the roof is selected in accordance with the regulations for ensuring fire safety measures for buildings (protocol SP 02.13130 of 2009). Manufacturers of these products produce a wide range of insulating materials, varying in thickness, density and compressive and tensile strength.
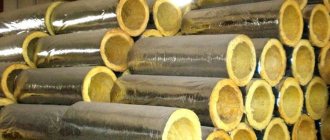
Along with the basic types of thermal insulation materials, there are wedge-shaped slabs on the building materials market, with the help of which the issue of drainage is ensured. Manufacturers offer a special type of insulation - fillets, used in construction as a component to ensure the pairing of horizontal and vertical thermal insulation.
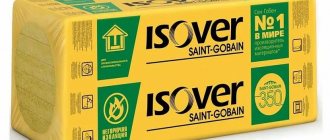
To insulate a flat roof, use any materials that are designed to protect walls, floor slabs and roofing. Concrete (lightweight concrete), gravel, synthetic or mineral material in rolls and slabs are used as insulation. Among the main insulation materials for flat roofs are mineral wool and expanded polystyrene.
Insulation of a flat roof with polystyrene foam
The most popular and frequently used material for insulating a flat roof is polystyrene foam. This building material is produced by baking styrene granules. Traditional polystyrene foam is used as a thermal insulation layer under the screed of a flat roof.
Along with the classic type of polystyrene foam, manufacturers offer an extrusion type of insulation. It is a fairly hard and durable material with a porous structure. It is produced in an extruder by mixing styrene granules with foaming material under high temperature and elevated pressure. This type of expanded polystyrene is used as insulation when installing a flat roof before the process of screeding with concrete.
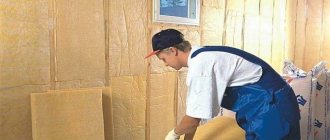
Insulation of a flat roof with mineral wool
Mineral wool continues to be a popular material for roof insulation. Mineral wool is a rigid or semi-rigid thermal insulating material with a fibrous structure. It is obtained by melting silicate rocks in combination with metal production waste and its components. This material has the lowest level of thermal conductivity and flammability, light weight, excellent insulating properties and is very easy to install.
The only disadvantage of mineral wool is the time and environment in which the material is used. Installation of a flat roof using mineral wool should take place during the dry season, without rain or drizzle. Therefore, the main work on installation and insulation of the roof must be done in one day. Otherwise, if the work is not completed before the rain and the thermal insulation gets wet, the material will lose its insulating properties and the mineral wool will need to be replaced.
Materials for comparison
- Expanded polystyrene (EPS) is a slab insulation obtained by foaming polystyrene. This material is better known as polystyrene foam. According to the old GOST, PPS was designated as PSB (pressless polystyrene foam), this abbreviation is still used in some sources.
- Extruded polystyrene foam (EPS) is made by extrusion through an extruder. It differs from conventional PPS by lower thermal conductivity and lower water absorption.
- PIR (polyisocyanurate foam) is a polymer insulation belonging to the group of thermosets. Has the lowest thermal conductivity compared to other materials.
Polymer insulation materials are usually divided into thermoplastics and thermosets. The first is obtained as a result of mechanical processing of a melt of a substance (PPS, EPPS). Thermosets are produced by a chemical reaction, so when heated they do not return to their previous state.
- Stone (basalt) wool is a slab insulation based on mineral rocks. Basalt wool consists of thin threads, the air space between it provides the thermal insulation properties of the material.
- Polyurethane foam (PPU) is a sprayed insulation material that is compressed in cylinders. When leaving the container under the influence of moisture and air, it begins to expand and fill the free space inside the structure.
Insulation thickness for flat roofs
An extremely important parameter in the thermal insulation of a roof is the thickness of the insulation material. A roof that is insulated according to all the rules will help keep the house warm and “save” a significant amount of the family budget on heating.
Sometimes insulation is laid in 1 or 2 layers in order to maintain the required thickness in terms of the thermal conductivity of a particular material. In this case, you need to make sure that the joints of both layers are laid in a checkerboard pattern, and the butt seams do not fall one above the other.
The thickness of the insulation depends on:
- region;
- material and method of wall installation;
- type and design of flat roof;
- type of insulation and its thermal conductivity coefficient.
Warning! When installing a flat roof, it is prohibited to use sheet foam as insulation. This is due to the short service life of this material, possible harm to human health and its relative fire safety.
The thickness of the insulation should be calculated based on the “Rules on Thermal Protection of Structures” (SNiP 02/23/2003). A correct calculation will not only help you approach the issue of home insulation professionally, but will also optimize future expenses as accurately as possible.
First, you should find out the permissible coefficient of heat transfer resistance of roofing structures and compare these data with the regional parameters specified in SNiP. We need to find an answer to the question of how much heat (W) can be transmitted by 1 m² of flat roofing with the required thickness of insulation when there is a temperature difference of 1°C inside and outside the room for a certain time.
However, it is worth noting that making such calculations on your own is very difficult. Therefore, to select the thickness of the roof insulation, you can rely on SNiP, which provides verified heat loss data for different regions.
Fire retardant properties
It is important to talk not about the properties of a single material, but about the parameters of the entire structure. In the case of flat roofs, the approach is different from pitched roofs. For them, there is no alternative to wood in roof construction, so non-combustible insulation materials are considered a priority.
The fire retardant properties of building materials consist of flammability (G1 - 4, NG), flammability (B1 - 3), smoke generation (D1 - 2) and toxicity (T1 - 4). We discussed these characteristics in more detail in the article about choosing insulation for a pitched roof (link at the end).
Methods of thermal insulation of a flat roof
The choice of roof insulation method depends on several fundamental factors:
- type of flat roof base;
- basic (minimum required) insulation parameters;
- construction region;
- financial capabilities of the building owner.
Insulation of a flat roof is carried out using a reinforced concrete floor slab or corrugated steel sheet. Installation and work sequence are carried out in full accordance with the type of base the roof has.
The reinforced concrete base of the roof is slabs or poured concrete screeds. Insulating such a roof is like a multi-layered cake, each layer of which has its own meaning and cannot be skipped. Each stage of roof installation must proceed in turn and in this order:
- A slope is laid on the reinforced concrete base of the flat roof. This layer is responsible for the drainage system of the future roof.
- Next, a leveling layer is installed on the roof, which smoothes out irregularities, pits and bumps throughout the entire plane.
- Then a vapor barrier film is laid and secured on the roof.
- Thermal insulation boards are installed in 2 layers. The first, bottom layer is laid out from insulation boards with a thickness of 180-200 mm (data for each region is different) and a compression resistance of 30 kPa.
- The second, top layer of insulation is laid on top of the first layer in a checkerboard pattern so that the butt seams do not fall one above the other. The thickness of the second layer is from 30 mm (also depends on regional parameters), and the compression resistance is 60 kPa.
- Next, the entire resulting roofing pie with insulation is fixed with special fasteners (2 units per 1 slab) to the concrete base of the roof.
- After this, the roof is covered with roll waterproofing. The seams of the tape insulation are installed sequentially, overlapping each other, to avoid any penetration of moisture.
The insulation of a flat roof on a corrugated sheet base has a two-layer structure and, in comparison with the insulation of a roof on a reinforced concrete slab, has its own characteristics.
- Firstly, this concerns the strength characteristics of the lower layer of insulation, which should be no lower than 30 kPa in compression, and the same values of the upper layer of thermal insulation - 60 kPa. The degree of deformation of both layers of insulation should not be more than 10%.
- Secondly, laying thermal insulation slabs on galvanized corrugated sheets can be carried out without a leveling layer made of a flat sheet of CNS or slate, if the thickness of the insulation slab is 2 times greater than the value between the corrugations. It should be remembered that the thermal insulation slabs must be supported by a flat corrugated base for at least 30% of the entire roof area.
- Thirdly, if the topmost layer of the roofing pie is planned to be made from heated bitumen mastic, then the material can be laid directly on the insulating board.
- Fourthly, mechanical fastening of insulation boards and waterproofing is carried out separately. When insulating the roof on a reinforced concrete base, this fastening stage was simultaneous.
Summary
New generation roofing insulation PENOPLEX, used in conjunction with the multifunctional waterproofing membrane Plastfoil, allows you to create profitable solutions with attractive characteristics:
- durability due to high quality materials;
- ease of operation (such a roof does not need to be cleaned of snow);
- maintainability;
- the ability to choose solutions to suit any financial capabilities, design ideas and functionality.
By choosing these materials for your roofing system, the developer receives reasonable benefits based on the durability and practicality of modern innovative solutions.
Subscribe to our Telegram channel Exclusive posts every week
How to insulate a flat roof of a house with your own hands
Insulating flat roofs on your own is possible for everyone. If you delve into the matter well, prepare properly and follow all the instructions step by step, then you can do this work almost at a professional level.
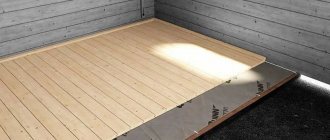
Insulating a flat roof from the outside
To insulate the roof with your own hands, use any of the classic installation methods described above. A feature of insulation can only be the type of insulated roof base (reinforced concrete or corrugated steel sheet) and the technique for attaching the heat-insulating layer.
Methods for attaching thermal insulation board:
- mechanical method;
- ballast method;
- glue method.
Mechanics. Thermal insulation boards are fixed mechanically using special sliding fasteners. They are long, complex anchor designs, with self-tapping screws screwed into the base. The telescopic mount goes through the entire thickness of the construction pie, and the plastic flat heads rigidly hold the entire structure. For reinforced concrete slabs, special anchors are used, and for cement screeds, plastic sleeves are used.
Ballast. Thermal insulation boards are laid on a flat roof and covered with a layer of waterproofing, and then, on top of it, a layer of gravel (expanded clay) is poured. If the roof is operational, then instead of a loose layer after waterproofing, plastic supports are installed on the roof surface for laying tiles. All elements of the roofing pie lie absolutely free (ballast). Fastening is carried out only around the perimeter of the roof, at the exit points of the chimney, ventilation and drainage system.
Glue. Heated bitumen mastic is used as glue in this method of roof insulation. Thermal insulation slabs are glued to the base (reinforced concrete panel). It is necessary that the adhesive adhesion of both surfaces be at least 30% of the entire roof area. All other layers of the roofing pie are attached in the same way. It should be remembered that all work must be carried out on a dry day, otherwise the insulation will absorb moisture and lose all its useful qualities.
Insulating a flat roof from the inside
Physically insulating the roof from inside the house is not very convenient, since most of the work requires holding your hands up. However, this process also has its advantages - insulation is carried out regardless of weather conditions, and there is no risk of the thermal insulation material getting wet.
The classic method of insulating a roof from the inside of a house is done in the following order:
- A lath is made from timber on the ceiling. The dimensions of the wooden beam must match the thickness of the insulation board, and the width of the step between the beams must match its width. The insulation board is easy to cut; if necessary, it can be cut to any size.
- Next, insulation boards (mineral wool or expanded polystyrene) are attached to the finished sheathing. For this purpose, glue, bitumen mastic, and a stapler are used.
- After all the intermediate areas between the lathing slats are filled with insulation, proceed to the stage of waterproofing the ceiling. A vapor barrier film is secured to the sheathing bars using a construction stapler.
- Then the ceiling is covered with plasterboard, a suspended ceiling is made, or one is combined with the other. Further finishing of the ceiling is carried out according to our own design.
By following the rules for insulating the roof from the inside, you can be absolutely sure that the house will be warm, dry and comfortable. A roof made with your own hands “conscientiously” will become a reliable outpost and a source of special pride for the owner.
Expanded clay backfill - its disadvantages
Expanded clay backfill is fragile; by itself, it is not capable of being the basis for a built-up waterproofing carpet. Therefore, it is necessary to install a reinforcing cement-sand screed on top of it. Moreover, it is worth keeping in mind that such a screed, being a cold bridge, increases heat loss from the roof. A screed over the thermal insulation will also have to be done if liquid polyurethane foam is used, since its strength is not enough to withstand the roofing carpet. It is recommended to apply the screed only after the material has completely hardened, otherwise it will be difficult to achieve an even base. Creating a durable base from expanded polystyrene concrete is also not easy, since this requires pouring the material in thin layers and waiting until they completely harden, only then the polystyrene foam granules are distributed evenly and voids do not appear. However, in practice, builders speed up installation by pouring thick layers of expanded polystyrene concrete, which creates voids that cause shrinkage and even failure of the base for the roofing carpet, which ultimately leads to unevenness on the carpet itself. Water gets into these irregularities, which, when frozen, can rupture the waterproofing. It is worth noting: the cement-sand mortar, which is the binding component of expanded polystyrene concrete, needs at least 28 days to gain strength. Moreover, if the screed does not dry completely, and a waterproofing coating is already deposited on it, then swelling and bubbles may soon form on it. Due to bubbles, the roofing carpet will lose its elasticity, and over time, cracks will appear in it and leaks will begin. Foam concrete, like expanded polystyrene concrete, contains cement mortar, which means that if the material does not dry completely, there is a possibility that the waterproofing deposited on it will swell in some places and begin to let moisture through.
Tips and tricks
Experienced professional roofers know how, with what and when to make thermal insulation for a flat roof. For those who are planning to do this work themselves, there are some useful tips that will help you avoid mistakes. Here they are:
- All work on insulating a flat roof should be carried out exclusively in dry times.
- To insulate the roof from the outside, it is better to use polystyrene foam, and to insulate the roof from the inside, it is better to use mineral wool.
- The thickness of the thermal insulation for the construction region should be clarified (use SNiP data 02/23/2003).
- Do not disturb the order of laying the layers of the roofing pie (see the specifics of installing insulation on a reinforced concrete slab and corrugated sheet).
- Use only high-quality insulation from proven brands.
Warning! If over time the roof requires major repairs and insulation, then it is necessary to completely dismantle the top layer of waterproofing and the old insulation boards. Installation of flat roof insulation must be done anew; applying a new thermal insulation layer to the old one is unacceptable.
Video description
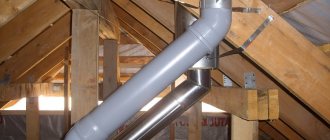
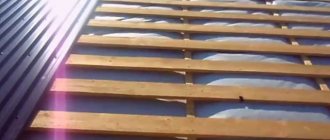
How to properly make hydro- and vapor barrier insulation of a cold attic floor, see the following video:
If you do the opposite, then water vapor from warm air will penetrate into the pores of the wood, but will not be able to erode - there is a vapor-proof barrier on top. This will lead to wetness of the wooden elements of the supporting structure, and no treatment with antiseptics will save the wood from waterlogging and rotting.
The scheme for insulating the wooden floor of a cold attic looks like this:
- On the side of the room there is a vapor barrier, on top of which there is lathing for decorative finishing of the ceiling. Vapor barrier can be of several types: simple film, with an anti-condensation surface, with a reflective (reflective) surface. In addition to protecting the thermal insulation from getting wet, it protects the room from insulation particles getting inside.
- Thermal insulation between beams is stone wool mats or expanded clay.
- A layer of waterproofing superdiffusion membrane.
- Distance bar.
- Attic flooring.
Typical scheme for insulating a wooden floor in a cold attic
Advantages
If you place a thermal insulation layer inside the house, the dew point will shift. This indicator determines the temperature value below which condensation occurs. In this case, the dew point moves indoors. This means that the humidity will increase, the walls will begin to “sweat” and mold will form. Internal insulation reduces the space of the room.
Even a small thickness of insulation can significantly reduce the square footage, because to thermally insulate a wooden building you will need to install sheathing. Another factor is the deterioration of the internal microclimate. The use of even modern thermal insulation materials will not allow wood to “breathe”. Insulation from the outside eliminates all of the above factors.
conclusions
So, what is the best roof insulation? You can choose the option like most and use mineral wool
If we are talking about insulating the roof floor, pay attention to ecowool. When calculated, its cost is not that high
But this is an environmentally friendly material that is not afraid of rodents. And this is a big plus. We have given enough general insights that will help you choose insulation
However, no matter how correctly the chosen material is selected, when laying the insulator it is important to adhere to the installation rules, which we described separately
As we found out, roof insulation can be not only buns with hot chocolate, but also at least 6 other good materials. Choose and let your roof be as warm as Carlson’s.
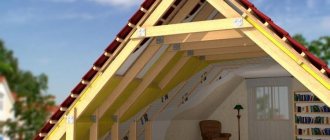
What kind of room is this
An attic is a category of living space located in the attic space, usually located under a specialized sloping (otherwise known as attic) roof.
According to the Russian classification (SNiP 2.08.01-89), an attic is considered to be a room where the line of intersection of the roof and facade is no higher than 1.5 meters.
The attic is located in the most specific temperature conditions within the house - in summer the roof can heat up above seventy degrees and transfer heat to the attic space; in winter, 50% of heat loss goes through the roof and another 15% through the walls of the attic.
In such conditions, the living space in the attic must be well insulated, not only taking into account cold weather, but also taking into account the need to be comfortable there in hot weather.
There is one universal recommendation for proper attic insulation - the materials used (if we take the middle band as the standard) should not exceed 0.04 W/m2C in terms of thermal conductivity.
Typically, half a meter to a meter of roofing space is enough for an attic; for colder regions this volume can be increased by 25-35%, and for warmer regions it is reduced by 40-50%.
Video description
Should you trust online calculators, watch the video:
The calculator helps estimate the cost of workSource www.strojmag.ua
Using the calculator, you can calculate the number of bricks for masonry, the cost of finishing, the dependence of insulation consumption on the width of the material, and many other parameters.
It is important to remember that the calculator does not provide exact numbers that can be used when designing or purchasing materials. It only helps to understand the principle of calculations and determine how much the same work will cost using different materials or projects
Full construction calculations can only be performed by qualified specialists.
PIR boards
A flat roof, without a doubt, will withstand the weight of objects standing on it and pedestrian loads and will serve for a long time without repair if you use PIR slabs as insulation, which are produced by TECHNONICOL, PirroGroup, Isobud, Lissant, ProfHolod. This is a new generation material based on polyisocyanurate foam (one of the types of rigid polyurethane foam). It appeared on the Russian market not long ago, so it is worth recalling that PIR boards have the lowest thermal conductivity among modern insulation materials: λ = 0.021–0.023 W/(m • K). While for extruded polystyrene foam slabs λ = 0.031–0.033 W/(m • K), and for stone wool slabs λ = 0.034–0.046 W/(m • K). The structure of the material is formed by closed cells filled with gas of low thermal conductivity (from 0.016 to 0.022 W/(m • K), which is noticeably lower than the thermal conductivity of air (0.0266 W/(m • K). This structure provides high efficiency and excellent thermal insulation characteristics, guaranteeing maximum thermal protection even with a small thickness of insulation.
The high compressive strength of PIR boards allows them to be used in flat roof systems, where they demonstrate the required resistance to foot traffic. The cost of 1 m² of thermal insulating PIR boards F/F with a size of 2385 × 1185 mm and a thickness of 40 mm is from 505 rubles, which is slightly higher than that of other thermal insulation products.
PIR is one of the most modern environmentally friendly insulation materials. It has characteristics that are extremely important when building a private house with a flat roof. Firstly, the low thermal conductivity of the PIR board allows you to reduce the amount of insulation and the overall weight of the roof structure. Secondly, the service life of such insulation is more than 50 years. It is not afraid of moisture, is durable, and does not trample, which is of paramount importance at the stage of arrangement and operation of the roof, including those equipped for a green recreation area. The main thing when installing insulation boards is to carefully adjust them to each other, avoiding gaps, the presence of which is fraught with heat loss, freezing and condensation formation. Keep in mind: rigid PIR boards follow the unevenness of the base, and this, of course, reduces the aesthetic perception of the work performed. Therefore, insulation should only be laid on a leveled surface.
Vladimir Shalimov
Leading technical specialist at TECHNONICOL
The process of installing a drainage membrane in an inversion system
A layer of gravel is poured onto the reinforced concrete base, a screed is poured, it is covered with two layers of rolled waterproofing, on top of which a Planter geo (TECHNONICOL) drainage membrane is laid with geotextile facing up. When connecting rolls, the geotextile of the bottom is separated from the base by the required amount for “joining” with the next sheet
As new canvases are laid, overlapping edges are formed on the long and short sides. To ensure that the drainage fabric is “continuous”, the seams are secured with Planterband tape.
And geotextiles - with double- or single-sided adhesive tape for geotextiles, obtaining a whole filter layer
For the ballast layer (from 40 mm), gravel of fractions 20–40 mm and weighing at least 50 kg/m² is used. It can be used as a finish on an unused roof, and when used, ceramic tiles or paving stones are laid on gravel
Photo: TECHNONICOL (5)
Nuances of performing work
1. The roof thermal insulation scheme using foam plastic involves a preliminary calculation of the number of blocks. To do this, you need to measure the roof area from the inside and outside, the pitch between the rafters, and the size of one slab. It is recommended to purchase material with a reserve of 8-10 pieces, since during the cutting process there is a risk of deformation and loss of polystyrene foam.
2. There are several mounting methods. This includes installation using an adhesive or mastic mixture, fixation using anchors with wooden slats, laying between sheathing elements and flooring technology. There is a manual for each scheme, and the method of working with foam plastic depends on the design features of the roof.
3. To prevent condensation from forming on wooden beams, it is recommended to use a vapor barrier and a waterproof membrane on top.
4. Expanded polystyrene slabs for roof insulation have a smooth surface, so it is necessary to create a slight roughness for better adhesion. To do this, use a knife, a needle roller or a stiff brush. If the products are embossed, such measures are not necessary.
Before starting work, you need to prepare the following consumables and tools:
- Calculated amount of foam.
- Vapor barrier film.
- Stapler.
- Knife and scissors.
- Wooden slats and bars.
- Fasteners.
- Moisture-proof membrane.
- Glue, foam.