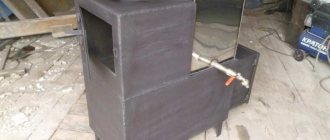
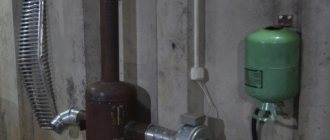
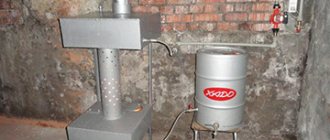
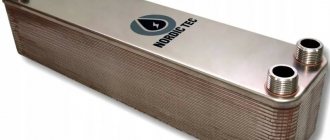
The issue of heating water for washing in a bath can be solved in various ways, including by installing an electric boiler. But when you plan to install a good wood-burning stove in the bathhouse, then no additional equipment is required for this purpose. It is enough to select and purchase a ready-made heater with a heat exchanger or make the latter yourself. This article is intended to help you understand why you need a heat exchanger for a bath and how to install it correctly.
Why do you need a heat exchanger?
The vast majority of sauna stove designs do not contribute to saving wood fuel. This is due to the specific requirements for them, namely:
- the steam room should be heated in the shortest possible time to a high temperature;
- the stove cannot take up much space;
- the presence of a heater is mandatory;
- The heater operating mode is periodic.
Based on the listed requirements, sauna stoves are designed in such a way as to quickly reach a high temperature in the firebox and maintain it for a certain period of time. In this case, a lot of unused heat simply escapes into the atmosphere through the chimney. It would be a sin not to use this thermal energy to heat water for washing or even heating the rooms adjacent to the steam room.
Note. An exception is Kuznetsov's brick bell-type stoves intended for baths. A well-thought-out design allows you to significantly save firewood, the stove retains heat for a long time and also heats neighboring rooms. There are also modifications using a water heat exchanger.
One of the simplest solutions is to use the heat generated by burning wood. Currently, there are many models of stoves with a built-in coil on the market. If a heater without a water circuit is already installed and functioning, nothing prevents it from being equipped with a homemade or factory-made heat exchanger. Then you won’t have to spend money on a boiler and then pay for electricity.
Description of heaters
If in the past the most popular were classic heaters, which only allowed heating the steam room, today universal stoves with heat exchangers are in demand on the market. Such installations allow you to simultaneously heat the steam room and solve the problem of heating water. Thanks to their use, the comfort of bathing procedures increases and the costs of purchasing appropriate thermal equipment are reduced.
Stoves with a water heat exchanger will be a convenient solution when the steam room and washing room are located separately in the bathhouse. Universal heaters are easy to use, they are extremely convenient, quickly heat the room, completely solving the problem with warm water. The choice of stoves with heat exchangers available today allows you to purchase or make them yourself for both a small steam room and a spacious public bathhouse. Advantages of stoves with a thermal circuit:
- long service life;
- compactness of heaters;
- efficiency and high speed of heating the room;
- possibility of making it yourself.
How to properly make ventilation in a bathhouse with your own hands
Principle of operation
According to the principle of operation, water heating devices are divided into 3 types:
- a coil built into the heater;
- an external heat exchanger in the bathhouse in the form of a rectangular tank, heated directly from the furnace wall;
- external water circuit that removes heat from flue gases.
Note. There are models where not a coil is built into the body of the stove, but a stainless steel water tank. Their operating principles are similar.
In the first case, the heat exchanger is a coil made of a steel pipe, built directly into the firebox. It is positioned in such a way that the pipe is not exposed to direct flame, that is, it is outside the highest temperature zone. It is desirable that the element stands in the way of waste products of fuel combustion, then it will not burn out and will last long enough. The built-in coil for heating the water at the outlet has connections for connecting pipes leading to a remote storage tank.
In such heat exchangers, the water warms up quite quickly, but the process cannot be called effective. After all, the heater takes heat directly from the firebox, thereby reducing the heater power. The steam room takes longer to warm up, which means more wood is consumed. Hot flue gases flew out into the chimney and continue to fly out unhindered; the efficiency of the unit remains very low (no more than 50%).
Note. An exception to this rule are brick sauna stoves with a heat exchanger and several flue gas passages that heat the dressing room and washing area.
An external hanging tank made of stainless steel is another option for transferring furnace heat to water. Usually it is suspended from one of the side walls of the firebox and heated by infrared radiation from it. The method is attractive due to its ease of implementation, but is not very convenient to use. In addition to the disadvantage of direct heat extraction described above, the hanging tank also requires constant addition of cold water.
Main advantages
The undoubted advantages of using a heat exchanger in the furnace design are:
- Simultaneous implementation of several functions: heating water, air in several rooms, as well as steam generation;
- Options for installing the tank at a considerable distance from the stove (even in another room);
- Durability. When using modern materials and following installation technology, the service life reaches 20 years.
- Aesthetic appearance
- Availability of care;
- Easy installation;
- High efficiency;
- Possibility of installation both in a Russian traditional bath and in a modern Finnish sauna;
- Space saving due to compact dimensions;
- High power and, as a result, fast heating to the required temperature;
- Absence (or insignificance) of deformation during heating
Devices for extracting heat from flue gases
It should be noted that even the simplest water-to-pipe heat exchanger dramatically increases fuel combustion efficiency by up to 60%. The trick is that this device does not in any way affect the functioning of the stove itself, and does not increase the heating time of the steam room or the consumption of firewood. The main advantage of such heat exchangers is that they take away the thermal energy of combustion products, lowering their temperature.
This principle of heat exchanger operation is used by many manufacturers of metal sauna stoves, installing an open water tank directly on the chimney pipe. This option is popular due to its availability, but is not very convenient. The reason is the same addition of water as it is used or evaporates due to boiling.
Finally, the best option from all points of view is a sauna stove with a heat exchanger on the chimney in the form of a flow-through heater of small capacity (from 5 to 10 liters). A system with a remote storage tank is connected to it, as well as to the coil built into the furnace, through pipes. The volume of the remote tank is 60-120 liters, depending on the power of the heating unit. During heating, the water in the container reaches the required temperature for washing.
In addition to those listed, there are also combined models, where a sauna stove with a heat exchanger built into the firebox also has a tank on the chimney. Moreover, these elements are connected to each other by pipelines, that is, not one heater is involved in the heating circuit, but two. Accordingly, this option absorbs all the advantages and disadvantages of various modifications. Again, this stove will still require a separate storage tank since the water in the tank will boil quite quickly.
Description
| Specifications | |
| Country of Origin | Russia |
| Manufacturer's warranty | 1 year |
| Weight, kg) | 70 |
| Height (mm) | 760 |
| Width (mm) | 445 |
| Depth (mm) | 700 |
| Fuel | Firewood |
| Furnace material | Steel |
| Power, kWt) | 20 |
| Weight of stones (kg) | 60 |
| Steam room volume (m3) | 24 |
| Chimney size (mm) | 115 |
| Heat exchanger | No |
| Door | Without glass |
| Remote tunnel | Eat |
| Firebox depth (mm) | 550 |
| Kamenka (stove) | Open |
- Description
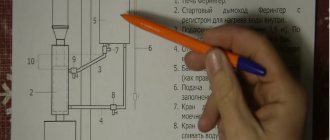
- Scheme of work
- Detailed description
- Documentation
- Reviews
Ermak 20 sauna stoves with a heat exchanger have a compact, rigid design, with a developed heat transfer system. Compactness allows you to save space in the steam room, rigidity eliminates the appearance of deformation of the product when heated, and a large heat transfer area ensures good power characteristics.
Heat exchanger installation
The easiest way to install a heat exchanger in a bathhouse is when it comes complete with a purchased metal stove. You just need to carefully study the operating instructions and perform assembly in accordance with the diagram. All that remains is to connect to the system, this will be discussed below. Installing a water circuit into a flue or firebox of a brick kiln is another matter. Then the register must be made in advance from a thick-walled black pipe or stainless steel, and then built in in accordance with the furnace design.
On the Internet you can often read a recommendation that the area of the heat exchanger, that is, its surface, should be 1 m2. The statement is not entirely correct, because ovens are different, and calculating this indicator is quite difficult. In this case, it is better to make a coil according to the principle of analogy. That is, you need to find the technical specifications for a product from any manufacturer with the same power as yours, and take the specified heat exchange surface area.
Important. If you make a circuit with a small exchange surface, the water in it will constantly boil, which is unacceptable. “Overdoing” the size, on the contrary, can lead to a long warm-up period; as a result, by the time of washing, the water in the tank will remain cool.
As for chimney heat exchangers operating on the principle of a water economizer, such an element can either be purchased ready-made or welded from two pipes of different diameters. Remember, the longer the circuit, the more efficiently it will exchange heat with the chimney.
How to install the stove correctly
A short instruction will help you do this yourself, without involving third parties.
- Prepare a foundation with a depth of 400 mm, the height is adjusted depending on the firebox.
- Enclose the sauna heater with brickwork using clay mortar.
Fencing the heater in the bathhouse
- Install a heat exchanger in the combustion chamber. In this case, the furnace outlet should be led out into a separate room in advance.
- Insulate the pipes coming from the heat exchanger.
- Exit the sauna chimney through a pre-made hole in the roof and protect the wooden elements with metal sheets and asbestos.
- Carefully seal all joints.
A little about connection
When installing a heat exchanger in a stove, you need to understand that it is primarily intended for heating a steam room, and heating water is a secondary function. It is impossible to control two processes at the same time; the steam room is a priority, so it costs nothing to boil the water in the tank or coil. This means that it is necessary to ensure good heat extraction or sufficient storage capacity. For the same reason, it is not recommended to use circulation pumps in such systems; the flow of the hot medium must be natural.
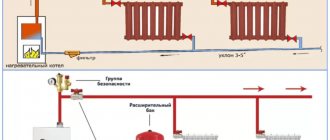
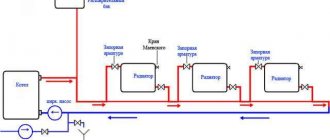
Having a heat exchanger such as a coil or economizer, you need to place an external tank in the bathhouse, hanging it above the level of the stove and connecting it with pipes, as shown in the diagrams:
For installation of the system, you can use both metal and polymer pipes, excluding polyethylene. The diameters of pipelines for gravity networks should be taken at least as large as the dimensions of the heater nozzles, or better yet, one size larger. In this case, the distance from the tank to the furnace should not exceed 3 m.
Area calculation
There are no strict limits when calculating the area of the heat exchanger. You should proceed from the usable area of the bathhouse or the place that it will heat. When installed in a steam room and used only to obtain hot water, a low-power design can be installed.
If the heat exchanger will be taken outside and it is necessary for it to also heat the room, then it should provide 5 kW per 1 square of usable area of the room. If it is designed not for heating, but for water consumption, then the volume may vary. The average water consumption can be up to 50 cubic meters per person. However, as the volume increases, the heating time also increases.
When installing the tank in the furnace, you must remember that it should not cool the stones. Therefore, it should be of such a size that it does not take all the heat from the stones, but warms up with them.
Coil for furnaces
One of the easiest heat exchangers to manufacture is a coil. All you need is to find a pipe made of a sufficiently ductile metal. Copper or aluminum are most often used, as both metals are resistant to corrosion and bend easily. Then the pipe is bent, and in principle it can be any shape.
In order for the water to actively move by gravity (without a pump), the total length of the coil should not exceed 3 meters (this includes the connection to the remote tank). When creating your own heat exchanger, “try” it on the stove: it should not come into contact with an open flame, but should be heated by hot air. An external thread is cut at the ends, to which a remote tank is then connected through fittings.
The coil can be located not only inside the firebox, but also outside. It is hardly worth wrapping the stove, but a metal chimney will heat water quite effectively. After all, if the furnace does not have an afterburner, the temperature at the furnace outlet can be up to 500°C. For an example of such a heat exchanger on a pipe, see the photo.
In the simplest version, the heat exchanger can have the shape of a horseshoe. Then you can use stainless steel - this way you can bend it. For example, the video clearly shows a similar shape that was used in the Vitra sauna stove (for a video on how to move the heat exchanger in a Vitra stove from the left side panel to the right, look at the end of the article).
The simplest type of heat exchanger for a sauna network is a curved tube with threaded ends
One type of coil is a register. This is, as a rule, a welded structure made of pipes, which is often somewhat reminiscent of heating ones. The register for a sauna stove is most often made of stainless steel, since only it can withstand harsh operating conditions for a long time. Welded structures are large in size and weight, and therefore they are more often installed in brick kilns. In an iron furnace it is not always possible to find a place to place a small heat exchanger tube, let alone a bulky welded structure. And when designing brick sauna stoves, you can allocate space for a register.
Heat exchanger-register. You can’t put one like this in a ready-made metal oven. This is an option either for a homemade iron stove or for a brick one (more likely judging by the size)
Sometimes the heat exchanger is made in the form of a small container with water (volume up to 3 liters), which is also located inside the firebox without direct contact with the fire. The principle of its operation is no different from others. To make such a heat exchanger tank last longer, when making it yourself, try to make the structure so that there are as few welds as possible. For example, take a stainless steel sheet (1-2 mm thick is enough) and use a sheet bending machine to create the required geometry. There will be only one seam on the body, plus the side panels and inlet pipes will be welded.
Heat exchanger for sauna stove - unique design
When making any of the heat exchangers located inside the furnace, you need to remember that they can take no more than 10% of the furnace power without damaging the heating of the room. So it is irrational to make registers that are too large. It is difficult to place them and they will negatively affect the air temperature in the steam room. It’s better to design the system so that you can heat the water several times during your visit to the bathhouse: you don’t need 150 liters of boiling water at once, do you? First you need a little hot water to steam the brooms, then a little more to wash yourself before the steam room, and then some more to rinse. As a result, you need maybe 150 liters of hot water, but in portions. So why make a system for 150 liters and wait several hours until it is at an acceptable temperature, if you can make a tank for 50-70 liters and heat water in it several times, which will be used as needed...
Selection of materials
The choice of material for the heating tank only seems simple. The most common option is steel. The main advantage is low cost and ease of manufacture using conventional welding operations. However, in the conditions of a Russian bath at constant high temperature, high humidity and exposure to superheated steam, this material quickly rusts and its service life is short. In addition, water in a rusty container may take on a corresponding tint. Protection using paint coatings will not work due to the risk of fire when coming into contact with a heated oven. The painted structure can be used in a system with a heat exchanger.
Another option is cast iron. In a cast iron container, the water takes a long time to heat up, but it also takes a long time to cool, which makes it possible to retain heat even after the furnace has stopped firing. Disadvantages: heavy weight, high price and problems with corrosion.
The best option is stainless steel. Of course, it is much more expensive than ordinary steel sheet, but it does not corrode and can last for many years. The most common steel grades for the manufacture of sauna heating tanks are 8-12X18H10 (304) and 08X17 (430). Stainless steel containers are quite light, have excellent thermal conductivity, and the coefficient of deformation during sudden temperature fluctuations is negligible.
In principle, it is possible to use ready-made enameled tanks. However, such containers are good as long as the enamel protective coating is intact. When the slightest chips appear, active corrosion begins
This means that enameled tanks require increased caution during operation, which is very difficult to ensure.
The question of how to heat water in a bathhouse is decided independently, based on specific conditions. The simplest option is to install a standard tank heated by heating elements and manually deliver it to the destination point in small containers.
Making containers for warm water
There are several options for containers - from expensive stainless steel to cheap store-bought plastic ones. We will not consider these options; we will focus on the most successful, from our point of view, metal made from sheet iron
Its advantages are not only its relatively low cost (although this is important), but also the ability to make a tank that is ideally suited in terms of linear parameters to each room of the bathhouse. As for appearance, there is a large selection of durable paints; surfaces can be painted in any color or covered with self-adhesive decorative polyethylene film
Simple water tank with lid
Table. Calculation of tank volume
| Stage | Description | Scheme |
| Find the volume of your tank | Multiply length (l), width (w) and height (h) | |
| Calculate filled volume (d) | For rectangular tanks, the filled volume is the same length and width, but less height. The new height is the filling height of the tank. | Tank fullness D |
Table. Making a tank
Step, No. Description of work Step 1. Prepare materials. You will need sheet iron with a thickness of at least 0.5 mm. We suggest making a rectangular tank, length 80 centimeters, height 40 centimeters, width 20 centimeters. The tank holds 64 liters of water, but you need to fill no more than 60 liters. You need to weld three metal pipes with threads into the tank; they are sold in stores. It is better to take the nominal diameter of the pipes at least 3/4 inch. This is the most commonly used diameter of pipelines and ensures normal natural circulation of water. To fully install the heat exchanger, you will need to have additional plumbing fixtures and fittings; we will talk about this below when considering installation issues. Step 2. Mark the tank on a metal sheet. You will need two plates 80x60 cm, two 40x20 cm and one 80x20 cm. We specially made the tank rectangular. The fact is that the distance between the inlet and outlet pipes should be increased as much as possible. This will allow warm water not to immediately mix with cold water; a significant difference in their temperatures will be achieved, which has a decisive influence on the speed of water flow in the pipelines. And not only the efficiency, but also the safety of using the heat exchanger largely depends on this criterion. Step 3. Cut the blanks to size. You need to use a grinder; when working with this tool, strictly follow the safety rules - it is very dangerous. Try to keep the cut as even as possible. Check the quality of cutting of each edge on a flat surface, eliminate large flaws. Step 4
Assemble all the parts of the tank in pairs, making them absolutely identical. Pay special attention to the corners, they should only be rectangular. Step 5. Place the front part of the tank on a flat surface, and weld the side of the tank in several places with a short seam. Do the same operation on the other side
Check their position; they will definitely move as the seam cools. Step 6. Place the second large part on the welded sidewalls, check its position, and adjust the sidewalls if necessary. Grab the elements. Make sure that the gap between the individual parts does not exceed 2–3 millimeters, otherwise during welding you will have to put wire in them, and this is undesirable. Step 7. Place the structures upside down and grab the bottom. Check and correct its position. Step 8. If everything is fine, weld all the elements. Monitor the quality of the seam; omissions are strictly excluded. You can “cheat” a little on the thickness of the weld seam; the container does not carry significant loads, but omissions are prohibited. Step 9. Weld metal pipes into the bottom. We have already said that the input and output should be removed from each other as much as possible. It is better to place the water intake pipe for the shower not in the middle, but closer to the drain; the water intake will speed up the circulation in the tank. Step 10. Burn holes for the pipes. For the pipes, you must first burn holes in the bottom of the tank; this can be done more conveniently by electric welding. Step 11. Come up with a way to attach the tank to the wall. You can weld special brackets to the back wall or install it on a stand. If you have the desire and the material, make a removable lid. Step 12. Using a cylindrical grinder, clean all seams, pour water and check their tightness. Seal holes if necessary. Step 13. Prepare the front surfaces of the container for finishing.
Video - Making a stainless steel tank
That's it with the water tank, you can install it in any room in the bathhouse. Now let's talk in more detail about heat exchangers.
Electric heater
This device is divided into two types. The first is intended for areas where water supply interruptions occur frequently. And it’s called a storage boiler. The second type is suitable for areas where there are no interruptions in the water supply.
It is called a flow device. Therefore, before choosing an electric heater, you should pay attention to the advice mentioned above. This will help prevent unwanted purchases.
- As for the technical characteristics of these two boilers, the storage capacity can be from 30 to 200 liters.
- It works using a heating element and is equipped with a sensor that maintains a constant temperature in the boiler.
- A flow-through heater operates similar to a gas appliance. Those. water passes through the coil, expanding the usable area, and thus heating up.
The electrical device, despite its high power consumption and the requirement for good power wiring, is a fairly popular device.
Buyers highlight the following advantages:
- Stable level of electricity protection;
- Maintaining constant water temperature;
- Variety of options (horizontal and vertical boiler);
- Inexpensive price of the device.
What you need to know about using the device
An equally important task is choosing a stove equipped with a similar device. When considering different models, you need to be extremely careful not to miss the smallest nuances. We invite you to familiarize yourself with the basic rules that determine the safe operation of devices:
- Fastening due to movable joints compensates for temperature deformation and changes in the dimensions of the apparatus components during their heating.
- Net power is an important indicator that must be taken into account when making all necessary calculations.
- It is desirable that the dimensions of the heat exchanger correspond to the characteristics of the furnace. Only a tenth of the total heat generated in the heating unit should be allocated to perform the functions of the device.
- It is necessary that the remote tank contains as much water as can be heated in just two hours from the moment the stove is lit.
- All seals installed at the joints of system elements must be made of materials that are resistant to high temperatures.
There are few basic requirements, but compliance with them is mandatory when installing and operating the device. This contributes to a significant increase in the durability of the device.
